

Page 1
Installation and Operation Manual
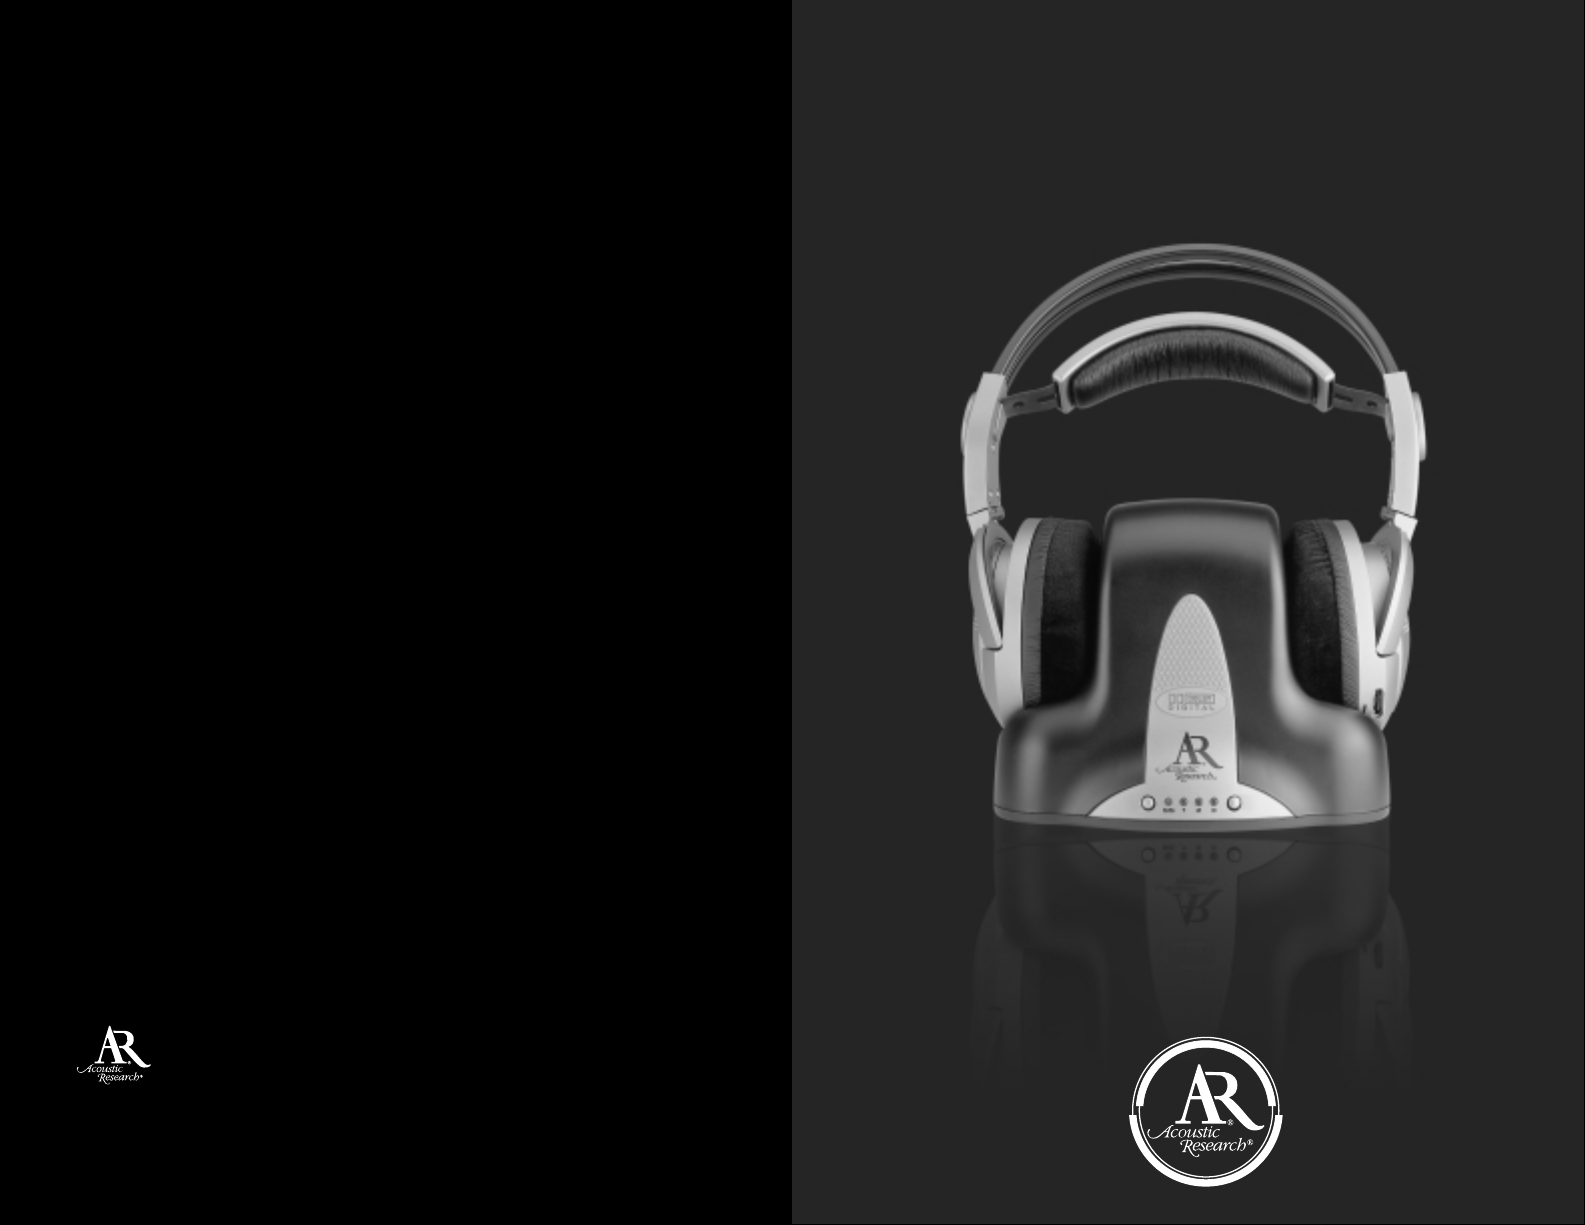
Model AW791
Wireless Surround Sound Headphones
with
Dolby
®
Digital technology
Covered by one or more of the following US patents and Patents
Pending: 5,272,525; 5,410,735; 5,666,658; and 6,215,981.
U.S. Patent Nos.5,371,799; 5,436,975; 5,809,149 and various
foreign counterparts. Copyright QSound Labs, Inc. 1996-2001.
Manufactured under license from Dolby Laboratories. "Dolby",
"Pro Logic", and the double-D symbol are trademarks of Dolby
Laboratories. Confidential unpublished works.
Copyright 1992-1997 Dolby Laboratories. All rights reserved.
All trademarks are the property of their respective owners.
15791-0-2
AD 34972
10/01
Recoton® Accessories, Inc.
2950 Lake Emma Road
Lake Mary, FL 32746
© 2001 Recoton
www.acoustic-research.com
MADE IN CHINA
Page 2

Table
of
Contents
I. Location of Functions. . . . . . . . . . . . . . . . . . . . . . . . . . . . . 2
II. Connecting the Headphone System . . . . . . . . . . . . . . . . . . 3
III. Charging the Batteries . . . . . . . . . . . . . . . . . . . . . . . . . . . . 5
IV. Listening to the Headphones . . . . . . . . . . . . . . . . . . . . . . . 6
V. Processing Modes . . . . . . . . . . . . . . . . . . . . . . . . . . . . . . . 6
VI. Troubleshooting. . . . . . . . . . . . . . . . . . . . . . . . . . . . . . . . . 7
VII. Specifications. . . . . . . . . . . . . . . . . . . . . . . . . . . . . . . . . . . 8
VIII. Warranty . . . . . . . . . . . . . . . . . . . . . . . . . . . . . . . . . . . . . . 9
Introduction
Acoustic Research/AR Surround Sound Headphones expand and
enhance the enjoyment of your home theater equipment. Today’s
movies and concert DVDs are recorded with five-channel audio
positioning to provide the most realistic atmosphere for a completely
immersive movie or music experience. Surround Sound places the
listener in the middle of the action while watching a movie, or in
front of the stage while listening to a concert. AR’s Surround Sound
Headphones provide an acoustic environment that is virtually
identical to that of a movie theater or a live musical performance.
AR’s Surround Sound Headphones are compatible with most digital
and analog audio/video equipment, i.e., DVD players, TVs, VCRs,
and home theater receivers.
This manual covers various connection options and detailed
operating procedures for making the AR Surround Sound
Headphones a valuable part of your home entertainment system. To
ensure proper operation and prevent damage, please read this
manual carefully before using this equipment. If, after having
reviewed the instructions, you have any questions, please contact
our Customer Service Department at 1-800-732-6866.
- 1 -
Page 3

Connecting
the
Headphone System
i. Setup:
Place the Transmitter in a location with enough clearance so that you can
store the Headphones on the Transmitter. This is important, because the
Transmitter charges the Rechargeable Batteries (P) inside the headphones so
they are always ready for use. See
Charging the Batteries on page 5.
You can use the Surround Sound Headphones with up to three different
audio/video components. The three inputs on the transmitter – two digital
and one analog – allow quick and easy connections for maximum versatility.
ii. Connecting to Digital Components:
a. Connecting Using the Supplied Toslink®Digital Optical Cable:
1. Connect one end of the
Toslink
®
Digital Optical
Cable (Q) to the
DIGITAL OPTICAL
OUTPUT of your
audio/video equipment.
2. Connect the other end
of the Toslink
®
Digital
Optical Cable (Q) to the
Toslink®Digital Optical
Connector (F2) on the
transmitter marked
“Digital 2”.
b. Connecting Using a Digital Coaxial Cable:
1. Connect one end of the
Digital Coaxial Cable
(not included) to the
DIGITAL COAXIAL
OUTPUT of your
audio/video equipment.
2. Connect the other end of
the Digital Coaxial Cable
to the RCA-type Digital
Coaxial Connector (F1)
on the transmitter
marked “Digital 1”.
A B C
CHANNEL
DIGITAL 1
DIGITAL 2
ANALOG 3
AC 7V
II
A B C
CHANNEL
DIGITAL 1
DIGITAL 2
ANALOG 3
AC 7V
- 3 -
Location
of
Functions
Transmitter Front View:
A. Surround Sound ON/OFF Switch
B. Surround Sound ON/OFF Light
C. Input Indicator Lights
1. Digital Coaxial
2. Digital Optical
3. Analog
D. Input Select Switch
Transmitter Back View:
E. AC Input Jack
F. Input Connectors
1. RCA-type Digital Coaxial Connector
2. Toslink
®
Digital Optical Connector
3. RCA-type Analog Left/Right Connectors
G. Channel Select Switch
Headphones:
H. Battery Compartment
I. Battery Compartment Cover
J. Self-adjusting Headband
K. Power Indicator Light
L. Volume Control
M. ON/OFF/Tuning Control
N. Stereo Tuning Indicator Light
Accessories:
O. Transmitter AC Power
Supply - 7V AC 1.4A
P. Rechargeable Batteries
3 AAA Ni-MH
Q. 3 ft. Toslink
®
Digital
Optical Cable
I
A B C
CHANNEL
DIGITAL 1
DIGITAL 2
ANALOG 3
AC 7V
- 2 -
SS 1 2 3
A B C1 C2 C3 D
CHANNEL
G
A B C
AC 7V
DIGITAL 1
DIGITAL 2
ANALOG 3
EF1F2F3
J
I
H
K
O
P
---
Q
L
+++
TRANSMITTER
CHANNEL
A B C
AC 7V
DIGITAL 1
DIGITAL 2
ANALOG 3
DVD PLAYER
COMPONENT VIDEO
RED GREEN BLUE
OUTPUT
RIGHT LEFT VIDEO OPTICALD-COAX
M
N
TRANSMITTER
CHANNEL
A B C
AC 7V
DIGITAL 1
DIGITAL 2
ANALOG 3
DVD PLAYER
COMPONENT VIDEO
RED GREEN BLUE
OUTPUT
RIGHT LEFT VIDEO OPTICALD-COAX
Page 4

Charging
the
Batteries
Note: The rechargeable batteries included with this product must be
charged for 10 hours before use.
i. Inserting the Batteries into the Headphones:
1. Remove the Battery Compartment
Cover (I) by simultaneously
depressing the tab and pulling up on
the cover.
2. Pull the cloth strip across the Battery
Compartment (H) so the
Rechargeable Batteries (P) can be
inserted over the strip.
3. Insert the Rechargeable Batteries (P)
observing the polarity ("+" and "-") as
diagrammed inside the Battery
Compartment (H).
4. Replace the Battery Compartment
Cover (I).
ii. Charging the Batteries within the Headphones:
1. Place the headphones onto the
Transmitter, making sure the
charging contact on the left earcup is
sitting properly on the charging post
of the transmitter.
2. Allow the Rechargeable Batteries (P)
to fully charge for 10 hours before
using for the first time.
3. Place the headphones on the
transmitter when not in use. This will
ensure the batteries are always fully
charged for hours of entertainment.
The Rechargeable Batteries (P) use
high-capacity Ni-MH cells that allow
recharging without the memory
effect of Ni-CD cells.
III
For customers in the USA and CANADA
RECYCLING NICKEL METAL-HYDRIDE BATTERIES
Nickel Metal-Hydride (Ni-MH) batteries are recyclable. Acoustic Research asks you to help
preserve our environment and recycle any unwanted Ni-MH batteries at your nearest
recycling facility for proper disposal.
Acoustic Research participates in the Rechargeable Battery Recycling Corporation (RBRC)
program. If you need advise on proper disposal of the included Ni-MH batteries, please call
1-800-822-8837 (US and CANADA ONLY).
Caution: Do not handle damaged or leaking batteries.
- 5 -
iii. Connecting to Analog Components:
You can connect the headphones to an analog device and listen to Dolby
Pro Logic recordings and compact discs.
1. Connect one end of the
Analog Audio Cable (not
included) to the RCA-TYPE
ANALOG AUDIO OUTPUT of
your audio/video equipment.
2. Connect the other end of
the Analog Audio Cable to
the RCA-type Analog
Left/Right Connectors (F3)
on the transmitter marked
“Analog 3”.
Note: When using a device with a variable analog output, make sure the
volume level is set to 1/2 to 2/3 volume. When using a variable level
output, noise may occur if the signal level is too weak or too strong. Adjust
the volume to eliminate the noise.
iv. Connecting the Power Supply:
1. Insert the 2.5mm barrel
connector from the AC Power
Supply (O) into the AC Input
Jack (E).
2. Plug the AC Power Supply
(O) into a standard electrical
wall outlet.
Note: Make sure the electrical outlet is not a switched outlet - usually
designed to control a lamp - and remains ON at all times. This is important,
as the transmitter base charges the headphones when not in use.
A B C
CHANNEL
DIGITAL 1
DIGITAL 2
ANALOG 3
AC 7V
A B C
CHANNEL
DIGITAL 1
DIGITAL 2
ANALOG 3
AC 7V
- 4 -
TRANSMITTER
CHANNEL
A B C
AC 7V
DIGITAL 1
DIGITAL 2
ANALOG 3
ANTENNA
IN
TV
OUT
VCR
INPUTOUTPUT
RIGHT LEF T V IDEORIGHT LEFT VIDEO
–
++
+
––
TRANSMITTER
CHANNEL
A B C
AC 7V
DIGITAL 1
DIGITAL 2
ANALOG 3
SS 1 2 3
Page 5

Troubleshooting
The following troubleshooting guide takes you through some of the most common issues
and solutions associated with the installation and/or operation of the Wireless Surround
Sound headphones.
Issue Cause and Solution
No Sound • Check that the AC Power Supply (O) is fully inserted into the wall outlet
and the barrel connector from the AC Power Supply (O) is firmly
connected to AC Input Jack (E). When the AC Power Supply (O) is
properly connected and providing power, the Surround Sound ON/OFF
Light (B) and Analog Input Indicator Light (C3) should be ON prior to
making any selections.
• Check that the headphones are turned "ON" and the red Power Indicator
Light (K) is brightly lit.
• Check that the Rechargeable Batteries (P) are firmly seated in the Battery
Compartment (H) following the polarity markings in the Battery
Compartment (H).
• Check that the audio sour ce (DVD player , TV, VCR) is turned "ON" and
providing sound as it normally should.
• Check that the headphone Volume Control (L) is turned up.
• If the Surround Sound LED (B) is blinking, this indicates that the input is
DTS encoded. This product does not decode DTS 5.1 encoded digital
signals. Refer to your DVD, Satellite, or other manual to change the audio
mode from DTS output to Dolby Digital or PCM output.
Note: Usually you can select among PCM, Dolby Digital and DTS output
formats on DVD players and satellite receivers.
• Check that the component’s digital sampling rate output is 48K
samples/second or lower. This product does not support 96K
samples/second. Refer to the component's manual to change the audio
sampling rate output.
Distortion/Static • Check that the headphone Tuning Indicator Light (N) is illuminated. If
not, push the ON/OFF/T uning Control (M) to manually search for the
channel. If it does not lock quickly, change the Channel Select Switch (G)
to one of the other two channels.
• Check the batteries - they may be weakening.
• Confirm the batteries are "good." When batteries begin to weaken, there
can be static breakup. If necessary, recharge the batteries.
• Change the physical location of the transmitter. Locate it as high and free
of obstruction as possible. Avoid placing the transmitter directly on top of
a TV .
•
Check that the Digital Coaxial Output from the DVD, satellite, etc., is
not connected to the Analog Audio Inputs (F3).
Sound from One • Check the left/right balance control on the audio source.
Earpiece Only • Check that the Tuning Indicator Light (N) is illuminated.
• Check the batteries – they may be weakening.
• Check that both Analog Audio Input Connectors (F3) are properly
connected, and that the audio source (VCR, TV, etc.) is equipped with
Stereo Analog Audio Output.
VI
- 7 -
Listening
to the
Headphones
1. Turn on the component you wish to listen to (DVD player, VCR, TV, or
another audio/video product).
2. Press the Input Select Switch (D) to choose the device you wish to listen to,
i.e., Digital 1, Digital 2, or Analog 3.
3. Press the Surround Sound ON/OFF Switch (A) to turn the effect ON or
OFF depending on the source material you wish to listen to. The virtual
Surround Sound should be on for all Dolby Digital or Dolby Pro Logic
encoded source material. All stereo music CDs, cassette tapes, or AM/FM
radio should be experienced with the virtual Surround Sound OFF.
See
Processing Modes below.
4. Turn the headphones ON by pressing the ON/OFF/Tuning Control (M).
The headphones may take a few seconds to tune.
5. Put the headphones on your head.
6. Adjust the volume (L) to a comfortable listening level.
7. When finished, power down the headphones by depressing the
ON/OFF/Tuning Control (M) until the Power Indicator Light (K) is OFF.
Note: The headphones must be OFF for the batteries to charge properly.
Make sure the Power Indicator Light (K) is OFF before charging.
IV
Processing
Modes
1. For multi-channel inputs (Dolby Digital inputs), the "virtual mode"
processing uses 5.1 channel Dolby Digital decoding then virtual
processing to create a 2 channel 3-D room equivalent output.
2. For multi-channel inputs (Dolby Digital inputs), the "stereo mode"
processing uses 5.1 channel Dolby Digital decoding/processing for any
number of channels to create a 2 channel equivalent output. If the multichannel input is stereo, then the 2 channel output is stereo (i.e., Dolby
Digital Stereo).
3. For Analog or PCM inputs, the "virtual mode" processing uses Dolby Pro
Logic decoding then virtual processing to create a 2 channel 3-D room
equivalent output.
4. For Analog or PCM inputs, the "stereo mode" processing uses direct
stereo decoding to create a 2 channel stereo output.
Note: This product does not decode DTS 5.1 encoded digital signals.
V
- 6 -
Page 6

ONE YEAR WARRANTY
Recoton Corporation (“Company”) warrants to the original retail purchaser of this
product that should the product or any part thereof be proven defective in material
or workmanship within one year from the date of original purchase, such defects will
be repaired or replaced, at the Company’s option, without charge for parts or labor.
To obtain replacement within the terms of this warranty, the product should be delivered,
transportation prepaid, to the Dealer where purchased or to the Company, along with proof of
date of purchase. Call 1-800-RECOTON to obtain information regarding the procedure for
proper return of your product, if your Dealer does not honor the warranty. This warranty is
valid in the USA and Canada only.
THIS WARRANTY DOES NOT APPLY TO ANY PRODUCT OR PART THEREOF WHICH
HAS BEEN DAMAGED THROUGH ALTERATION, MISHANDLING, MISUSE, NEGLECT,
ACCIDENT, IMPROPER INSTALLATION OR UNAUTHORIZED REPAIR.
THIS WARRANTY IS EXCLUSIVE AND IN LIEU OF ANY AND ALL OTHER WARRANTIES,
EXPRESSED OR IMPLIED, INCLUDING WITHOUT LIMITATION THE IMPLIED
WARRANTIES OF MERCHANTABILITY AND FITNESS FOR A PARTICULAR PURPOSE
AND ANY OBLIGATION, LIABILITY, RIGHT, CLAIM OR REMEDY IN CONTRACT OR
TORT, WHETHER OR NOT ARISING FROM THE COMPANY’S NEGLIGENCE, ACTUAL OR
IMPUTED. NO PERSON OR REPRESENTATIVE IS AUTHORIZED TO ASSUME FOR THE
COMPANY ANY OTHER LIABILITY IN CONNECTION WITH THE SALE OF THIS
PRODUCT. IN NO EVENT SHALL COMPANY BE LIABLE FOR INCIDENTAL OR
CONSEQUENTIAL DAMAGES.
This warranty gives you specific legal rights and you may also have other rights
which vary from state to state/province to province, so some of the above
limitations or
exclusions may not apply to you.
NON-WARRANTY SERVICE
If non-warranty service is required, the product may be sent to the Company for repair/
replacement, transportation prepaid, by calling 1-800-RECOTON for details, complete
instructions, and service fee charges.
VIII
Warranty
- 9 -
Specifications
Headphones:
Push-button tuning
40mm titanium-impregnated elements with neodymium magnets
Frequency response: 20Hz – 20kHz
Transmitter:
Signal-to-Noise ratio: >70dB
Stereo separation: >35dB
Dolby Digital processor
Virtual Surround Sound headphone technology
Effective transmitting range: 300 feet*
Three separate transmission channels
20 bit ADC/DAC
Optical input connector conforms to EIAJ standard CP-1201
Compatible digital audio sampling rates: 32K, 44.1K, 48K samples/second
Dolby Digital in IEC 1937 format (formerly IEC 958 Annex B) as specified in
ATSC A/52 Annex B
PCM in AES/EBU format
Included Inside:
3-foot premium digital optical cable with Toslink®connectors
7V AC 1.4A UL Listed power supply
Three AAA Nickel Metal Hydride (Ni-MH) rechargeable batteries
This device complies with part 15 of the FCC rules. Operation is subject to
the following two conditions: 1) This device may not cause harmful
interference and 2) This device must accept any interference received,
including interference that may cause undesired operation.
Changes or modifications not expressly approved by the party responsible
for compliance could void the users authority to operate the equipment.
Features and specifications subject to change without notice.
* Range may vary according to environment.
VII
- 8 -
 Loading...