

Page 1

Quick Start Guide
Setting up a new Recon Sentinel™ is easily done in a few quick steps!
Step 1: Connecting a Recon Sentinel™
Insert the Ethernet Cable into the back of your router/modem and the Recon Sentinel. Plug the power
adapter into an outlet and the Recon Sentinel.
The Recon Sentinel will now power on and will display its Device ID once it is running.
Step 2: Creating an Account
To Create an Account, go to www.reconsentinel.com, or download the Recon Sentinel App from the
Apple App Store or Google Play Store. From within the App or Website, select the ‘Register User’ button.
Login (Website)
After completing the registration form, the ‘Register’ button should be selected to submit and finalize
your new account.
www.reconsentinel.com
Page 1 of 2
Page 2
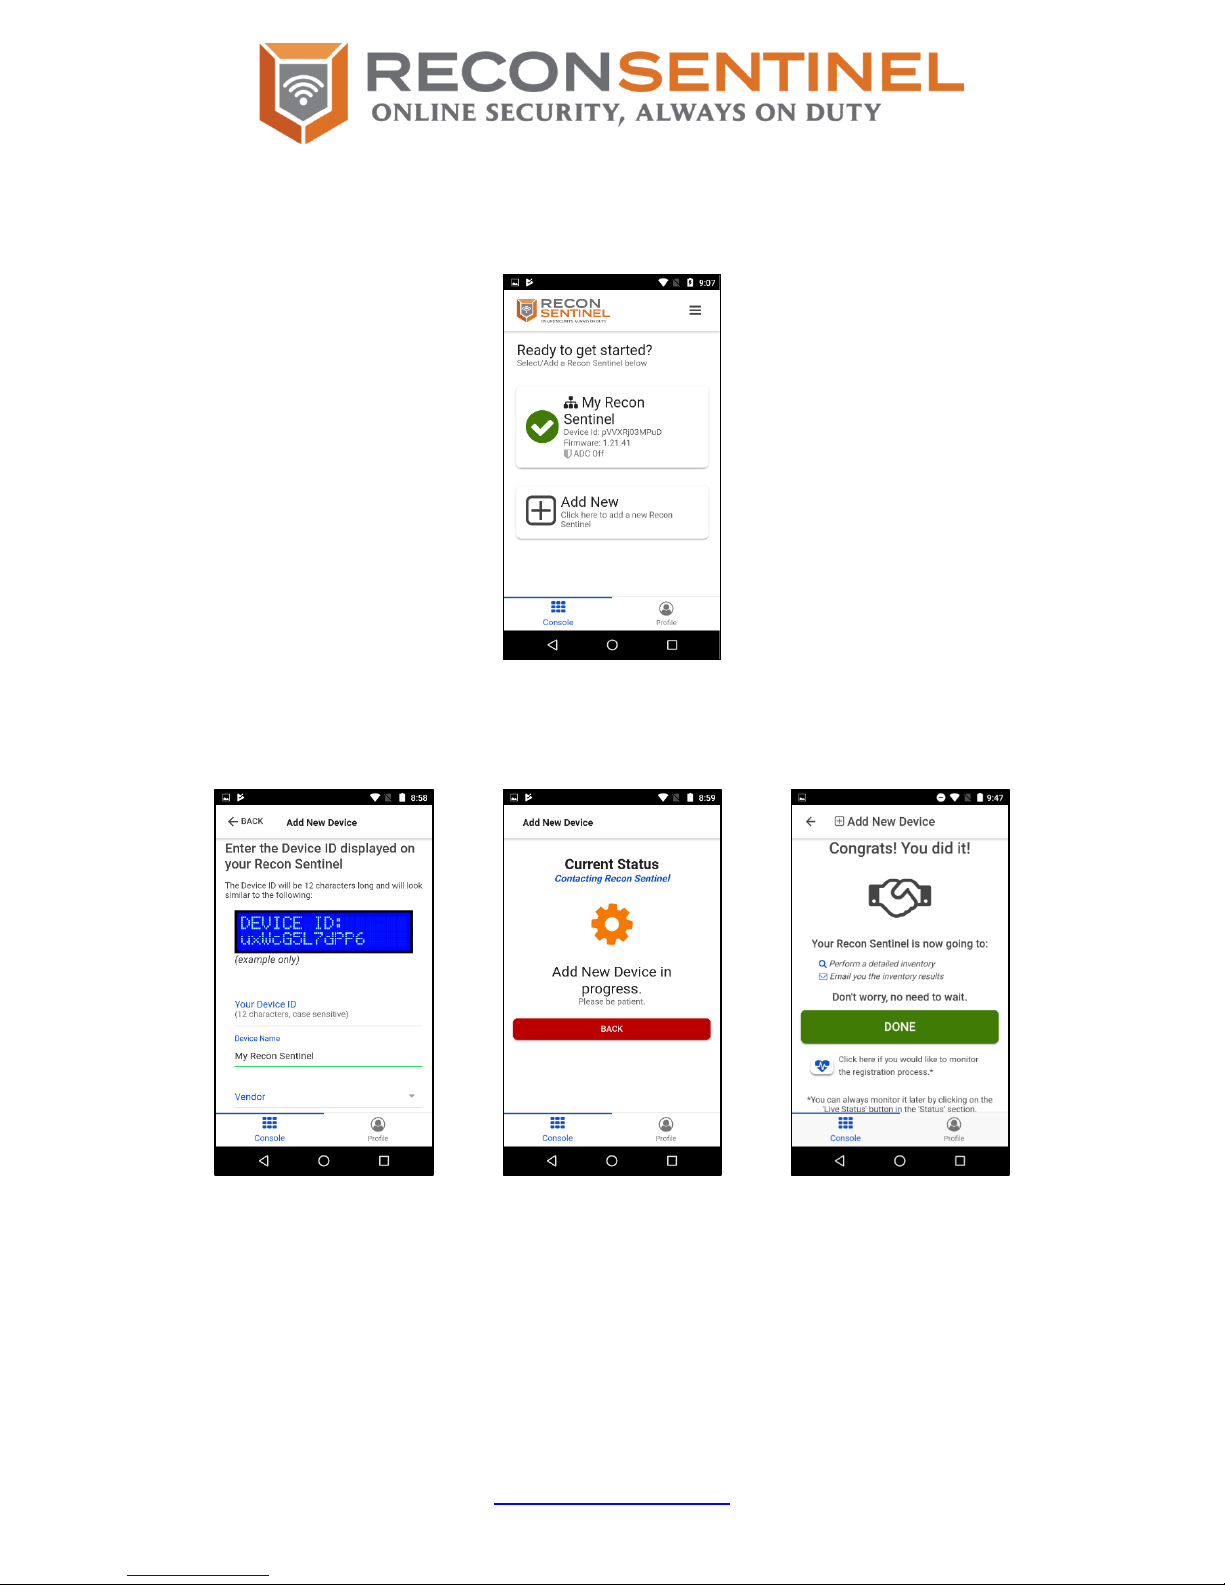
Step 3: Registering a Recon Sentinel™
Registering a Recon Sentinel to your account can be done by selecting the ‘Add New Recon Sentinel’
button from the Console panel along with the Device ID displayed on the Recon Sentinel LCD screen.
Console
The ‘Add New Recon Sentinel’ button will step you through the process of registering a new Recon
Sentinel device to your account. Make sure you select the Vendor where you purchased your Recon
Sentinel when entering the New Device Information during the Add New Device process.
Add New Device Add New Device Add New Device
Enter Device Information In Progress Complete
Your Recon Sentinel will take inventory of all devices connected to your network. Once the inventory is
done, you can authorize and add labels to your devices.
Step 4: Relax!
Setup of the Recon Sentinel is complete, so sit back and relax while the device defends and protects
your network!
www.reconsentinel.com
Page 2 of 2
 Loading...