

Page 1
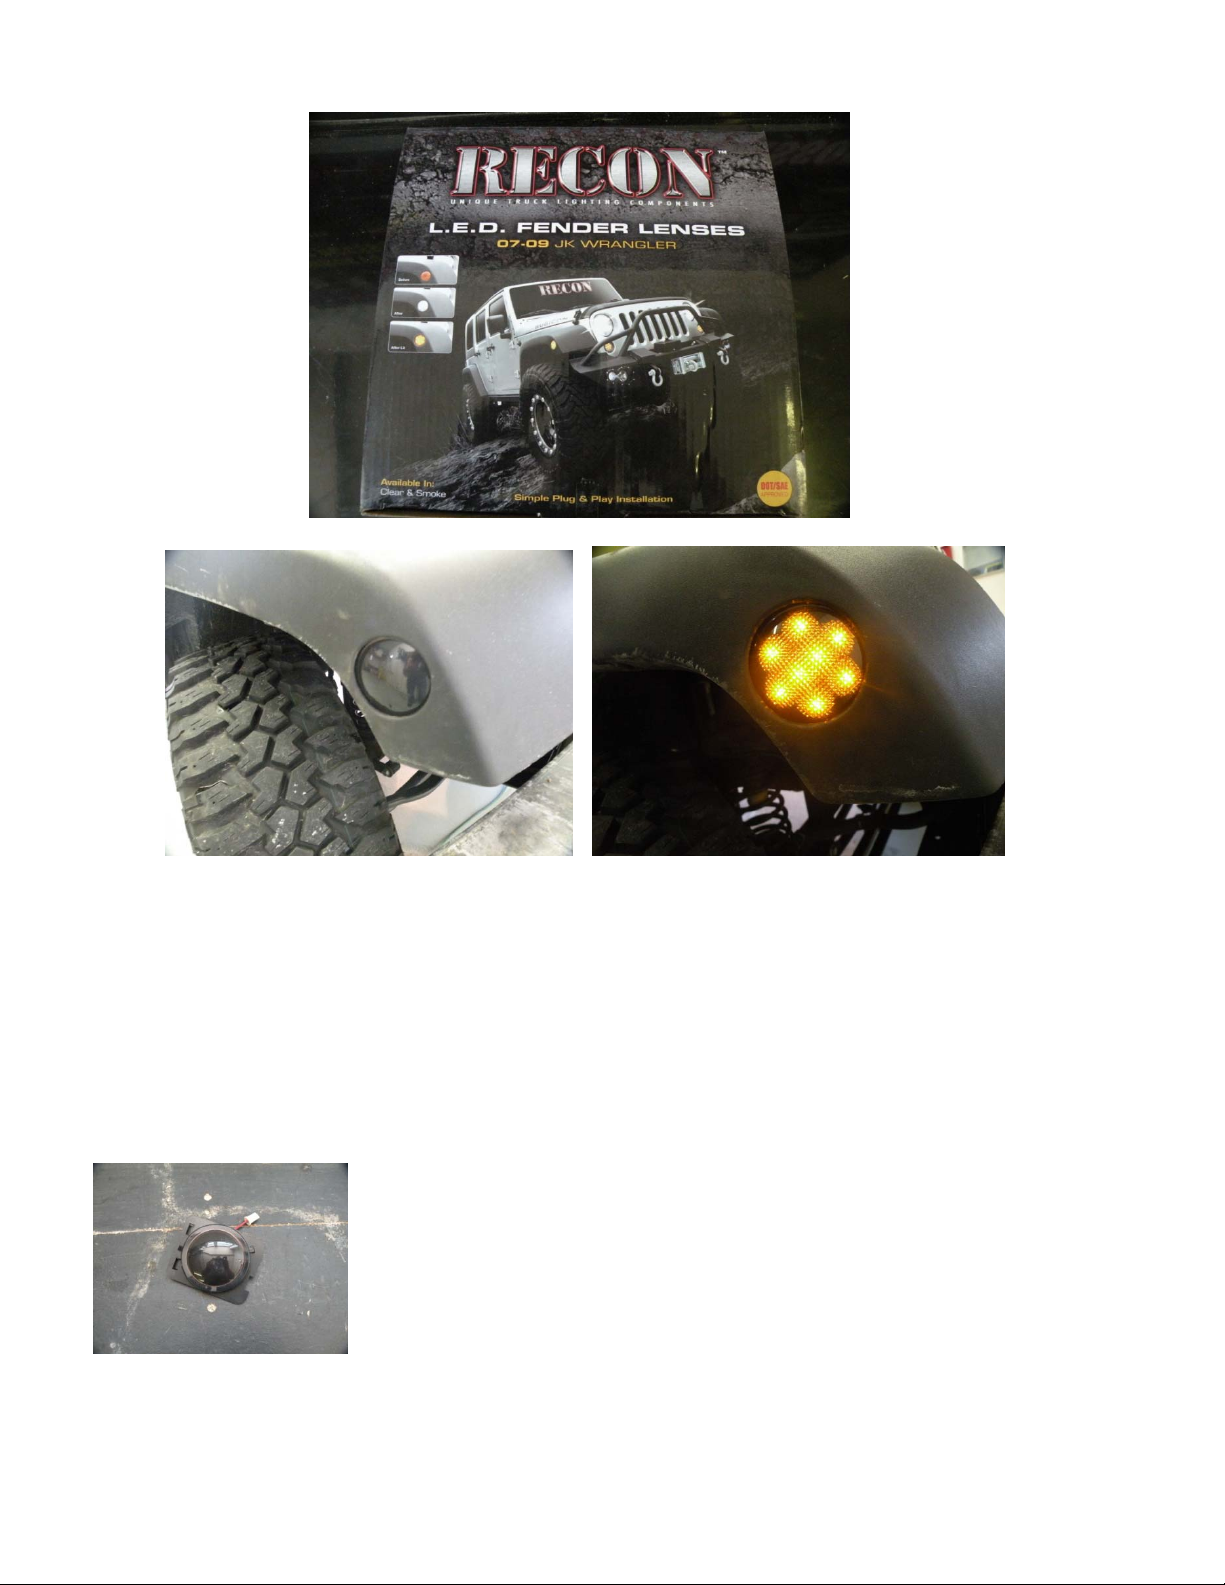
How To Install RECON Round Fender Lenses On A JK Wrangler.
*Now, There Are Many Ways of Installing Them, Including Wiring Methods,
Wiring Connectors, And Other Variables - In This Install I Will Show You My
Method of Install.
The “How to” Writer Is Not Responsible for the Information Following Instructions. This Guide is Provided Simply for Concepts and
Ideas on How to Install The Fender Lenses.
- Go Over The Equipment You Received - Look For Blemishes, or Missing Parts.
You Should Have:
• 2 Round Fender Lights
Tools Required:
Page 2
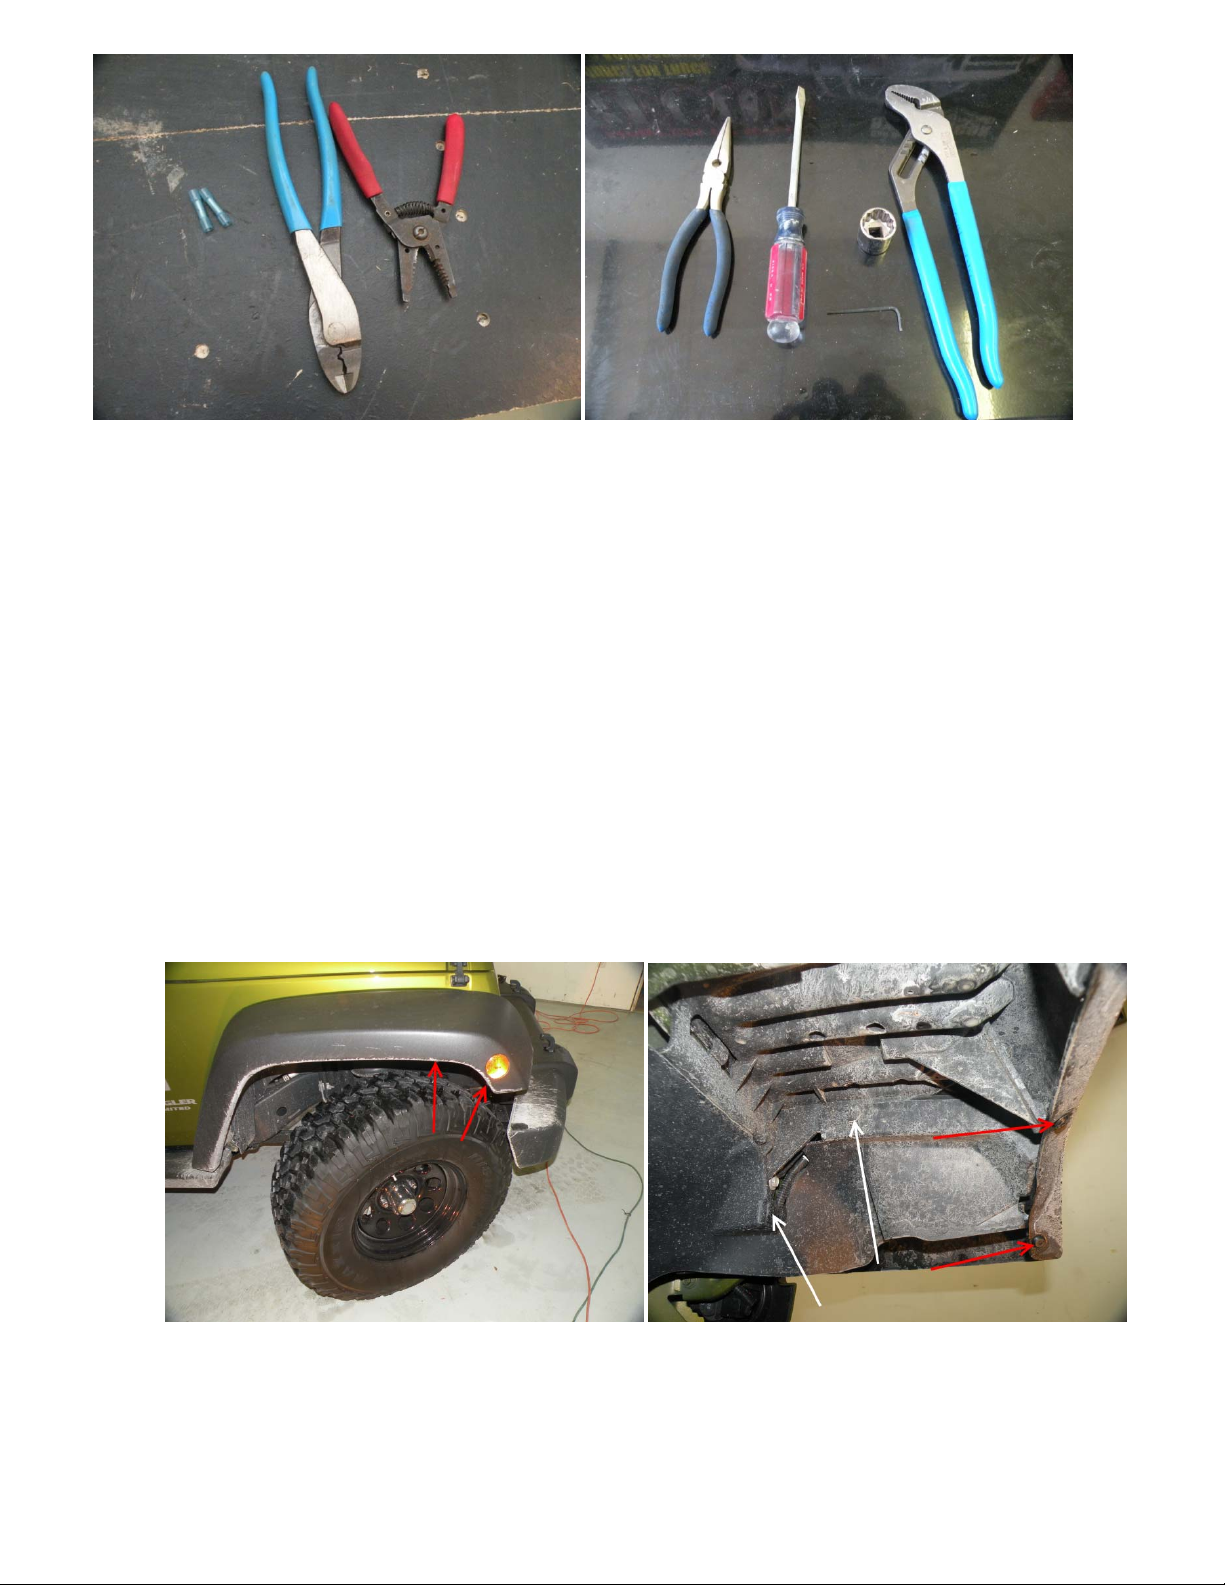
A Good Assortment of Hand Tools is Recommended, Required Hand tools are as
Followed:
- Plastic Button Remover
o OR: Channel Locks
o 1” Socket
o Small To Medium Sized Allen Key
- Wire Strippers / Crimpers
- Flat Head Screw Driver
- Heat Gun
- Electrical Connectors / Heat Shrink Tubing
- Needle Nose Pliers
On To The Tear Down.
- It Is Not Required, but Disconnecting Your Batteries Negative Cable Is Recommended
Start by Removing The Buttons In The Fender & Fender Lining.
- On The Outer Fender, Remove The 2 Button Pins Holding The Fender (Red Arrows)
- Using The Channel Locks, Secure The Socket To The Top Jaw
Page 3
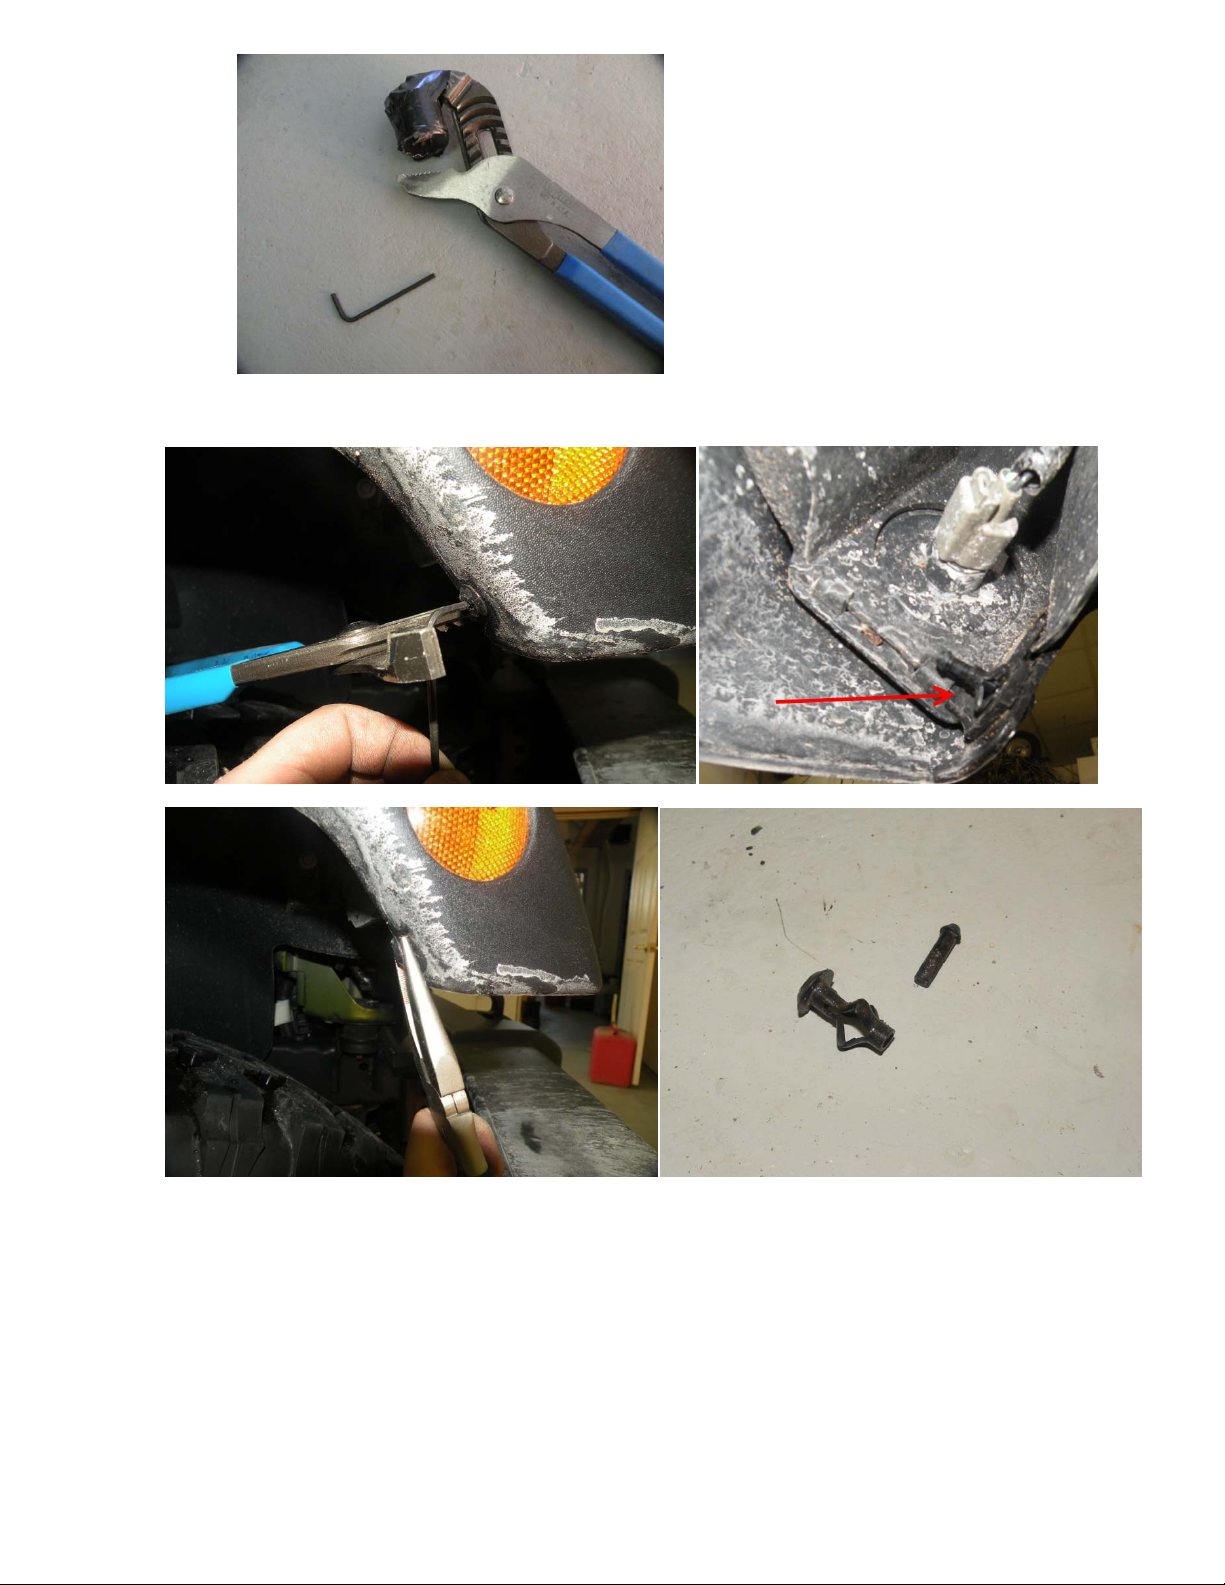
- Place The Socket Over The Inside Of The Button
- Using The Allen Key, Place The Short End On The Pin
- Close The Channel Locks Tightly Until The Pin Pops Out Of The Hole
- Now, Using A Screw Driver & Needle Nose, Pop The Button Out Of The Fender
Page 4

- On The Fender Lining, Pop The 2 Buttons Out (Marked In White Above)
- Pull The Lining Back & Secure Out Of The Way.
* USE CAUTION AND TAKE YOUR TIME. Do Not Force. Plastic Parts Can & Will Break If Work Is
Done Improperly.
Removing The OEM Lens
- Unclip The OEM Wire Connector
Page 5

- Gently Pull The Outer Fender Up Until The Top Clip Is Exposed
- Push The Tab Down And Pull The Top Of The Lens
- Once The Top Is Unclipped The Lens Will Have To Be Pulled Downwards
- Now The Lens Is Free, Gently Pull The Fender Away and Remove The OEM Lens
Preparing & Installing The New Recon Lenses
- On A Flat Workable Surface Layout The Lenses
Page 6

- Cut The Connector
- Strip The Cut Wire
- Install Your Choice Of Connector On The Lens Wires (Heat Shrink Butt Connector Installed)
Page 7

- Place The Recon Lens Inside The Fender The Same Way The OEM Lens Was Removed
- Clip The Bottom Hooks Back Up In Place
- Pull The Lens Wires Through The Hole
- The Push The Top Clip Securely In Place
Connecting The Wires & Final Steps
- Cut The OEM Connector
- Strip The Wires
- Connect The Other End Of The Connector Previously Installed On The Lens
- Using The Heat Gun Shrink The Connectors
Page 8

- Using The Wire Loom Cover The Wires & Connectors.
Re Install The Fender lining & The Plastic Buttons.
- Push The Pin Into The Button And Extend The Button
- Push The Plastic Button Back Into The Hole Keeping The Plastic Fins From Spreading
- Now From The Backside, Push The Pin Back Into The Hole – This Will Spread The Fins
- With The Channel Locks, Set The Pin Until It Is Flush With The Button Head
- Re-Install The Fender Lining Pins By Simply Popping Them Into Place
Page 9

Now Test The New RECON Led Fender Lenses. By Turning On The Running Lamps Your NEW Recon LED
Fender Lenses Will Illuminate.
Enjoy!
If you have any questions, feel free to contact us:
info@reconaccessories.com - www.GoRecon.com
 Loading...