

Page 1
4
BA No.: 02.05.012/2016-12
User Instructions
Intended Use / User Advisory
The Rollators are designed for persons with limited walking ability and serve to increase their
ability to move. The Rollators may be used only on solid, even surfaces.
The aluminium tubular design provides security against tipping over. Its lightweight not only
makes the Rollator easier to drive, the bow handle also allows it to be pulled up towards the
upper body, thus allowing the patient to easily overcome street kerbs. In addition the
backrest may be outfitted with a back padding (accessory), which makes sitting comfortable.
For transport, the Rollator can be folded up. The bow handle is also height adjustable to suit
the height of the patient.
Have your specialised dealer or care provider advice you on using the Rollator and its
adjustment for proper function!
Spare Parts and Accessories
Art. No.
name
Description
288.00.45
Front wheel, black
plastic
288.00.46
Rear wheel, black
plastic
280.00.60
Brake set 1.265x1.000 Niro incl. nipple
VA steel
280.10.48
Black cushion (accessories: weight 70 g)
PU
286.65.25
Seat, black (accessories: weight 800 g)
wood
Technical Specifications (Technical specifications subject to change without notice!)
Specifications
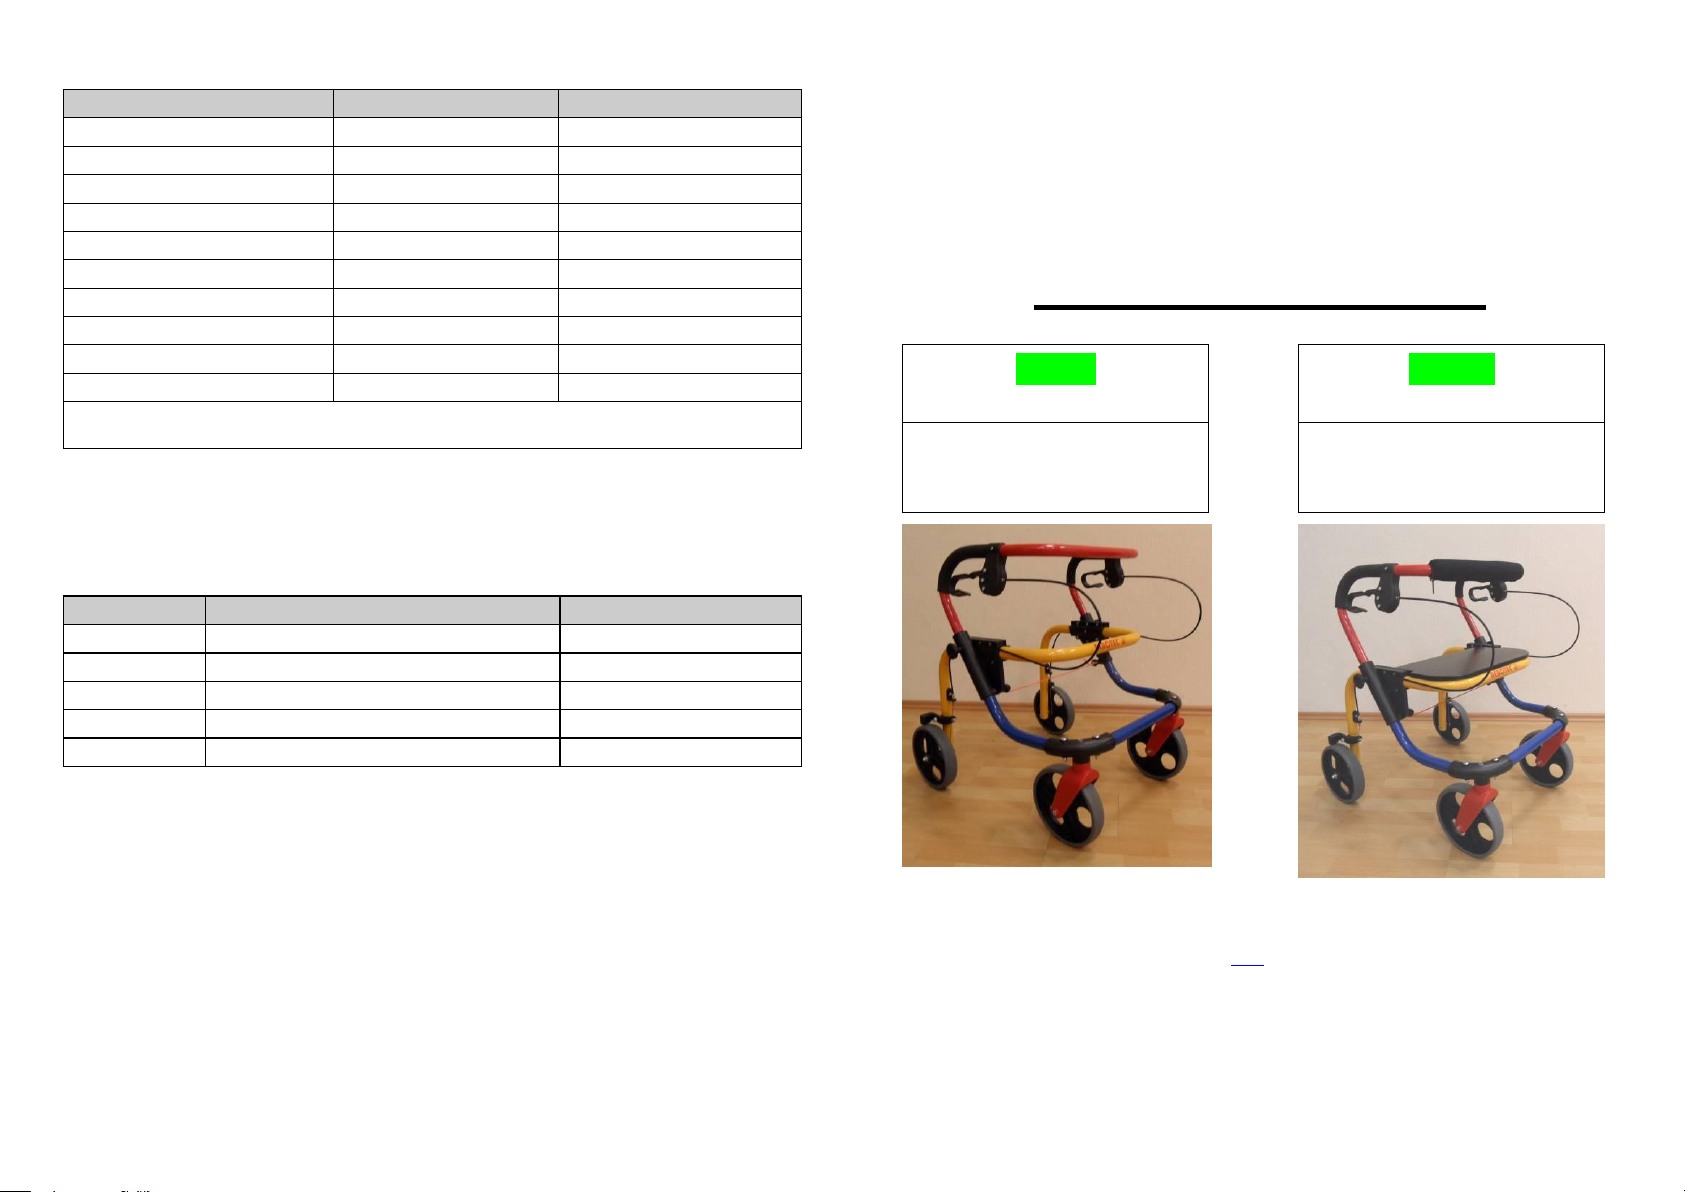
Model FIXI
Model FOX
Weight / product (kg)
6.2
6.3
Max. body weight (kg)
100
100
Length approx.
680
680
Width approx.
580
580
Seat height (mm)
470
465
Seat width (mm)
380
385
handle height (mm)
610-700 / 5 positions
700-780 / 5 positions
Turning radius approx. (mm)
900
900
wheels
4x Plain bearing, D=200
4x Plain bearing, D=200
Type of brake
2x permanent brakes
2x permanent brakes
Angle between longitudinal centre line of handgrip and movement direction:
0 degrees (parallel)
* Weight only accessories Production-dependent tolerances of tubes +/- 15 mm
GB
Advisory!
Always keep the User Instructions in case of future use.
Always bring a copy of the User Instructions with you whenever you leave the house so that
in the case of an emergency another person will be able to operate the Rollator.
The identical serial number in the User Instructions is also printed on the nameplate of the
product. For complaints or questions, always provide the model, serial no. and the User
Instructions no.
The user instructions and the maintenance manual are downloadable on our homepage.
With seat and cushion (accessories)
®
REBOTEC
PO Box Q541
Queen Victoria Building
NSW 1230
rebotec.com.au
Rehabilitationsmittel GmbH
Rollator For Kids
FIXI
186.00.10
Serial #
FOX
186.00.20
Serial #
Page 2
1
2
3
Reuse
The product is intended for reuse. The reuse (life) depends on the product state.
Before the re-use of the device maintenance must be carried out and the appropriate
instructions to security, care and maintenance must be observed.
This review shall exclude a possible improper use caused by obvious or invisible damage.
Please refer to the Medical Device Directive (MDD) and the regulation for operator
(MPBetreibV).
Life
The expected life of the products listed in this manual when used in accordance with safety
instructions, maintenance intervals and care instructions is 3 years.
Beyond this period, the product can be set used only in a safe condition. Maintenance should
be done at least every six months. Specific requirements of the product, due to the use of the
patient, causing shorter maintenance intervals.
Warranty
The products listed in this manual are provided with a warranty of 24 months. Wear parts and
damages of the products due to improper use are excluded.
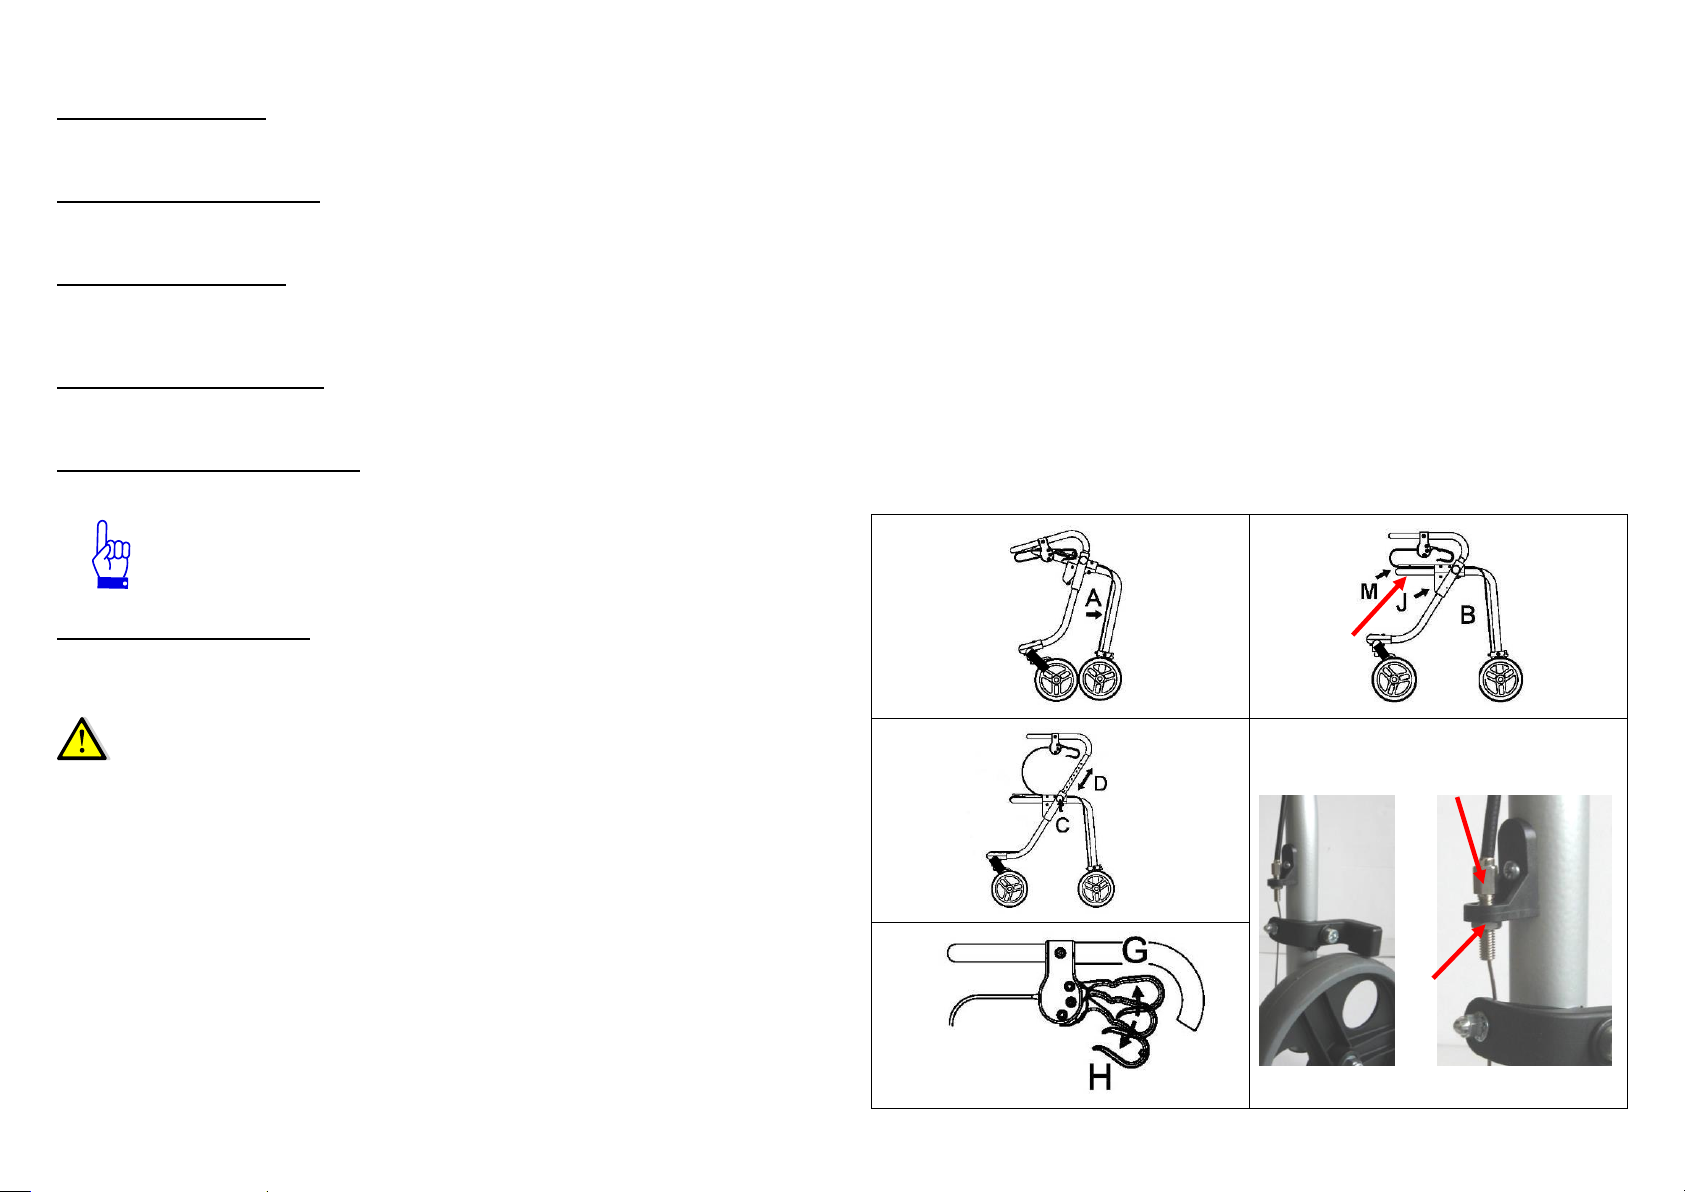
Figures:
Instructions for Assembly and First-time Use
1. Unfolding the Rollator
Place the Rollator on its front wheels and push the frame with the rear wheels apart (A) Fig. 1.
The Rollator clicks by itself into its final position (B) Fig. 2.
2. Adjusting the Handles-Fig. 3
Next remove both star-grip screws (C). Then choose the appropriate height (D) and adjust the
grip handles to the next screw hole. Reinstall the star-grip screws (C) and tighten them firmly.
3. Using the Brakes –Fig. 4
By pulling up the left and right brake levers (G), the back wheels are locked respectively. The
permanent brake is set by pushing the brake levers (H) downwards. By pulling up the brake
levers (G) the permanent brake is disengaged.
4. Folding the Rollator together
Then with one hand pull the red cord (J) Fig. 2 upwards until the click-lock disengages. Then
with the other hand lift the Rollator at the tubular bow (F).
5. Using the Seat (accessory)-Fig. 2
The seat (M) is screwed firmly to the frame (F).
Before using the seat, activate the permanent brake (H), see Step 4.
When the sun shines the seat may get hot! Therefore, check the
temperature of the seat with your hand. If necessary, allow the seat to cool
down, or place a cushion on the seat.
6. Adjusting the Brakes-Fig. 5
Loosen the counter nuts (L) and then adjust the brake with the adjustment screw (K).
Be sure that when the brake is released, the wheels are allowed to turn freely, and when the
brake levers are pulled the wheels are firmly arrested. Then retighten the counter nut (L).
Safety Instructions and Inspection
After the first time set-up and before each use, always conduct a visual inspection of the
Rollator for deficiencies. Check the screw connections to be sure they are tight. Tighten if
necessary using the appropriate tools. If you have any doubt, then do not use the Rollator.
Contact a specialised dealer.
Before each use, check over the folding mechanism to be sure it has clicked into its final
position.
Check the function of the brakes and the permanent brake function as well.
Use the grasp handle only for raising the Rollator and as a backrest.
DANGER OF TIPPING!
For moving the Rollator only use the rubberized handles.
Care and Maintenance
The surface of the aluminium tubing has been provided with a paint coating. The Rollator can
be cleaned with a commercially available cleaning or disinfecting agent – always follow
instructions for use. All moving parts are permanently lubricated. Inadequate or negligent care
and maintenance leads to limitations or annulment of product liability by the Manufacturer.
Allow your Rollator to be checked over by specialised dealer once a year!
1
1
2
4
3
5
L
K
F
 Loading...