

Realtone RT212 Quick Start Manual

Instruction Manual
Date: Apr 3, 2012
Print color : Black text on white paper
Size: 125W x 125H mm
Model RT212
AM/FM Dual Alarm
Clock Radio
Questions? Visit www.realtoneaudio.com

FCC Information
This device complies with Part 15 of the FCC Rules, operation is subject to the following two conditions:
(1) This device may not cause harmful interference, and (2) this device must accept any interference
received, including interference that may cause undesired operation.
• Warning: Changes or modifications to this unit not expressly approved by the party responsible for compliance could
void the user’s authority to operate the equipment.
• NOTE: This equipment has been tested and found to comply with the limits for a Class B digital device, pursuant to Part
15 of the FCC Rules.
These limits are designed to provide reasonable protection against harmful interference in a residential installation. This
equipment generates, uses and can radiate radio frequency energy and, if not installed and used in accordance with the
instructions, may cause harmful interference to radio communications.
However, there is no guarantee that interference will not occur in a particular installation. If this equipment does cause
harmful interference to radio or television reception, which can be determined by turning the equipment off and on, the user
is encouraged to try to correct the interference by one or more of the following measures:
• Reorient or relocate the receiving antenna.
• Increase the separation between the equipment and receiver.
• Connect the equipment into an outlet on a circuit different from that to which the receiver is connected.
• Consult the dealer or an experienced radio/TV technician for help.
This Class B digital apparatus complies with Canadian ICES-003.
Cet appareil numérique de la classe B est conforme à la norme NMB-003 du Canada.

Table of Contents
Controls and Indicators / Unit Display ........................................................................................................................... 1
Quick Start ........................................................................................................................................................................2
Using the Unit................................................................................................................................................................ 3-5
Replacing Backup Battery ...............................................................................................................................................5
A Consumer Guide to Product Safety ............................................................................................................................6
Troubleshooting ................................................................................................................................................................7
Warranty Information ........................................................................................................................................................ 8
Maintenance
• Place the unit on a level surface away from sources of direct sunlight or excessive heat.
• Protect your furniture when placing your unit on a natural wood and lacquered finish. A cloth or other protective material
should be placed between it and the furniture.
• Clean your unit with a soft cloth moistened only with mild soap and water. Stronger cleaning agents, such as Benzene,
thinner or similar materials can damage the surface of the unit.
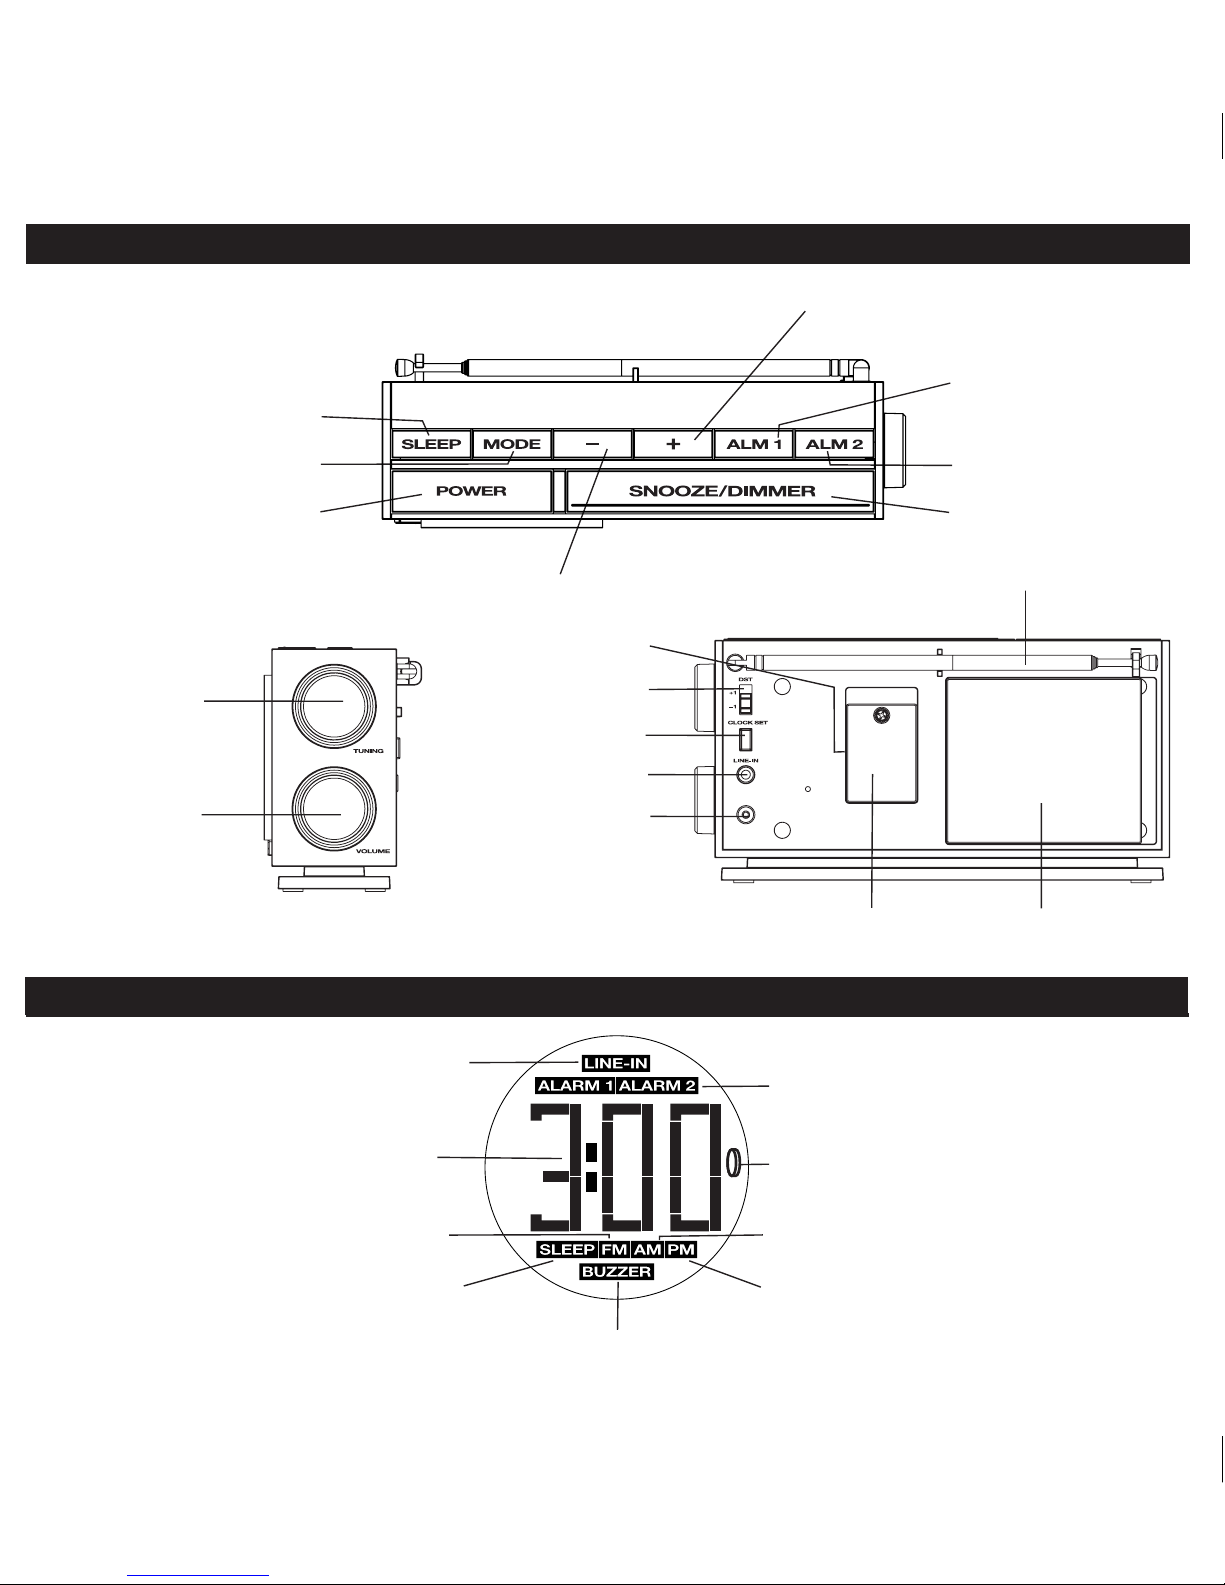
Sleep Button
Controls and Indicators
+ Forward/Advance Setting Button
Top Panel
Alarm 1 Button
Mode Button
Alarm Reset / Power Button
Right Side
Tuning Knob
Volume Knob
– Reverse/Back Setting Button
Battery Pull Tab
DST Switch
Clock Set Button
Line-in Jack
DC 7.5V
500mA
AC Adaptor Jack
Backup Battery Compartment (CR2450)
Controls and Indicators
Unit Display
Alarm 2 Button
Snooze/Dimmer Button
FM Antenna
Rear Side
Battery Compartment (4 AA)
Line-In Indicator
Time/Radio Frequency Display
FM Indicator
Sleep Indicator
Alarm 1, Alarm 2 Indicators
Low Back-up Battery Indicator
AM Indicator
PM Indicator
Buzzer Indicator
1
 Loading...