

Real Flame Lannon 3300 Assembly Instructions Manual
Mantel Assembly Instructions
Model # 3300
Lannon Fireplace
3300-LANNON-JW-081111
LOT#
PO#

WARNING
!!
Read entire label and all instructions included with fireplace fuel and fireplace
If you have questions please call customer service at: 1-800-654-1704
NOTICE: Buyer assumes all responsibility for safety and use that is not in accordance with these instructions and warnings.
1. Never touch logs, fireplace fuel cans or any other surfaces during or immediately after burning fireplace fuel.
They will be extremely HOT. Allow surfaces to cool for 20 minutes before touching or refuelling.
2. Make sure fireplace is operated on a flat, level and stable surface. Keep fireplace stable at all times
3. WARNING: Never alter or dismantle the fireplace, metal firebox or logset in any manner.
4. Never store or use gasoline or any other flammable vapors, liquids, or materials in the vicinity of the fireplace
and fireplace fuel.
5. Burn only Real Flame® fireplace fuel in this fireplace. Never burn trash, paper, or wood in the fireplace.
5. Never leave a burning fire unattended, especially AROUND CHILDREN OR PETS.
6. Fireplace is not to be operated by anyone below age 18. Keep away from children and pets.
7. Never burn fireplace fuel outside the designated burn areas in metal firebox. Wipe up spills right away with a
paper towel or rag.
8. Do not burn more than three cans of fuel in the firebox at any one time.
9. Do not wear flammable or loose clothing when operating the fireplace.
10. Do not place more than 100 lbs. of weight on the top of the fireplace at anytime.
11. Never move fireplace while in use. Do not attempt to move fireplace until 30 minutes after
fireplace fuel has been extinguished.
12. Do not place fireplace in high traffic areas, such as a hallway or entryway.
13. Exercise the same precautions as you would with any open fire.
Fireplace fuel is flammable. Failure to follow warnings can result in property damage or serious burns.
Do not attempt to pourany kind of fuel on a fire that is already burning. Flare-ups or flashbacks can
occur if you do. Allow unit to cool for 20 minutes before refueling or removing cans of fuel.
Use only Real Flame® Fireplace fuel in this unit. Do not use with any other fuel or flammable material. Do not
attempt to refill cans of fireplace fuel.
Do not store or use gasoline or other flammable materials, including fireplace fuel, near this product. Vapors from
these types of items may collect and increase the risk of fire, explosion or injury.
In case of an emergency use a CO2 extinguisher or baking soda to extinguish the fire.
RF Mantle WARNINGS Rev7 050812
-
-
-
-
-
Using your
Fireplace
-Fireplace is designed to be used indoors, there is no need for ventilation.
-Before using unit, be sure you have read and understood all of the
step-by-step instructions.
-After several burns, soot may develop on the inside of the firebox. Clean with
a damp soapy rag or any household glass cleaner.
-During the initial burn you may experience a slight odor. Odor is temporary
and will be absent on following burns.
FLAMMABLE Real Flame Fireplace Fuel contains isopropyl alcohol.
Avoid contact with eyes, mucous membranes or prolonged contact with skin. May
irritate eyes. Store in a cool, dry place. Keep away from flame, heat or items that
spark. Use in well-ventilated areas. Keep out of reach of children and pets. In case
of fire, use a CO2 fire extinguisher or baking soda.
FIREPLACE
FUEL
If fuel gets in eyes, flush with water for 15 minutes; get medical attention. If ingested,
do not induce vomiting; call a poison control center a doctor.
FIRST AID
HAZARDS
PROPERTY DAMAGE, SERIOUS INJURY OR DEATH may result if these warnings are not followed
Precautions
2
3
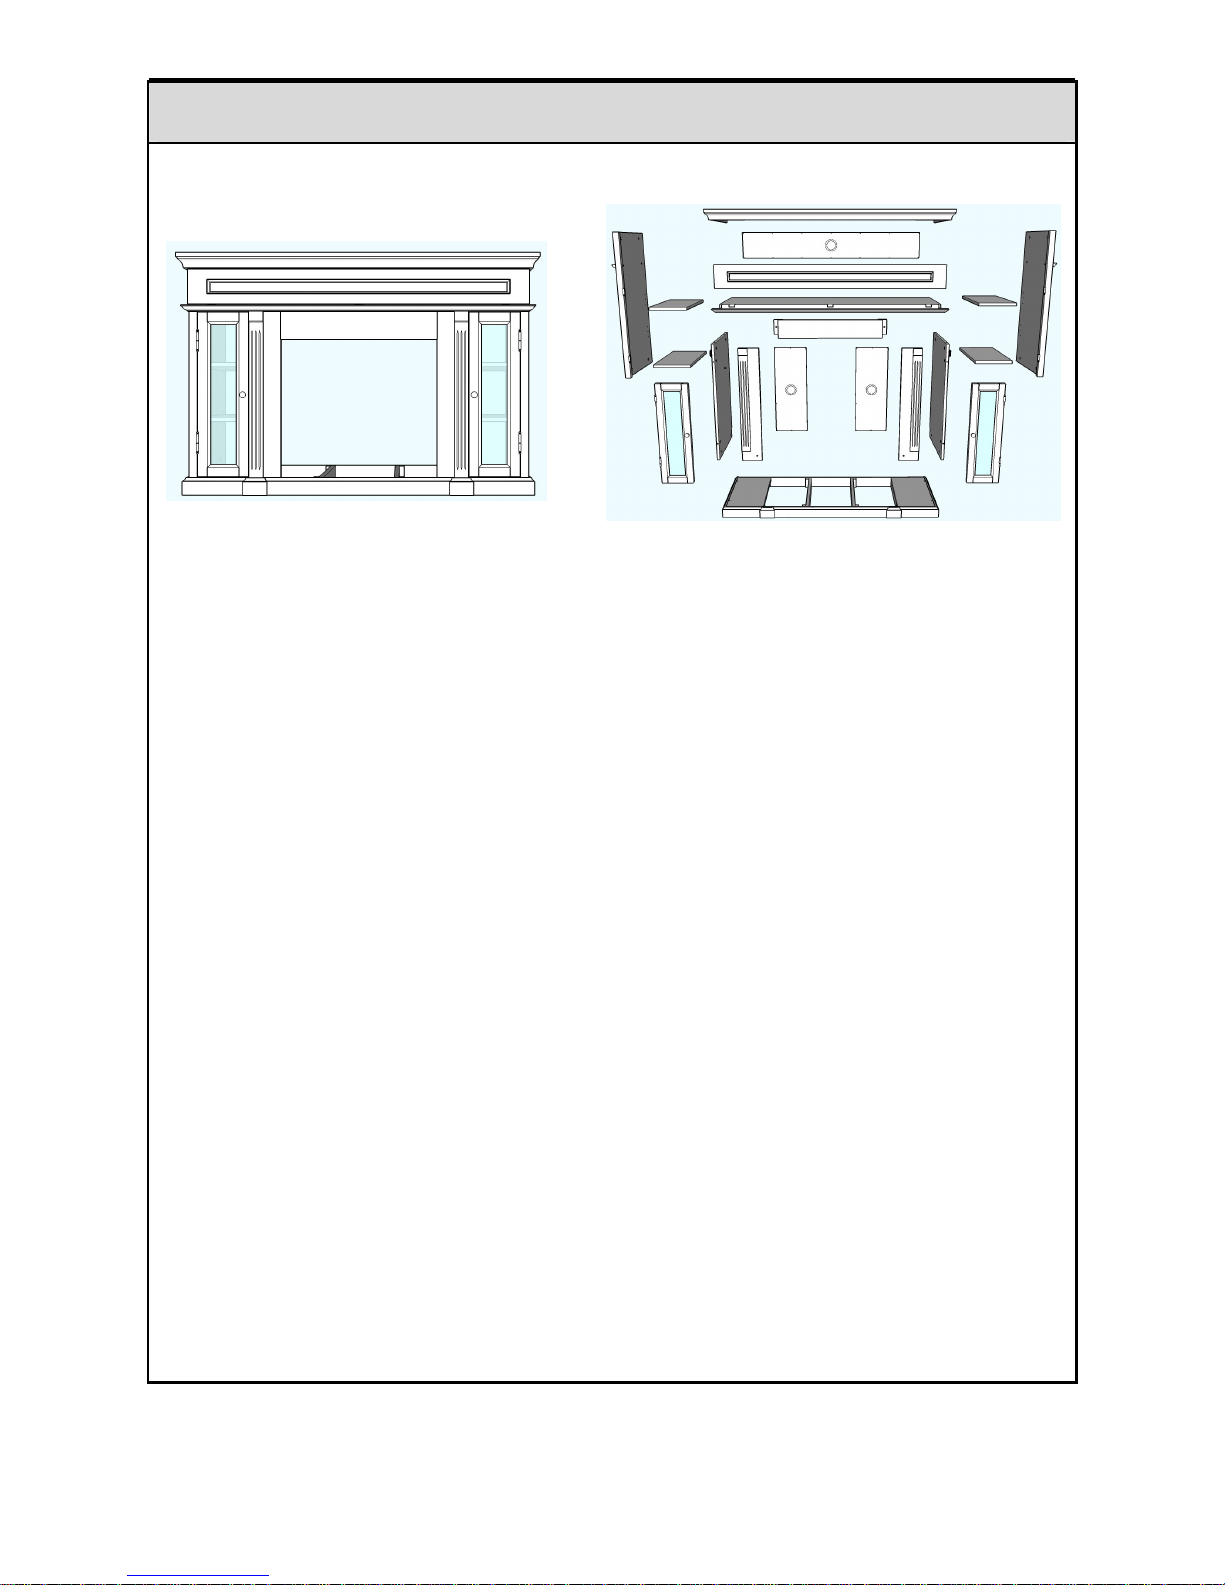
PARTS LIST
Number Description Dark Walnut Espresso Quantity
1 Base Panel 33001201JW 33000301JW 1
2 Left Outside Panel 33001202JW 33000302JW 1
3 Right Outside Panel 33001203JW 33000303JW 1
4 Left Inside Panel 33001204JW 33000304JW 1
5 Right Inside Panel 33001205JW 33000305JW 1
6 Left Door 33001206JW 33000306JW 1
7 Right Door 33001207JW 33000307JW 1
8 Left Front Panel 33001208JW 33000308JW 1
9 Right Front Panel 33001209JW 33000309JW 1
10 Upper Firebox Trim 33001210JW 33000310JW 1
11 Center Shelf Panel 33001211JW 33000311JW 1
12 Upper Door 33001212JW 33000312JW 1
13 Top Panel 33001213JW 33000313JW 1
14 Side Back Panel 33001214JW 33000314JW 2
15 Upper Back Panel 33001215JW 33000315JW 1
16 Side Shelf Panel 33001216JW 33000316JW 4
17 Hardware Kit 33000017JW 33000017JW 1
1
2
4 5
6 7
8
9
10
16
16
3
11
12
13
14 14
15
16
16

4
HARDWARE KIT-33000017JW
A x 16
3 in 1 Bolt
B x 16 C x 12
Long Allen Screw
D x 12
Washer
E x 1
Allen Wrench
F x 42
Back Panel Screw
Upper Door Stopper Screw
G x 18
Upper Door Hinge Screw
H x 2
Side Door Stopper
I X 3
Upper Door Hinge
J x 8
Side Door Stopper Screw
K x 2
Upper Door Stopper
L x 2
Handle
M x 2
Handle Screw
N x 16
Shelf Panel Support
K1 K2
H1 H2
Excenter Fitting
5
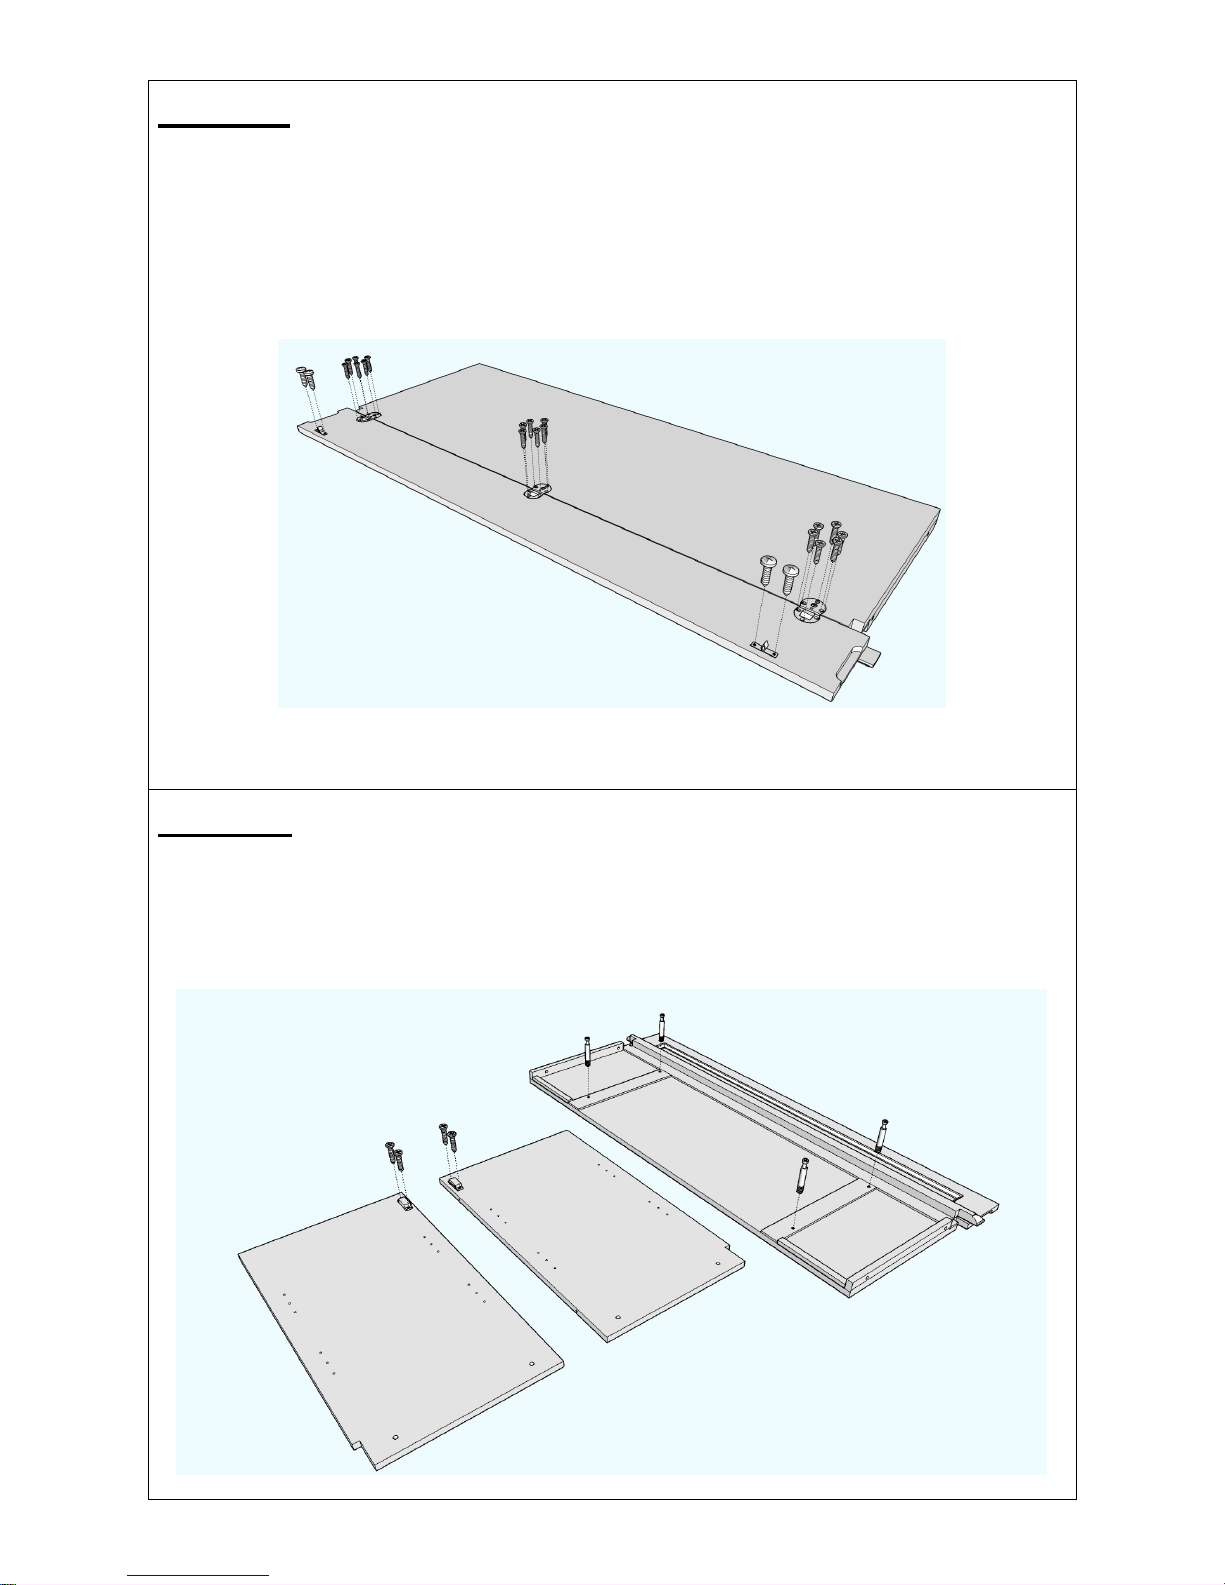
Step One
-Join upper door (12) with center shelf panel (11) by securing 18 upper door hinge screws (G)
through 3 upper door hinges (I).
-Attach two K1 of upper door stopper to upper door by securing 4 upper door stopper screws (F).
Step Two
-Attach 1pc H2 of side door stopper to left inside panel (4) by securing 2 side door stopper
screws (J). Repeat with right inside panel (5).
-Screw four 3-in-1 bolts (A) to center shelf panel (11).
11
12
G
F
K1
I
4
5
H2
J
11
12
A
6
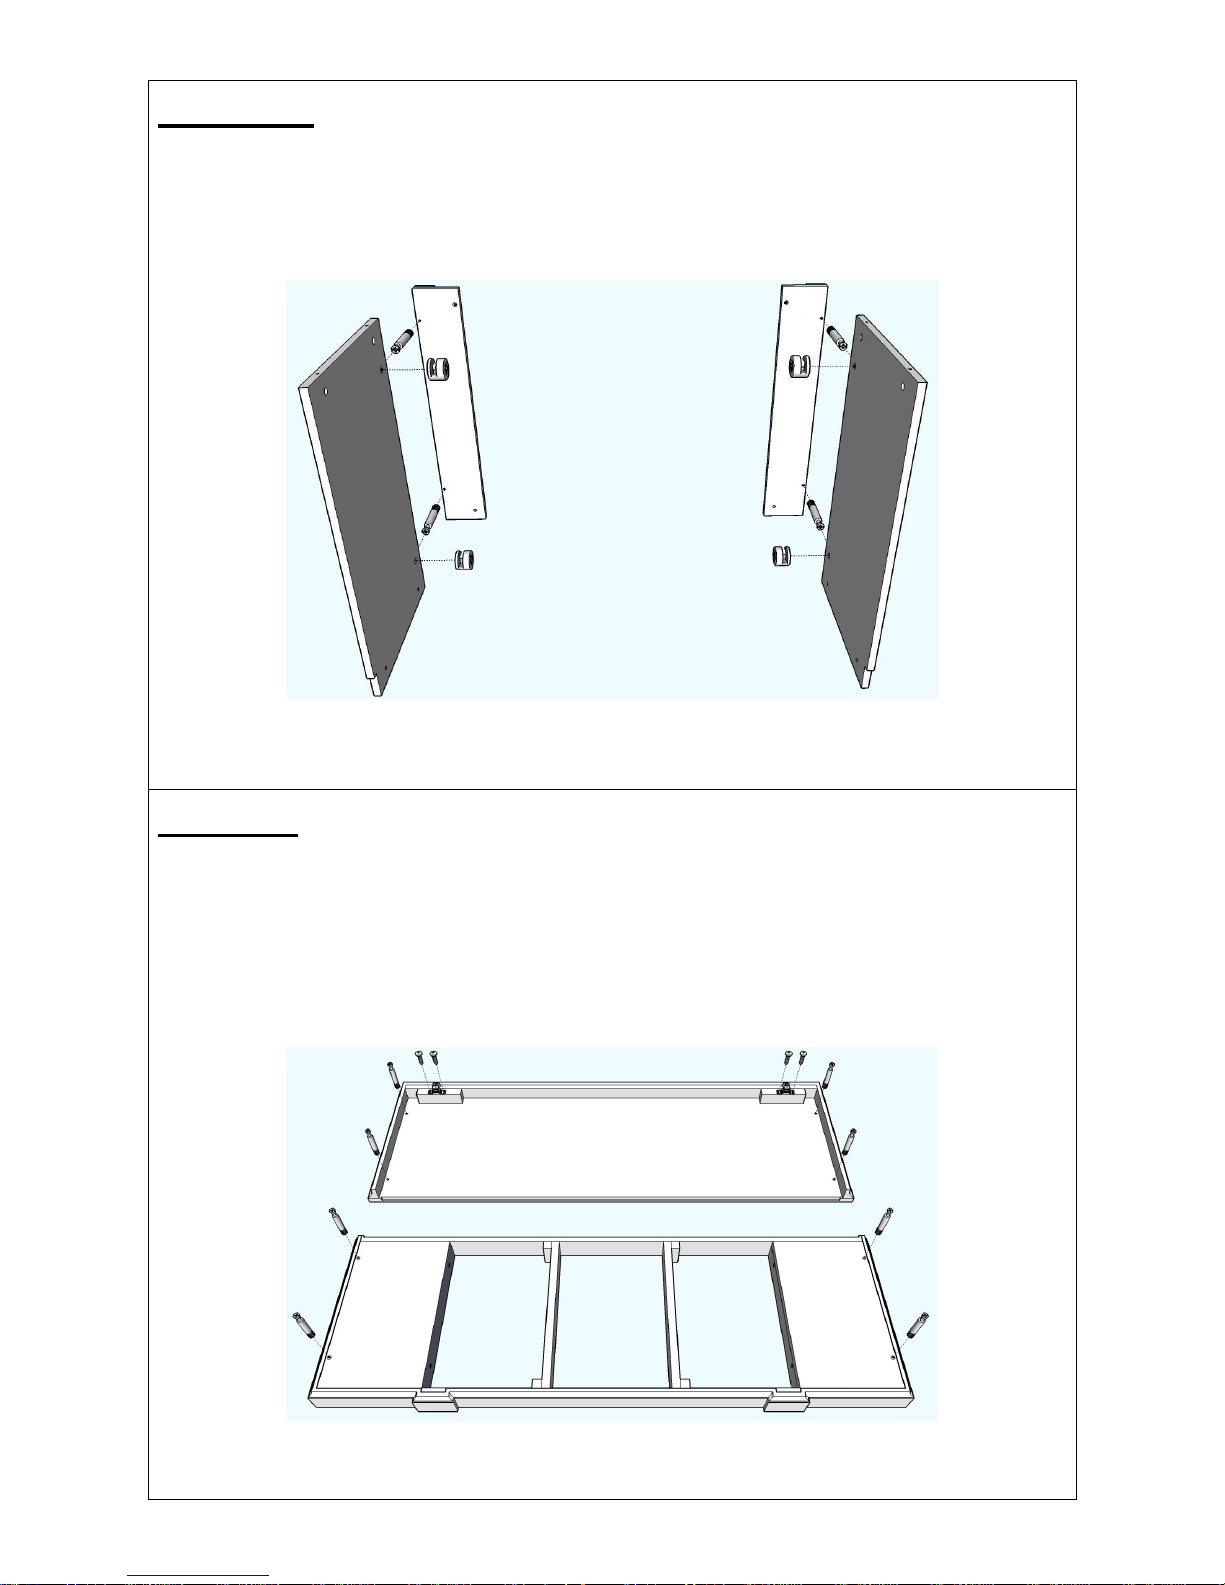
Step Three
-Screw two 3-in-1 bolts (A) to left front panel (8).
-Join left inside panel (4) with left front panel (8) by inserting two bolts (A) in the holes of panel (4).
Using 2 excenter fittings (B) to lock the bolts (A).
Step Four
-Screw four 3-in-1 bolts (A) to base panel (1).
-Screw four 3-in-1 bolts (A) to top panel (13).
-Attach two K2 of upper door stopper to top panel (13) by securing 4 upper door stopper
screws (F).
9
8
5
4
B
A
1
13
A
A
F
K2
7
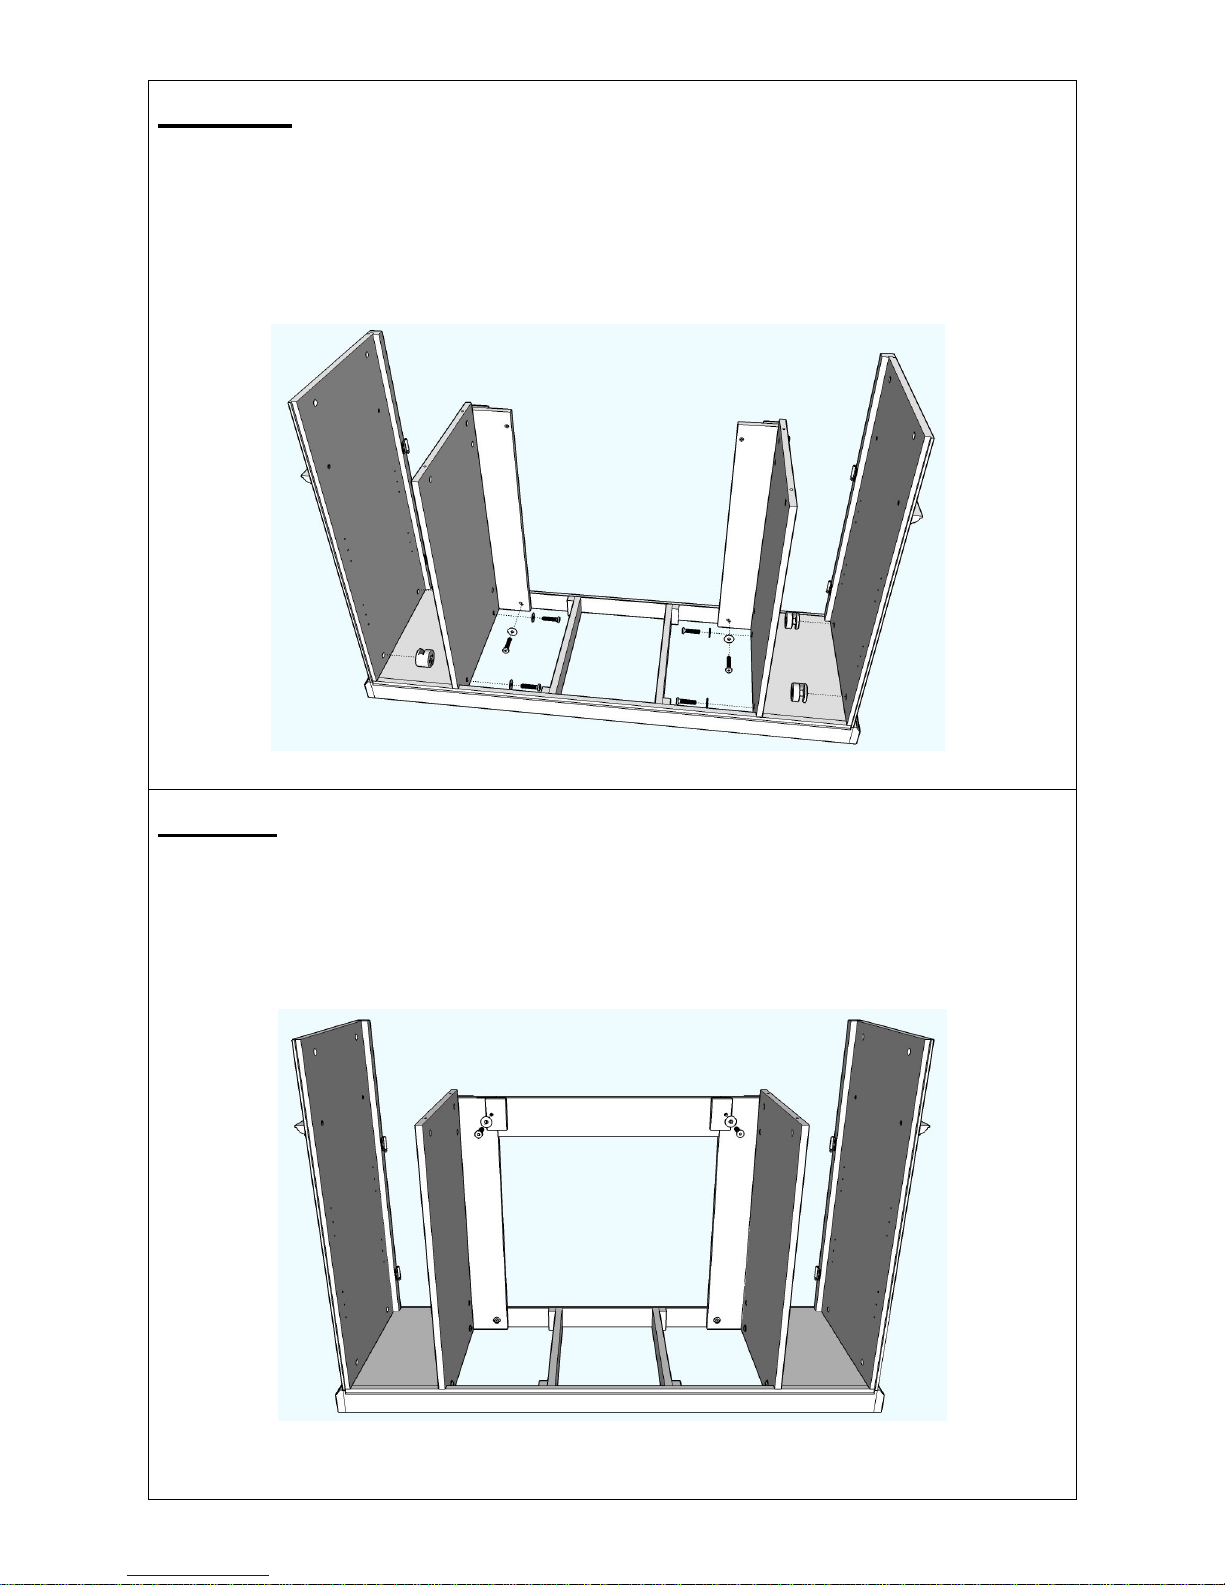
Step Five
-Set base panel (1) on a flat surface as shown.
-Join outside panel (2), (3) by inserting four bolts (A) in the holes of (2),(3). Using 4 excenter fit tings
(B) to lock the bolts (A).
-Join panel (4)&(8), (5)&(9) by securing 6 long allen screws (C) through 6 washers (D).
Step Six
-Attach upper firebox trim (10) to left (8) and right (9) firebox trim by securing 2 long allen screws (C)
through 2 washers (D).
8 9
10
C
D
1
2
3
5
9
4
8
B
C
D
C
8
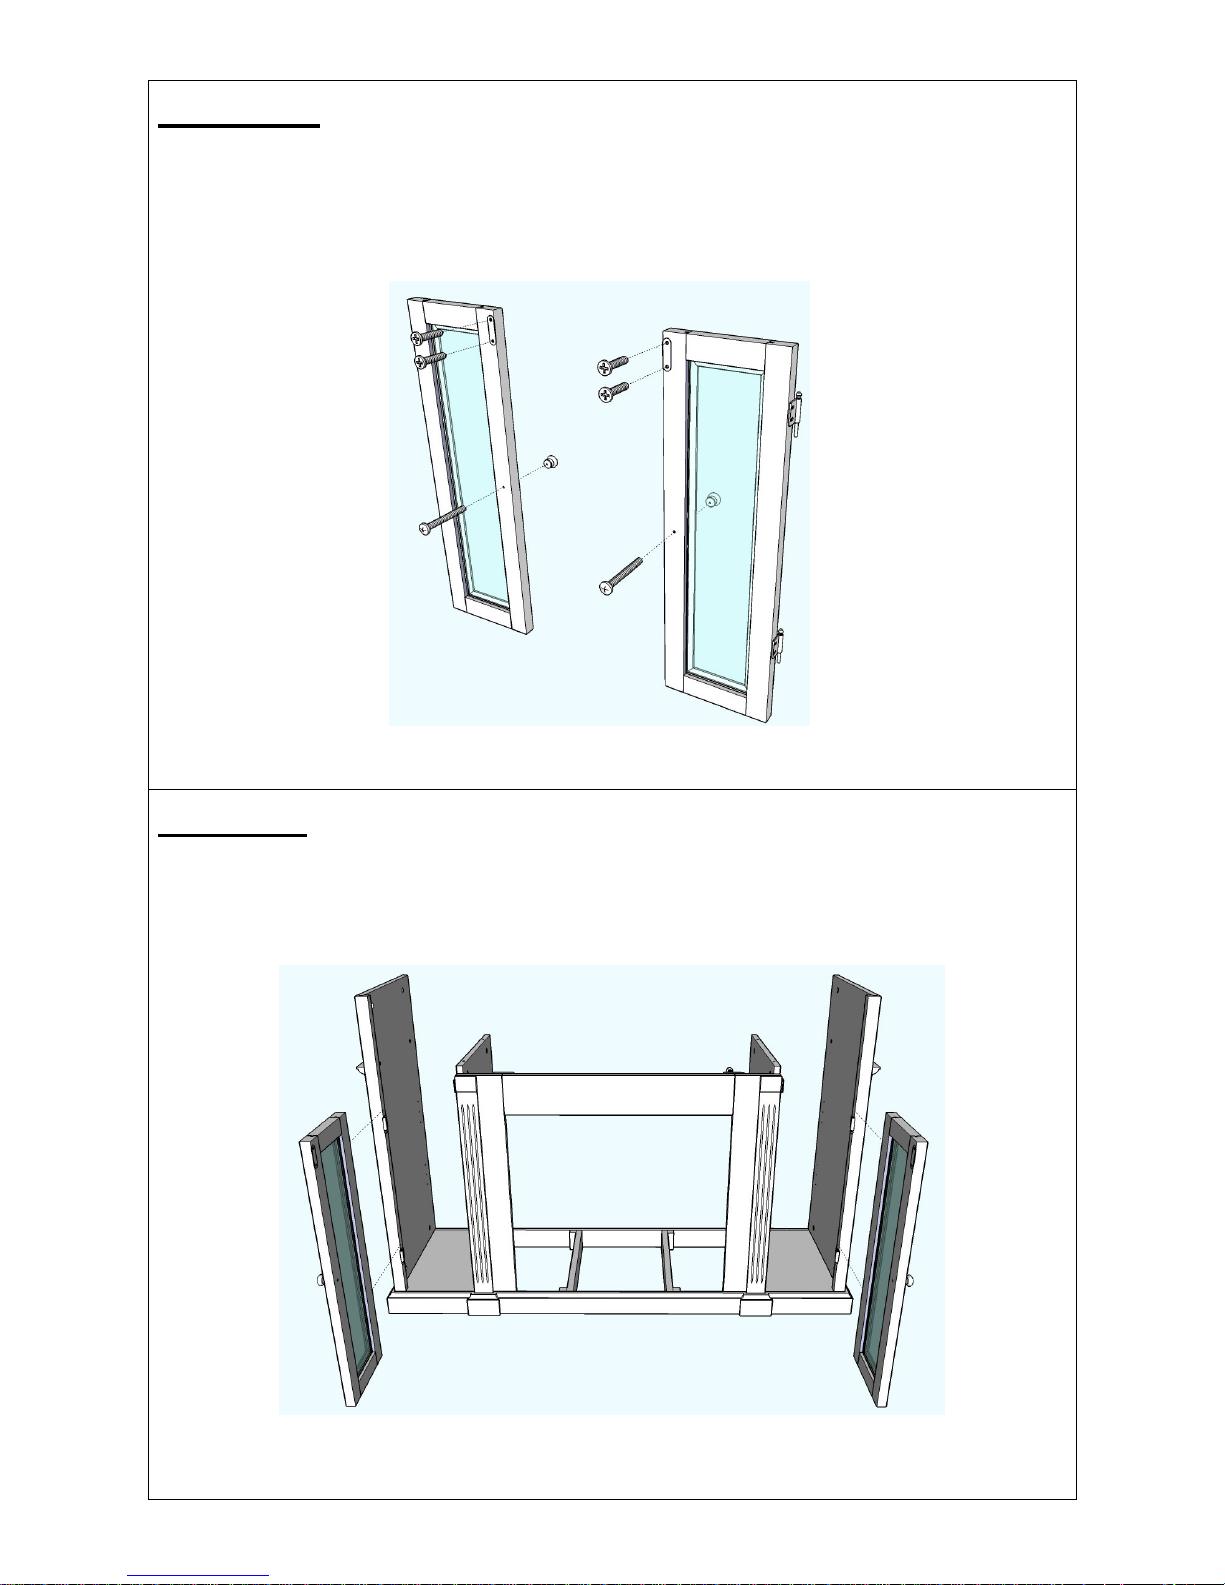
Step Seven
-Attach 1pc H1 of side door stopper to left door (6) by securing 2 side door stopper screws (J).
-Attach 1pc handle (L) to left door (6) by securing 1 handle screw (M).
-Repeat with right door (7).
Step Eight
-Join left door (6) with left outside panel (2) by inserting 2 installed side door hinges.
-Repeat with right door (7) and right outside panel (3).
L
6 7
2 3
J
M 6
7
H1
L
 Loading...