

Page 1
Safety Precautions
Edited with the trial version of
Foxit Advanced PDF Editor
To remove this notice, visit:
www.foxitsoftware.com/shopping
• Adult assembly is required. Keep small parts away
from children when assembling.
• This product is not a toy. Do not allow children or
infants to play with it.
• This video monitor is not a substitute for responsible
adult supervision.
• Test the video monitor before use. Become familiar with
its functions.
• Keep the cords out of reach from children and infants.
• Never use extension cords with power adapters.
• Only use the chargers and power adapters provided.
Do not use other chargers or power adapters as this
may damage the device and battery pack.
• Only insert batteries/battery pack of the same type.
• Insert batteries with the correct polarity.
• Do not mix new and used batteries.
• Do not mix alkaline, standard, and rechargeable
batteries.
• Remove exhausted batteries from the product.
• Keep all batteries away from children and infants.
• Dispose or recycle batteries in accordance with local
laws, which may vary by location.
• Do not cover the video monitor with a towel or blanket.
• Do not use the video monitor near water.
• Do not install the video monitor near a heat source.
• Do not touch the plug contacts with sharp or metal
objects.
• Keep this user’s guide for future reference.
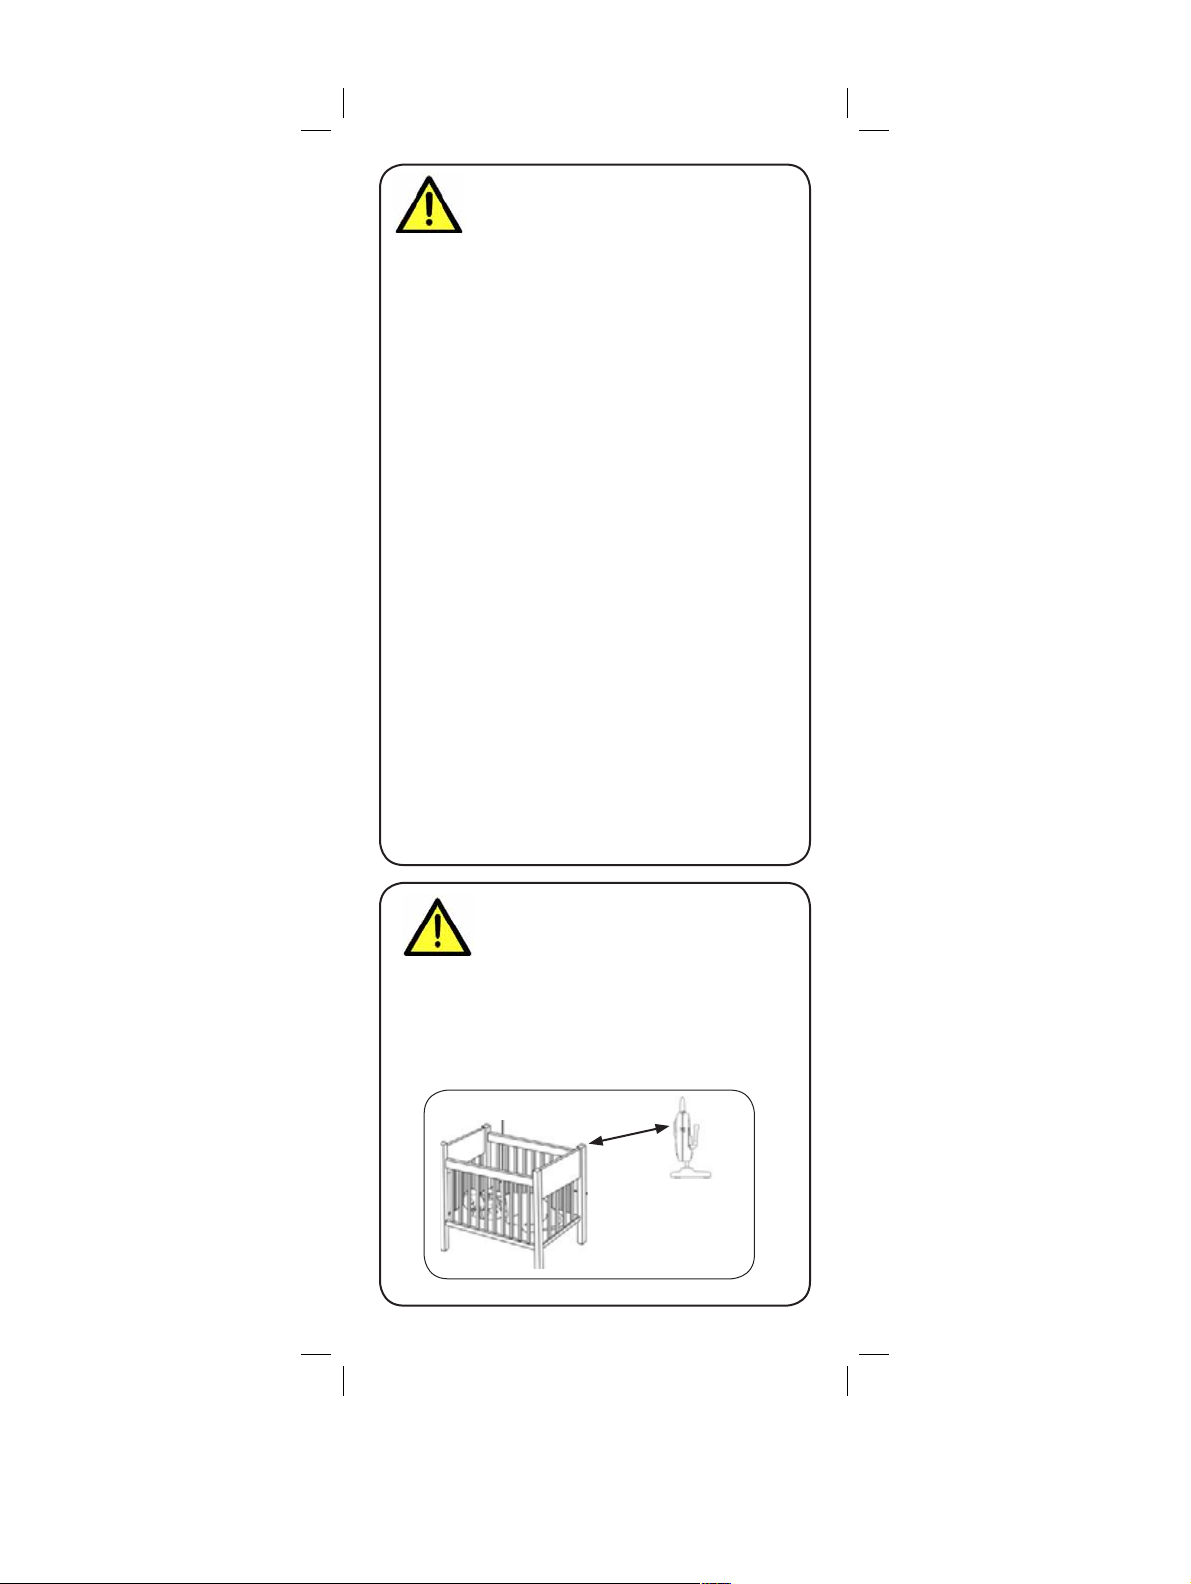
To Avoid Injury to
Children & Infants:
• MAKE SURE to keep the camera and all power
cords are least 3ft / 1m away from cribs and out of
reach of your child.
• Use the included cable clips to help keep power
cords away from your child.
3ft / 1m
Page 2

Table of Contents:
Product Includes..............................3
Monitor Overview...........................3
Camera Overview...........................4
Getting Started ...............................6
Optional - Mounting the Camera............... 7
Using the Cable Clips.............................. 9
Using Your Baby Monitor ..............10
Adjusting Volume ..................................10
Changing Channels............................... 11
Talking to Your Baby.............................. 11
Using Digital Zoom................................ 11
Locking the Monitor............................... 12
Video Off Mode (Audio Only Mode)....12
Inserting a microSD Card .......................12
Video Recording ................................... 13
Taking Snapshots ..................................14
Using the Night-Light .............................14
Playing Sleep & Soothe Sounds............... 15
Using Quad and Scan View Mode.......... 16
Using the Main Menu ............................ 17
Setting the Date and Time.......................17
Adjusting Camera Brightness ..................18
Configuring Recording Options............... 19
Configuring Recording Options............... 19
Changing Languages............................. 20
Configuring Alarm Volume .....................21
Temperature Alerts................................. 22
Using the Timer..................................... 24
Using Motion Tracking
(P/T Camera Only)................................ 24
Using Playback Mode............................25
Formatting Memory Card .......................28
Using Power Saving Mode .....................29
ENGLISH
1
Page 3

Restoring Default Settings ....................... 29
Remotely Connecting to Your
Cameras .......................................31
Using Audio / Video Out ...............32
Pairing Additional Cameras ..........34
Technical Specifications .................36
Fixed Camera ...................................... 36
P/T Camera .........................................36
3.5” Monitor ........................................ 36
4.3” Monitor ........................................ 36
Unit Dimensions ............................37
Troubleshooting ............................38
Need Help?...................................38
2
Page 4
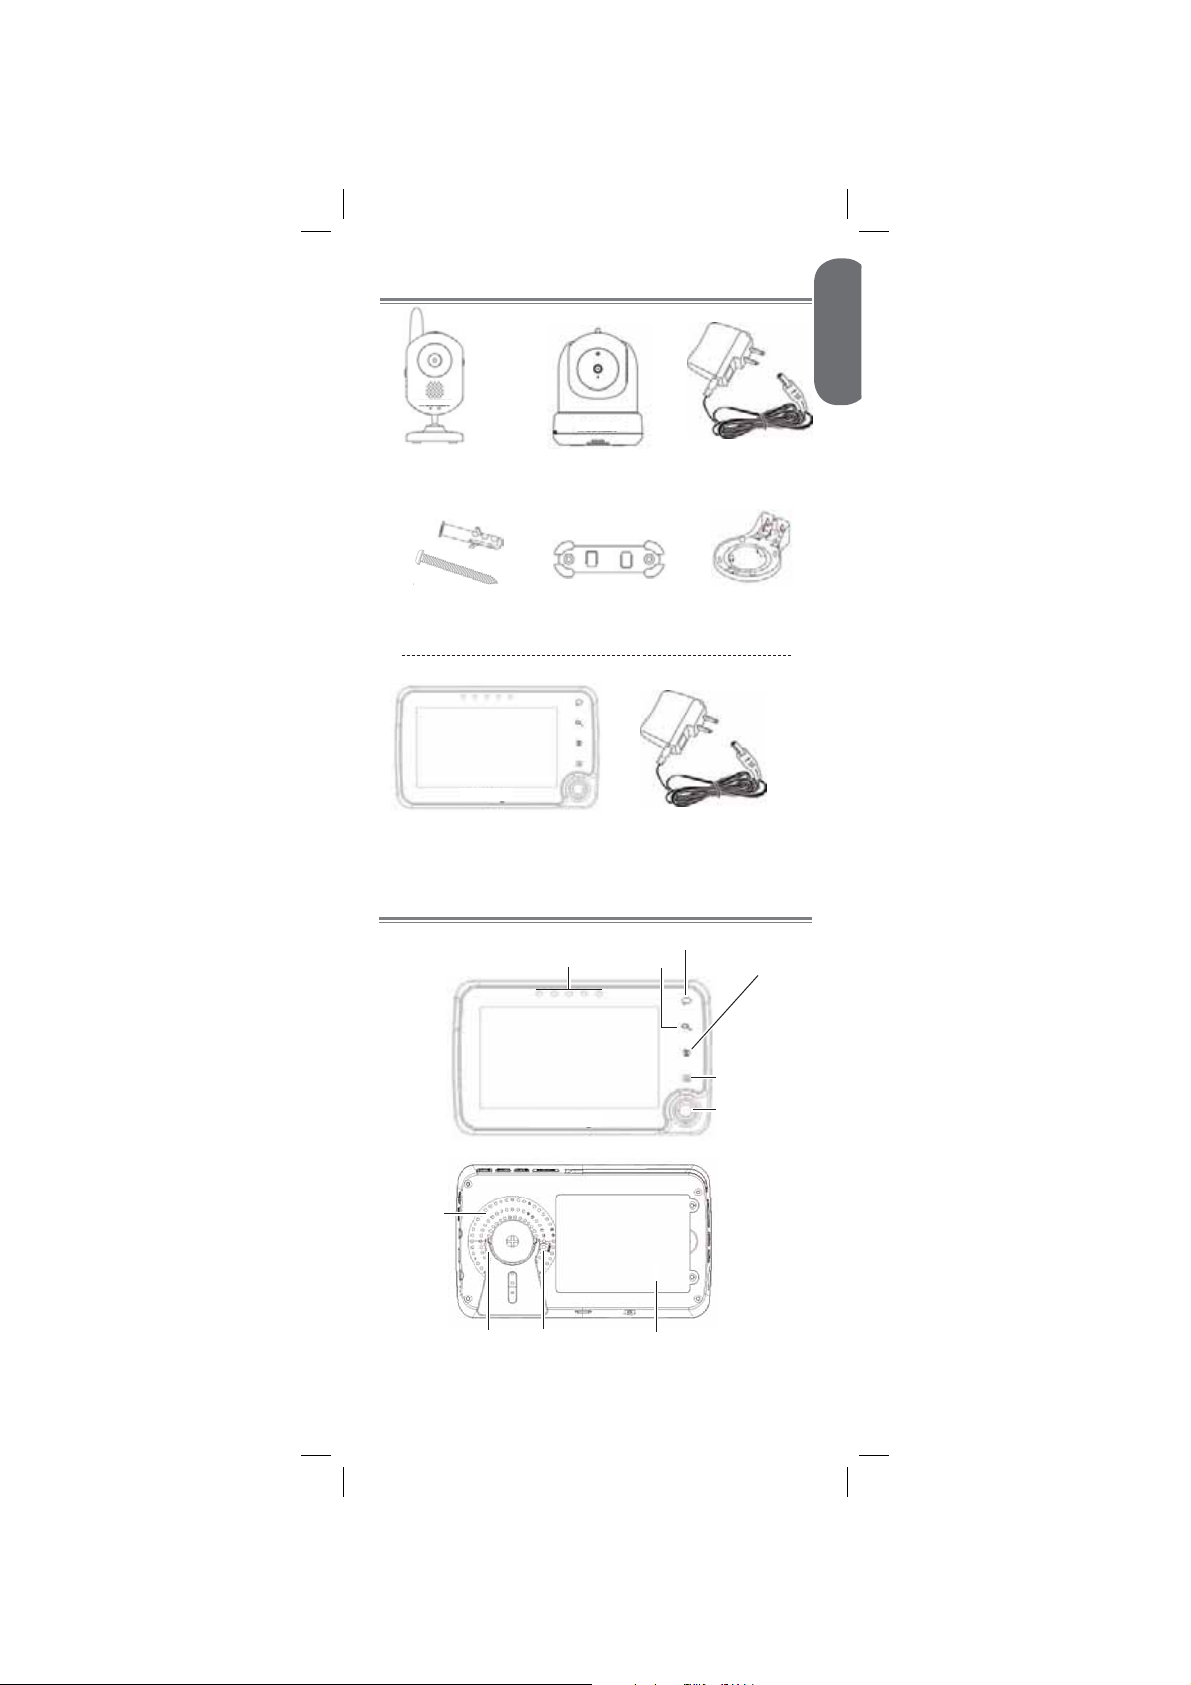
Product Includes
ENGLISH
x1*
OR
Fixed Camera
Mounting Kit
Monitor
*See product packaging for exact contents
Pan/Tilt (P/T)
Camera
x1*
Cable Clips
x1
x1*
Power Adapter
x3*
P/T Mounting
(for P/T camera only)
Power Adapter
x1*
x1*
Plate
x1
Monitor Overview
Talk
Power / Sound LED’s*
Speaker
Stand
*Power / Sound LED’s on the left side of the 3.5” LCD monitor
Reset
button
Zoom
Battery compartment
3
Switch channel
Enter / exit
menu
Joystick
Page 5

LEFT
Volume
controls
Play / stop
sounds
microSD
slot
Next sound
RIGHT
Quad
view /
Scan mode
TOP
Lock mode
AV out port
Antenna
Mini USB port
Power / video on /off
Start / stop recordingNight light
Charging
indicator
Power port
Snapshot
BOTTOM
Wi-Fi Cradle connector*
*Wi-Fi Cradle not included. See “Remotely Connecting to
Your Cameras” on page 31 for details.
Camera Overview
Fixed Camera (BB3500 / BB4300 Series)
Infrared LED’s
Microphone
Temperature
Sensor
Pairing button
Night light button
Lens
Speaker
Light
sensor
Antenna
Mounting thread
Power port
Stand
4
Page 6

ENGLISH
Power
switch
Power
indicator
P/T Camera (BB3500 Series)
Light sensor
Microphone
Speaker
Antenna
Volume dial
Infrared LED’s
Lens
Temperature sensor
Ceiling mount switch
Pairing buttonPower button Volume dial
5
Power port
Page 7

Getting Started
Connect the power adapter to the
1
camera.
Fixed camera
P/T camera
Make sure all power cables are at
least 3ft / 1m away from the crib and
out of reach of your child.
Use the included cable clips to help
keep power cords away from your
child.
Slide the power switch to ON or press
2
and hold the power button.
Power switch
Connect the power adapter to the monitor.
3
Press and hold the power button on top
4
of the monitor for 3 seconds. The display
turns on.
Power button
Power button
6
Page 8
Optional - Mounting the Camera
Before permanently mounting the camera:
• Determine where you will get the best view of
your baby.
• Ensure the power cable is long enough to power
the camera.
• Test your camera(s) before mounting permanently.
Make sure all power cables are at
least 3ft / 1m away from the crib
and out of reach of your child.
Use the included cable clips to help
keep power cords away from your
child. See “Using the Cable Clips” on
page 9 for installation details.
To mount your camera:
Fixed Camera
Drill 2 holes in the wall with centers exactly
1
38mm apart.
Tap anchors into holes with a hammer. Insert
2
screws 2/3 of the way.
ENGLISH
While holding the camera base firmly in
3
place, twist the camera counterclockwise to
remove it from the base.
Reattach the base to the mounting thread on
4
the back of the camera.
Reattach the
camera base
here
Align the mounting points with the screws
5
and push the camera down.
7
38mm
Page 9

P/T Camera
If wall mounting:
1
Drill 2 holes in the wall with centers exactly
26mm apart.
If ceiling mounting:
Hold the included P/T mounting plate
against the ceiling. Use a pencil to mark the
centres of the 3 mounting slots. Drill holes
where you have marked
NOTE: Make sure that the lone mounting
slot points toward the viewing area.
Viewing area
Tap anchors into holes with a hammer. Insert
2
screws 2/3 of the way.
Align the slots on the mounting plate with the
3
screws and push down to lock in place.
Tighten the screws to secure the mounting
4
plate in place.
Place the camera on the mounting plate and
5
twist clockwise to lock in place.
26mm
OR
94mm
NOTE: For ceiling mounting, use the ceiling mounting
switch on the bottom of the P/T camera to invert the video
image.
8
Ceiling mounting
switch
34mm
Page 10

Using the Cable Clips
Option 1
Thread the extra cable through the cable clip notches.
Option 2
Thread the extra cable through the cable clip notches.
Wrap the excess cable around the clip.
Option 3
Wrap the excess cable around the clip.
ENGLISH
Tips
t It is recommended to charge the battery for 5 hours
before use.
t The charge LED glows red while the monitor is
charging and glows green when charging is complete.
t For overnight monitoring, it is recommended to connect
the power adapter. When fully charged, the monitor
will stay on up to 4 hours in normal mode or 8 hours in
Video OFF mode.
t Use Power Save mode to conserve battery power.
t The power LED glows constantly when battery is full
and blinks twice per second when running low.
t For better reception, pull up the antenna on the
monitor.
Pull up to extend
antenna
9
Page 11

Using Your Baby Monitor
The monitor shows the following icons during use:
Icon Meaning
Signal strength
Selected
channel
Recording
REC
Volume muted
Digital zoom
X2
activated
Song currently
playing
Talk feature
activated
Touch buttons
locked
Timer set
Night light on
Adjusting Volume
Icon Meaning
microSD card
inserted
File overwrite
enabled
New pictures
or videos
Battery full
Battery low
Battery
charging
68°F
Out
of
range
Current room
temperature
Camera out of
range or off.
Monitor
Press + and - to adjust monitor volume
Fixed Camera P/T Camera
Use the volume
dial to adjust
camera volume
10
Page 12

Changing Channels
Press to
cycle through
connected
cameras.
The currently
selected camera
is shown on
screen.
The monitor only plays sound from the
camera that is currently being viewed.
To connect additional cameras to the
monitor, see “Pairing Additional Cameras”
on page 34.
Talking to Your Baby
Press and
hold
to the selected
camera
ENGLISH
to talk
Using Digital Zoom
Press on the monitor to zoom in. A X2
1
icon appears on the screen.
X2
Move the joystick to adjust the zoom area.
2
Press again to return to normal
3
viewing mode.
11
Press
Page 13

Locking the Monitor
Press the Lock button ( ) on the side of the
monitor to disable the touch buttons on the front
of the monitor. A lock icon ( ) appears on the
monitor. Use this function to keep from pressing
touch buttons by accident.
Press
Press the Lock button ( ) again to re-enable
touch buttons.
Video Off Mode (Audio Only Mode)
Video Off mode is a power-saving function which
turns the monitor’s display off while continuing to
play audio from the camera(s).
Press to turn the screen off and
1
monitor sound only.
The monitor will play sound from the
selected channel only.
NOTE: If Scan mode is enabled, the
monitor will play sound from the channel
that is currently selected.
Press any button to turn the screen back on.
2
NOTE: See “Using Power Saving Mode” on page
29 for more power-saving options.
Inserting a microSD Card
You must use a microSD card (not included) with
your video monitor to store picture and video files
from your camera(s). The video monitor supports
microSD cards up to 32 GB (gigabytes).
12
Page 14

To insert a microSD card:
Orient the microSD card as shown below
1
and insert it into the microSD slot.
microSD card slot
Push the microSD card in until it clicks into
2
place.
You can now save recorded video and snapshots
from your camera(s) on your monitor. See “Using
Playback Mode” on page 25 for details on
viewing and managing video and picture files.
Video Recording
You can save recorded video from a single
camera or all cameras connected to your system.
Video files are saved to the microSD card (not
included).
To record video:
Use the monitor to view the channel(s) you
1
wish to record video from.
ENGLISH
You can record video from one channel
by using normal viewing mode, or all
channels using Quad mode.
Press the manual recording button ( ) on
2
top of the monitor to begin recording.
Recording button
Press the manual recording button ( )
3
again to stop recording. Recording will stop
automatically after 10 minutes.
A new file icon (
For details on viewing and managing videos, see
“Using Playback Mode” on page 25.
) appears on the screen.
13
Page 15

Taking Snapshots
The snapshot feature allows you to capture
images from a single camera channel in normal
viewing mode or all 4 channels in Quad mode.
Snapshot images are saved to the microSD card
(not included).
To take a snapshot:
Press the Snapshot button ( ) on top of the
monitor to save a picture of your monitor’s
display.
Snapshot button
A new file icon ( ) appears on the screen.
For viewing and managing snapshots, see “Using
Playback Mode” on page 25.
Using the Night-Light
Press the night light button ( ) on top of the
monitor to turn on the night light for the currently
selected camera.
Press
OR
Fixed Camera Only
Press the night light button ( ) on top of the
camera where light is needed.
Press
14
Page 16

Playing Sleep & Soothe Sounds
The camera can play 5 different pre-loaded Sleep
& Soothe sounds.
To play sounds:
Press the button on the side of the
1
monitor to play sound on the currently
selected camera.
Press
A icon with the number of the currently
playing sound (1-5) appears in the bottomleft corner of the monitor.
1
ENGLISH
Press the button on the side of the
2
monitor to play the next sound in sequence.
Press
Press the button to stop playing
3
sounds.
15
Page 17

Using Quad and Scan View Mode
If you have multiple cameras, Quad view mode
and Scan view mode help you keep an eye on
them.
Scan view mode
Use Scan mode to display video from each
camera connected to your system in full-screen for
3 seconds before switching to the next camera.
From normal viewing mode, press
1
once to activate Scan mode. The monitor
will begin displaying connected video
channels in sequence.
Press once
Press to return to normal viewing
2
mode.
Quad view mode
Use Quad mode to display video from all 4
camera channels in split-screen (viewing area
appears black for channels that do not have a
camera connected).
From normal viewing mode, press
1
twice to activate Quad mode. The monitor
will display all 4 channels in split-screen.
Press twice
Press to return to normal viewing
2
mode.
16
Page 18

Using the Main Menu
Press to launch the main menu.
1
Move the joystick to adjust menu options.
2
Press the joystick to make a selection.
Press
again to exit the main menu.
ENGLISH
Press
Press again to
exit menus
Move joystick to
adjust menu options.
Press to make a
selection.
Setting the Date and Time
Press , then select Settings.
1
2
17
Select
Settings
Select Date
& Time
Page 19

Move the joystick left and right to switch
3
between fields. Move the joystick up and
down to adjust the date and time.
NOTE: Video monitor uses 24-hour time.
Push the joystick in to save changes.
4
Press repeatedly to get back to normal
5
viewing mode.
Adjusting Camera Brightness
Press , then select Setup.
1
2
Adjust the brightness level by moving the
3
joystick left and right.
18
Select
Setup
Select
Brightness
Adjust
camera
brightness
Page 20

Configuring Recording Options
You may choose to record video at a low or high
quality depending on your recording needs.
To adjust video quality:
Press , then select Recording.
1
Select
Recording
2
Select Video
Quality
Select High for clearer video or Low for
3
smaller file size.
ENGLISH
Configuring Recording Options
You can configure your system to overwrite old
video files to make way for new recordings.
To configure file overwriting:
Press , then select Recording.
1
Select
Recording
19
Page 21

2
Select File
Overwrite
Select Yes to enable file overwriting or
3
No to disable.
Changing Languages
This baby monitor supports 3 languages: English,
French, and Spanish.
To change languages:
Press , then select Settings.
1
2
20
Select
Settings
Select
Language
Page 22

Move the joystick up and down to switch
3
between languages. Press the joystick to
select a language.
Configuring Alarm Volume
You can set the volume of the alarm used by the
timer and temperature alert functions.
Press , then select Alarm.
1
Select
Alarm
ENGLISH
2
Move the joystick left and right to adjust
3
the volume of the alarm.
21
Select Alarm
Volume
Adjust alarm
volume
Page 23

Temperature Alerts
The temperature alert feature allows you to
ensure the baby’s room is at a comfortable
and safe temperature. The monitor beeps if the
temperature gets too hot or cold. Temperature
sensor is accurate within 3°F/1°C.
You can control the high and low temperatures
that trigger alerts or disable temperature alerts.
To select temperature units:
Press , then select Settings.
1
Select
Settings
2
Select Temp.
Display Unit
Move the joystick up and down to select
3
o
C (Celsius) or oF (Fahrenheit). Select the
desired unit for temperature display.
To setup temperature alerts:
Press , then select Alarm.
1
22
Select
Alarm
Page 24

2
Move the joystick up and down to
3
change your selection. Move the joystick
left and right to adjust the high and low
temperatures that trigger alerts.
Select On to activate temperature alerts.
4
ENGLISH
Select
Temp.
Alert
Range
Adjust high
and low
temperatures
Select On
23
Page 25

Using the Timer
You can set the monitor to sound an alarm after
a preset period of time to help you stay aware of
feeding and nap times.
Press , then select Alarm.
1
Select
Alarm
2
Select Timer
Move the joystick left and right to switch
3
between hours and minutes. Move the
joystick up and down to adjust timer
duration.
Adjust timer
duration
Push the joystick in when you have
4
finished setting the timer.
Select On to start the timer or Off to
5
cancel.
Using Motion Tracking
(P/T Camera Only)
P/T cameras with motion tracking enabled will
follow any movement the camera detects.
NOTE: This feature is useful only for tracking
single objects, such as your baby moving around
the crib.
24
Page 26

To enable motion tracking:
Press , then select Setup.
1
2
Move the joystick up and down to change
3
the channel you are configuring. Move
the joystick right or left to toggle motion
tracking on and off.
ENGLISH
Select
Setup
Select Motion
Tracking
On/Off
Select On or
Off
Choose channel
NOTE: You may use the joystick to override the
automatic movement of your P/T camera when
motion tracking is activated.
Using Playback Mode
Playback mode is used to view and manage
snapshots and video files stored on the microSD
card (not included).
To view files:
Press the joystick during normal viewing
1
mode.
25
Page 27

Move the joystick up and down to select
2
the VIDEO or PICTURE folder. Press the
joystick to select a folder.
VIDEO
PICTURE
Move the joystick up and down to choose
3
the date you wish to playback. Earliest
pictures and videos are shown first. Push
the joystick in to select a folder.
The folders are named by the year, month,
and date. For example, a folder named
02042013 means that the folder was
created in 2013, February (02), on the
4th.
Move the joystick up and down to choose
4
the file you wish to playback. Push the
joystick in to select a file.
To back up picture / video files on PC:
Remove the memory card.
1
Insert the microSD card into a memory
2
card reader (not included)or use an SD
card adapter (not included) to convert the
microSD card to SD/HCSD memory card
format.
When the AutoPlay menu appears, click on
3
Open folder to view files.
NOTE: If the Autoplay menu does not
appear, open Windows Explorer and
locate the microSD card manually. Doubleclick to view the contents of the microSD
card.
26
Page 28

Double-click the VIDEO folder, then select
4
the sub-folder you want to open.
NOTE: The folders are named by the year,
month, and date. For example, a folder
named 02042013 means that the folder
was created in 2013, February (02), on
the 4th.
Double-click the desired video file to begin
5
playback.
To back up picture / video files on Mac:
Remove the memory card.
1
Insert the microSD card into a memory
2
card reader (not included)or use an SD
card adapter (not included) to convert the
microSD card to SD/HCSD memory card
format.
Double-click the USB icon ( ) on your
3
desktop to view the microSD contents.
ENGLISH
Double-click the VIDEO folder, then select
4
the sub-folder you want to open.
NOTE: The folders are named by the year,
month, and date. For example, a folder
named 02042013 means that the folder
was created in 2013, February (02), on
the 4th.
Double-click the desired video file to begin
5
playback.
To delete files and folders:
Press the joystick to enter playback mode.
1
27
Page 29

Move the joystick up and down to toggle
2
between files or folders.
VIDEO
PICTURE
Highlight the file or folder you wish to
3
delete. Move the joystick to the right to
highlight the red “X“ and push the joystick
in.
NOTE: The VIDEO folder cannot be
deleted.
Select Yes to delete the chosen file or
4
folder or No to cancel.
Delete?
X
Yes No
Formatting Memory Card
The format function permanently erases
all saved picture and video files on the
microSD card (not included). Ensure that any
video and picture files you wish to keep are
backed up on your computer prior to formatting.
To format memory card:
Press , then select Settings.
1
Select
Settings
28
Page 30

2
Select
Format
Memory
Card
3
Select Yes
Using Power Saving Mode
Power save mode is a battery-conserving
function that shuts off the monitor’s LCD display
if no sound is detected by your camera(s) for 2
minutes. When sound is detected, the display
turns back on.
ENGLISH
To enable power saving mode:
Press , then select Power Save.
1
Select On to activate power saving mode or
2
or select Off to cancel.
29
Select
Power
Save
Page 31

Restoring Default Settings
Restoring your video monitor returns any setting
changes to default settings.
NOTE: Restoring to default settings will not
delete saved video and picture files.
To restore to default settings:
Press , then select Settings.
1
Select
Settings
2
Select
Default
Settings
3
Select Yes
30
Page 32

Remotely Connecting to
Your Cameras
The Wi-Fi Cradle accessory allows you to
connect to your cameras from anywhere (model
#: ACCWIFI1, not included).
Use the Wi-Fi Cradle to:
t Connect to your cameras from anywhere
using your mobile phone (iOS & Android) or
computer (PC & Mac).
t Remotely connect to your system without
disrupting live viewing mode on your
monitor.
t Provide a secure, password-protected feed
for accessing your camera(s) remotely.
FPO - will be
picture of Wifi
ENGLISH
Cradle
.
31
Page 33

Using Audio / Video Out
For large screen viewing, you can connect the
video monitor to your television (RCA only) using
an optional 3.5mm to RCA adapter (model #:
ACCAVOUT1).
To view files on a television:
Power on the television you will use to
1
view the baby monitor’s display.
Connect the 3.5mm end of the adapter to
2
the monitor’s A/V out port.
Connect 3.5mm end
Connect the RCA ends of the adapter to
3
audio and video inputs on your television.
Video from the baby monitor is
immediately displayed on your television.
NOTE: The monitor’s LCD display turns off
when using this feature.
Turn on your TV to the correct input.
4
To configure audio / video out:
NOTE: Only required if viewing on a PAL
television set.
Press , then select Settings.
1
32
Select
Settings
Page 34

2
Select NTSC (North America) or PAL
3
(UK/Europe) and by pushing the joystick.
ENGLISH
Select
Default
Settings
FPO
3.5” to RCA adapter
3.5” termination
RCA termination
33
Page 35

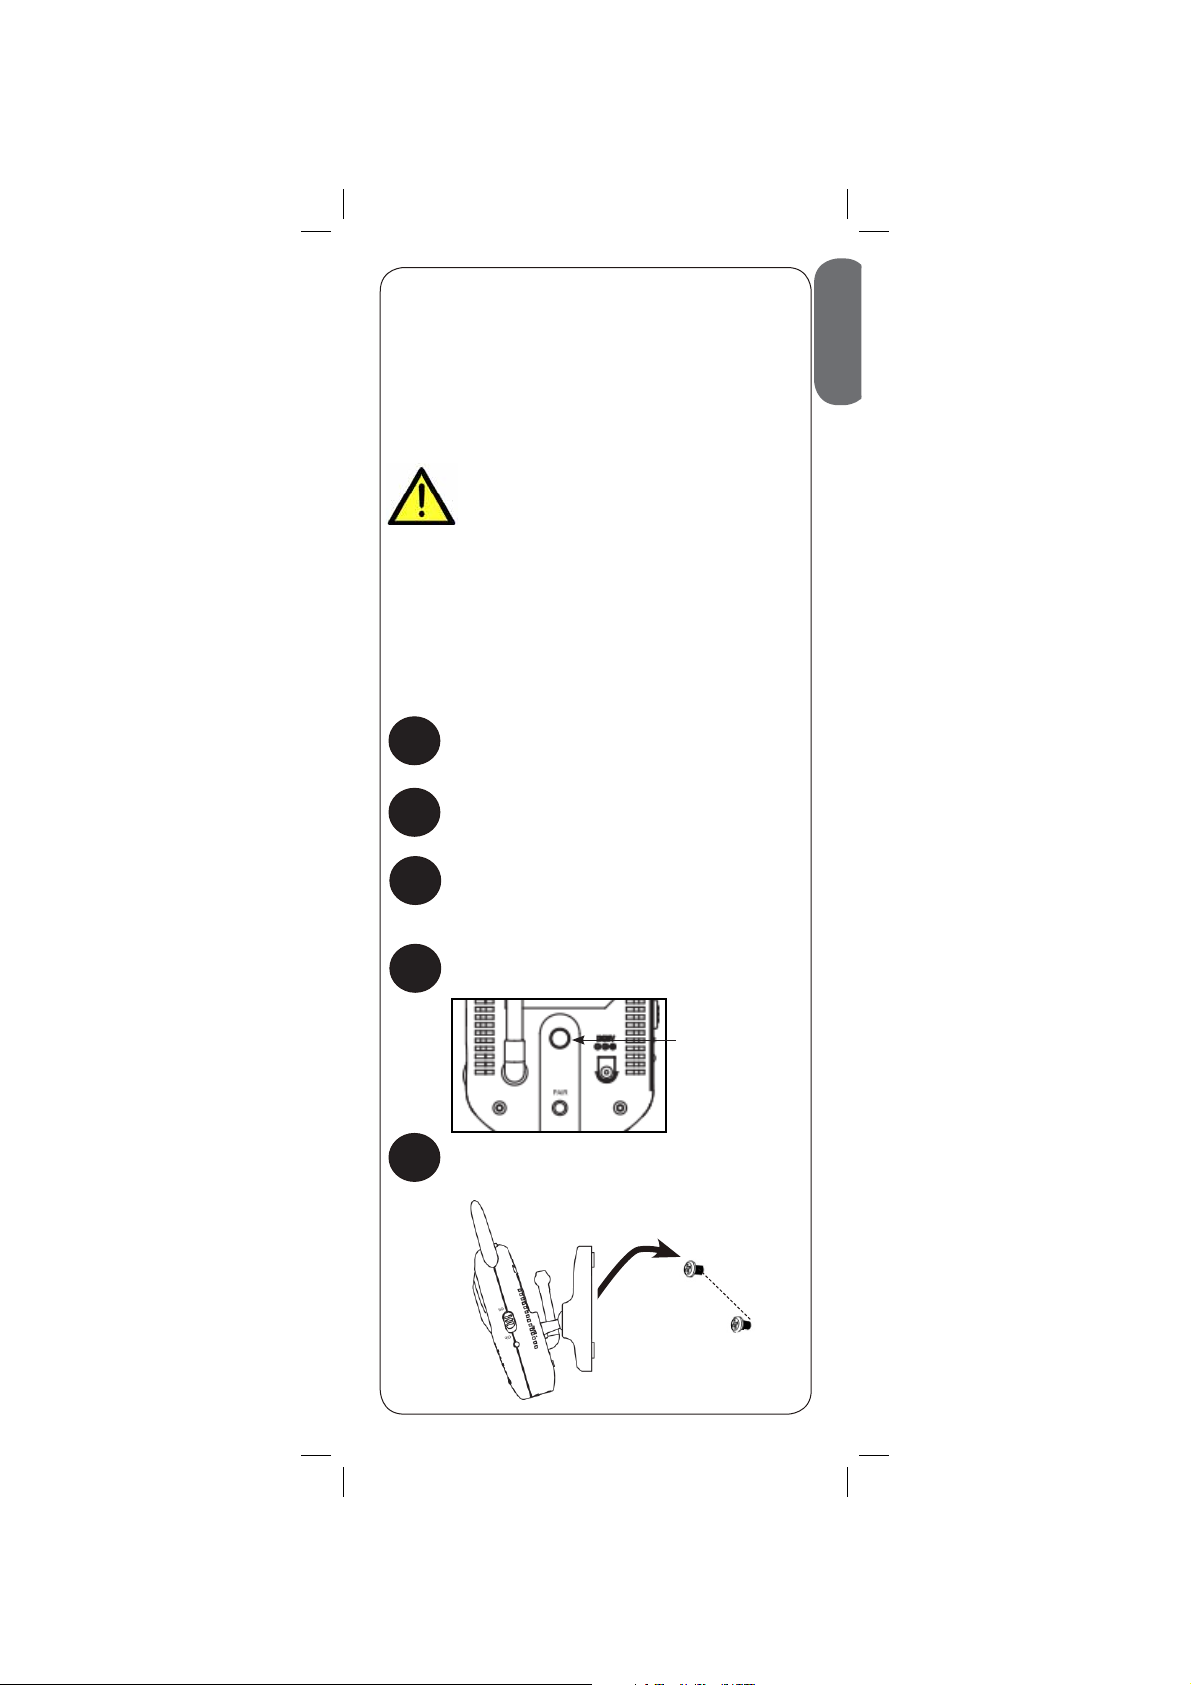
Pairing Additional Cameras
The camera(s) included have already been
paired with the monitor. If you have purchased
additional add-on cameras (model# BB311AC1 /
BB351AC1), OR if your monitor and camera are not
paired up, follow the steps below.
To pair a camera to your monitor:
Place the camera and monitor next to each
1
other. Make sure the camera is turned on
and plugged in.
Press
2
, then move the joystick left or
right to select SETUP.
3
Use the joystick to select the channel you
4
would like to pair the camera to.
Select
Setup
Select
Pairing
Select a
channel
to pair the
camera to.
If a camera is already connected to
this channel, the new camera will
replace the existing camera.
34
Page 36

Press the PAIR button on the back of the
5
fixed camera or the bottom of the P/T
camera within 30 seconds of selecting the
pairing channel.
Press PAIR
Press PAIR
Live video from the camera is immediately
shown on the monitor once the camera is
successfully paired.
ENGLISH
Notes
• Immediately move the camera away from the
monitor to avoid speaker feedback.
• The monitor can connect up to 4 cameras.
• The monitor can be used with a combination
of fixed and P/T cameras.
35
Page 37

Technical Specifications
Fixed Camera
Frequency 2.4GHz - 2.48GHz
Maximum Range Up to 450ft / 137m outdoors*
Image Sensor 1/6” Color Image Sensor
Lens 4.9mm F2.8
IR LED 8 pcs
Power Adapter 5.0V DC 1000mA
Weight
P/T Camera
Frequency 2.4GHz - 2.48GHz
Maximum Range Up to 450ft / 137m outdoors*
Image Sensor 1/6” Color Image Sensor
Lens 3.0mm F2.8
IR LED 10 pcs
Power Adapter
Weight 0.6lbs / 0.3kg
3.5” Monitor
Frequency 2.4GHz - 2.48GHz
Display 3.5” TFT Color LCD
Power Adapter 5.0V DC 1000mA
Battery Li-ion Rechargeable Battery 3.7V DC
Battery Life Up to 5 hours in normal mode
Weight 0.4lbs / 0.2kg
Up to 150ft / 46m indoors*
0.2lbs / 0.1kg
Up to 150ft / 46m indoors*
5.0V DC 1000mA
???mAh
Up to 8.5 hours in Video Off mode
4.3” Monitor
Frequency 2.4GHz - 2.48GHz
Display 4.3” TFT Color LCD
Power Adapter
Battery Li-ion Rechargeable Battery 3.7V DC
Battery Life Up to 4 hours in normal viewing mode
Weight
*Based on unobstructed line of sight. Actual range will vary
based on surroundings.
5.0V DC 1000mA
1500mAh
Up to 8 hours in Video Off mode
0.5lbs / 0.2kg
36
Page 38

Unit Dimensions
Fixed Camera
ENGLISH
5.9in
149mm
P/T Camera
5.9in
149mm
3.5” Monitor
2.4in
60mm
3.9in
99mm
2.9in
73mm
3.9in
99mm
3.2in
81mm
4.3” Monitor
3.2in
81mm
5.4in
137mm
5.4in
137mm
1.1in
28mm
1.1in
28mm
37
Page 39

Troubleshooting
Problem Solution
No video displayed on
the monitor
Monitor screen keeps
turning off
The camera is not
detected; “Out of Range”
is shown on the monitor
Feedback / squealing
noise coming from the
monitor
Touch buttons on the
monitor aren’t working
Display is frozen t Press the Reset button on the
t Press and hold the
button for 3 seconds to power
on the monitor.
t Monitor is out of batteries. Plug
in the monitor power adapter.
t Video Off mode is on. Press
any button to turn the screen
back on.
t Power save mode is on. Press
any button to turn the screen
back on.
t If none of the solutions above
work, press the Reset button on
the back of the monitor.
t The monitor battery is low. Plug
in the monitor power adapter.
t Power save mode is on. Press
any button to turn the screen
back on.
t Make sure the camera is
powered on.
t The camera and monitor may
be out of range. Extend the
antennas on the monitor and
camera or move the monitor
and camera closer together.
t You may need to pair the
camera and the monitor
again. See “Pairing Additional
Cameras” on page 34 for
details.
t Wrong channel selected.
Press
a channel with a camera
connected to it.
t Your camera and monitor may
be too close to each other.
Move them further apart.
t Lower the monitor volume.
t Press the Lock button (
the side of the monitor to unlock
the touch buttons.
back of the monitor to reboot.
Settings and saved files are
unaffected.
repeatedly to select
) on
Need Help?
Product Support is available 24/7 including product
information, user guides, quick start guides, and FAQ’s
38
Page 40

CLEANING
Edited with the trial version of
Foxit Advanced PDF Editor
To remove this notice, visit:
www.foxitsoftware.com/shopping
Clean the monitor and camera with a slightly damp cloth or an antistatic cloth. Never use cleaning agents or abrasive solvents.
• Do not clean any part of the product with cleaners with thinners or
other solvents and chemicals. This may cause permanent damage
to the product, which is not covered by the Warranty. When
necessary, clean it with a damp cloth.
• Keep your camera and monitor away from hot, humid areas or
strong sunlight, and do not get it wet.
• Every effort has been made to ensure high standards of reliability
for your baby monitor. However, if something does go wrong,
please do not try to repair it yourself. Contact Customer Service for
assistance.
DISPOSAL OF THE DEVICE
At the end of the product life cycle, you should
not dispose of this product with normal household
waste, but take the product to a collection point for
the recycling of electrical and electronic equipment.
The symbol on the product, user’s guide, and/or
box indicates this.
Some of the product materials can be re-used if
you take them to a recycling point. By reusing some parts or raw
materials from used products you make an important contribution to
the protection of the environment.
Please contact your local authorities in case you need more information
on the collection points in your area. Dispose of the battery pack in an
environmentally-friendly manner according to your local regulations.
NOTICES
WARNING: Any changes or modifications not expressly approved
by the grantee of this device could void the user’s authority to operate
the device.
ENGLISH
FCC NOTICE
This device complies with Part 15 of the FCC Rules. Operation is
subject to the following two conditions: (1) this device may not
cause harmful interference, and (2) this device must accept any
interference received, including interference that may cause undesired operation.
The manufacturer is not responsible for any radio or TV interference
caused by unauthorized modifications to this equipment. Such
modifications could void the user’s authority to operate the equipment.
However, it is imperative that the user follows the guidelines in this
manual to avoid improper usage which may result in damage to the
unit, electrical shock and fire hazard injury.
CAUTION: To maintain compliance with the FCC’s RF exposure
guidelines, place the camera at least 20cm (7.87in) from nearby
persons.
CANADA/IC NOTICE
This device complies with Industry Canada licence-exempt RSS
standard(s). Operation is subject to the following two conditions: (1)
this device may not cause interference, and (2) this device must accept
any interference, including interference that may cause undesired
operation of the device.
39
Page 41

USER’S GUIDE
Page 42

NOTICES
Edited with the trial version of
Foxit Advanced PDF Editor
To remove this notice, visit:
www.foxitsoftware.com/shopping
WARNING
!
STRANGULATION HAZARD:
Infants have STRANGLED in power cords. Keep power
cords more than 3 feet away from cribs, bassinets, play
yards and other safe sleep environments for infants.
FCC Notice:
This device complies with Part 15 of FCC Rules.
Operation is two conditions: (1) this device may not
cause harmful interference, and (2) this device
must accept any interference received, including interference that may cause undesired operation.
This equipment has been tested and found to comply with the limits for a Class B digital device, pursuant to Part 15 of the FCC rules. These limits are
designed to provide reasonable protection against
harmful interference in a residential installation. This
equipment generates, uses and can radiate radio
frequency energy and, if not installed and used in
accordance with the instructions, may cause harmful interference to radio communications.
However, there is no guarantee that interference will
not occur in a particular installation. If this equipment
does cause harmful interference to radio or television reception (which can be determined by turning
the equipment on and off), the user is encouraged
to try to correct the interference by one or more of
the following measures:
• Reorient or relocate the receiving antenna •
Increase the separation between the equipment and
receiver • Connect the equipment into an outlet
on a circuit
different from that to which the receiver is connected
• Consult the dealer or an experienced radio or
television technician for assistance
Warning:
To ensure compliance with the FCC’s RF exposure
guidelines, this equipment should be installed and
operated with minimum distance 20cm (7.87in) between the radiator and nearby persons.
Industry Canada Notice:
This device complies with Industry Canada licenceexempt RSS standard(s). Operation is subject to the
following two conditions: (1)this device may not
cause interference, and
(2) this device must accept any interference
, including interference that may cause undesirable operation of the device.
This Class B digital apparatus complies with
Canadian ICES-003.
Le présent appareil est conforme aux CNR
d'Industrie Canada applicables aux appareils radio
exempts de licence. L'exploitation est autorisée aux
deux conditions suivantes : (1) l'appareil ne doit pas
produire de brouillage, et (2) l'utilisateur de
l'appareil doit accepter tout brouillage
radioélectrique subi, même si le brouillage est
susceptible d'en compromettre le fonctionnement.
Cet appareil numérique de la classe B est conforme
à la norme NMB-003 du Canada.
MODIFICATION:
Any changes or modifications not expressly
approved by the grantee of this device could void the
user's authority to operate the device.
Toute modification non approuvée explicitement par
le fournisseur de licence de l'appareil peut
entraîner l'annulation du droit de l'utilsateur à
utiliser l'appareil.
RoHS:
This product is fully compliant with the European
Union Restriction of the Use of Certain Hazardous
Substances in Electrical and Electronic Equipment
("RoHS") Directive (2002/95/EC). The RoHS directive
prohibits the sale of electronic equipment
containing certain hazardous substances such as
lead, cadmium, mercury, and hexavalent
chromium, PBB, and PBDE in the European Union.
It is imperative that the user follows the guidelines in this manual to avoid improper usage which may result in damage
to the product, electrical shock, and fire hazard injury. In order to improve the features, functions, and quality of this
product, the specifications are subject to change without notice from time to time.
Please see the label on your device for FCC/IC certification numbers.
vii
 Loading...