

Page 1
INT E R P R ETE R S E T
POS TAZIONE I N T ERP R E T E
SIS2411X
RCF FORUM
User manual
Manuale d’uso
the rules of sound
Page 2

ITALIANO
IMPORTANTE
Prima di collegare ed utilizzare questo prodotto, leggere attentamente le istruzioni contenute in
questo manuale, il quale è da conservare per riferimenti futuri. Il presente manuale costituisce parte
integrante del prodotto e deve accompagnare quest’ultimo anche nei passaggi di proprietà, per
permettere al nuovo proprietario di conoscere le modalità d’installazione e d’utilizzo e le avvertenze
per la sicurezza.
L’installazione e l’utilizzo errati del prodotto esimono la
RCF S.p.A. da ogni responsabilità.
ATTENZIONE: per prevenire i rischi di fiamme o scosse elettriche, non esporre mai questo prodotto
alla pioggia o all’umidità (salvo il caso in cui sia stato espressamente progettato e costruito per l’uso
all’aperto).
AVVERTENZE PER LA SICUREZZA
1. Tutte le avvertenze, in particolare quelle relative alla sicurezza, devono essere lette con
particolare attenzione, in quanto contengono importanti informazioni.
2.1 ALIMENTAZIONE DIRETTA DA RETE
a. La tensione di alimentazione dell’apparecchio ha un valore sufficientemente alto da costituire
un rischio di folgorazione per le persone: non procedere mai all’installazione o connessione
dell’apparecchio con l’alimentazione inserita.
b. Prima di alimentare questo prodotto, assicurarsi che tutte le connessioni siano corrette e che la
tensione della vostra rete di alimentazione corrisponda quella di targa dell’apparecchio,
in caso contrario rivolgetevi ad un rivenditore RCF.
c. Le parti metalliche dell’apparecchio sono collegate a terra tramite il cavo di alimentazione.
Nel caso la presa di corrente utilizzata per l’alimentazione non fornisca il collegamento
con la terra, contattare un elettricista qualicato, che provvederà a connettere a terra
l’apparecchio tramite l’apposito morsetto.
d. Accertarsi che il cavo di alimentazione dell’apparecchio non possa essere calpestato o
schiacciato da oggetti, al fine di salvaguardarne la perfetta integrità.
e. Per evitare il rischio di shock elettrici, non aprire mai l’apparecchio: all’interno non vi sono
parti che possono essere utilizzate dall’utente.
2.2 ALIMENTAZIONE TRAMITE ALIMENTATORE ESTERNO
a. Alimentare il prodotto utilizzando solo l’alimentatore dedicato; verificare che la tensione della
vostra rete corrisponda quella di targa dell’alimentatore e che il valore ed il tipo (continua o
alternata) di tensione d’uscita dello stesso corrisponda a quella d’ingresso del prodotto,
in caso contrario rivolgersi ad un rivenditore RCF; verificare inoltre che l’alimentatore non sia
stato danneggiato da eventuali urti o sovraccarichi.
b. La tensione di rete, alla quale è connesso l’alimentatore, ha un valore sufficientemente alto da
costituire un rischio di folgorazione per le persone: prestare attenzione durante la connessione
alla rete (es. non effettuarla con le mani bagnate) e non aprire mai l’alimentatore.
c. Accertarsi che il cavo dell’alimentatore non sia o possa essere schiacciato da altri oggetti
(prestando particolare attenzione alla parte del cavo vicino alla spina ed al punto dove questo
esce dall’alimentatore).
3. Impedire che oggetti o liquidi entrino all’interno del prodotto, perché potrebbero causare un corto circuito.
4. Non eseguire sul prodotto interventi / modifiche / riparazioni se non quelle espressamente
descritte sul manuale istruzioni.
Contattare centri di assistenza autorizzati o personale altamente qualificato quando:
•
l’apparecchio non funziona (o funziona in modo anomalo);
• il cavo di alimentazione ha subito gravi danni;
• oggetti o liquidi sono entrati nell’apparecchio;
• l’apparecchio ha subito forti urti.
5. Qualora questo prodotto non sia utilizzato per lunghi periodi, togliere la tensione dal cavo di
alimentazione (o scollegare l’alimentatore esterno).
6. Nel caso che dal prodotto provengano odori anomali o fumo, spegnerlo immediatamente e
togliere la tensione dal cavo di alimentazione (o scollegare l’alimentatore esterno).
Page 3

7. Non collegare a questo prodotto altri apparecchi e accessori non previsti.
Quando è prevista l’installazione sospesa, utilizzare solamente gli appositi punti di ancoraggio e
non cercare di appendere questo prodotto tramite elementi non idonei o previsti allo scopo.
Verificare inoltre l’idoneità del supporto (parete, soffitto, struttura ecc., al quale è ancorato il prodotto)
e dei componenti utilizzati per il fissaggio (tasselli, viti, staffe non fornite da RCF ecc.) che devono
garantire la sicurezza dell’impianto / installazione nel tempo, anche considerando, ad esempio,
vibrazioni meccaniche normalmente generate da un trasduttore.
Per evitare il pericolo di cadute, non sovrapporre fra loro più unità di questo prodotto, quando
questa possibilità non è espressamente contemplata dal manuale istruzioni.
8. La RCF S.p.A. raccomanda vivamente che l’installazione di questo prodotto sia eseguita
solamente da installatori professionali qualicati (oppure da ditte specializzate) in grado di
farla correttamente e certicarla in accordo con le normative vigenti.
Tutto il sistema audio dovrà essere in conformità con le norme e le leggi vigenti in materia di
impianti elettrici.
9. Sostegni e Carrelli
Se previsto, il prodotto va utilizzato solo su carrelli o sostegni consigliati dal produttore. L’insieme
apparecchio-sostegno / carrello va mosso con estrema cura. Arresti improvvisi, spinte eccessive e
superfici irregolari o inclinate possono provocare il ribaltamento dell’assieme.
10. Vi sono numerosi fattori meccanici ed elettrici da considerare quando si installa un sistema
audio professionale (oltre a quelli prettamente acustici, come la pressione sonora, gli angoli di
copertura, la risposta in frequenza, ecc.).
ITALIANO
11. Perdita dell’udito
L’esposizione ad elevati livelli sonori può provocare la perdita permanente dell’udito. Il livello di
pressione acustica pericolosa per l’udito varia sensibilmente da persona a persona e dipende dalla
durata dell’esposizione. Per evitare un’esposizione potenzialmente pericolosa ad elevati livelli di
pressione acustica, è necessario che chiunque sia sottoposto a tali livelli utilizzi delle adeguate
protezioni; quando si fa funzionare un trasduttore in grado di produrre elevati livelli sonori è
necessario indossare dei tappi per orecchie o delle cuffie protettive.
Consultare i dati tecnici contenuti nel manuale istruzioni per conoscere la massima pressione sonora
che i diffusori acustici collegati sono in grado di produrre.
NOTE IMPORTANTI
Per evitare fenomeni di rumorosità indotta sui cavi che trasportano segnali dai microfoni o di
linea (per esempio 0dB), usare solo cavi schermati ed evitare di posarli nelle vicinanze di:
• apparecchiature che producono campi elettromagnetici di forte intensità
(per esempio trasformatori di grande di potenza);
• cavi di rete;
• linee che alimentano altoparlanti.
PRECAUZIONI D’USO
• Non ostruire le griglie di ventilazione dell’unità. Collocare il prodotto lontano da fonti di calore
e garantire la circolazione dell’aria in corrispondenza delle griglie di aerazione.
• Non sovraccaricare questo prodotto per lunghi periodi.
• Non forzare mai gli organi di comando (tasti, manopole ecc.).
• Non usare solventi, alcool, benzina o altre sostanze volatili per la pulitura delle parti esterne dell’unità.
• Non avvicinare fiamme libere al dispositivo
• Il fondo dell’unità centrale deve essere sempre sollevato dal piano d’appoggio di un’altezza minima
pari a quella dei piedini di gomma in dotazione, allo scopo di garantire la corretta convezione
dell’aria. Sul piano superiore del contenitore deve essere garantito uno spazio di areazione
minimo di 5 cm.
Page 4
ITALIANO
RCF S.p.A. Vi ringrazia per l’acquisto di questo prodotto, realizzato in modo da
garantirne l’affidabilità e prestazioni elevate.
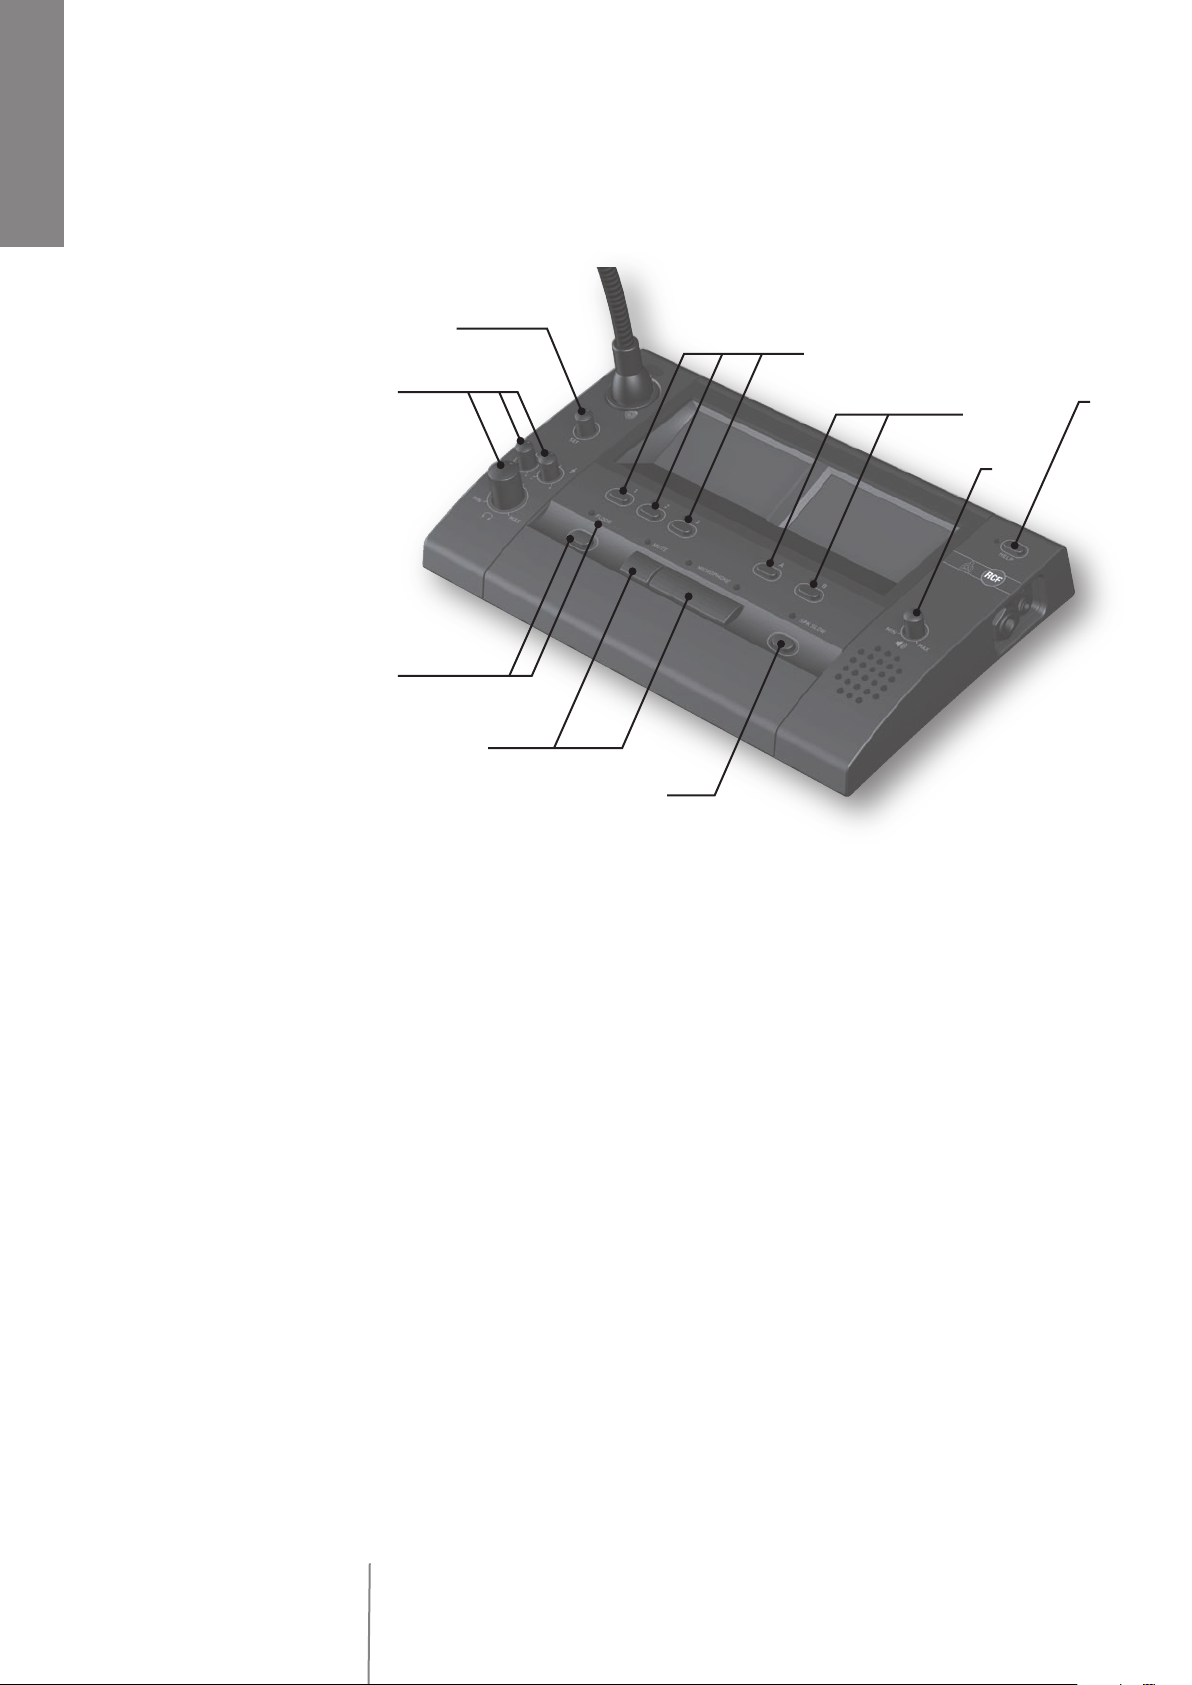
CONSOLE INTERPRETI
1
4
2
3
5
7
Selettore funzioni (attivo solo in modalità configurazione traduzioni)
1
6
9
8
2 Manopole regolazione volumi e toni cuffia
3 Tasto selezione ascolto lingua originale (con relativo led bicolore verde/rosso)
4 Tasti selezione lingua tradotta (relay) (con relativi led verdi)
5 Tasti mute e accensione microfono (con relativi led rossi)
6 Tasti selezione canale audio in uscita (con relativi led bicolore verde/rosso)
7 Tasto di richiesta all’oratore di parlare più lentamente (con relativo led giallo)
8 Manopola regolazione volume monitor
9 Tasto richiesta intervento di un tecnico (con relativo led rosso)
Page 5
FUNZIONE DEI LED
Led verde acceso sopra il tasto 3 = attivato ascolto lingua originale
Led rosso acceso sopra il tasto 3 = disattivato ascolto lingua originale
Led verde acceso sopra uno dei tasti 4 = attivato ascolto lingua tradotta (relay)
Led rosso acceso sopra il tasto grande 5 = microfono acceso
Led rosso acceso sopra il tasto piccolo 5 = mute attivato
Led verde acceso sopra uno dei due tasti 6 = indicazione canale d’uscita utilizzato
Led rosso acceso sopra uno dei due tasti 6 = canale d’uscita occupato
Led giallo acceso sopra il tasto 7 = inviata richiesta di parlare lentamente
Led rosso acceso sopra il tasto 9 = inviata richiesta intervento tecnico
FUNZIONAMENTO DELLA CONSOLE TRADUTTORE
ITALIANO
ITALY
Ver 1.01
ITALY
Ver 1.01
ITALY
Ver 1.01
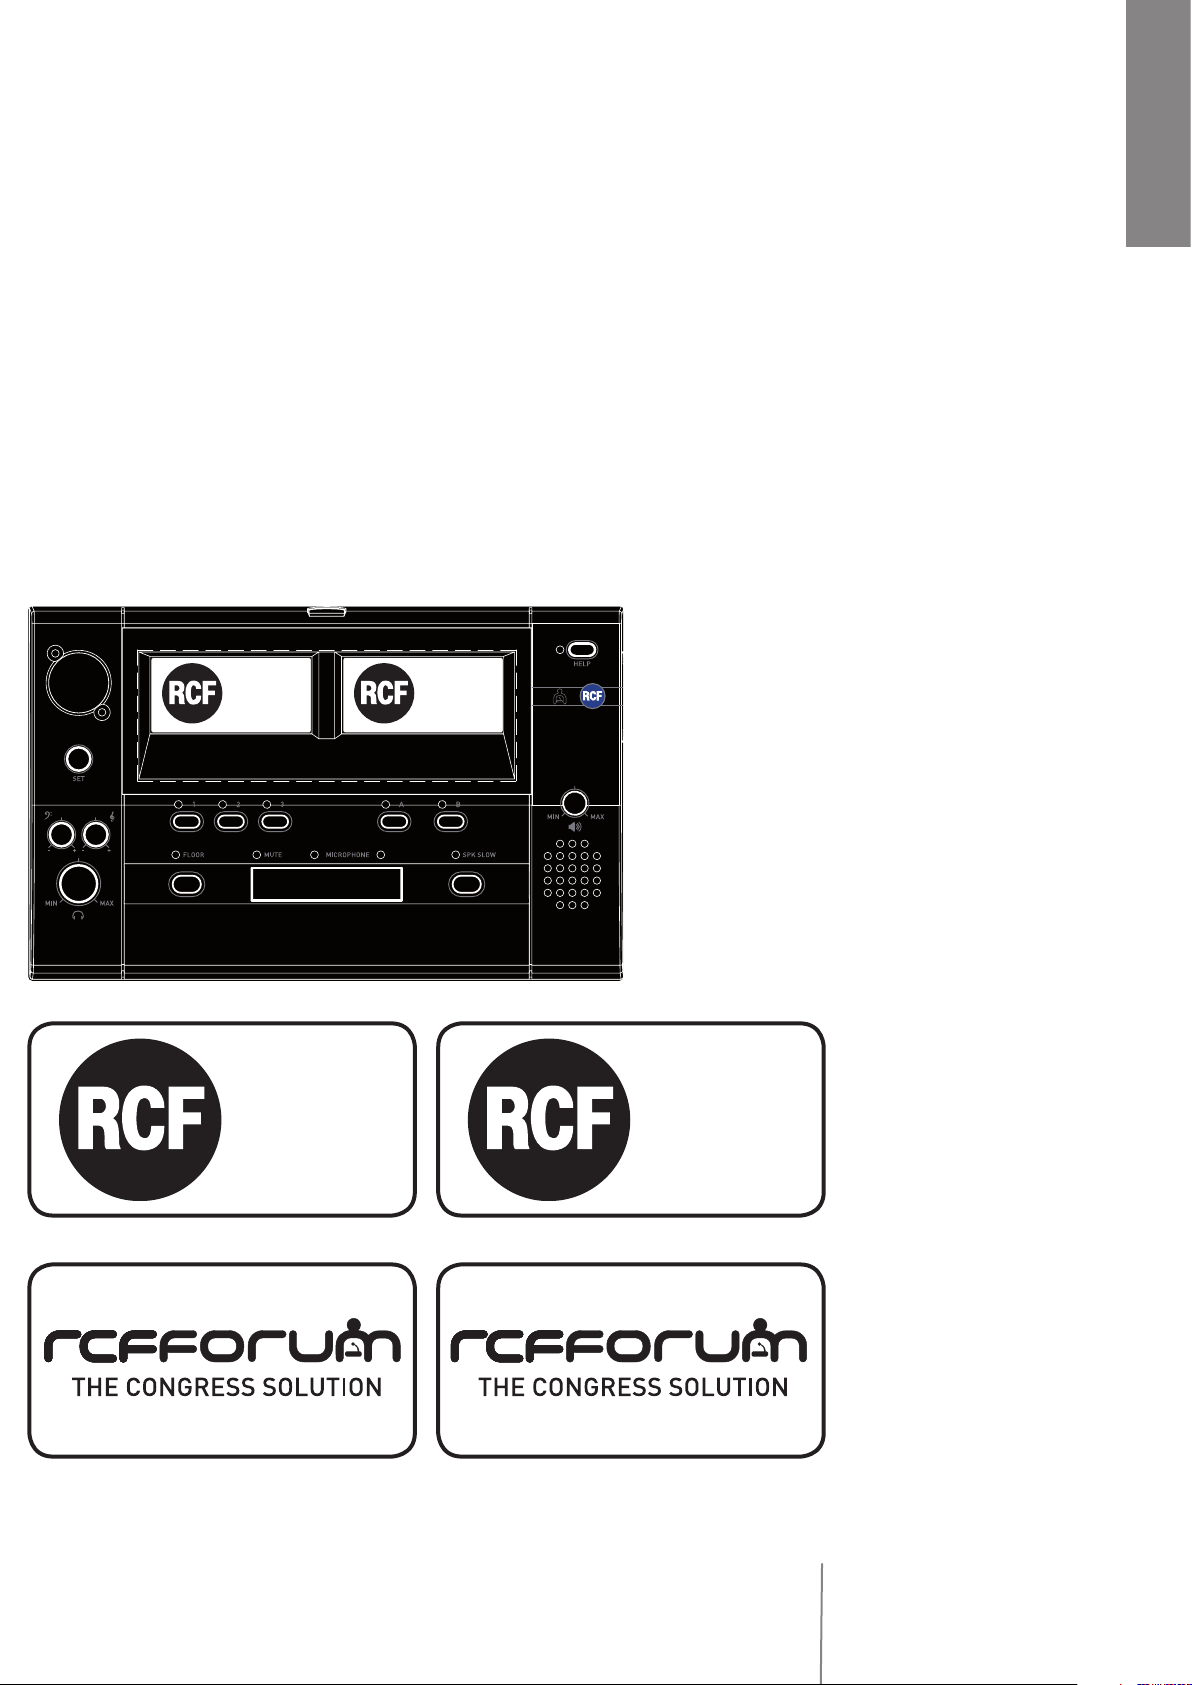
All’accensione dell’Unità
Centrale, vengono registrate
per prime le console delegato
collegate alle rispettive 4
linee, successivamente
vengono registrate le console
traduttore collegate alle
rispettive due linee.
Durante la fase di attesa della
registrazione sui display delle
ITALY
Ver 1.01
console apparirà la seguente
schermata nella quale viene
visualizzata la versione
Firmware.
All’inizio della fase di
registrazione sui display
apparirà la seguente
schermata.
Page 6
ITALIANO
Al termine della fase di registrazione le console saranno operative e sui display appariranno le
seguenti schermate.
1-FLOOR LANGUAGE
2-FLOOR LANGUAGE
3-FLOOR LANGUAGE
FLOOR LANGUAGE
Tramite il PC, collegato all’Unità Centrale, si dovranno inviare alle console delegato e traduttore la
lista delle lingue di traduzione utilizzate.
Una volta inviata è possibile configurare nelle console traduttori la selezione dei canali relativi alle
lingue d’ascolto e d’uscita.
CONFIGURAZIONE DELLE LINGUE D’ASCOLTO
I canali d’ascolto sono 4. Un canale è riservato alla lingua originale della conferenza (Floor) e 3 sono
riservati alle lingue di traduzione (Relay). Solo questi ultimi possono essere configurati, selezionando
le lingue presenti nell’elenco precedentemente inviato.
Per cambiare o modificare la lingua d’ascolto si deve tener premuto il tasto relativo (1,2,3), dopo
circa 2 secondi il led corrispondente al tasto che si sta premendo inizia a lampeggiare e, nel display
di sinistra, il canale selezionato viene evidenziato in negativo. Ruotando il selettore funzioni si scorre
l’elenco delle lingue selezionabili presenti. Una volta individuata la lingua sarà sufficiente rilasciare
il tasto.
01/01/2008 10:00:00
A-FLOOR LANGUAGE
B-FLOOR LANGUAGE
1-ITALIAN
2-FLOOR LANGUAGE
3-FLOOR LANGUAGE
FLOOR LANGUAGE
CONFIGURAZIONE DEL CANALE AUDIO D’USCITA
I canali delle lingue d’uscita sono 2, un canale (A) riservato alla lingua madre e un canale (B)
riservato per le altre lingue di traduzione. Solo sul canale (B) è possibile andare a cambiare la lingua
d’uscita.
La selezione della lingua d’uscita del canale (A) è configurabile solo da PC e viene settata alla
spedizione dell’elenco delle lingue.
Page 7

Per impostare o modificare la lingua del canale (B) si deve tener premuto il tasto relativo, dopo circa
2 secondi il led corrispondente al tasto che si sta premendo inizia a lampeggiare e, nel display di
destra, il canale selezionato viene evidenziato in negativo. Ruotando il selettore funzioni si scorre
l’elenco delle lingue selezionabili presenti. Una volta individuata la lingua sarà sufficiente rilasciare
il tasto.
01/01/2008 10:00:00
A-ITALIAN
B-ENGLISH
ITALIANO
UTILIZZO DELLA CONSOLE TRADUTTORE
L’utilizzo della console traduttore è semplice. Con i tasti Floor, 1, 2, 3 si seleziona il canale della
lingua d’ascolto. Questo viene visualizzato sul display di sinistra tramite un puntatore a freccia e
contemporaneamente il led corrispondente al tasto premuto si illumina.
Con i tasti A e B si seleziona il canale della lingua d’uscita. Per poterlo occupare si deve attivare
il microfono (premendo il tasto Microphone). All’accensione del microfono si accendono i led
rossi posti sopra il tasto microfonico e si illumina, sempre di rosso, l’anello dell’asta microfonica.
Spegnendo il microfono si va a liberare il canale d’uscita precedentemente occupato.
Se si tenta di occupare un canale d’uscita già occupato da un’altra console, viene segnalato
all’operatore un errore tramite il cambio del colore del led corrispondente al canale d’uscita
precedentemente selezionato (da verde a rosso per un tempo di 5 secondi) e dalla scritta BUSY
CHANNEL che compare sul display di destra.
01/01/2008 10:00:00
A-ITALIAN
B-ENGLISH
BUSY CHANNEL
Page 8

ITALIANO
Durante lo svolgimento della conferenza potrebbe capitare che l’oratore che viene tradotto parli
troppo velocemente; l’interprete premendo il tasto SPK SLOW invia un messaggio di richiesta di
scandire le parole più lentamente. Premendo il tasto SPK SLOW si accende il led corrispondente
che lampeggerà per 5 secondi e contemporaneamente, sul display della base dei delegati, apparirà
la scritta SPEAK SLOWLY insieme al lampeggio dei led rosso e verde posti sopre il pulsante
d’accensione del microfono.
01/01/2008 10:00:00
> SPEAK SLOWLY <
MUTE
Sempre durante lo svolgimento della conferenza potrebbe capitare un problema tecnico o di
altro genere, l’interprete può inviare una richiesta d’intervento tecnico premendo il tasto HELP, il
led corrispondente lampeggerà per 5 secondi. La richiesta d’intervento viene visualizzata in una
maschera che apparirà sul PC collegato all’Unità Centrale.
La cuffia va inserita sul lato destro della console
(presa Jack da 3,5 o da 6,3 mm.).
Nella parte inferiore sinistra della console (punto 2) sono presenti le manopole del controllo del
volume e dei toni relativi alla cuffia.
Sulla destra della console (punto 8) è presente una manopola per il controllo del volume relativo
all’altoparlante monitor presente all’interno della console.
Page 9

IMPORTANTE DA SAPERE
Se si utilizzano 5 canali di traduzione bisogna collegare tutte le console interpreti a una sola linea
dell’Unità Centrale. Da 6 a 10 canali si utilizzerà la seconda linea.
Per ogni canale di traduzione si possono collegare al massimo 3 console.
Le console della prima linea possono ascoltare tutti i canali audio in ingresso, mentre possono
occupare in uscita solo i primi 5 canali.
Le console della seconda linea possono ascoltare tutti i canali audio in ingresso, mentre possono
occupare in uscita solo i secondi 5 canali.
Quando sono presenti 10 canali di traduzione, una console interpreti potrebbe trovarsi impostata
la lingua del canale B d’uscita con la stessa lingua del canale A. In questo caso è possibile poter
occupare solo il canale B, il canale A verra bloccato automaticamente.
AGGIORNAMENTO DEL FIRMWARE
Esiste la possibilità di aggiornare il firmware delle console interpreti tramite un PC collegato all’Unità
Centrale. Questo aggiornamento viene fatto contemporaneamente a tutte le console collegate.
Per l’utilizzo e la procedura di aggiornamento fate riferimento al manuale d’utilizzo del software di
gestione dell’Unità Centrale.
ITALIANO
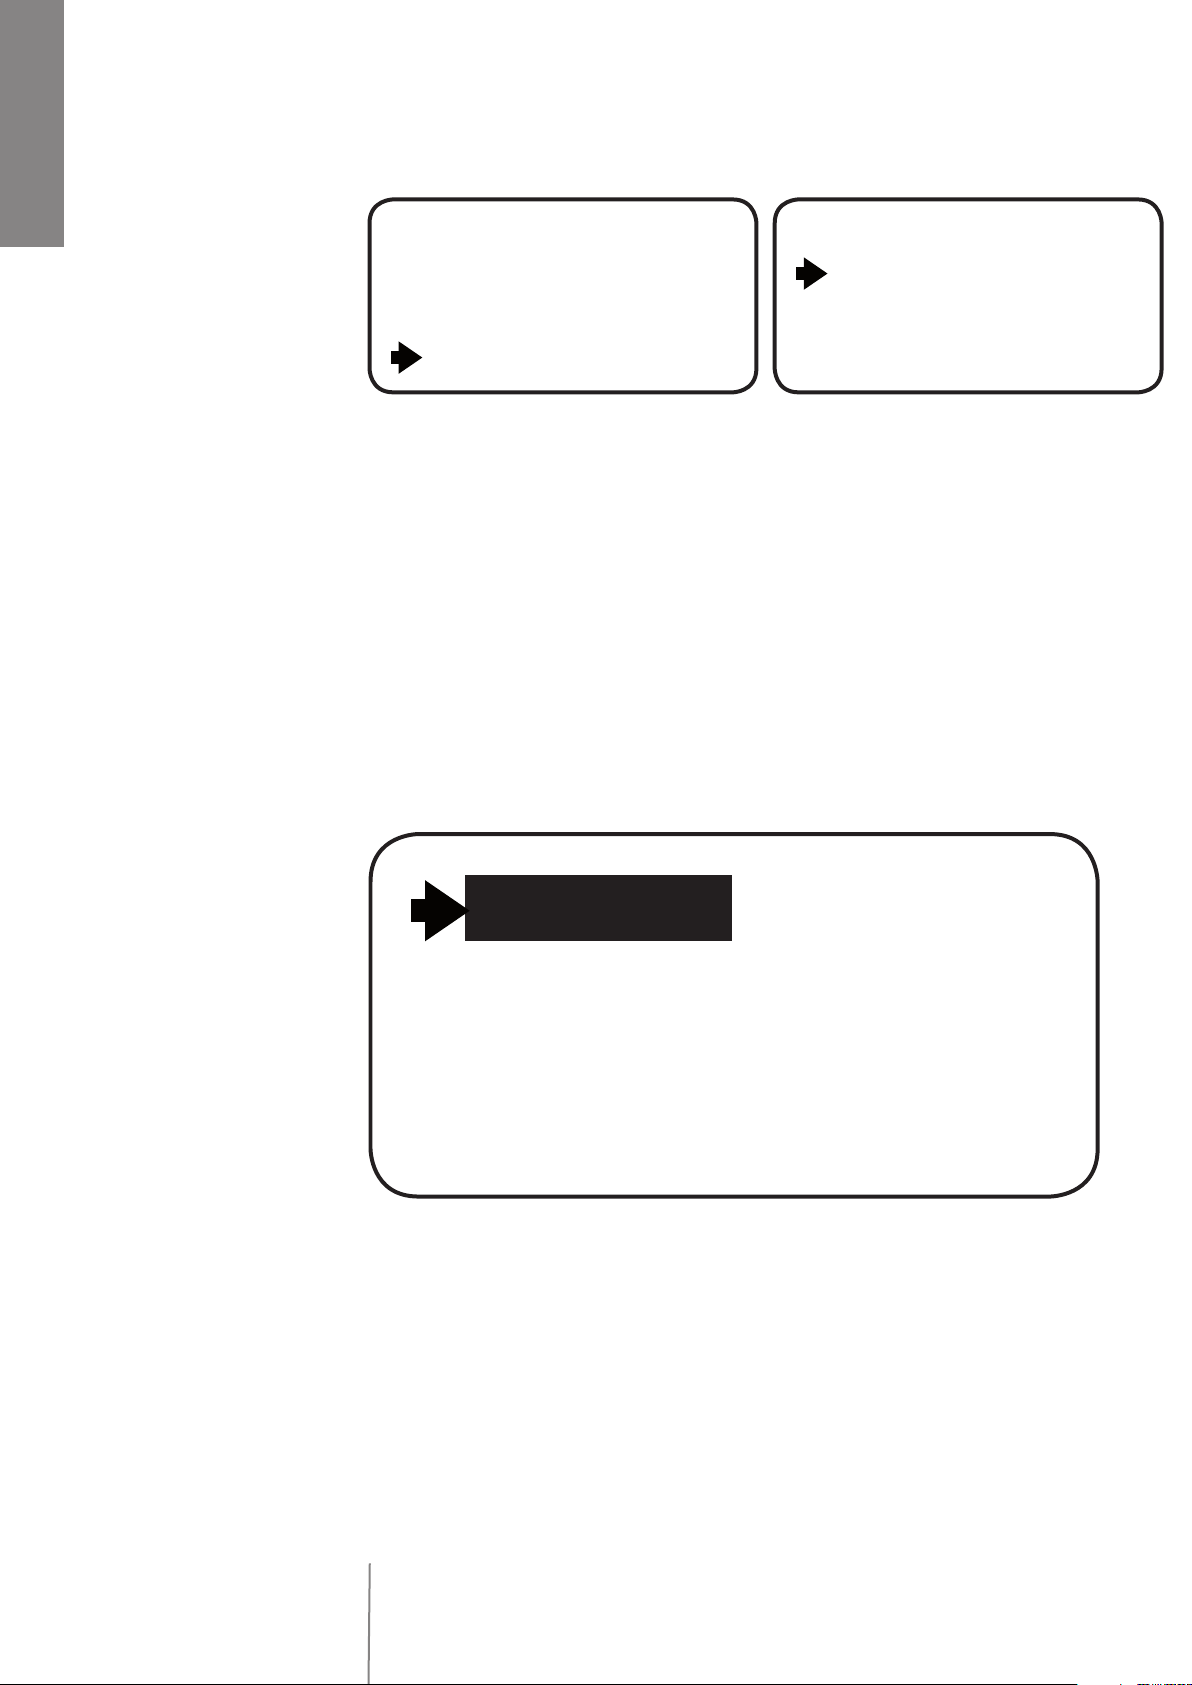
MENÙ NASCOSTO
Premendo contemporaneamente per più di 2 secondi i tasti FLOOR, SPK SLOW e HELP, si attiva
un menù nascosto che serve per regolare individualmente il livello del contrasto dei due display
LCD. Premendo i tasti relativi l’icona – e + si abbassa e si alza il contrasto, premendo il tasto relativo
l’icona HOME si memorizza la modifica e si esce automaticamente dalla regolazione.
reg. contrast LCD
< 40 >
- +
reg. contrast LCD
< 50 >
- +
Page 10

ESEMPIO DI TRADUZIONE 4 LINGUE SENZA UTILIZZO DEL RELAY:
ITALIANO
Mic off
inglese
italiano
Mic off
B
francese
Mic off
B
tedesco
FLOOR FLOOR
Mic off
B
italiano
B
ESEMPIO DI TRADUZIONE 5 LINGUE CON L’UTILIZZO DEL RELAY:
FLOOR FLOOR
italiano
Mic on
B
inglese spagnolo
italiano
Mic on Mic on Mic on
B
francese
B
B
tedesco
10
Page 11

Before connecting and using this product, please read this instruction manual carefully and keep
it on hand for future reference. The manual is to be considered an integral part of this product and
must accompany it when it changes ownership as a reference for correct installation and use as well
as for the safety precautions.
RCF S.p.A. will not assume any responsibility for the incorrect installation and / or use of this
product.
WARNING: to prevent the risk of fire or electric shock, never expose this product to rain or humidity
(except in case it has been expressly designed and made for outdoor use).
SAFETY PRECAUTIONS
1. All the precautions, in particular the safety ones, must be read with special attention, as they
provide important information.
2.1 POWER SUPPLY FROM MAINS (direct connection)
a. The mains voltage is sufficiently high to involve a risk of electrocution; therefore, never
install or connect this product with the power supply switched on.
b. Before powering up, make sure that all the connections have been made correctly and the
voltage of your mains corresponds to the voltage shown on the rating plate on the unit,
if not, please contact your RCF dealer.
c. The metallic parts of the unit are earthed by means of the power cable. In the event that the
current outlet used for power does not provide the earth connection, contact a qualied
electrician to earth this product by using the dedicated terminal.
d. Protect the power cable from damage; make sure it is positioned in a way that it cannot be
stepped on or crushed by objects.
e. To prevent the risk of electric shock, never open the product: there are no parts inside that
the user needs to access.
IMPORTANT NOTES
ENGLISH
2.2 POWER SUPPLY BY MEANS OF AN EXTERNAL ADAPTER
a. Use the dedicated adapter only; verify the mains voltage corresponds to the voltage
shown on the adapter rating plate and the adapter output voltage value and type
(direct / alternating) corresponds to the product input voltage, if not, please contact your
RCF dealer; verify also that the adapter hasn’t been damaged due to possible clashes /
hits or overloads.
b. The mains voltage, which the adapter is connected to, is sufficiently high to involve a risk
of electrocution: pay attention during the connection (i.e. never do it with wet hands) and
never open the adapter.
c. Make sure that the adapter cable is not (or cannot be) stepped on or crushed by other
objects (pay particular attention to the cable part near the plug and the point where it leads
out from the adapter).
3. Make sure that no objects or liquids can get into this product, as this may cause a short circuit.
4. Never attempt to carry out any operations, modifications or repairs that are not expressly described
in this manual.
Contact your authorized service centre or qualified personnel should any of the following occur:
•
the product does not function (or functions in an anomalous way);
• the power supply cable has been damaged;
• objects or liquids have got into the unit;
• the product has been subject to a heavy impact.
5. If this product is not used for a long period, switch it off and disconnect the power cable.
6. If this product begins emitting any strange odours or smoke, switch it off immediately and
disconnect the power supply cable.
11
Page 12

1
ENGLISH
7. Do not connect this product to any equipment or accessories not foreseen.
For suspended installation, only use the dedicated anchoring points and do not try to hang this
product by using elements that are unsuitable or not specific for this purpose.
Also check the suitability of the support surface to which the product is anchored (wall, ceiling,
structure, etc.), and the components used for attachment (screw anchors, screws, brackets not
supplied by RCF etc.), which must guarantee the security of the system / installation over time, also
considering, for example, the mechanical vibrations normally generated by transducers.
To prevent the risk of falling equipment, do not stack multiple units of this product unless this
possibility is specified in the instruction manual.
8. RCF S.p.A. strongly recommends this product is only installed by professional qualied
installers (or specialised rms) who can ensure correct installation and certify it according to
the regulations in force.
The entire audio system must comply with the current standards and regulations regarding
electrical systems.
9. Supports and trolleys
The equipment should be only used on trolleys or supports, where necessary, that are recommended
by the manufacturer. The equipment / support / trolley assembly must be moved with extreme caution.
Sudden stops, excessive pushing force and uneven floors may cause the assembly to overturn.
10. There are numerous mechanical and electrical factors to be considered when installing a
professional audio system (in addition to those which are strictly acoustic, such as sound pressure,
angles of coverage, frequency response, etc.).
11. Hearing loss
Exposure to high sound levels can cause permanent hearing loss. The acoustic pressure level that
leads to hearing loss is different from person to person and depends on the duration of exposure.
To prevent potentially dangerous exposure to high levels of acoustic pressure, anyone who is
exposed to these levels should use adequate protection devices. When a transducer capable of
producing high sound levels is being used, it is therefore necessary to wear ear plugs or protective
earphones.
See the technical specifications in the instruction manual for the maximum sound pressure the
loudspeaker is capable of producing.
IMPORTANT NOTES
To prevent the occurrence of noise on the cables that carry microphone signals or line signals
(for example, 0 dB), only use screened cables and avoid running them in the vicinity of:
• equipment that produces high-intensity electromagnetic fields (for example, high power
transformers);
• mains cables;
• lines that supply loudspeakers.
OPERATING PRECAUTIONS
• Do not obstruct the ventilation grilles of the unit. Situate this product far from any heat sources
and always ensure adequate air circulation around the ventilation grilles.
• Do not overload this product for extended periods of time.
• Never force the control elements (keys, knobs, etc. ).
• Do not use solvents, alcohol, benzene or other volatile substances for cleaning the external
parts of this product.
• Keep any flame far from the device
• The FMU 9100 must always stand around 1 cm. above the surface of the desk (or shelf), in
order to allow correct heat dissipation. For this purpose 4 rubben feet are provided with the unit:
please remuve only when 19” rack mounted. Above the FMU 9100 5 cm. must be kept empty to
guarantee proper ventilation as well.
Page 13

RCF S.p.A. would like to thank you for purchasing this product, which has been
designed to guarantee reliability and high performance.
INTERPRETER CONSOLE
1
4
ENGLISH
2
3
5
7
Function selector (only active in translation configuration mode)
1
6
9
8
2 Headset tone and volume adjustment knobs
3 Original language listen select button (with two-colour green/red LED indicator)
4 Translated language selection buttons (relay) (with green LED indicators)
5 Microphone mute and on buttons (with red LED indicators)
6 Audio output channel selection buttons (with two-colour green/red LED indicators)
7 Button to ask the speaker to talk more slowly (with yellow LED indicator)
8 Monitor volume adjustment knob
9 Technical assistance request button (with red LED indicator)
1
Page 14

1
ENGLISH
LED INDICATIONS
Green LED on above button (3) = original language listen on
Red LED on above button (3) = original language listen off
Green LED on above one of the buttons (4) = translated language listen on (relay)
Red LED on above the large button (5) = microphone on
Red LED on above the small button (5) = microphone mute
Green LED on above one of the two buttons (6) = indicates output channel in use
Red LED on above one of the two buttons (6) = indicates output channel occupied
Yellow LED on above button (7) = request issued to speak slowly
Red LED on above button (9) = technical assistance request issued
OPERATING THE TRANSLATOR CONSOLE
When the Main Unit is
switched on, first the
speaker consoles connected
to the relevant 4 lines
are registered, and then
the translation consoles
connected to the relevant 2
lines are registered.
ITALY
Ver 1.01
ITALY
Ver 1.01
At the start of the registration
phase, the consoles display
the following screens,
indicating the Firmware
version.
When registration begins the
consoles display the following
screens.
ITALY
Ver 1.01
ITALY
Ver 1.01
Page 15

On completion of registration the consoles are operative and they display the following screens.
1-FLOOR LANGUAGE
2-FLOOR LANGUAGE
3-FLOOR LANGUAGE
01/01/2008 10:00:00
A-FLOOR LANGUAGE
B-FLOOR LANGUAGE
FLOOR LANGUAGE
Using a PC, connected to the Main Unit, the list of translation languages in use must be transmitted
to the speaker and translation consoles.
Once transmitted it is possible to configure the translator consoles, selecting the relative listening
languages and output channels.
SELECTING THE LISTENING LANGUAGES
There are 4 listening channels. One channel is reserved for the original language of the conference
(Floor) and 3 are reserved for the translation languages (Relay). Only the latter three can be
configured, by selecting the languages from the list transmitted previously.
To set or modify the listening language the relative button (1, 2 or 3) must be held down and after
about 2 seconds the corresponding LED for the button will start flashing and on the left display
the selected channel will be highlighted. Rotating the function selector scrolls through the list of
selectable languages. Once the correct language has been selected, simply release the button.
ENGLISH
1-ITALIAN
2-FLOOR LANGUAGE
3-FLOOR LANGUAGE
CONFIGURING THE AUDIO OUTPUT CHANNEL
There are 2 language output channels, one channel (A) is reserved for the mother tongue language
and one channel (B) is reserved for the other translation languages. The output language can only
be changed on channel (B).
The selection of the channel (A) output language can only be configured with a PC and is set on
transmission of the language list.
FLOOR LANGUAGE
1
Page 16

1
ENGLISH
To set or modify the language for channel (B), the relative button must be held down. After about 2
seconds the corresponding LED will start flashing and on the right-hand display the selected channel
will be highlighted. Rotating the function selector scrolls through the list of selectable languages.
Once the required language has been selected, simply release the button.
01/01/2008 10:00:00
A-ITALIAN
B-ENGLISH
USING THE TRANSLATOR CONSOLE
Using the translator console is simple. The listening language is selected with the Floor, 1, 2
and 3 buttons. This is indicated on the left-hand display with an arrow and at the same time the
corresponding LED for the button pushed lights up.
Buttons A and B are used to select the language output channel. In order to occupy one of these
the microphone must be enabled (by pushing the Microphone button). When the microphone is
switched on, the red LEDs above the microphone button come on and the ring on the microphone
stand lights up, again coloured red. When the microphone is switched off the output channel
previously occupied becomes free.
If an attempt is made to occupy an output channel already occupied by another console, an error
is signalled to the operator by the change in colour of the LED corresponding to the output channel
selected (from green to red for a period of 5 seconds) and with the words “BUSY CHANNEL” on the
right-hand display.
01/01/2008 10:00:00
A-ITALIAN
B-ENGLISH
BUSY CHANNEL
Page 17

During a conference it may happen that the speaker being translated talks too rapidly. By pressing
the SPK SLOW button the interpreter asks the speaker to talks more slowly. When SPK SLOW is
pressed the corresponding LED lights up and flashes for 5 seconds and at the same time the speaker
unit displays the words “SPEAK SLOWLY” and the red and green LEDs above the Microphone On
button start flashing.
01/01/2008 10:00:00
> SPEAK SLOWLY <
MUTE
During a conference a technical or other problem might arise and the interpreter can issue a
request for technical assistance by pressing the HELP button. The corresponding LED will flash for
5 seconds. The request for help is displayed in a window that appears on the PC connected to the
Main Unit.
ENGLISH
The headset is connected on the right hand side of
the console (3.5 or 6.3 mm jacks).
The control knobs for the headset volume and tone are on the lower left part of the console (point 2).
A volume control knob for the monitor speaker inside the console is on the right of the console (point 8).
1
Page 18

1
ENGLISH
IMPORTANT NOTES
If 5 translation channels are used all of the interpreter consoles must be connected to a single line
of the Main Unit. The second line is used with 6 to 10 channels.
For each translation channel a maximum of 3 consoles can be connected.
The consoles on the first line can listen to all of the audio input channels, but can occupy only the
first 5 output channels.
The consoles on the second line can listen to all of the audio input channels, but can occupy only
the second 5 output channels.
When there are 10 translation channels, one interpreter console might be set so that the channel B
output language is the same as the channel A language. In this case it is only possible to occupy
the B channel and the A channel is automatically blocked.
UPDATING THE FIRMWARE
It is possible to update the interpreter console Firmware using a PC connected to the Main Unit. This
update is conducted simultaneously on all the connected consoles.
For the use and update procedure refer to the manual of use of the Main Unit operating software.
HIDDEN MENU
Simultaneously holding down the FLOOR, SPK SLOW and HELP buttons for 2 seconds activates
a hidden menu for individually adjusting the contrast level of the two LCD displays. Pressing the
buttons for the - and + icons lowers and raises the contrast. Pressing the button for the HOME icon
memorizes the modification and automatically exits adjustment.
reg. contrast LCD
< 40 >
- +
reg. contrast LCD
< 50 >
- +
Page 19

EXAMPLE OF TRANSLATION
INTO 4 LANGUAGES WITHOUT THE USE OF RELAY
FLOOR FLOOR
Mic off
B
italiano
B
Mic off
inglese
italiano
Mic off
B
francese
Mic off
B
tedesco
EXAMPLE OF TRANSLATION
INTO 5 LANGUAGES WITH THE USE OF RELAY
FLOOR FLOOR
italiano
ENGLISH
Mic on
B
inglese spagnolo
italiano
Mic on Mic on Mic on
B
francese
B
B
tedesco
1
Page 20

Salvo eventuali errori ed omissioni.
RCF S.p.A. si riserva il diritto di apportare modifiche senza preavviso.
Except possible errors and omissions.
RCF S.p.A. reserves the right to make modifications without prior notice.
the rules of sound
RCF SpA: Via Raffaello, 13 - 42010 Reggio Emilia > Italy
tel. +39 0522 274411 - fax +39 0522 274484 - e-mail: rcfservice@rcf.it
…
 Loading...