

RCA VR327 Owner’s Manual

USER'S
GUIDE
3-Or;_--g_U-
ImportantInformation.............i
TableofContenls.....................1
HookingUptheVCR.................2
SelfingUptheVCR...................7
UsingtheRemoteControl.......10
PlayingaTape.......................12
RecordingaProgram.............17
References.............................23
Index....................................29
VIDEO CASSETTE
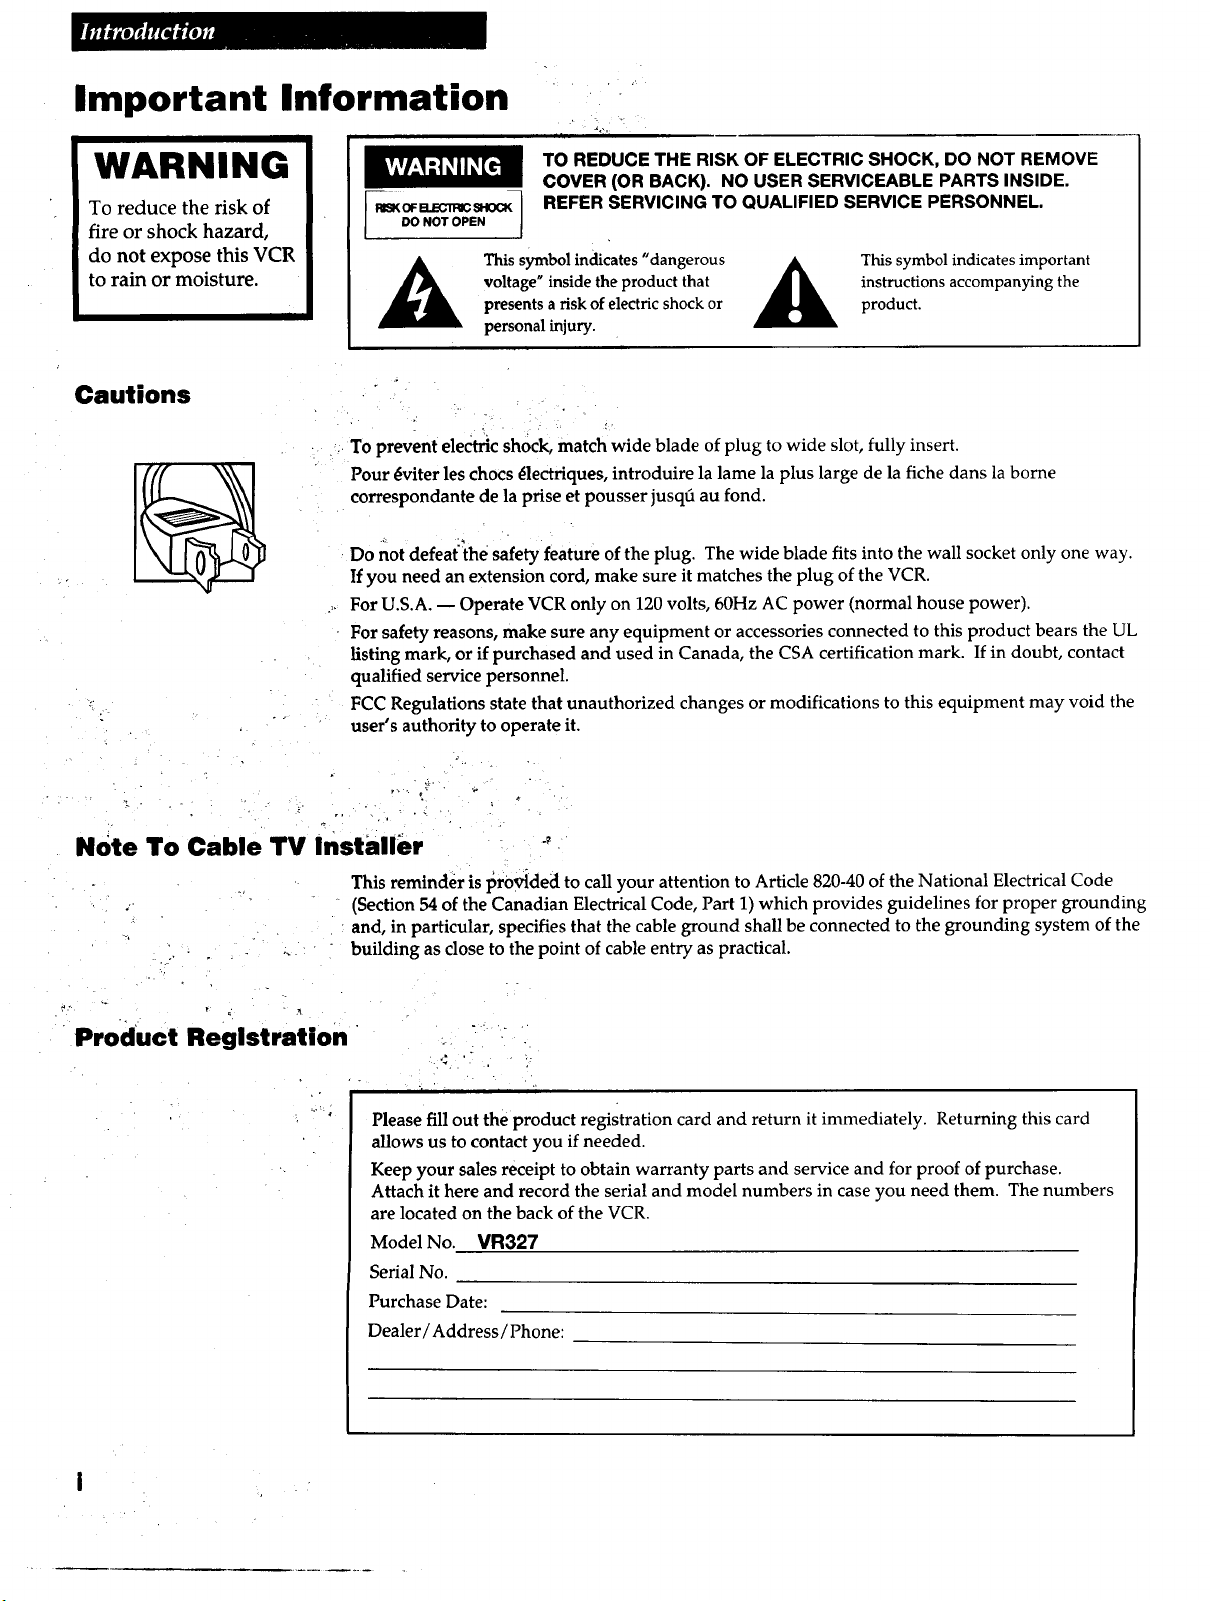
Important Information
WARNING
To reduce the risk of
fire or shock hazard,
do not expose this VCR
to rain or moisture.
Cautions
TO REDUCE THE RISK OF ELECTRIC SHOCK, DO NOT REMOVE
COVER (OR BACK). NO USER SERVICEABLE PARTS INSIDE.
--mKOFaZCn_SHOCK_REFER SERVICING TO QUALIFIED SERVICE PERSONNEL.
DO NOT OPEN /
voltage" inside the product that instructions accompanying the
_ This symbol indicates "dangerous _ This symbol indicates important
To prevent ele_ric shock, match wide blade of plug to wide slot, fully insert.
Pour 4viter les chocs 41ectriques, introduire la lame la plus large de la fiche dans la borne
correspondante de la prise et pousser jusq6 au fond.
Do not defeat:the safety feature of the plug. The wide blade fits into the wall socket only one way.
If you need an extension cord, make sure it matches the plug of the VCR.
For U.S.A. -- Operate VCR only on 120 volts, 60Hz AC power (normal house power).
For safety reasons, make sure any equipment or accessories connected to this product bears the UL
listing mark, or if purchased and used in Canada, the CSA certification mark. If in doubt, contact
qualified service personnel.
FCC Regulations state that unauthorized changes or modifications to this equipment may void the
user's authority to operate it.
presents a riskof electric shock or product.
personal injury.
Note 1"o Cable TV Installer
This reminder is provided to call your attention to Article 820-40 of the National Electrical Code
(Section 54 of the Canadian Electrical Code, Part 1) which provides guidelines for proper grounding
and, in particular, specifies that the cable ground shall be connected to the grounding system of the
building as close to the point of cable entry as practical.
Product Registration
allows us to contact you if needed.
Keep your sales receipt to obtain warranty parts and service and for proof of purchase.
Attach it here and record the serial and model numbers in case you need them. The numbers
are located on the back of the VCR.
Model No. VR327
Serial No.
Purchase Date:
Dealer/Address/Phone:
[ i i
Please fill out the product registration card and return it immediately. Returning this card
i
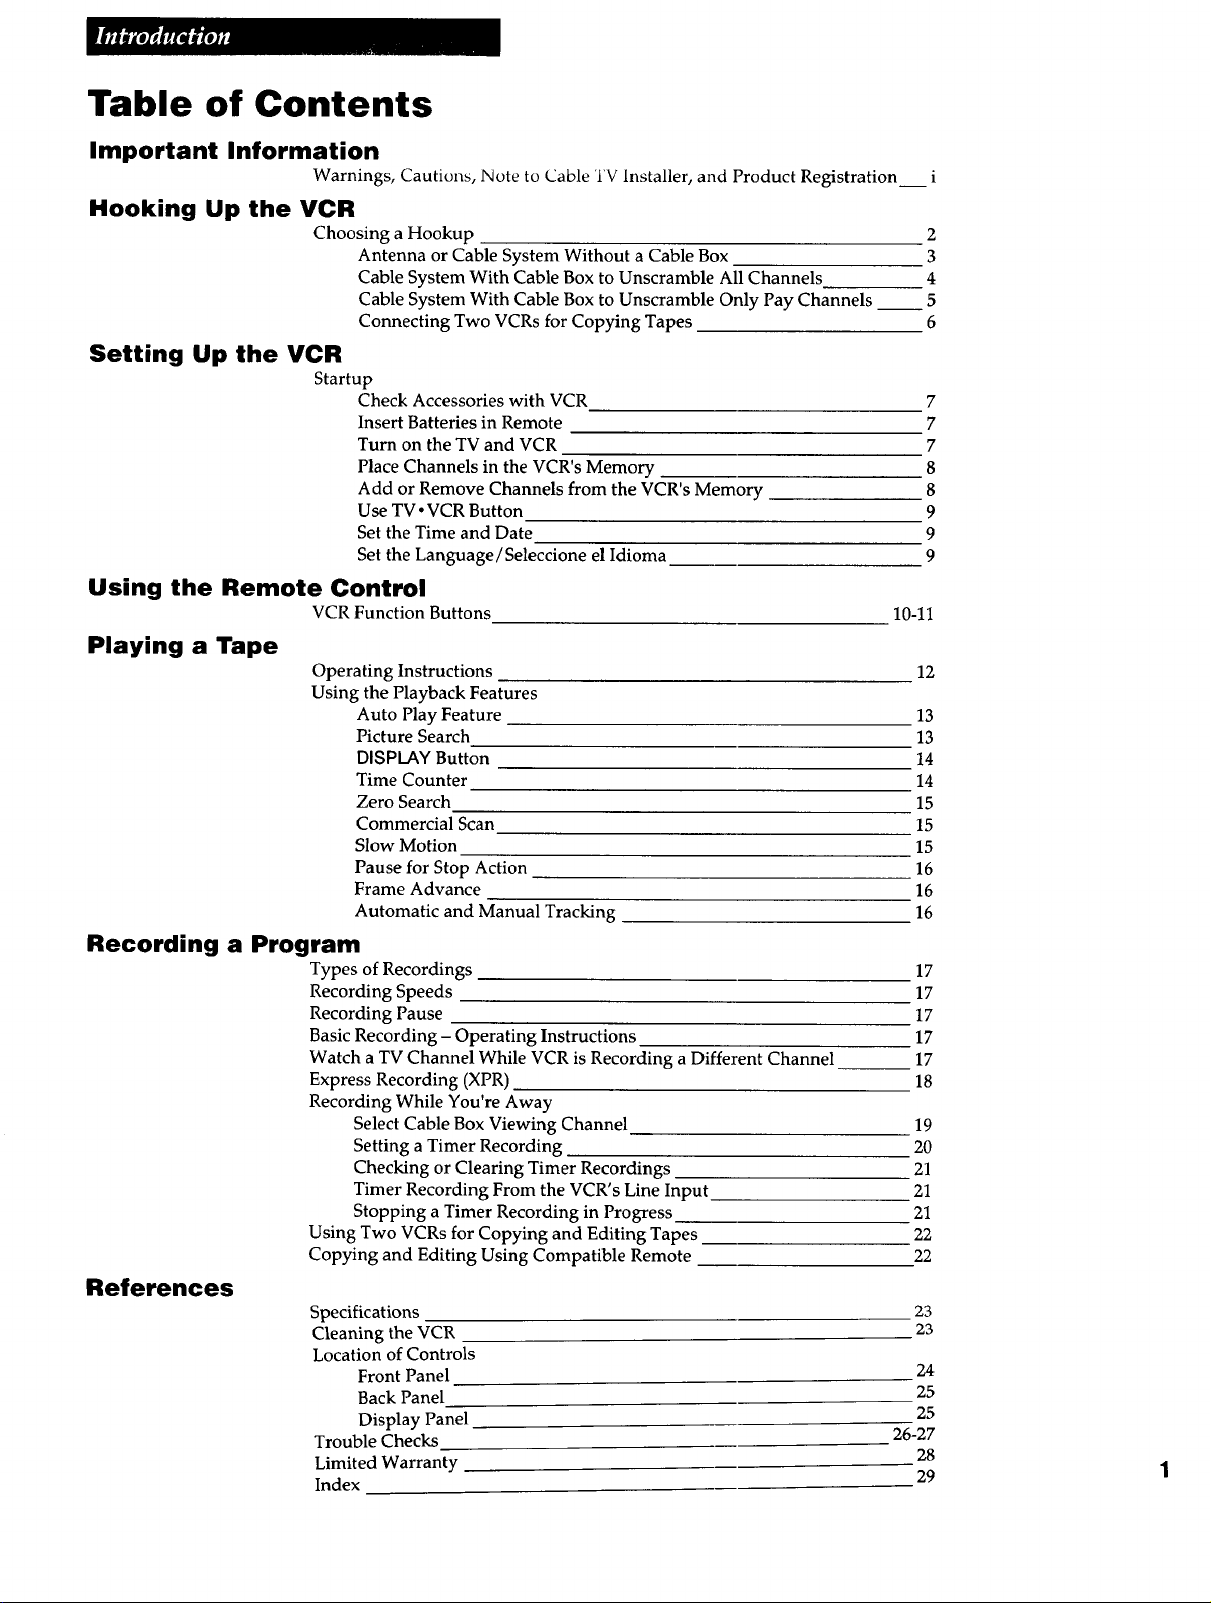
Table of Contents
Important Information
Warnings, Cautions, Note to Cable TV installer, and Product Registration i
Hooking Up the VCR
Choosing a Hookup 2
Antenna or Cable System Without a Cable Box 3
Cable System With Cable Box to Unscramble All Channels 4
Cable System With Cable Box to Unscramble Only Pay Channels __ 5
Connecting Two VCRs for Copying Tapes 6
Setting Up the VCR
Startup
Check Accessories with VCR 7
Insert Batteries in Remote 7
Turn on the TV and VCR 7
Place Channels in the VCR's Memory 8
Add or Remove Channels from the VCR's Memory 8
Use TV •VCR Button 9
Set the Time and Date 9
Set the Language/Seleccione el Idioma 9
Using the Remote Control
VCR Function Buttons
Playing a Tape
Operating Instructions
Using the Playback Features
Auto Play Feature
Picture Search
DISPLAY Button
Time Counter
Zero Search
Commercial Scan
Slow Motion
Pause for Stop Action
Frame Advance
Automatic and Manual Tracking
Recording a Program
Types of Recordings
Recording Speeds
Recording Pause
Basic Recording - Operating Instructions
Watch a TV Channel While VCR is Recording a Different Channel__
Express Recording (XPR)
Recording While You're Away
Select Cable Box Viewing Channel
Setting a Timer Recording
Checking or Clearing Timer Recordings
Timer Recording From the VCR's Line Input
Stopping a Timer Recording in Progress
Using Two VCRs for Copying and Editing Tapes
Copying and Editing Using Compatible Remote
References
Specifications
Cleaning the VCR
Location of Controls
Front Panel
Back Panel
Display Panel
Trouble Checks
Limited Warranty
Index
10-11
12
13
13
14
14
15
15
15
16
16
16
17
17
17
17
17
18
19
20
21
21
21
22
22
23
23
24
25
25
26-27
28
29

Choosing a Hookup
The hookups on pages 3 through 5 are divided into two hookup types:
Basic (A) and Advanced (B).
The basic hookup shows the backs of TVs that have only an antenna/cable
connection. It is the easier of the two and additional accessories may not be
needed.
The advanced hookup shows the VCR hooked up to a monitor/receiver
(TV with audio and video jacks) using a signal splitter. This connection may
improve the picture quality as well as convenience of operation.
Answer the questions to choose the hookup for your VCR.
1 How do you receive your TV signals?
Choose one answer from below.
A. Outside antenna - Turn to page 3.
B. Rabbit ears (set-top) and/or bow tie antenna - Turn to page 3.
G. Cable System - Go to question 2.
2. What type of Cable-TV system* do you have?
Choose one answer from below.
A. Cable without a box - Turn to page 3.
B. Cable box to unscramble all the channels - Turn to page 4.
G. Cable box to unscramble only pay channels, such as HBO, Showtime,
Cinemax, etc. - Turn to page 5.
*You may need to contact your local cable company for assistance.
Optional Hookups
2
How to hook up two VCRs for copying tapes?
A. Select a hookup by answering questions 1 and 2 above.
B. Then modify the connections as shown on page 6.
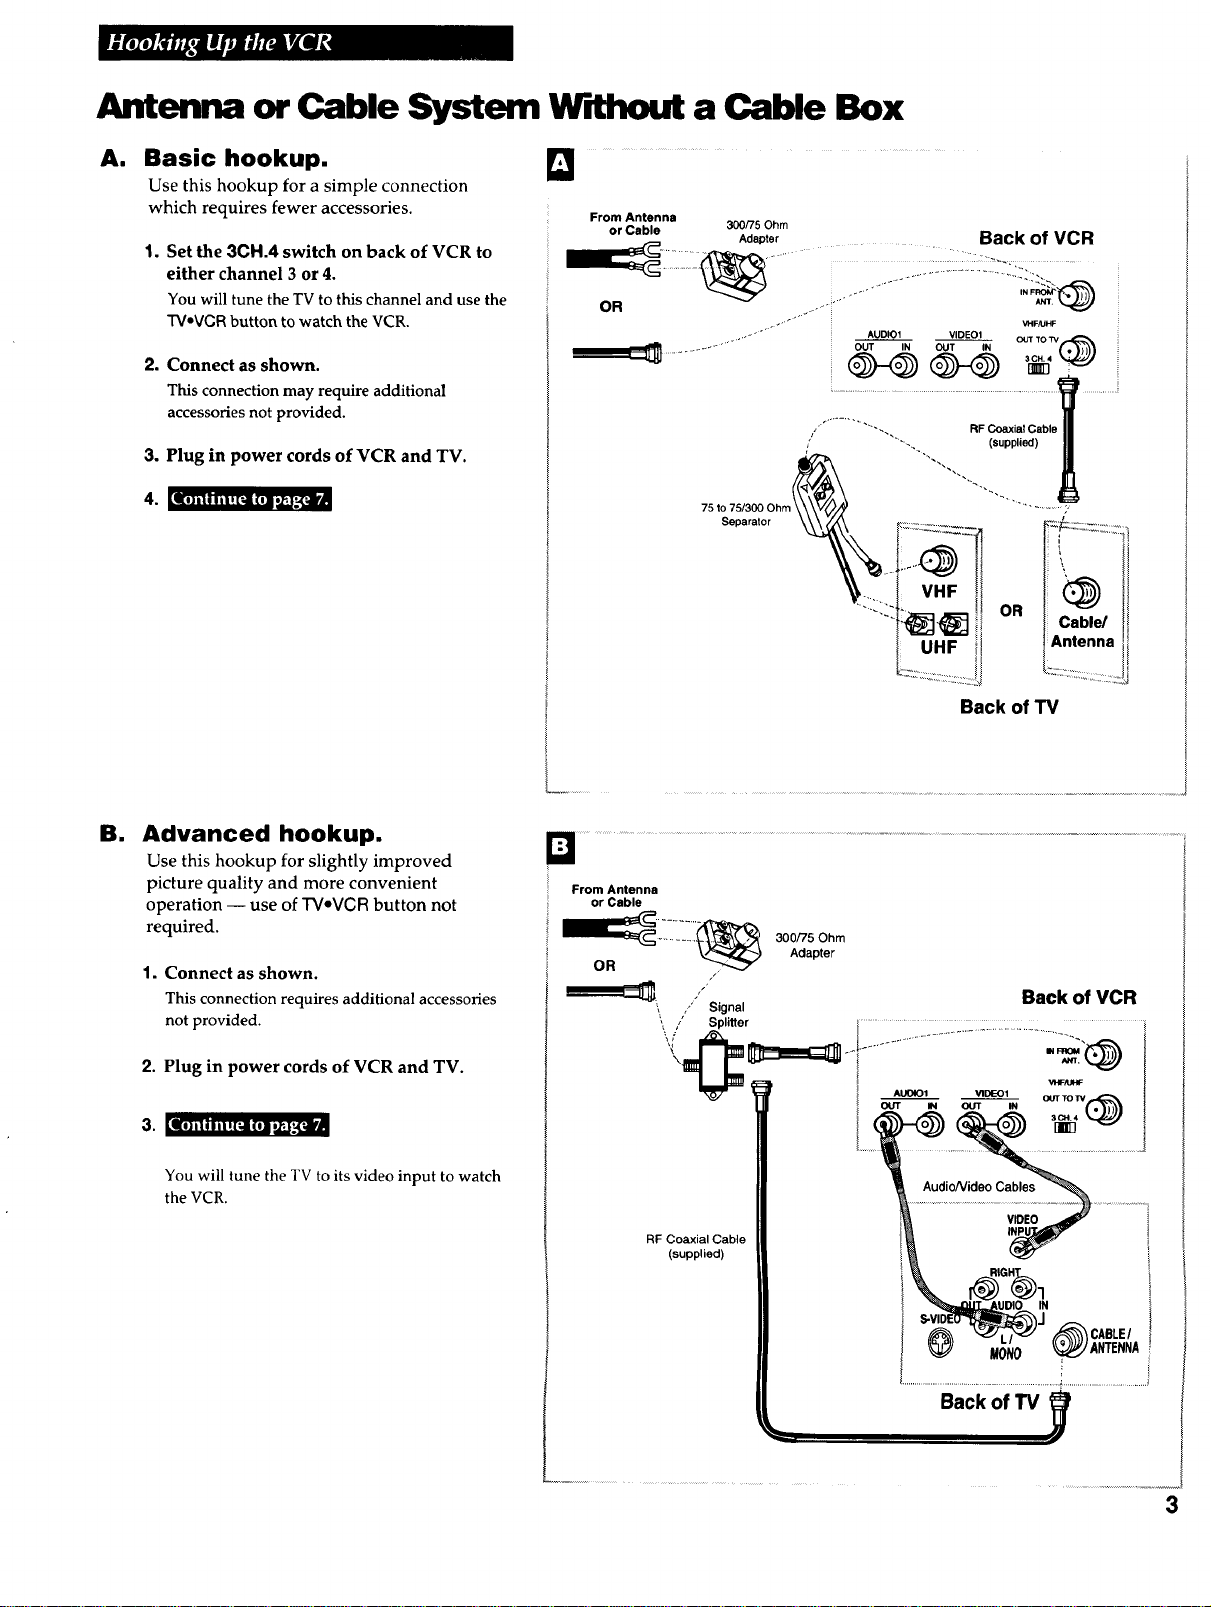
Antenna or Cable System W'dhout a Cable Box
Am
Basic hookup.
Use this hookup for a simple connection
which requires fewer accessories.
1. Set the 3CH.4 switch on back of VCR to
either channel 3 or 4.
You will tune the TV to this channel and use the
"I"V,VCRbutton to watch the VCR.
.
Connect as shown.
This connection may require additional
accessories not provided.
3.
Plug in power cords of VCR and TV.
4.
[I, ill m 
Cable System W dh Cable Box to Unscramble All Channels
A. Basic hookup. [_
Use this hookup for a simple connection
which requires fewer accessories.
1. Set the 3CH.4 switch on back of VCR to
either channel 3 or 4.
You will tune the TV to th£s channel and use the
TVoVCRbutton to watch the VCR.
2.
Connect as shown.
This connection may require additional
accessories not provided.
3.
Plug in power cords of VCR, TV, and
cable box.
i[l] iI I I ill D,I Ill i_II
From Cable
i
Cable Box RFCoaxial
i Cable
75 t_7_/a3rOa?o?hm_
AUDIO1 VIDE01
. (supplied)
Back of VCR
N FROM
VHF/UHF
OUSTTO TV
RF Coaxial Cable
ANT
El
Advanced hookup.
Use this hookup for slightly improved
picture quality and more convenient
operation -- use of TV-VCR button not
required.
1. Connect as shown.
This connection requires additional accessories
not provided.
2. Plug in power cords of VCR, TV, and
cable box.
3.
[il] iii i i i ! [_1 (ll J_j:-_i'A
From Cable : ............................................
i I
RF Coaxial
Cable
Signal
Splitter
Cable Box
. VHF
UHF
o.
Cable/
Antenna
Backof TV
You will tune the TV to its video input to watch
the VCR.
RF Coaxial Cable
(supplied)
Audio/Video Cables
VIDEO
INPU
}
IN
MONO _ ANTENNA
L
Back of TV _
,,_-_ CABLE/
: i

Cable System W dh Cable Box to Unscramble Only Pay Charmels
(suchas HBO,Showtime, Pay-Per-View, etc.)
A. Basic hookup.
Use this hookup {or a simple connection
which requires fewer accessories.
Set the 3CH.4 switch on back of VCR to
1°
either channel 3 or 4.
You will tune the TV to this channel and use the
TVoVCRbutton to watch the VCR.
2. Connect as shown.
This connection may require additional
accessories not provided.
3°
Plug in power cords of VCR, TV, and
cable box.
I*)i|illt![lil(*lll_'_[_il
............................
From Cable
_i Back of VCR
............................................................ Cable
L- .....I i AuD,o_ v,o.ol
Cable Box RFCoax_a,
VNFSUNF
i ou, iN ou, 1. .... o_v_
Back of TV
el
Advanced hookup.
Use this hookup for slightly improved
picture quality and more convenient
operation -- use of TV,,,VCR button not
required.
1. Connect as shown.
This connection requires additional accessories
not provided.
2. Plug in power cords of VCR, TV, and
cable box.
3. [lloliliiii!lill(lll]':l,_iillil
You will tune the TV to its video input to watch
the VCR. All pay channels are viewed through
the VCR.
RF Coaxial
Cable
(supplied)
5

Connecting Two VCRs for Copying Tapes
Option A hookup.
Use this hookup for a simple connection
which requires fewer accessories.
1.
Select a hookup from pages 2 through 5
and then modify with this connection.
2.
Set the 3CH.4 switch on the playback
VCR to either channel 3 or 4.
You will tune the recording VCRto this channel
to receive the signal from the playback VCR.
3. Connect as shown.
This connection may require additional
accessories not provided.
4. Plug in power cords of VCRs and TV.
kl] il I I it ! [_1 (11 id_t._ll
II
From Antenna, Cable
or Cable Box i ........................................................................
Playback VCR
.................. T IN FROM "_'_
i "NT'"_)
i AUD,01 VIDE01 0:: ::_
RF Coaxial Cable
(supplied)
Recording VCR
IN FROM
AUDIO1 VIDEO1
OUT IN OUT IN
Audio/Video | Cable
Cables S or - - - I
VHF/UHF
OUT TO TV
RF Coaxial II
_ i_'
Use the hookup to the TV
as previously selected on
pages 3, 4, or 5.
ANT.
Option B hookup.
Use this hookup for slightly improved copy
quality and more convenient operation --
use of TV,VCR button not required.
1. Select a hookup from pages 2 through 5
and then modify with this connection.
2. Connect as shown.
This connection requires additional accessories
not provided.
3. Plug in power cords of VCRs and TV.
Ill] iI I I il! [_ilfl]l _._'.i
You will select the line (audio/video) input on
the recording VCR to receive the signal from the
playback VCR.
television programs and other materials
l aution: The unauthorized recording of
may infringe the rights of others.
6
Playback VCR (only)
IN FROM _
ANT.
VRF/UHF I
O_N OLiN OUT TO lV(._
-% ,u ,o/V,deo
R " Cables
ecordmg VCR _ '_ FromAntenna,Cable
.................... _ ..... _ .......................... or Cable Box
i VHF/UHF
! OUT_ UT _ (_\
-- j II RF Coax' I A
R Audio/Video J , i.e. _able
Cable;--; or i [supp,ea)
% S
_s
Use the hookup to the TV
as previously selected on
t I ANT'_INFROM ...........
pages 3, 4, or 5.
Startup
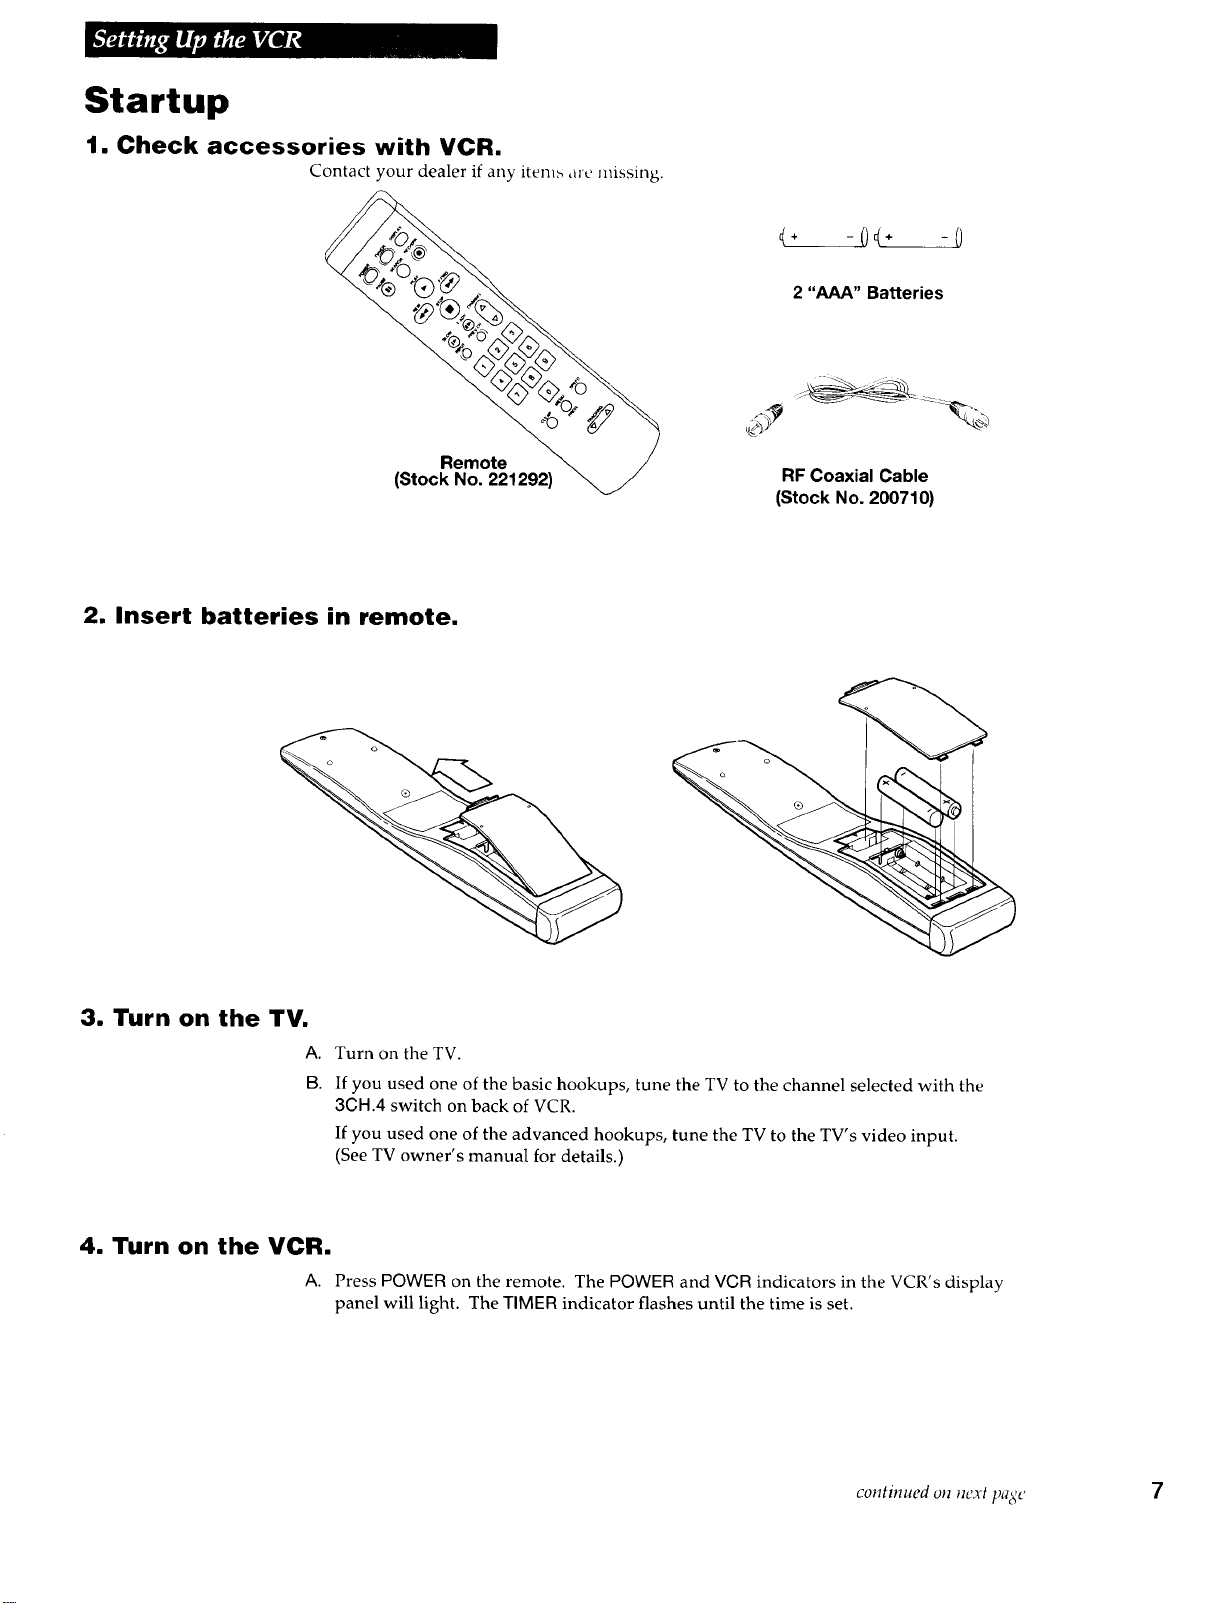
1. Check accessories with VCR.
Contact your dealer if any item_ arc missing.
4÷ -0< ÷ -0
2 "AAA" Batteries
(Stock No. 221292)
2. Insert batteries in remote.
3. Turn on the TV.
A.B.Turn on the TV.
If you used one of the basic hookups, tune the TV to the channel selected with the
30H.4 switch on back of VCR.
If you used one of the advanced hookups, tune the TV to the TV's video input.
(See TV owner's manual for details.)
Remote
RF Coaxial Cable
(Stock No. 200710)
4. Turn on the VCR.
A.
Press POWER on the remote. The POWER and VGR indicators in the VCR's display
panel will light. The TIMER indicator flashes until the time is set.
continued on next page 7

Startup
5. Place channels in the VCR's memory.
The first time you turn on the VCR or atter a power
interruption, the VCR will display a message on the TV
screen prompting you to AUTO-SEARCH CHANNELS for the
VCR. If the message does not appear, go to step A below.
If the message appears, follow the directions on the screen.
Wait until the channel numbers stop changing. This takes
about one to two minutes. The TV will then tune to the
lowest channel found. Pressing CHANNEL up or down will
select only the active channels.
If you ever need to manually setup the channels on the VCR
because you change cable or antenna signals:
A. Press MENU PROG to display the VCR MAIN MENU on
the TV screen. If this menu does not appear:
• Make sure TV is tuned to same channel as3CH.4
switch on the VCR or the TV's video input (refer to
TV's manual).
• If you use a basic hookup, check the VCR indicator in
display panel -- it should be on. Press TV.VCR to
turn it on.
• Check the connections.
B,
Press 3 to display the CHANNEL SETUP menu.
C.
Press 1 to begin AUTO-SEARCH CHANNELS.
The VCR automatically selects GABLE (cable TV) or
ANTENNA. If you need to change the setting manually,
press 3.
AUTO-SEARCH CHANNELS
CONNECT ANTENNA CABLE...
THEN PRESS CH UP
VCR MAIN MENU
TIMER PROGRAMMING
REVIEW PROGRAMS
CHANNEL SETUP
CHANNEL SETUP
I AUTO-SEARCH CHANNELS
2 ADD/REMOVE CHANNELS
3 TUNING MODE: CABLE
4 CABLE BOX SETUP
0 EXIT TO MAIN MENU
6. Add or remove channels from the VCR's memory.
You may want to add or remove channels if some of the
channels are not active, have weak signals, or you do not
want to watch them.
Channels must be placed in memory using the AUTO-
SEARCH CHANNELS feature described above before you can
add or remove channels.
A. Press MENU PROG on the remote to see the VCR MAIN
MENU on the TV screen.
B. Press 3 to display the CHANNEL SETUP menu.
C. Press 2 to display the ADD/REMOVE CHANNEL menu.
D. Follow the directions on the screen.
E. Add or remove more channels by using the CHANNEL
up and down buttons.
VCR MAIN MENU |
1 TIMER PROGRAMMING
2 REVIEW PROGRAMS
3 CHANNEL SETUP
AUTO-SEARCH CHANNELS
CHANNEL SETUP
ADD/REMOVE CHANNELS
ADD/REMOVE CHANNEL
CH 03
IS PRESENTLY ADDED
PRESS CLEAR TO REMOVE
PRESS MENU TO EXIT
!
8
 Loading...