

RCA VG4040, VG2040 Owner’s Manual
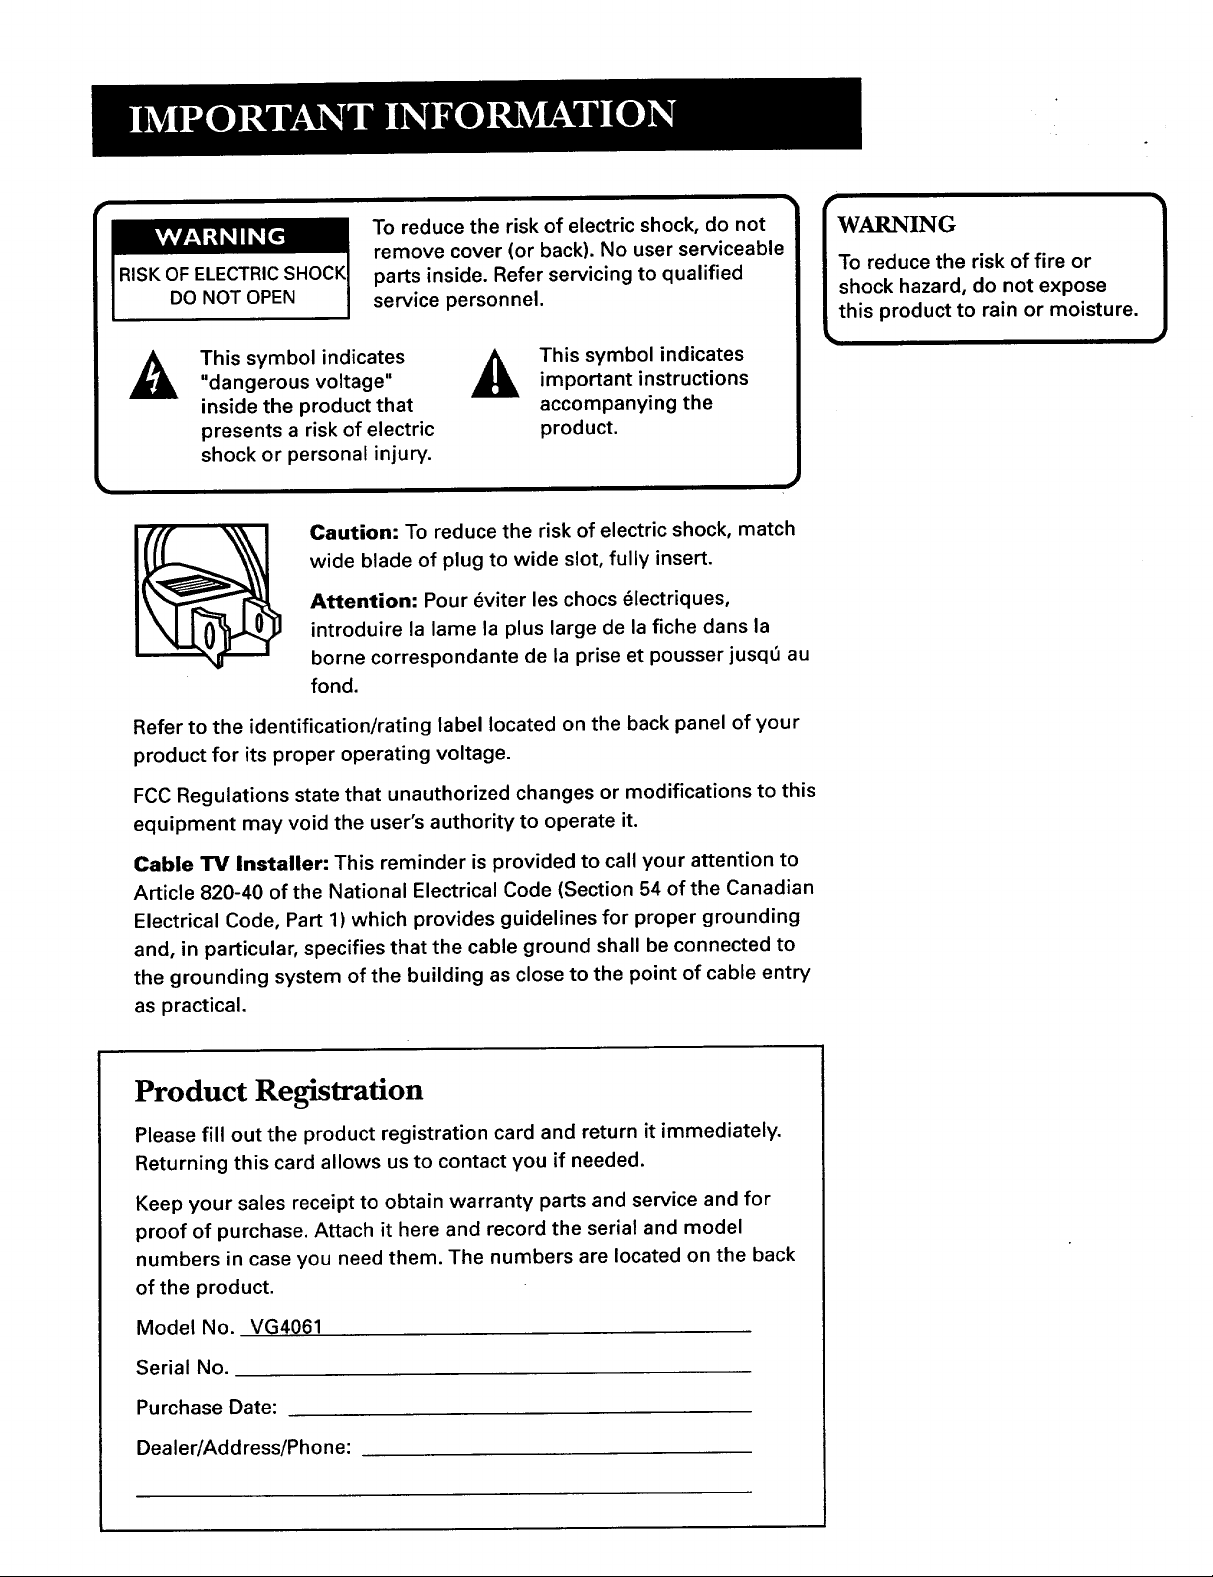
To reduce the risk of electric shock, do not
remove cover (or back). No user serviceable
RISK OF ELECTRIC
DO NOT OPEN
This symbol indicates
"dangerous voltage"
inside the product that
presents a risk of electric
shock or personal injury.
Caution: To reduce the risk of electric shock, match
wide blade of plug to wide slot, fully insert.
Attention: Pour _viter les chocs _lectriques,
introduire la lame la plus large de la fiche dans la
borne correspondante de la prise et pousser jusq_ au
fond.
Refer to the identification/rating label located on the back panel of your
product for its proper operating voltage.
FCC Regulations state that unauthorized changes or modifications to this
equipment may void the user's authority to operate it.
parts inside. Refer servicing to qualified
service personnel.
This symbol indicatesimportant instructions
accompanying the
product.
|To reduce the risk of fire or
|shock hazard, do not expose
twaiN° ]
this product to rain or moisture.
Cable TV Installer: This reminder is provided to call your attention to
Article 820-40 of the National Electrical Code (Section 54 of the Canadian
Electrical Code, Part 1) which provides guidelines for proper grounding
and, in particular, specifies that the cable ground shall be connected to
the grounding system of the building as close to the point of cable entry
as practical.
Product Registration
Please fill out the product registration card and return it immediately.
Returning this card allows us to contact you if needed.
Keep your sales receipt to obtain warranty parts and service and for
proof of purchase. Attach it here and record the serial and model
numbers in case you need them. The numbers are located on the back
of the product.
Model No. VG4061
Serial No.
Purchase Date:
Dealer/Address/Phone:
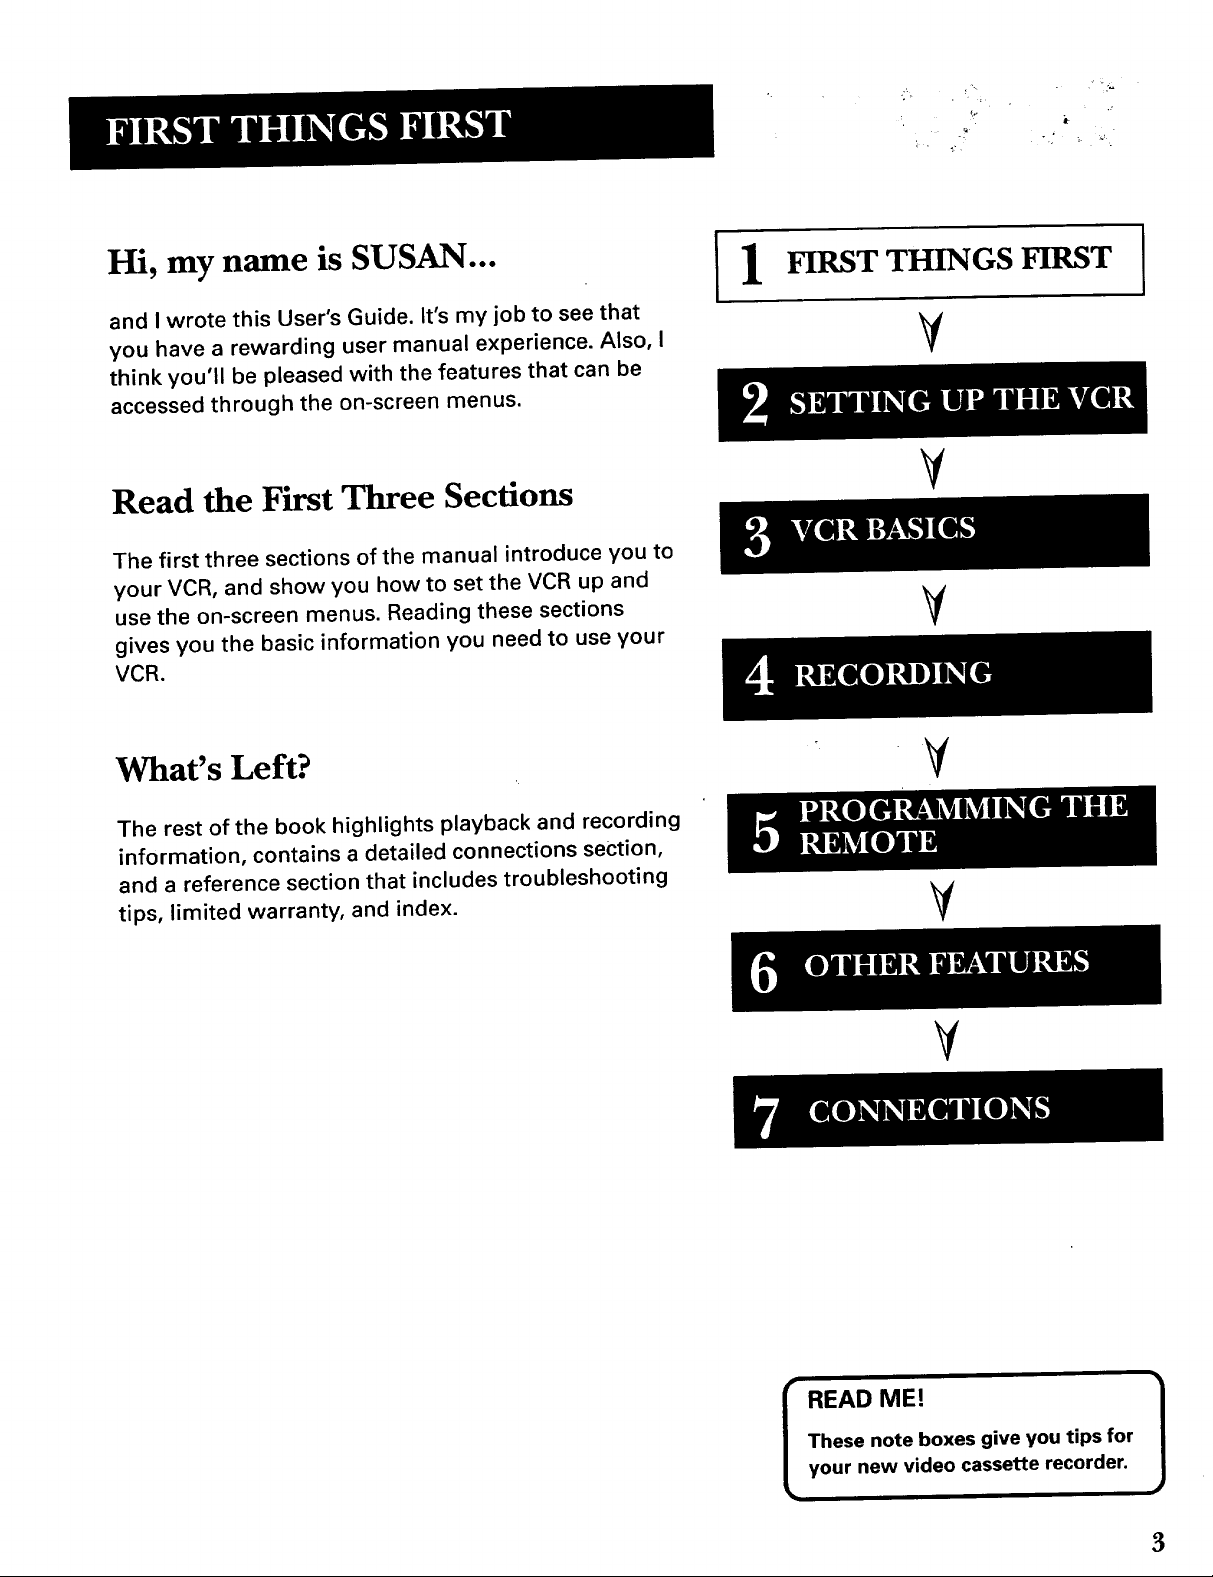
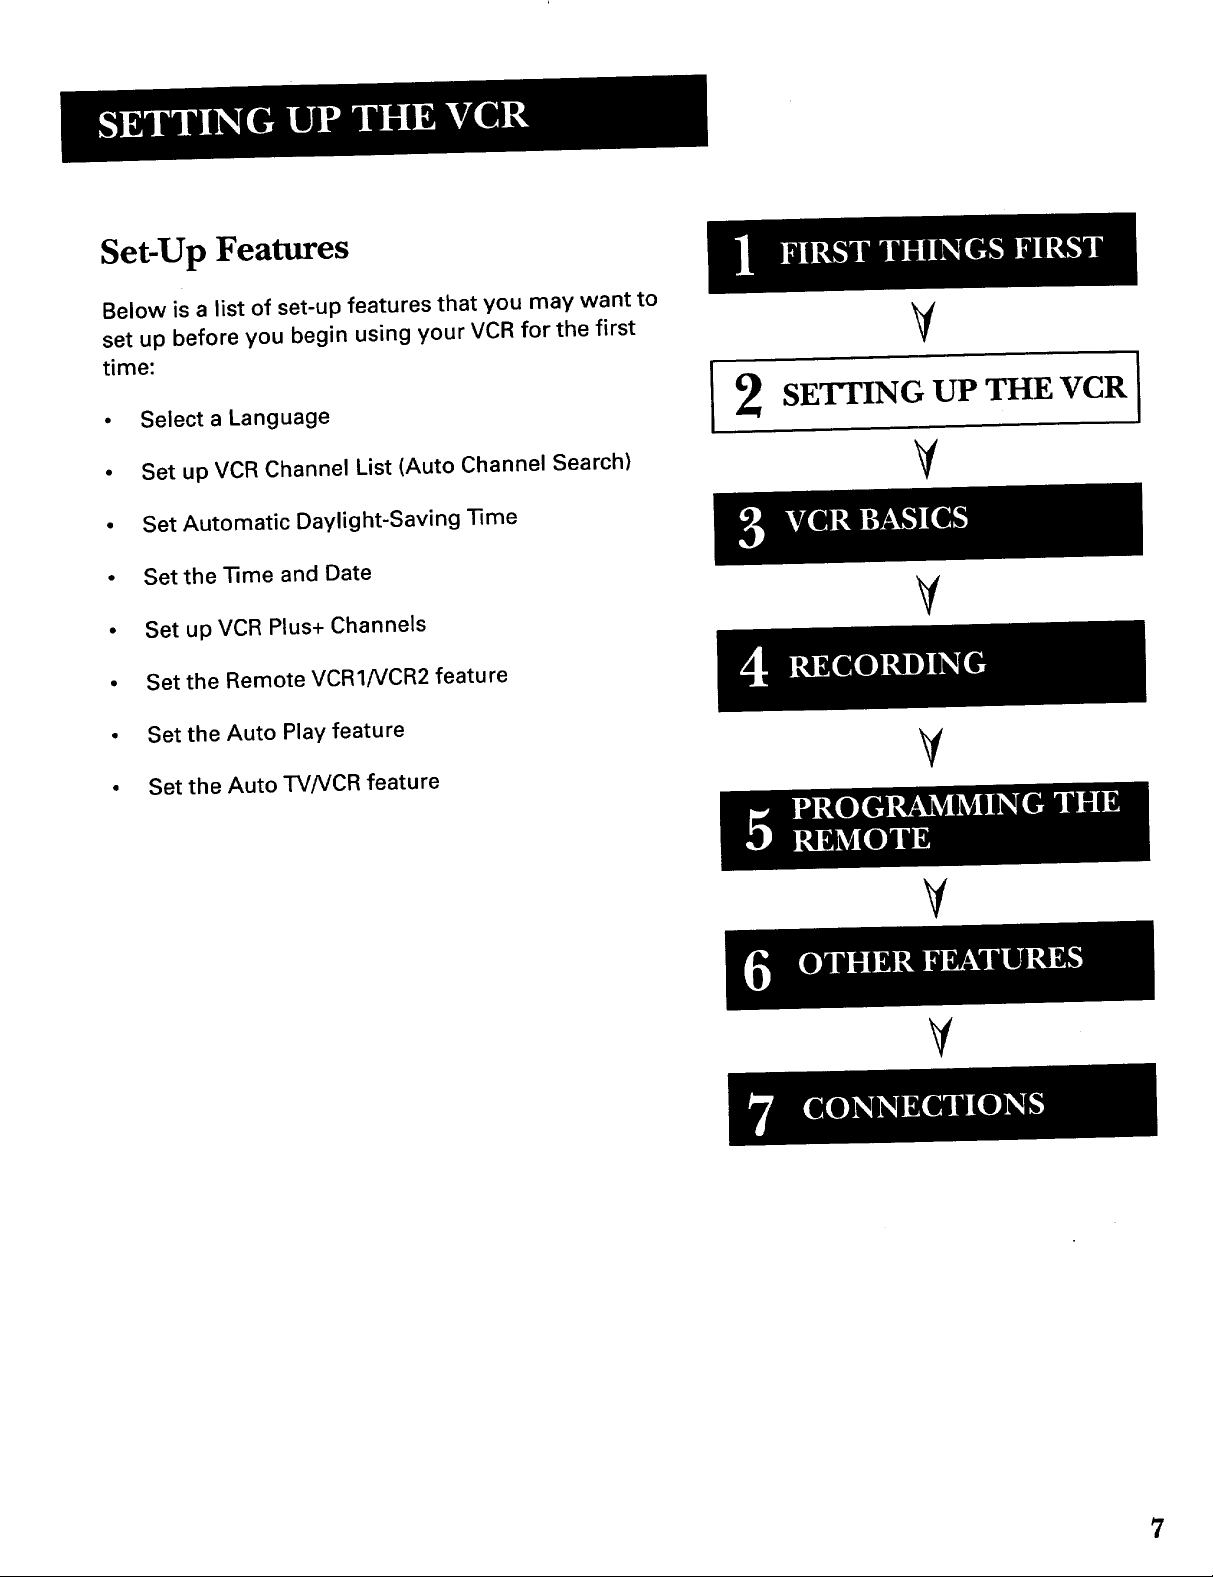
First Things First .................................................. 3
Setting up the VCR .............................................. 7
Using the Menu to Set Up Features ...................................... 8
Language ........................................................................... 8
VCR Channels List ............................................................. 8
To Auto Channel Search ............................................. 9
To Change the Signal Type ....................................... 10
To Add or Remove Channels .................................... 10
Time and Date .................................................................. 10
Set Daylight-Saving Time ......................................... 11
Set the Time and Date ............................................... 11
VCR Plus+ Channels ........................................................ 12
Additional Set-up Features in the PREFERENCES Menu ... 14
Remote VCR1NCR2 Option ............................................ 15
Auto Play .......................................................................... 16
Auto TVNCR .................................................................... 16
VCR Basics ........................................................ 17
Remote Buttons ..................................................................... 18
Component Buttons ........................................................ 18
VCR Function Buttons ..................................................... 18
TV Function Buttons ........................................................ 19
Playing a Tape ........................................................................ 20
Tape Eject ............................................................................... 20
Recording ............................................................................... 21
Check the Safety Tab ....................................................... 21
Automatic Rewind ................................................................. 21
Recording ................................................................ 23
Recording Features ............................................................... 24
Express Recording .......................................................... 24
Timer Recording .............................................................. 25
VCR Plus+ Recording ...................................................... 26
Stopping a Timer Recording ........................................... 28
Reviewing and Clearing Programs ................................ 28
Using Two VCRs for Copying and Editing Tapes .......... 29
Programming the Remote .................................. 3 l
To Control a IV ................................................................ 32
Other Features ................................................... 35
Picture Search Options ......................................................... 36
Forward and Rewind Search .......................................... 36
Slow Motion .................................................................... 36
Commercial Scan (SEARCH Button) .............................. 36
Frame Advance ................................................................ 37
Index Search .................................................................... 37
Zero Search ...................................................................... 38
Time Counter ......................................................................... 38
On-Screen Displays ............................................................... 39
Tracking ........ .......................................................................... 39
Connections ....................................................... 41
Things to Know Before Connecting Components .............. 41
Connecting Your VCR ............................................................ 42
Jacks and Cables ............................................................. 42
Choosing a VCR Connection ......................................... 43
Advantages of Audio/Video Cable Connections .......... 43
Don't Forget About the Auto TV/VCR Feature ............... 43
TV With RF Jack Only ...................................................... 44
TV With Audio/Video Jacks ............................................ 45
TV With Audio/Video Jacks and Cable Box to
Unscramble Pay Channels Only ................................. 46
Appendix A: Reference ...................................... 47
Front Panel ............................................................................. 48
Display Panel ......................................................................... 49
Back Panel .............................................................................. 50
Troubleshooting "13ps ............................................................ 51
Specifications ........................................................................ 54
Cleaning the VCR ................................................................... 54
Limited Warranty ................................................................... 55
Index ................................................................. 56
2
n__ q
Hi, my name is SUSAN... [1
and I wrote this User's Guide. It's my job to see that
you have a rewarding user manual experience. Also, I
think you'll be pleased with the features that can be
accessed through the on-screen menus.
Read the First Three Sections
The first three sections of the manual introduce you to
your VCR, and show you how to set the VCR up and
use the on-screen menus. Reading these sections
gives you the basic information you need to use your
VCR.
What's Left?
The rest of the book highlights playback and recording
information, contains a detailed connections section,
and a reference section that includes troubleshooting
tips, limited warranty, and index.
FIRST THINGS FIRST
V
V
V
ILlgi[l]L!I]I_[_
V
¥
V
These note boxes give you tips for
READ ME! 1
your new video cassette recorder.
3
Step 1: Unpack What's in the Box
The following items come packed in the box:
• VCR
• Remote control
• RF coaxial cable
Step 2: Install Batteries in the Remote
Control
Follow these steps whenever you need to install or change the
batteries in your VCR remote.
1. Remove the cover of the battery compartment.
2. Place batteries in remote, matching the + and - ends of each
battery to the diagram inside the compartment.
3. Replace the cover.
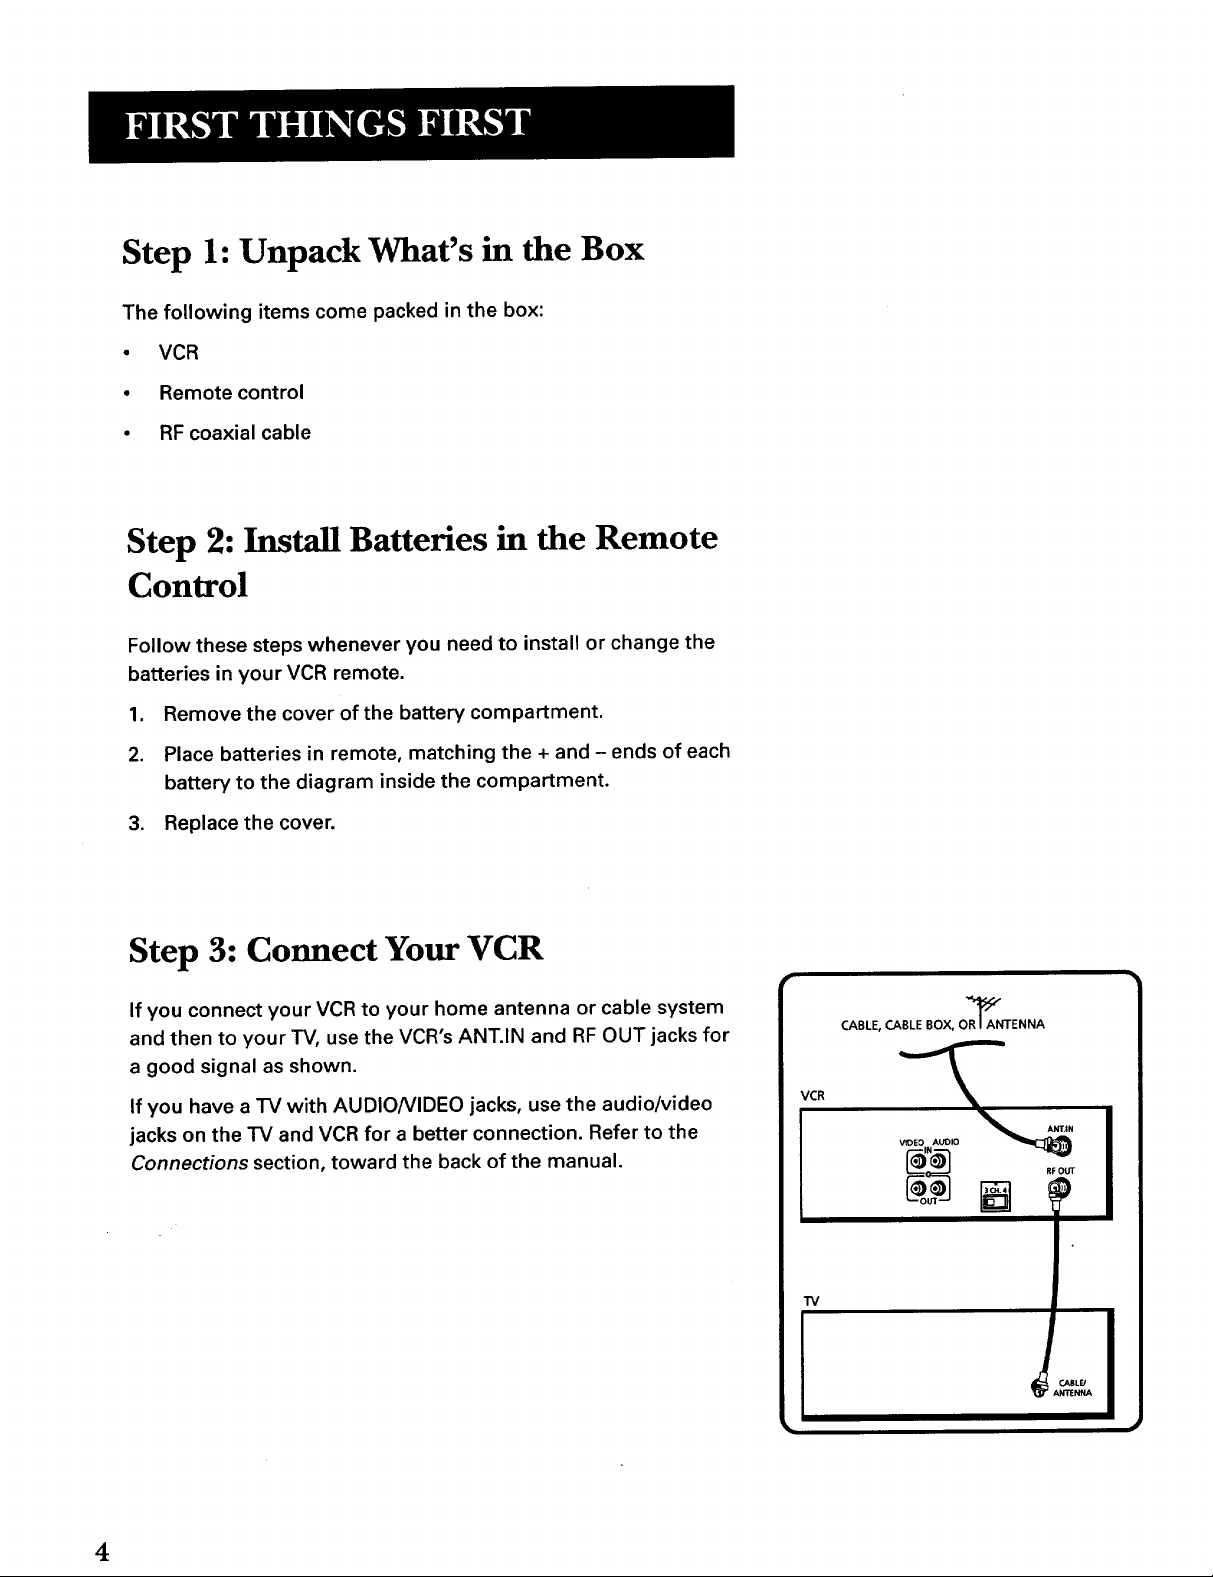
Step 3: Connect Your VCR
If you connect your VCR to your home antenna or cable system
and then to your TV, use the VCR's ANT.IN and RF OUT jacks for
a good signal as shown.
If you have a TV with AUDIO/VIDEO jacks, use the audio/video
jacks on the TV and VCR for a better connection. Refer to the
Connections section, toward the back of the manual.
CABLE, CABLE BOX, OR_ANTENNA
VCR
_ RFOUT
"IV
4
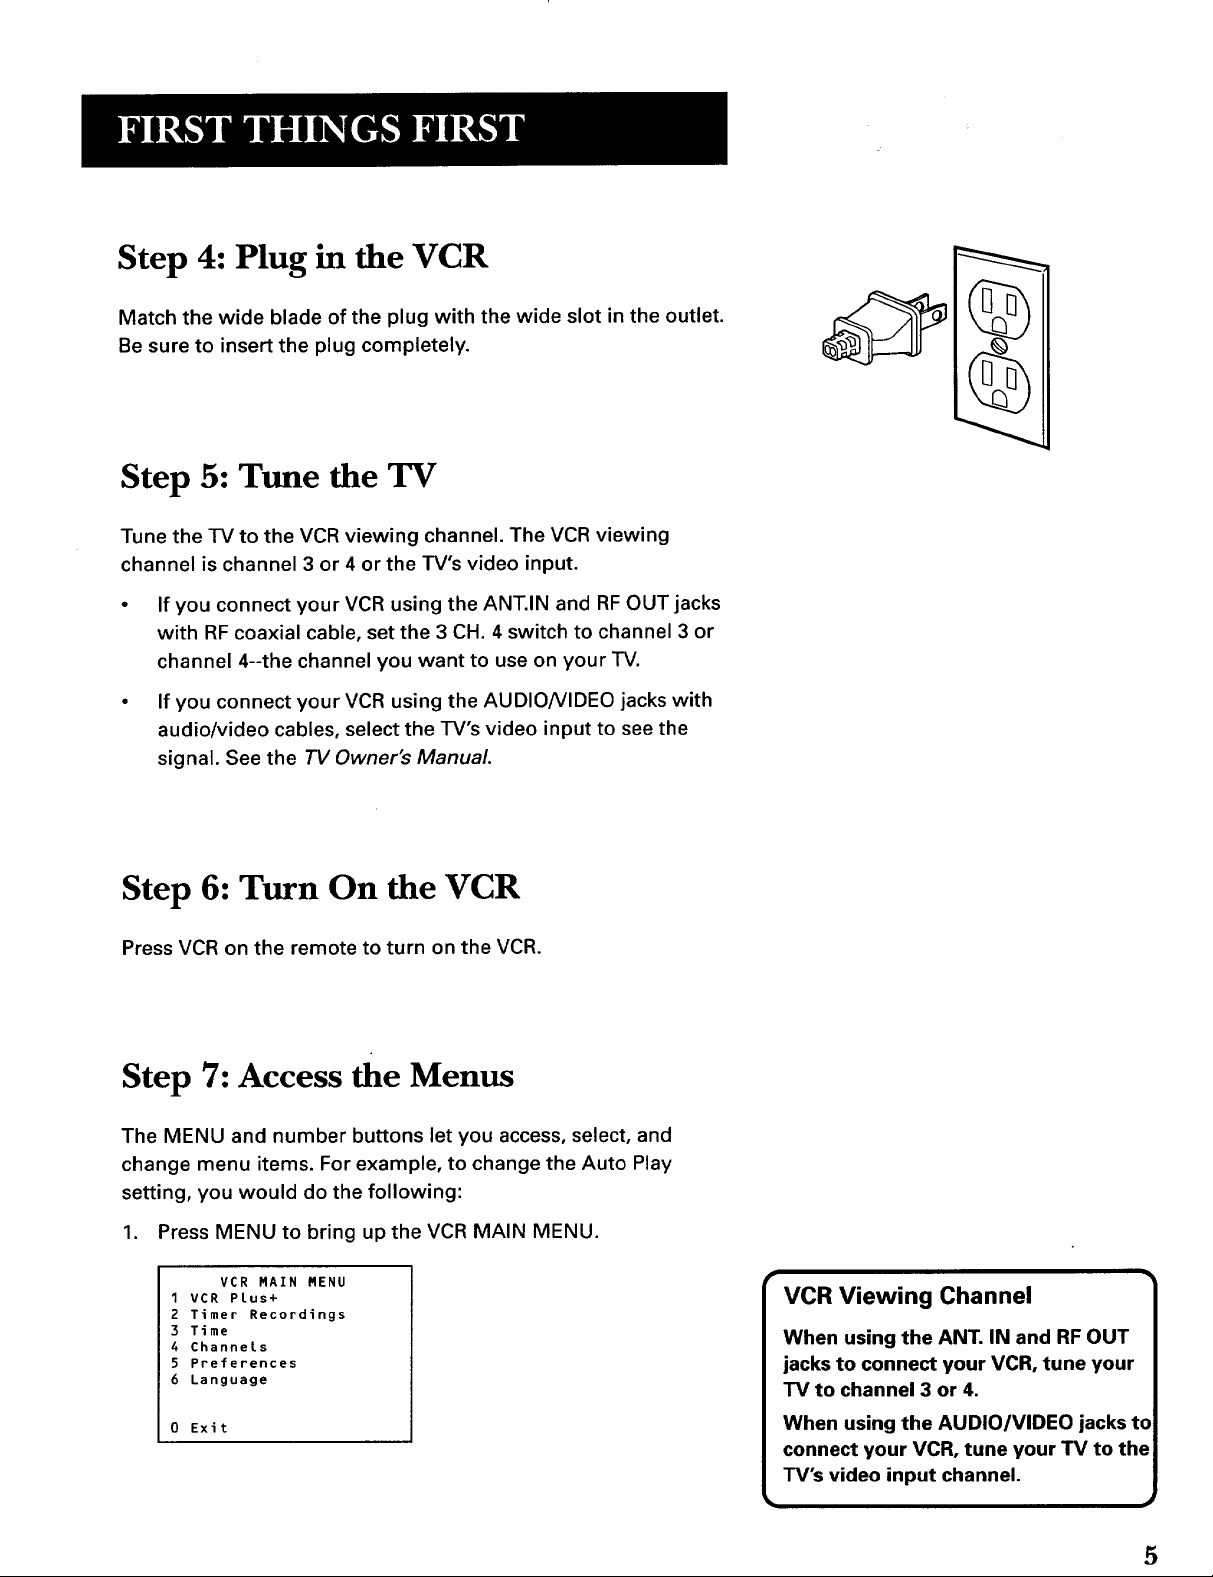
Step 4: Plug in the VCR
Match the wide blade of the plug with the wide slot in the outlet.
Be sure to insert the plug completely.
Step 5: Tune the TV
Tune the TV to the VCR viewing channel. The VCR viewing
channel is channel 3 or 4 or the TV's video input.
If you connect your VCR using the ANT.IN and RF OUT jacks
with RF coaxial cable, set the 3 CH. 4 switch to channel 3 or
channel 4--the channel you want to use on your TV.
If you connect your VCR using the AUDIO/VIDEO jacks with
audio/video cables, select the TV's video input to see the
signal. See the TV Owner's Manual.
(uq_.
III I"1\
Step 6: Turn On the VCR
Press VCR on the remote to turn on the VCR.
Step 7: Access the Menus
The MENU and number buttons let you access, select, and
change menu items. For example, to change the Auto Play
setting, you would do the following:
1. Press MENU to bring up the VCR MAIN MENU.
VCR MAIN MENU
1VCR Plus+
2 Timer Recordings
3 Time
4 Channels
5 Preferences
6 Language
0 Exit
VCR Viewing Channel
When using the ANT. IN and RF OUT
jacks to connect your VCR, tune your
TV to channel 3 or 4,
When using the AUDIO/VIDEO jacks to
connect your VCR, tune your TV to the
TV's video input channel.
5
2. Press 5 to display the PREFERENCES menu.
PREFERENCES
1 Remote Control: VCR1
2 Auto Play: ON
3 Auto TV/VCR: ON
0 Exit
3. Press 2 to switch Auto Play ON or OFF.
PREFERENCES
1 Remote Control: VCR1
2 Auto Play: OFF
3 Auto TV/VCR: ON
0 Exit
See Setting Up the VCRfor detailed information about the
Auto Play feature.
Step 8: Set Up the VCR
Once you understand how to move around and/or through the
menus, go to the next section to set up your VCR.
6
Set-Up Features
Below is a list of set-up features that you may want to
set up before you begin using your VCR for the first
time:
V
• Select a Language
• Set up VCR Channel List (Auto Channel Search)
• Set Automatic Daylight-Saving'time
• Setthe'Rme and Date
• Set upVCR Plus+ Channels
• Set the Remote VCR1/VCR2 feature
• Set the Auto Play feature
• Set the AutoTV/VCR feature
SETrING UP THE VCR
¥
Y
V
V
I
V
o o
7

i
Using the Menu to Set Up Features
You can set up features by using the menu system. Each feature
is explained in this section.
Language
Select your preferred language, and the on-screen displays will
appear in that language.
1. Press MENU to display the VCR MAIN MENU.
VCR MAIN MENU
1 VCR PLus+
2 Timer Recordings
3 Time
4 Channels
5 Preferences
6 Language
0 Exit
2. Press 6 to display the LANGUAGE menu.
LANGUAGE
Select a Language.
l_English
2 Espanol
3 FranFais
Press MENU to continue
3. Press 1 for English, 2 for Espafiol (Spanish), or 3 for
Frangais (French).
VCR Channels List
If you use a cable box for all channels, this step is not necessary.
Your VCR may come with a channel list preset at the factory.
Even though your VCR may come with a list, it's possible that
you may want to add or eliminate some channels depending on
whether they are active.
On-screen Menus
Not all the VCR screens are shown in
this manual when explaining
{
the features.
All Channels
}
If you do not use a cable box for ALL
channels, then you will want to use a
channel list (Auto Channel Search).
8
}
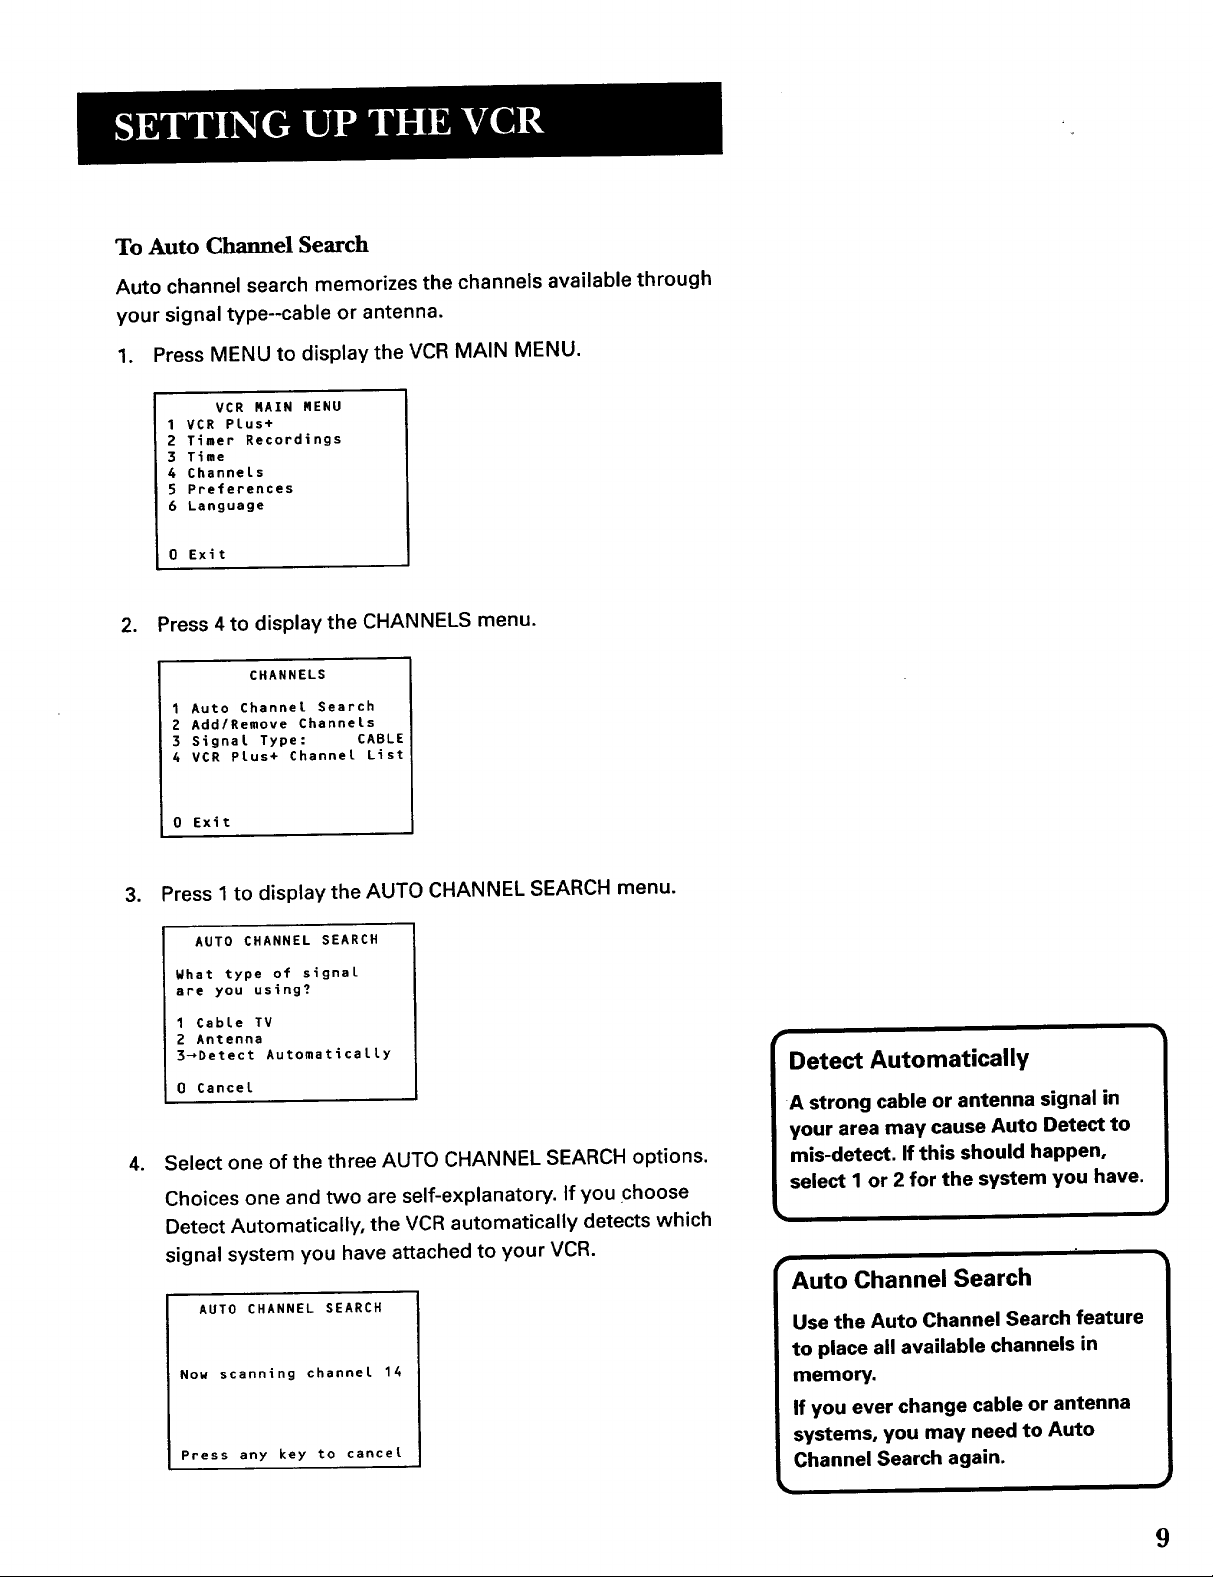
To Auto Chamlel Search
Auto channel search memorizes the channels available through
your signal type--cable or antenna.
1. Press MENU to display the VCR MAIN MENU.
VCR RAIN RENU
1VCR Plus+
2 Timer Recordings
3 T_me
6 Channels
5 Preferences
6 Language
0 Exit
2. Press 4to display the CHANNELS menu.
CHANNELS
1 Auto Channel Search
2 Add/Remove Channels
3 Signal Type: CABLE
4 VCR Plus+ Channel List
0 Exft
3. Press 1to display the AUTO CHANNEL SEARCH menu.
AUTO CHANNEL SEARCH
What type of signal
are you using?
1 Cable TV
2 Antenna
3_Detect Automatically
0 Cancel
o
Select one of the three AUTO CHANNEL SEARCH options.
Choices one and two are self-explanatory. If you choose
Detect Automatically, the VCR automatically detects which
signal system you have attached to your VCR.
AUTO CHANNEL SEARCH
Nou scanning channel 14
Press any key to cancel
Detect Automatically
Auto Channel Search
9
The VCR begins scanning for the available channels-this
takes about one to two minutes. The lowest channel is tuned
once the search is completed. Pressing CHANNEL up or
down now selects the active channels.
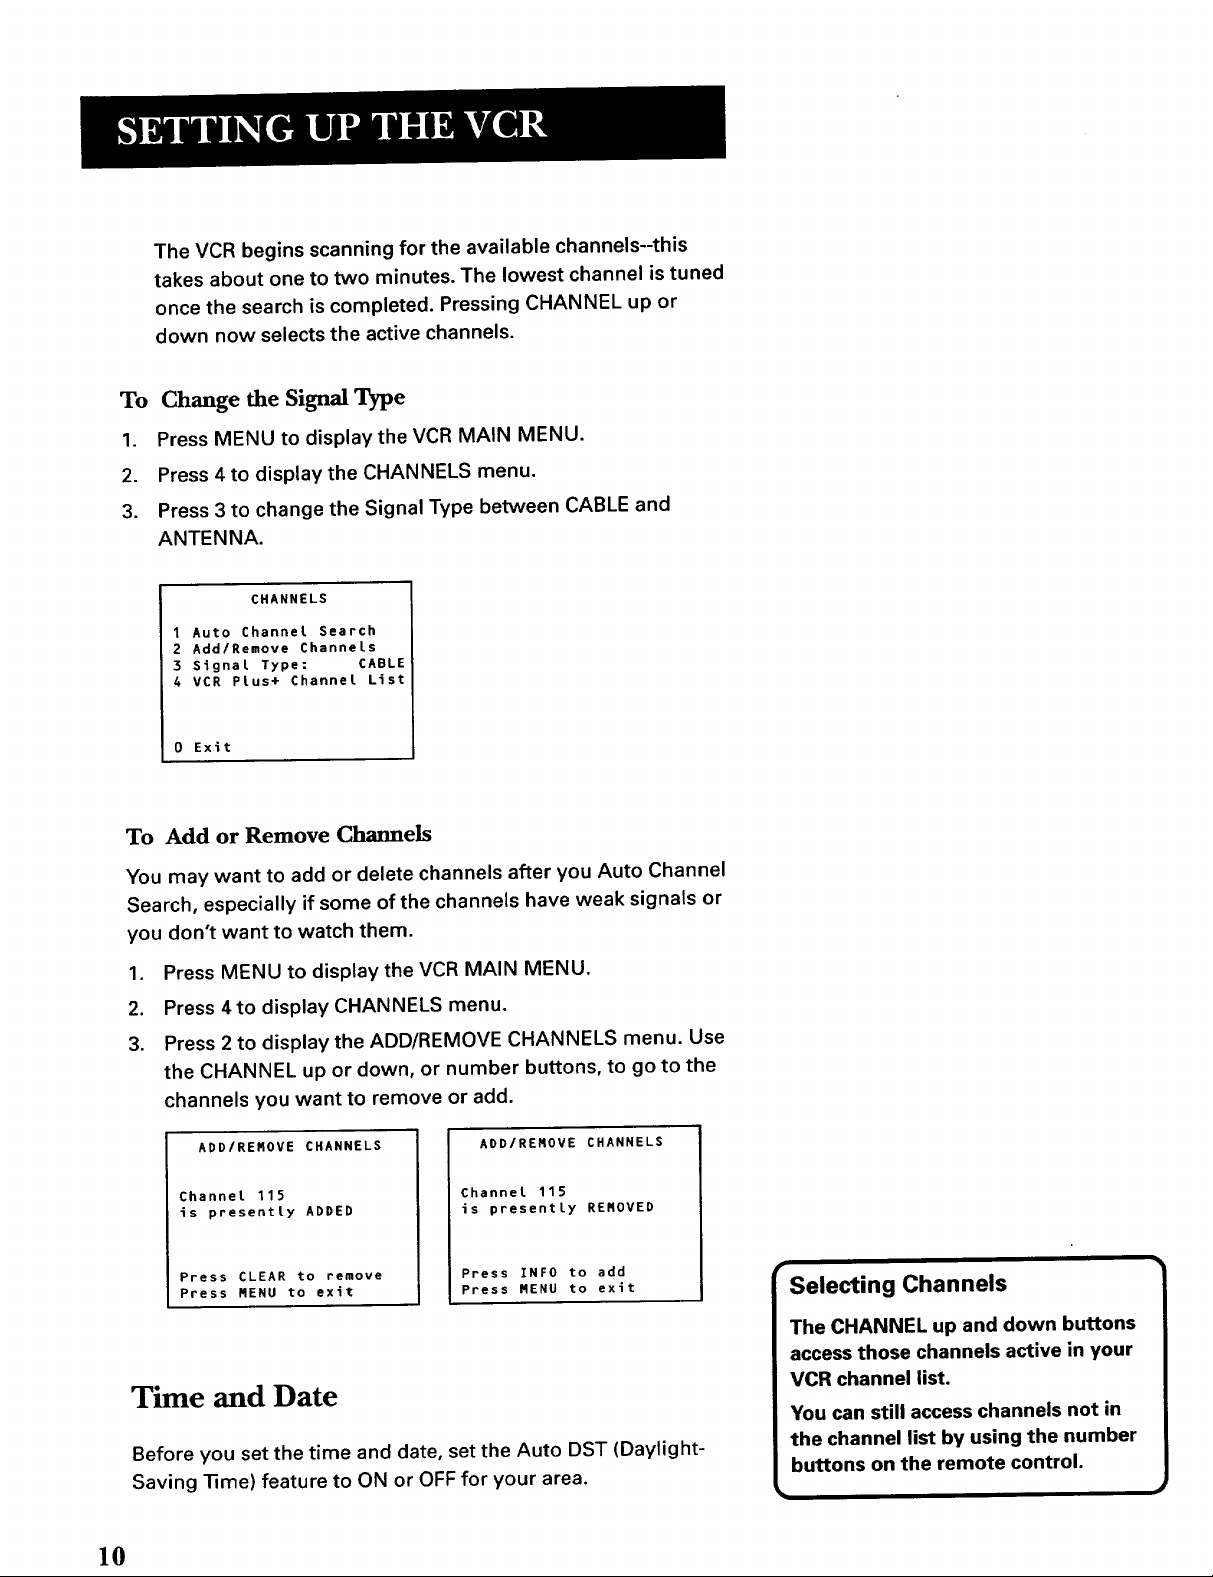
To Change the Signal Type
1. Press MENU to display the VCR MAIN MENU.
2. Press 4 to display the CHANNELS menu.
3. Press 3 to change the Signal Type between CABLE and
ANTENNA.
CHANNELS
1 Auto Channel Search
2 Add/Remove Channels
3 Signal Type: CABLE
4 VCR Plus+ Channel List
0 Exit
To Add or Remove Channels
You may want to add or delete channels after you Auto Channel
Search, especially if some of the channels have weak signals or
you don't want to watch them.
1. Press MENU to display the VCR MAIN MENU.
2. Press 4 to display CHANNELS menu.
3. Press 2 to display the ADD/REMOVE CHANNELS menu. Use
the CHANNEL up or down, or number buttons, to go to the
channels you want to remove or add.
ADD/RENOVE CHANNELS
Channet 115
is presentty ADDED
Press CLEAR to remove
Press MENU to exit
ADD/RENOVE CHANNELS
Channel 115
is presentLy RENOVED
Press INFO to add
Press MENU to exit
Time and Date
Selecting Channels
Before you set the time and date, set the Auto DST (Daylight-
Saving Time) feature to ON or OFF for your area.
10
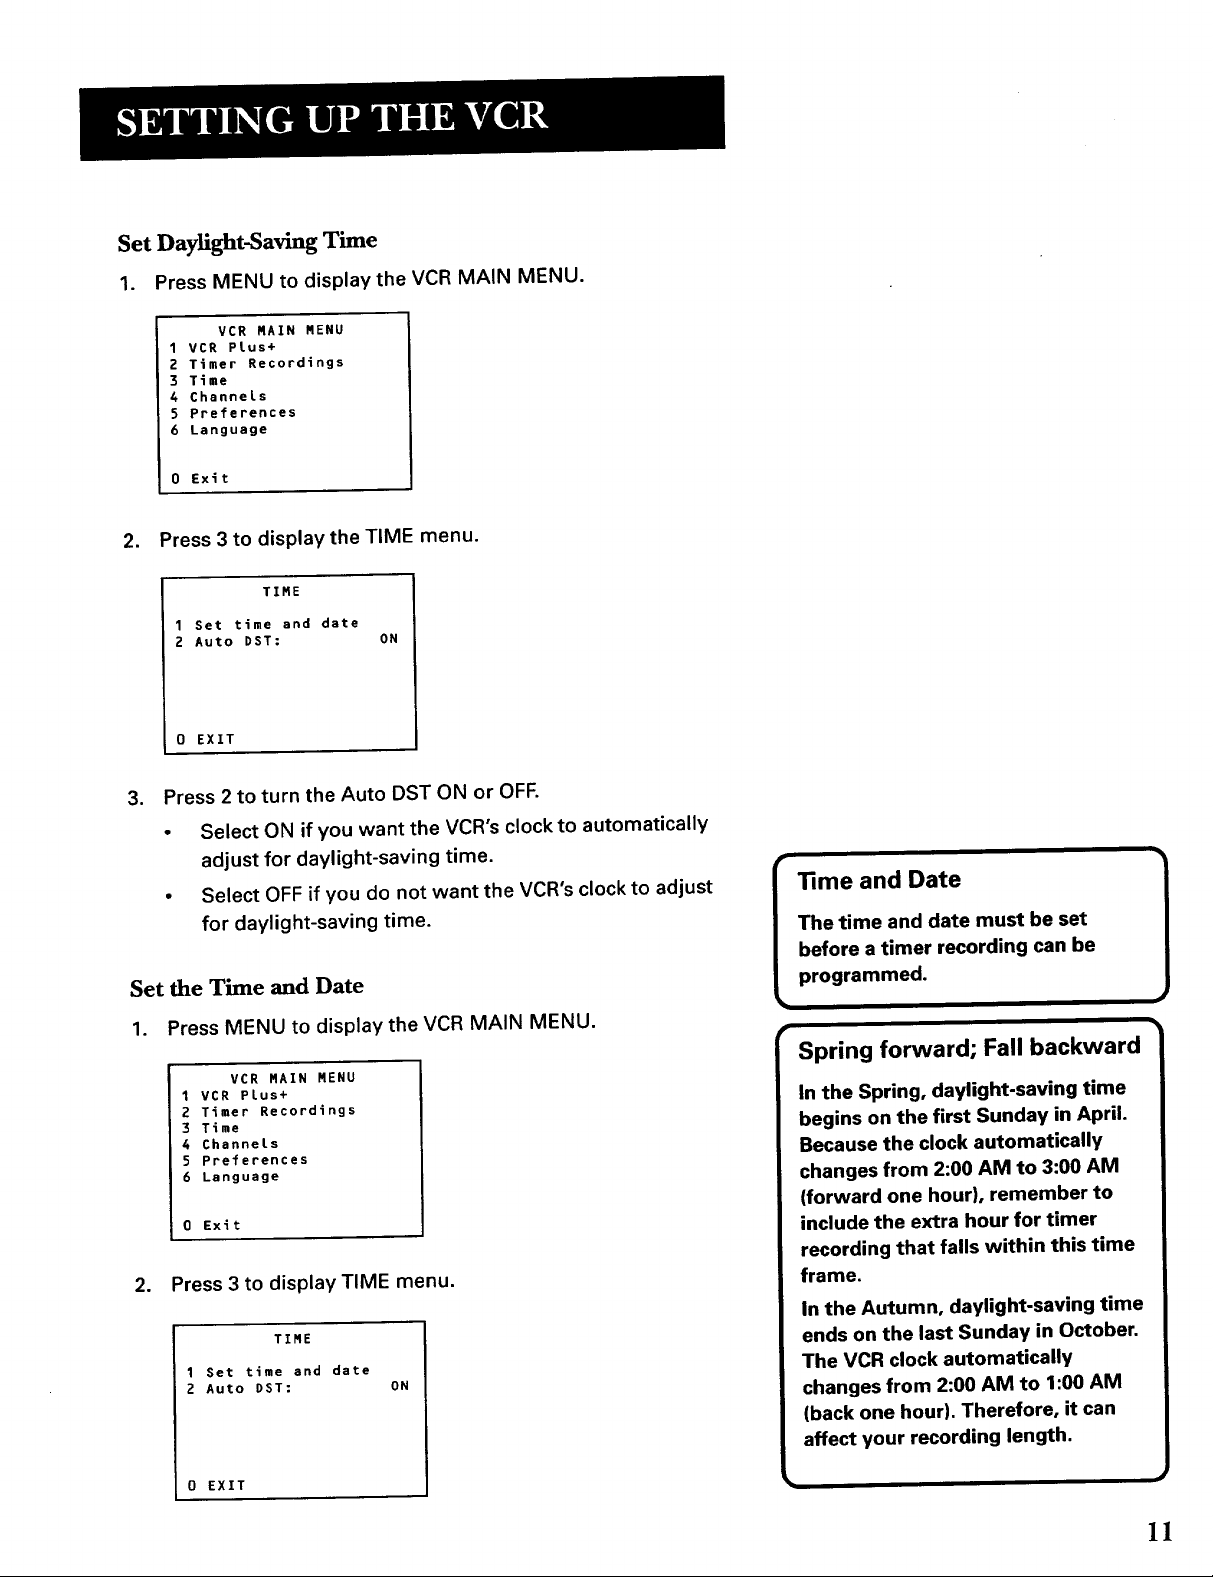
Set Daylight-Saving Time
1. Press MENU to display the VCR MAIN MENU.
VCR MAIN MENU
1 VCR Plus+
2 Timer Recordings
3 Time
4 Channels
5 Preferences
6 Language
0 Exit
2. Press 3 to display the TIME menu.
TIME
1 Set time and date
2 Auto DST: ON
0 EXIT
3. Press 2 to turn the Auto DST ON or OFF.
• Select ON if you want the VCR's clock to automatically
adjust for daylight-saving time.
• Select OFF if you do not want the VCR's clock to adjust
for daylight-saving time.
Set the Time and Date
1. Press MENU to display the VCR MAIN MENU.
VCR MAIN MENU
1VCR Plus+
2 Timer Recordings
3 Time
4 Channels
5 Preferences
6 Language
0 Exit
2. Press 3 to display TIME menu.
TIME
1 Set time and date
2 Auto DST: ON
0 EXIT
_me and Date
The time and date must be set
before a timer recording can be
programmed.
Spring forward; Fall backward
In the Spring, daylight-saving time
begins on the first Sunday in April.
Because the clock automatically
changes from 2:00 AM to 3:00 AM
(forward one hour}, remember to
include the extra hour for timer
recording that falls within this time
frame.
In the Autumn, daylight-saving time
ends on the last Sunday in October.
The VCR clock automatically
changes from 2:00 AM to 1:00 AM
(back one hour). Therefore, it can
affect your recording length.
1
11
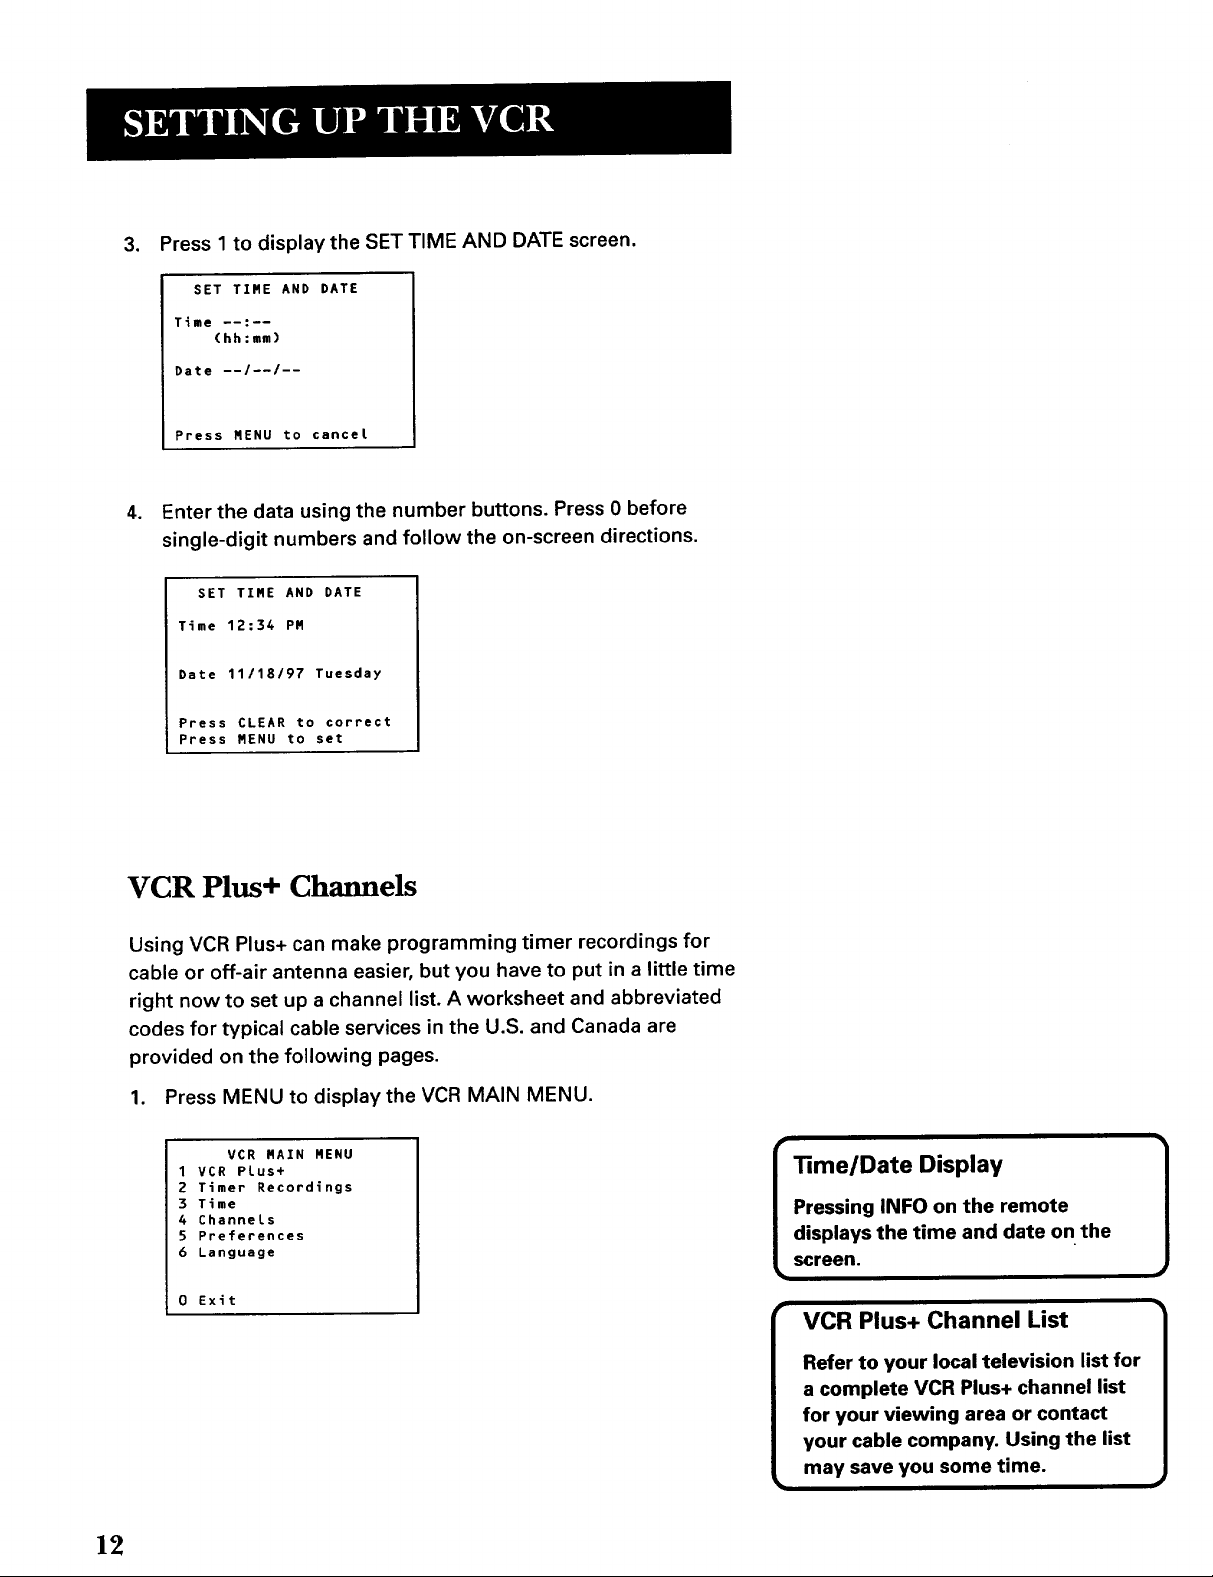
, Press 1 to display the SET TIME AND DATE screen.
SET TIME AND DATE
Time --:--
(hh:mm)
Date --I--I--
Press MENU to cancel
. Enter the data using the number buttons. Press 0 before
single-digit numbers and follow the on-screen directions.
SET TIME AND DATE
Time 12:34 PM
Date 11/18/97 Tuesday
Press CLEAR to correct
Press MENU to set
VCR Plus+ Channels
Using VCR Plus+ can make programming timer recordings for
cable or off-air antenna easier, but you have to put in a little time
right now to set up a channel list. A worksheet and abbreviated
codes for typical cable services in the U.S. and Canada are
provided on the following pages.
1. Press MENU to display the VCR MAIN MENU.
VCR MAIN MENU
1VCR Plus+
2 Timer Recordings
3 Time
4 Channels
5 Preferences
6 Language
0 Exit
13me/Date Display
VCR Plus+ Channel List
12
VCR Plus+ Worksheet
Broadcast or VCR Plus+ Channel Channel Number
Cable-TV Station Number =* You Receive the
Name Station On*
HBO 33
ESPN 34
I
Two-DigitVCR Plus+ Channel
Numbers for CableTV
(USA List)
35 American Movie Classics
39 Arts &-Entertainment
57 Black Entertainment
54 Bravo
42 Cable News Network
45 Cinemax
98 Cinemax 2
37 The Discovery Channel
53 The Disney Channel
63 Entertainment Television
34 ESPN Sports Network
47 The Family Channel
33 Home Box Office
95 Home Box Office 2
96 Home Box Office 3
51 The Learning Channel
46 Lifetime
58 The Movie Channel
48 Music Television
49 The Nashville Network
38 Nickelodeon
64 Nostalgia Television
99 QualityValue Cable
41 Showtime
97 Showtime 2
59 Sports Channel
52 Turner NetworkTelovision
44 USA-Network
62 Video Hits I
93 Viewer's Choice I
94 Viewer's Choice 2
55 WGN Chicago
43 WTBS Atlanta
60 WWOR-NewYork
*Check your local or cable listing for the channel number you receive this station on.
**Check your local listing for broadcast or VCR Plus+ channel number assigned.
See next page for Canadian List
13
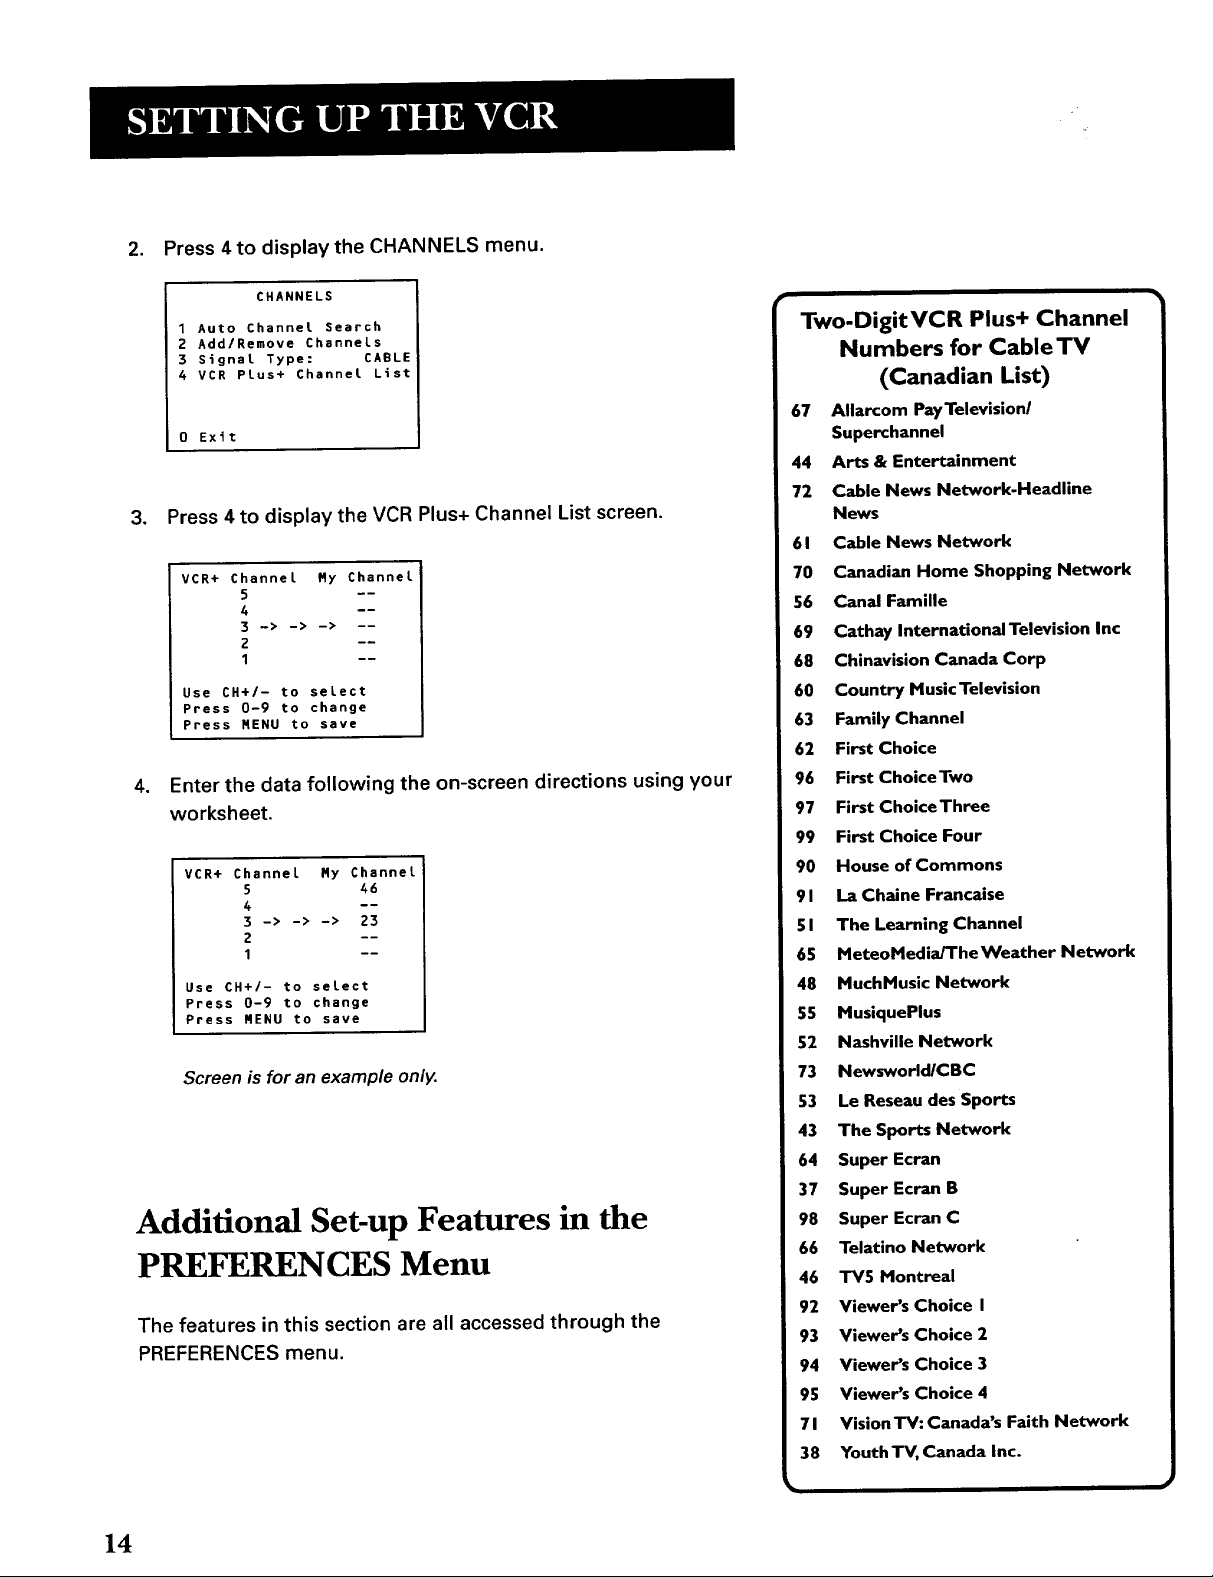
2. Press 4 to display the CHANNELS menu.
CHANNELS
1 Auto Channel Search
2 Add/Remove Channels
3 Signal Type: CABLE
4 VCR PLus+ Channel List
0 Exit
3. Press 4to display the VCR Plus+ Channel List screen.
VCR+
Channel My Channel
5 ----
4 ----
3 -> -> -> --
1 --
Use CH+/- to select
Press 0-9 to change
Press NENU to save
4. Enter the data following the on-screen directions using your
worksheet.
VCR+
Channel My Channel
5 46
4 --
3 -> -> -> 23
1 --
Use CH+/- to select
Press 0-9 to change
Press MENU to save
Screen is for an example only.
Additional Set-up Features in the
PREFERENCES Menu
The features in this section are all accessed through the
PREFERENCES menu.
Two-DigitVCR Plus+ Channel
Numbers for Cable TV
(Canadian List)
67 Allarcom PayTelevision/
Superchannel
44 Arts & Entertainment
72 Cable News Network-Headline
News
61 Cable News Network
70 Canadian Home Shopping Network
56 Canal Famille
69 Cathay InternationaITelevision Inc
68 Chinavision Canada Corp
60 Country MusicTelevision
63 Family Channel
62 First Choice
96 First ChoiceTwo
97 First ChoiceThree
99 First Choice Four
90 House of Commons
91 La Chalne Francaise
51 The Learning Channel
65 MeteoMediaJTheWeather Network
48 MuchMusic Network
55 MusiquePlus
52 Nashville Network
73 Newsworld/CBC
53 Le Reseau des Sports
43 The Sports Network
64 Super Ecran
37 Super Ecran B
98 Super Ecran C
66 Telatino Network
46 TV5 Montreal
92 Viewer's Choice I
93 Viewer's Choice 2
94 Viewer's Choice 3
95 Viewer's Choice 4
71 Vision'rV: Canada's Faith Network
38 Youth TV, Canada Inc.
14
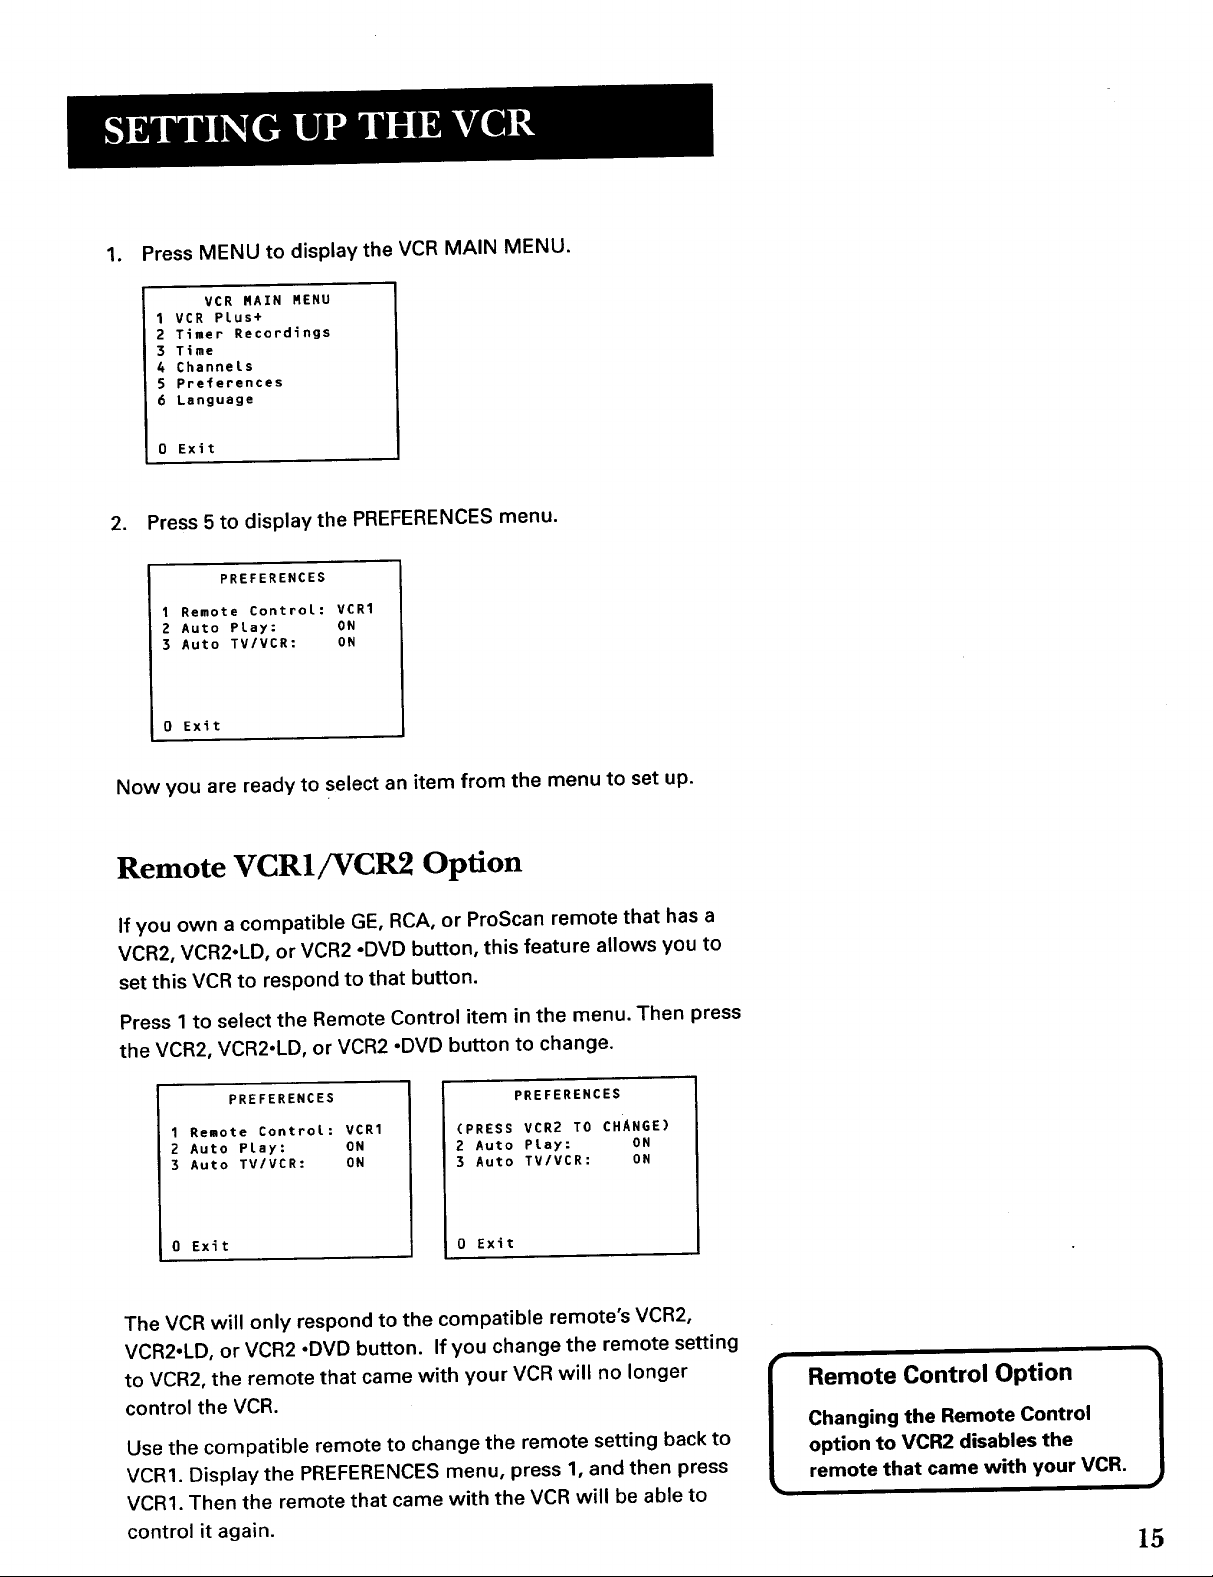
1. Press MENU to display the VCR MAIN MENU.
VCR MAIN MENU
1VCR Plus+
2 Timer Recordings
3 Time
4 Channels
5 Preferences
6 Language
0 Exit
2. Press 5 to display the PREFERENCES menu.
PREFERENCES
1 Remote ControL: VCR1
2 Auto PLay: ON
3 Auto TV/VCR: ON
0 Exit
Now you are ready to select an item from the menu to set up.
Remote VCRI/VCR2 Option
If you own a compatible GE, RCA, or ProScan remote that has a
VCR2, VCR2oLD, or VCR2 °DVD button, this feature allows you to
set this VCR to respond to that button.
Press 1 to select the Remote Control item in the menu. Then press
the VCR2, VCR2°LD, or VCR2 ,DVD button to change.
PREFERENCES
1 Remote Contro[: VCR1
2 Auto PLay: ON
3 Auto TV/VCR: ON
0 Exit
The VCR will only respond to the compatible remote's VCR2,
VCR2,LD, or VCR2 °DVD button. If you change the remote setting
to VCR2, the remote that came with your VCR will no longer
control the VCR.
Use the compatible remote to change the remote setting back to
VCR1. Display the PREFERENCES menu, press 1, and then press
VCRI. Then the remote that came with the VCR will be able to
control it again.
PREFERENCES
(PRESS VCR2 TO CHANGE)
2 Auto PLay: ON
3 Auto TV/VCR: ON
0 Exit
½
Remote Control Option
Changing the Remote Control
option to VCR2 disables the
I
remote that came with your VCR.
i
15
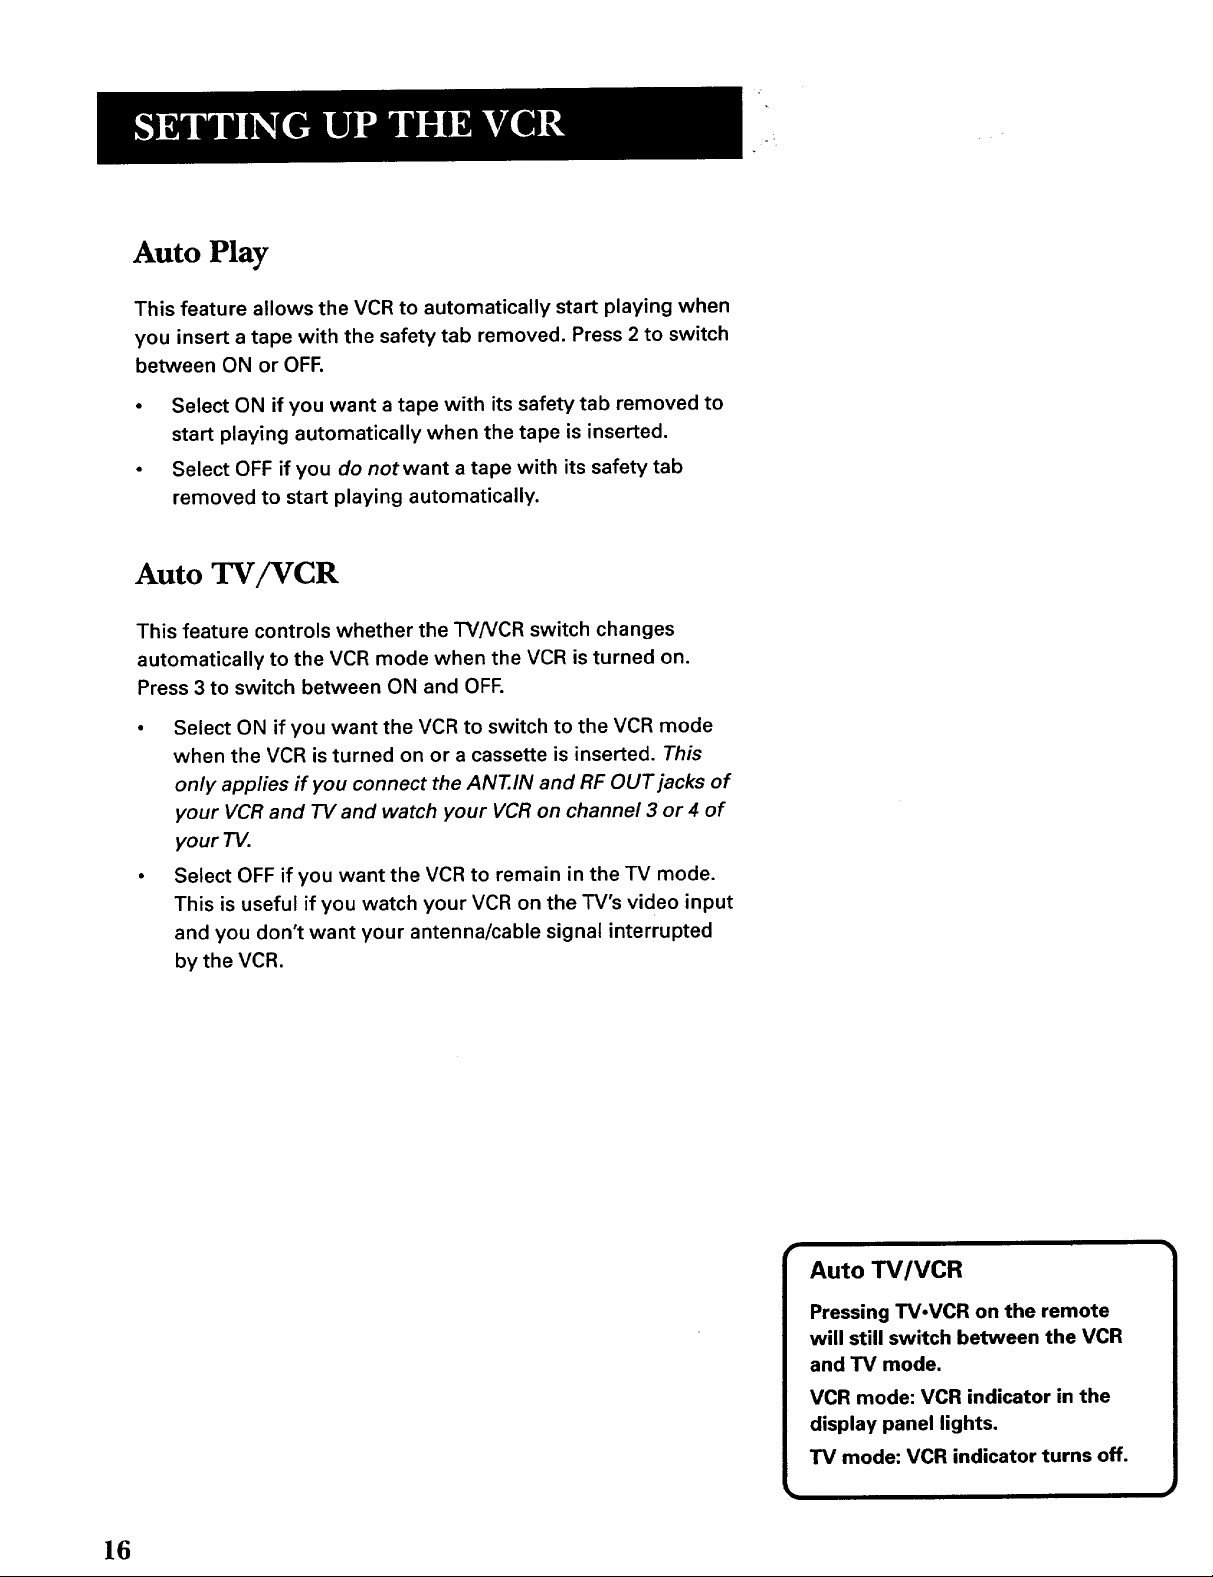
Auto Play
This feature allows the VCR to automatically start playing when
you insert a tape with the safety tab removed. Press 2 to switch
between ON or OFF.
• Select ON if you want a tape with its safety tab removed to
start playing automatically when the tape is inserted.
• Select OFF if you do not want a tape with its safety tab
removed to start playing automatically.
Auto TV/VCR
This feature controls whether the "I'V/VCRswitch changes
automatically to the VCR mode when the VCR is turned on.
Press 3 to switch between ON and OFF.
4"
• Select ON if you want the VCR to switch to the VCR mode
when the VCR is turned on or a cassette is inserted. This
only applies if you connect the ANT.IN and RF OUT jacks of
your VCR and 73/and watch your VCR on channel 3 or 4 of
your TV.
• Select OFF if you want the VCR to remain in the TV mode.
This is useful if you watch your VCR on the TV's video input
and you don't want your antenna/cable signal interrupted
by the VCR.
16
 Loading...