

RCA TX-TVD809 User Manual
TV/DVD
User's G ide
Changing Entertainment. Hn.
i p@rtan mnf@r ati@n
RISK OF ELECTRICSHOCK
DO NOT OPEN
Caution: To reduce the risk of electric
shock, do not remove cover (or back). No
user serviceable parts inside. Refer
servicing to qualified service personnel.
_ This symbol indicates
important instructions _IL
accompanying the
product.
This symbol indicates
"dangerous voltage" inside
the product that presents a
risk of electric shock or
personal injury.
CAUTION
THIS PRODUCT UTILIZESA LASER. USE OF
CONTROLS OR ADJUSTMENTS OR
PERFORMANCE OF PROCEDURESOTHER THAN
THOSE SPECIFIED HEREIN MAY RESULT IN
HAZARDOUS RADIATION EXPOSURE. DO NOT
OPEN COVERSAND DO NOT REPAIR
YOURSELF. REFERSERVICING TO QUALIFIED
PERSONNEL.
WARNING
To reduce the risk of fire or electric shock,
do not expose this product to rain or
moisture. No objects filled with liquids,
such as vases, shall be placed on the
apparatus.
Notes:
This DVD player is designed and
manufactured to respond to the Region
Management Information. If the Region
number of a DVD disc does not
correspond to the Region number of this
DVD player, this DVD player cannot play
the disc. The Region number for this DVD
player is Region No I.
This device is protected by U.S. patent
numbers 4,631,603 and 4,577,216 and
4,819,098 and other intellectual property
rights. The use of Macrovision's copy
protection technology in the device must
be authorized by Macrovision and is
intended for home and other limited pay-
per-view uses only, unless otherwise
authorized in writing by Macrovision.
Reverse engineering or disassembly is
prohibited.
Caution: To prevent electric shock, match wide blade
of plug to wide slot, fully insert.
Attention: Pour _viter les chocs electriques, introduire
la lame la plus large de la fiche dans la borne
correspondante de la prise et pousser jusqQ au fond.
Refer to the identificationlrating label located on the back panel of
your product for its proper operating voltage.
FCCRegulations state that unauthorized changes or modifications to
this equipment may void the user's authority to operate it.
Caution: Using video games or any external accessory with
fixed images for extended periods of time can cause them to be
permanently imprinted on the picture tube (or projection TV
picture tubes). ALSO, some network/program Iogos, phone
numbers, etc. may cause similar damage. This damage is not
covered by your warranty.
Cable TV Installer: This reminder is provided to call your attention to
Article 820-40 of the National Electrical Code (Section 54 of the
Canadian Electrical Code, Part 1)which provides guidelines for proper
grounding and, in particular, specifies that the cable ground shall be
connected to the grounding system of the building as close to the
point of cable entry as practical.
I CLASS 1
LASER
PRODUCT
Product Registration
Pleasefill out the productregistration card (packed separately)and return it immediately.Returningthecard allows us to contact
you ifneeded.
Product Information
Keep your sales receipt to obtain warranty parts and service and for proof of purchase. Attach it here and record the serial and
model numbers in case you need them, These numbers are located on the product.
Model No. Serial No. PurchaseDate:
Dealer/AddresslPhone:
G-LINK, VCR Plus+, C3,PlusCode, GUIDE Plus+, and GUIDE Plus+ Gold are trademarks of Gemstar Development
Corporation.
The GUIDE Plus+ Gold system is manufactured under license from Index Systems Inc.
THOMSON MULTIMEDIA INC. AND GEMSTAR ARE NOT IN ANY WAY LIABLE FOR THE ACCURACY OF THE
PROGRAM INFORMATION PROVIDED BY THE GUIDE PLUS+ SYSTEM. IN NO EVENT SHALL THOMSON
MULTIMEDIA INC. OR GEMSTAR BE LIABLE FOR ANY AMOUNT REPRESENTING LOSS OF PROFITS, LOSS OF
BUSINESS, OR INDIRECT, SPECIAL, OR CONSEQUENTIAL DAMAGES IN CONNECTION WITH THE PROVISION
OR USE OF ANY INFORMATION EQUIPMENT, OR SERVICES RELATING TO THE GUIDE PLUS+ SYSTEM.
Key Features Overview
Your TV/DVD is equipped with some special l_atures that will add to your viewing experience.
The t_llowing inl_rmation summarizes some of these t_.atures.
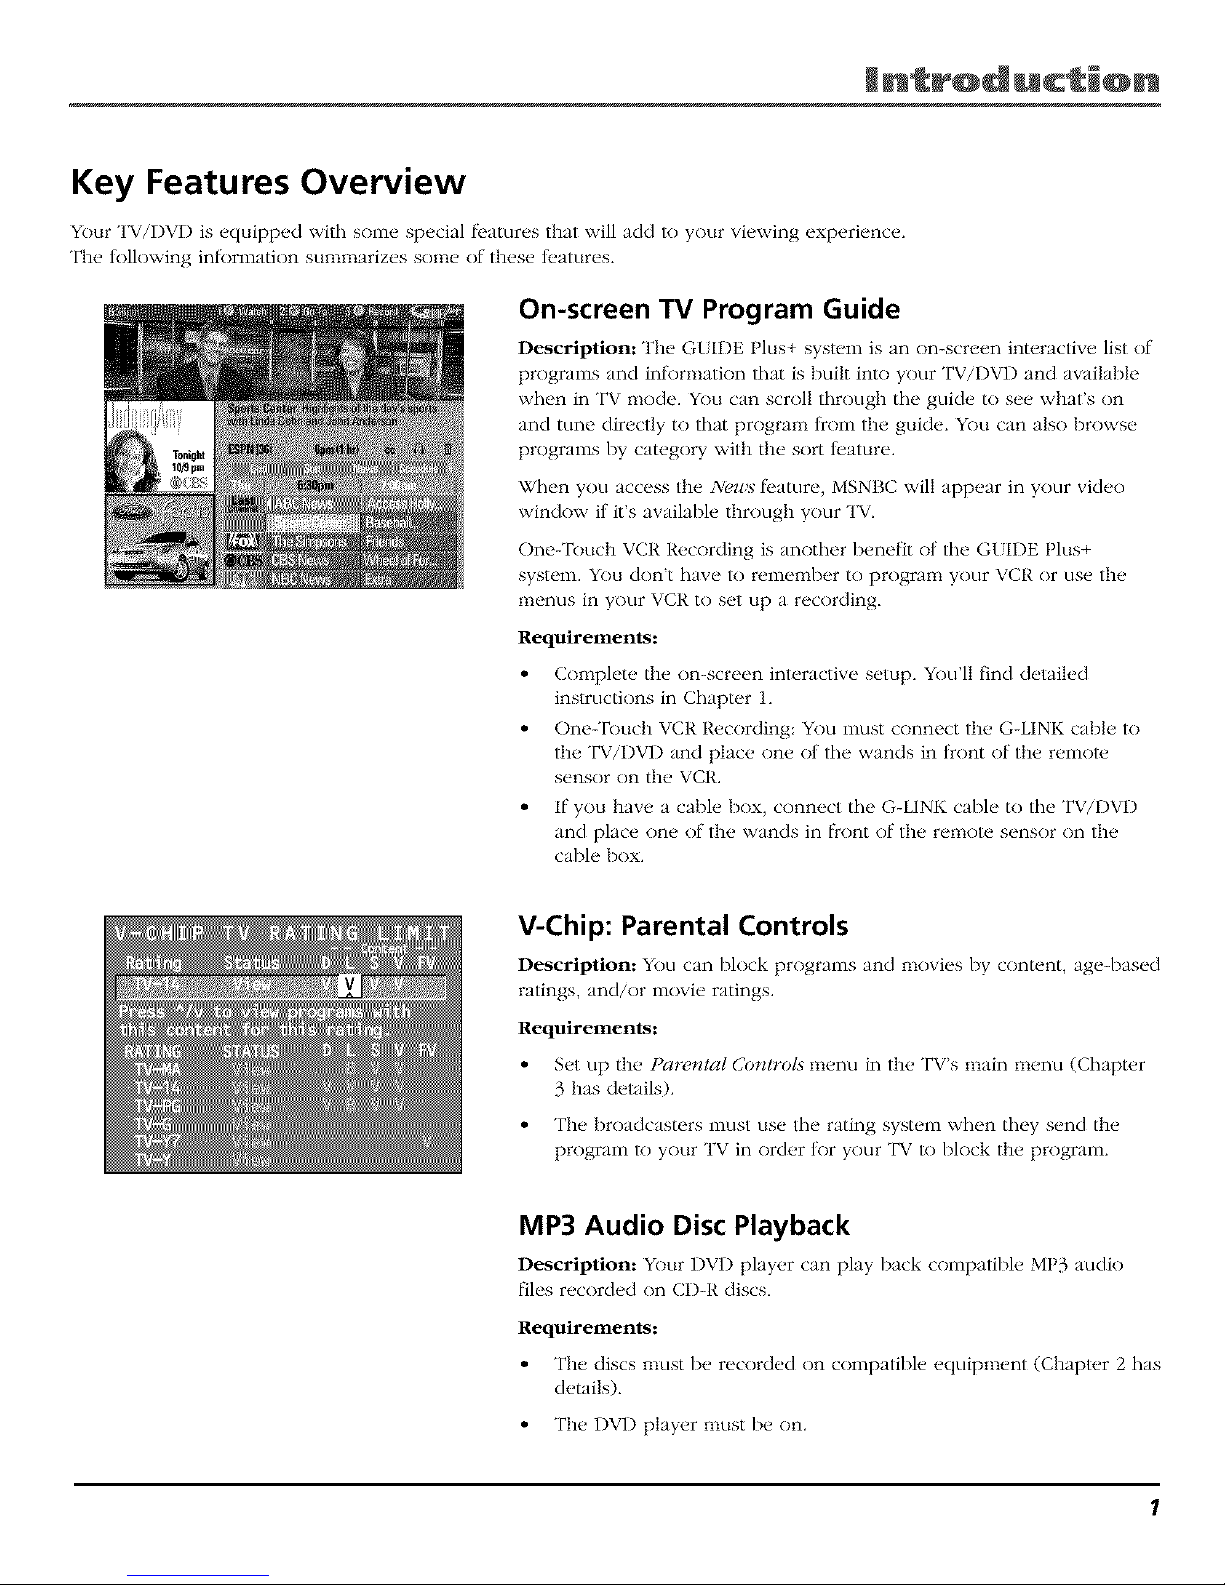
On-screen TV Program Guide
Description: The GLIDE Plus+ systvm is an on-screen interactive list of
programs and inll)rmation that is built into your TViDVD and available
when in TV mode. You can scroll through tile guide to see what's on
and tune directly to that program flcom the guide. You can also browse
programs by category with the sort tUature.
When you access the News l_ature, MSNBC will appear in your vide()
window if it's awtilable through your TV.
One-Touch VCR Recording is another benefit of tile GUIDE Plus+
system. You don't have to remenlber to program your VCR or use the
menus in your VCR to set up a recording.
Requirements:
• Complete the on-screen interactive setup. You'll find detailed
instructions in Chapter 1.
• One-'Rmch VCR Recording: You nmst connect the G-LINK cable to
the TViDVD and place one of tile wands in front of the remol_.
sensor on the VCR.
• If you have a cable box, connect tile G-LINK cable to tile TV/DVD
and place one of the wands in front of the remote sensor on the
cable box.
V-Chip: Parental Controls
Description: You can block programs and movies by content, age-based
ratings, and/or movie ratings.
Requirements:
• Set up the Parental Control._ menu in the TV's main menu (Chapter
3 has details).
• The broadcasters nmst use tile rating system when they send the
program lo your TV in order tk>ryour TV lo block the program.
MP3 Audio Disc Playback
Description: Your 1)VI) player can play back compatible MP3 audio
files recorded on CD-R discs.
Requirements:
• The discs must be recorded on compatible equipmvnt (Chapl_,r 2 has
details).
• The DVD player must be on.
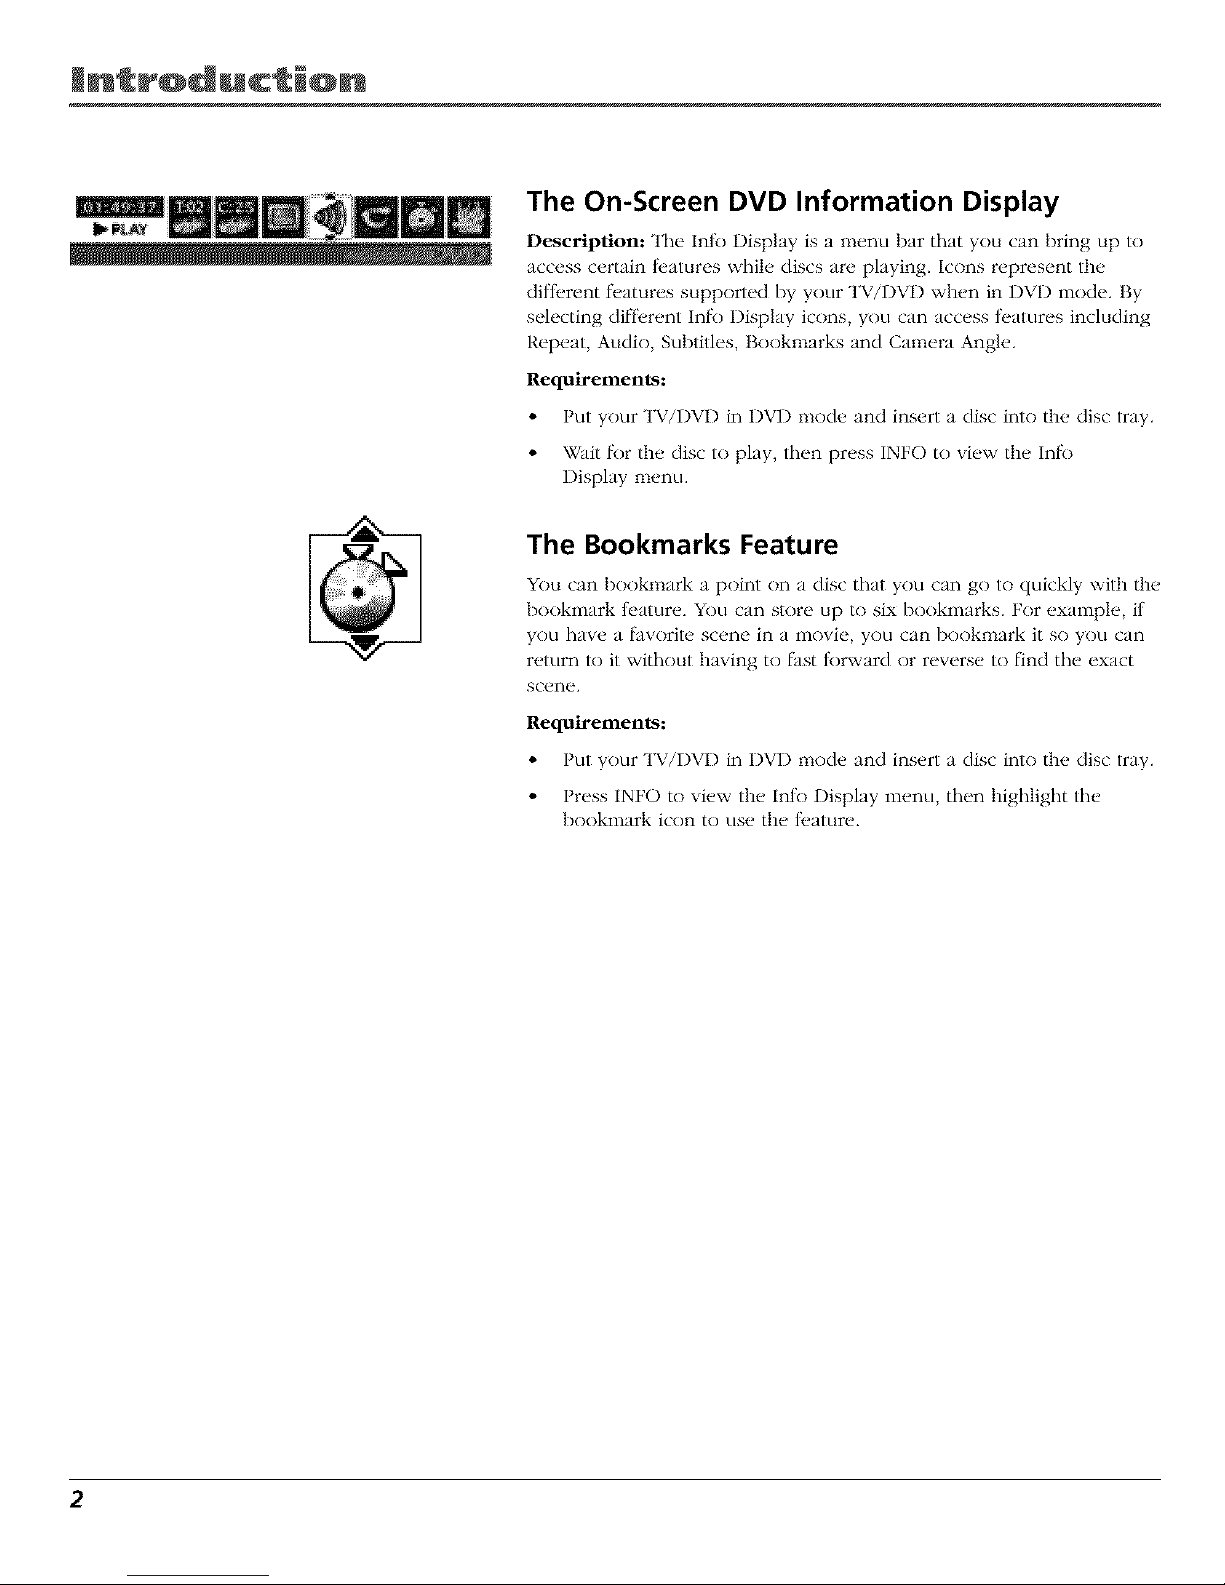
The On-Screen DVD Information Display
Description: The Inl_) Display is a menu bar that you can bring tip to
access certain li:atures while discs are playing. Icons represent tile
difll.rent fl.atures supported by your TV/DVD when in DVD mode. By
selecting dil]k_rent inlk) Display icons, you can access t_atures including
Repeat, Audio, Subtitles, Booknlarks and Canlera Angle.
Requirements:
• Put your TV/DVD in DVD mode and insert a disc into tile disc tray.
• Wait lk)r the disc to play, then press INFO to view the Inl_>
Display menu.
The Bookmarks Feature
You can booknmrk a point on a disc that you can go to quickly with the
bookmark t_ature. You can store up to six bookmarks. For example, if
you have a l_vorite scene in a movie, you can bookmark it so you can
return R) it without having to lhst tk)rward or reverse to lind the exact
scene.
Requirements:
• Put your TV/DVD in DVD mode and insert a disc into the disc tray.
• Press INFO to view the Inlk) Display menu, then highlight the
bookmark icon to use the tl.ature.
2
bJe @f C@ntents
Introduction
Key Features Overview .................................................................................................... 1
On-screen TV Program Guide .................................................................................... 1
V-Chip: Parental Controls ........................................................................................... 1
MP3 Audio Disc Playback ........................................................................................... 1
The On-Screen DVD Information Display ................................................................. 2
The Bookmarks Feature ............................................................................................. 2
Chapter 1: Connections & Setup
Things to Consider Before You Connect ......................................................................... 8
Protect Against Power Surges ................................................................................... 8
Protect Components from Overheating ................................................................... 8
Position Cables Properly to Avoid Audio Interference ............................................ 8
Important Stand and Base Safety Information ........................................................ 8
Use Indirect Light ....................................................................................................... 8
Connection Pictures ................................................................................................... 8
Types of Discs Your TV/DVD will Play ........................................................................ 8
Choose Your Connection .................................................................................................. g
TV/DVD Only ................................................................................................................... 10
TV/DVD + VCR................................................................................................................. 11
TV/DVD + Receiver ......................................................................................................... 13
Why You Should Connect This G-LINK Cable ............................................................... 14
How to Find the Remote Sensor ............................................................................. 14
Placing the G-LINK Wands ....................................................................................... 14
Plug in the TV/DVD ......................................................................................................... 15
Put Batteries in the Remote ........................................................................................... 15
How to Use the Remote Control to Complete the Interactive Setup ......................... 15
Turn on theTV ................................................................................................................ 15
Complete the Interactive Setup ..................................................................................... 16
Set the Menu Language .......................................................................................... 16
Complete Auto Channel Search .............................................................................. 16
The GUIDE Plus+ System Setup ................................................................................ 16
What to Expect ............................................................................................................... 21
Set the DVD Menu Language ........................................................................................ 21
Setting Other Options .................................................................................................... 21
The Buttons on the Remote Control ............................................................................. 22
Chapter 2: Playing DVDs
Regional Coding ............................................................................................................. 26
Using Different Menus ................................................................................................... 26
Loading and Playing Discs ............................................................................................. 26
To Load and Play a Disc ............................................................................................ 27
Manufactured under license from Dolby Laboratories. "Dolby" and the double-D symbol are trademarks of Dolby Laboratories.
Confidential unpublished works. @1992-1997 Dolby Laboratories, Inc. All rights reserved.
DTSis a registered trademark of Digital Home Theater Systems,Inc.
3
bJe @f C@ntents
Using a Disc Menu .......................................................................................................... 27
Using the On-Screen Info Display ................................................................................. 29
Time Display .............................................................................................................. 30
Selecting a Title ........................................................................................................ 30
Selecting a Chapter .................................................................................................. 30
Selecting Subtitles .................................................................................................... 31
Changing the Audio Language ............................................................................... 31
Using the Repeat Feature ........................................................................................ 32
Using Bookmarks ...................................................................................................... 33
Changing the Camera Angle ................................................................................... 34
Disc Playback Features Using the Remote .................................................................... 34
Chapter 3: Using the TV's Features
About the GUIDE Plus+ System ..................................................................................... 38
Downloading Data ................................................................................................... 38
Getting In & Out of the GUIDE Plus+ System ......................................................... 39
The GUIDE Plus+ System Menus .............................................................................. 39
Grid Guide ................................................................................................................ 39
Sort ............................................................................................................................ 41
News .......................................................................................................................... 42
Schedule .................................................................................................................... 42
Messages ................................................................................................................... 43
Channels ................................................................................................................... 44
Setup ......................................................................................................................... 44
How to Get More Information About an Advertisement or a Program ............... 45
GUIDE Plus+ Menu Items ............................................................................................... 45
Channel Banner .............................................................................................................. 46
Why You Should Use the Auto Tuning Feature ............................................................ 46
How to Set Up the Auto Tuning Feature ................................................................ 46
Parental Controls and V-Chip ......................................................................................... 48
How V-Chip Works ................................................................................................... 48
V-Chip TV Rating Limit ............................................................................................. 49
Blocking Specific Content Themes .......................................................................... 51
Viewing Specific Content Themes ........................................................................... 52
V-Chip Movie Rating Limit ....................................................................................... 53
V-Chip Unrated Program Block ............................................................................... 54
Channel Block ........................................................................................................... 54
Front Panel Block ..................................................................................................... 54
Lock/Unlock Parental Controls ................................................................................ 54
Chapter 4: Using the DVD's Menu System
The DVD's Menu System ................................................................................................ 56
Two Types of Menu Items: Path and Action ........................................................... 56
The Play/Resume Play Option ........................................................................................ 56
The Play Mode Menu ..................................................................................................... 57
Selecting a Play Mode .............................................................................................. 57
How to Create a Program ........................................................................................ 58
4
bJe @f C@ntents
Editing a Program .................................................................................................... 58
AutoPlay ................................................................................................................... 59
Dub Assist ................................................................................................................. 59
IntroScan ................................................................................................................... 59
The Lock Menu ................................................................................................................ 60
Locking Your DVD .................................................................................................... 60
Unlocking Your DVD ................................................................................................ 60
Changing Your Password ......................................................................................... 60
Setting the Ratings Limits ........................................................................................ 61
Unrated Titles ........................................................................................................... 62
System Test ................................................................................................................ 62
The Display Menu ........................................................................................................... 63
TV Image ................................................................................................................... 63
On-Screen Displays ................................................................................................... 64
The Sound Menu ............................................................................................................ 64
Digital Output .......................................................................................................... 64
Sound Logic .............................................................................................................. 65
The Languages Menu ..................................................................................................... 66
Glossary ........................................................................................................................... 67
Code List .......................................................................................................................... 68
Chapter 5: Using the TV's Menu System
How to Use Your TV's Menu System ............................................................................. 70
Audio Menu .................................................................................................................... 70
Picture Quality Menu ..................................................................................................... 71
Screen Menu ................................................................................................................... 72
Using Closed Captioning ................................................................................................ 72
Closed-Caption Modes ............................................................................................. 72
Channel Menu ................................................................................................................. 73
Time Menu ...................................................................................................................... 74
Chapter 6: Playing Other Types of Discs
Using the Info Display .................................................................................................... 76
Using the Time Display ............................................................................................. 77
Selecting a Specific Track ......................................................................................... 77
Selecting a Specific Index (Available only on Video CDs) ...................................... 77
Selecting a Play Mode (Available only on Audio CDsand MP3s) .......................... 77
Using the Repeat Feature ........................................................................................ 79
Changing the Audio Channel Output (Available only on Video CDs) .................. 80
Using IntroScan (Available only on Audio CDs and MP3s) .................................... 80
Using Bookmarks (Available only on Audio CDs) ................................................... 80
Dub Assist (Available only on Audio CDs)............................................................... 82
5
bJe @f C@ntents
Chapter 7: Other Information
Troubleshooting .............................................................................................................. 84
Care and Cleaning .......................................................................................................... 89
Handling Cautions .................................................................................................... 89
Formation of Condensation .................................................................................... 89
Handling Discs .......................................................................................................... 90
Cleaning Discs........................................................................................................... 90
The Front of Your TV/DVD ............................................................................................. 91
Universal Remote ........................................................................................................... 92
Test the Remote ........................................................................................................ 92
Program the Remote ...................................................................................................... 92
Automatic Code Search ........................................................................................... 92
Direct Entry ............................................................................................................... 93
Operate Components after Programming the Remote ............................................... 93
Codes ......................................................................................................................... 94
Limited Warranty ............................................................................................................ 95
Accessory Order Form .................................................................................................... 97
Index .............................................................................................................................. 100
6
t
Connections 8t Setup
Chapter Overview:
• Things to Consider Before You Connect
• Choose Your Connection
• Connections
• Why You Should Connect This G-LINK Cable
• Plug in the TV/DVD
• Put Batteries in the Remote
• How to Use the Remote Control to Complete the
Interactive Setup
• Turn on the TV
• Complete the Interactive Setup
• Set the DVD Menu Language
• The Remote Control
Changing Entertainment. tin.
_J
G_hics cow,rained within this p_blicatio_ arej_r r_rese_t_tio_ only,.
7
C@nnect @ns Setup
Things to Consider Before You Connect
Protect Against Power Surges
• Connect all components beR>re you plug any of their power cords into fl_e wall outlet.
• Turn off the TViDVD and/or component belk>re you connect or disconnect any cables.
• Make sure all antennas and cables are properly grounded. R*.t>r lo the Important Sal_.guards sheet packed
with your TV/DVD.
Protect Components from Overheating
• Don't block ventilation holes on any of the components. Arrange the components so that air can circulate
tYeely.
• Don't stack components.
• When you place componenls in a stand, make sure you allow adequate ventilation.
• If you connect an audio receiver or amplifier, place it on the lop shelf so the heated air tYom it won't [low
around other c<)mponents.
Position Cables Properly to Avoid Audio Interference
• Insert each cabl_, firmly into the designated jack.
• If you place components above the TV/DVD, route all cables down the side of the back of the TViDVD
instead of straight down the middle of the back of the TV/DVD.
• If your anwnna uses 300-ohm twin lead cables, do not coil the cables. Also, keep the twin lead cables
away tYom audio/video cables.
Important Stand and Base Safety Information
Choose the location t_>ryour TV/I)VI) carefully. Place the TV/I)V1) on a stand or base that is of adequate size
and strength to prevent the TV/DVD tYom being accidentally tipped over, pushed off, or pulled ofl_ This
could cause personal injury and/or damage the TViDVD. Rel}erto the important Sail.guards sheet packed with
your TViDVD.
Use Indirect Light
Don't place the TV/1)V1) wh_,re sunlight or room lighting will be direcwd toward the screen. Use soil or
indirect lighting.
Connection Pictures
Audio/video cables are usually bundled together. For better visibility, the connection pictures in this book
show each cable separately (audio left, audio right, and video).
Types of Discs Your TV/DVD will Play
• DVD discs - DVD discs contain high quality picture and sound content.
• Audio discs - Audio CDs contain nmsical or sound content only.
• Video CD discs - Like DVD video discs, Video CDs contain picture and sound content. The difl_.rence is
the amount of inl_)rmation that can be stored on the disc.
• MP3 discs - A disc that contains audio files (R)r example, a CD-R with downloaded MP3 files).
8 Chapter I

C@nnect @ns Setup
Choose Your Connection
There are several ways to connect your TV/DVD, Please use the following chart to determine
which connection is best [k)r you. Proceed to the appropriate page and connect your TV/DVD.
Components
Connection Title
TV/DVD Only
TV/DVD + VCR
TV/DVD + Receiver
Cables Needed
• Coaxial
• Coaxial
• Audio/video
• G-Link
• Coaxial
• Audio/video
• Optical
• G-Link
page10
page 11
pages 12-13
Cables Needed to Connect Components to Your TV/DVD
The pictures below show tile cables needed lor tile connections represented in this book.
Notes: AudioNideo cables (A!V cables for short) are usually sold asa bundled set, but the connection
pictures in this book show each cable separately for better visibility.
Please locate the G-LINK cable (provided) when you're getting ready to set up your TV/DVD. You need
to connect this cable to your TV/DVD, and to your VCR and/or cable box in order for all of the
features of the program guide to work properly.
This TV/DVD's optical digital output jack fully complies with the international standard governing this
type of jack (IEC958), and is designed for connection to a Dolby Digital (AC-3 _or PCM) receiver or
Dolby Digital (AC-3 or PCM) decoder. Older equipment, some of which is not fully compliant with
IEC958, may not be compatible with the Dotby Digital bitstream. Such a connection using anything
other than Dolby Digital AC-3 or PCM receiver or decoder could create a high noise level, causing
damage to headphones or speakers.
G-UNK cable Audio/Video cables
Coaxial cable Optical cable
Chapter I 9
C@nnect @ns Setup
TV/DVD
R_IOEO G LINK
CABLE
OR
OFF-AIR SIGNAL
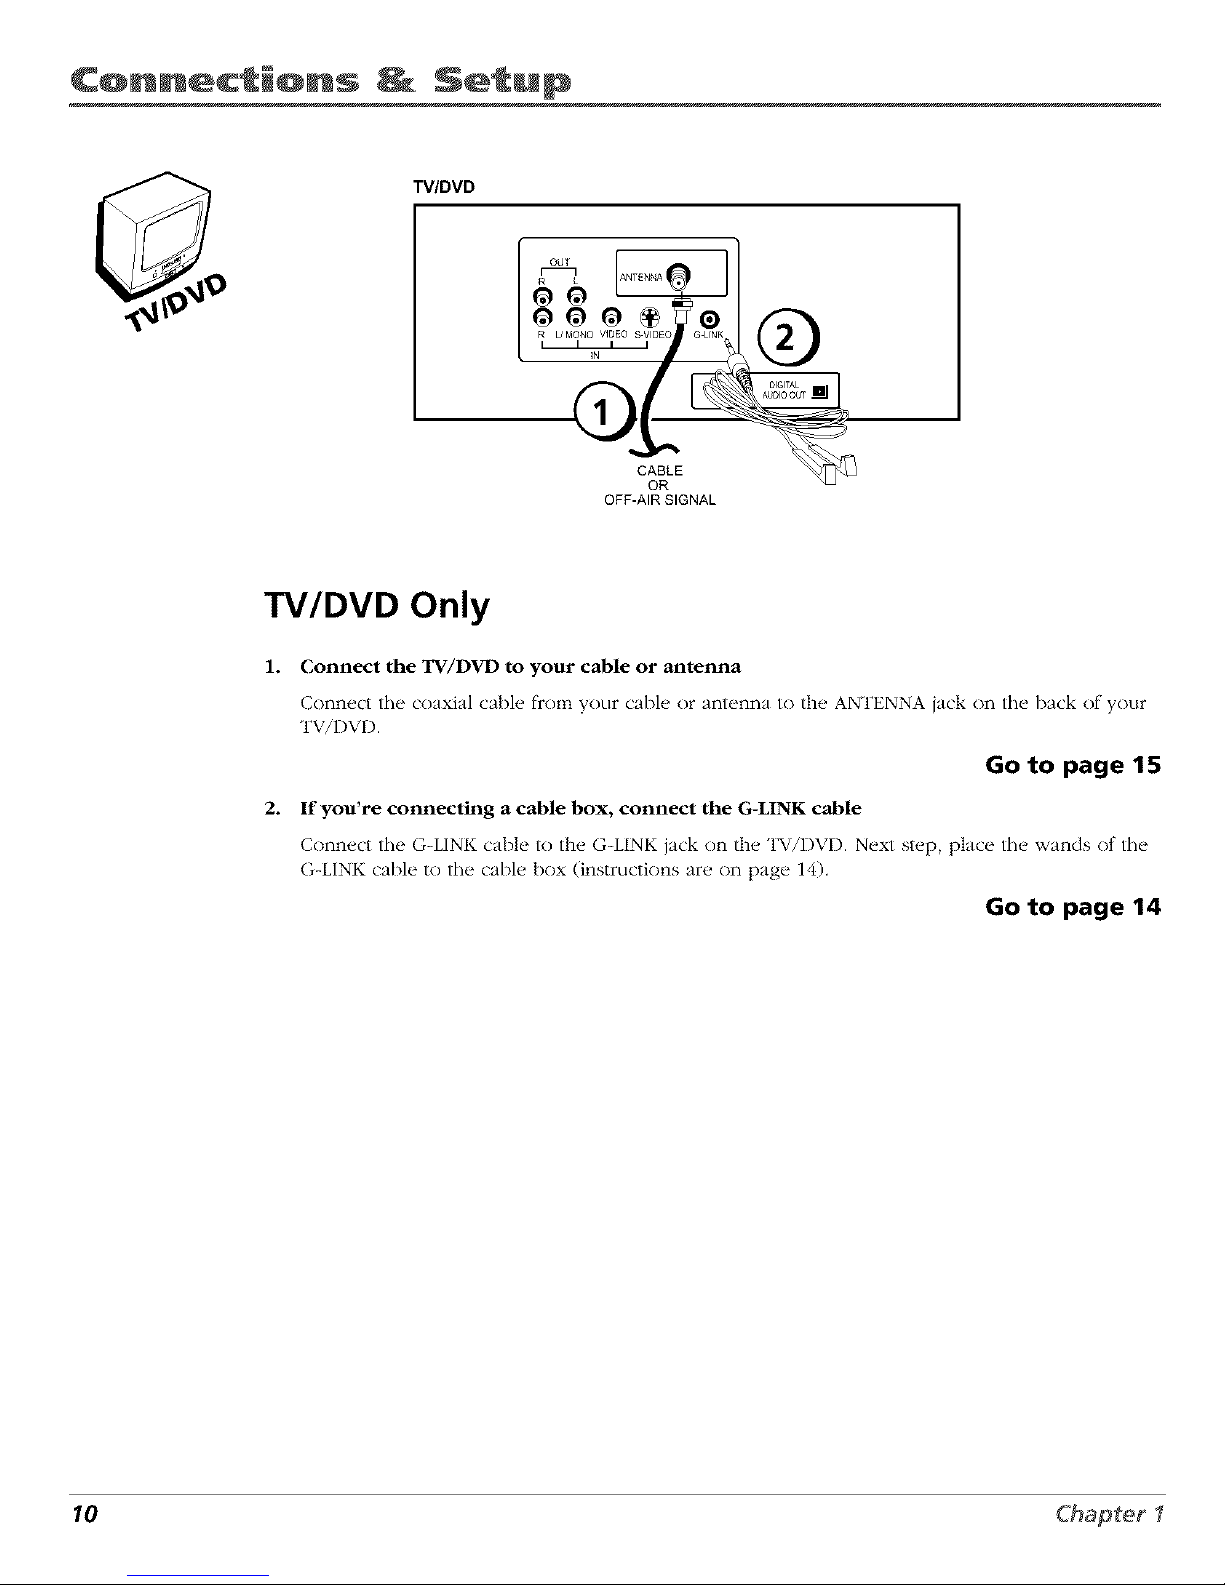
TV/DVD Only
1. Connect the TV/DVD to your cable or antenna
Connect the coaxial cable flcom your cable or antenna to the ANTENNA jack on the back of your
TV/DVD.
Go to page 15
2. If you're connecting a cable box, connect the G-LINK cable
Connect the G-LINK cable to the G-LINK jack on thv TV/DVD. Next st.p, place thv wands of the
G-LINK cable to the cable box (instructions are on page 14).
Go to page 14
10 Chapter I
C@nnect @ns Setup
TV/DVD
©
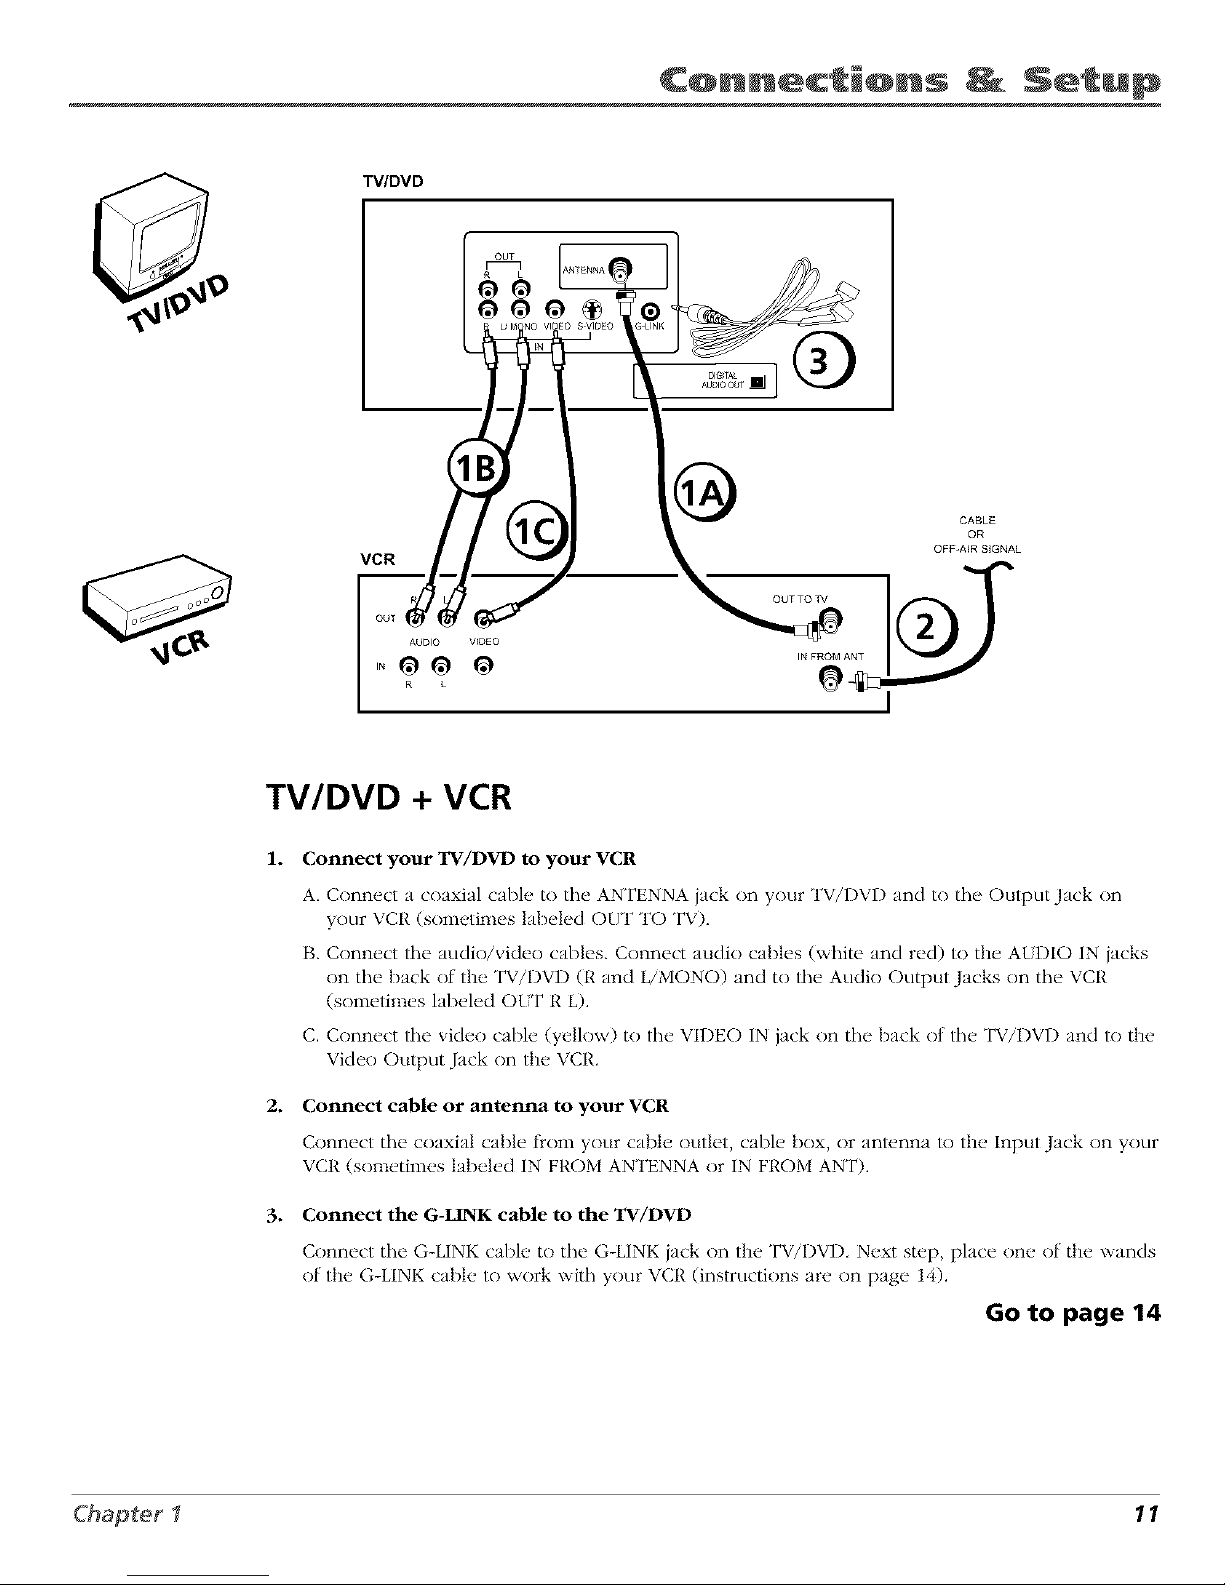
TV/DVD + VCR
1. Connect your TV/DVD to your VCR
A. Connect a coaxial cable to the ANTENNA jack on your TV/DVD and to the Output Jack on
your VCR (sometimes labeled OUT TO TV).
B. Connect ll_e audio/video cables. Connect audio cables (white and red) to the AUDIO IN jacks
on the back of the TViDVD (R and L/MONO) and to ll_e Audio Output Jacks on the VCR
(sometimes labeled OLT R L).
C. Connect the video cable (yellow) to the VIDEO IN jack on the back ot the TV/DVD and to the
Video Output Jack on the VCR.
2. Connect cable or antenna to your VCR
Connect tile coaxial cable t_oln your cable outlet, cat)k, box, or antenna to the Input Jack on your
VCR (sometimes labeled IN FROM ANTENNA or IN FROM ANT).
3. Connect the G-LINK cable to the TV/DVD
Connect tile G-LINK cable to the G-LINK jack on the TV/DVD Next step, place one of the wands
1 /
of the G-LINK cable to _ork with your VCR (instructions are on page 14).
Go to page 14
Chapter I 11
C@nnect @ns Setup
CABLE OR
TV/DVD OFF-AIR SIGNAL
S VIDEO G LINK
_ -0R-
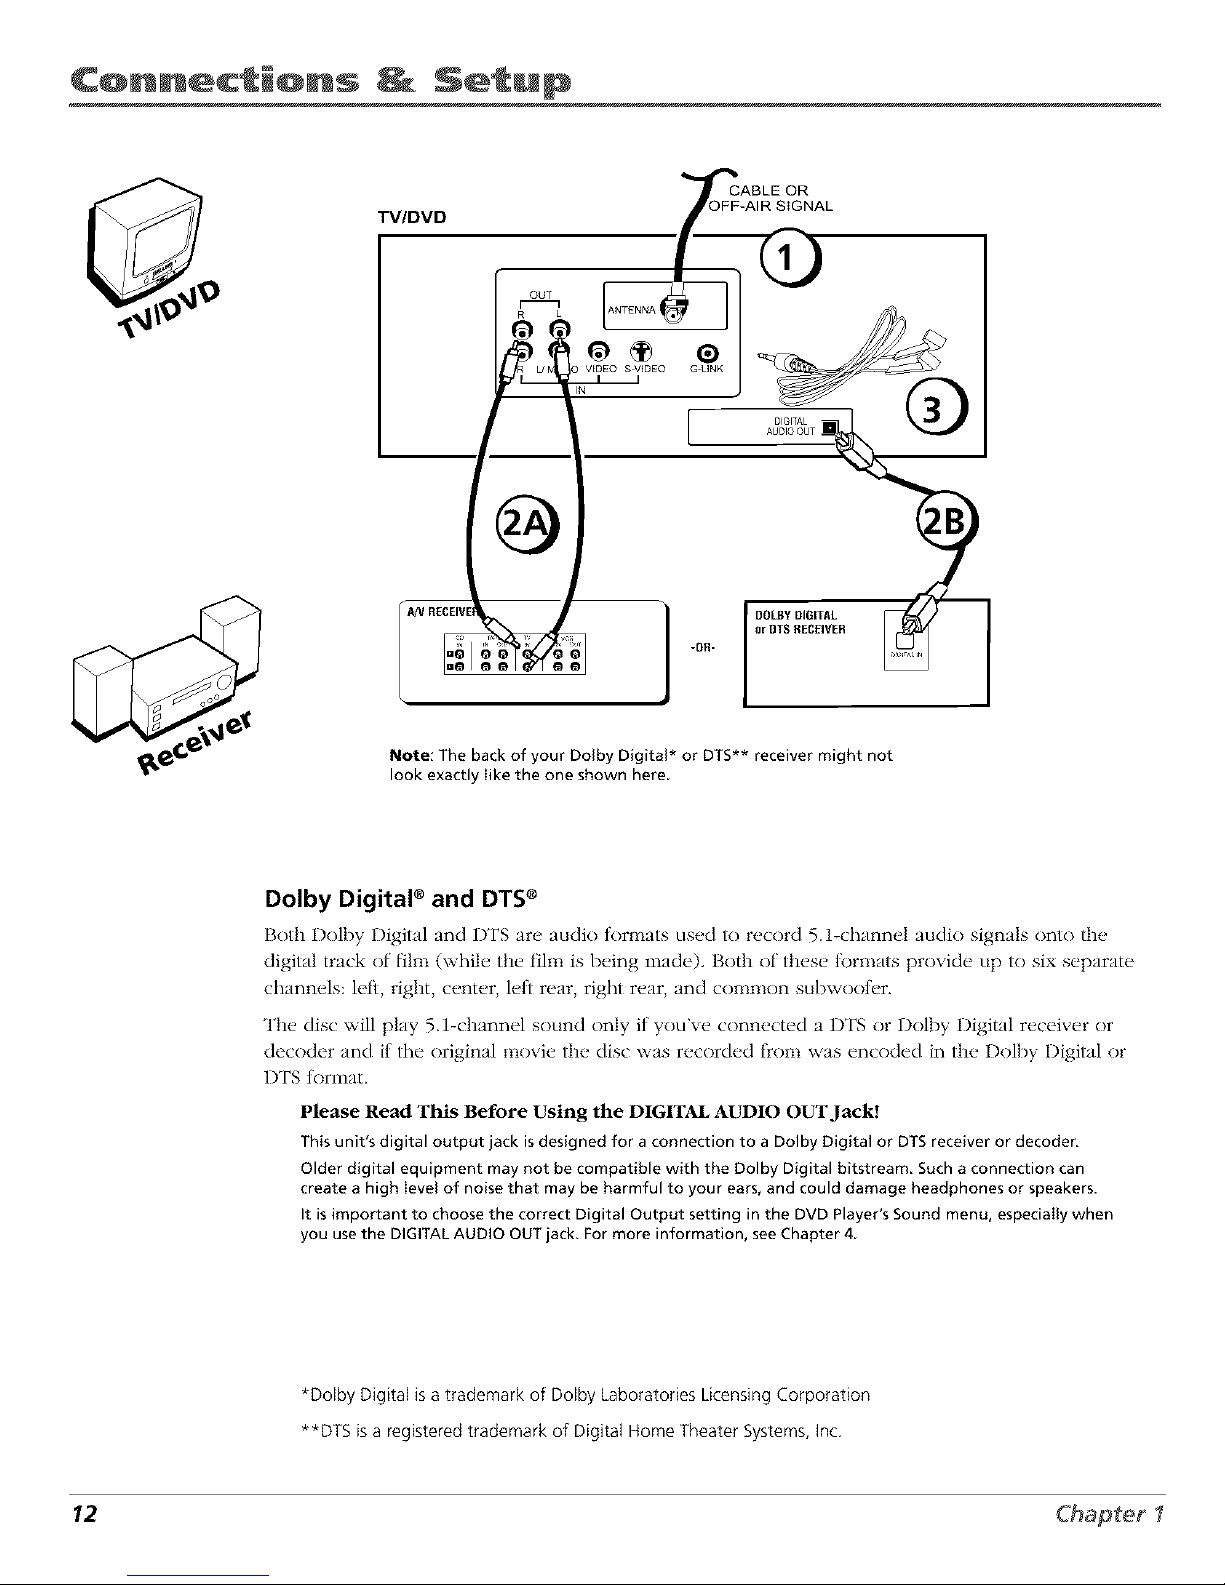
Note: The back of your Dolby Digital* or DTS** receiver might not
look exactly like the one shown here
Dolby Digital ®and DTS®
Both l)olby Digital and 1)TS are audio R>rmats used to record 5.1-chann_'l audio signals onto the
digital track of llhn (while the tlhn is being made). Both of these tk)rmats provide up to six separate
channels: let_, right, center, let:t rear, right rear, and common subwoot_r.
The disc will play 5.1-channel sound only it you've connected a DTS or Dolby Digital receiver or
decoder and il the original movie the disc was recorded tYom was encoded in the Dolby Digital or
DTS tormat.
Please Read This Before Using the DIGITAL AUDIO OUT Jack!
This unit's digital output jack is designed for a connection to a Dolby Digital or DTS receiver or decoder.
Older digital equipment may not be compatible with the Dolby Digital bitstream. Such a connection can
create a high level of noise that may be harmful to your ears, and could damage headphones or speakers.
It is important to choose the correct Digital Output setting in the DVD Player's Sound menu, especially when
you use the DIGITAL AUDIO OUT jack. For more information, see Chapter 4.
*Dolby Digital is a trademark of Dolby Laboratories Licensing Corporation
**DTS is a registered trademark of Digital Home Theater Systems, Inc.
12 Chapter I
C@nnect @ns Setup
TV/DVD + Receiver
1. Connect the TV/DVD to your cable or antenna
Connect the coaxial cable from your cable or antenna to the ANTENNA jack on the back of
your TV/DVD.
2A. Connect the A/V receiver to your TV/DVD
Connect the audio/video cables. Connect audio cables (white and red) to tile AtDIO OUT
jacks on the back of the TV/DVD (R and L) and to the Audio Input Jacks on the receiver
(sometimes labeled AUDIO IN L R).
or
2B. Connect Dolby Digital or the DTS Receiver to your TV/DVD
If you have a Dolby Digital or DTS receiver with a Digital Input jack, connect an optical
cable (not provided) to the DIGITAL ALDIO OUT jack on the TV/DVD and to the Digital
Input jack on tile back of the receiver. You must also set tile Digital Output setting in tile
Sound menu (Chapter 4 has details).
3. If you're connecting a cable box, connect the G-LINK cable
Connect the G-LINK cable to the G-LINK jack on tile TV/DVD. Next step, place the wands
ot tile G-LINK cable to tile cable box (instructions are on page 14).
Go to page 14
Chapter I 13
C@nnect @ns Setup
Why You Should Connect This G-LINK Cable
The G-LINK cable enables the GtlDE Plus+ system (the on-screen interactive program guide) to
work with your VCR and/or cable box.
Cable Box- If your TV/DVI) is connected to a cable box you must connect tile G-LINK cable to
receive TV program listings for your area, and to tune directly to a channel when the program
guide is on your TV screen.
VCR-- If your TV/I)VI) is connected to a VCR and you don't connect tile G-LINK cable, one-touch
VCR recording won't work. The other ll.atures of the guide will work properly.
G-LINK cable
/
G-LINK wands
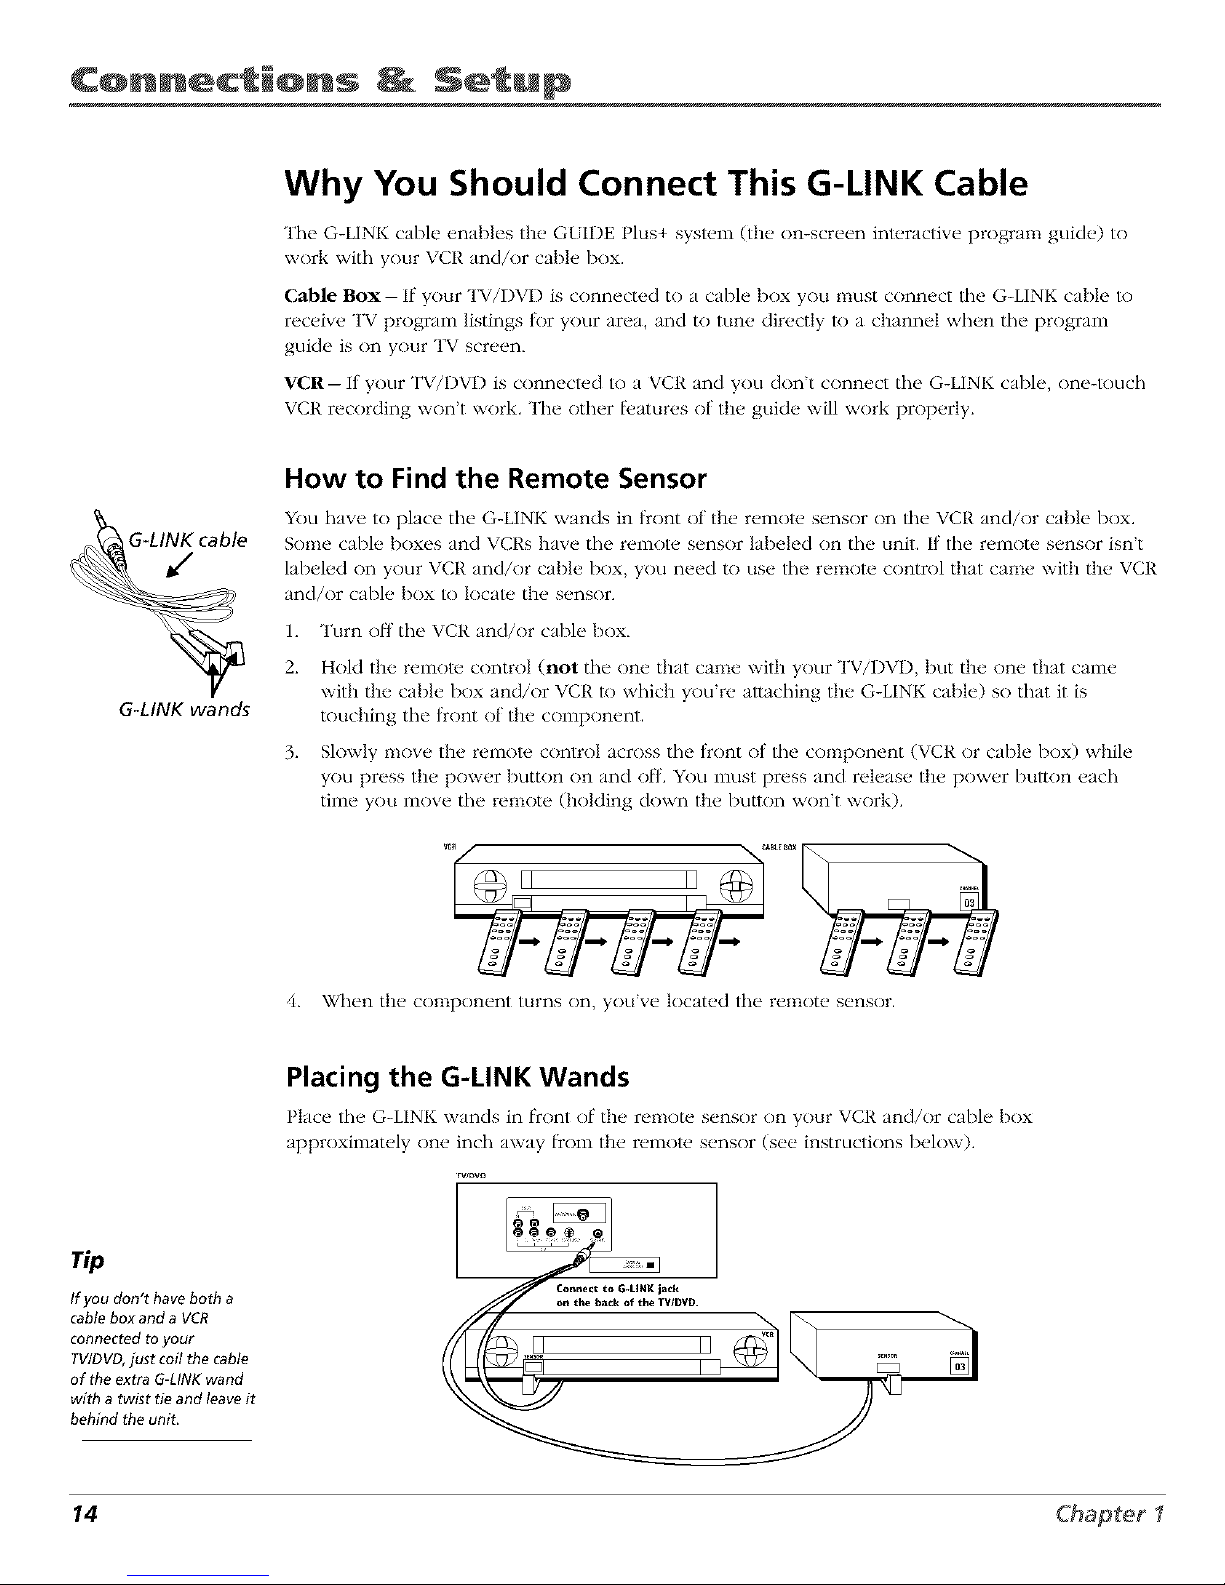
How to Find the Remote Sensor
You have to place tile G-LINK wands in l)ront of the remolu sensor on tile VCR and/or cable box.
Some cable boxes and VCRs have tile remote sensor lal)eled on tile unit. If tile remote sensor isn't
labeled on your VCR and/or cal)le box, you need to use tile remote conm}l that came with the VCR
and/or cable box to locale the sensor.
1. Turn off tile VCR and/or cable box.
2. Hold the remote control (not tile one that came with your TV/DVD, but the one that came
with the cable box and/or VCt{ to which you're attaching the G-LINK cable) so that it is
touching the tront ot' the component.
3. Slowly move the remote control across tile front of tile component (VCR or cable box) while
you press the power butt(m on and off. You must press and release the power butt(m each
time you move the remote (holding down the button won't work).
II II
g -g-
4. When the c(}mponent turns on, you've located the remote sensor.
Placing the G-LINK Wands
I lace tile G-LINK wands in t_cont of the remote sensor on your VCR and/or cable box
approximately one inch away l_com the remote sensor (see instructions below).
rvsDvo
rip
If you don't have both a
cable box and a VCR
connected to your
TVIDVD,just coil the cable
of the extra G-LINKwand
with a twist tie and leave it
behind the unit.
,,,U II .........
14 Chapter I
C@nnect_@ns _ Setup
Plug in the TV/DVD
Phlg the end of tile pow_,r cord into the wall outlet. Match the wide blade of the plug with the
wide slot in tile outlet. Insert the plug completely into tile outlet.
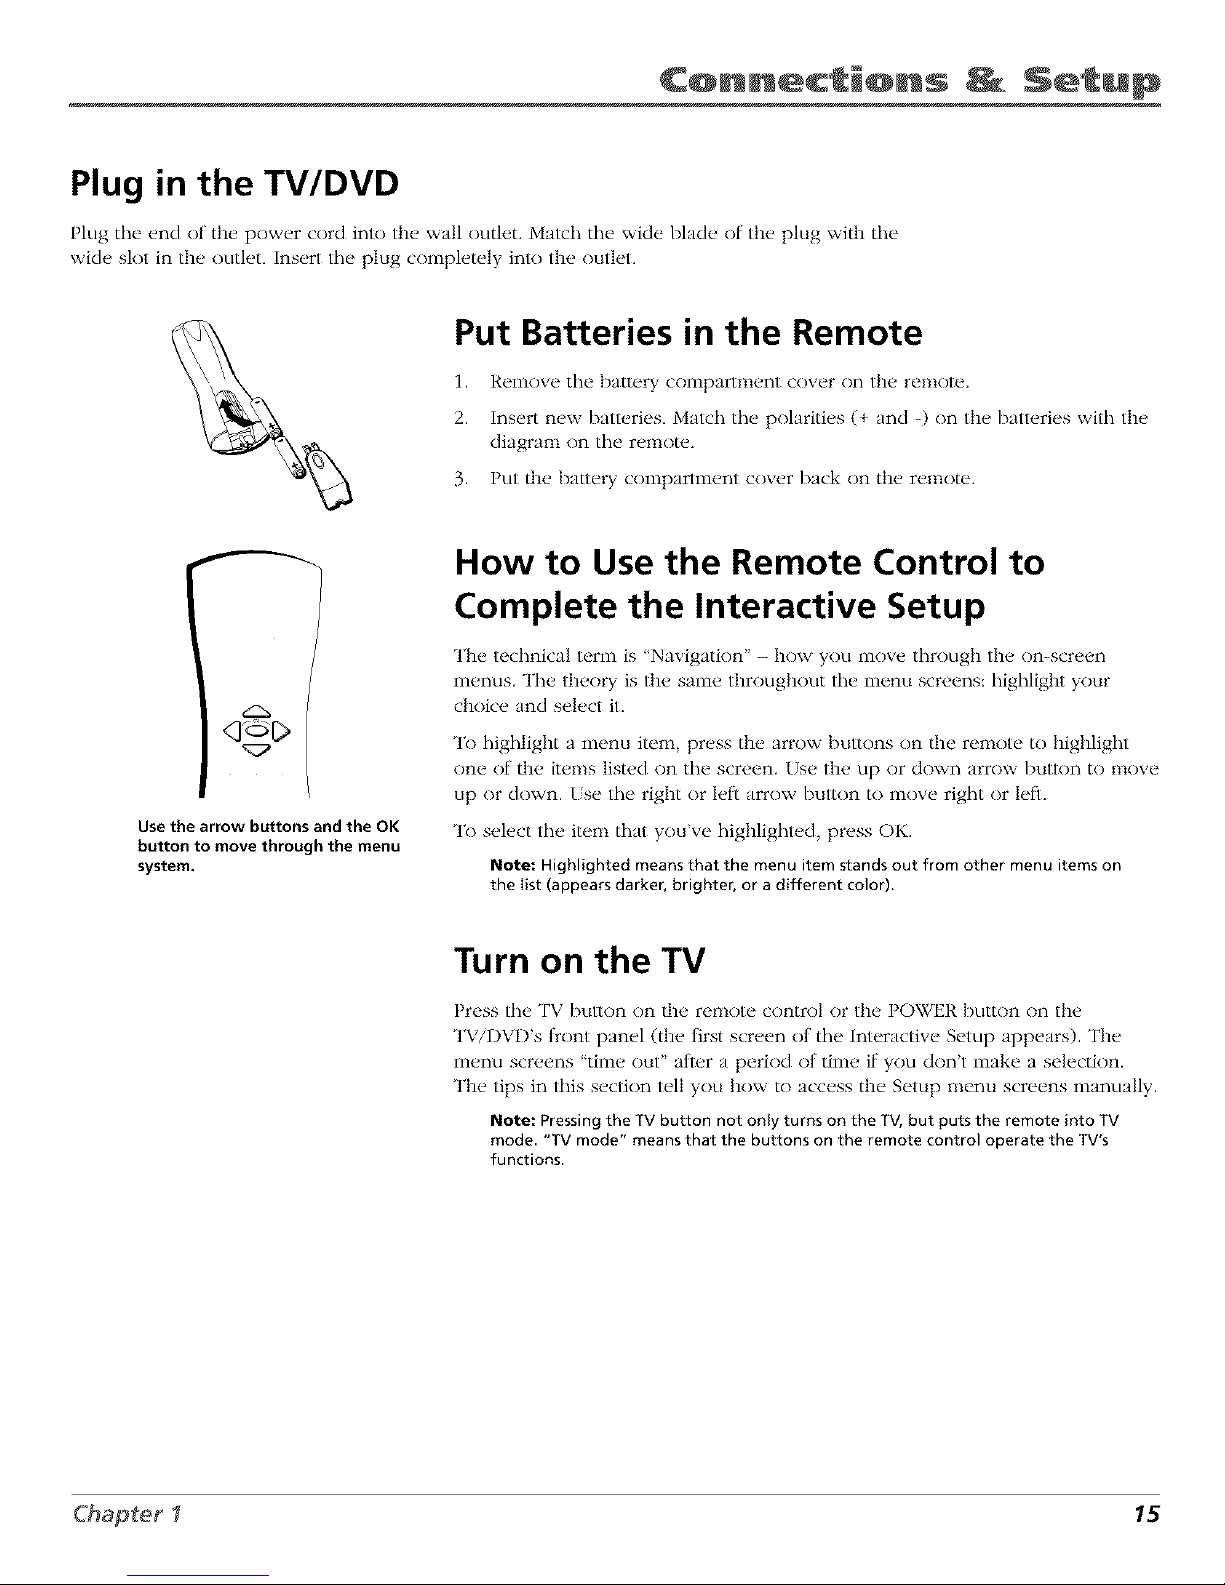
Put Batteries in the Remote
1. Remove the battery compartment cover on tile remote.
2. Insert new batteries. Malch the polarities (+ and -) on tile bam.ries with tile
diagram on the remote.
3. Put tile battery compartment cover back on tile remote.
q_D
Use the arrow buttons and the OK
button to move through the menu
system.
How to Use the Remote Control to
Complete the Interactive Setup
The technical term is "Navigation" - how you move through tile on-screen
menus. The theory is tile same throughout the menu screens: highlight your
choice and select it.
To highlight a menu item, press the arrow buttons on the remote to highlight
one of tile items listed on the screen. Use the up or down arrow button to move
up or down. [se the right or leti arrow button to move right or left.
To select the item that you've highlighted, press OK.
Note: Highlighted means that the menu item stands out from other menu items on
the list (appears darker, brighter, or a different color).
Turn on the TV
Press tile TV buuon on tile remote control or tile POWER button on tile
TV/DVD's front panel (tile first screen of the Interactive Setup appears). "File
menu screens "time out" after a period of time if you don't make a selection.
The tips in lifts section tell you how to access tile Setup menu screens manually.
Note: Pressingthe TV button not only turns on the TV,but puts the remote into TV
mode. "TV mode" means that the buttons on the remote control operate the TV's
functions.
Chapter I 15
C@nnect @ns Setup
rip
Toaccessthe setup menus manually,
press MENU and choose Setup.
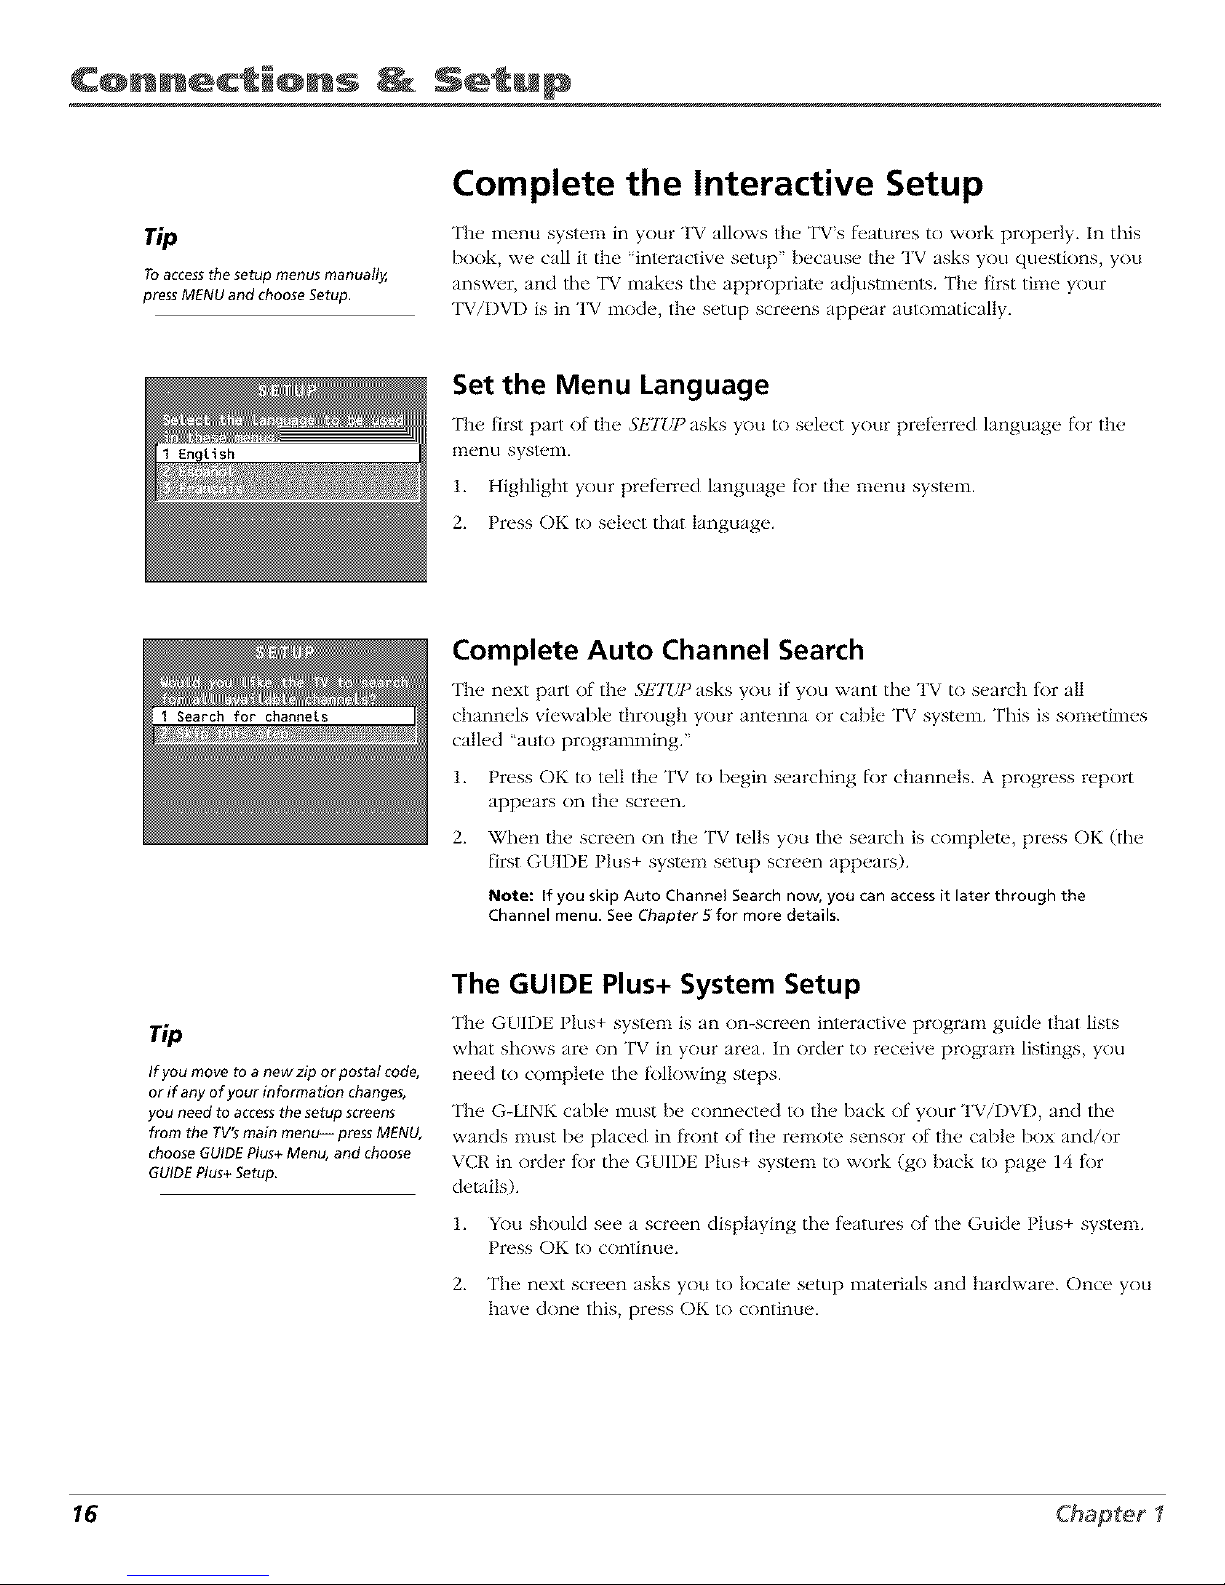
Complete the Interactive Setup
The menu system in your TV allows the TV's l_atures to work properly. In this
book, we call it the 'interactive setup" because lhe TV asks you questions, you
answer, and lhe TV makes the appropriate adjustmenls. The first time your
TViDVD is in TV mode, the setup screens appear automatically.
Set the Menu Language
The first part of the StJTbq_asks you to select your prel}erred language t_)r the
menu system.
1. Highlight your preterred language tbr the menu system.
2. Press OK to select that language.
Complete Auto Channel Search
The next part of the SETU!_asks you if you want the TV to search for all
channels viewable through your antenna or cable TV system. This is sometimes
called "auto programming."
1. Press OK to tell the TV to begin searching R)r channels. A progress report
appears on the screen.
2_
When the screen on the TV tells you tile search is complete, press OK (tile
first Gt I1)E I It s+ system setup screen appears).
Note: If you skip Auto Channel Search now, you can access it later through the
Channel menu. See Chapter 5 for more details.
If you move to a new zip or postal code,
or if any of your information changes,
you need to access the setup screens
from the TV's main menu-- press MENU,
choose GUIDE Plus+Menu, and choose
GUIDE Plus+Setup.
The GUIDE Plus+ System Setup
The GUIDE Plus+ system is an on-screen int_.ractive program guicle that lists
what shows are on TV in your area. In order to receive program listings, you
need to complete tile tbllowing steps.
The G-LINK cable must be connected lo the back of your TV/DVD, and the
wands must be placed in front of the remote sensor of the cable box and/or
VCR in order tk)r the GUIDE Plus+ system to work (go back lo page 14 tk)r
details).
1. YOu should see a screen displaying tile features of tile Guide Plus+ system.
Press OK to continue.
2. The next screen asks you to locate setup materials and hardware. Once you
have done this, press OK to continue.
16 Chapter I
C@nnect @ns Setup
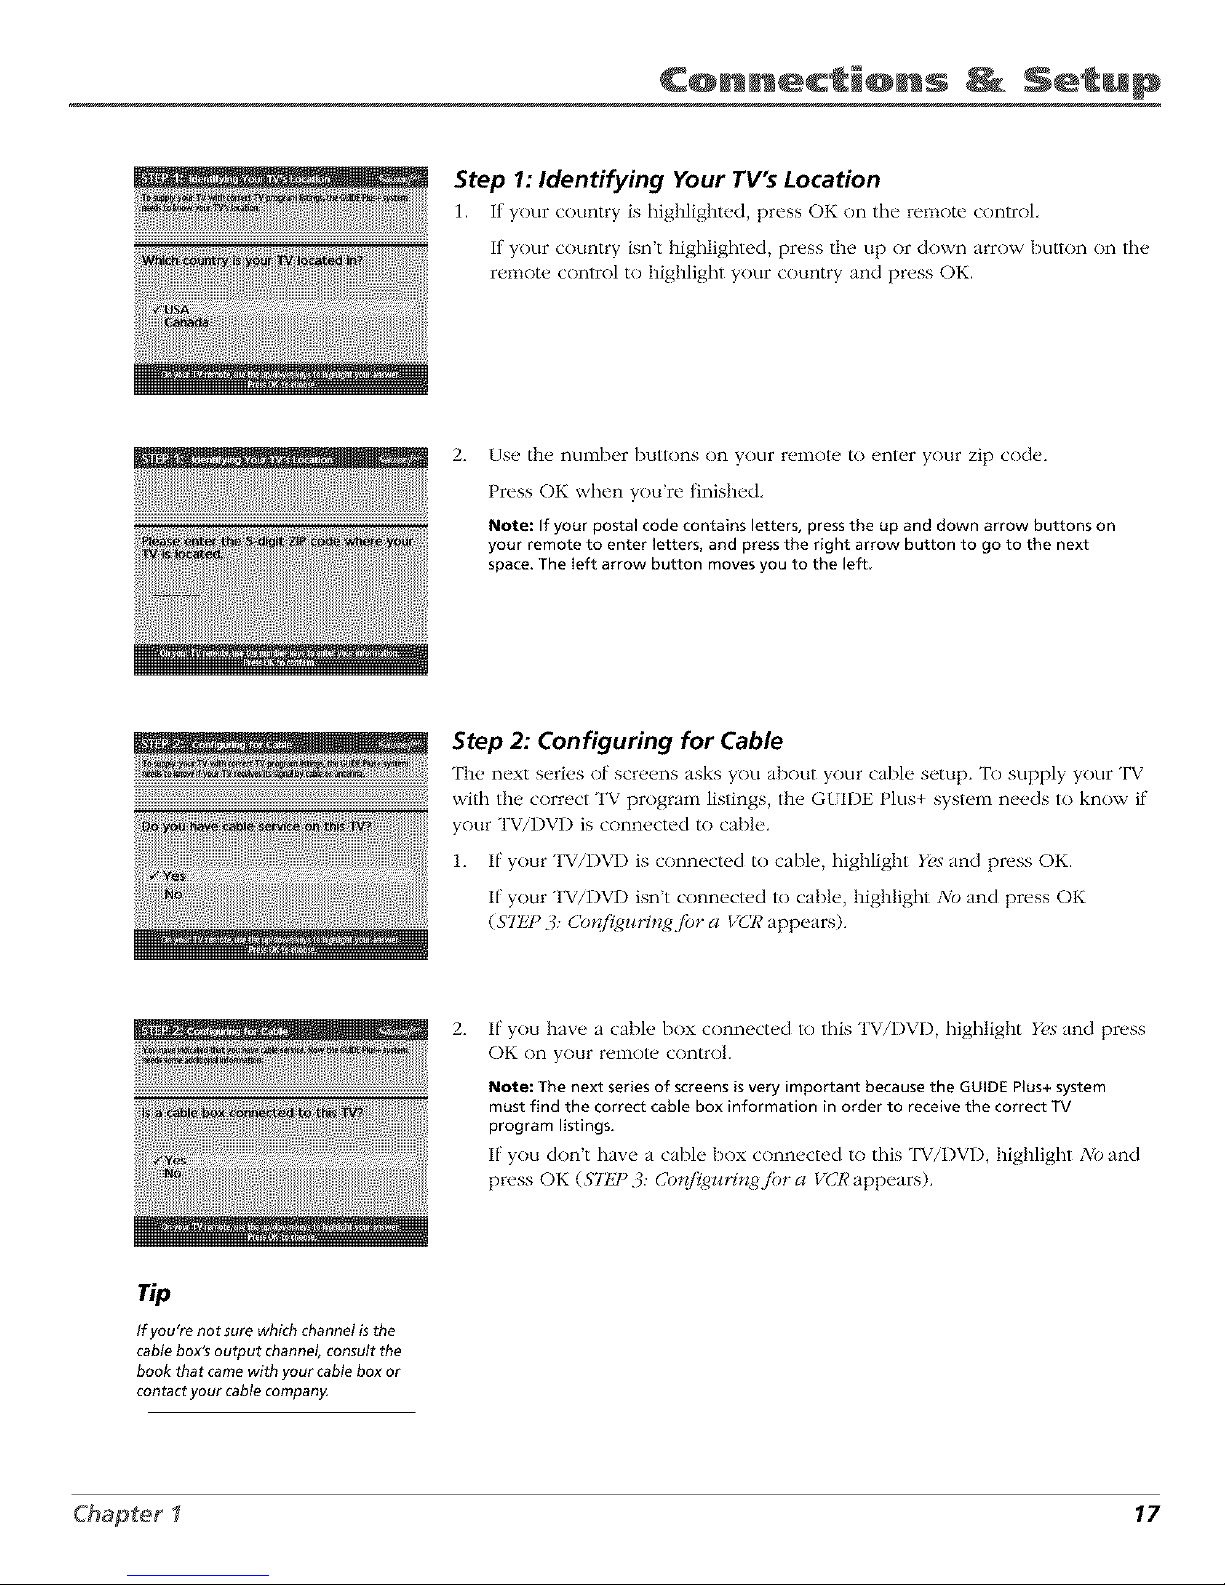
Step 1: Identifying Your TV's Location
1. It your country is highlighted, press OK on the remote control,
If your country isn't highlighted, press the up or down arrow button on the
remote control to highlight your country and press OK.
2_
{Jse the number butlons on your remolu to enter your zip code.
Press OK when you're finished.
Note: Ifyour postal codecontains letters, pressthe up and down arrow buttons on
your remote to enter letters, and pressthe right arrow button to go to the next
space.The Ieft arrow button moves you to the left
Step 2: Configuring for Cable
The next series of screens asks you about your cable setup. To supply your TV
with the correct TV program listings, the G{IDE Plus+ system needs to know if
your TV/DVD is connected to cable.
1. If your TV/DVD is connected to cable, highlight Yt,s and press OK.
If your TV/DVD isn't connected to cable, highlight NO and press OK
($7t£P :_: Co*_il_zlH*l/_.fi)ra I/CRappears).
2_
If you have a cable box connected to this TV/DVD, highlight Y(,s and press
OK on your remote control.
Note: The next series of screensisvery important because the GUIDEPlus+system
must find the correct cable box information in order to receive the correct TV
program listings.
If you don't haw' a cable box conn_,cted to this TWI)VI), highlight No and
press OK (S_l_J _3: Cotd_mqrzgjbr a VCR appears).
rip
If you're not sure which channel is the
cable box's output channel, consult the
book that came with your cable box or
contact your cable company.
Chapter I 17
C@nnect @ns Setup
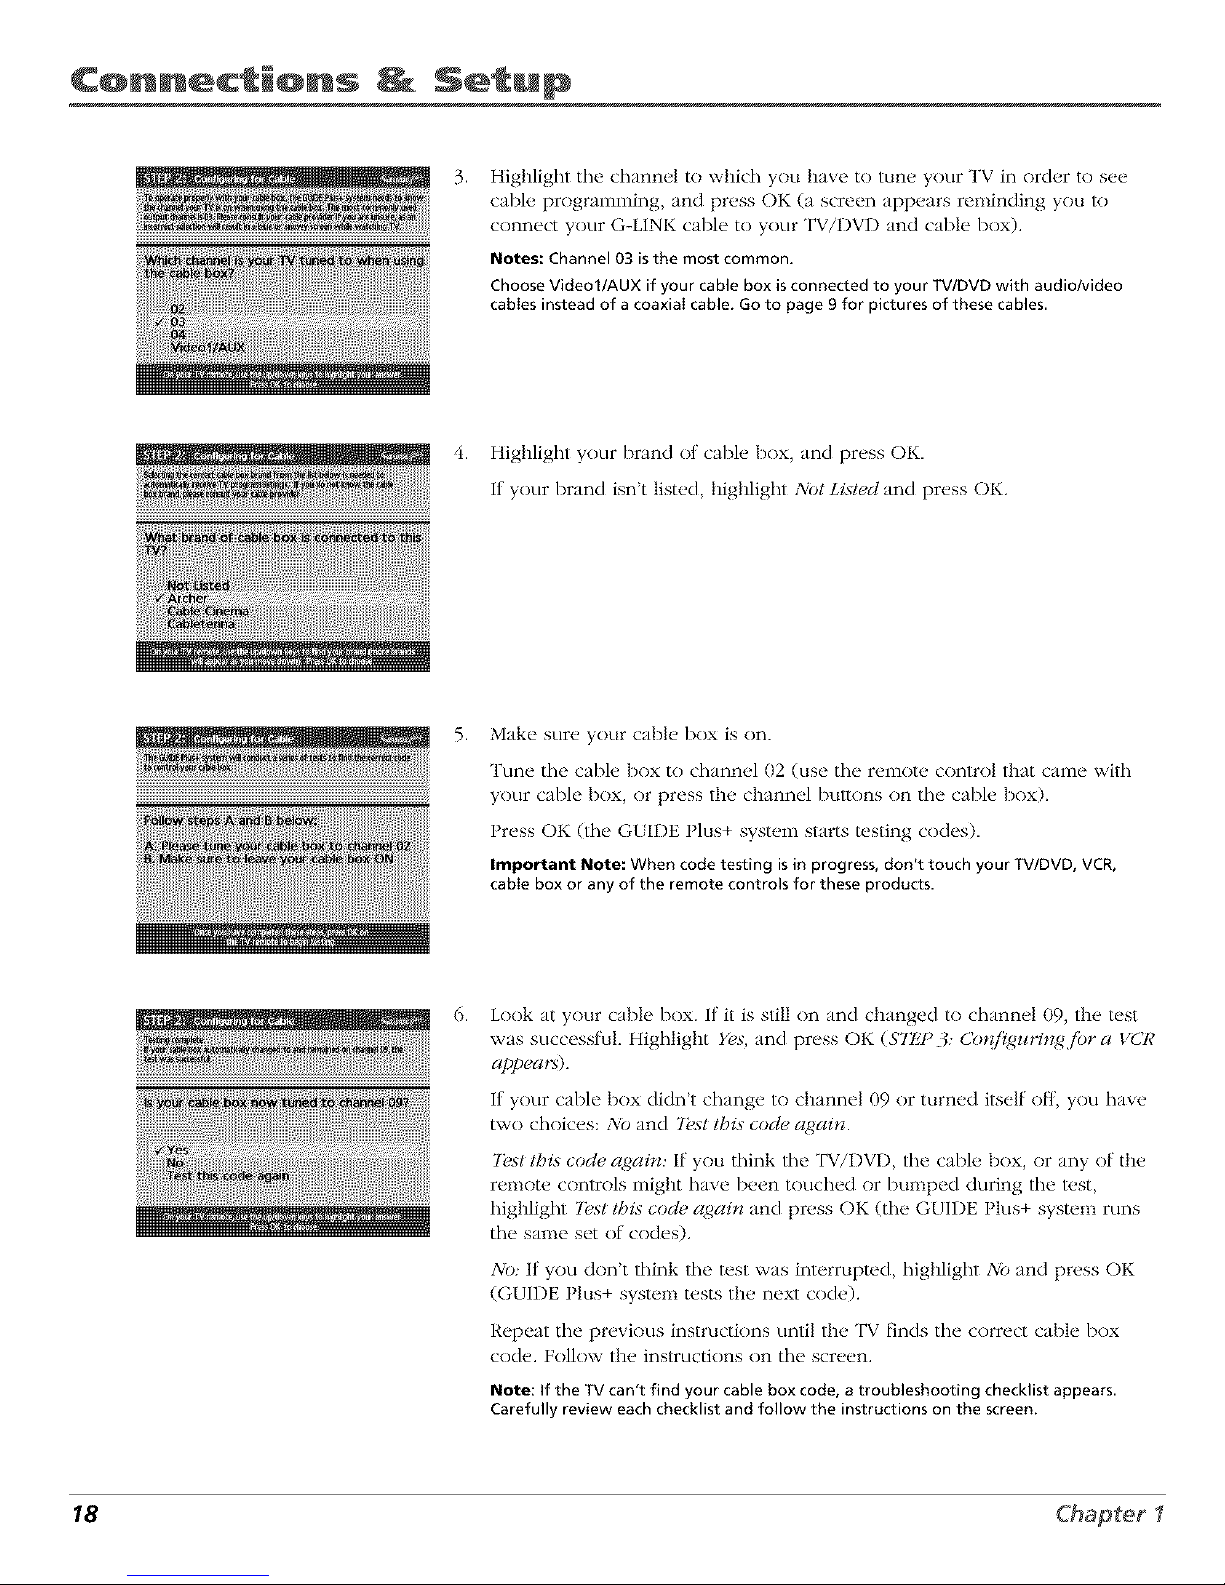
,
Highlight tile channel to which you have to tune your TV in order to see
cable programming, and press OK (a screen appears reminding you lo
connect your G-LINK cable to your TViDVD and cable box).
Notes: Channel 03 isthe most common.
ChooseVideol/AUX if your cable box isconnected to your TV/DVD with audio/video
cables instead of acoaxiaI cable. Go to page 9 for pictures of these cables
4. Highlight your brand ot cable box, and press OK,
If your brand isn't listed, highlight NOt Listed and press OK.
5,
Make sure your cable box is on.
Tune tile cable box to channel 02 (use tile remote control that came with
your cable box, or press the channel buuons on tile cable box).
Press OK (lhe GLIDE Plus+ system starts testing codes),
Important Note: When code testing isin progress, don't touch your TV/DVD, VCR,
cable box or any of the remote controls for these products.
,
Look at your cable box. It it is still on and changed to channel 09, the test
was successful. Highlight Yes, and press OK ($7t£I_3: Co*_/l_t_z_ring./_JraVCR
appeatx).
If your cable box didn't change to channel 09 or turned itself off:, you have
two choices: NO •'rod 2_st, this code) again.
7k,st this code again: If you think file TV/DVD, tile cable box, or any of the
remote conlrols might have been touched or bumped during tile t*.st,
highlight Test this cod*, again and press OK (tile GUIDE Plus+ system runs
tile same set of codes).
NO: if you don't think tile test was interrupted, highlight z\'b and press OK
(GUIDE Plus+ system tests the next code).
Repeat tile previous instructions until the TV finds tile correct cable box
code. Follow the instructions on tile screen.
Note: If the TV can't find your cable box code, a troubleshooting checklist appears.
Carefully review each checklist and follow the instructions on the screen.
18 Chapter I
C@nnect @ns Setup
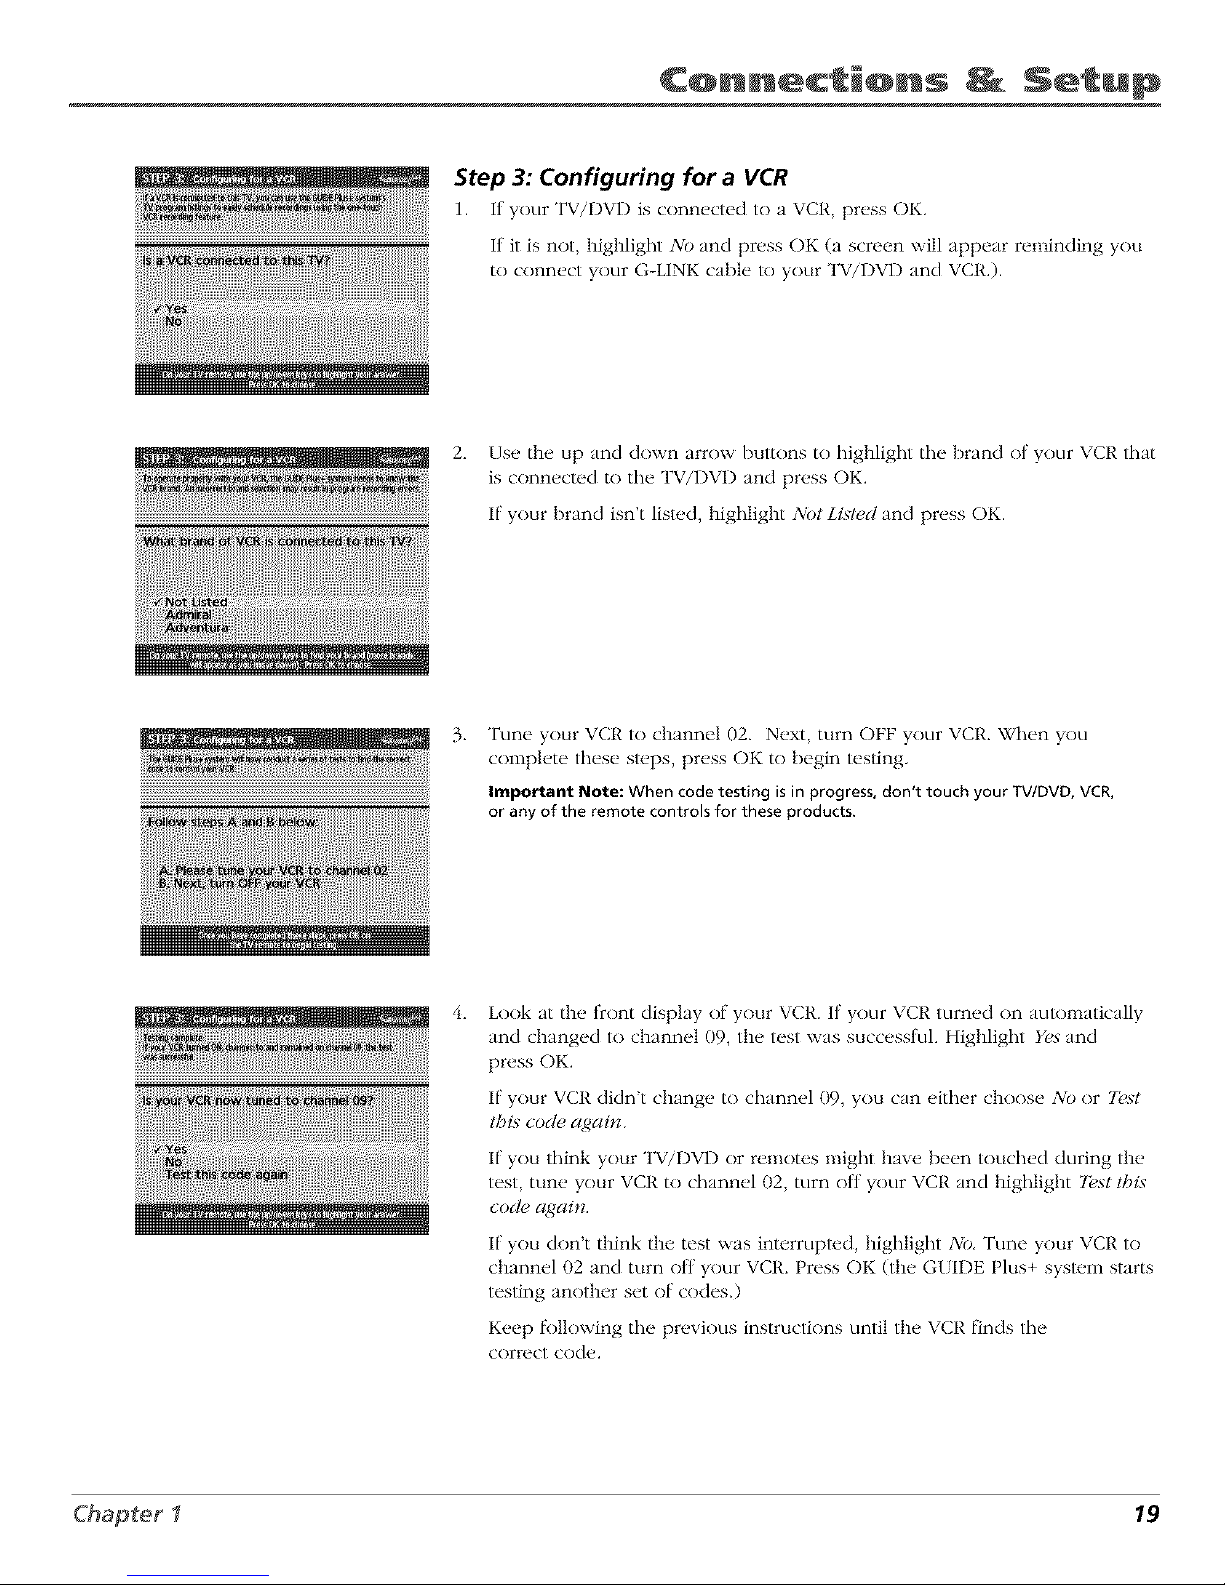
Step 3: Configuring for a VCR
1. It your TV/I)VD is conn_,cted to a VCR, press OK.
It it is not, highlight N0 and press (-)K (a screen will appear renfinding you
to connect your G-LINK cable to your TV/DVD and VCR.).
2. Use the Lip and down arrow buttons to highlight tile brand of your VCP, that
is connected to the TV/DVD and press OK.
If your brand isn't listed, highlight NOt Listed and press OK.
3_
Tune your VCR to channel 02. Next, turn OFF your VCR. When you
complete these st_.ps, press OK to begin testing.
Important Note: When code testing isin progress, don't touch your TV/DVD,VCR,
or any of the remote controlsfor these products.
?
Look at the front display of your VCR. If your \ CR turned on automatically
and changed to channel 09, the test was successlul. Highlight Yes"and
press OK.
If your VCR didn't change to channel 09, you can either choose NO or 7t,st
this code a_,qain.
If you think your TV/I)VD or remotes nfight have been touched during the
test, tune your VCR to channel 02, turn ott your VCt{ and highlight Test this
code again.
If you don't think the test was interrupted, highlight NO, Tune your VCR to
channel 02 and mrn ott your VCR. Press OK (the GLIDE Plus+ system starts
testing another set of codes.)
Keep R>llowing tile previous instructions until the VCR finds tile
correct code.
Chapter I 19
C@nnect @ns Setup
rip
Leaveyour cable box turned ON to
download program information,
Leaveyour VCRturned OFFto record
programs.
Note: If the GUIDE Plus+ system can't locate the correct code for the VCR, a list of
troubleshooting instructions appears to help you before you try again.
Try VCR configuration again: repeat VCR setup.
Test alternate codes: tests selected brands and if this fails, the test continues
with all codes in the system.
Skip this step: the GUIDE Plus+ system won't be able to automatically schedule
programs to record on your VCR.
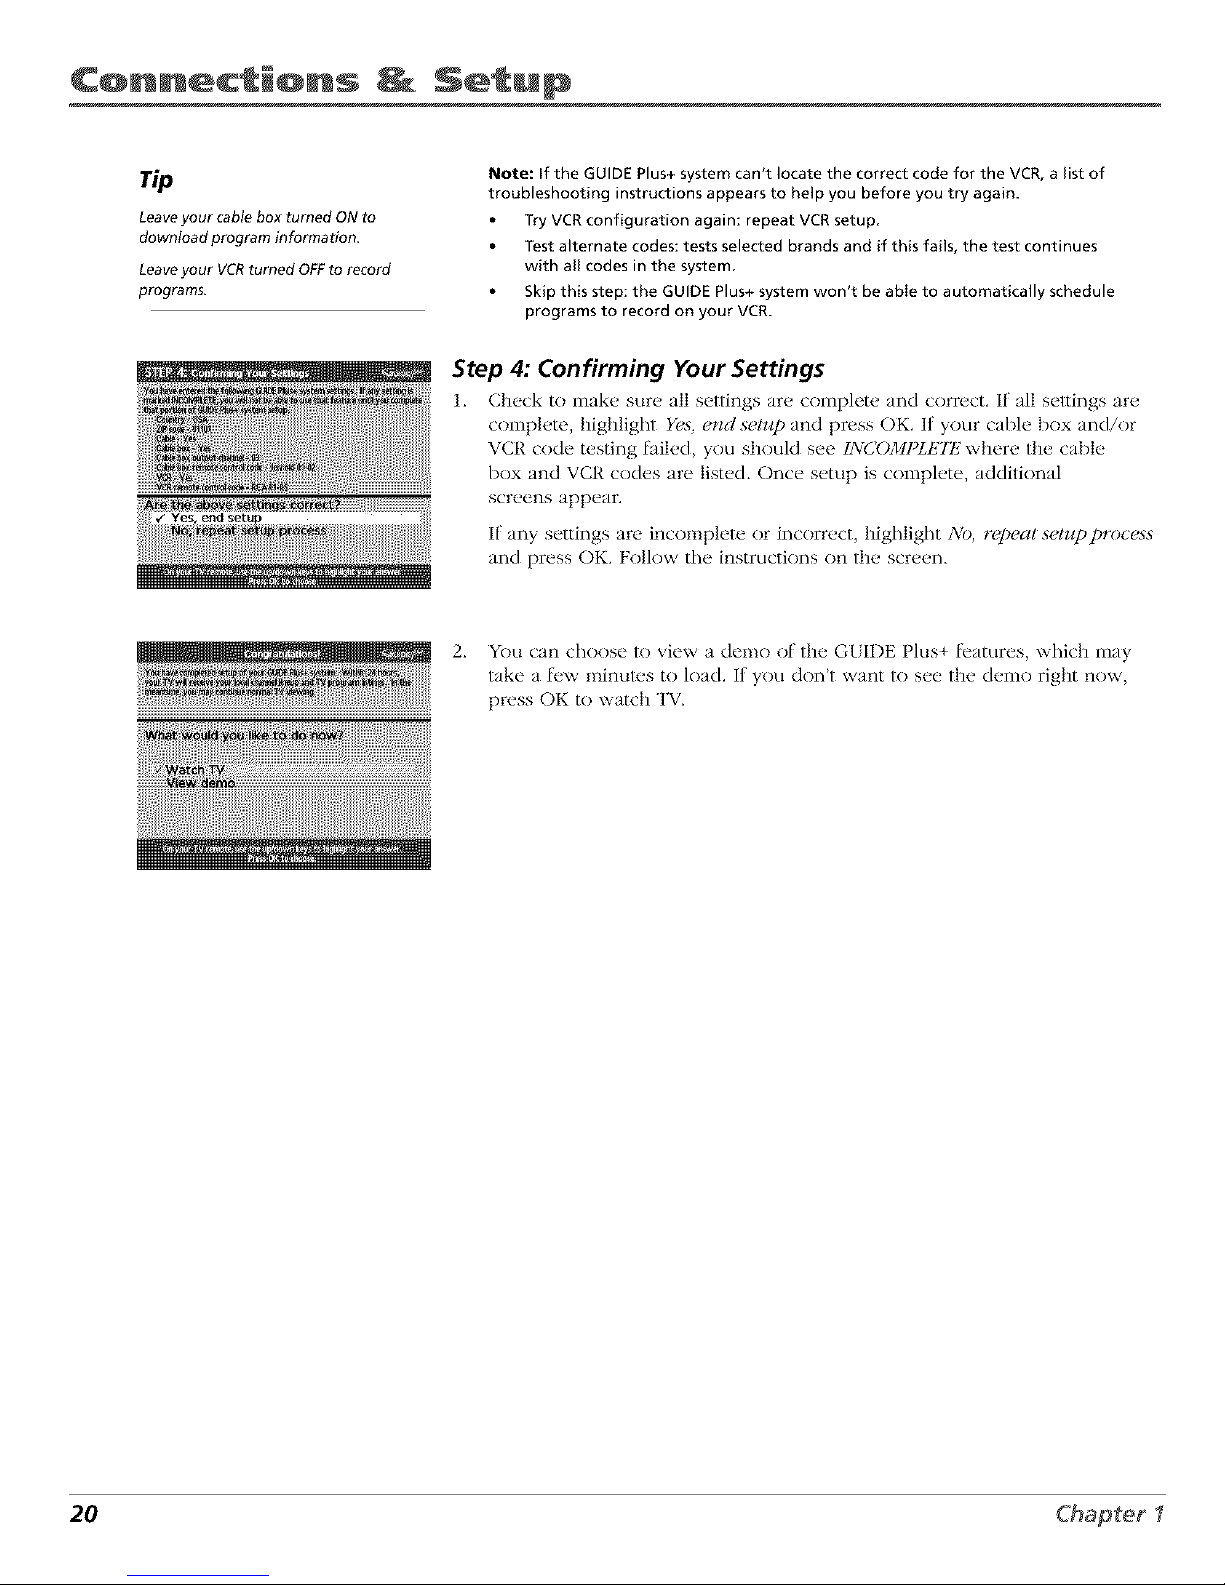
Step 4: Confirming Your Settings
l. Check to make sure all settings are complete and correct, If all seltings are
complete, highlight Yes, end s_,lJ_p and press OK. If your cable box and/or
VCR code testing l_iled, you should see INCOMPLtZTtZ where the cable
box and VCR codes are listed. Once setup is complete, additional
screens appear.
If any settings are incomplete or incorrect, highlight NO, r_f)eat selz_pprocess
and press OK. Follow the instructions on the screen.
2. YOu can choose to view a demo of the G{IDE Plus+ l)atures, which may
take a li:w minutes to load. It you don't want to see the demo right now,
press OK to watch TV.
20 Chapter I
C@nnect @ns Setup
What to Expect
The next time you are in TV mode, the GUIDE PIus+ system will appear on the screen. The
l_fllowing examples explain what you might see:
• If all of the program inl_>rmation has been sent lo your TV, the GLIDE Plus+ system
appears with all of your TV program listings.
• If tile program inl_>rmation hasn't been sent R) your TV yet, an outline of the G{IDE
(without TV program listings) will appear on the screen. Program infi)rmation is usually
sent to your TV at night.
• If the TV detected that you have multiple cable companies in your area, SI}'Z!a 5: Cboo.shl_,d
Yoztr Cbannet LineJ_p appears.
Features of the G{IDE Plus+ syst_.m are explained in Chapter 3.
_R)clear the guide t_om your screen, press CLEAR or GLIDE on the remotu control.
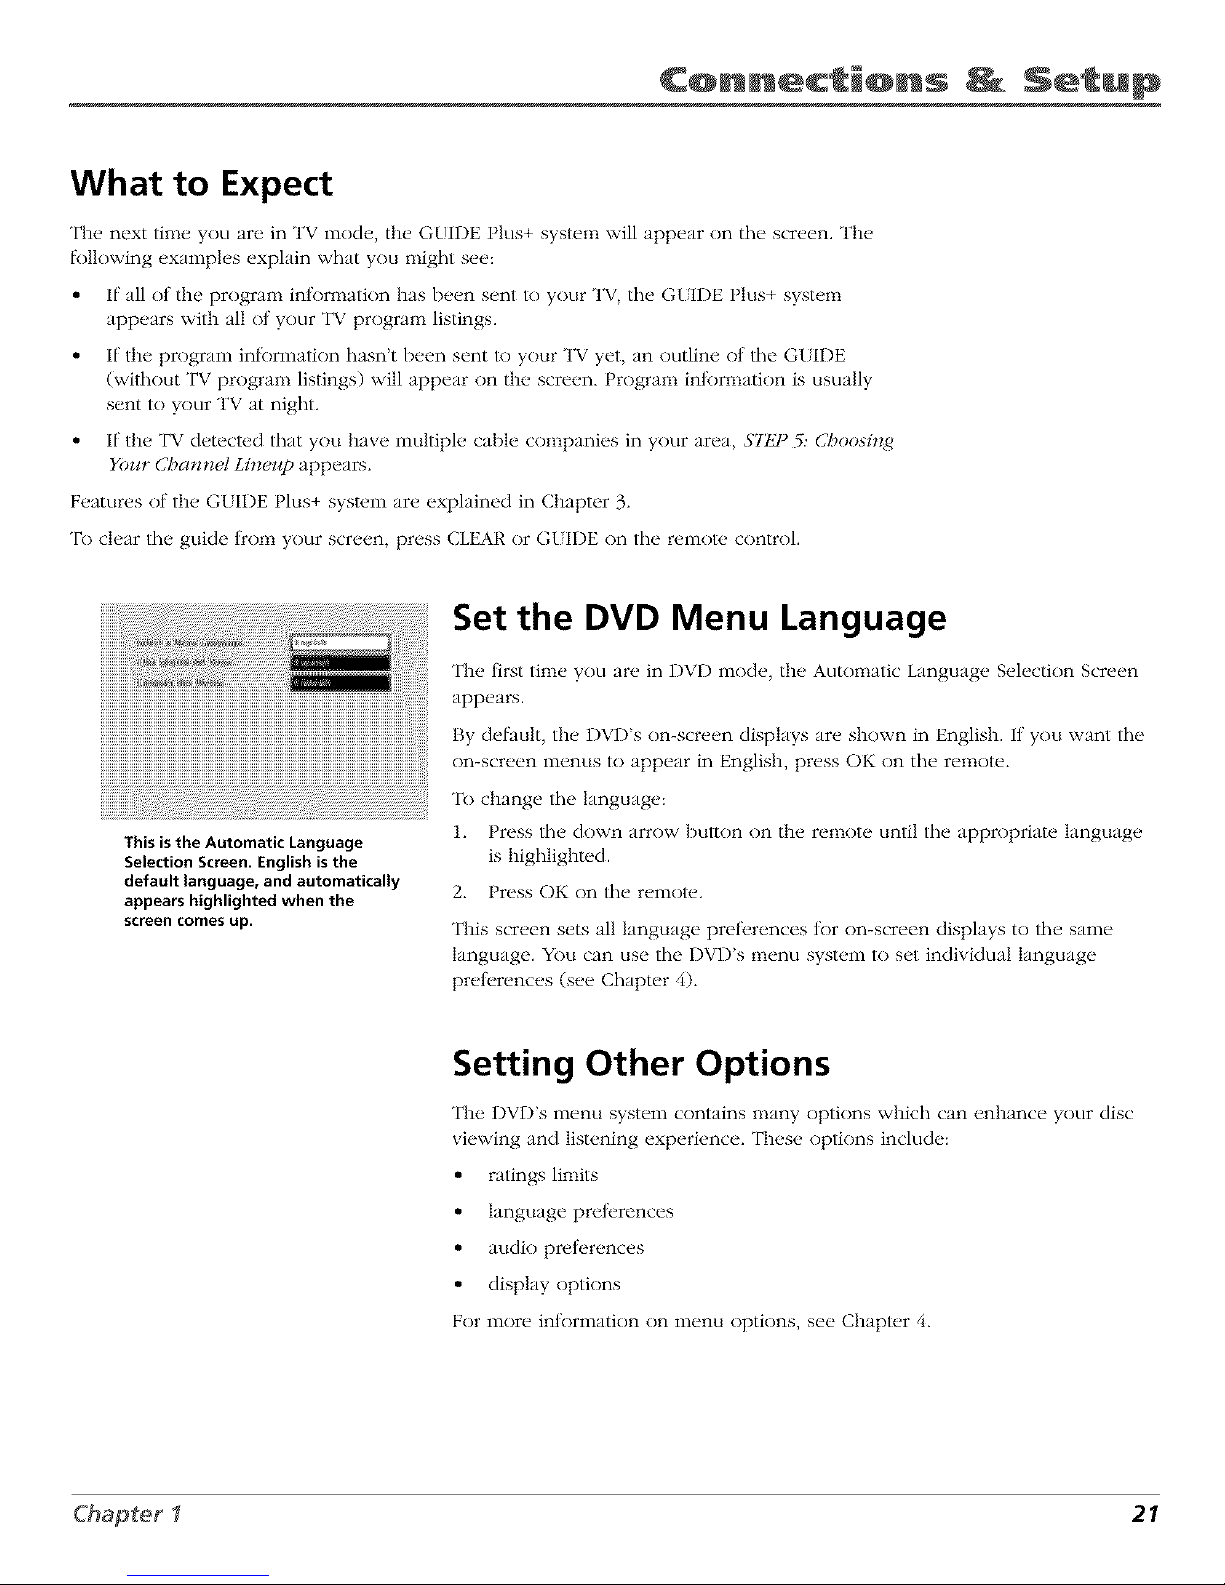
This is the Automatic Language
Selection Screen. English is the
default language, and automatically
appears highlighted when the
screen comes up.
Set the DVD Menu Language
The first time you are in DVD mode, the Automatic Language Selection Screen
appears.
By default, the DVD's on-screen displays are shown in English. If you want the
on-screen menus to appear in English, press OK on the remote.
To change lhe language:
1. Press lhe down arrow buuon on the remote until the appropriate language
is highlighted.
2. Press OK on the relnot_..
This screen sets all language prefi.rences for on-screen displays to the salne
language. YOu can use the DVD's menu system to set individual language
preterences (see Chapter 4).
Setting Other Options
The DVD's menu system contains many options which can enhance your disc
viewing and listening experience. These options include:
• ratings limits
• language prefi, rences
• audio prel_rences
• display options
For more inl_>rmation on menu options, see Chaplur 4.
Chapter I 21
C@nnect @ns Setup
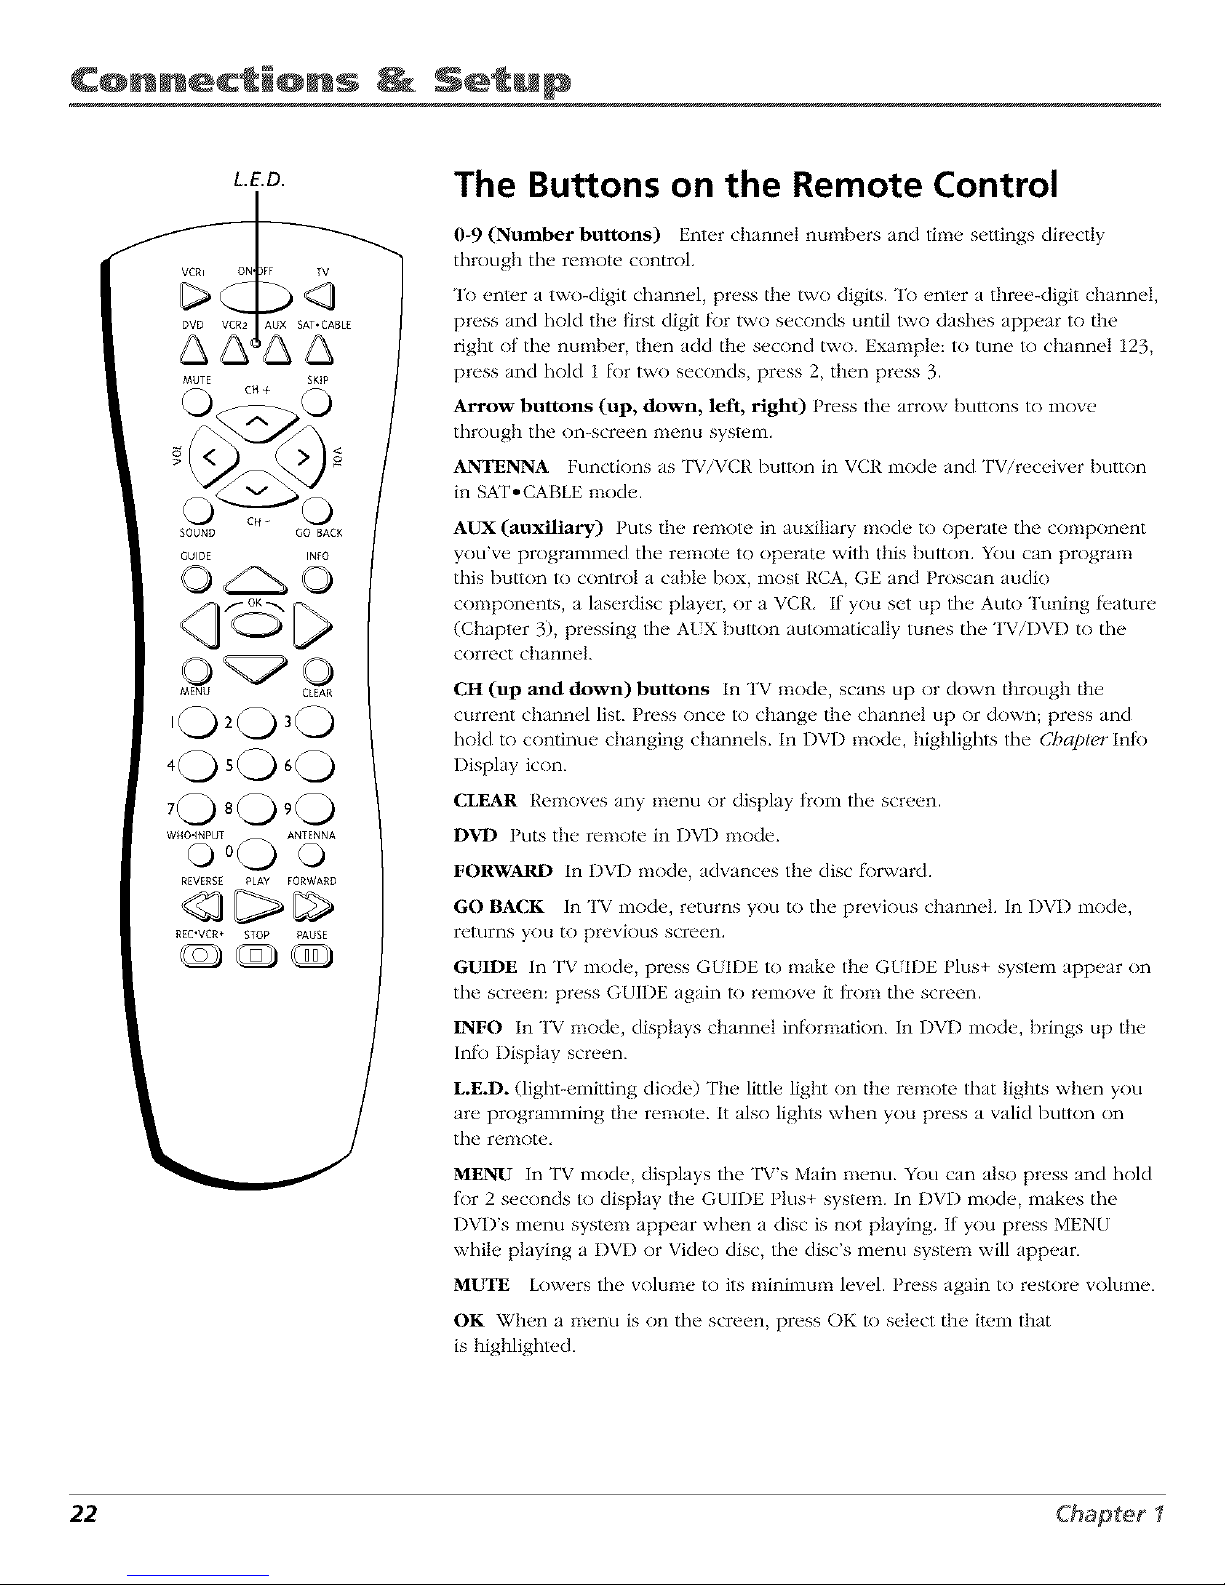
L.E.D.
VCRI ON DFF TV
DVD VCR2 AUX SAT.CABLE
& &
MUTE SKIP
O c.÷O
O c.. O
SOUND GO BACK
GUIDE IN£O
MENU CLEAR
,020'0
40s0,0
,0 8090
REVERSE PLAY FORWARD
REC'VCR÷ STOP PAUSE
The Buttons on the Remote Control
0-9 (Number buttons) Enter channel num/)ers and time settings directly
through the remote control.
]b enter a two-digit channel, press the two digits. ]b ent_.r a three-digit channel,
press and hold the first digit li)r two seconds until lwo dashes appear to the
right of the number, then add the second two. Example: to rune lo channel 123,
press and hold 1 li)r two seconds, press 2, then press 3.
Arrow buttons (up, down, left, right) Press the arrow l)uttons to move
through the on-screen nlenu syst{.in.
ANTENNA Functions as TViVCR butlon in VCR mode and TV/receiver l)utton
in SAT. CABLE mode.
AUX (auxiliary) Puts the remote in auxiliary mode to operate the component
you've programmed the remote to operate with this buuon. You can program
this button to control a cable box, most RCA, GE and Proscan audio
components, a laserdisc player, or a VCR. If you set up the Auto Tuning l)ature
(Chapl_.r 3), pressing the A[X l)uuon automatically tunes the TV/DVD to the
correct channel.
CIt (up and down) buttons In TV mode, scans up or down through the
current channel list. Press once to change the channel up or down; press and
hold to continue changing channels. In DVD mode, highlights the Chcqat(.rInfi)
Display icon.
CLEAR Removes any menu or display t)rom the screen.
DVD Puts the remote in DVD mode.
FORWARD In DVD mode, aclvances the disc lk)rward.
GO BACK In TV mode, returns you to the previous channel. In DVD mode,
returns you to previous screen.
GUIDE In TV mode, press GLIDE to make the GLIDE Plus+ syslum appear on
the screen: press GUIDE again lo remove it from the screen.
INFO In TV mode, displays channel inlk)rmation. In DVD mode, brings up the
Inlk) Display screen.
L.E.D. (light-emitting diode) The little light on the remote that lights when you
are programming the remote. It also liglns when you press a valid button on
the remote.
MENU In TV mode, displays the TV's Main menu. You can also press and hold
tk)r 2 seconds lo display the GUIDE Plus+ system. In DVD mode, makes the
DVD's menu system appear when a disc is not playing. If you press MENU
while playing a DVD or Video disc, lhe disc's menu system will appear.
MUTE Lowers lhe volunle to its mininlunl level. Press again to restore volume.
OK When a nlenu is on the screen, press OK to select the item that
is highlighted.
22 Chapter I
C@nnect @ns Setup
rip
To turn off alt the RCA, GE, and Proscan
components that are connected to the
TV/DVD, press ON, OFF twice within two
seconds,
This feature only works with most RCA,
GEand Proscan products.
ON,.OFF Turns file TV/DVD on and off.
PAUSE In DVD mode, press PAUSE when tile disc is playing to pause playback.
PLAY In DVD mode, plays the disc.
RECoVCR+ In TV mode, when the GUIDE Plus+ program guide is on the
screen, press REC°VCR+ lo program your VCR to record a program.
llEVERSE In DVD mode, press REVERSE lo go backwards on a disc.
SAT°CABLE In TV mode, puts tile remote in SAT°CABLE mode.
SKIP In TV mode, if you press this bullc)n bet_>re you change tile channel, tile
TV ,,'*';.tits30 seconds and automatically goes back to tile original channel. Each
time you press SKIP, you add 30 seconds (i.e, if you press SKIP two times belk>re
you change tile channel, the TV waits 60 seconds and automatically turns back
to the original channel).
SOUND In TV mode, displays the AUDIO PROCESSOR menu.
STOP In DVD mode, stops playing the disc.
TV Turns on the TV and puts the remote in TV mode. Also displays channel
inl_mnation.
VCR1 Puts the remote in VCR mode.
VCR2 Puts the remote in VCR mode.
VOL (up and down) buttons Decrease or increase the TV/DVD's volume.
WHO,.INPUT In TV mode, press WHO..INPUT to toggle through the available
Video Input channels (VIDiFRNT and the current channel). In SKI"mode, press
to select available channel lists.
Chapter I 23

(This page intentionally left blank)
2
Playing DVDs
Chapter Overview:
• Regional Coding
• Using Different Menus
• Loading and Playing Discs
• Using a Disc Menu
• Using the On-Screen Info Display
• Disc Playback Features
Changing
G_cy)hics contributed _z_itbi_ this pz_b/ication arejbr _])_sentatio_ on(_,.
Playing DVD%
Regional Coding
Both the TV/DVD unit and the discs are coded l)y region. These regional codes must match in
order tnr the disc to play. It the codes don't match, the disc won't play. This unit's code is region 1.
Using Different Menus
Each disc is programmed with dilterent fl,atures. There are three separate menu paths that you can
use to access features:
Tile Disc menu - The disc menu is part of each disc and is separate from the DVD's menu
system. The contents of each disc menu wtry according to how the disc was authored and what
lL,atures are included. The disc menu is turned on and off (while the disc is playing) with the
MENU button on the remol*,.
• The DVD's Info Display - The Inln Display appears as icons across the top ol the screen
when a disc is playing. It can only be accessed while you are playing a disc. It's turned on and
ott with the INFO button on the remote.
• Tile DVD's menu system - The DVD's menu system is accessed only when a disc isn't
playing. It appears automatically when the STOP button is pressed.
P,ememl)er that a teature will only work if the disc was programmed with that fl,ature. For example,
if you choose subtitles on the Inlk) Display, the subtitles will only appear if the disc was created
with subtitles. It a menu item is "grayed nut" it means that item isn't available.
Loading and Playing Discs
Your TV/DVD unit plays DVD discs, Vide() CD discs, Audio CD discs, MP3 discs and CD-R discs.
Belk>re you load a disc, make sure that it is compatible with the player. The tk>llowing discs
CANNOT l)e used with lhis player:
• Laserdiscs
• CD-I, CD-ROM (cnmputer-only discs), CD-RW, DVD-ROM
)
• Discs recorded using other l)roadcast standards (i.e. tAL or SECAM)
26
Playing DVDs
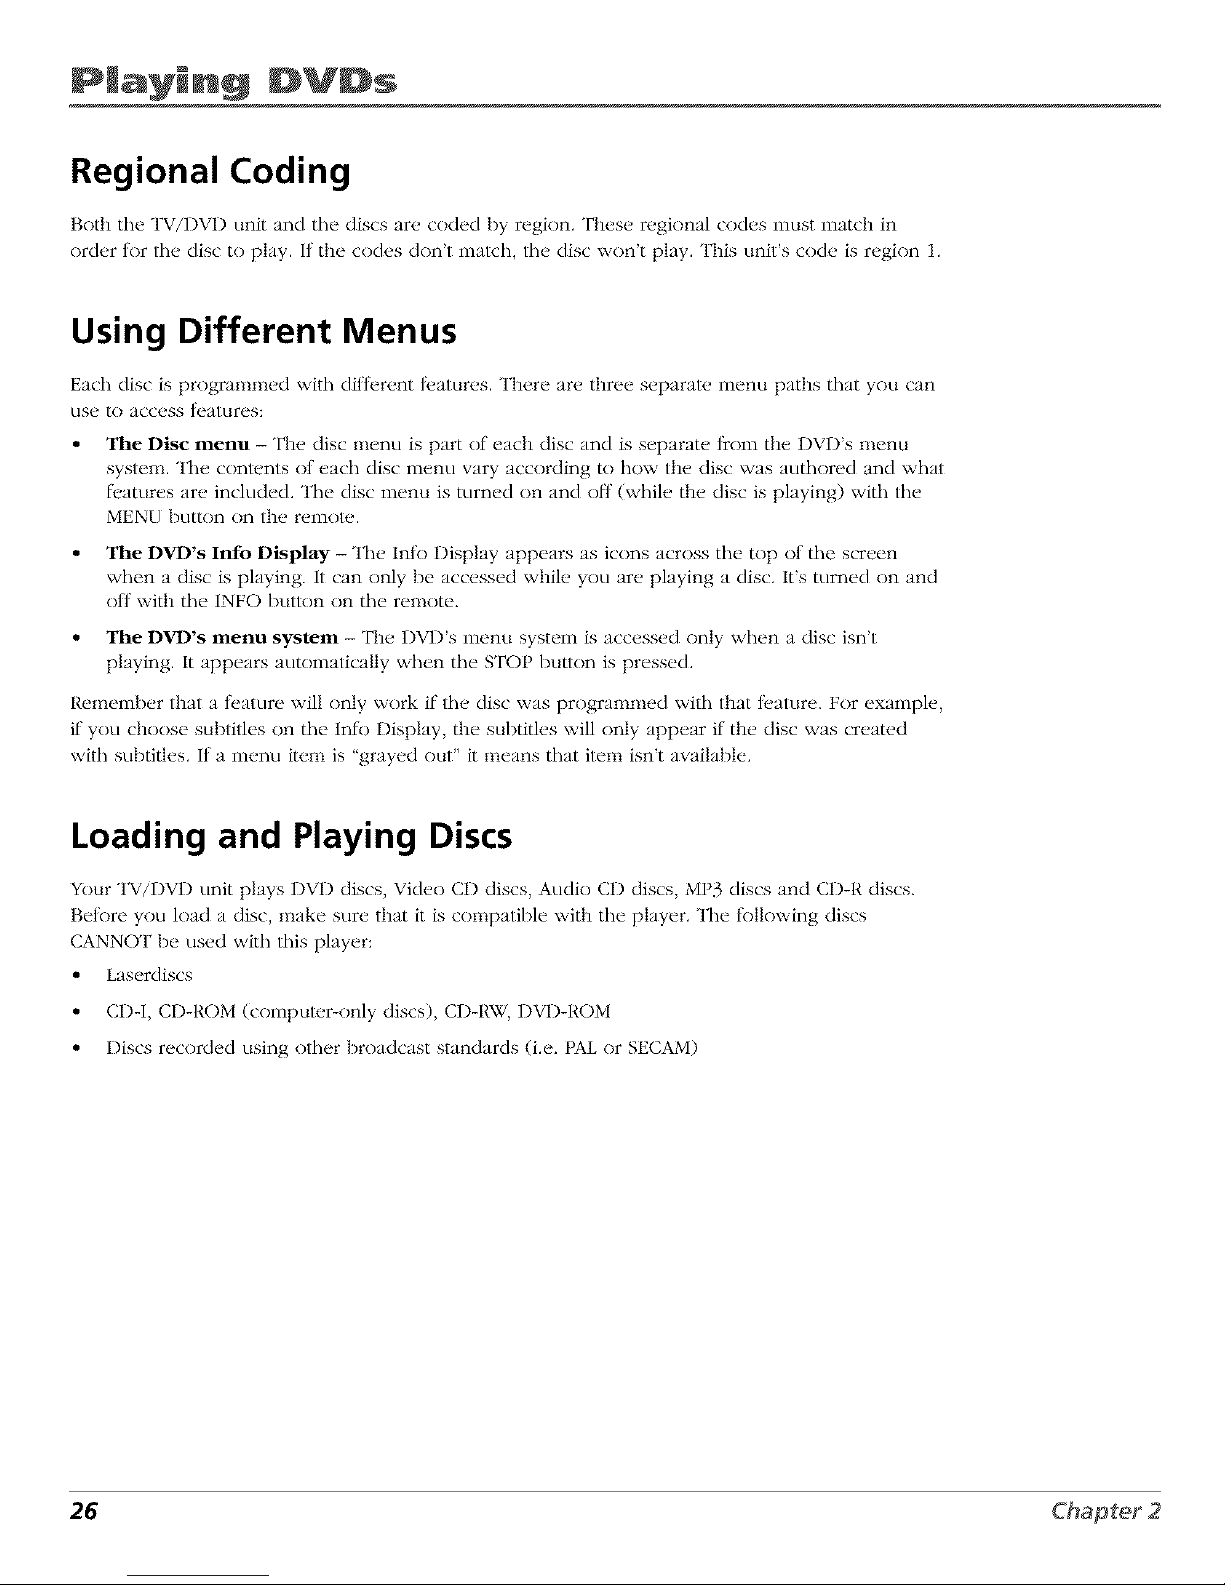
To Load and Play a Disc
To put tile TV/I)VI) in I)V1) mode and play a disc, press the, I)V1) button on the remote control.
This is an example
of a one-sided
disc.
This is an example
of a 2_sided disc.
The title is in the
center.
1. Press tile OPEN*CLOSE butlon on tile t_ont of the TV/DVD. The disc
tray opens.
2. Place a disc gently into tile tray with the disc's label tacing up
(double-sided discs have content on both sides, so you can place
either side up).
3. Press tile OPEN*CLOSE or PLAY button. The disc lray closes.
The TV/DVD reads the disc's table of contents, and then one of
three things happens depending on how the disc was programmed:
• The disc starts playing.
• The disc menu appears on tile screen. One of the options will
start disc play. Highlight that option and press OK on the remote.
• The DVD's main menu appears on tile screen. Highlight tile Play
option and press OK on the remote.
When you stop playing a disc, file unit remembers where you stopped.
When you start playing tile disc again, the unit picks up where you left
off unless the disc is removed, the unit is unplugged, or you pressed tile
STOP button twice.
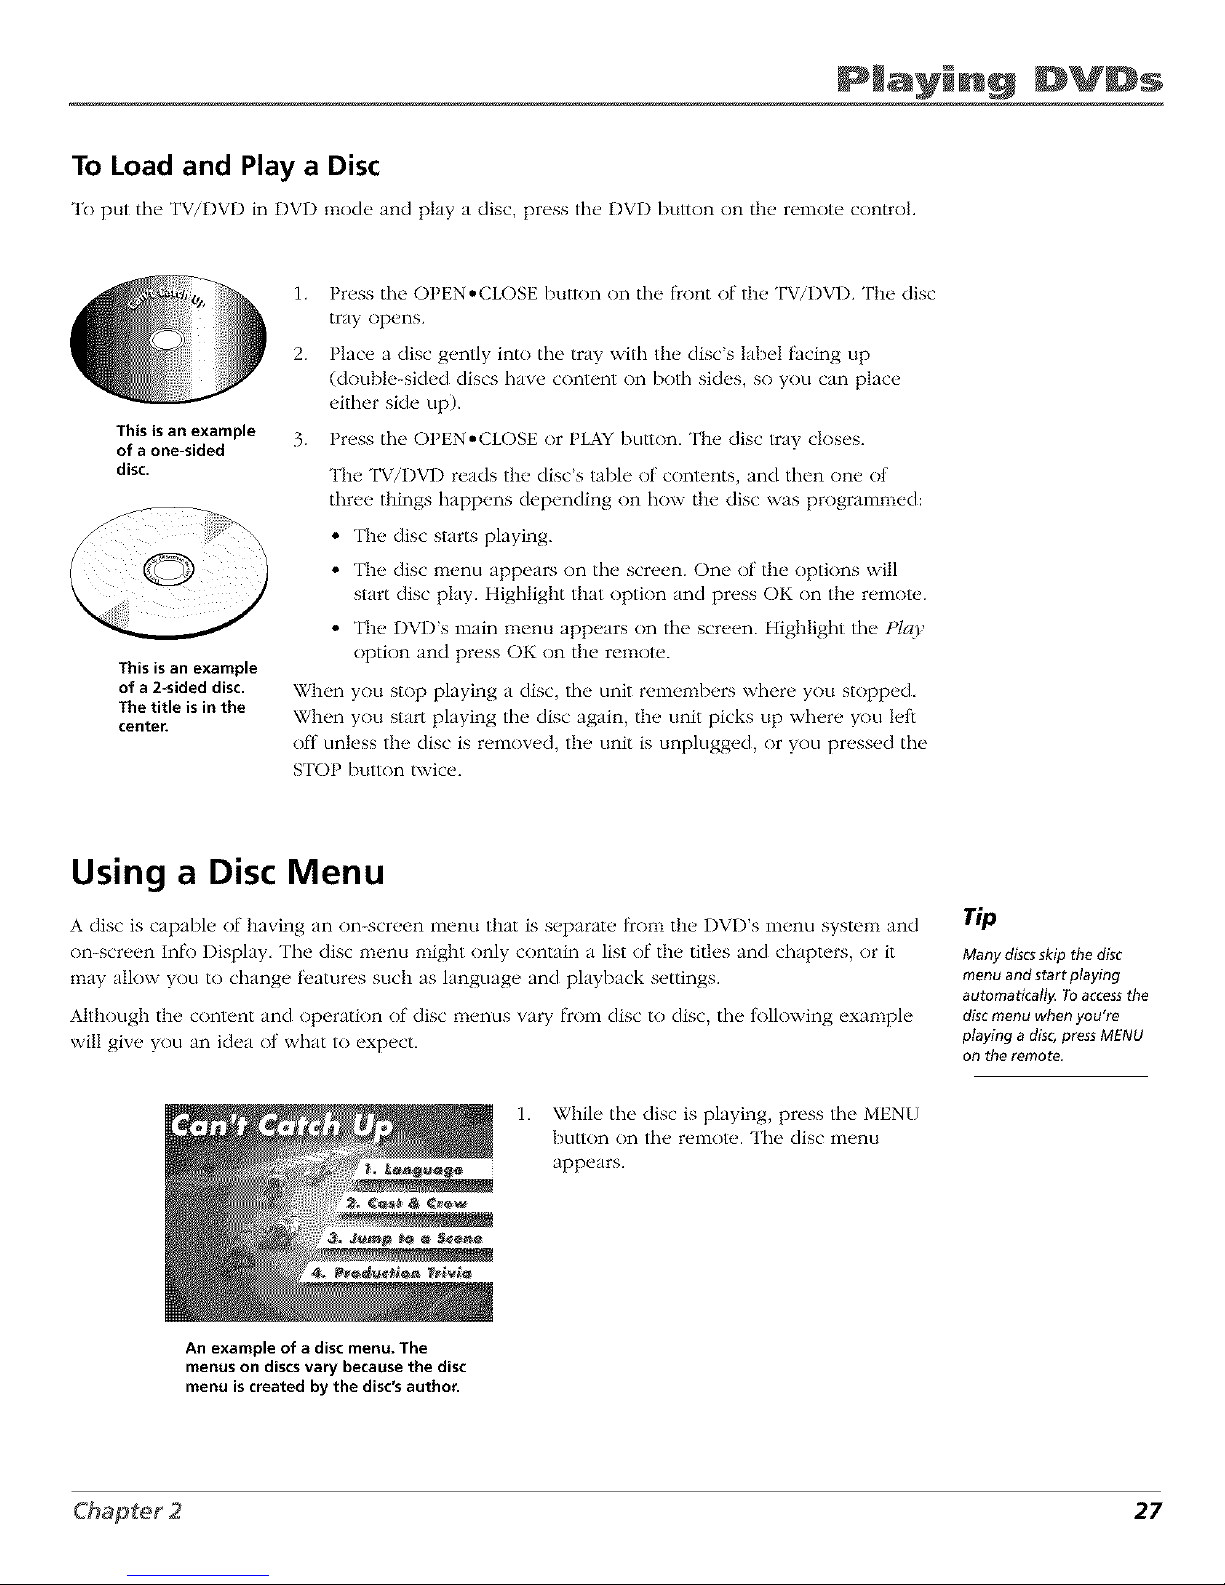
Using a Disc Menu
A disc is capable of having an on-screen menu that is separate from the DVD's menu system and
on-screen Intk) Display. "Filedisc menu might only contain a list of the titles and chapters, or it
may allow you to change t_atures such as language and playback settings.
Although the content and operation of disc menus vary l)com disc to disc, tile tk>llowing example
will give you an idea of what to expect.
ri0
Many discs skip the disc
menu and start playing
automatically. To accessthe
disc menu when you're
playing a disc, press MENU
on the reroo te.
i. While tile disc is playing, press file MEN{)
button on the retools.. The disc menu
appears.
An example of a disc menu. The
menus on discs vary because the disc
menu is created by the disc's author.
27
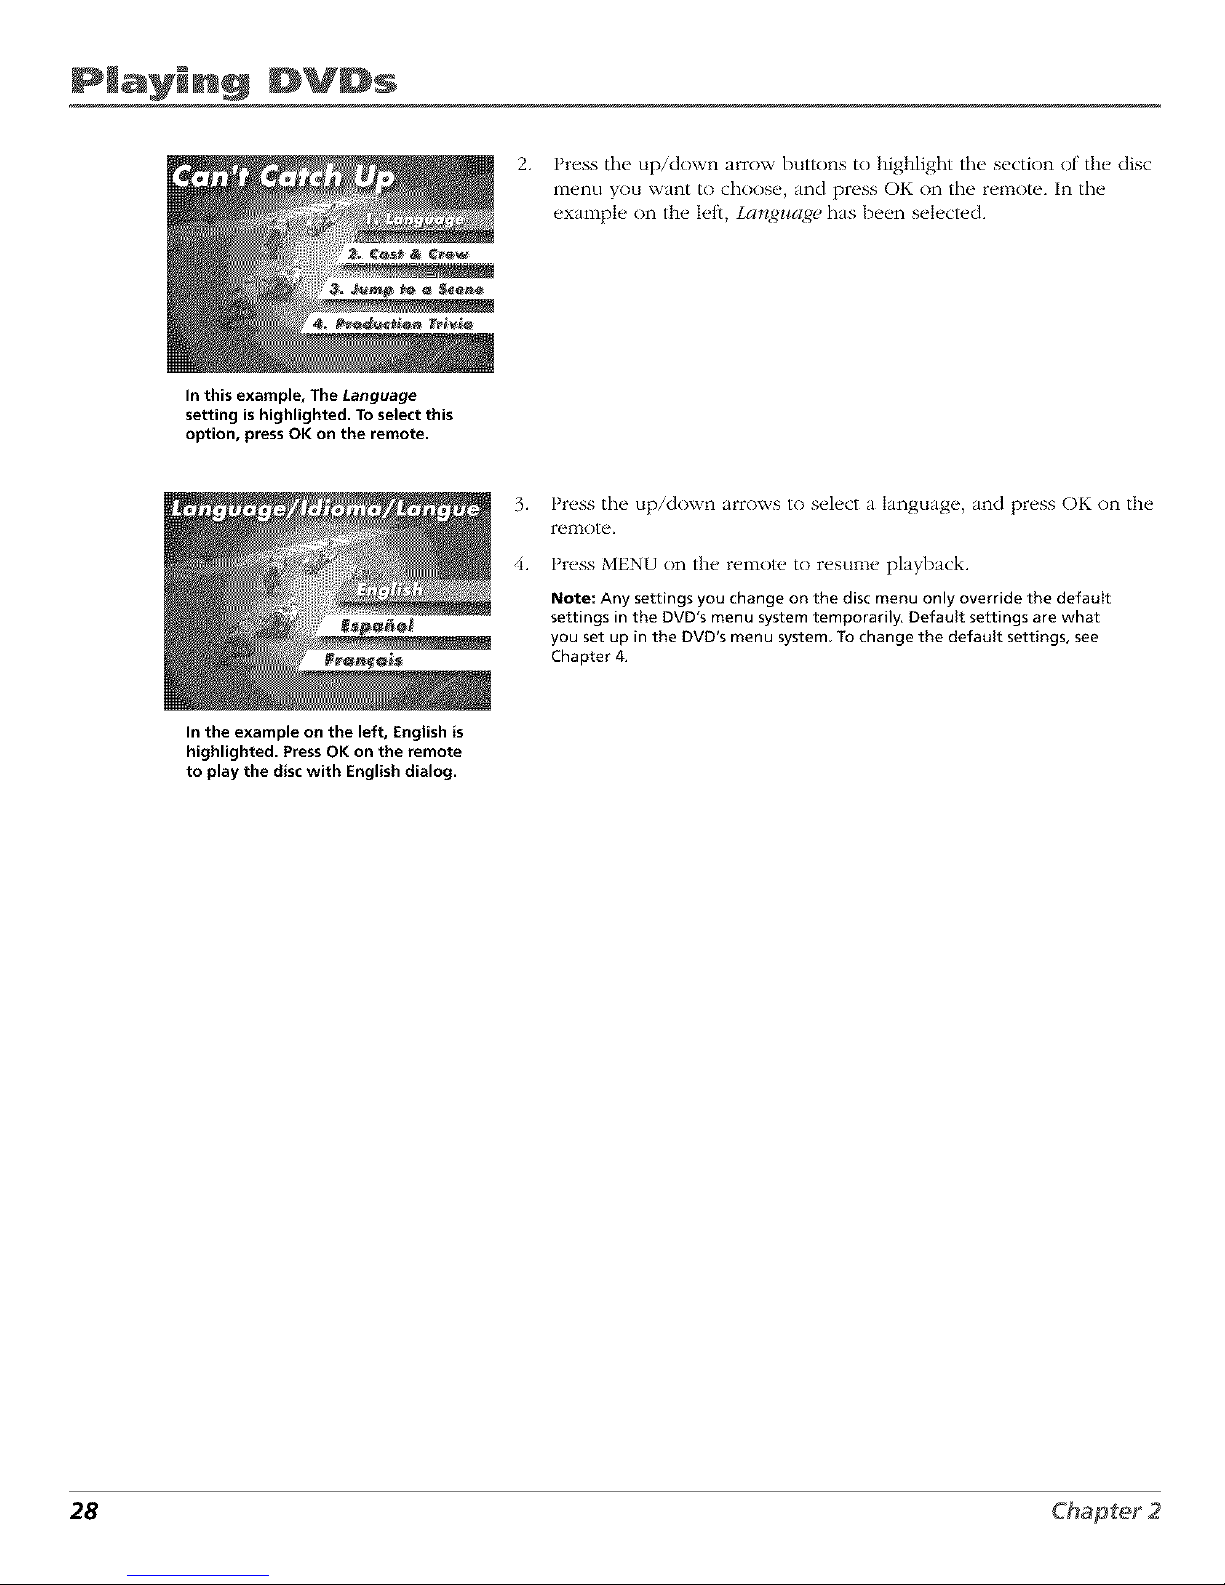
Playing DVD%
2. Press the up/down arrow buttons to highlight the section of the disc
menu you want to choose, and press OK on the remote. In the
example on the leti, Larzgz¢age has been selecled.
In this example, The Language
setting is highlighted. To select this
option, press OK on the remote.
3. Press the up/down arrows to select a language, and press OK on the
remote.
4. Press MENU on the remote, to resume playback.
Note: Any settings you change on the disc menu only override the default
settings in the DVD's menu system temporarily. Default settings are what
you set up in the DVD's menu system. To change the default settings, see
Chapter 4.
In the example on the left, English is
highlighted. Press OK on the remote
to play the disc with English dialog.
28
 Loading...