

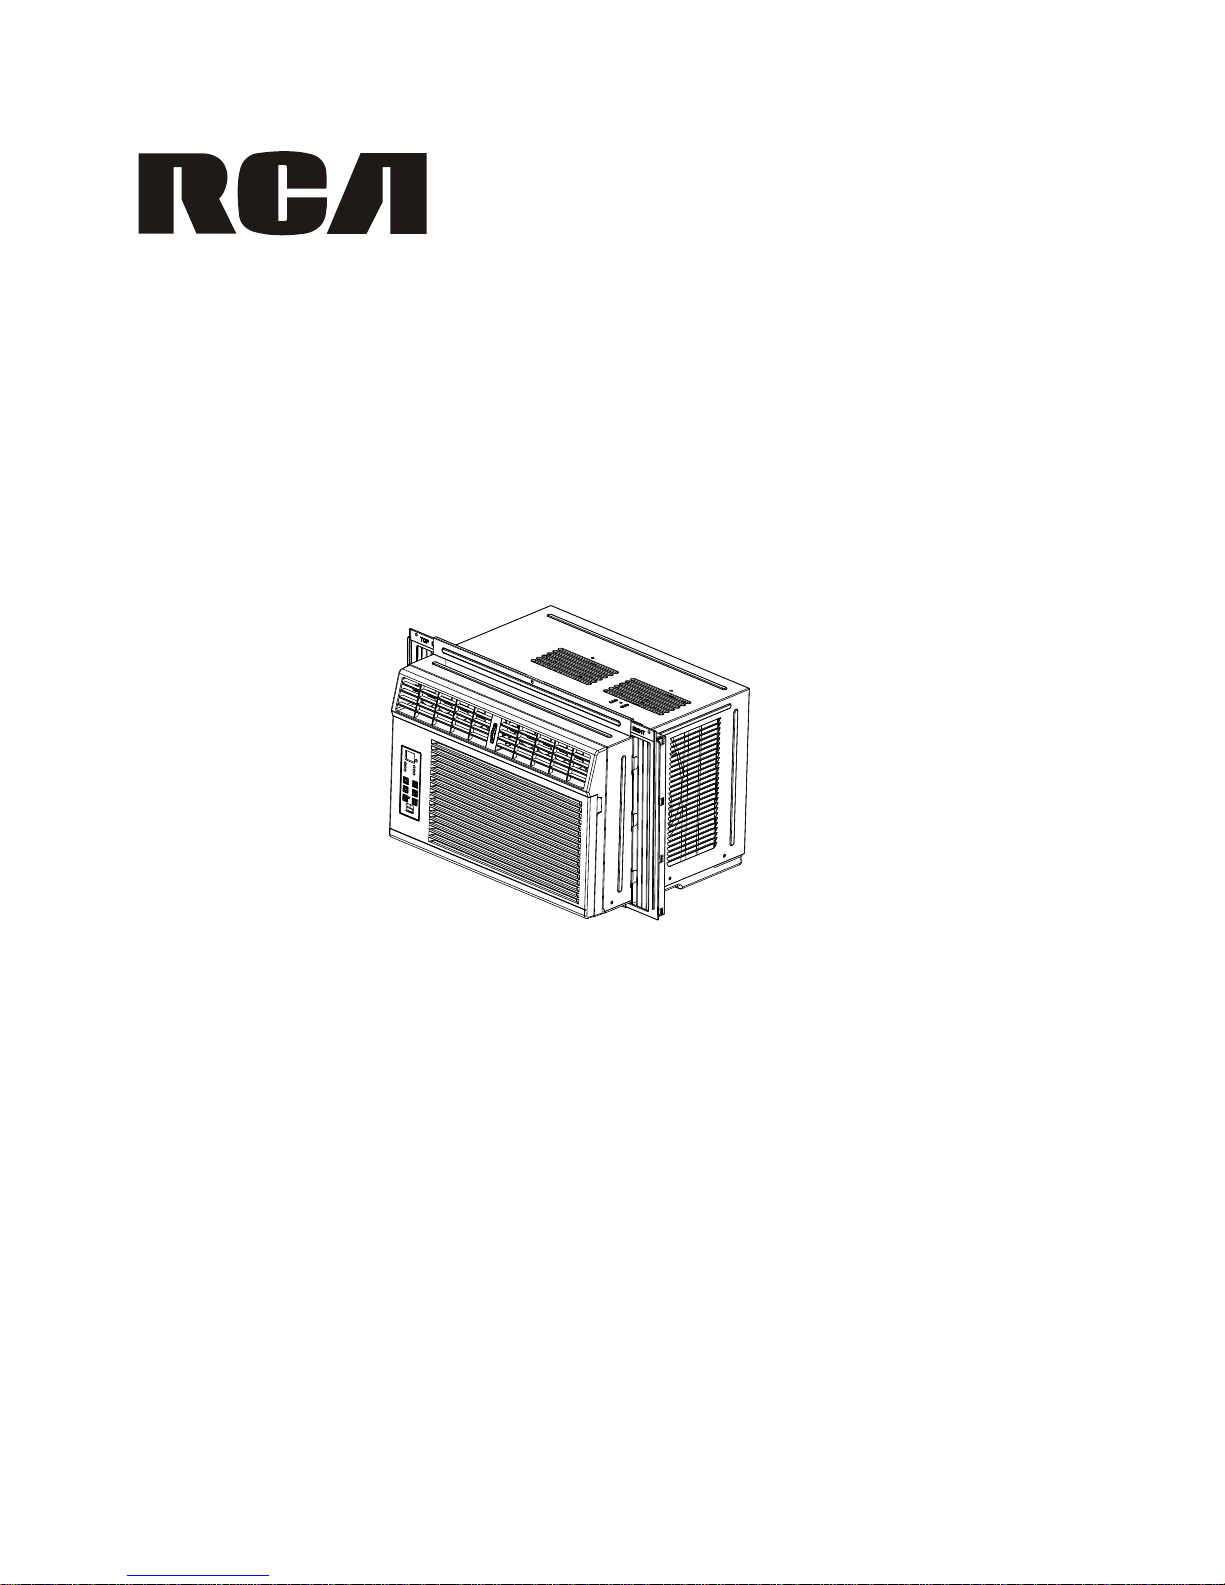
RCA RACE1202-B Owner's Manual
KC-E5
Please read this owner’s manual carefully and thoroughly before
installing and operating your room air conditioner.
Please retain this owner’s manual for future reference after reading it
thoroughly.
OWNER'S MANUAL
(WINDOW TYPE)
AIR CONDITIONER
MODEL:RACE1202%

1
CONTENTS
Contents…………………………………………………………………………………………..1
Important Safety Instructions…………………………………………………………..2
Product Registration………………………………………………………………………..4
Packaging………………………………………………………………………………………..4
Normal Sounds……………………………………………………………………..…………….4
Air Conditioner Features……………………………………………………….…………5
Operating Instructions………………………………………………………………………..6
Care and Cleaning……………………………………………………………………………11
Energy Saving Ideas………………………………………………………………………..12
Trouble Shooting…………………………………………………………………………..13
Installation Instructions……………………………………………………………………14
French Manual…………………………………………………………………………………
20
Important Safety Instructions
NOTE:
This USE & CARE MANUAL provides specific operating instructions for your model. Use the
room air conditioner only as instructed in this USE & CARE MANUAL. These instructions are
not meant to cover every possible condi tion and situtation that may occur. Common sense an d
caution must be practice d when installing, operating, and ma intaing any appliance.
NOTE:
The power supply cord with this air conditioner contains a current detection device designed to reduce the risk
of fire.
Please refer to the section Operation of Current Device for details.In the event that the power supplycord is
damaged, it cannot be repaired. It must be replaced with a cord from the product manufactured.
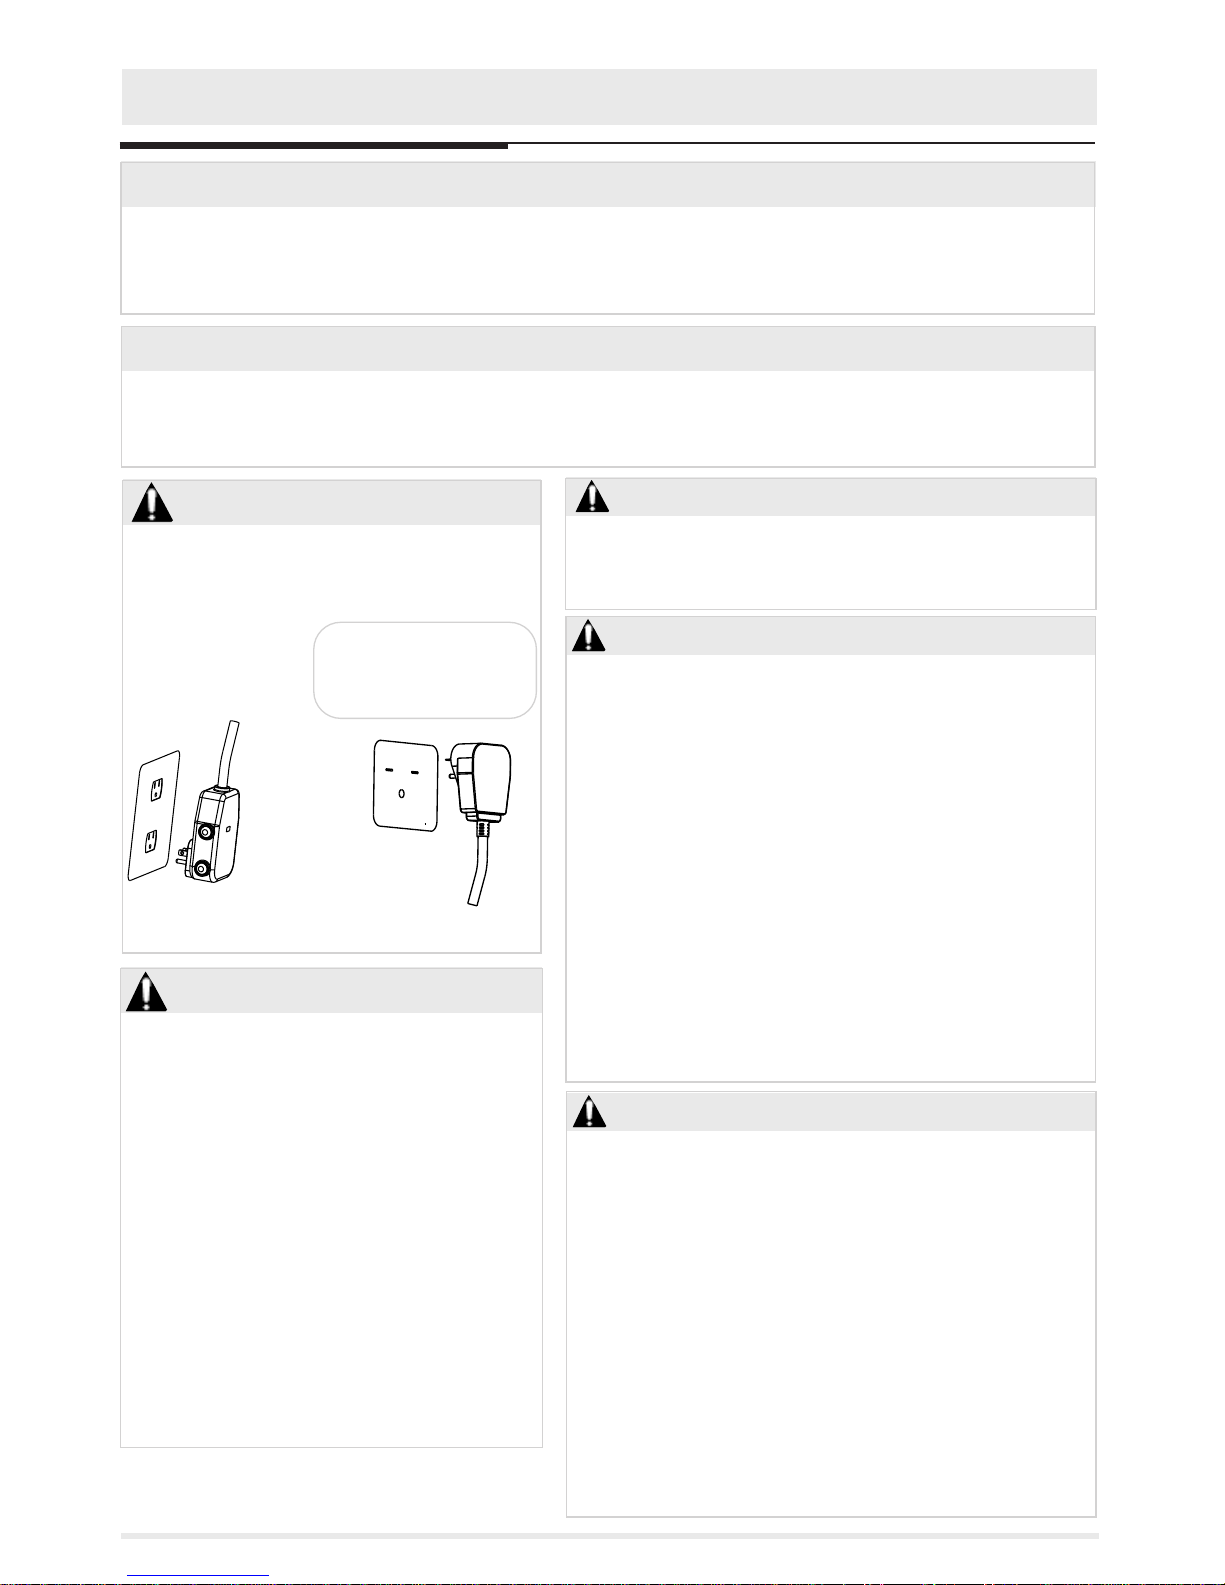
WARNING
Avoid fire hazard or electr ic shock. Do not use
an extension cord or an adaptor plug. Do not
remove any prong from the power cord.
Grounding type wall
receptacle
Do not, under any
circumstances, cut,
remove, or bypass
the grounding prong.
Pow er s upply c or d
wit h 3- prong g ro un ding
plu g an d curre nt
det ec ti on de vi ce
To reduce the risk of fire, electric shock, or injury to persons
when using your air conditioner, follow basic precautions,
including the following:
Be sure the electrical service is adaquate for the model
you have chosen. This information can be found on the
serial plate, which is located on the side of the cabinet
and behind the grille.
If the air conditioner is to be installed in a window, you
will probably want to clean both sides of the glass first.
If the window is a triple-track type with a screen panel
included, remove the screen complertely before
installation.
Be sure the air conditioner has been securely and
correctly installed according to the separte installation
instructions provided with this manual. Save this manual
and the installation instructions for possible future use
in removing or reinstalling this unit.
When handling the air conditioner, be careful to avoid
cuts from sharp metal fins on front and rear coils.
Prevent Accidents
To complete electrical rating of your new room air coditioner
is stated on the serial plate. Refer to the rating when
checking the electrical requirements.
Be sure the air conditioner is properly grounded. To
minimize shock and fire hazards, proper grounding is
important. The power cord is equipped with a three-
-prong grounding plug for protection against shock
hazards.
Your air conditioner must be used in a properly grounded
wall receptacle. If the wall receptacle you intend to use
is not adaquately grounded or protected by a time delay
fuse or circuit breaker, have a qualified electrician install
the proper receptacle.
Do not run air conditioner without outside protective
cover in place. This could result in mechanical damage
with the air conditioner.
Do not use an extension cord or an adapter plug.
Electrical Information
2
This air conditoner contains no user-serviceable
parts. Always call an authorized servicer for
repairs.
Do not insert or place fingers or objects into the
air discharge area in the front of the unit.
Do not start or stop the air conditioner by
unplugging the power cord or turning off the
power at the electric box.
Do not cut or damage the power cord.
If the power cord is damaged, it should only be
replaced by an authorized servicer.
In the event of a malfunction (sparks, burning
smell,etc.), Immemediately stop the operation,
disconnect the power cord, and call an
authorized servicer.
Do not operate the air conditioner with wet hands.
Do not pull on the power cord.
Do not drink any water that is drained from the
air conditioner.
WARNING
DANGER! Avoid Serious Inju ry or Dea th
WARNING
WARNING
Do not store or use gasoline or other flammable vapors and liquids in
the vicinity of this or any other appliance. Read product tabels for
flammability and other warnings.
For Your Safety
WARNING
Or
Pow er s upply c or d
wit h 3- prong g ro un ding
plu g
Important Safety Instructions
SAFETY PR ECAUTIONS
Provide occasional ventilation during use. Do not direct aif flow at fireplaces or other heat related sources as this could
cause flare ups or make units run excessively.
Do not climb on or place objects on outdoor part of the unit.
Do not hang objects off the unit.
Do not place containers with liquids on the unit.
Turn off the air conditioner at the power source when it will not be used for an extended period of time.
Periodically check the condition of the units installation accessories for any damage.
Do not apply heavy pressure to the radiator fins of the unit.
Operate the unit with air filter in place.
Do not block or cover the intake grille, discharge area and outlet ports.
Ensure that any electrical/electronic equipment is one yard away from the unit.
Do not use or store flammable gases near the unit.
DANGER! Avoid Injury or damage to the unit or other property
READ THIS SECTION BEFORE ATTEMMPTING TO OPERATE AIR CONDITIONER.
Unit must be upright for one hour prior to operating.
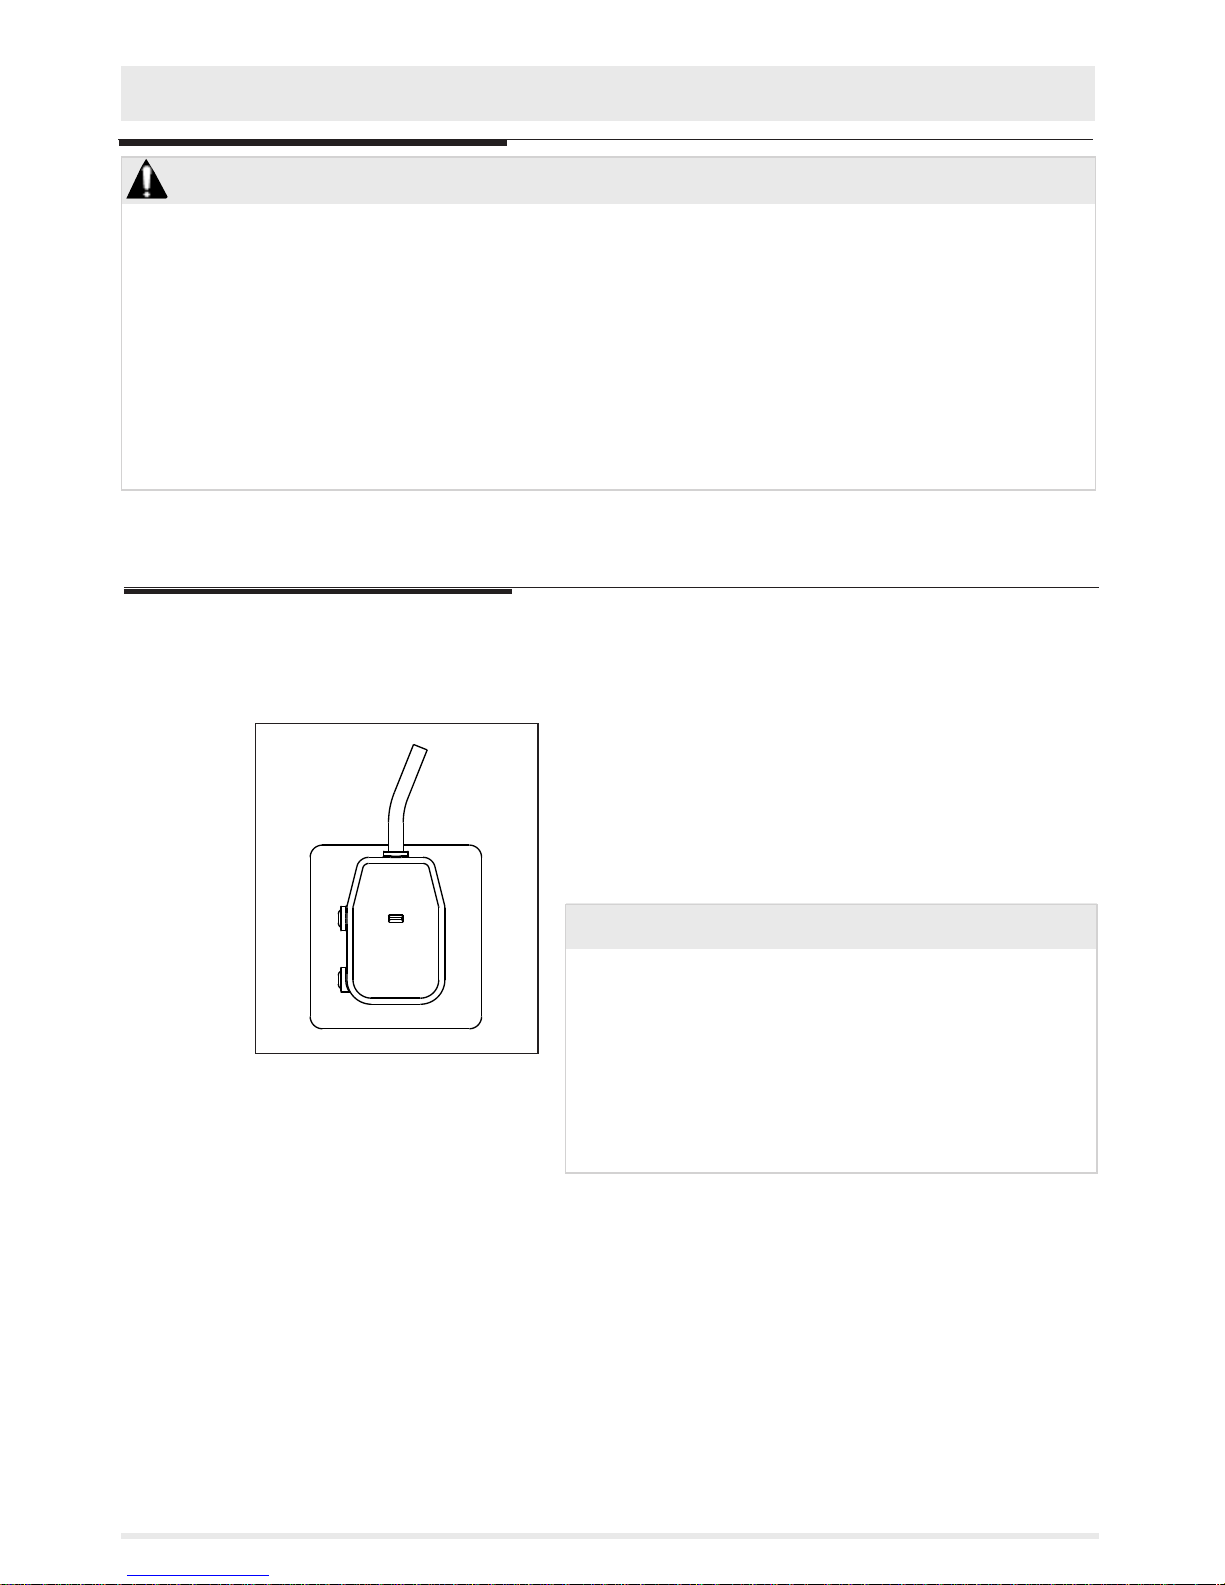
Operation of Current Device
Plug in
& press RESET
Remark: The apperance of actual plug
may be slightly different from the line
drawing shown in the figure. The line
drawing is for reference only.
TES T
RES ET
POWE R
The power supply cord contains a current device that senses
damage to the power cord. To test your power supply cord do the
following:
1. Plug in the Air Conditioner.
2. The power supply cord will have TWO buttons on the plug side.
Press the TEST button. You will notice a click as the RESET button
pops out.
3. Press the RESET button. Again you wil notice a click as the
button engages.
4. The power supply cord is now supplying electricity to the unit.
NOTE:
Do not use this device to turn the uinit on or off.
Always make sure the RESET button is pushed in for correct
operation.
The power supply cord must be replaced if it fails to reset
when either the TEST button is pushed, or it cannnot be
reset. A new one can be obtained from the product
manufacturer.
If power supply cord is damaged, it CANNOT be repaired. It
must be replaced by one obtained from the product
manufacturer.
3
Product Registration, Packaging & Normal Sounds
Product Registration
Record Your Model and Serial Numbers
Record in the space provided below the model and serial
numbers. On all models, the serial plate is located on the
outside of the cabinet.
Model Number
Serial Number
Packaging
Remove all packaging from inside the carton,
along with any inserts placed into the side
louvers
PACKAGING INSERTS
Normal Sounds
Vibration
Unit may vibrate and make
noise becaus e of poor wall or
window construction or
incorrect installation.
Gurgle/Hiss
“Gurgling or hissing”
noise may be heard due to
refrigerant passing through
evaporator during normal
operation.
4
Fan
You may he ar air
movement from the fan.
Condenser
You may he ar droplets of water
hitting the condenser, causing
a pinging or clicking sound.
Compressor
The modern high effici ency compressor
may have a high pi tched hum or pulsating
noise that cycles on and off.
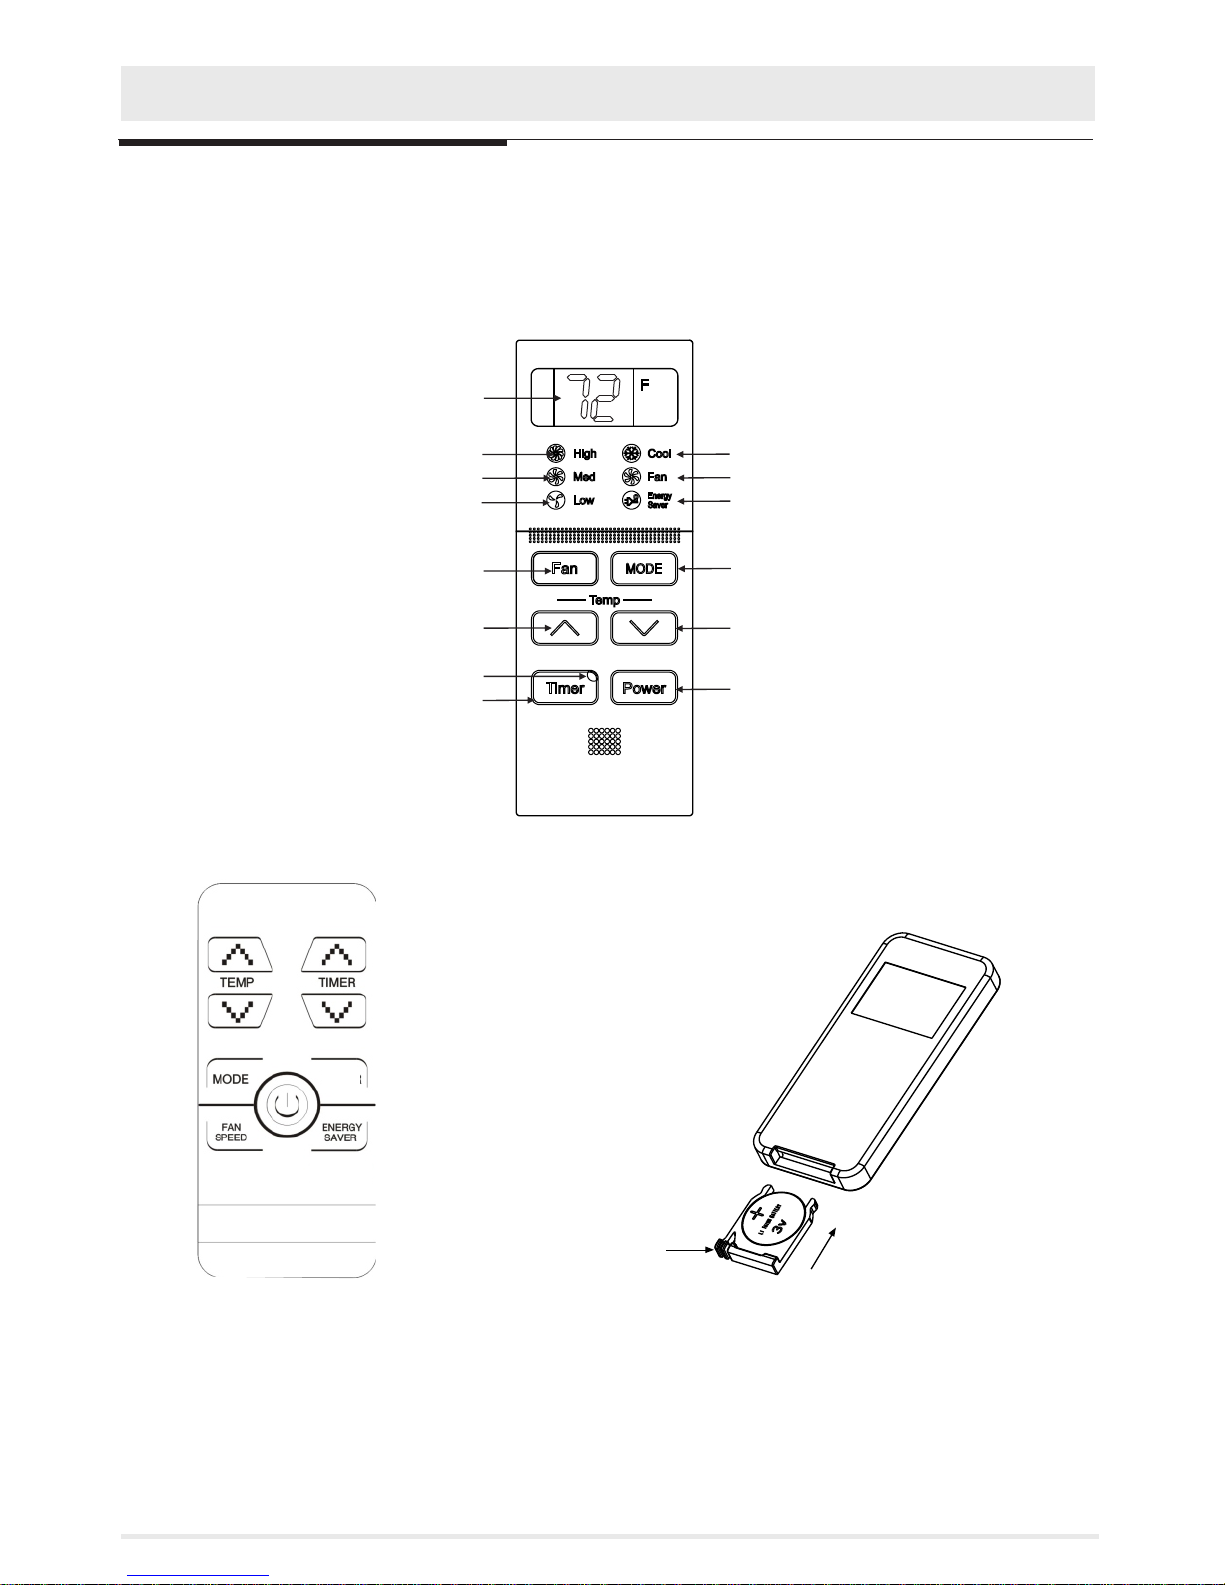
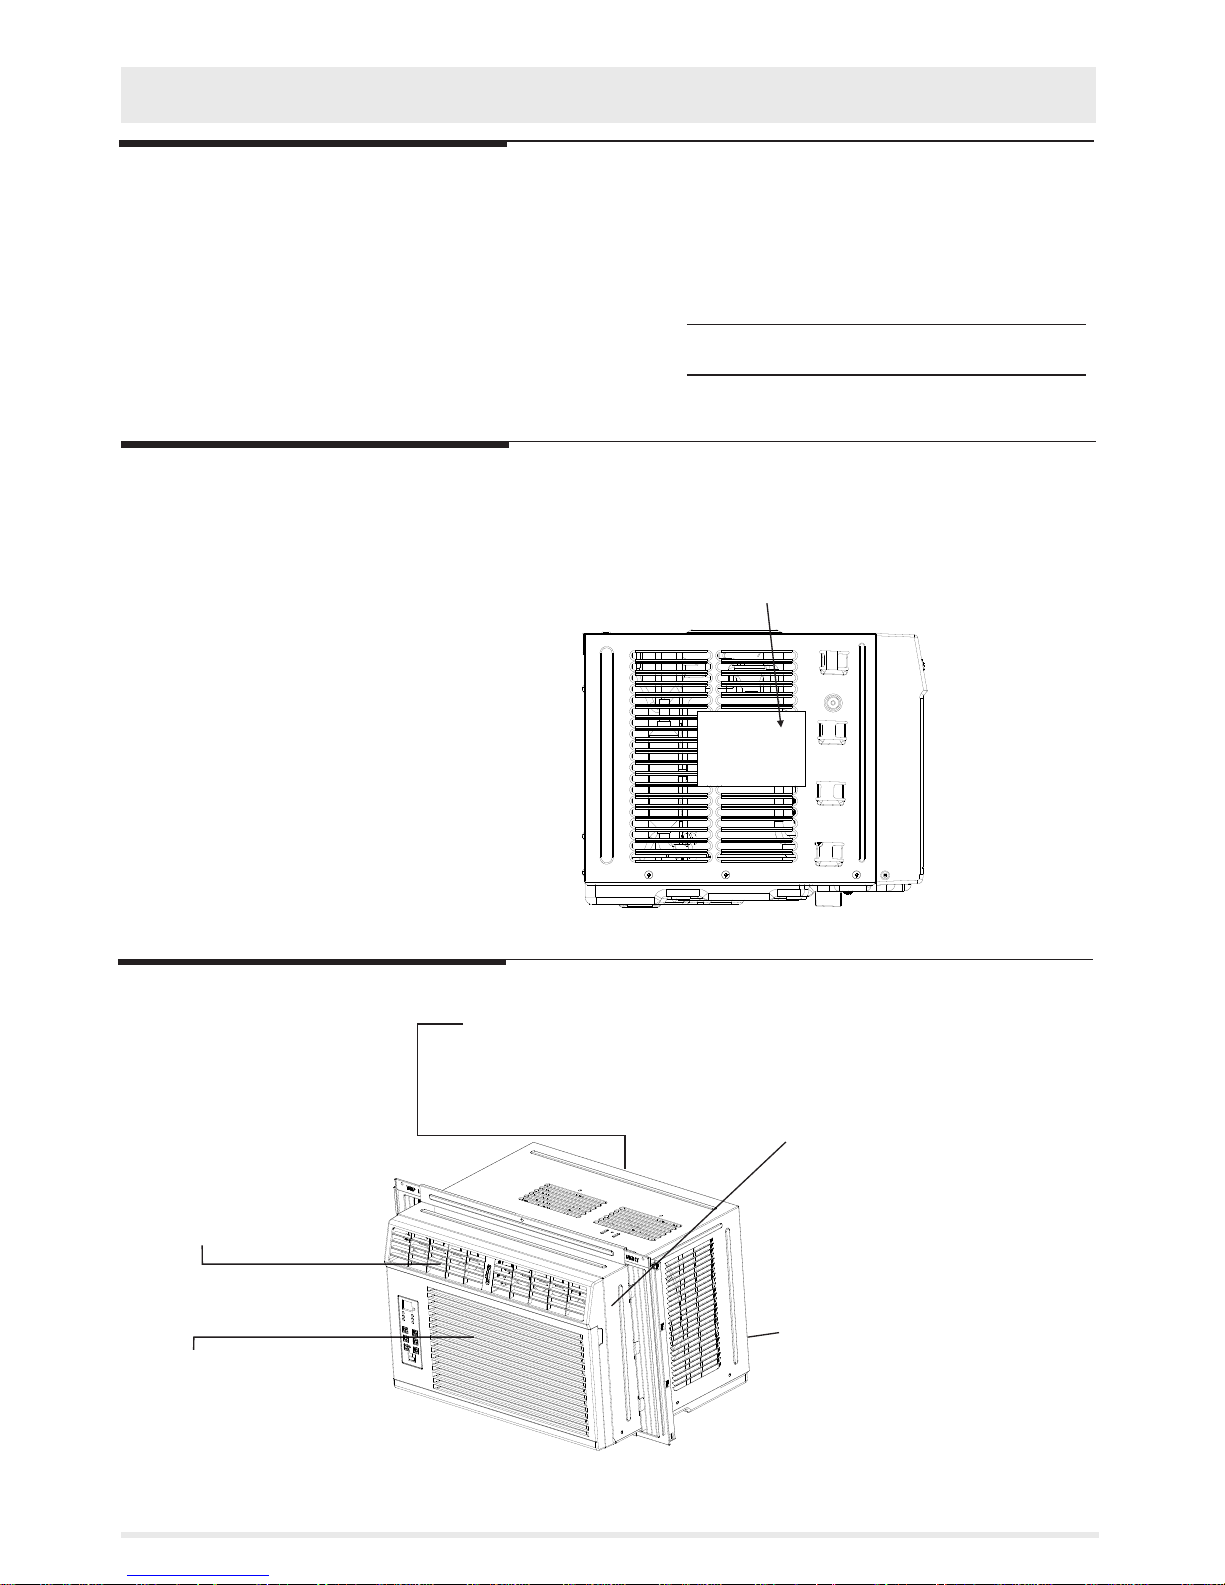
Air Conditioner Features
Air Conditioner Features
ELECTRONIC CONTROL
Before you begin, thoroughly familiarize yourself with
the control panel and remote as shown below and all its
functions, then follow the symbol for the functions you
desire. The unit can be controlled by the touch pad alone
or with the remote.
SLEEP
TIMER SET BUTTON
FAN SPEED BUTTON
HIGH SPEED INDICATOR LAMP
MEDIUM SPEED INDICATOR LAMP
LOW SPEED INDICATOR LAMP
ENERGY SAVER INDICATOR LAMP
OPERATION MODE BUTTON
ON/OFF BUTTON
COOL MODE INDICATOR LAMP
FAN MODE INDICATOR LAMP
SET INCREASE BUTTONTEMPERATURE
SET DECREASE BUTTONTEMPERATURE
TIMER INDICATOR LAMP
5
DISPLAY TEMPERATURE/TIME
REMOTE CONTROL
TO REPLACE BATTERY
TAB
Battery Size: CR2025
Turn Remote Control upside down. Squeeze tab
and pull to remove battery tray. Place battery
in tray with POSITIVE(”+ ”) side facing up,
according to diagram. Re-insert battery tray.
Operating Instructions
NOTE
The following instructions repres ent the Touch Pad, the same instructions can be used for the
Remote Control.
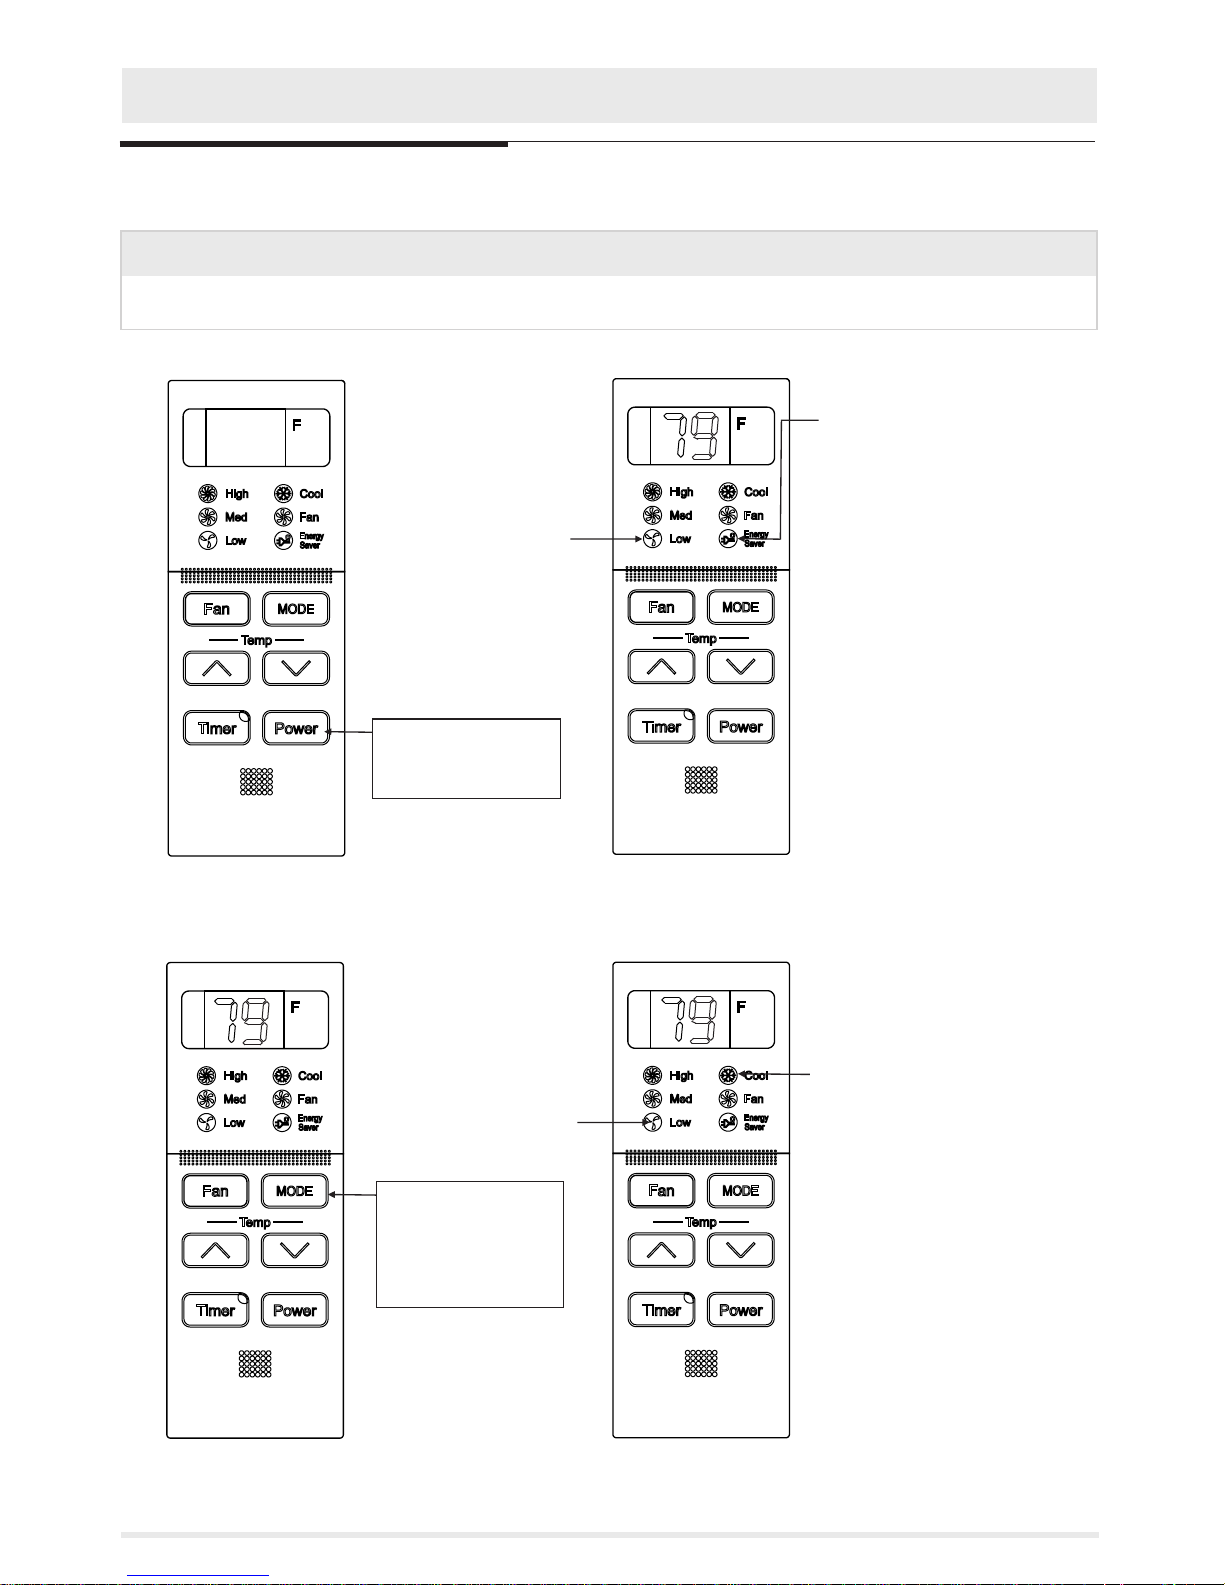
TO TURN UNIT ON:
DO THIS:
PRESS POWER
BUTTON
YOU WILL SEE:
Note: When unit is turned on
it defaults energy saver
mode and the temperature
is79F(26℃). But if the unit
has been set fan mode before,
it defaults fan mode when
turned on again.In energy
saver mode, fan motor runs
when the compressor runs,
fan motor stops when the
compressor stops. When the
room temperature is above
the set temperature, the
compressor turns back on.
Energy saver mode can also
be initiated by pressing the
button on the remote control.
Energy saver indicator lamp
lights
Low speed indicator lamp
lights
TO OPERATE COOL MODE:
DO THIS:
PRESS
MODE BUTTON
CHOOSE
COOL
YOU WILL SEE:
Note: In this mode the initi al
set temperature is 79F(26℃).
Cool mode indicator lamp lights
Low speed indicator lamp
lights
6
Operating Instructions
Operating Instructions
Operating Instructions
(continued)
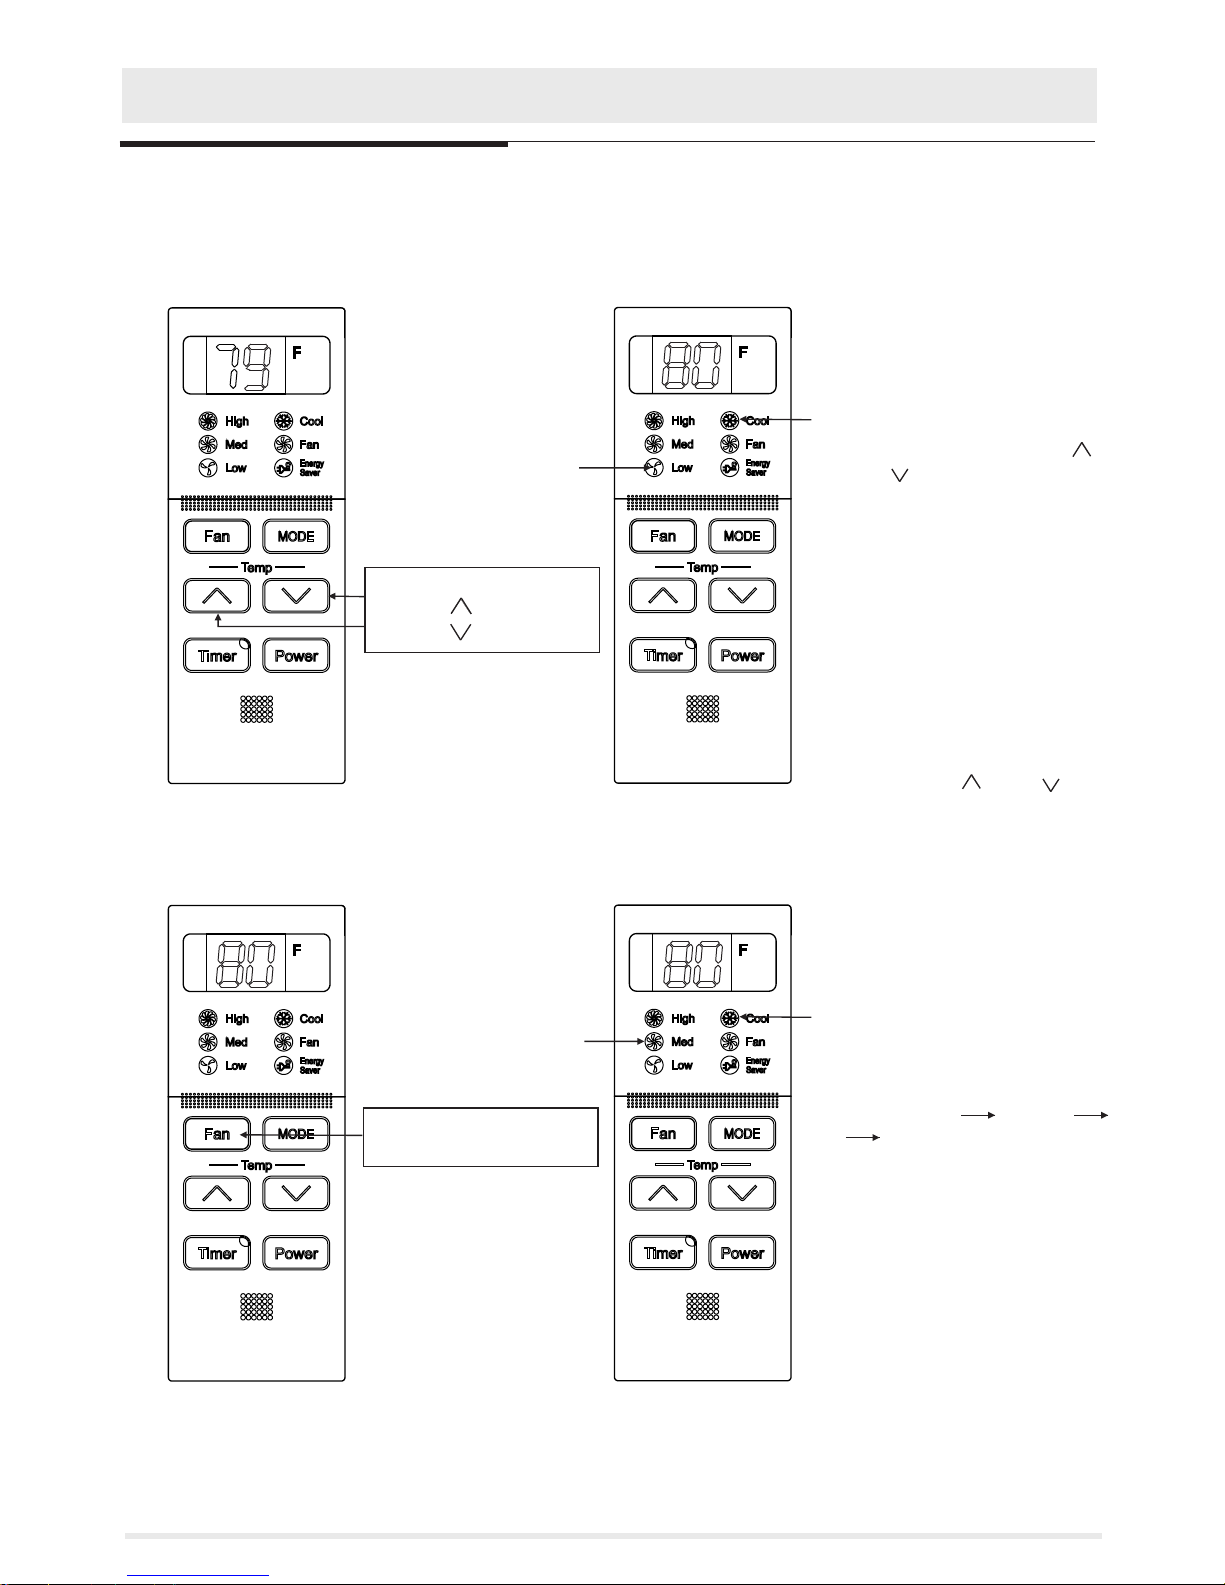
TO CHANGE T EMPERATURE SETTING: YOU WILL SEE:
DO THIS:
PRESS TO RAISE
PRESS TO LOWER
Note: Tap or hold either up ( )
or down ( ) button until the
desired temperature is seen
on the display. This temperature will be automatically
maintained anywhere between
61F(16℃) and 88F(31℃).
When the unit is on, at cool
mode the set temperature is
displayed on the display all
along, if you want the display
to read the actual room
temperature. See To Operate
on Fan Onlysection on page
8. At fan mode, ( ) and ( )
buttons are not functional.
Cool mode indicator lamp lights
Low speed indicator lamp
lights
DO THIS:
PRESS TO SELECT
Note:Press the fan speed
button to selet the fan speed in
the order of: low medium
high low.
Cool mode indicator lamp lights
Medium speed indicator
lamp lights
TO ADJUST FAN SPEEDS: YOU WILL SEE:
7

Operating Instructions
Operating Instructions
(continued)
TO OPERATE ON FAN ONLY: YOU WILL SEE:
DO THIS:
PRESS
MODE BUTTON
CHOOSE
FAN
Note:Use this function only
when cooling is not desired,
such as for room air circulation.
You can choose any fan speed
you prefer. During this function,
the display will show the actual
room temperature, not the set
temperature as in the cooling
mode.
Fan mode indicator lamp lights
Medium speed indicator
lamp lights
TIMER: DELAY STOP/START FEATU RE YOU WILL SEE HOW MUCH TIME IS CHOS EN:
FIRST
DO THIS:
PRESS
TIMER BUTTON
8
SECOND
DO THIS:
PRESS
UP/DOWN BUTTON
Timer indicator lamp lights
THIRD
DO THIS:
PRESS
MODE BUTTON
CHOOSE MODE
Operating Instructions
9
Note: For Delay Stop , the unit must be in the On position.
First, press TIMER button, then adjust timer setting, tap or hold the UP ( ) or the DOWN arrow ( ) to
change delay timer at 1 hour increments, up to 24 hours. The time will be shown on the display, then the
control will automayically change the display back to the set temperature in 5 seconds.
Note: For Delay Start, the unit must be in the Off position.
First, press TIMER button, then adjust timer setting, tap or hold the UP ( ) or the DOWN arrow ( ) to
change delay timer at 1 hour increments, up to 24 hours. The control will count down the time remaining
until start (3,2,1,etc.). Press mode button to select modes, once energy saver or cool mode is chosen,
the set temperature defaults 79F(26℃). Press fan speed button to select fan speed.The display will
show the hours remaining until the unit start/stop. Pressing the unit On/Off button at any time will
cancel the Delay Start/Stop function. The Delay Start/Stop Feature will work until the unit either starts
or stops. Once that happens the above steps have to be repeated again.
Operating Instructions
(continued)
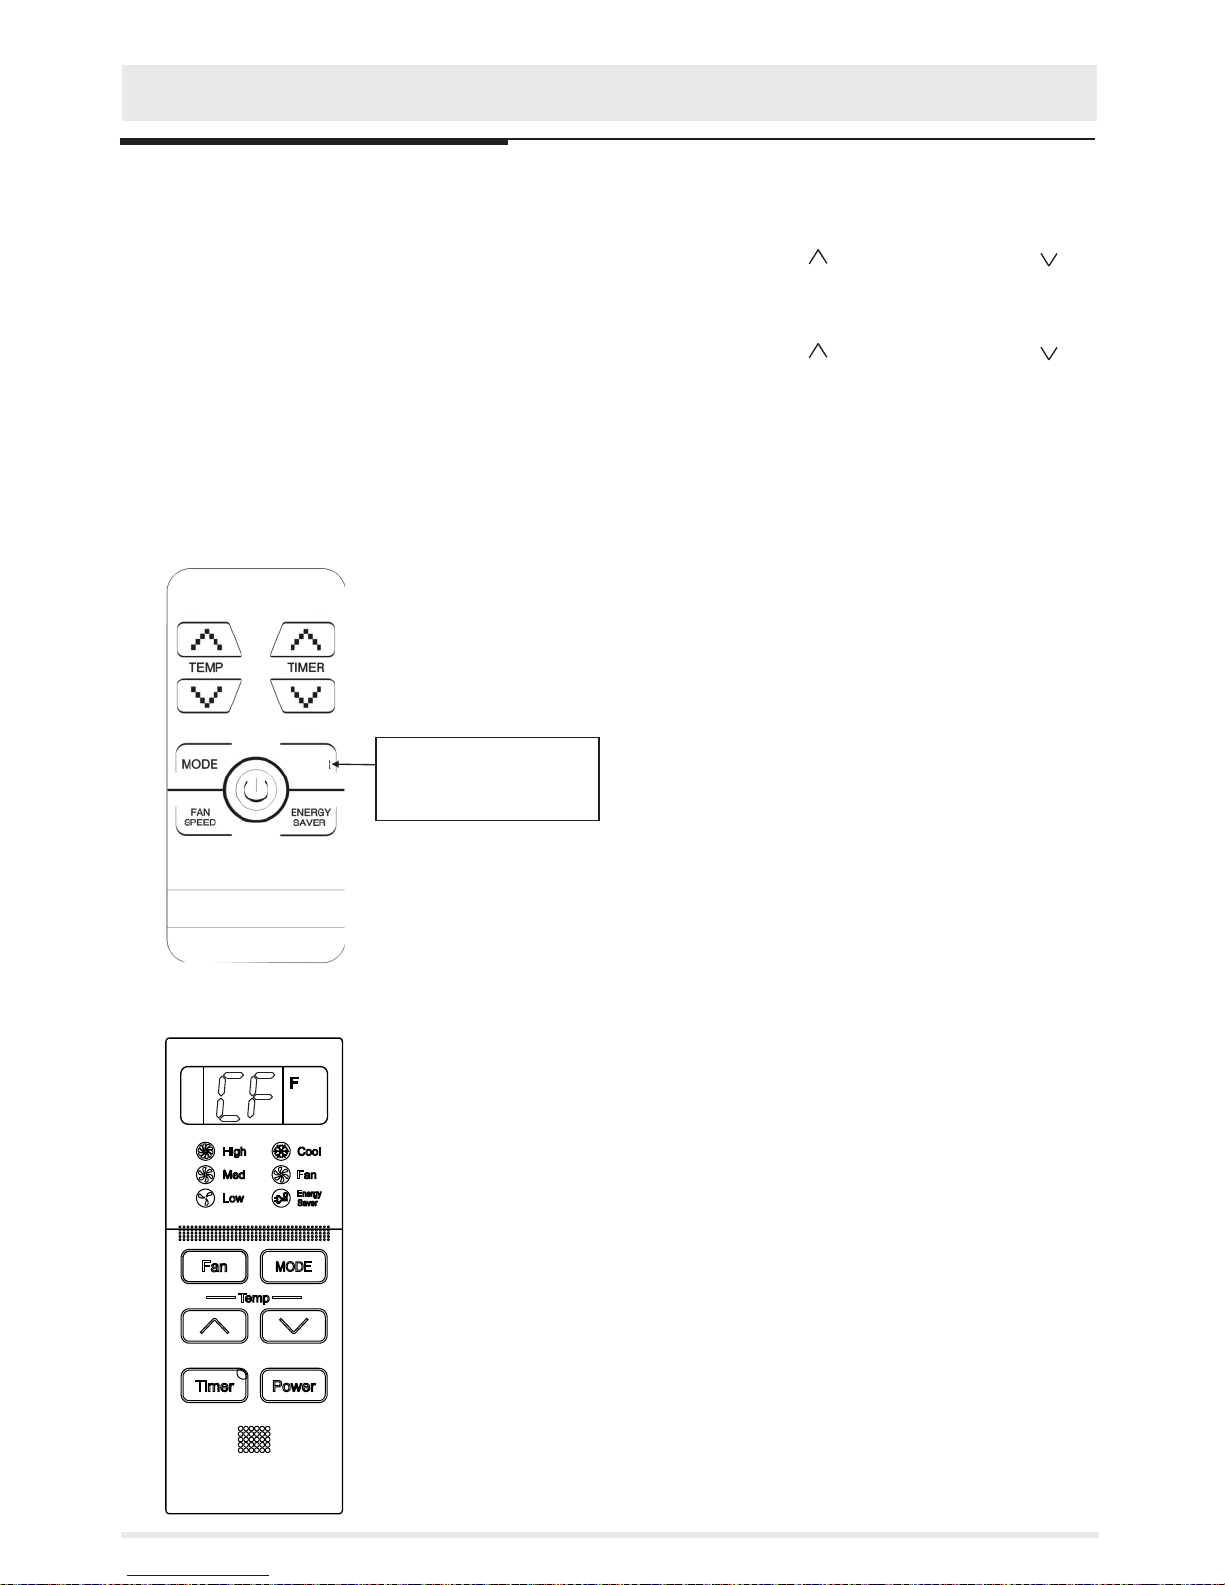
SLEEP
SLEEP FEATURE:
DO THIS:
PRESS
SLEEP BUTTON
Note:Press the sleep button on the remote
control to start sleep function .
During cooling mode, the set temperature will
increase 2F(1℃) one hour after setting sleep
mode, and will increase 2F(1℃) once more in
the next one hour (that means the set
temperature increases 4F(2℃) within two hours
after setting sleep mode), then the air
conditioner will work at this temperature all along.
During sleep mode, fan speed will be "LOW".
The sleep mode
can also be cancelled at any time during operation
by again pressing the “Sleep”button.
Press
fan speed button during sleep mode, the air
conditioner will stop sleep function.
Note:This feature is a reminder
to clean tne air filter (See Care
and Clean) for more efficient
operation. After 200 hours of
operation the display panel
will flashly displayCF to
remind you of cleaning the air
filter.
FILTER REM INDER, YOU WILL SEE:
 Loading...