

Page 1
USER M_-_UAL
Page 2
SO ADVANCED. YET SO SIMPLE.TM
We're building our reputation on produds that are so advanced, they're
simple. If you want all the benefits of the latest technology, without the
complexity, we have a very simple solution.
It's called ProScan. State-of-the-art technology that real people can use.
Thank you for choosing ProScan. And welcome to our company-wide
commitment to your complete satisfaction and viewing enjoyment.
Page 3
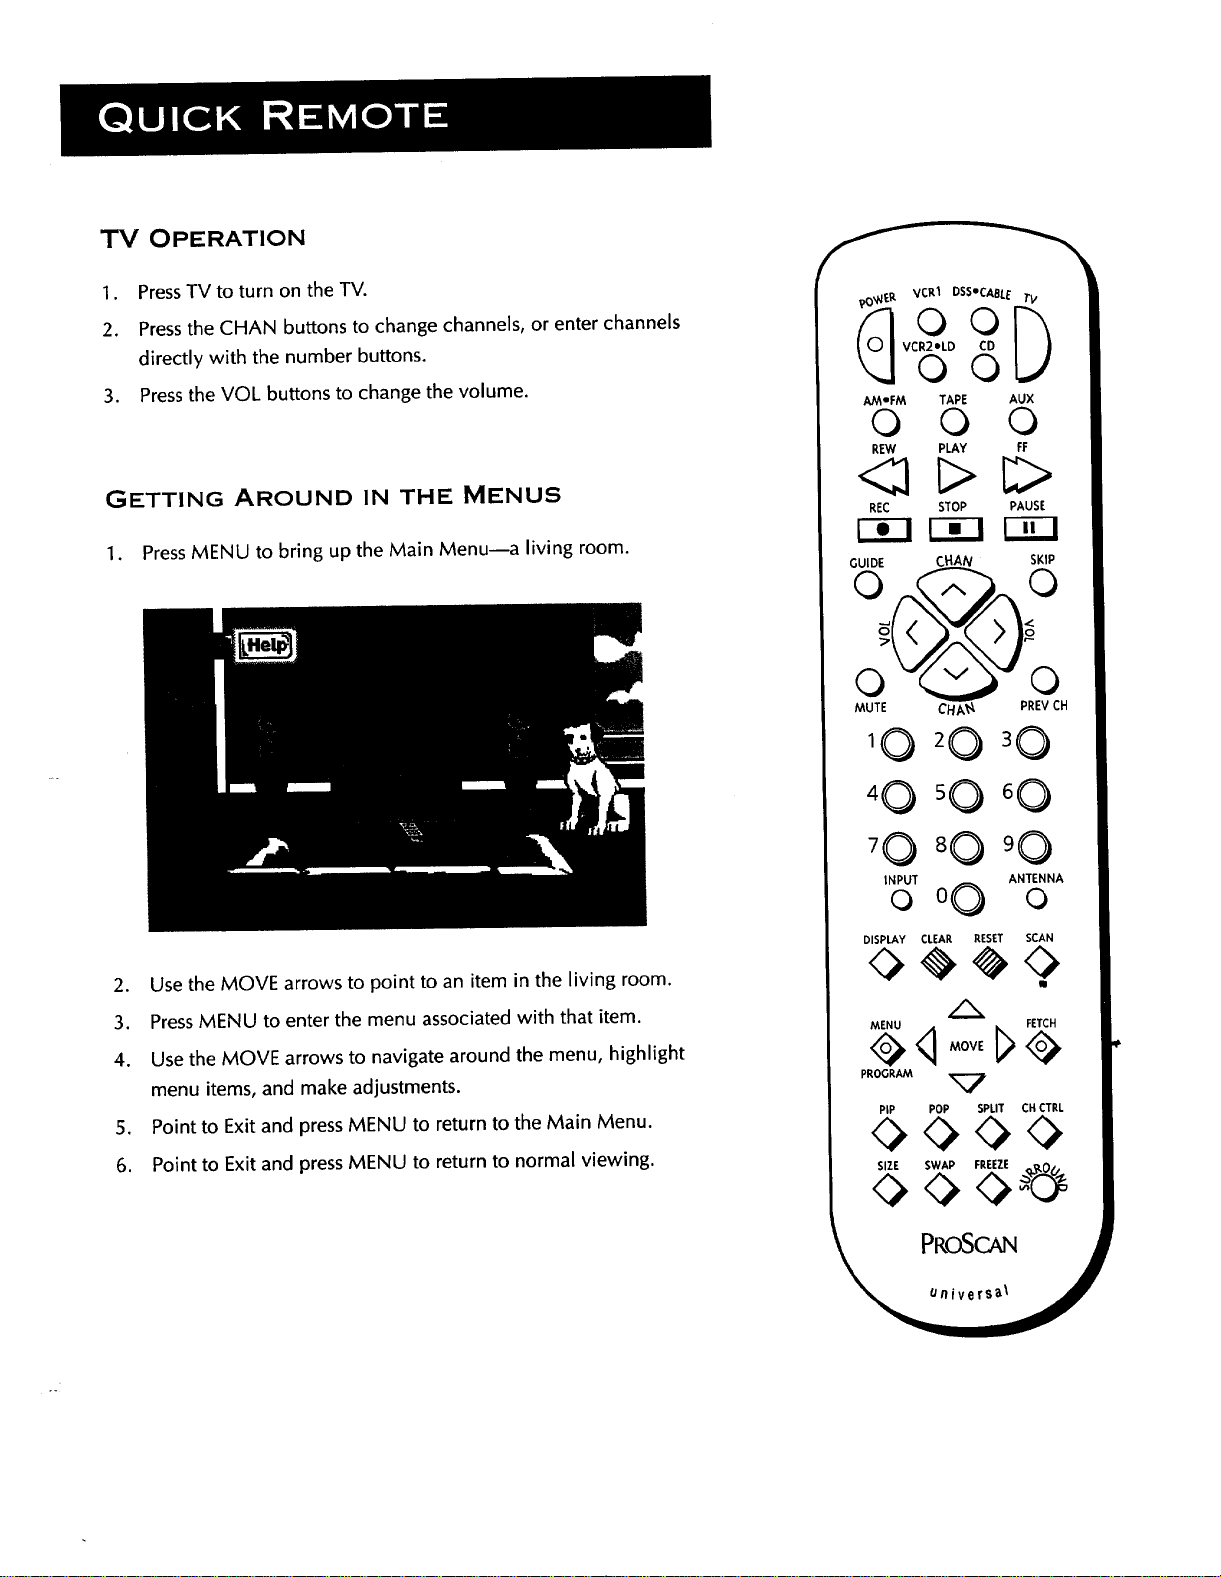
TV OPERATION
1. PressTV to turn on the TV.
2. Pressthe CHAN buttons to change channels, or enter channels
directly with the number buttons.
3. Pressthe VOL buttons to change the volume.
GETTING AROUND IN THE MENUS
1. PressMENU to bring up the Main Menu--a living room.
2. Use the MOVE arrows to point to an item in the living room.
3. PressMENU to enter the menu associated with that item.
4. Use the MOVE arrows to navigate around the menu, highlight
menu items, and make adjustments.
5. Point to Exit and press MENU to return to the Main Menu.
6. Point to Exit and press MENU to return to normal viewing.
O0
VCR2*LD CD
VCR1 DSSICAgLE }.
O0
AM'FM TAPE AUX
0 0 0
REW PLAY FF
REC STOP PAUSE
r-_l rT1 r_-i
GUIDE ,HA..._/
MUTE CHA
INPUT ANTENNA
0 00 0
DISPLAY CLEAR RESET SCAN
SKIP
PREV CH
<:> <:>
III
MENU FE¥CH
PROGRAM _7
PiP POP SPLIT CH CTRL
0000
SIZE SWAP FREEZE
PROSCAN
Page 4
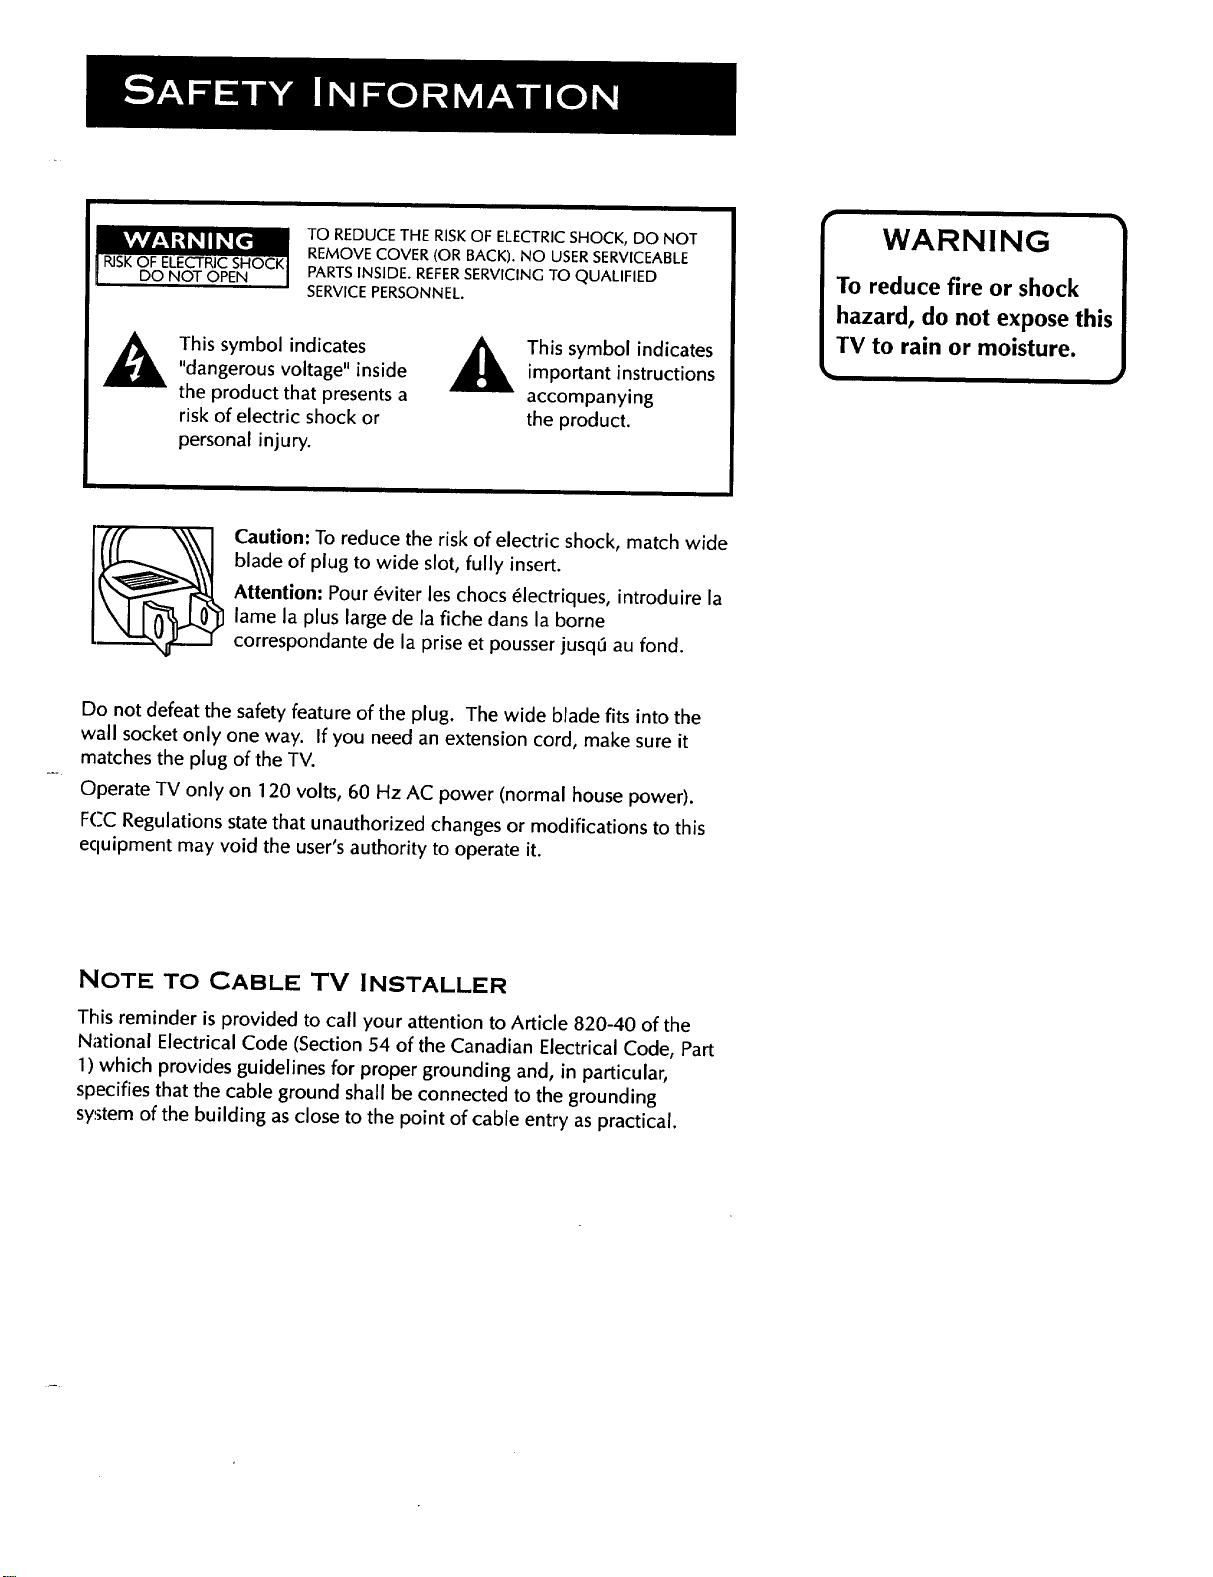
TO REDUCE THE RISK OF ELECTRIC SHOCK, DO NOT
REMOVE COVER (OR BACK). NO USER SERVICEABLE
DO NOT OPEN
PARTS INSIDE. REFERSERVICING TO QUALIFIED
SERVICEPERSONNEL.
This symbol indicates
"dangerous voltage" inside
the product that presents a
risk of electric shock or
_k his symbol indicatesimportant instructions
accompanying
the product.
personal injury.
Caution: To reduce the risk of electric shock, match wide
blade of plug to wide slot, fully insert.
Attention: Pour 6viter les chocs 61ectriques, introduire la
lame la plus large de la fiche dons la borne
correspondante de la prise et pousser jusq6 au fond.
Do not defeat the safety feature of the plug. The wide blade fits into the
wall socket only one way. If you need an extension cord, make sure it
matches the plug of the TV.
Operate TV only on 120 volts, 60 Hz AC power (normal house power).
FCC Regulations state that unauthorized changes or modifications to this
ecluipment may void the user's authority to operate it.
WARNING
To reduce fire or shock
hazard, do not expose this
TV to rain or moisture.
NOTE TO CABLE TV INSTALLER
This reminder is provided to call your attention to Article 820-40 of the
National Electrical Code (Section 54 of the Canadian Electrical Code, Part
1) which provides guidelines for proper grounding and, in particular,
specifies that the cable ground shall be connected to the grounding
system of the building as close to the point of cable entry as practical.
Page 5
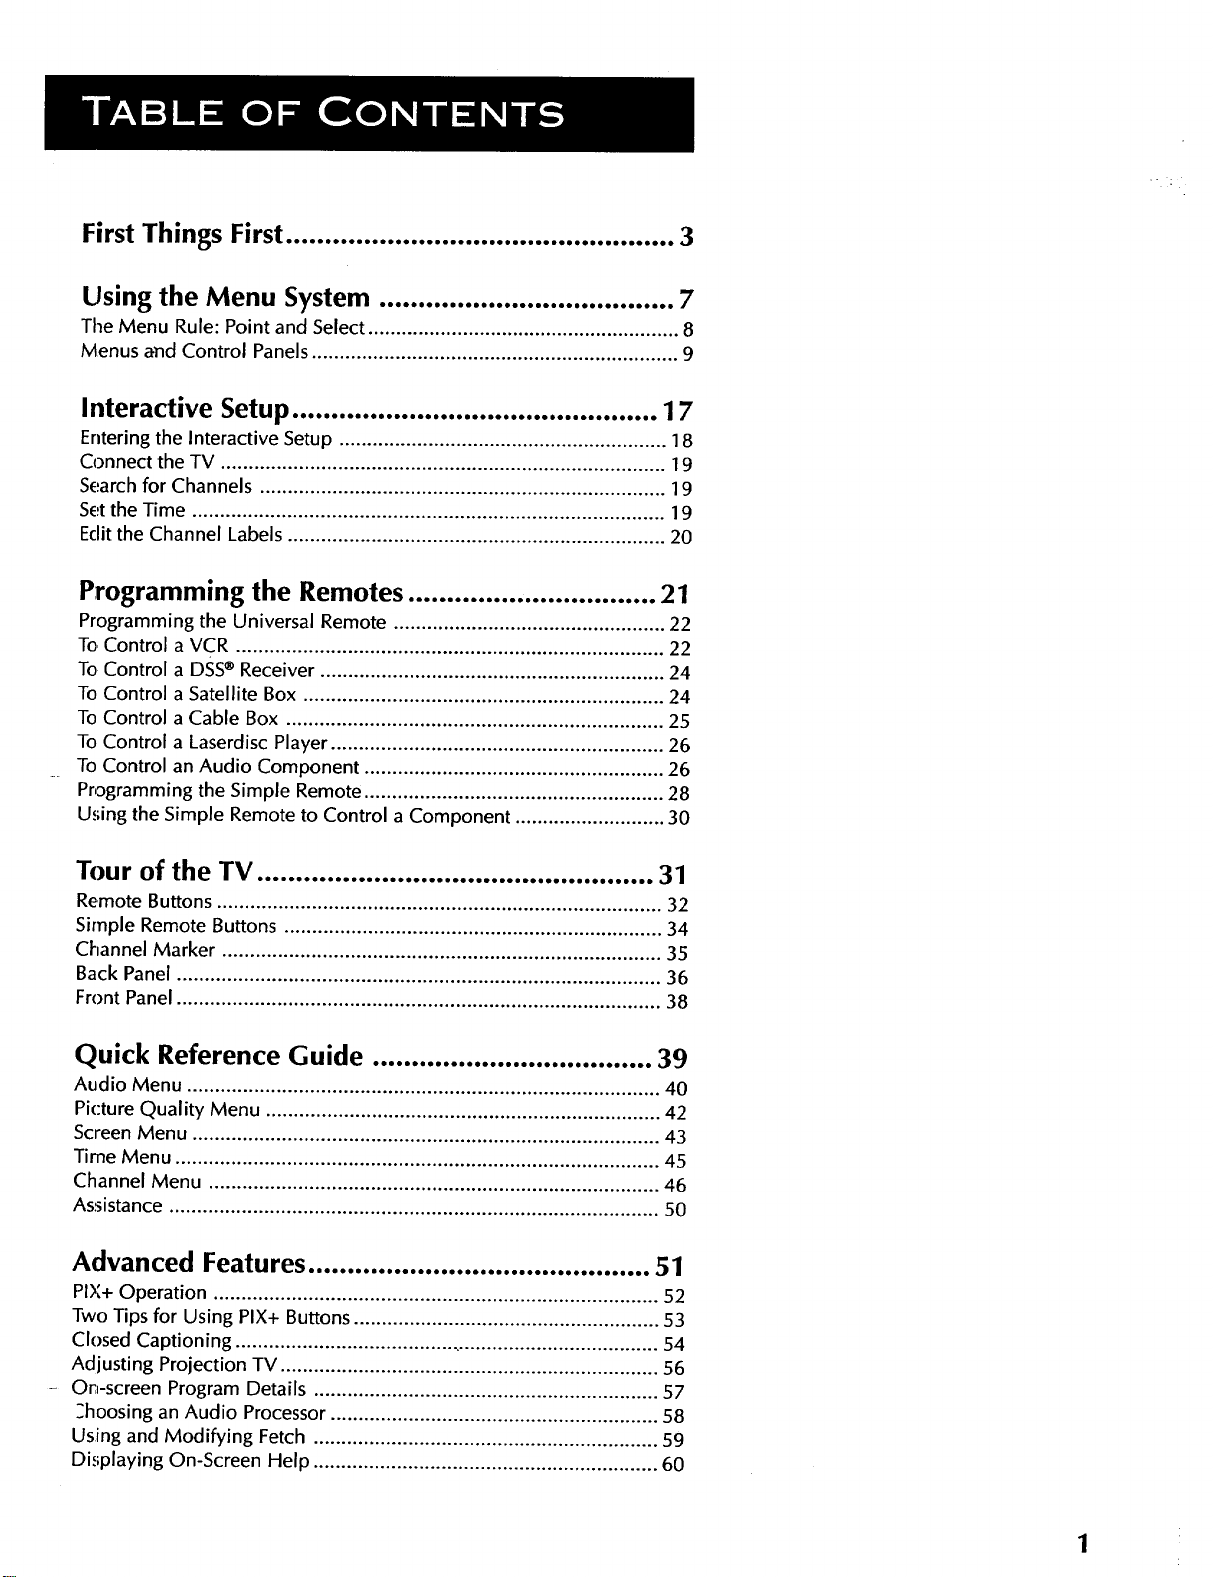
First Things First .................................................. 3
Using the Menu System ...................................... 7
Tile Menu Rule: Point and Select ........................................................ 8
Menus and Control Panels .................................................................. 9
Interactive Setup ............................................... 17
Enteringthe Interactive Setup ........................................................... 18
Connect the TV ................................................................................ 19
Search for Channels ......................................................................... 19
Set the Time ..................................................................................... 19
Editthe Channel Labels .................................................................... 20
Programming the Remotes ................................ 21
Programming the Universal Remote ................................................. 22
To Control a VCR ............................................................................. 22
To Control a DSS®Receiver .............................................................. 24
To Control aSatellite Box ................................................................. 24
To Control a Cable Box .................................................................... 25
To Control a Laserdisc Player ............................................................ 26
To Control an Audio Component ...................................................... 26
Programming the Simple Remote ...................................................... 28
Using the Simple Remote to Control a Component ........................... 30
Tour of the TV ................................................... 31
Remote Buttons ................................................................................ 32
Simple Remote Buttons .................................................................... 34
Channel Marker ............................................................................... 35
Back Panel ....................................................................................... 36
Front Panel ....................................................................................... 38
Quick Reference Guide .................................... 39
Audio Menu ..................................................................................... 40
Picture Quality Menu ....................................................................... 42
Screen Menu .................................................................................... 43
Time Menu ....................................................................................... 45
Channel Menu ................................................................................. 46
Assistance ........................................................................................ 50
Advanced Features ............................................ 51
PIX+ Operation ................................................................................ 52
Two Tips for Using PIX+ Buttons ....................................................... 53
Closed Captioning ............................................................................ 54
Adjusting Projection TV .................................................................... 56
- On-screen Program Details .............................................................. 57
=hoosing an Audio Processor ........................................................... 58
Using and Modifying Fetch .............................................................. 59
Displaying On-Screen Help .............................................................. 60
1
Page 6

Appendices ....................................................... 61
Things to Know Before Connecting Components .............................. 61
Appendix A: Connections .............. "................... 62
Connection A: TV Only .................................................................... 62
Connection B:TV and Mono VCR .................................................... 63
Connection C: TV and Stereo VCR ................................................... 64
Connection D: TV and Stereo VCR Using a Splitter ........................... 65
Connection E:TV and DSS® Receiver ............................................... 66
Connection F: TV, VCR and DSS® Receiver ....................................... 67
Connection G: TV, VCR and DSS® Receiver Using a Splitter ............. 68
Connection H: Adding a Laserdisc Player ......................................... 70
Appendix.B: Connecting External Speakers ....... 71
Connecting External Speakers, .......................................................... 71
Connecting Audio Components ....................... ................................. 72
Connecting a Camcorder for Playback .............................................. 73
Connecting a Camcorder to Record from TV .................................... 74
Appendix C: Troubleshooting Tips .................... 75
Appendix D: Limited Warranty ......................... 77
Appendix E: Care and Cleaning ......................... 78
Index ................................................................ 79
Accessories .............................. Inside Back Cover
DSS is a registered trademark of Hughes Communications, a unit of GM Hughes Electronics
2
Page 7
FIRST THINGS FIRST
FIRST THINGS FIRST
Page 8
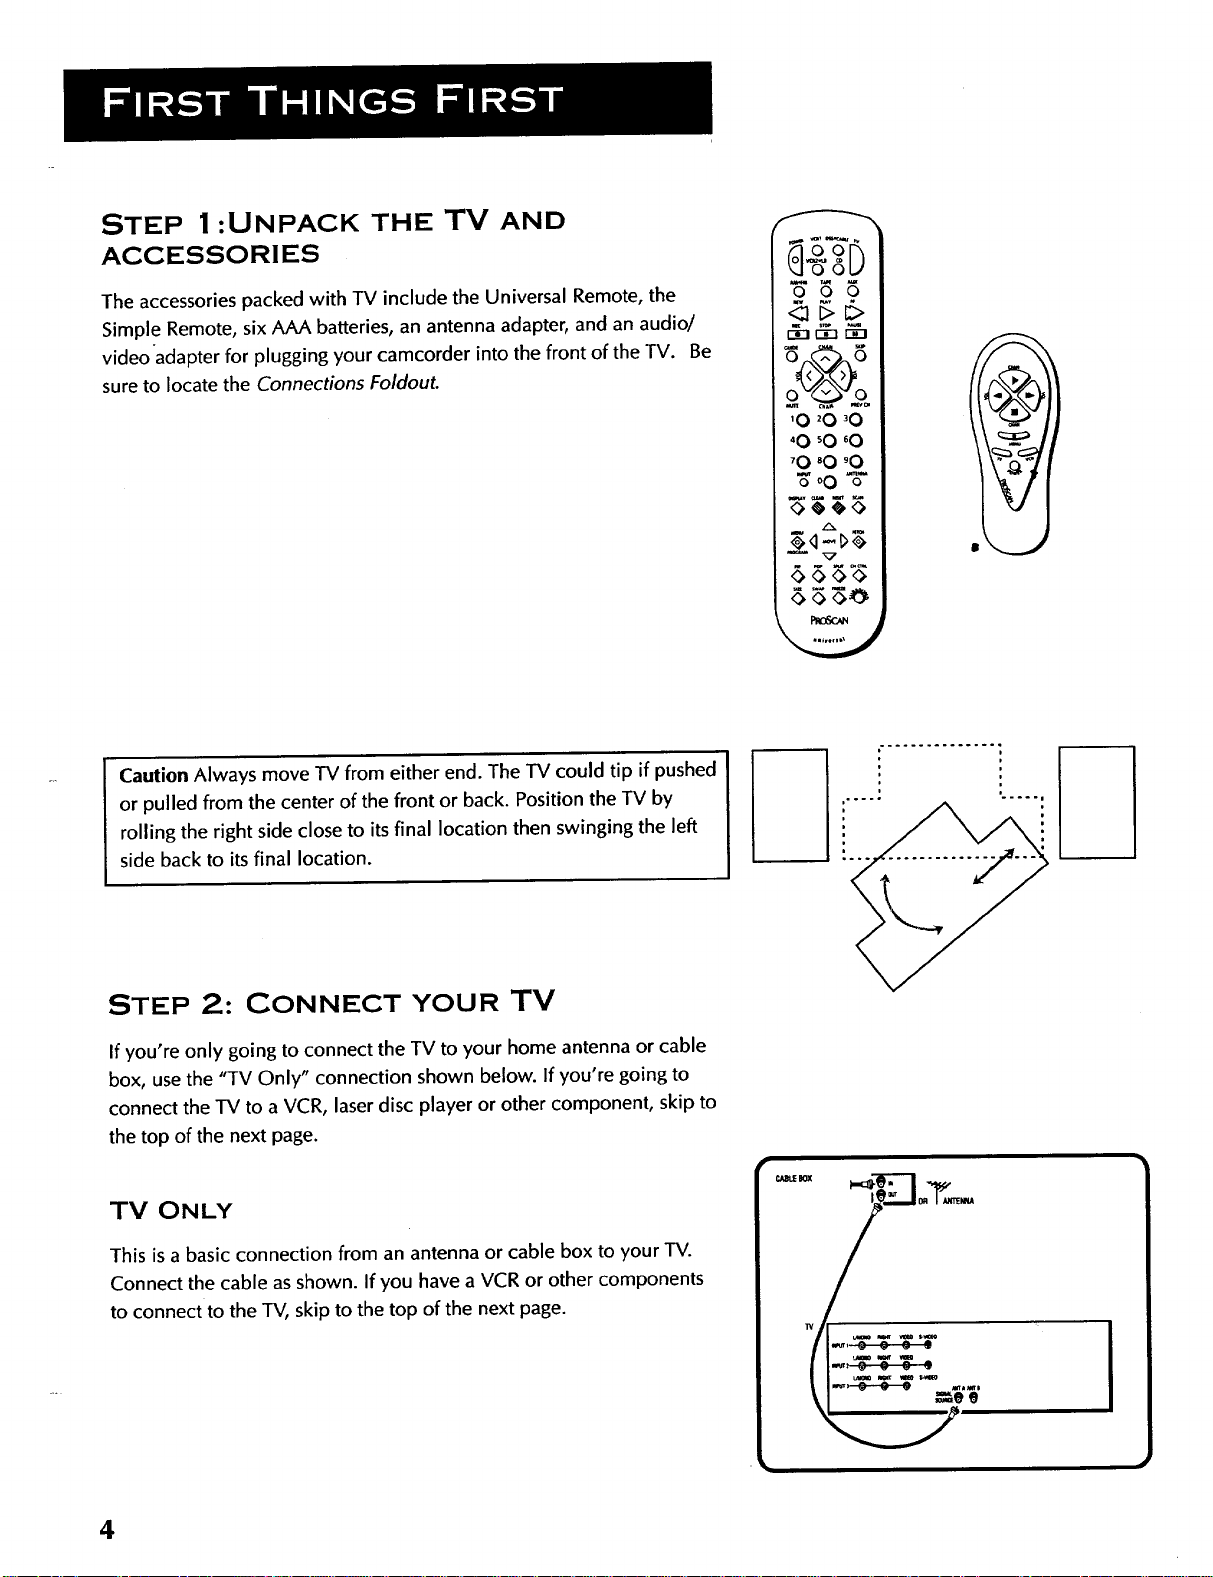
STEP 1:UNPACK THE TV AND
ACCESSORIES
The accessories packed with TV include the Universal Remote, the
Simple Remote, six AAA batteries, an antenna adapter, and an audio/
videoadapter for plugging your camcorder into the front of the TV. Be
sure to locate the Connections FoldouL
Caution Always move TV from either end. The TV could tip if pushed
or pulled from the center of the front or back. Positionthe TV by
rolling the right side closeto its final location then swinging the left
side back to itsfinal location.
o o o
o o
'0 _0 '0
_0'0 '0
Z°O "5"
.4t g
0 <><><>
1_06oa
STEP 2: CONNECT YOUR TV
If you're only going to connect the TV to your home antenna or cable
box, use the "TV Only" connection shown below. If you're going to
connect the TV to a VCR, laser disc player or other component, skip to
the top of the next page.
TV ONLY
This is a basic connection from an antenna or cable box to your TV.
Connect the cable as shown. If you have a VCR or other components
to connect to the TV, skip to the top of the next page.
4
Page 9
TV WITH OTHER COMPONENTS
Use the Connections Foldout to connect your TV to a VCR, DSS®
receiver, or laserdisc player. SeeAppendix A, p. 62 for detailed
information about using each of these connections. After connecting
the TV, p_oceed to Step 3, below.
If your components don't match those shown on the Foldout, or if you
prefer a different connection, see your dealer or the specific
component user manuals.
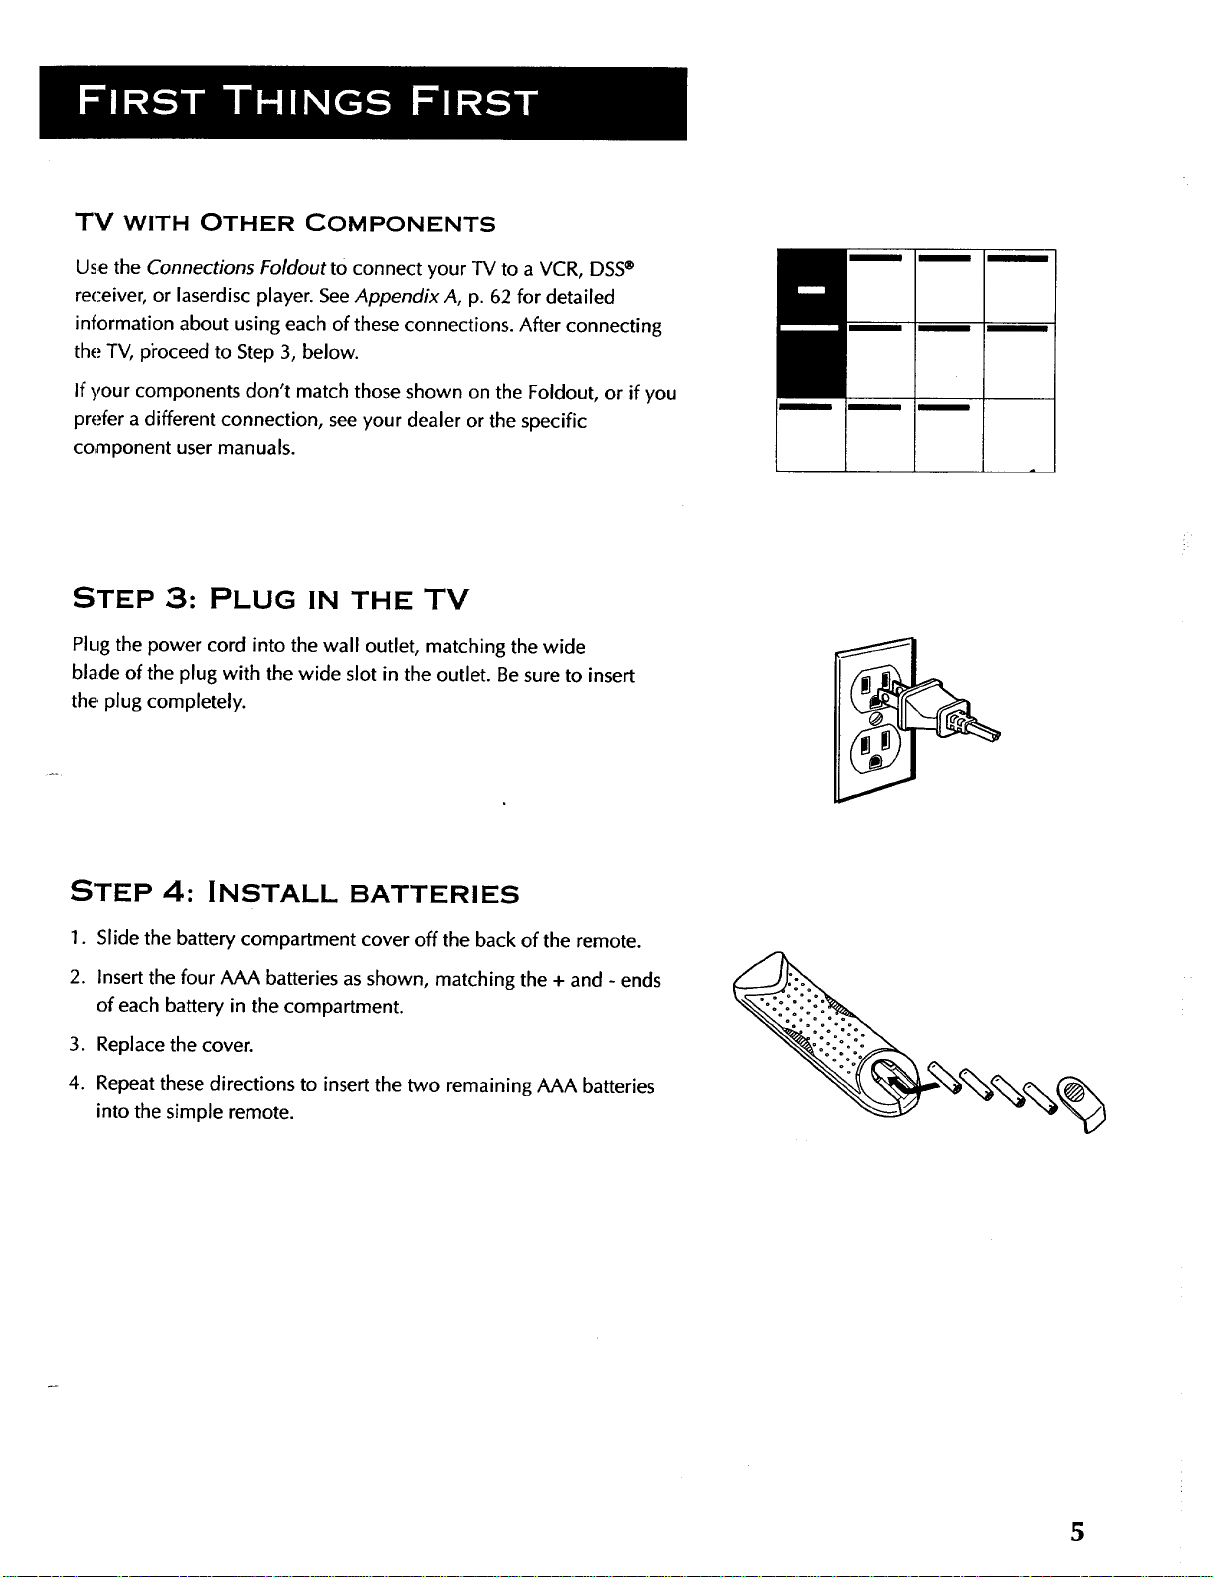
STEP 3: PLUG IN THE TV
Plug the power cord into the wall outlet, matching the wide
blade of the plug with the wide slot in the outlet. Be sure to insert
the. plug completely.
STEP 4: INSTALL BATTERIES
1. Slide the battery compartment cover off the back of the remote.
2. Insert the four AAA batteries asshown, matching the + and - ends
of each battery in the compartment.
3. Replace the cover.
4. Repeat these directions to insert the two remaining AAA batteries
into the simple remote.
5
Page 10
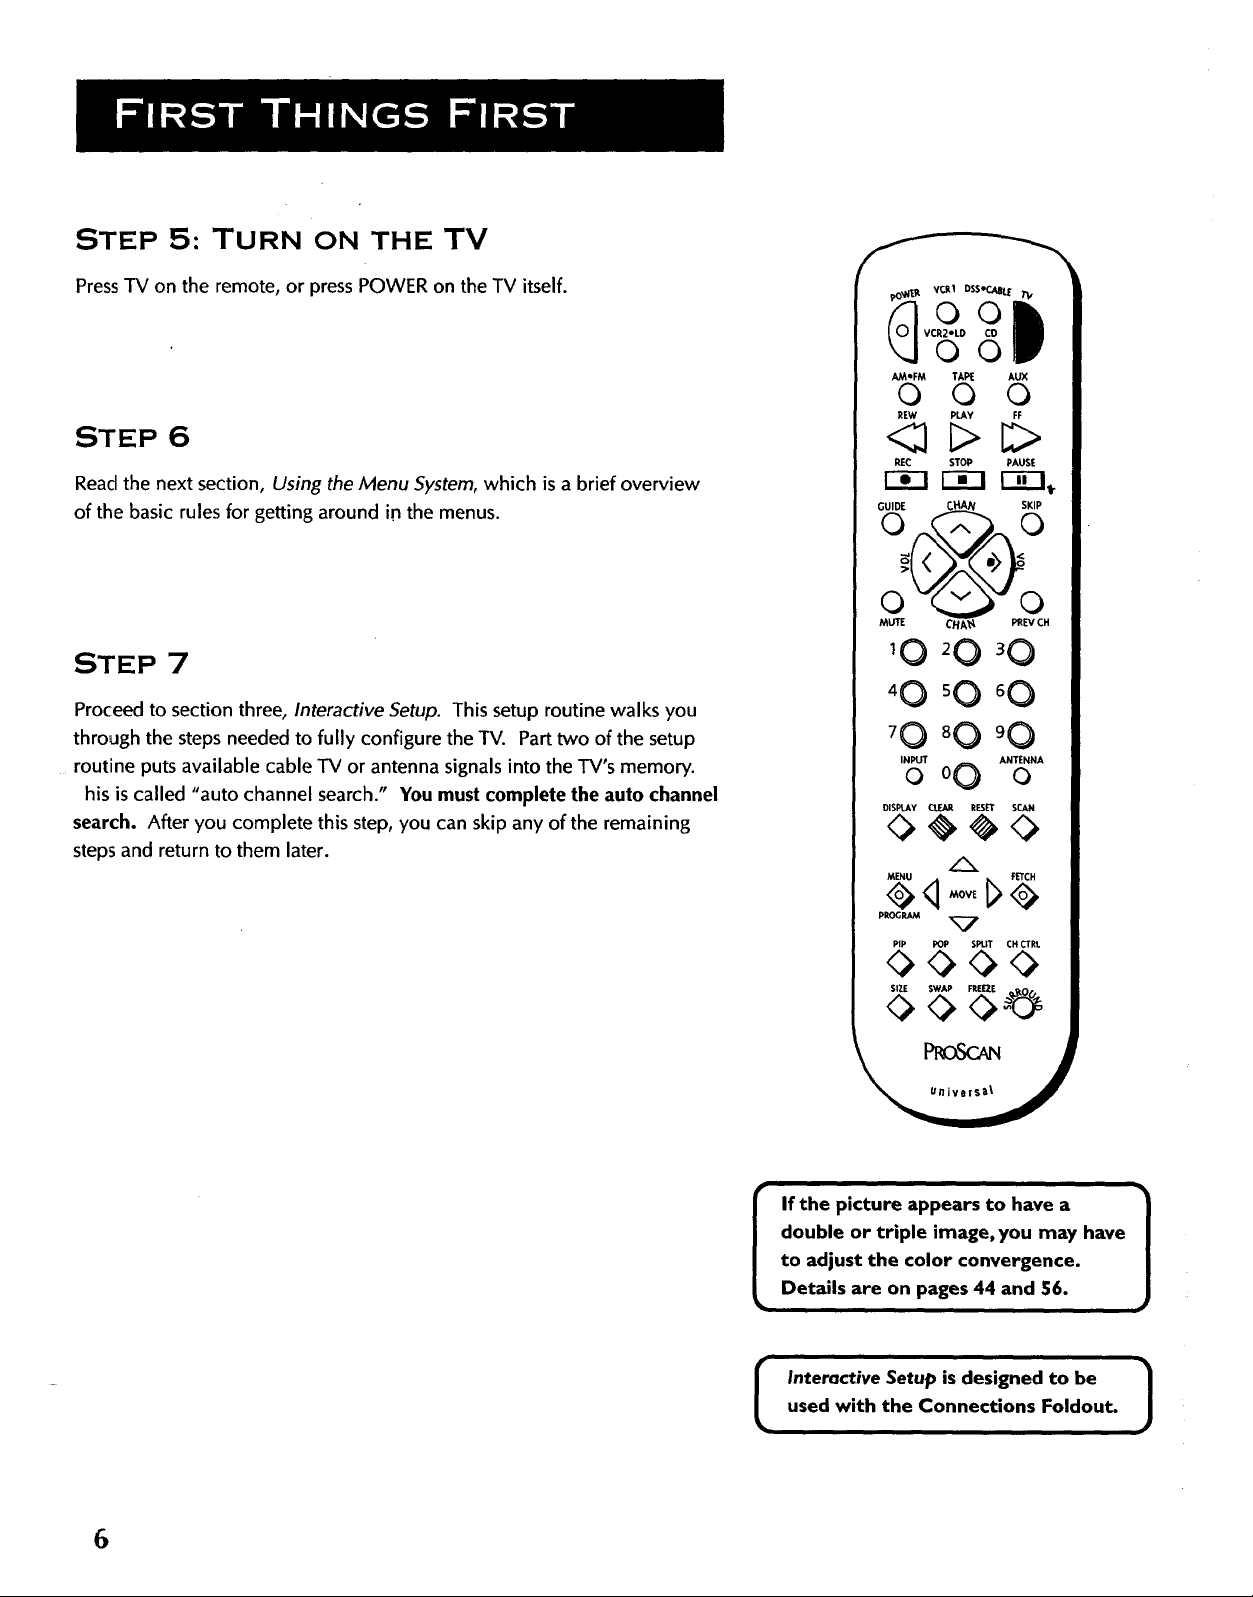
STEP 5: TURN ON THE TV
Press-IV on the remote, or press POWER on the TV itself.
STEP 6
Read the next section, Using the Menu System, which is a brief overview
of the basic rules for getting around in the menus.
STEP 7
Proceed to section three, Interactive Setup. This setup routine walks you
through the steps needed to fully configure the TV. Part two of the setup
routine puts available cable TV or antenna signals into the TV's memory.
his is called "auto channel search." You must complete the auto channel
search. After you complete this step, you can skip any of the remaining
steps and return to them later.
AM*FM TAPE AUX
0 0 0
REW PLAY FF
RE(: STOP PAUSE
r-_ r-_ [3C],
GUIDE Ct_N SKIP
_ CHA'_ _P,, CH
70 8 0 9 0
INPUT ANTENNA
oo0 o
DISPUW CLEAR RESET SCAN
pROGRAM
PIP POP SPLIT CH CTRt
0000
SIZE SWAP FREEZE
<><>
double or triple image, you may have
to adjust the color convergence.
I If the picture appears to have a /
Details are on pages 44 and 56.
used with the Connections Foldout.
I Interactive Setup isdesigned to be /
J
J
6
Page 11
USING THE MENU SYSTEM
USING THE MENU SYSTEM
Page 12
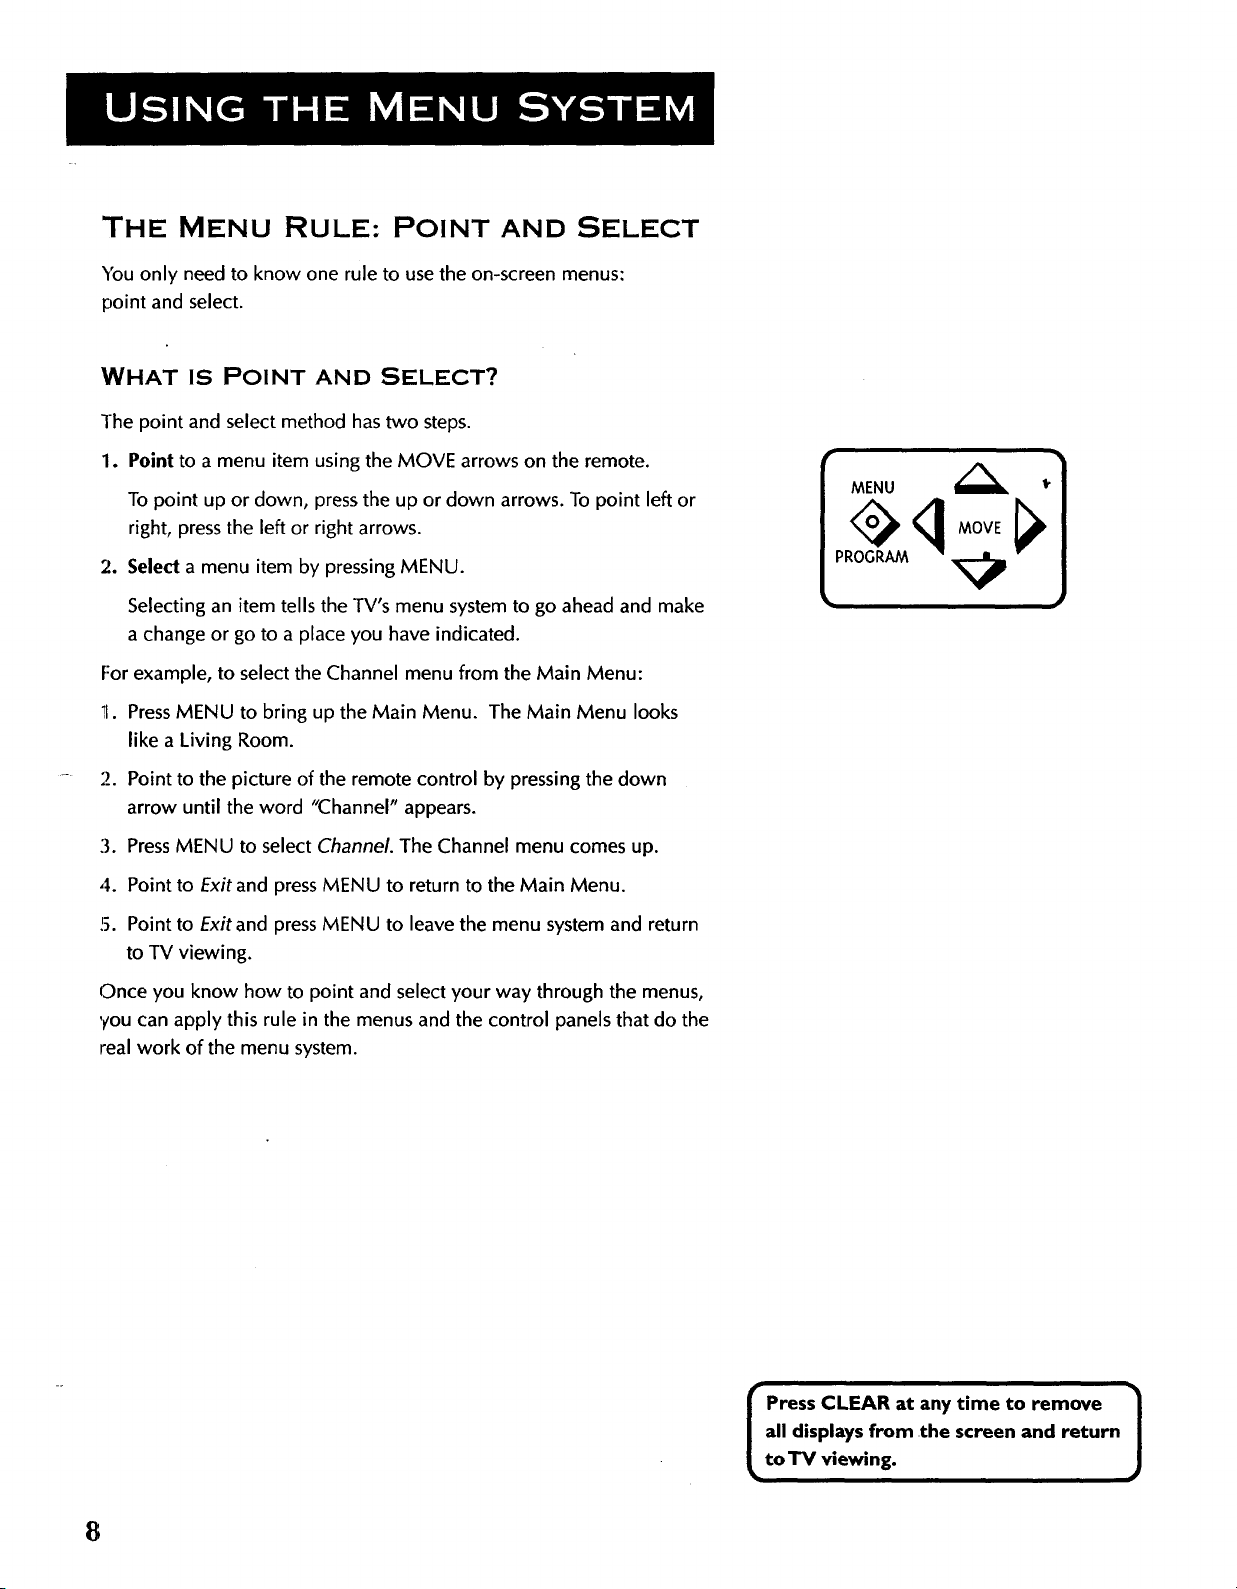
THE MENU RULE: POINT AND SELECT
You only need to know one rule to use the on-screen menus:
point and select.
WHAT IS POINT AND SELECT?
The point and select method has two steps.
1. Point to a menu item using the MOVE arrows on the remote.
To point up or down, press the up or down arrows. To point left or
right, press the left or right arrows.
2. Seled a menu item by pressing MENU.
Selecting an item tells the TV's menu system to go ahead and make
a change or go to a place you have indicated.
For example, to select the Channel menu from the Main Menu:
!1. PressMENU to bring up the Main Menu. The Main Menu looks
like a Living Room.
2. Point to the picture of the remote control by pressing the down
arrow until the word "Channel" appears.
MENU I.
MOVE
3. Press MENU to select Channel. The Channel menu comes up.
4. Point to Exit and press MENU to return to the Main Menu.
5. Point to Exit and press MENU to leave the menu system and return
to TV viewing.
Once you know how to point and select your way through the menus,
you can apply this rule in the menus and the control panels that do the
real work of the menu system.
all displays from the screen and return
Press CLEAR at any time to remove |
toTV viewing.
J
8
Page 13
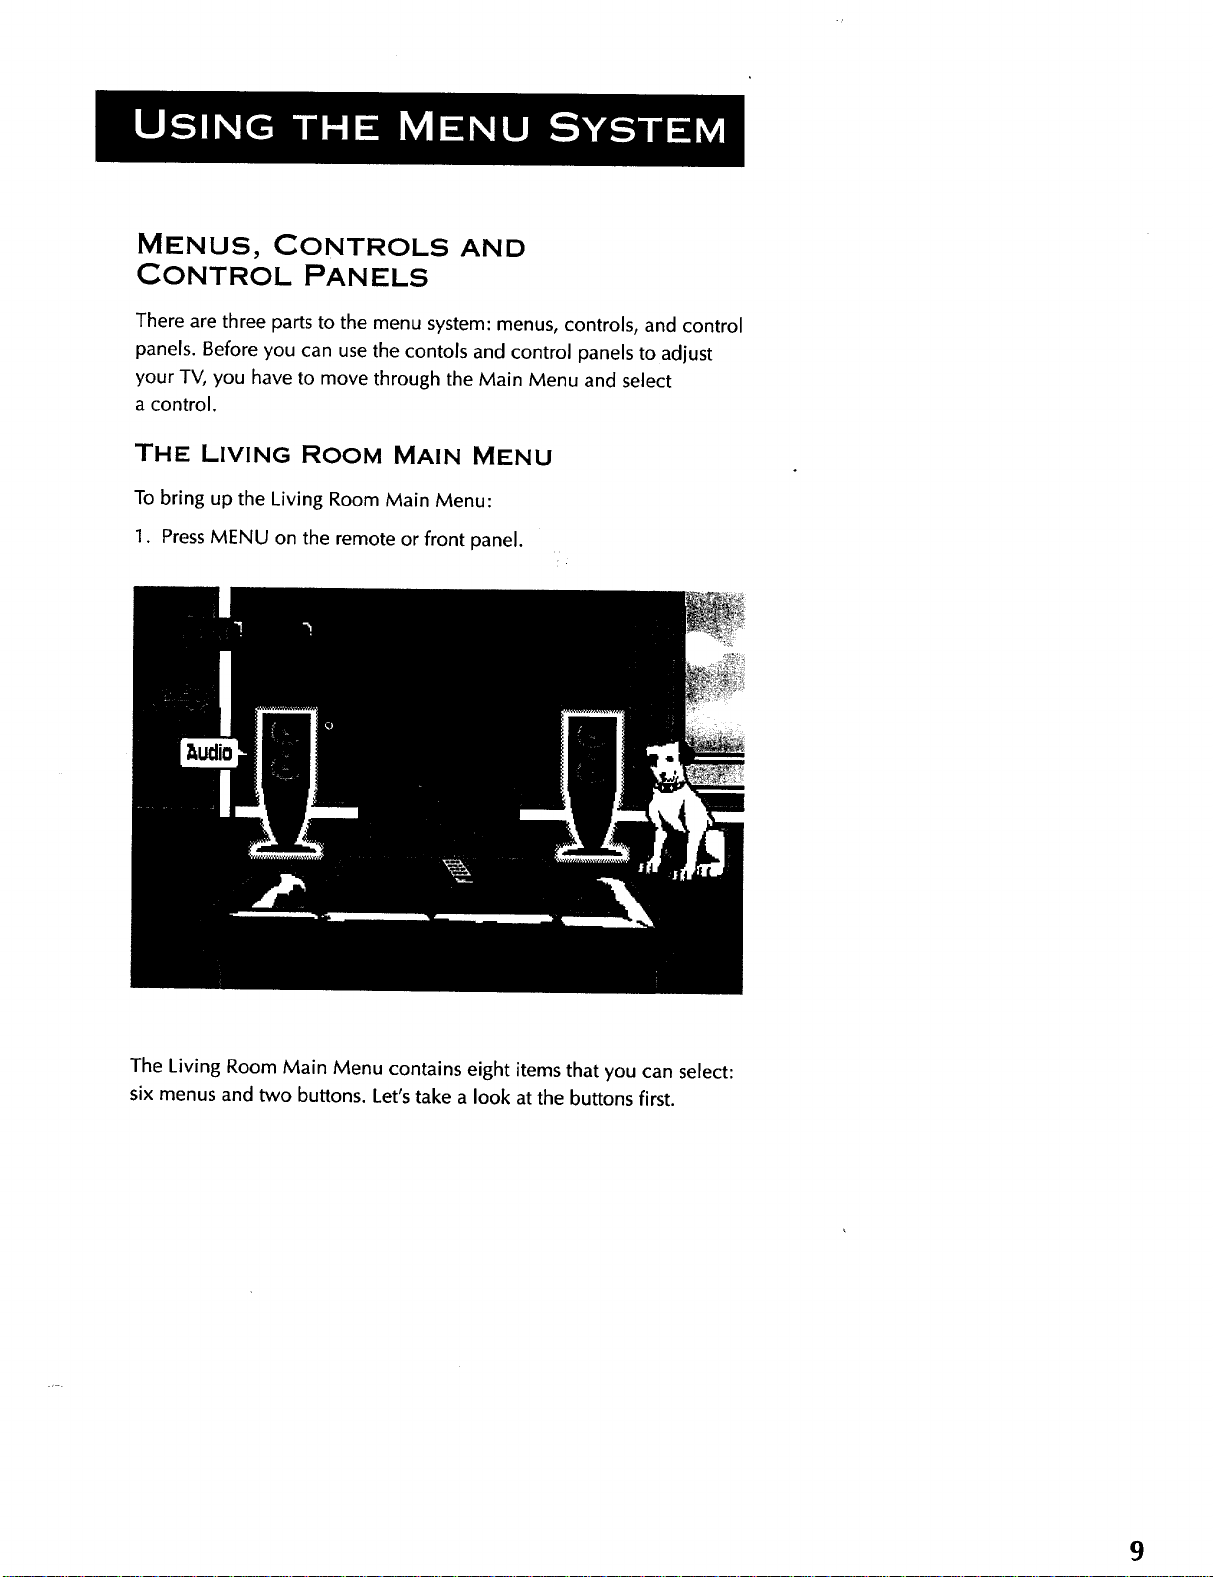
MENUS, CONTROLS AND
CONTROL PANELS
There are three parts to the menu system: menus, controls, and control
panels. Before you can use the contols and control panels to adjust
your TV, you have to move through the Main Menu and select
a control.
THE LIVING ROOM MAIN MENU
To bring up the Living Room Main Menu:
1. PressMENU on the remote or front panel.
The Living Room Main Menu contains eight items that you can select:
six menus and two buttons. Let's take a look at the buttons first.
9
Page 14
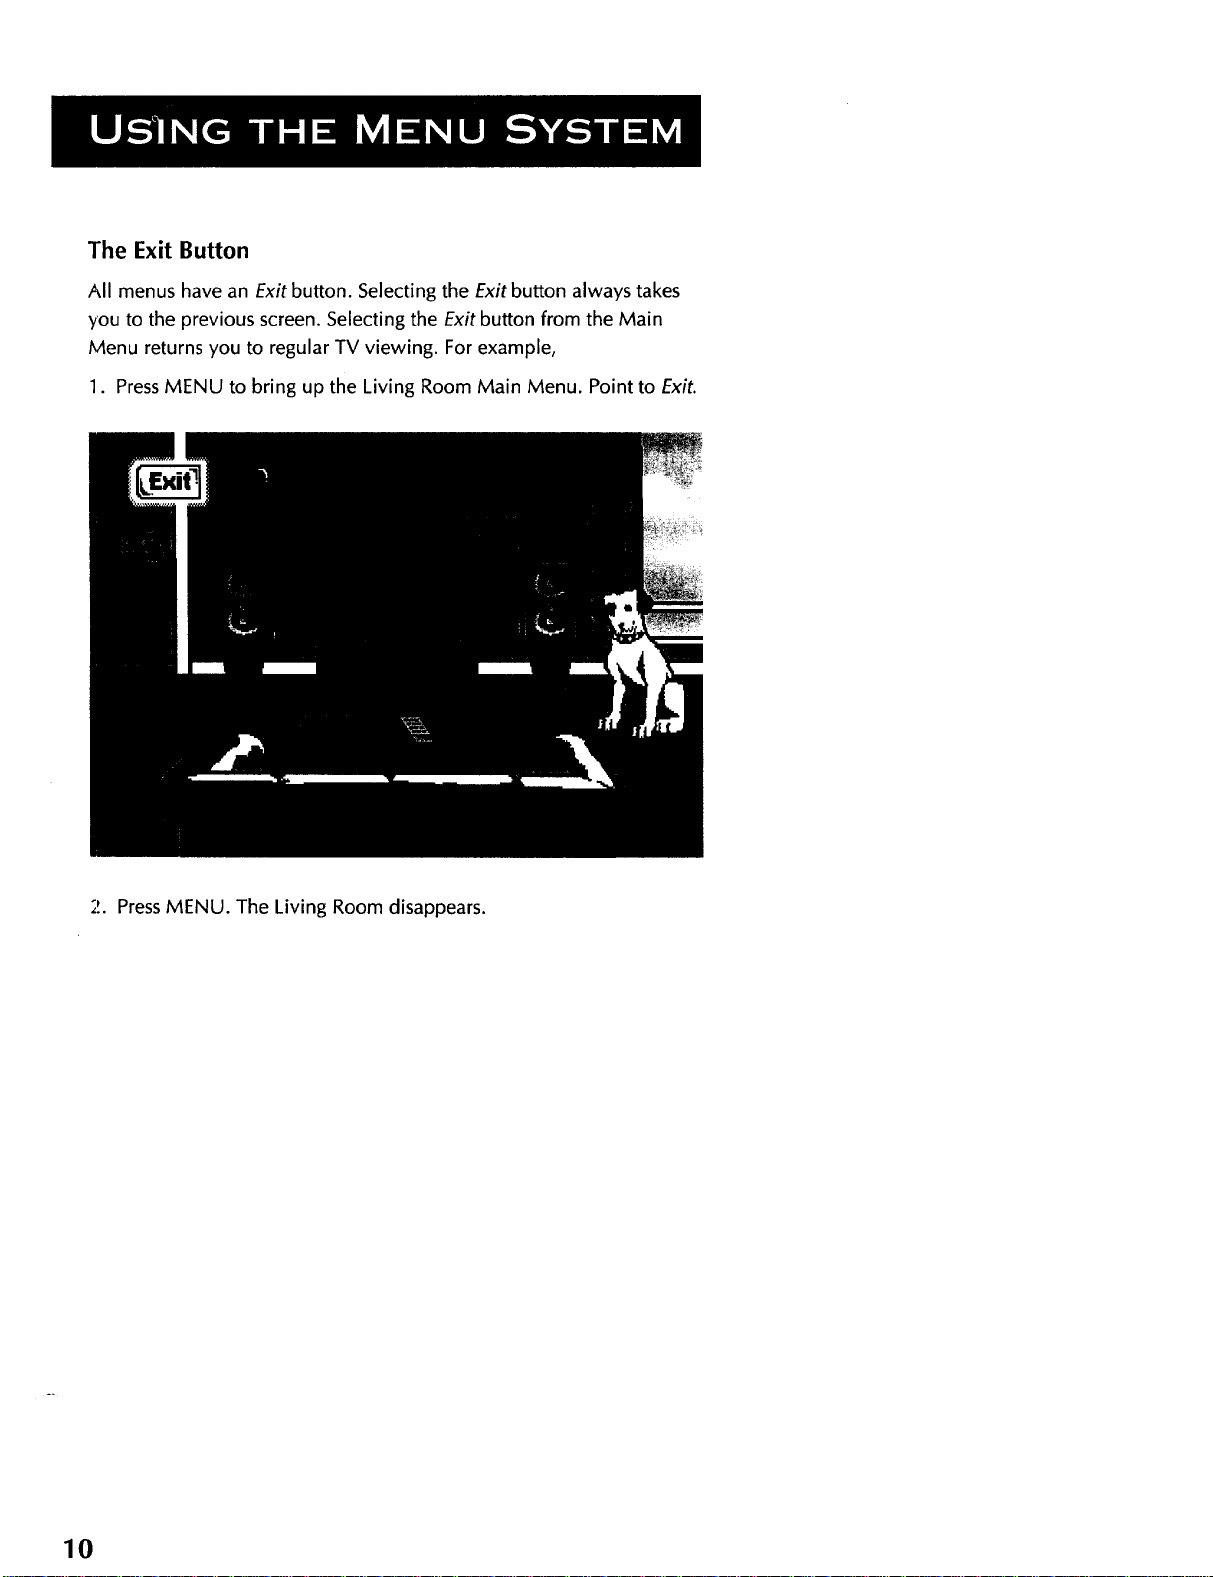
The Exit Button
All menus have an Exit button. Selecting the Exit button always takes
,/ou to the previous screen. Selecting the Exit button from the Main
Menu returns you to regular TV viewing. For example,
1. PressMENU to bring up the Living Room Main Menu. Point to Exit.
2. PressMENU. The Living Room disappears.
10
Page 15
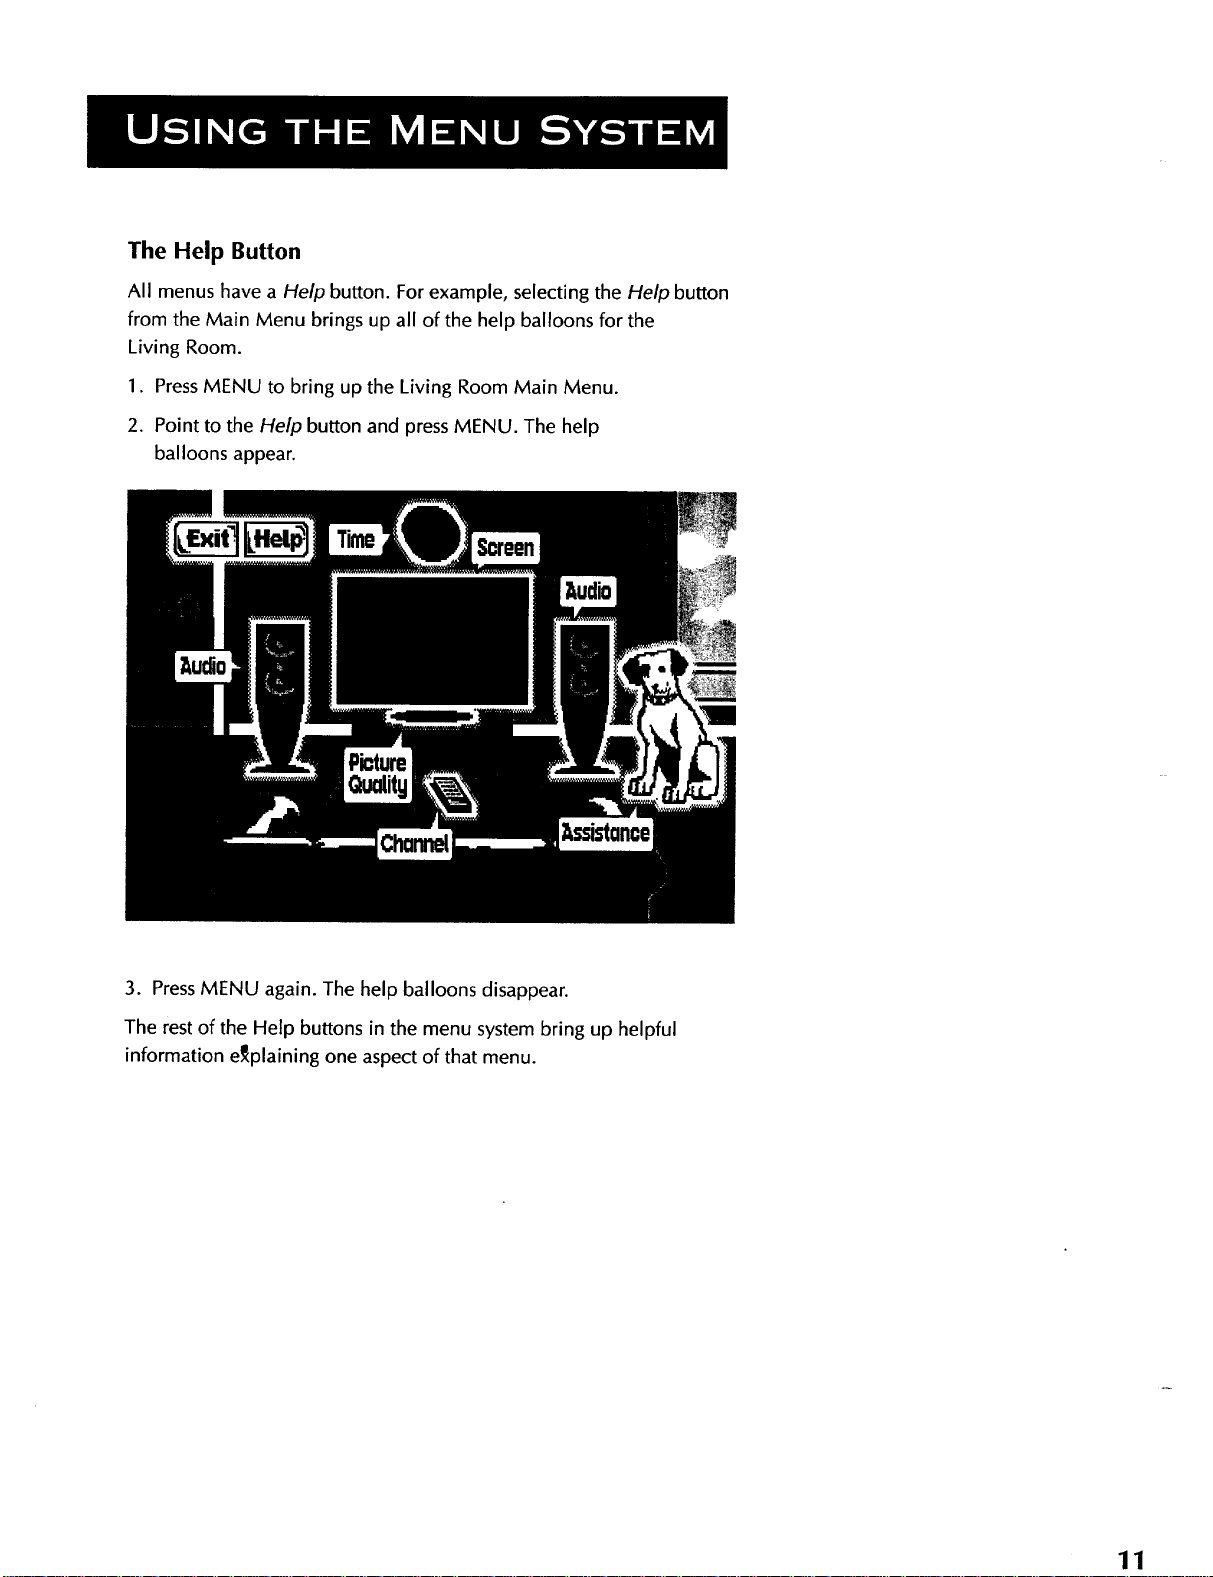
The Help Button
All menus have a Help button. For example, selecting the Help button
from the Main Menu brings up all of the help balloons for the
Living Room.
1. PressMENU to bring up the Living Room Main Menu.
2. Point to the Help button and press MENU. The help
balloons appear.
Assislance
3. PressMENU again. The help balloons disappear.
The rest of the Help buttons in the menu system bring up helpful
information e_plaining one aspect of that menu.
11
Page 16
THE MENUS
There are six menus available from the Living Room Main Menu.
When you point to different items in the Living Room, a different
menu highlights. PressMENU on the remote to select the
highlighted menu.
To exit a menu
There are two ways to exit a menu:
• Point to Exitand press MENU.
• PressCLEAR. The on-screen displays clear from the screen and you
return to TV viewing.
CONTROLS
Controls do the work in the menu system. Using the controls, you can
choose a setting, enter a number, or adjust a level such as tint or
brightness. There are three kinds of controls: sliders, toggles, and
path buttons.
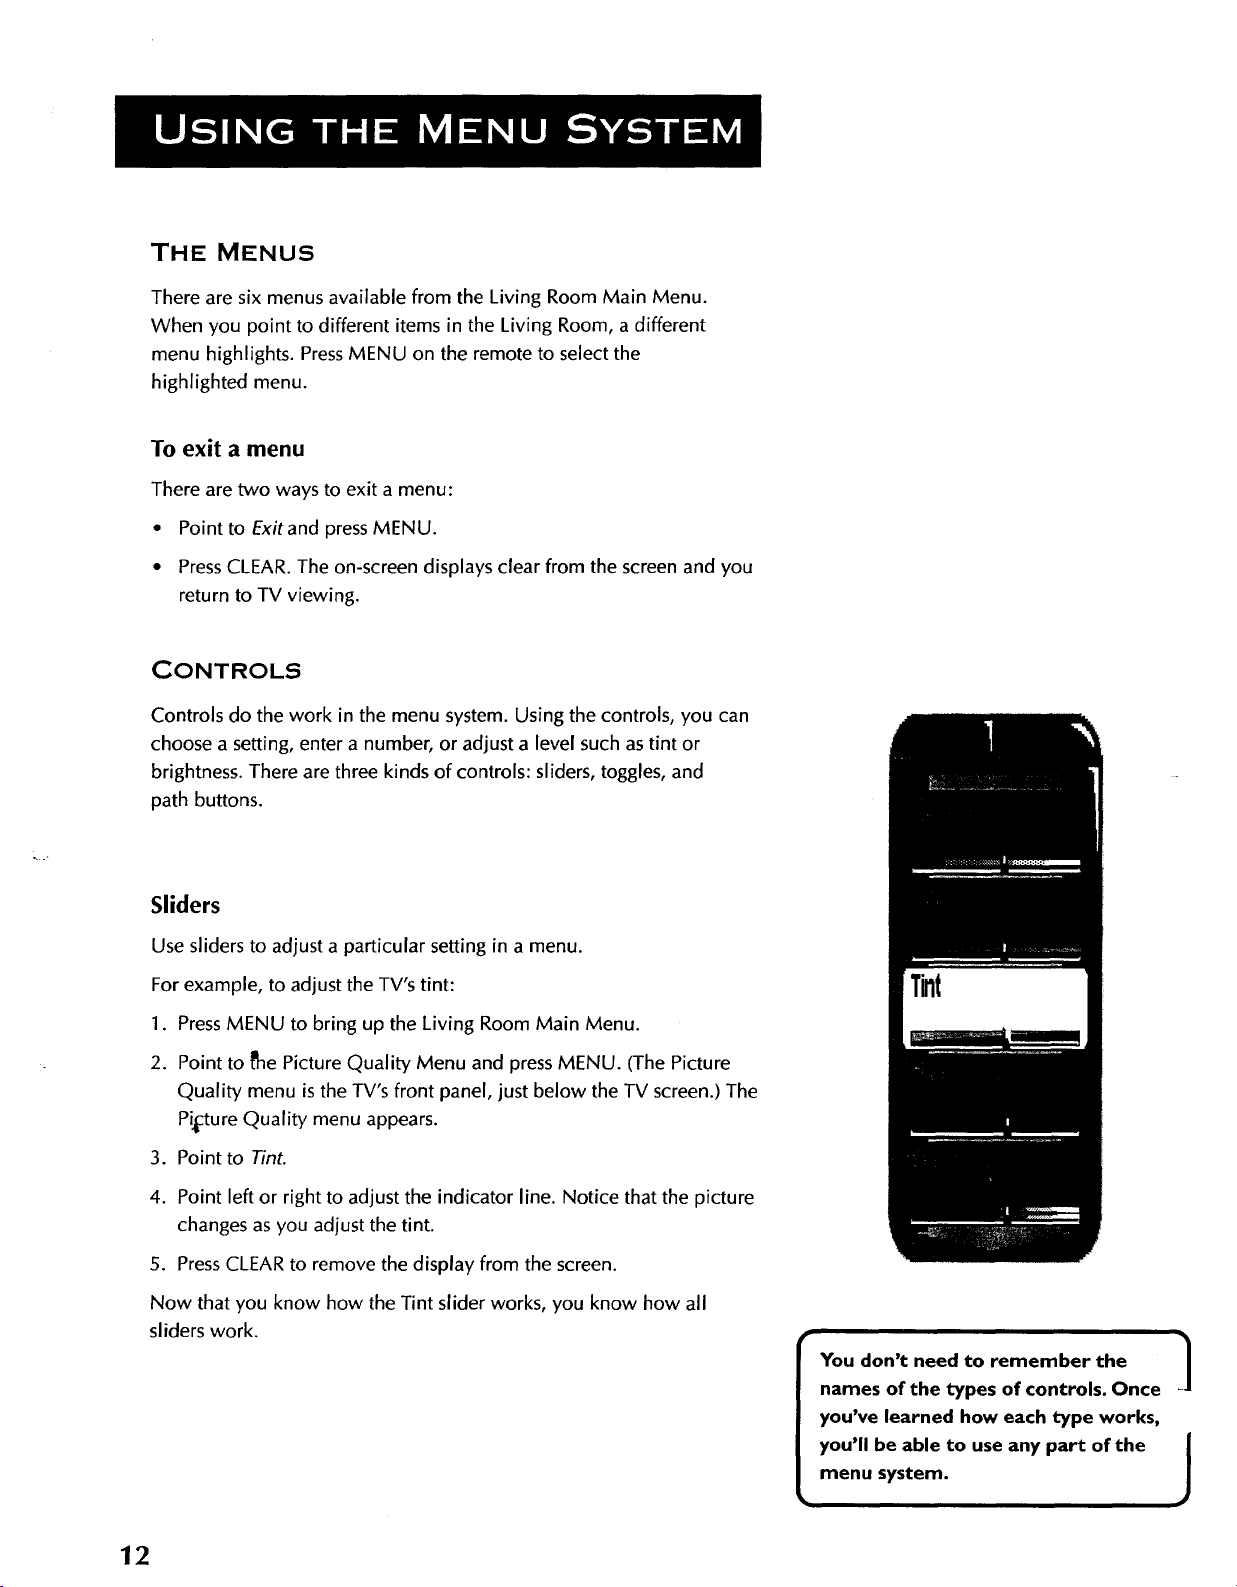
Sliders
Use sliders to adjust a particular setting in a menu.
For example, to adjust the TV's tint:
1. PressMENU to bring up the Living Room Main Menu.
2. Point to De Picture Quality Menu and press MENU. (The Picture
Quality menu is the TV's front panel, just below the TV screen.) The
Pi_ctureQuality menu appears.
3. Point to Tint.
4. Point left or right to adjust the indicator line. Notice that the picture
changes as you adjust the tint.
5. Press CLEARto remove the display from the screen.
Now that you know how the Tint slider works, you know how all
sliders work.
Tint
You don't need to remember the |
names of the types of controls. Once
you've learned how each type works,
you'll be able to use any part of the /
menu system.
J
J
12
Page 17
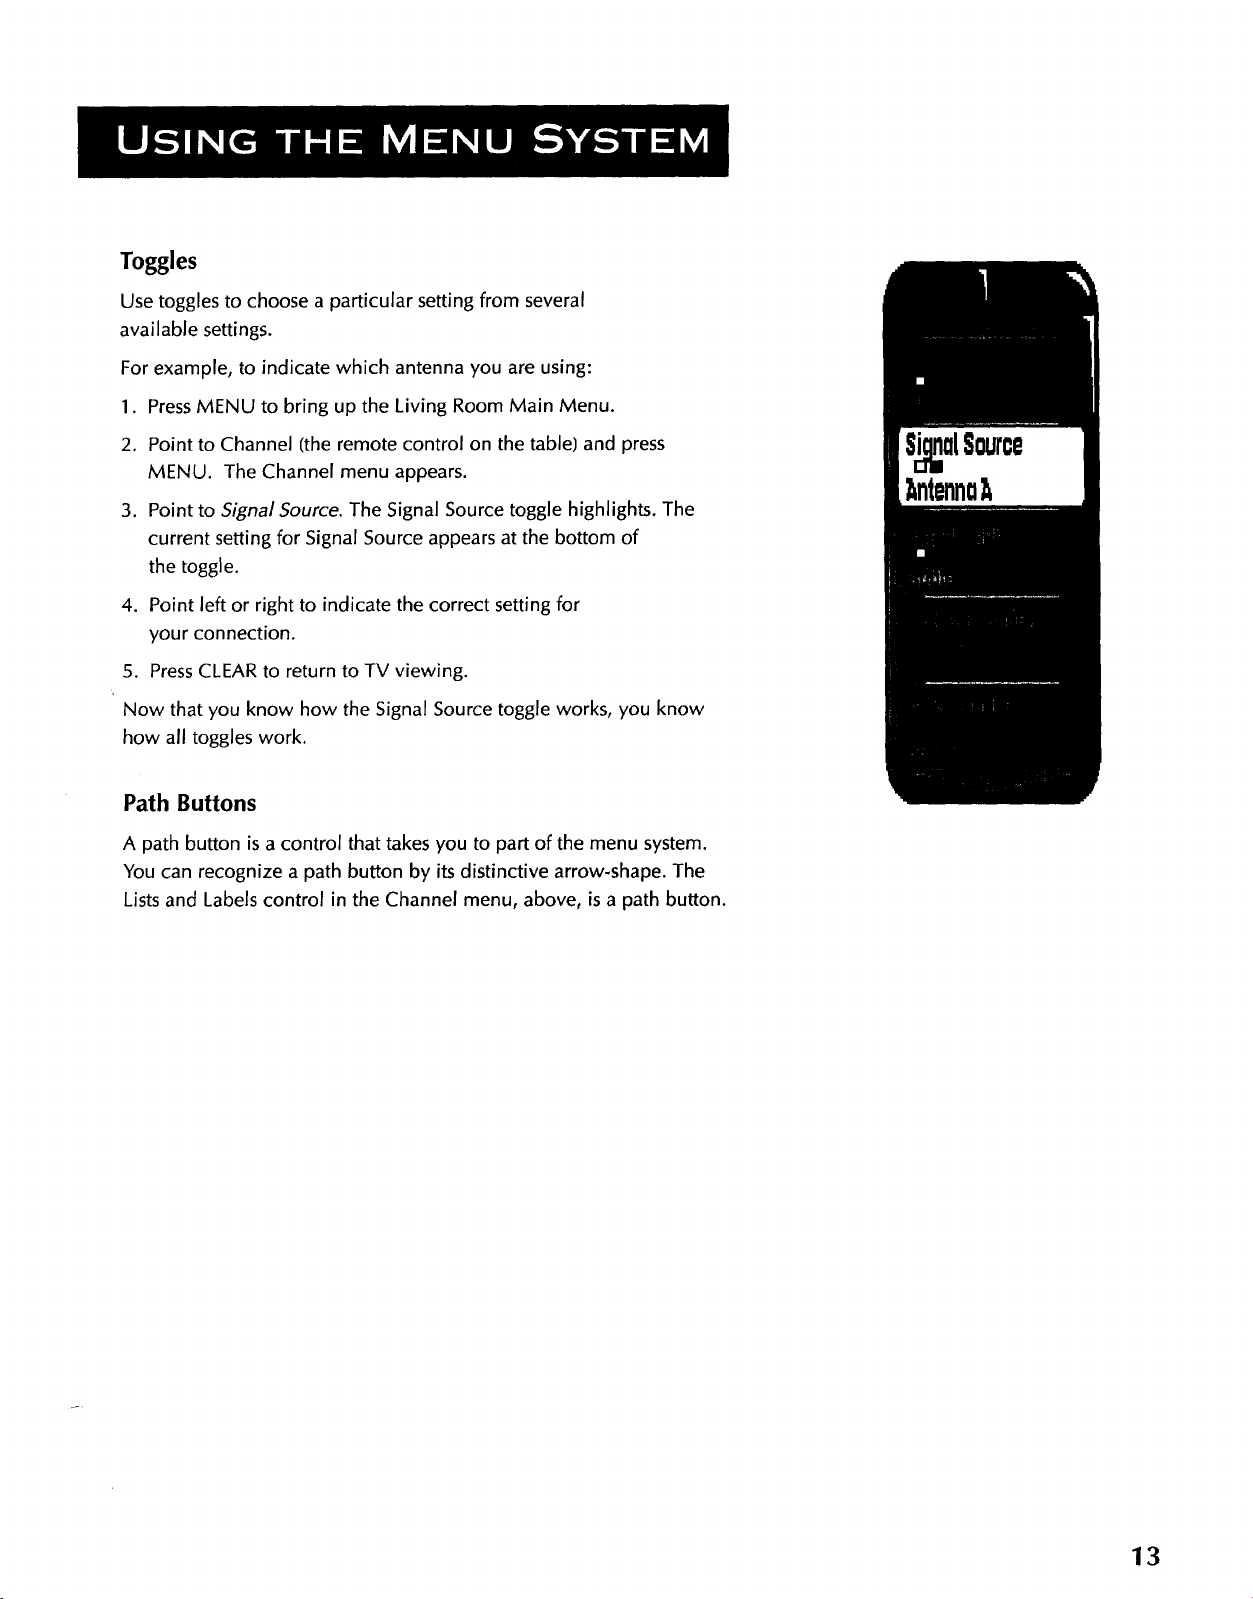
Toggles
Use toggles to choose a particular setting from several
available settings.
For example, to indicate which antenna you are using:
1. PressMENU to bring up the Living Room Main Menu.
2. Point to Channel (the remote control on the table) and press
MENU. The Channel menu appears.
3. Point to Signal Source. The Signal Source toggle highlights. The
current setting for Signal Source appears at the bottom of
the toggle.
4. Point left or right to indicate the correct setting for
your connection.
5. PressCLEARto return to TV viewing.
Now that you know how the Signal Source toggle works, you know
how all toggles work.
Path Buttons
A path button is a control that takes you to part of the menu system.
You can recognize a path button by its distinctive arrow-shape. The
Listsand Labels control in the Channel menu, above, is a path button.
ntennu
13
Page 18
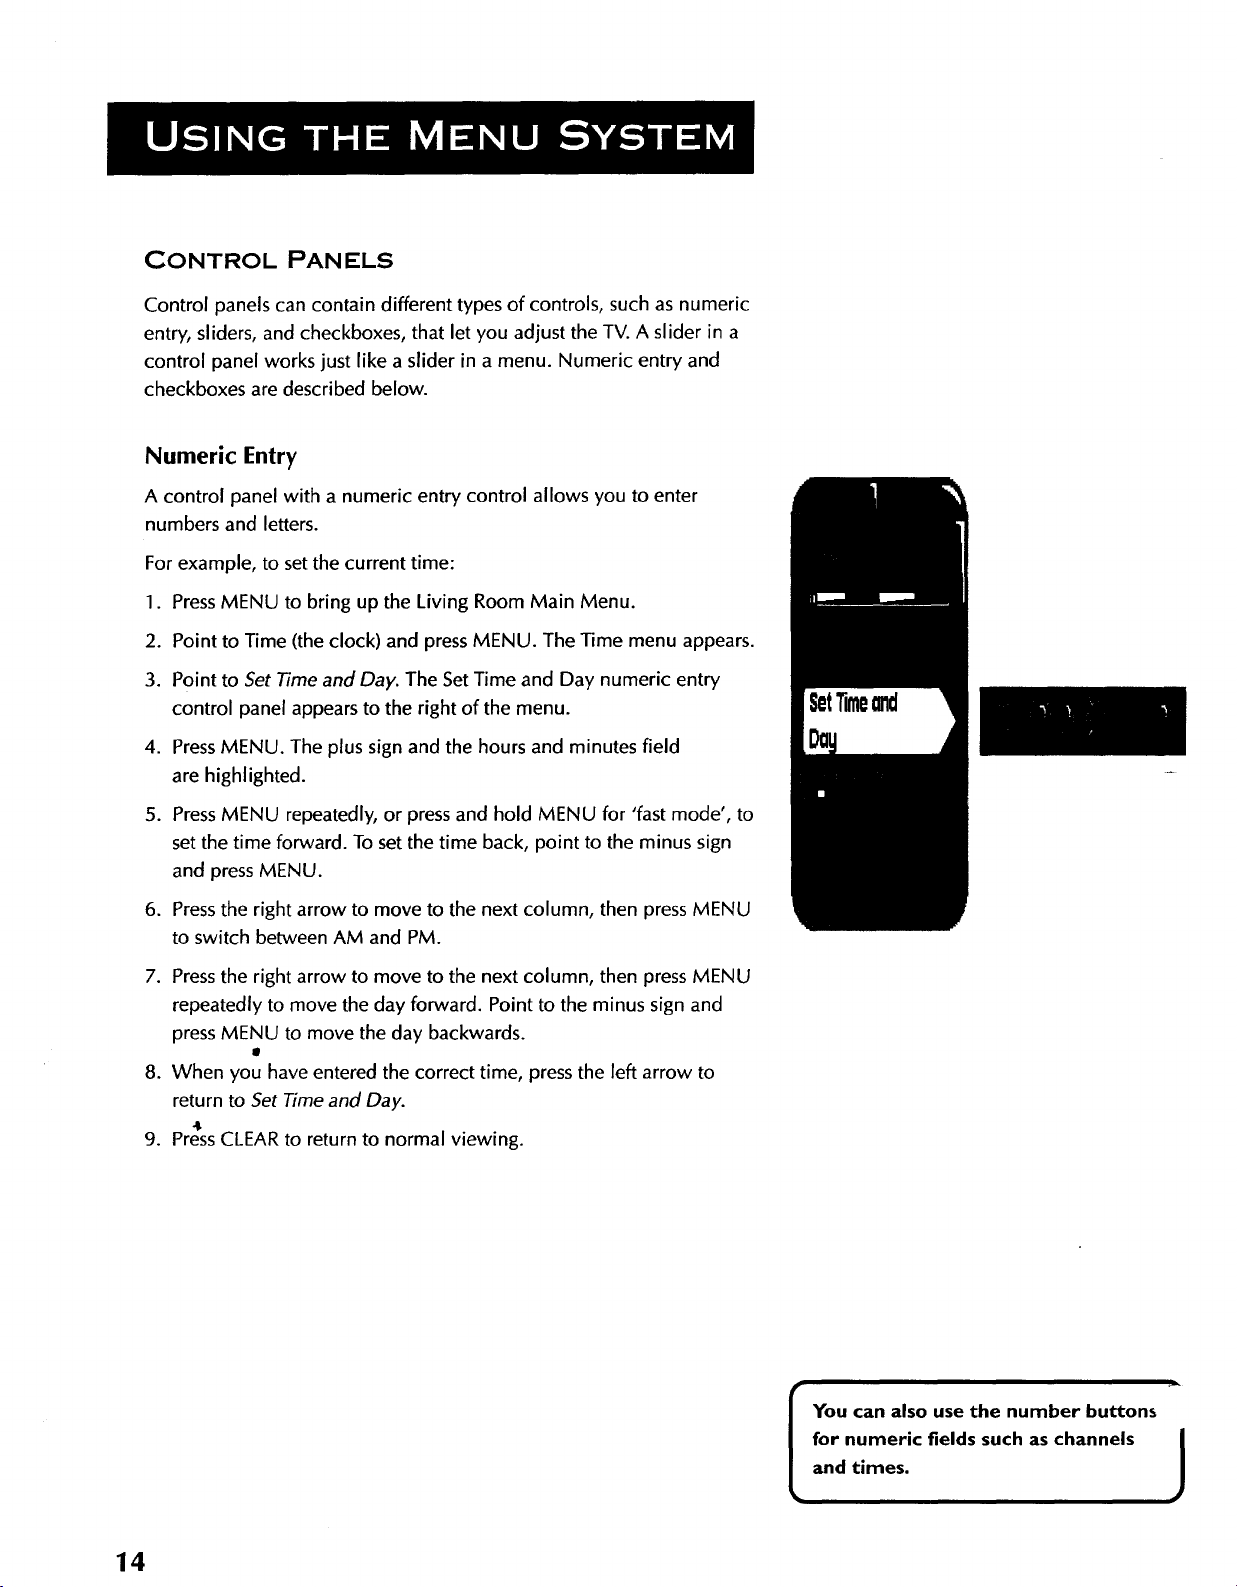
CONTROL PANELS
Control panels can contain different types of controls, such as numeric
entry, sliders, and checkboxes, that let you adjust the TV. A slider in a
control panel works just like a slider in a menu. Numeric entry and
checkboxes are described below.
Numeric Entry
A control panel with a numeric entry control allows you to enter
numbers and letters.
For example, to set the current time:
1. PressMENU to bring up the Living Room Main Menu.
2. Point to Time (the clock) and press MENU. The Time menu appears.
3. Point to Set Time and Day. The Set Time and Day numeric entry
control panel appears to the right of the menu.
4. PressMENU. The plus sign and the hours and minutes field
are highlighted.
5. PressMENU repeatedly, or press and hold MENU for 'fast mode', to
set the time forward. To set the time back, point to the minus sign
and press MENU.
SetTime d
6. Pressthe right arrow to move to the next column, then press MENU
to switch between AM and PM.
7. Press the right arrow to move to the next column, then press MENU
repeatedly to move the day forward. Point to the minus sign and
press MENU to move the day backwards.
8. When you have entered the correct time, press the left arrow to
return to Set Time and Day.
.I
9. Press CLEAR to return to normal viewing.
You can also use the number buttons
for numeric fields such as channels
and times.
J
14
Page 19

Checkboxes
Use checkboxes to add a particular channel to a list of channels, or to
remove the channel from a list.
For example, to add channel 13 to your list of favorite channels:
1. PressMENU to bring up the Living Room Main Menu.
2. Point to Channel (the remote control) and press MENU. The
Channel menu appears.
3. Point to Lists and Labels and press MENU. The Lists and Labels
control panel appears. The Normal channel list checkbox
is highlighted.
ListsandLabels
4. Point up repeatedly until channel 13 highlights.
5. Point right until the Fay checkbox highlights.
6. Press MENU to put channel 13 into the Favorite channel list. A
check mark appears in the box. To remove channel 13 from the
list, press MENU again.
7. PressCLEAR to return to normal viewing.
Now that yout know how the Favorite Channel checkbox works, you
know how all checkboxes work.
I_Once
you've set up your FAV list, you L
can set theTV to show only your
favorite channels. Select Options from |
the Screen menu, then choose the FAV
Channel List.
J
15
Page 20
EXPLORE, EXPLORE, EXPLORE!
Once you've learned the basics, feel free to poke around in the menu
system. The context-sensitive help at the bottom of the screen provides
instructions for getting through any particular menu or control panel.
Remember, press CLEAR at any time to leave the menu system and
return to regular TV viewing.
When you've had your fill, proceed to the next section of the manual,
Interactive Setup.
16
Page 21
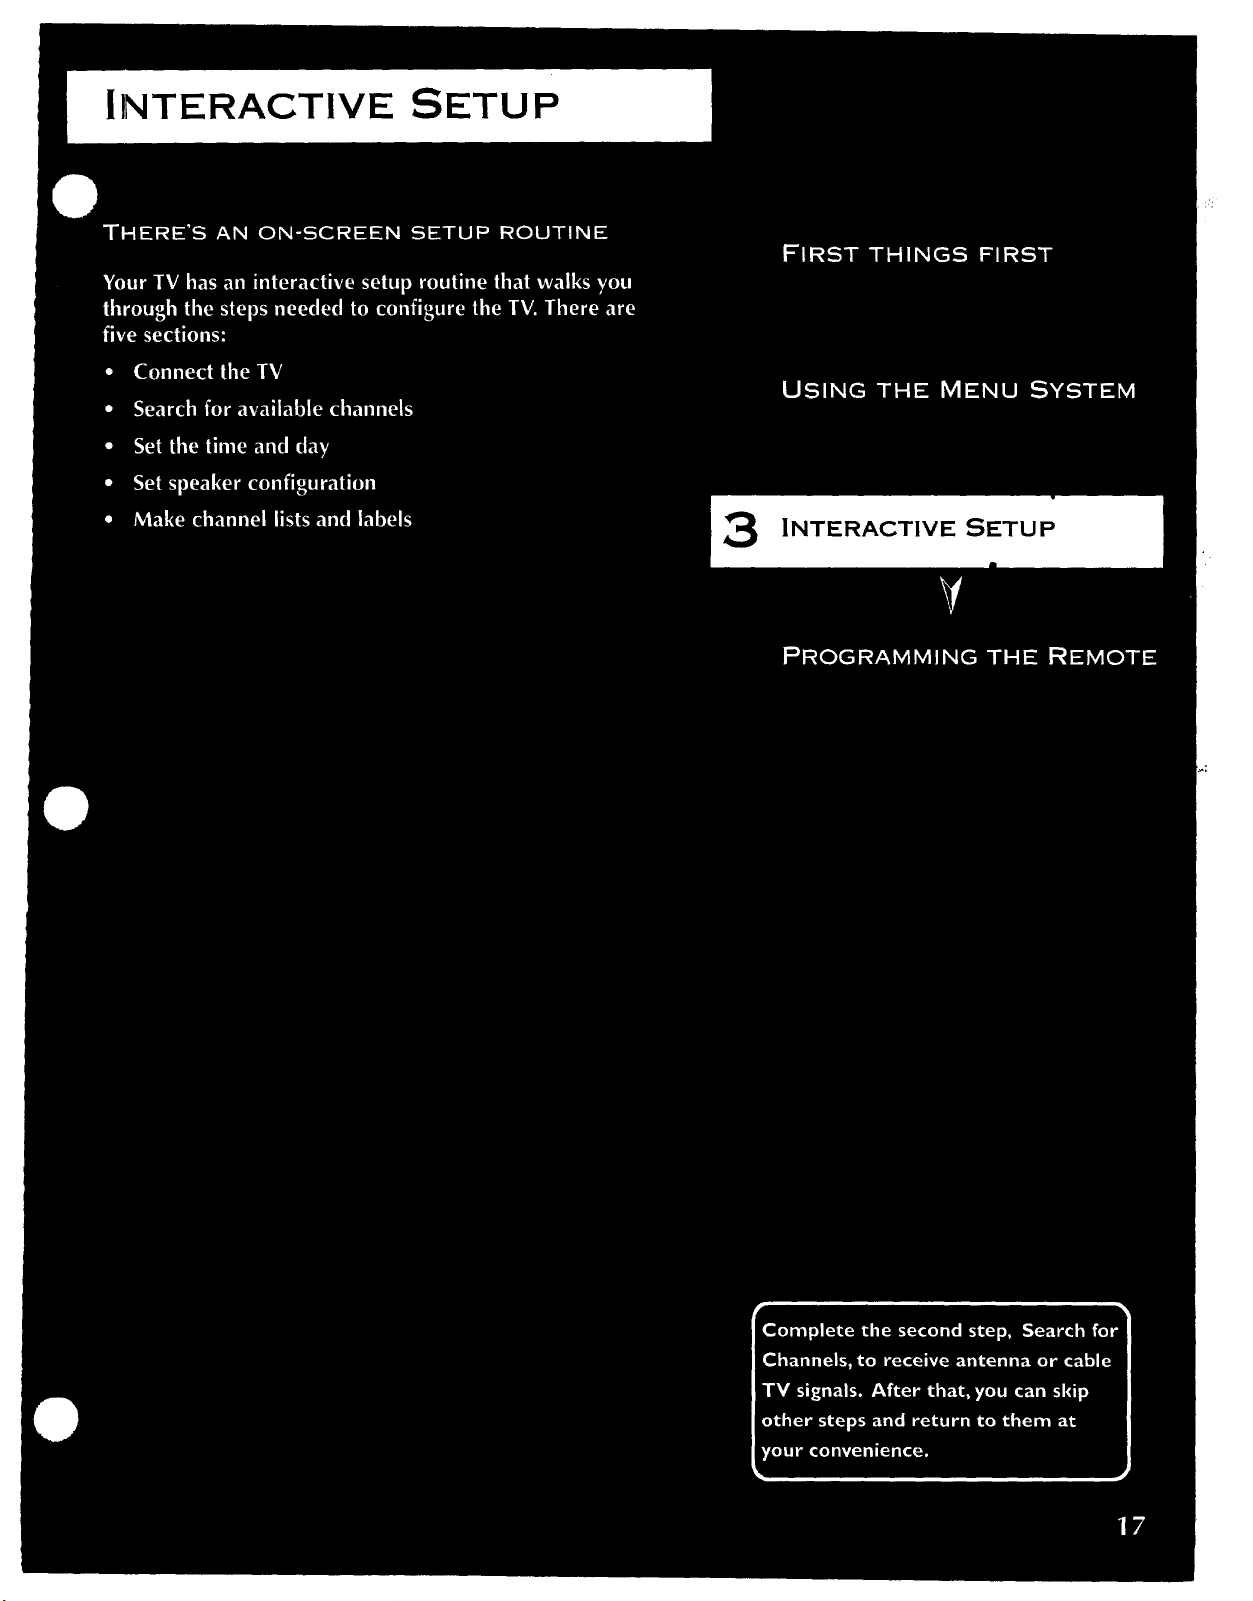
INTERACTIVE SETUP
3
Page 22
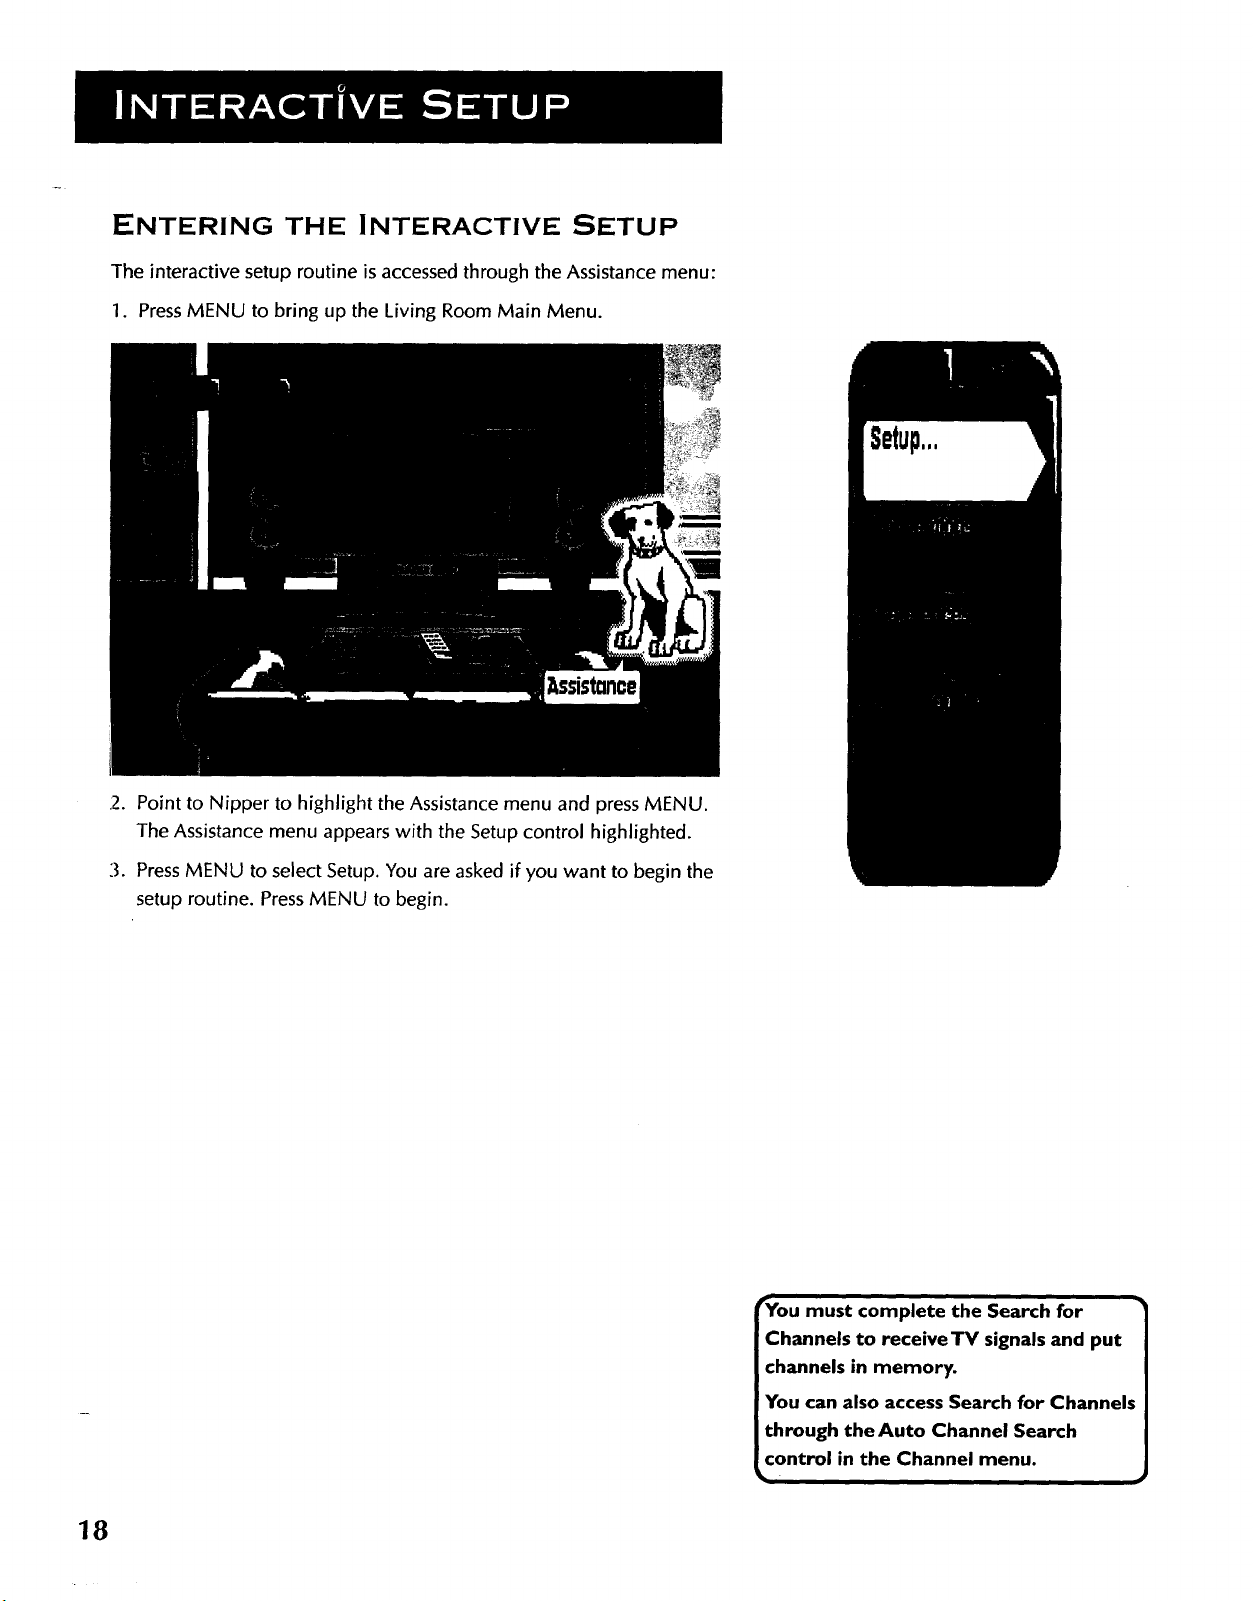
ENTERING THE INTERACTIVE SETUP
The interactive setup routine is accessed through the Assistance menu:
1. PressMENU to bring up the Living Room Main Menu.
12.Point to Nipper to highlight the Assistance menu and press MENU.
The Assistance menu appears with the Setup control highlighted.
3. PressMENU to select Setup. You are asked if you want to begin the
setup routine. PressMENU to begin.
_Youmust complete the Search for •
Channels to receiveTV signals and put
channels in memory.
You can also access Search for Channels
through the Auto Channel Search
control in the Channel menu.
18
Page 23
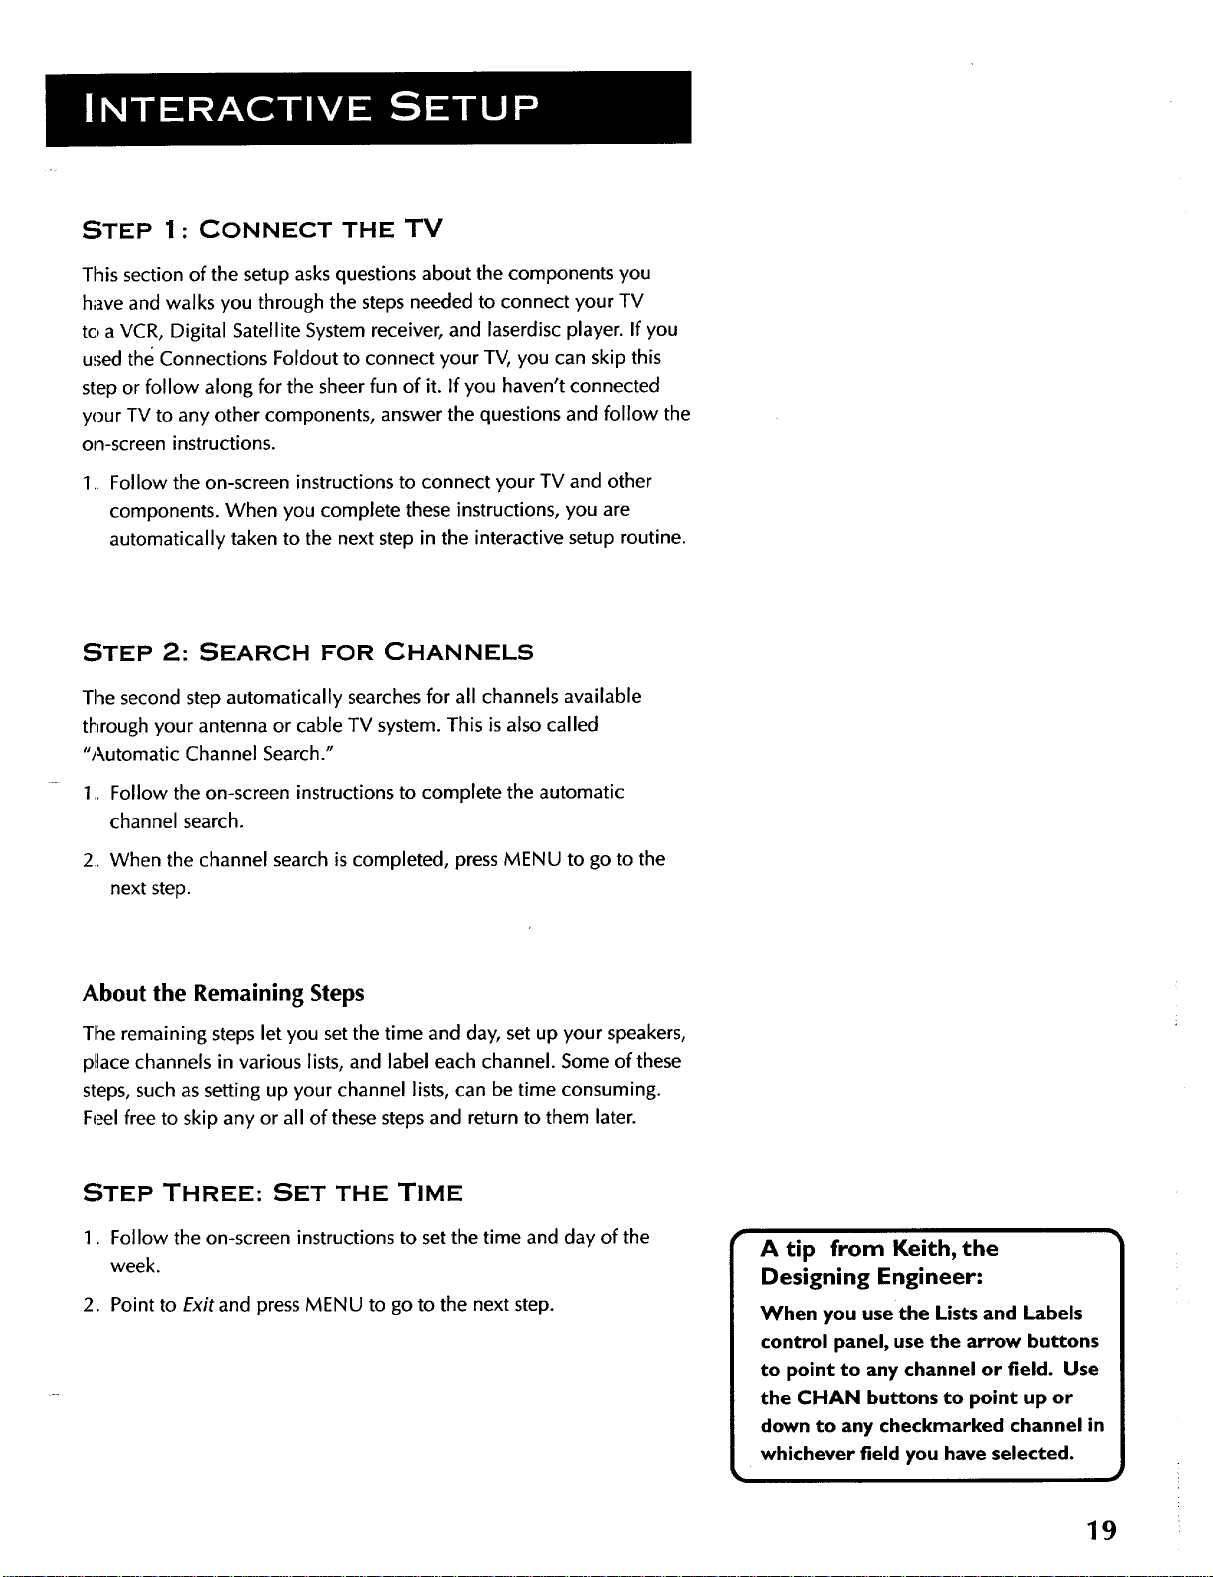
STEP 1 : CONNECT THE TV
This section of the setup asks questionsabout the components you
have and walks you through the steps needed to connect your TV
to a VCR, Digital Satellite System receiver, and laserdisc player. If you
used the Connections Foldout to connect your TV, you can skip this
step or follow along for the sheer fun of it. If you haven't connected
your TV to any other components, answer the questions and follow the
on-screen instructions.
1 Follow the on-screen instructions to connect your TV and other
components. When you complete these instructions, you are
automatically taken to the next step in the interactive setup routine.
STEP 2: SEARCH FOR CHANNELS
The second step automatically searches for all channels available
through your antenna or cable TV system. This is also called
"Automatic Channel Search."
1. Follow the on-screen instructions to complete the automatic
channel search.
2. When the channel search is completed, press MENU to go to the
next step.
About the Remaining Steps
The remaining steps let you set the time and day, set up your speakers,
place channels in various lists, and label each channel. Some of these
steps, such as setting up your channel lists, can be time consuming.
Feel free to skip any or all of these steps and return to them later.
STEP THREE: SET THE TIME
1. Follow the on-screen instructions to set the time and day of the
week.
2. Point to Exitand pressMENU to go to the next step.
A tip from Keith, the
Designing Engineer:
When you usethe Lists and Labels
control panel, use the arrow buttons
to point to any channel or field. Use
the CHAN buttons to point up or
down to any checkmarked channel in
whichever field you have selected.
19
Page 24
STEP FOUR: SET THE SPEAKER
CON FIGU RATION
This step lets you tell the TV how many speakers you have connected
to your TV.
1. Point left or right to indicate the speaker setup that matches your
system.
2. Point to EXITand press MENU to go to the next step.
STEP FIVE: EDIT CHANNEL LABELS
This step lets you set up your channel lists and assign or build labels
for your channels.
1. Follow the on-screen instructions to set up your channels and
channel lists.
2. Point to EXIT and press MENU to complete the interactive setup.
WHAT NOW?
Now that you've finished the interactive setup, you can sit back, relax,
and enjoy the TV. Or...
Program the Remote
Since you've gone this far, in just a few minutes you can program the
remote control to work with your VCR, laserdisc player, and other
component. To find out how to program both of the remotes, go to the
next section.
2O
Page 25
PROGRAMMING THE REMOTES
4
Page 26
PROGRAMMING THE
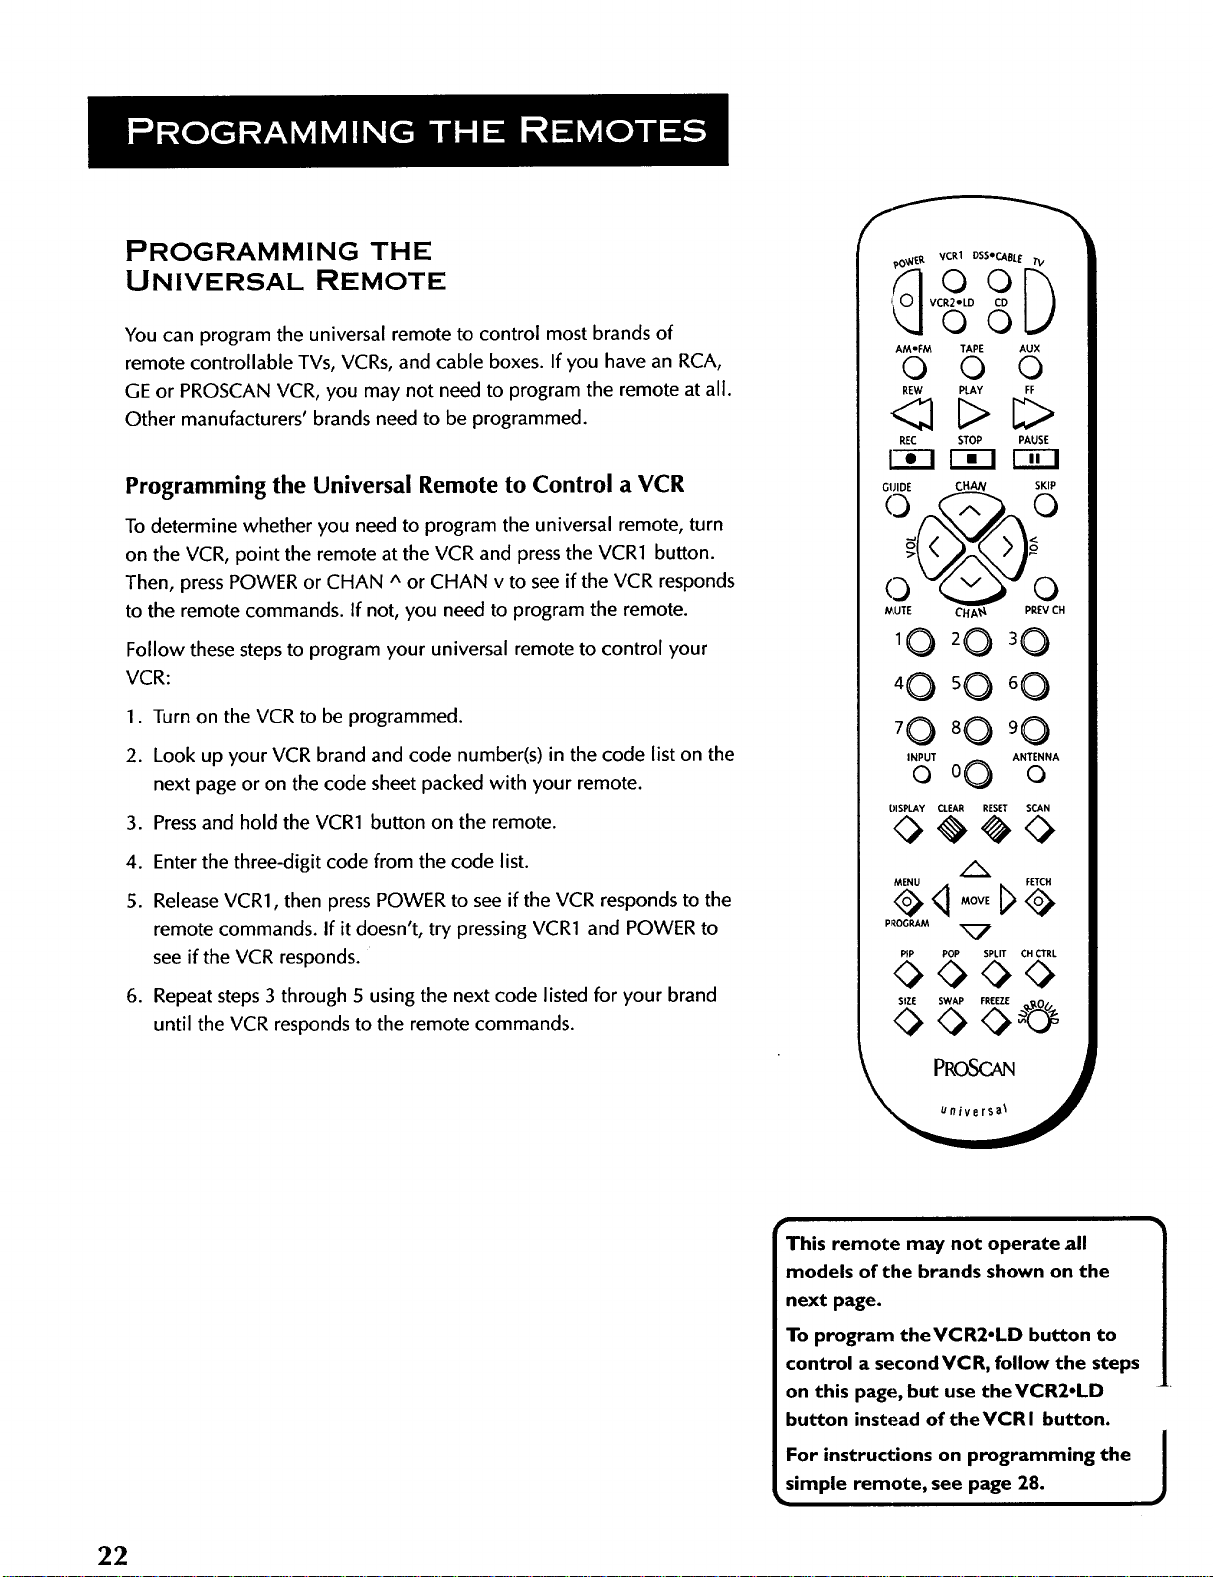
UNIVERSAL REMOTE
You can program the universal remote to control most brands of
remote controllable TVs, VCRs, and cable boxes. If you have an RCA,
GE or PROSCAN VCR, you may not need to program the remote at all.
Other manufacturers' brands need to be programmed.
_,O_E._. VCR1 DSSeCABL E TV
i VCR2-LD
o9[}
©0
AMeFM TAPE AUX
0 0 ©
REW PLAY FF
<21 C>C>
REC STOP PAUSE
Programming the Universal Remote to Control a VCR
To determine whether you need to program the universal remote, turn
on the VCR, point the remote at the VCR and press the VCR1 button.
Then, press POWER or CHAN A or CHAN v to see if the VCR responds
to the remote commands. If not, you need to program the remote.
Follow these stepsto program your universal remote to control your
VCR:
1. Turn on the VCR to be programmed.
2. Look up your VCR brand and code number(s) in the code list on the
next page or on the code sheet packed with your remote.
3. Pressand hold the VCR1 button on the remote.
.
Enter the three-digit code from the code list.
5.
Release VCR1, then press POWER to see if the VCR responds to the
remote commands. If it doesn't, try pressing VCR1 and POWER to
see if the VCR responds.
.
Repeat steps 3 through 5 using the next code listed for your brand
until the VCR responds to the remote commands.
G_JIDE CHAN SKIP
t_,UTE CHA_ PREVCH
10
40 'O °O
70 80 90
INPUT ANTENNA
0 o0 0
DISPLAY CLEAR RESET SCAN
MENU FETCH
PROGRAM _7
P_P POP SPLIT CH CTRL
SIZE SWAP FREEZE -In,.
22
This remote may not operate all
models of the brands shown on the
next page.
To program theVCR2-LD button to
control a secondVCR, follow the steps
on this page, but use the VCR2°LD
button instead of theVCRI button.
For instructions on programming the
simple remote, see page 28.
J
Page 27
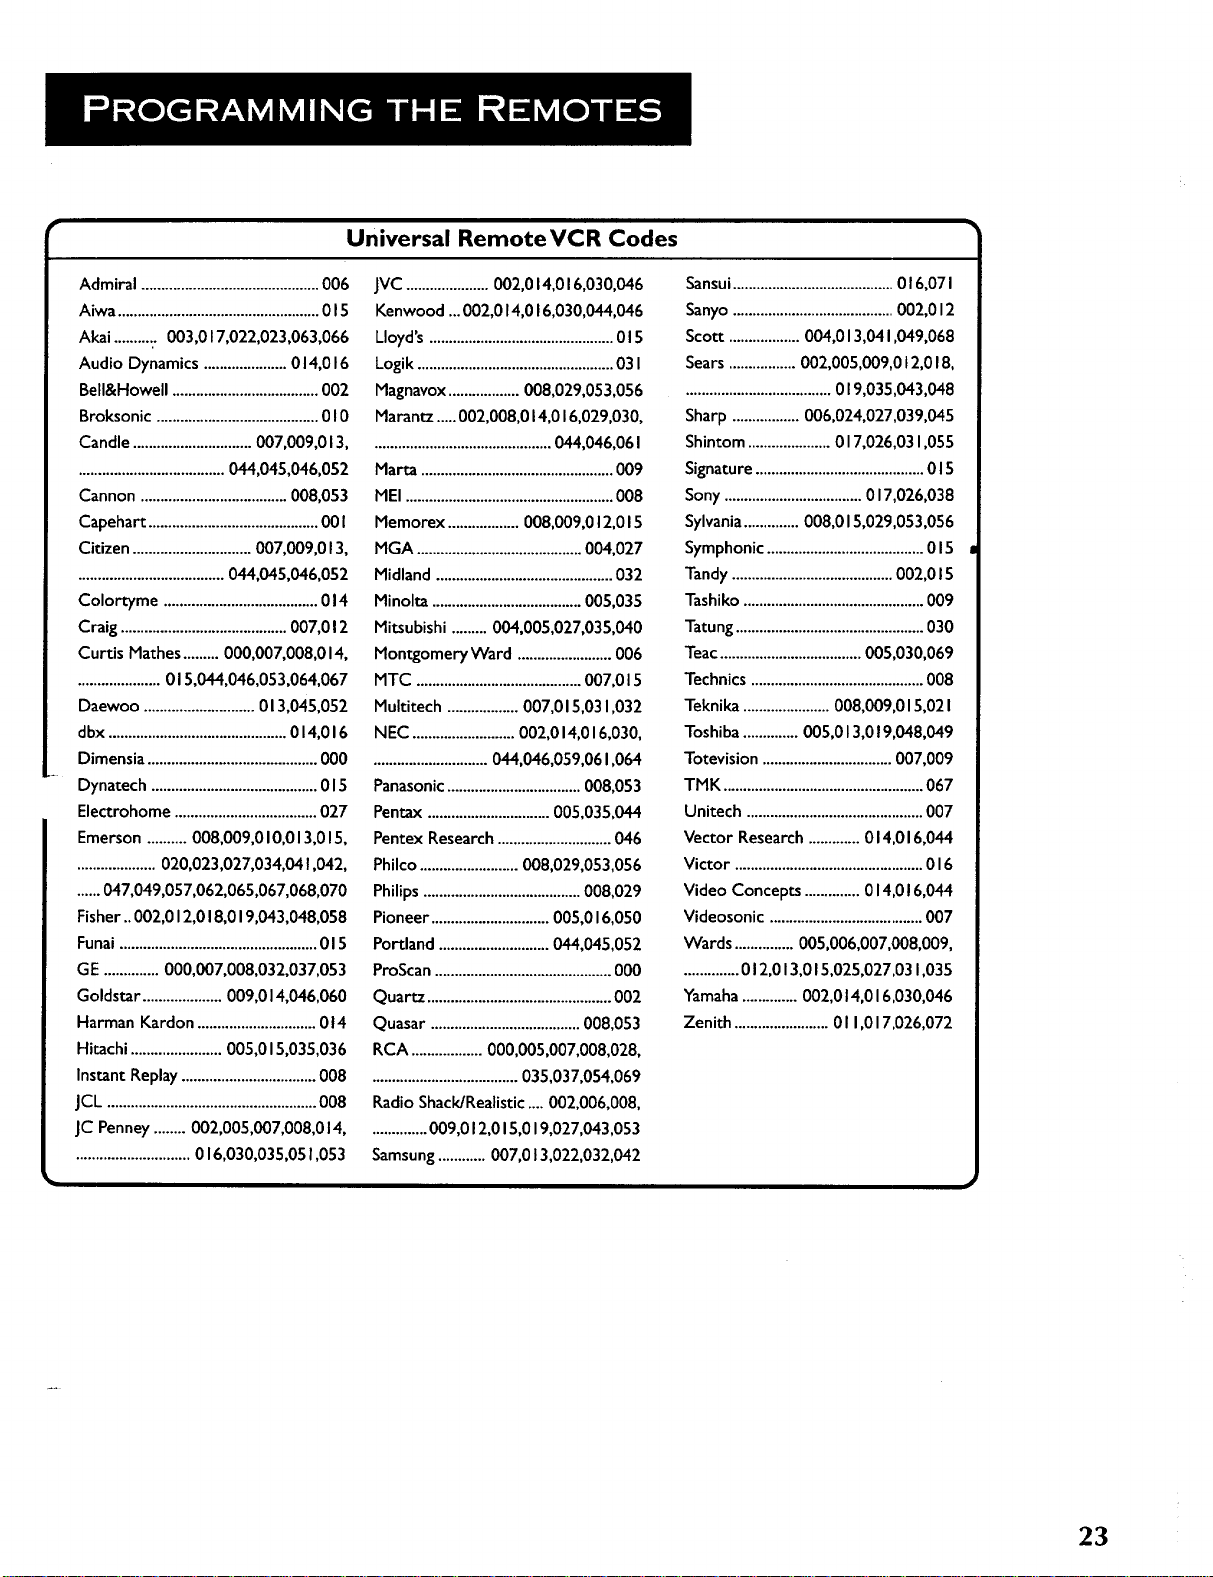
• Universal RemoteVCR Codes
Admiral.............................................006
Aiwa...................................................015
Akai ........... 003,017,022,023,063,066
Audio Dynamics .....................014,016
Bell&Howell .....................................002
Broksonic .........................................010
Candle..............................007,009,013,
.....................................044,045,046,052
Cannon .....................................008,053
Capehart ...........................................00 I
Citizen ..............................007,009,013,
.....................................044,045,046,052
Colortyme .......................................014
Craig ..........................................007,012
Curtis Mathes.........000,007,008,014,
.....................015,044,046,053,064,067
Daewoo ............................013,045,052
dbx .............................................014,016
Dimensia...........................................000
Dynatech ..........................................015
Electrohome ....................................027
Emerson ..........008,009,010,013,015,
....................020,023,027,034,04 1,042,
......047,049,057,062,065,067,068,070
Fisher.. 002,012,018,019,043,048,058
Funai ..................................................015
GE ..............000,007,008,032,037,053
Goldstar ....................009,014,046,060
Harman Kardon ..............................014
Hitachi .......................005,015,035,036
Instant Replay..................................008
JCI_.....................................................008
JC Penney........002,005,007,008,014,
.............................016,030,035,051,053
JVC .....................002,014,016,030,046
Kenwood ...002,014,016,030,044,046
lloyd's ...............................................015
Logik ..................................................03I
Magnavox..................008,029,053,056
Marantz .....002,008,014,016,029,030,
.............................................044,046,06I
Marta .................................................009
MEI .....................................................008
Memorex ..................008,009,012,015
MGA ..........................................004,027
Midland .............................................032
Minolta ......................................005,035
Mitsubishi .........004,005,027,035,040
Montgomery Ward ........................006
MTC ..........................................007,015
Multitech ..................007,015,031,032
NEC..........................002,014,016,030,
.............................044,046,059,061,064
Panasonic..................................008,053
Pentax ...............................005,035,044
Pentex Research.............................046
Philco .........................008,029,053,056
Philips ........................................008,029
Pioneer ..............................005,016,050
Portland ............................044,045,052
ProScan.............................................000
Quartz ...............................................002
Quasar ......................................008,053
RCA ..................000,005,007,008,028,
.....................................035,037,054,069
Radio Shack/Realistic....002,006,008,
..............009,012,015,019,027,043,053
Samsung............007,013,022,032,042
Sansui.........................................016,071
Sanyo.........................................002,012
Scott ..................004,013,04 1,049,068
Sears.................002,005,009,012,018,
.....................................019,035,043,048
Sharp.................006,024,027,039,045
Shintom.....................017,026,031,055
Signature ...........................................015
Sony ...................................017,026,038
Sylvania..............008,015,029,053,056
Symphonic ........................................015
Tandy .........................................002,015
Tashiko ..............................................009
Tatung................................................030
Teac....................................005,030,069
Technics ............................................008
Teknika ......................008,009,015,02I
Toshiba..............005,013,019,048,049
Totevision .................................007,009
TMK ...................................................067
Unitech .............................................007
Vector Research.............014,016,044
Victor ................................................016
Video Concepts ..............014,016,044
Videosonic .......................................007
Wards ...............005,006,007,008,009,
..............012,013,015,025,027,031,035
Yamaha..............002,014,016,030,046
Zenith ........................011,017,026,072
23
Page 28
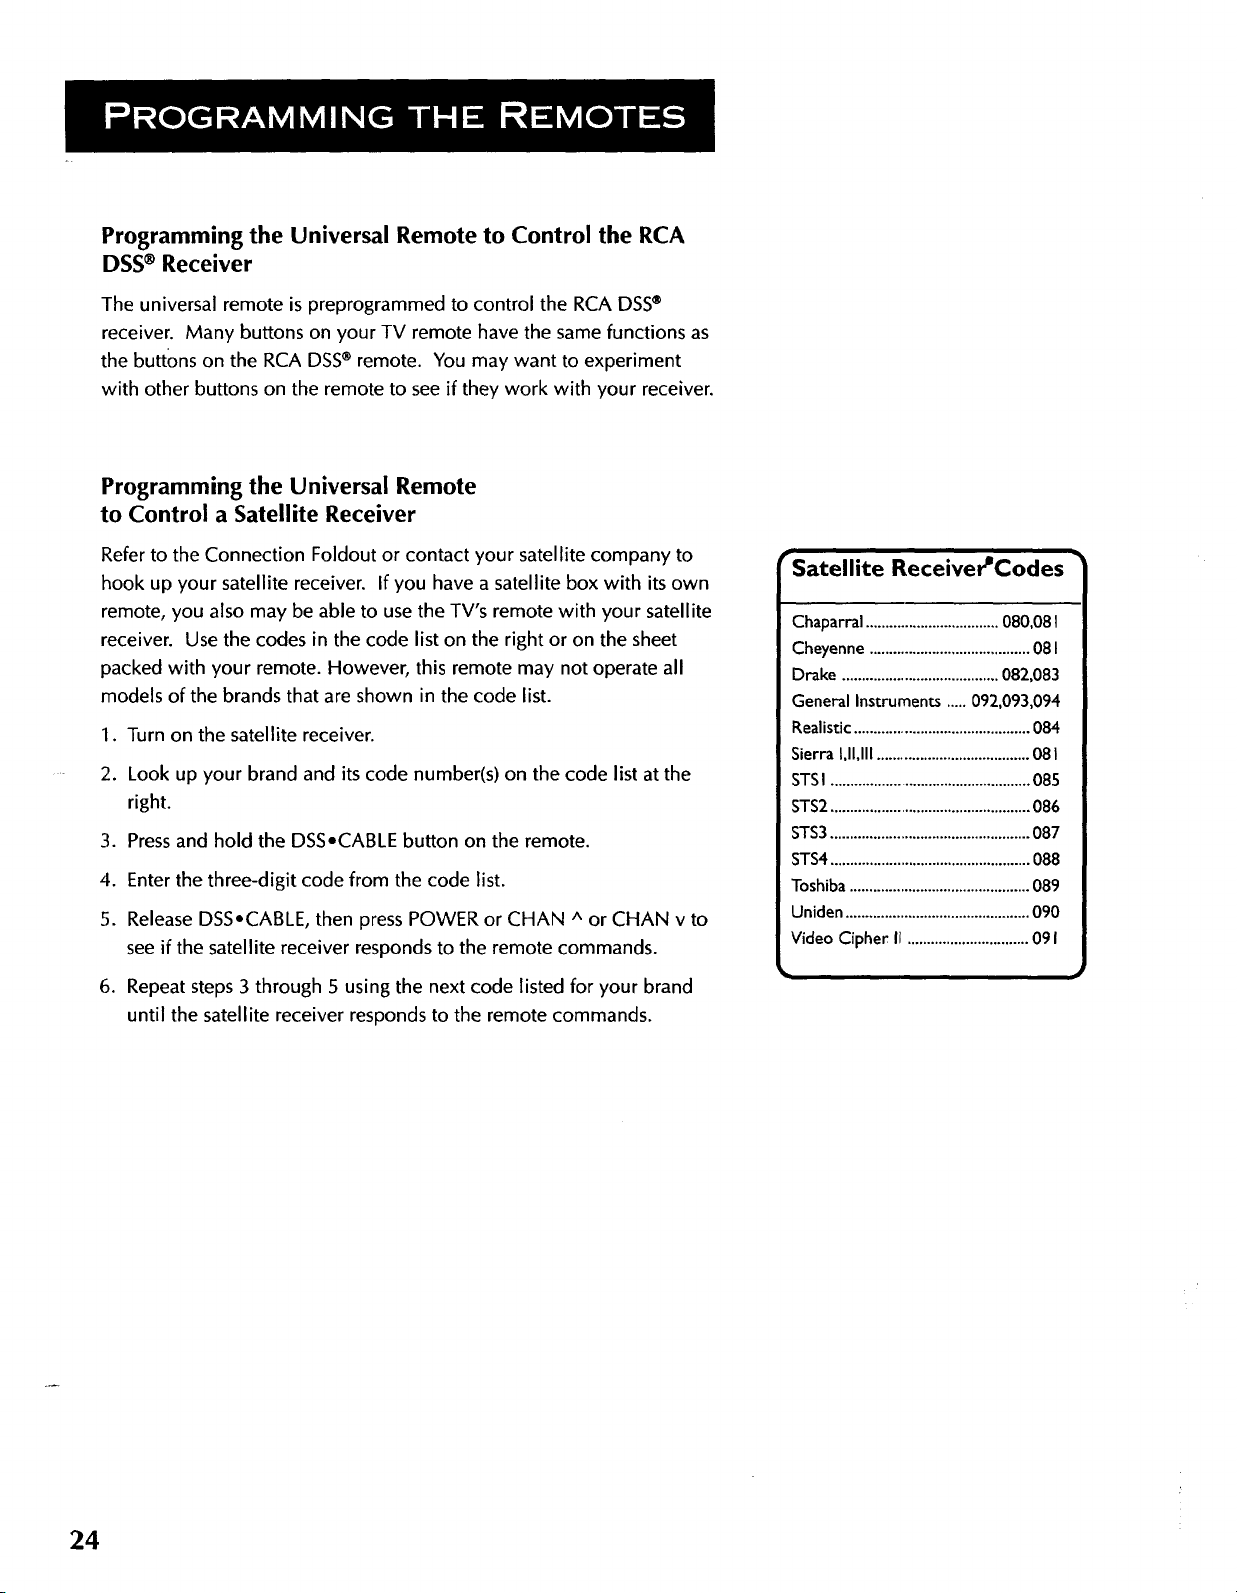
Programming the Universal Remote to Control the RCA
DSS ® Receiver
The universal remote is preprogrammed to control the RCA DSS®
receiver. Many buttons on your TV remote have the same functions as
the buttons on the RCA DSS®remote. You may want to experiment
with other buttons on the remote to see if they work with your receiver.
Programming the Universal Remote
to Control a Satellite Receiver
Refer to the Connection Foldout or contact your satellite company to
hook up your satellite receiver. If you have a satellite box with itsown
remote, you also may be able to use the TV's remote with your satellite
receiver. Use the codes in the code list on the right or on the sheet
packed with your remote. However, this remote may not operate all
models of the brands that are shown in the code list.
1. Turn on the satellite receiver.
2. Look up your brand and its code number(s) on the code list at the
right.
3. Pressand hold the DSSoCABLE button on the remote.
4. Enterthe three-digit code from the code list.
5. Release DSS°CABLE, then press POWER or CHAN A or CHAN v to
see if the satellite receiver responds to the remote commands.
6. Repeat steps 3 through 5 using the next code listed for your brand
until the satellite receiver responds to the remote commands.
_Satellite Receiver_Codes •
Chaparral..................................080,08I
Cheyenne.........................................08I
Drake........................................082,083
GeneralInstruments.....092,093,094
Realistic.............................................084
SierraI,I1,111.......................................08I
STSI ................................................... 085
STS2...................................................086
STS3................................................... 087
STS4...................................................088
Toshiba..............................................089
Uniden...............................................090
VideoCipherIr ...............................091
24
Page 29

Programming the Universal Remote to Control a
Cable Box
Refer to the Connection Foldout or contact your cable company to
hook up your cable box. If you have a cable box with its own remote,
you also may be able to use the TV's remote with your cable box. This
remote can be programmed to control either a DSS®receiver or a
cable box, not both. Use the codes in the code list on the right or on
the sheet packed with your remote. This remote may not operate all
models of the brands that are shown in the code list.
1. Turn on the cable box.
2. Look up your brand and its code number(s) on the code list at right.
3. Pressand hold the DSSoCABLE button on the remote.
4. Enter the three-digit code from the code list.
5. Release DSSoCABLE, then press POWER or CHAN A or CHAN v to
see if the cable box responds to the remote commands.
6. Repeat steps 3 through 5 using the next code listed for your brand
until the cable box responds to the remote commands.
Cable Box Codes
ABC ................................................. 022,046,053,054
Anvision .......................................................... 007,008
Cablestar ........................................................ 007,008
Diamond ................................................................. 056
Eagle................................................................. 007,008
Eastern Int.............................................................. 002
General Instuments ............................................. 046
GI 400 .............. 004,005,015,023,024,025,030,036
Hamlin ..................................... 003,012,013,034,048
Hitachi ..................................................... 037,043,046
Jerrold .............004,005,015,023,024,025,030,036,
................................................... 045,046,047,062,065
Macom ............................................................ 037,043
Magnavox ............................... 007,008,019,021,026,
........................................... 028,029,032,033,040,041
NSC ........................................................................ 009
Oak .......................................................... 001,016,038
Oak Sigma .............................................................. 016
Panasonic ........................................ 003,027,039,06 I
Philips ......................................007,008,019,021,026,
........................................... 028,029,032,033,040,041
Pioneer .................................................... 018,020,044
RCA ......................................................... _......000,027
Randtek ........................................................... 007,008
Regal ........................................................ 003,012,0Je3
Regency .......................................................... 002,033
Samsung .................................................................. 044
Sci. Atlanta .............................. 003,022,035,063,064
Signature ................................................................. 046
Sprucer .................................................................. 027
Starcom .................................................................. 046
Stargate 2000 ........................................................ 058
Sylvania............................................................ 011,059
Teknika ................................................................... 006
Texscan ................................................... 010,01 1,059
Tocom ...................................... 017,021,049,050,055
Unika ....................................................... 031,032,04 I
Universal ................................................. 051,052,060
Viewstar ................................. 007,008,019,021,026,
........................................... 028,029,032,033,040,04 I
Warner Amex ....................................................... 044
Zenith .............................................. 014,042,057,06 I
•
Page 30

Programming the Universal Remote
to Control a Laserdisc Player
Laserdisc Player Codes
Use the codes in the code list on the right or on the sheet packed with
your remote. However, this remote may not operate all models of the
brands that are shown in the code list on the right.
Follow these steps to program your universal remote to control your
laserdisc player:
1. Turn on the laserdisc player.
2. Look up your brand and code number(s) in the code list.
3. Pressand hold the VCR2oLD button on the remote.
.
Enter the three-digit code from the code list.
5.
Release VCR2• LD, then press POWER to see if the laserdisc player
responds to the remote commands. If it doesn't, try pressing
VCR2 •LD, then POWER again.
.
Repeat steps 3 through 5 using the next code listed for your brand
until the laserdisc player responds to the remote commands.
Programming the Universal Remote
to Control an Audio Component
To program the remote for a remote-controllable audio component,
point the remote at _: '_mponent and pressthe correct component
button: AUX for an -.eiver, CD for a CD player, etc. Then, press
POWER or CHAN u I,_wn. If the component doesn't respond, the
remote needs to be pr grammed. Use the codes in the code list on the
next page or=on the sheet packed with your remote. However, this
remote may not operate all models of the brands that are shown in the
code list.
ProScan ..................................... 033,037
P,CA ........................................... 033,037
Pioneer ...................................... 033,037
Follo4wthese steps to program your universal remote to control your
audio component:
1. Turn on the component to be programmed.
2. Look up your brand and code number(s) on the code list.
3. Pressand hold the component button on the remote.
4. Enter the three-digit code from the code list.
5. Release component button, then press POWER to see if the
component responds to the remote commands. If it doesn't, try
pressing the component button, then FOWER again.
6. Repeat steps 3 through 5 using the next code listed for your brand
until the component responds to the remote commands.
26
Page 31

Audio Component Codes
ADS
AMP ..........................................001
AIWA
CD ..........................................060
AKAI
AMP ..................................002,008
DENON
CD ............................................057
DYNAMIC BASS
AM/FM .....................................029
CD ............................................025
TAPE.................................026,027
PHONO ..................................028
EMERSON
CD ..........................................066
FISHER
AMP ........................................023
CD ..........................................067
HITACHI
CD ............................................063
jvc
AMP ..................................016,058
AM/FM .............................030,035
CD ............................................032
TAPE.................................033,034
AUX .........................................03 I
KENWOOD
AMP ................................017,074
AM/FM .....................................074
CD ...........................067,070,077
TAPE.................................071,072
PHONO ---m............................073
KYOCERA
AMP ..........................................009
LOT_E (NEC)
CD ............................................075
MAG NAVOX
AMP ..........................................065
AM/FM ...................................065
CD ..........................................06 I
MARANTZ
AMP ..................................022,076
AM/FM .....................................076
CD ..........................................068
MITSUBISHI
AMP ..................................015,059
AM/FM .....................................059
NAKAMICHI
AM P..........................................020
ONKYO
AM/FM .....................................082
CD ..........................................078
TAPE.................................080,08I
PHONO ..................................079
PANASONIC
AMP..........................................012
AM/FM .....................................038
CD ....................................036,083
TAPE.........................................037
PHILIPS
AMP ..........................................062
AM/FM .....................................062
CD ..........................................06 I
PIONEER
AMP..........................................014
AM/FM .....................................042
CD ............................................039
TAPE.................................040,04I
RCA
AMP..........................................024
AM/FM ...................................003
CD ............................007,043,044
TAPE.......................................006
PHONO ..................................005
AUX .................................004,054
REALISTIC
CD ..................................063,066
SANSUI
CD ............................................045
SCOTT
CD ............................................066
TAPE.................................055,056
SHERWOOD
AMP..................................011,013
SONY
AMP ..........................................021
AM/FM .....................................049
CD ............................................046
TAPE.................................048,053
PHONO ..................................047
TEAC
AMP ..........................................010
CD ............................................069
TECHNICS
AM/FM .....................................052
CD ............................................050
TAPE.........................................05I
YAMAHA
AMP ..................................018,019
27
Page 32

PROGRAMMING THE SIMPLE REMOTE
There are two methods to program the simple remote's VCR button:
CODE SEARCH and DIRECT ENTRY. The simple remote's TV button is
already programmed for your TV.
To program the VCR button using CODE SEARCH
1. Make sure the VCR is turned off unless it is a GE, PROSCAN, or
RCA product. If the VCR is a GE, PROSCAN or RCA product, turn
it on.
2. Pressthe VCR button and the POWER button simultaneously.
3. Release the two buttons.
4. Pressthe POWER button repeatedly until the VCR turns ON.
5. Pressthe CHAN v button to verify the VCR operates correctly.
PressMENU to complete the process.
To program the VCR button using DIRECT ENTRY
1. Find the keypress combination for your VCR by locating your brand
of VCR in the VCR Codes table on the next page.
2. Note the code numbers that follow your brand of VCR.
3. Locate the code number in the Key Combination chart on
the next page.
4. Press and hold the VCR button.
5. Enter the four keypresses shown in the Key Combination Chart.
Symbol
A
v
>
<
Simple Remote Button '1k
CHAN UP
CHAN DOWN -_-
VOL DOWN
VOL UP j
!
28
Page 33

Simple RemoteVCR Codes
Admiral ............................................06
Aiwa .................................................15
Akai ......................03,17,22,23,63,66
Audio Dynamics ...................... 14,16
Bell&Howell ...................................02
Broksonic ..........................................0
Candle ............07,09,13,44,45,46,52
Cannon .......................................08,53
Capehart ......................................_..0 I
Citizen ............07,09,13,44,45,46,52
Colortyme ......................................14
Craig ...........................................07,12
Curtis Mathes ....................00,07,08,
..........................14,15,44,46,53,64,67
Daewoo ...............................13,45,52
dbx ..............................................14,16
Dimensia .........................................00
Dynatech .........................................15
Electrohome ...................................27
Emerson ...................08,09,I0,13,15,
........................... 20,23,27,34,41,42,47,
..........................49,57,62,65,67,68,70
Fisher ...................................02,12,18,
...........................................19,43,48,58
Funai ................................................15
GE ........................00,07,08,32,37,53
Goldstar .........................09,14,46,60
Harman Kardon ............................14
Hitachi .............................05,15,35,36
Instant Replay.................................08
JCL ...................................................08
JC Penney .....................02,05,07,08,
................................14,16,30,35,51,53
JVC .............................02,14,16,30,46
Kenwood ............ 02,14,16,30,44,46
Lloyd's..............................................15
Logik ................................................3I
Magnavox .......................08,29,53,56
Marantz ....................02,08,14,16,29,
...........................................30,44,46,6 I
Marta ...............................................09
MEI ...................................................08
Memorex .......................08,09,12,15
MGA ...........................................04,27
Midland ............................................32
Minolta .......................................05,35
,vlitsubishi..................04,05,27,35,40
L
Montgomery Ward .......................06
MTC ............................................07,15
Multitech ........................07,15,31,32
NEC .....02,14,16,30,44,46,59,61,64
Panasonic ...................................08,53
Pentax...................................05,35,44
Pentex Research + ........................46
Philco ...............................08,29,53,56
Philips .........................................08,29
Pioneer ......05,16,33 (laser disc),50
Portland ...............................44,45,52
ProScan ...........................................00
Quartz .............................................02
Quasar ........................................08,53
RCA .....00,05,07,08,28,35,37,54,69
Radio Shack/Realistic ........02,06,08,
..........................09,12,15,19,27,43,53
Samsung ....................07,13,22,32,42
Sansui..........................................16,71
Sanyo ..........................................02,12
Scott ..........................04,13,41,49,68
Sears .........................02,05,09,12,18,
...........................................19,35,43,48
Sharp..........................06,24,27,39,45
Shintom ..........................17,26,31,55
Signature .........................................15
Sony ......................................17,26,38
Sylvania ......................08,15,29,53,56
Symphonic ......................................15
Tandy ..........................................02,15
Tashiko ............................................09
Tatung ..............................................30
Teac.......................................15,30,69
Technics ...........................................08
Teknika ...........................08,09,15,2 I
Toshiba ......................05,13,19,48,49
Totevision ..................................07,09
TMK .................................................67
Unitech ............................................07
Vector Research .................14,16,44
Victor ...............................................16
Video Concepts .................14,16,44
Videosonic ......................................07
Wards .......................05,06,07,08,09,
..........................12,13,15,25,27,31,35
Yamaha ......................02,14,16,30,46
• Key Combinations
00 h^^^ 51 ^<^<
01 ^hA> 52 h<>^
02 ^^^V 53 ^<>>
03 ^hA< 54 ^<>V
04 ^^>^ 55 ^<><
05 ^h>> 56 ^<V ^
06 ^^>v 57 ^<v>
07 hh>< 58 ^<VV
08 ^^V h 59 ^<V<
09 ^^V> 60 ^<<h
10 ^^VV 61 ^<<>
II ^^V< 62 ^<<V
12 ^^<^ 63 ^<<<
13 ^^<> 64 >^h^
14 ^^<v 65 >^^>
15 ^^<< 66 >^^v
16 ^>^^ 67 >^^<
17 ^>^> 68 >^>^
18 ^>^v 69 >^>>
19 ^>^< 70 >^>v
20 ^>>^ 71 >^><
21 ^>>> 72 >^v ^
22 ^>>v 73 >^v>
23 ^>>< 74 >^vv
24 ^>v ^ 75 >^v<
25 ^>v> 76 >^<^
26 ^>vv 77 >^<>
27 ^>v< 78 >^<v
28 ^><h 79 >^<<
29 ^><> 80 >>^^
30 ^><v 81 >>^>
31 ^><< 82 >>^v
32 ^v ^^ 83 >>^<
33 ^v ^> 84 >>>h
34 ^V^V 85 >>>>
35 hv^< 86 >>>V
36 ^V> ^ 87 >>><
37 ^V>> 88 >>V ^
38 ^V>V 89 >>V>
39 ^V>< 90 >>VV
40 ^VV ^ 91 >>V<
41 ^VV> 92 >><^
42 ^VVV 93 >><>
43 ^VV< 94 >><V
44 ^v< ^ 95 >><<
45 ^v<> 96 >v ^^
46 ^v<v 97 >v^>
47 ^v<< 98 >v^v
48 ^<^^ 99 >v^<
49 ^<^> I00 >v> h
50 ^<^v
29
Page 34

Using the Remote to Control a Component
Once the remote has been programmed with the correct codes, you're
ready to use it to control your component.
To operate the component using the remote:
1. Pressthe component button (TV, VCR, VCR2. LD, DSS.CABLE,
AUDIO, etc.) to set the remote to control that component.
2. Press POWER to turn the device off or on.
3. Use the remote buttons that apply to that device (CHAN buttons,
transport keys, etc.).
31)
For PROSCAN, RCA, and GE
Page 35

TOUR OF THE TV
Page 36

REMOTE CONTROL BUTTONS
POWER When in TV mode, turns off the TV. In VCR mode, and if
programmed, turns on and off some VCRs.
VCR1 If programmed, turns on VCR and puts the remote in VCR
mode. Also, turns on the TV.
DSS,CABLE Turns on the DSS®receiver or, if programmed, some
cable boxes. Puts the remote in DSSor CABLE mode. Also, turns on
the TV.
VCR2oLD If programmed, turns on the second VCR or laserdisc
player. Puts the remote in VCR2 • LD mode. Also, turns on the TV.
TV Turns on the TV and puts the remote in TV mode. Also, displays
channel information.
CD If programmed, turns on the compact disc player and puts the
remote in CD mode.
O0
VCR2"LD CD
(_ CR1 DSS"CABLE0
O0
AM'FM TAPE AUX
© 0 0
REW PLAY FF
<] !> [:> •
REC STOP PAUSE
Fi-1 Fi-! F_-I
GUIDE CHA/%
• SKIP
AM°FM If programmed, turns on the AM/I=M receiver and puts the
remote in AM.FM mode.
TAPE If programmed, turns on the tape player and puts the remote in
Tape mode.
AUX If programmed, turns on the auxiliary audio component and puts
the remote in that mode.
REW, PLAY,FF, REC,STOP, PAUSE If programmed, provide transport
control for some remote-controllable VCRs, laserdisc players, tape
decks, and CD players.
VOL < or VOL > Decreases or increases the TV's volume.
CHAN ^ or CHAN v Scans up or down through the current channel
list. Press once to change the channel up or down. Press and hold to
continue changing channels.
DISPLAY Brings up channel information. Press repeatedly to see
detailed program information, if available.
SKIP Pressonce before changing channels, and the TV waits 30
seconds before returning you to the original channel. Press repeatedly
to add more time.
MUTE Turns off the TV's sound. Pressagain to restore the sound.
MUTE CH/
PREV CH
'0 '0
7 0 8 0 9 0
INPUT ANTENNA
0 00 0
DISPLAY CLEAR RESET SCAN
MENU FETCH
<)4 <>
PROGRAM x_ 7
PiP POP SPLIT CH CTRL
<><><><>
SIZE SWAP FREEZE -o_,.
PRoScaN ,
PREVCH Returns to the previous channel.
(0-9) Number Buttons Enters channel numbers and time settings
directly from the remote control. To enter a two-digit channel, press
the two digits. To enter a three-digit channel, press and hold the 1
digit, then add the second two. For example, to tune to channel 123,
press and hold 1. Then, press 2 and press 3.
32
IFor more, see Programmingthe Universal1
emote, p. 22.
Page 37

INPUT Pressto toggle through the available input sources (VID1,
VID2, VID3, FRNT, etc.).
ANTENNA When in TV mode, changes the antenna input. Functions
asTVoVCR button in VCR mode and TV°DSS button in
DSS.CABLE Mode.
CLEAR Removes any menu or display from the screen and returns to
TV viewing.
MENU Brings up the Main Menu. When in the menu system, selects
Ihighlighted items. When on an Exit button, returns to the previous
menu. When in VCR mode, functions as a Program button.
RESET Returns all picture quality controls to their original settings.
MOVE (Arrows) Used to point to different items in the menu system.
Also used to adjust the menu controls and to move the PIP window
when no menus are on the screen.
PIP Brings up the small picture-in-picture window. Press again to
remove the PIP window.
SPLIT Divides the main picture into left and a right pictures. Press
again to remove the split screen.
POP Brings up three small picture-outside-picture windows. Press
again to remove the POP windows.
GUIDE Brings up twelve small pictures that are previews of the next
twelve channels in the channel list. Use the up and down arrows to
see the previous or next four channels. Press MENU to go to the
channel you have highlighted. Press GUIDE again to remove the
channel guide.
CH CTRL Selects whether the main picture or a PIX+ window is
affected by the CHAN and FREEZE buttons.
SWAP Swaps the main picture with the currently selected
PIX+ window.
FREEZE Freezes the video in the main picture or PIP window, if it's
displayed.
SIZE Selects the size of the PIP window.
SCAN Briefly displays each channel from the current channel list.
Pressagain to stop scan.
SURROUND Pressonce to display the current audio processor. Press
repeatedly to toggle through the available audio processors.
cableTV signals. Signals from the
Video INPUTS are not displayed in
I he POP windows display antenna or 1
POP mode.
FETCH Contains up to five frequently used controls from other menus.
You can choose what controls are available at the fetch menu.
the Fetch Menu, see Using and
I To add your own favorite control to l
33
JModifying Fetch, p. 59.
Page 38

SIMPLE REMOTE BUTTONS
VOL < Decreases the volume, When in the menu system, VOL < is
used to point to items and adjust menu controls, in VCR mode, it
functions as a REW or reverse search button.
VOL > Increasesthe volume. When in the menu system, VOL > is
used to point to items and adjust menu controls. In VCR mode, it
functions asa FF or fast search button.
CHAN ^ Scans up through the channel list. In the menu system, it
points to items and adjusts menu controls. In VCR mode, it functions
as a PLAY button.
CHAN v Scans down through the current channel list. In the menu
system, it points to items and adjusts menu controls. In VCR mode, it
functions as a STOP button.
MENU Brings up the Main Menu. When in the menu system, it selects
highlighted items. Also returns to the previous menu. When in VCR
mode, it functions asa PAUSEbutton.
TV Turns on the TV and puts the remote in TV mode. Also displays
channel information.
VC:R If programmed, turns on the VCR and puts remote in VCR mode.
Also turns on the TV.
POWER Turns off the TV. Also turns some VCRs off and on.
34
as trans| keys,
Page 39

CHANNEL MARKER
There are several indicators that come up when you change
channels, press the DISPLAYbutton, or press the TV button. This
display is called the Channel Marker.
9 Displ(_ys the current channel.
P|P 2 Displays the current PIPchannel, if in use.
CNN If assigned using the Listsand Labels control panel, displays the
channel logo for the current channel.
ANT A Displays the current input source.
C:CDisplayed when Closed Captioning is available on the
current channel.
Stereo Displayed when the current channel is broadcasting in Stereo.
SAP Displayed when the current channel is broadcasting SAP
(Second Audio Program) information.
Sleep Displayed when the Sleep Timer has been set.
NORM Displays the current channel list.
just an example, of course.
I he channel marker shown above is 1
35
Page 40

BACK PANEL
INPUT 1
Lets you connect a video component such asa VCR, DSS® receiver, or
laserdisc player.
L/MONO Provides left audio connection. Or, if you are connecting a
mono component, use the L/MONO input. The left audio connector is
usually white.
RIGHT Provides right audio connection. The right audio connector is
usually red.
VIDEO Provides video connection. The video connector is
usually yellow.
UMON0 RIGHT VIDEO
UMONO RIGHT VIDEO
INPUT2 _
S-VEIE0
glGNT VIDEO S-VIDE0
S-VIDEO Lets you connect a component with S-Video capability, such
as a DSS® receiver or S-VHS VCR. When using S-Video, make sure to
connect the three audio/video cables, aswell as the S-Video
connector.
INPUT 2
Provides connection to a second video component such asa VCR,
DSS®receiver, or laserdisc player. Its jacks are the same asdescribed
for INPUT 1, above.
INPUT 3
Provides connection to a third video component such as a VCR or
laserdisc player.
L/MONO Providesleft audio connection. Or, if you are connecting a
mono component, use the L/MONO input. The left audio connector is
usually white.
RIGHT Provides right audio connection. The right audio connector is
usually red.
"DEO Provides video connection. The video connector is usually
,=llow.
You can use the ANT B input for
video games and switch between the
two inputs using the ANTENNA
button on the remote,
When using TV games, computers
and similar products with yourTV,
keep the contrast at a low setting. If
a fixed (non-moving) pattern is left
on the screen for long periods of
time at a high contrast setting, the
image can be permanently
imprinted onto the picture tubes.
These types of imprints are not
covered by your warranty because
they are the result of misuse.
36
Page 41

SIGNAL SOURCE Provides connection to a home antenna or cable
TV system.
FIXED OUTPUT Provides fixed-level audio and video output from the
TV. These output signals are ideal for connecting to an AN receiver or
arnplifiei" that has its own remote control.
VIDEO UMONO RIC41T SURR _
VIDEO UI_ONO RIGHT VOLlilI¢E-
PAOLI_IG
VIDEO L/I_IONO RIGHT LEFT/_jBOU_TS
RIGHT
TV TUNER OUTPUT Provides audio and video output from the TV
tuner. The TV TUNER OUTPUT jacks are ideal for connecting the TV
to an AV receiver with video display, then routing the audio and video
jacks back into the TV's audio/video inputs.
VOLUME-CONTROLLED PROLOGIC OUTPUTS These five jacks
provide connections to an AV receiver or power amplifier.
PIP OUTPUT Provides audio output from the PIX+ window.
CENTER (switch) Lets you choose between playing center channel
audio through the TV's internal speaker, or through an external center
channel speaker connected to the TV.
CENTER CHANNEL SPEAKERS Lets you connect external center
channel speakers to the TV.
MAIN (switch) The internal main speaker switch lets you turn off the
TV's internal main speakers and play the main audio through external
speakers connected to the TV.
MAIN SPEAKERSLetsyou connect external left and right speakers to
tile TV.
SURROUND OUTPUT (SURR OUTPUT) SPEAKERS Lets you
connect left and right surround channel speakers to the TV.
k_rrA N/TB
LEFT RIGHT
37
Page 42

FRONT PANEL
VOL < Decreases the volume. When in the menu system, use VOL <
to point left to items and adjust menu controls.
VOL > Increasesthe volume. When in the menu system, use VOL > to
point right to items and adjust menu controls.
CHAN ^ Scansup through the channel list. In the menu system, use it
to point up to items and adjust menu controls.
CHAN v Scansdown through the current channel list. In the menu
system, use it to point down to items and adjusts menu controls.
MENU Brings up the Main Menu. In the menu system, use it to select
highlighted items and return to the previous menu.
POWER Turns the TV on and off.
(Headphone) Plug stereo headphones into this jack.
A.V (Audio/Video Jack) Use the AV adapter, included with your
TV accessories, to connect a camcorder or other device to the front of
'he TV.
pOWER
38
Page 43

QUICK REFERENCE
Page 44

AUDIO MENU
Mute
Lets you turn the TV's sound off or on.
Equalizer
Takes you to slider bars that adjust the tone of each of the TV's external
and internal speakers.
Speakers
Letsyou turn on or off the TV's internal, external or rear speakers.
Audio Processor
Lets you choose among the available audio modes, which control the
way sound comes through your speakers.
Mono Plays the sound in mono only. This is a good choice when
receiving broadcasts where distance makes the stereo signal weak.
Stereo Splits the incoming stereo audio signal into left and right
channels. Most TV programs and recorded materials have stereo
audio. The TV displays the word STEREOwhen you tune to a program
that is broadcast in stereo.
Dolby* 3 Splits the incoming audio signal into left, right and center
channels.
Pro Logic Surround Splits the incoming audio signal into left, right,
center, and rear channels. You must connect rear speakers to hear the
rear (surround) channel information.
Matrix Surround Splits the incoming audio signal into left, right, and
rear channels. You must connect rear speakers to hear the rear
(surround) channel information. This is a good choice when you're
listening to monophonic audio, such as speeches, sporting events or
plain dialog.
Hall Surround Splits the incoming audio signal into left, right, and rear
channels. You must connect rear speakers to hear the rear (surround)
channel information. This is a good choice for movies, music, etc.
the Menu System, page 7.
I or more on the menus, see Using
J
* Dolby is a trademark of Dolby Laboratories Licensing Corp.
40
Page 45

Tweak
-rakesyou to a control panel that letsyou make appropriate fine
adjustments to your TV's sound. The changes you can make depend
on the speaker configuration and the audio processor you chose.
Sound Check
Lets you feed white noise through each of your speakers in turn, two
seconds at a time to better adjust the balance among your speakers.
Volume Limit
Lets you adjust the TV's maximum volume limit.
Headphone Volume
Lets you set the volume of the sound played through headphones
connected to the jack on the front of the TV.
Headphone Audio
Lets you set whether the headphones play the audio from the main TV
picture or the PIX+ window.
41
Page 46

PICTURE QUALITY MENU
Contrast
Adjusts.the difference between the light and dark areas of
the picture.
Color
Adjusts the richnessof the color.
Tint
Adjusts the balance between the red and green levels.
Black Level
Adjusts the brightness of the picture.
Sharpness
Adjusts the crispness of edges in the picture.
Auto Color
Contrast
Lets you turn on the feature that automatically corrects the color of the
picture. This is especially useful for tracking realistic flesh tone colors
asyou switch from channel to channel. Select Off if you prefer to
adjust the picture with the Picture Controls.
Video Noise Filter
Lets you reduce noise, or 'snow,' in the picture.
Color Warmth
Lets you set one of three automatic color adjustments: Cool (for a more
bhJe palette of picture colors), Normal (for standard picture colors),
and Warm (for a more red palette of picture colors).
Theatre
Automatically setsthe picture quality controls for optimal viewing in a
Jarkened, theatre-like setting, for example, a darkened room.
you prefer to manually adjust the
I Turn the Auto Color feature OFF if |
picture with the picture controls.
J
42
Page 47

Reset Picture Controls
Lets you reset the picture controls to their original settings.
SCREEN MENU
PIX+
Lets you set the PIX+ mode.
Single Screen The usual appearance of the TV.
'PIP(Picture-in-Picture) A second, smaller picture appears in the
corner of the screen.
Split Screen The screen is divided into two pictures, one on the left
,andone on the right.
POP (Picture-outside-Picture) Three secondary pictures appear on the
right side of the screen.
Channel Guide Twelve small pictures appear on the screen.
,Options
Lets you control the appearance of the current PIX+ mode.
Single Picture & Channel Guide Lets you choose whether the CHAN
buttons provide accessto your Normal or Favorite channel list.
Dmmmm
Screen
PIP (Picture-in-Picture) Letsyou control whether the main picture or
the PIPwindow is affected by the CHAN button and at what size the
PIPwindow is displayed.
Split Screen Lets you control which picture is affected by the CHAN
button, and whether the Normal or Favorite channel list is available.
An action button lets you swap the left and right pictures.
POP (Picture-outside-Picture) Lets you control which picture is
affected by the CHAN button.
43
Page 48

Closed Captioning Display
Lets you choose the way closed captioning information is shown on the
screen.
Off No captioning information displayed.
On Ahvays Captioning information is displayed, when available.
On When Sound is Muted Captioning information is displayed, if
available, when the TV's sound is muted. The captioning information is not
displayed when the sound is on.
Closed Caption Mode
Lets you choose a captioning mode for displaying captioning information.
Adjust Projection TV
Lets you adjust the TV's three color projection tubes for precise picture
alignment.
DNNNN
Screen
available on all channels at all times.
For more on using closed captioning,
I Captioning information is not 1
see Advanced Features, page 51m.
44
Page 49

TIME MENU
Sleep Timer
Lets you select how long the TV waits before it turns off.
Schedule
Leadsto a control panel that lets you set up a schedule for turning the
TV on and off automatically. The on-screen directions guide you
through the steps needed to set the schedule.
Set Time and Day
Leadsto a control panel that lets you enter the current time and
current day of the week. The on-screen directions guide you through
the steps needed to set the time and day.
Time Display
Lets you choose how the TV's clock is displayed. The clock can appear
in the upper right corner of the main picture; it can appear every 60,
30, or 15 minutes for four seconds; or it can be off entirely.
SetTimeand
45
Page 50

CHANNEL MENU
Parental Control
Lets you turn the Parental Control feature off or on. You indicate which
channels are Parent Approved in the Lists and Labels control panel,
explained below.
On The front panel CHAN buttons will tune only to channels that you
have marked as "Parent Approved" in the Lists and Labels control
panel (see below). Important: When Parental Control is on, the TV's
front panel no longer provides access to the menus. Parents may prefer
to hide the remote and let children use the front panel to change
channels.
Off The TV shows all channels, whether they are marked as "Parent
Approved" or not. Front panel access to menus is available when
Parental Control is set to Off.
Signal Source
Lets you indicate whether you are currently using a signal plugged
into the Antenna A or Antenna B jacks on the back of the TV. Usually,
the antenna or cable is connected to Antenna A.
Signal Type
Letsyou select which type of TV signal you are currently using.
UHF/VHF Antenna Choose if you are currently using an antenna for
TV signals.
Cable Choose if you are currently using cable or a cable box for
TV signals.
Lists and Labels
Leads to a control panel that lets you choose whether to include each
channel in various lists: a list of normally available channels, a list of
favorite channels, a list of parent approved channels, and a list of
channels that will be accompanied by dialog in asecond language, if
available. Also lets you assign easily-remembered labels to the channel
numbers.
CHAN Use the MOVE arrows to move up and down through the
channel scan list.
F
Connect your video game to Antenna
B.Then, when you want to play video
games, press ANTENNA on the
remote to change the Signal Source to
Antenna B.
You may prefer to include only a dozen
or so of your favorite channels in the
Normal list, and use the number
buttons on the big remote to access
the rest of the channels as desired.
46
Page 51

NORM All the channels that have Normal checked make up the
Normal list. These channels can be viewed by scanning with the
CHAN buttons, if the Normal viewing list is selected in the Options
control panel in the Screen menu. In Normal viewing, channels that
are not part of the list can be viewed by using the number buttons on
the remote. Use the MENU button to check or uncheck the Normal
box for a channel.
FAVAll the channels that have Favorite checked make up the Favorite
list. You can place I0 channels in the FAYlist.
Parent Approved Use the MENU button to check or uncheck the
Parental Control box for a channel. A check indicates that the channel
can be shown at any time, regardless of whether Parental Control is
turned on. No check indicates that the front panel cannot tune to that
channel when Parental Control isturned on. Important: You must
turn the Parental Control feature to On.
SAP(Second Audio Program) When this is chosen for a channel, the
channel's dialog is in a secondlanguage, if a second-language audio
signal isavailable. The TV displaysthe word SAPwhen you tune to a
program that isbroadcast with SAPinformation. SAPaudio is
broadcast in mono.
ParentalControl
1311
Labels Use the MOVE arrows to enter a six-character custom label for
each channel. Hold the button down to scroll quickly through the
characters-there are a lot of them. PressRESETto clear a label. The TV
can store at least 24 labels in memory. Youmay wish to use the
graphic Iogosfor most channelsand usethe custom labelsfor special
channels.
Auto Channel Search
Tells theTV to search automatically for all the channels available
through the antenna input(s). When the IV finds an active channel, it
places it in the Normal channel list. Inactive channels-weak stations or
channels with no signal at all-are removed from the channel list.
VIDEO I is automatically placed in the Normal channel list. If the
VIDEO 2 and VIDEO 3 inputs were assigned to a device, they are
added to the Normal channel list also.
47
Page 52

AUTO TUNING
Leadsto a menu that letsyou set up the TV to automatically tune to
the correct input channel when you press VCRI, VCR2. LD, or
DSSoCABLE.
Set VCR 1 Channel
Lets you select the channel that the TV tunes to when you press the
VCR1 button. The choices are:
Not Connected Choose this if you do not have a VCR connected to an
antenna or Video input on the back of the TV, or if you don't want the
TV to tune to a channel when the VCRI button is pressed.
Channel 3 Antenna A Choose this if your VCR is connected to the
Antenna A jack on the back of the TV, and you want the IV to tune to
channel 3 when you press the VCRI button. Reminder: Make sure the
component's Ch 3/4 switch is set to channel 3.
Channel 4 Antenna A Choose this if your VCR isconnected to the
Antenna A jack on the back of the TV, and you want the TV to tune to
channel 4 when you press the VCRI button. Reminder: Make sure the
component's Ch 3/4 switch is set to channel 4.
Channel 3 Antenna B Choose this if your VCR is connected to the
Antenna B jack on the back of the TV, and you want the TV to tune to
channel 3 when you press the VCRI button. Reminder: Make sure the
component's Ch 3/4 switch isset to channel 3.
Channel 4 Antenna B Choose this if your VCR is connected to the
Antenna B jack on the back of the TV, and you want the TV to tune to
channel 4 when you press the VCRI button. Reminder: Make sure the
component's Ch 3/4 switch is set to channel 4.
Video I Input Choose this if your VCR is connected to the Video 1
jacks on the back of the TV, and you want the TV to tune to Video I
input when you press the VCR1 button.
Video 2 Input Choose this if your VCR is connected to the Video 2
jacks on the back of the TV, and you want the TV to tune to Video 2
input when you press the VCR1 button.
Video 3 Input Choose this if your VCR is connected to the Video 3
jacks on the back of the TV, and you want the TV to tune to Video 3
input when you press the VCR1 button.
48
Page 53

Set VCR2 • LD Channel
Letsyou select the channel that the TV tunes to when you press the
WZR2. LD button. The choices are the same as those listed under Set
W:R 1 Channel, except that the component is the second VCR or
laserdisc player, and the remote button being programmed is
VCR2* LD. For example:
Video 2 Input Choose this if your second VCR or laserdisc player is
connected to the Video 2 jacks on the back of the TV and you want
the TV to tune to Video 2 input when you press the VCR2.LD button.
This is a typical setting for a second VCR or laserdisc player.
Set DSS.CABLE Channel
Lets you select the channel that the TV tunes to when you press the
DSS*CABLE button. Usually, DSS.CABLE can control either a DSS®
receiver connected to the Video 1 input jacks or a cable box
connected to the Antenna A jack.
The choices are the same as those listed under Set VCR 1 Channel,
and include Channel 2 Antenna A and Channel 2 Antenna B. Also, the
component is either a DSS®Receiver or a cable box, and the button
being programmed is DSS°CABLE. For example:
Video 1 Input Choose this if your DSS® Receiver is connected to the
Video 1 jacks on the back of the TV and you want the TV to tune to
Video 1 input when you press the DSS°CABLE button. This is the
typical setting for a DSS®Receiver.
Tile following is an example for a cable box:
Ch 3 Antenna A Choose this if your cable box is connected to the
Antenna A jack on the back of the TV and you want the TV to tune to
channel 3 when you press the DSS.CABLE button. This is a typical
setting for a cable box.
49
Page 54

ASSISTANCE
Setup
The Setup routine is part of the Assistance menu and is described in
Interactive Setup.
Connections
Helps you connect different components to the TV. The Connections
routine is also part of the setup routine. When you are using the
Connections routine, be sure and follow along in the Connections
Foldout.
Preferences
Lets you set your preferences for things such as the appearance of the
on-screen menus.
Menu Display Lets you change the appearance of the Main Menu.
Choose the family room with Nipper (Pictorial) or choose one more
like the other on-screen menus (Textual).
Display Size Lets you choose extended or reduced graphics for the on-
screen displays. Reduced graphics eliminates the context-sensitive
help bar which appears at the bottom of the screen, the mute indicator
which appears on screen when mute is active, the volume indicator
arid many other graphics.
Display Colors Lets you choose what eye-pleasing palette of colors
will be used for the on-screen menus. Choose from Cornflower,
Sandstone, Seafoam or Charcoal.
Clock Style Lets you change the appearance of the clock that hangs on
the wall in the main menu living room. Choose an analog or
digital clock.
About Your TV
Gives on-line information about using your TV and about your remote
controls.
Guided Tour Provides an automatic tour through the TV's features and
menu system.Follow the on-screen directions to stepthrough the
-- different sections,or sit back and enjoy the show.
Remote Control Showsthe remote control you are currently using-the
universalor the simple remote-and explains the function of each of
the buttons as you point to them.
50
Page 55

,ADVANCED FEATURES
Page 56

PIX+ OPERATION
There are four different PIX + modes: PIP (picture-in-picture), Split
Screen, POP (picture-outside-picture) and Channel Guide. You can
access all of these modes through the Screen menu.
PIPMotie (picture-in-picture) Displays a second, smaller picture on
top of the main picture.
Split Screen Mode Divides the main picture into left and a
right pictures.
POP Mode (picture-outside-picture) Displays three small pictures to
the right of the main picture.
Channel Guide Replaces the large picture with 12 small pictures.
PIX + with remote control buttons
The following remote control buttons affect the PIX+ modes:
PIP Brings up the PIPwindow. PressPIP again to remove the window.
SPLIT Brings up the Split Screen. PressSPLITagain to remove the
Split Screen.
POP Brings up the POP windows. Press POP again to remove the
windows.
Guide Brings up 12 windows. PressGuide again to remove
the windows.
CH CTRL (Channel Control) Selects whether the main picture or a
PIX+ window is affected by the CHAN A and CHAN v button. For
instance, press PIP to bring up the PIP window, then press CH CTRL.
Now, when you press the CHAN buttons, the channels will change in
the PIPwindow, not the main picture.
In PIP and Split Screen modes, CH CTRL switches between the main
picture and the PIX+ window. In POP mode, CH CTRL switches from
main picture to top window to middle window to bottom window and
back to main.
FREEZE Freezes the video in the main picture or PIP window. To
change which window is currently selected, use CH CTRL.
SWAP In PIP or Split Screen mode, switches, or "swaps"' the video
diisplay from the PIX + window to the main picture.
SIZE In PIPmode, selects the size of the PIPwindow. Choose from
five sizes.
52
Page 57

SCAN Pressing SCAN causes the TV to automatically scan through
your channel list, using the currently selected window. To change the
currently selected window, use CH CTRL. Eachchannel is displayed
for four seconds before the TV automatically tunes to the next channel
in the list. In channel guide mode, you can highlight one of the 12
windows and press Scan to freeze the other 11 windows and run the
selected window.
Move Buttons In PIP mode, you can use the move buttons to push
the PIP window to different positions on the screen.
TWO TIPS FOR USING PIX + BUTTONS
Automatic Channel Surfing during commercials in the
Main Picture
You can auto-surf through the channels during commercials using the
SKIPand SCAN buttons.
Ii. PressSKIPto set the commercial skip timer. The PIP
window appears.
2. Then, press SCAN to auto-surf the main picture through the channel
list. When the SKIPfeature times out, the original channel will
return automatically to the main picture and the PIP
window disappears.
Automatic Channel Surfing in the PIP Window
You can use the PIPwindow to auto-surf through channels as well.
11.PressPIP to bring up the PIPwindow.
2. PressCH CTRL to move the channel control to the PIPwindow.
3. PressSCAN. The TV begins displaying each channel in the PIP
window. If you see a channel that interests you, press SWAP.
53
Page 58

CLOSED CAPTIONING
Many programs are encoded with closed captioning information,
which lets you display the audio portion of a program as text on the
TV screen. You can tell the TV to display closed captioning: a)never,
b) wheriever it is available, or c) whenever the audio is muted.
TO DISPLAY CLOSED CAPTIONING
1. PressMENU to bring up the Main Menu.
2. Point to Screen and press MENU. The Screen Menu appears with
PIX+ highlighted.
3. Point to Closed Cap Disp.
4. Pressthe move buttons to select a closed captioning display:
Off No closed captioning information is displayed.
On always Closed captioning is displayed whenever it is available.
On when muted Closed captioning is displayed only when you
have muted the sound.
5;. Point to Exit and press MENU to return to the Main menu.
54
Closed captioning is not available on
all channels at all times. Only specific
programs encoded with closed
captioning information are applicable.
When a program is closed captioned,
the letters CC are displayed in the
channel marker.
Page 59

CLOSED CAPTIONING MODES
The TV offers eight closed-captioned modes, including four
text modes.
To Set the Closed Captioning Mode
1. Select Screen from the Main Menu.
2. Point to Closed-Captioned Mode.
3. Use the move arrows to select your choice.
4. Select Exit to return to the Main menu.
TURNING OFF CLOSED CAPTIONING
1. Select Screen from the Main Menu.
2. Point to Closed Cap Disp.
3. Use the move arrows to highlight the OFF toggle and select it. The
closed captioning turns off.
4. Select Exit to return to the Main menu.
If you are unsure of the differences
among the modes, you may prefer to
leave the closed captioned mode set
to CC I, which displays complete text
of the program in the primary
language in your area.
55
Page 60

ADJUSTING PROJECTION TV
Your projection TV has three color projection tubes-one for red, one
for green, and one for blue. When the tubes are precisely aligned they
create the color images you see on the TV screen. Over time, the
picture can drift out of alignment due to normal bumps and vibrations
or moving the TV. If you notice colored rings or halos around objects
in the picture, you may want to adjust the picture tubes.
.
Press MENU to bring up the Main Menu.
2.
Point to Screen and press MENU. The Screen Menu appears with
PIX+ highlighted.
.
Point to Adjust Projection TV.
+4.
Use the move arrows to select a color to adjust, red or blue. The
green projection tube remains stationary.
5.
A test pattern appears on the screen. Adjust the colors until the grid
lines appear white.
,6. Point to Exit and press MENU to return to the Main Menu.
56
Page 61

ON-SCREEN PROGRAM DETAILS
Program providers have the option of sending information through the
ain_aves along with their programs. If this information is available, the
TV can display it when you press DISPLAY. To display the on-screen
program details:
1. Press DISPLAY once to bring up the channel marker.
2. Press DISPLAY again to bring up the program title and the
program's length and elapsed time.
3. PressDISPLAY again for other program details such as the story line
and whether Closed-Captioning is available.
4. PressDISPLAY again to clear the screen.
Whether all (or any) of the program
details are displayed depends on
whether the program provider
sends the information along with
the program.
It
57
Page 62

CHOOSING AN AUDIO PROCESSOR
Changing the audio processor changes the way your TV sounds. There
are two ways to change the audio processor: from the Audio menu or
by pressing SURROUND on the remote. For more information, see
Audio Menu.
Choosing an audio processor from the Audio Menu
1. Press MENU to bring up the Main Menu.
2. Press MENU again to select the Audio menu.
3. Point to Audio Processor.
4. Use the move arrows select an audio processor: Mono, Stereo,
Dolby 3, Pro Logic, Matrix Surround, and Hall Surround. These
options are described on page 40.
Choosing an audio processor from the remote
1. Press SURROUND to display the current audio processor mode on
the screen.
2. PressSURROUND repeatedly to toggle through the different audio
modes. The TV displays the name of the current audio processor
mode each time you press SURROUND.
The number of audio processor
choices available depends on the
speaker configuration you are
currently using. For example, you can
only use the Pro Logic audio processor
when you have left, right, center and
external rear speakers.
58
Page 63

USING AND MODIFYING FETCH
Using Fetch
To use the commands currently stored in Fetch:
.
Pressthe Fetch button during normal viewing. The Fetch menu appears.
By default, the menu includes the Sleep Timer slider from the Time
menu, the Audio Processor toggle from the Audio menu, the Contrast
slider from the Picture Quality menu, and the Closed Cap Disp toggle
from the Screen menu.
3. To usethe Contrast command, highlight Contrast and move the contrast
slider asyou would if it were in its usual menu.
4. Point to Exitand press MENU to return to normal viewing.
Every command you find in the Fetch menu behaves just as it would in
its usual menu.
Modifying Fetch
You carl add a new command or replace existing commands in the Fetch
m'_nu. For example, to add the Equalizer command to the Fetch menu:
.'ress MENU to bring up the Main Menu.
2. In the family room, point to one of the speakers and press MENU. The
Audio menu appears.
3. Highlight Equalizer.
4. PressFETCH. The Fetch menu appears, and the Equalizer command
appears to the right of the menu.
5. There are 5 slots in the FETCH menu. To place the Equalizer control
panel in one of the slots, highlight the slot and press MENU. A message
appears telling you the command is in place.
6. PressMENU again.
7. PressCLEAR. You are returned to normal viewing.
Not all command menus can beplaced in the Fetch menu.
]
59
Page 64

DISPLAYING ON-SCREEN HELP
When you are at the Main Menu--the family room--press Help in the
upper left corner of the family room to display reminders of the
locations of all available menus.
Menu Help
Every menu has a Help command. If you select it, detailed information
appears about the choices available in that menu.
For example,
1. PressMENU to bring up the Main Menu.
2. In the family room, point to the remote control and pressMENU.
The Channel menu appears.
3. Use the move buttons to point to Help and press MENU. Helpful
information relating to the Channel menu appears.
Context Sensitive Help
This ProScan TV also provides Context-Sensitive Help. The TV knows
the buttons you press and will offer information tailored to your needs.
• _ use Context-Sensitive Help:
1. PressMENU to bring up the Main Menu.
2. In the family room, point to the screen and press MENU. The
Screen menu appears.
,
Point to a command, Closed Cap Disp for example.
4.
Helpful information about the command appears in the lower right
of the screen. For example, if you highlighted Closed Cap Disp, this
message appears at the bottom of the screen:
Press < or > to turn the display
on, off, or on when sound is muted.
option in the Assistance menu, the
I If you select the reduced graphics 1
context sensitive help is not displayed.
6O
Page 65

APPENDICES
Page 66

TV ONLY
This information applies to Connection A in the Connections Foldout.
Connection A provides:
• stereo sound from broadcast programs
• Picture in Picture (PIP)
To use this connection you must have:
* (I) coaxial cable
To connect:
"1. Connect cables as shown in Connection A.
2. Return to First Things First, then follow the steps in the
Interactive Setup.
USING CONNECTION A
To watch TV programs:
"I. PressTV and tune to a channel.
62
SeeConnections Foldout, Connection A
Page 67

TV AND MONO VCR
"[his information applies to Connection B in the Connections Foldout.
Connection B provides:
,. stereo sound from broadcast programs
., mono sound from VCR
., Picture in Picture (PIP)
., viewing one channel on TV while recording another channel
To use this connection you must have:
• (2) audio/video cables
• (2) coaxial cables
"1"oconnect:
1. Connect cables as shown in Connection B.
2. Return to First Things First, then follow the steps in the
Interactive Setup.
USING CONNECTION B
To watch TV programs:
_1.TurnVCR off.
2. PressTV and tune to a channel.
To record one program and watch another:
11.PressVCR1 and tune to a channel.
2. Begin recording.
3. Make sure the TV/VCR switch on the VCR is set to TV.
"l. PressTV and tune to a channel.
To play a tape on the VCR:
1. PressVCR1.
2. PressPLAY.
F
/
See Connections Foldout, Connection B
63
Page 68

TV AND STEREO VCR
This information applies to Connection C in the Connections Foldout.
Connection C provides:
• stereo sound from broadcast programs
• stereo sound from VCR
• Picture in Picture (PIP)
• viewing one channel on TV while recording another channel
]0 use this connection you must have:
• (2) coaxial cables
• (3) audio/video cables
• (I) S-Video cable (optional)
To connect:
I. Connect cables as shown in Connection C.
2. Return to First Things First, then follow the steps in the
Interactive Setup.
USING CONNECTION C
To watch TV programs:
1. Turn VCR off.
2. PressTV and tune to a channel.
To record one program and watch another:
1. Press VCR1 and tune to a channel.
2. Begin recording.
3. Make sure the TV/VCR switch on the VCR is set to TV.
4. Press TV and tune to a channel.
To play a tape on the VCR:
1. Press VCR1.
2. Press PLAY.
l @0@ Q _T.- l
See Connections Foldout, Connection C
64
Page 69

TV AND VCR USING A SPLITTER
This information applies to Connection D in the Connections Foldout.
Connection D provides:
• stereo sound from broadcast programs
• stereo sound from VCR
• Picture in Picture (PIP)
• viewing one channel on TV while recording another channel
To use this connection you must have:
• (1) splitter
• (3) coaxial cables
• (3) audio/video cables
• (1) S-Video cable (optional)
To connect:
1. Connect cables as shown in Connection D.
2. Return to First Things First, then follow the steps in the
Interactive Setup.
USING CONNECTION D
To watch TV programs:
1. PressTV and tune to a channel.
To record one program and watch another:
1. PressVCR1 and tune to a channel.
2. Begin recording.
3. PressTV and tune to a channel.
To play a tape on the VCR:
1. PressVCR1.
++ 2.
Press PLAY.
L___ • I
SeeConnections Foldout, Connection D
65
Page 70

TV AND DSS ® RECEIVER
This information applies to Connection E in the Connections Foldout.
Connection E provides:
• stereo sound from broadcast programs
• stereo sound from the DSS® receiver
• Picture in Picture (PIP)
To use this connection you must have:
• (2) coaxial cables
• (3) audio/video cables
• (I) S-Video cable (optional)
To connect:
I. Connect cables as shown in Connection E.
2. Return to First Things First, then follow the steps in the
Interactive Setup.
USING CONNECTION E
To watch TV programs:
I. Press TV and tune to a channel.
To watch DSS ® programming:
I. Press DSS•CABLE and tune to a channel.
See Connections Foldout, Connection E
Ii
66
Page 71

TV, VCR, AND DSS ® RECEIVER
This information applies to Connection F in the Connections Foldout.
Connection F provides:
• stereo sound from broadcast programs
• stereo sound from VCR
• stereo sound from the DSS® receiver
To use this connection you must have:
• (4) coaxial cables
• (6) audio/video cables
• (2) S-Video cables (optional)
To connect:
1. Connect cables as shown in Connection F.
2. Return to First Things First, then follow the steps in the
Interactive Setup.
USING CONNECTION F
To watch TV programs:
1. Turn off VCR and DSS®receiver.
2. PressTV and tune to a channel.
To watch DSS® programming:
1. PressDSS•CABLE and tune to a channel.
To record off-air (cable or antenna) broadcasts and watch
a different channel:
1. Turn DSS®receiver off.
2. PressVCR1 and tune to a channel.
3. Press RECORD to begin recording.
4. To watch another channel, make sure the TV/VCR switch on the
VCR is set to TV; then press TV and tune to a channel.
To play a tape on the VCR:
1. PressVCR1 and then press PLAY.
See Connections Foldout, Connection F
67
Page 72

TV, VCR, AND DSS ® RECEIVER
USING A SPLITTER
This information applies to Connection G in the Connections Foldout.
Connection G provides:
• stereo sound from broadcast programs
• stereo sound from VCR
• stereo sound from the DSS®receiver
• Picture in Picture (PIP)
• viewing one channel on TV while recording another channel
To use this connection you must have:
• (5) coaxial cables
• (6) audio/video cables
• (2) S-Video cables (optional)
• (1) splitter
To connect:
1. Connect cables as shown in Connection G.
2. Return to First Things First, then follow the steps in the
Interactive Setup.
USING CONNECTION G
To watch TV programs:
1. Turn VCR and DSS®receiver off.
2. PressTV and tune to a channel.
To watch DSS ® programming:
1. PressDSS•CABLE and tune to a channel.
F
ii i
68
See Connections Foldout, Connection G
Page 73

To record off-air (cable or antenna) broadcasts and watch
a different channel:
I. Turn DSS® receiver off.
2. Press VCRI and tune to a channel.
3. Press RECORD to begin recording.
4. To watch another channel, make sure the TViVCR switch on the
VCR is set to TV; then press TV and tune to a channel.
To play a tape on the VCR:
I. Press VCRI and then press PLAY.
69
Page 74

ADDING A LASERDISC PLAYER
This information applies to Connection H in the Connections Foldout.
Connection H provides:
• stereo sound from a Laserdisc player
To use this connection you must have:
(3) audio/video cables
To connect:
1:. Connect cables as shown in Connection H.
2. Return to First Things First, then follow the steps in the Interactive
Setup.
USING CONNECTION H
To play a laserdisc:
I. PressVCR2-LD and then press PLAY.
7O
See Connections Foldout, Connection H
Page 75

CONNECTING EXTERNAL SPEAKERS
You can connect up to six additional speakers to the TV: two to the
FRONT SPEAKERSterminals, two to the CENTERSPEAKERS,and two
to the REAR SPEAKERSterminals.
mcenterchannel
I,,_ Ill
Front (Main) Speakers
To connect external speakers:
1. Connect speakers to the MAIN terminals.
2. Set the SPEAKERSWITCH to EXTERNAL.
Center Speakers
To connect external speakers:
1. Connect speakersto the CENTERCHANNEL terminals.
2. Set the SPEAKERSWITCH to EXTERNAL.
Rear Speakers
To connect rear speakers for surround sound effects.
1. Connect two speakers to the SURROUND terminals.
2. Position them behind you in your TV room. To improve the
surround sound effect, you may prefer to set or mount the speakers
several feet off the ground.
I,_TIII
J
SURR
OUTPUT
remain
--surround
IMPORTANT
Connecting Speakers to the TV
1. If necessary, remove the vinyl covering from the ends of the speaker
wire and twist the wire core.
2. Pressdown and hold the lever on the speaker terminal.
3. Insert the wire core into the hole. Be sure to connect the (+) to (+)
and (-) to (-).
4. Release the lever. Pull gently on the wire to seethat it's connected
securely.
Connecting a Subwoofer
Toconnect a subwoofer to the TV:
• Connect the subwoofer's audio input to the left (I_/MONO)
HI-FI OUT jack.
When connecting the speaker wire,
make sure you connect the positive
(+) terminal on theTV to the positive
(+) terminal on the speaker. One side
of the speaker wire is usually marked
with a white stripe to help you match
up the terminals correctly. If the (+)
and (-) terminals are not matched
properly, the speakers will not be "in
phase," causing reduction in bass
frequencies.
Do not allow the wire core to touch
other wires or terminals. Damage to
components could result if the cores
of two wires touch each other.
71
Page 76

CONNECTING AUDIO COMPONENTS
Connecting a stereo amplifier
1. Connect the amplifier's TV audio inputs to the left (L/MONO) and
right (R) HI-FI OUTPUT jacks.
2. You may prefer to turn off the TV's internal speakers by selecting a
speaker configuration with external speakers from the
Audio menu.
If your audio amplifier is part of a system that uses its own remote
control, you may prefer to connect it to the TV using the Fixed
Output jacks.
Important: Do not use the amplifier's PHONO inputs. If the
amplifier is not stereo, use the L/MONO HI-FI OUT jack. Consult
the amplifier's owner's manual for the manufacturer's
recommended hookup.
Connecting a tape deck
To use a tape deck to record audio from TV:
1. Connect the tape deck's audio inputs to the FIXED OUTPUT jacks
on the back of the TV.
FIXED
OUTPUT
I VIDEO L/MONO RIGH_ 1
Tape Deck Connection
The FIXED OUTPUT jacks provide a
fixed level audio signal, making them
ideal for audio recording, or for use
with an audio amplifier that has its
own remote control. No matter how
the volume changes on the TV, the
output volume stays the same.
72
Page 77

CONNECTING A CAMCORDER FOR PLAYBACK
There are two connections recommended for playing back from the
camcorder to the TV:
Front Connection Playback
1. Locate the AV adapter included with your TV accessories.
2. Connect the camcorder's video output to the adapter's video
input (yellow).
3. Connect the camcorder's audio output to the adapter's audio
input (white).
4. Connect the adapter to the AoV jack on the front of the TV.
5. PressINPUT on the remote until the channel marker
displays FRNT.
6. Start playback on the camcorder.
Back Connection Playback
1. Connect the camcorder's audio/video outputs to the INPUT1 audio
and video jacks on the TV.
A°V
O
2. PressINPUT on the remote until the channel marker
displays VlD1.
3. Start playback on the camcorder.
S-VHS CAMCORDER
To connect a camcorder with S-Video capability:
I. Connect an S-Video cable from the camcorder to the S-VlDEOI
jack on the TV.
2. Connect the camcorder's audio/video outputs to the INPUTI audio
and video jacks on the TV.
3. PressINPUT on the remote until the channel marker
displays VlDI.
4. Start playback on the camcorder.
73
Page 78

CONNECTING A CAMCORDER TO RECORD
FROM THE TV
To record from the TV to the camcorder:
1. Connect the camcorder's audio/video input cables to the TV's
FIXED OUTPUT jacks.
2. Consult your camcorder's owner's manual for instructions on
camcorder recording.
• S-VHS Camcorder
The TV does not supply video output in S-Video form. Use the
connection described above.
74
TheTV must remain on during
recording. If you change channels on
theTV, the channel change will be
recorded.
Signals from the S-Video connector
do not come through the FIXED
OUTPUT video jack.To record to an
S-Video component, remember to
connect its regular video cable as
well as the S-Video cable.
The PIP window and on-screen
menus and displays will not be
recorded. If you change channels on
theTV, the channel change will be
recorded.
Page 79

TROUBLESHOOTING
Troubles sometimes are caused by simple "faults" that you can correct
without the help of a service technician. Ifyou experience any
difficulty with your TV, check a few basic remedies before calling your
service technician.
TV will not turn on
• Check to make sure it is plugged in.
• Check the wall receptacle (or extension cord) to make sure it is
"live" by plugging in something else.
• Maybe batteries in remote control are "dead."
• Maybe remote control is not aimed at remote sensor.
Controls don't work
• If using remote control, make sure remote is in TV mode by first
pressing TV button.
• Try unplugging set for two minutes and then plug it back in and turn
it on again.
...."roblems with Remote
• Maybe something is between the remote and the remote sensor.
Maybe the remote is not aimed directly at the component (TV or
VCR) you are trying to control.
• Maybe remote is not in TV Mode. Pressthe TV button so remote
will control TV.
• Maybe batteries in remote are weak or dead or installed incorrectly.
Try replacing the batteries.
Remote stops working
• Remove batteries and hold down one or more buttons for several
seconds. Install the batteries and try remote.
TV Turns off while playing
• Schedule function may be activated.
• Electronic protection circuit may have been activated because of a
power surge. Wait 30 seconds and then turn on again. If this
happens frequently, the voltage in your house may be
abnormally high.
Schedule does not turn off the TV at the set time
Check schedule on/off function (it must be set to On).
• Check to make sure clock is set to the correct time.
75
Page 80

Blank screen
• Maybe the device connected to the input jacks is not turned on.
• Try another channel.
• Press RESET, in case the picture controls are set too low.
No sound, picture okay
• Maybe sound is muted. Try pressing volume up button to
restore sound.
• Maybe TV's speaker configuration is wrong. Check Speakers
command in the Audio menu.
• If using an S-VHS component, remember to also connect the
component's L and R AUDIO OUT jacks to the TV's L and R INPUT
1 jacks.
• Maybe SPEAKERswitch on the back of the TV is not in the
INTERNAL position.
Can't select certain channel
• If using a VCR, check to make sure the TV/VCR switch on the VCR
is in the correct position.
Noisy stereo reception
• May be a weak station. Use SURROUND button to change to
mono mode instead of stereo.
No picture, no sound but power light is on
• Maybe cable/air function is in wrong position.
• Maybe a vacant channel is tuned. Try another channel.
• If watching VCR (connected only through antenna input), make
sure TV is tuned to channel 3 or 4 - same asCH3/4 switch on VCR.
Also check to make sure TV/VCR switch on VCR is in correct
position.
Sound okay, picture poor
• Check antenna connections.
• Try adjusting Video Noise Filter to improve weak signals.
Black Box appears on the screen
• Captioning may be turned on. Check the Closed-Caption Display
control in the Channel Menu.
TV works, can't tune to a channel
• Maybe TV is in FAV Channel mode. Check the Channel List toggle
in the Pix+ Options part of the Screen menu,
76
Page 81

LIMITED WARRANTY
What your warranty covers:
• Any defect in material or workmanship.
For how long after your purchase:
• One year for labor charges.
• One year for parts.
• Two years for picture tube.
The warranty period for rental units begins with the first rental.
What we will do:
• Pay any Authorized ProScan Television Servicenter the labor charges to
repair your television.
• Pay any Authorized ProScan Television Servicenter for the new or, at our
option, refurbished replacement parts and picture tube required to repair
your television.
How you get service:
• Request home service from any Authorized ProScan Television
Servicenter. To identify your nearest Authorized ProScan Television
Servicenter, ask your Dealer, look in the Yellow Pages,or call 1-800-
PROSCAN.
• Show the service technician your evidence of purchase date.
What your warranty does not cover:
• Customer instruction. (Your Owner's Manual clearly describes how to
install, adjust, and operate your television. Any additional information
should be obtained from your Dealer.)
• Installation and related adjustments.
• Signal reception problems not caused by your television.
• Damage from misuse or neglect.
• Remote control batteries.
• A television that has been modified or incorporated into other products or
is used for institutional or other commercial purposes.
• A television purchased or serviced outside the USA.
• Acts of God, such as but not limited to lightning damage.
Product Registration:
• Pleasecomplete and mail the Product Registration Card packed with your
set. It will make it easier to contact you should it ever be necessary. The
return of the card is not required for warranty coverage.
How state law relates to this warranty:
• This warranty givesyou specific legal rights, and you also may have other
rights that vary from state to state.
If you purchased your television outside the U.S.A.:
• This warranty does not apply. See your dealer for details.
77
Page 82

CARE AND CLEANING
You can clean the TV as required, using a soft cloth or the dusting
attachment for your vacuum cleaner. Be sure to occasionally vacuum
the ventilation slots in the cabinet to help assure adequate ventilation.
Toclean the TV screen, use a diluted soap and water mixture and a
soft cloth. Do not use furniture polish on the TV cabinet or screen.
While cleaning do not allow liquid to run down the screen and inside
the TV. Also, avoid placing drinks or vases with water on top of the
TV. This could cause damage to the TV.
78
Page 83

Symbols
(0-9) 32
A
A°V 38.
AoV jack 73
Additional speakers 71
Advanced Features 51
ANT B input, note 36
ANTENNA 33
Arrows 33
Audio component 32
Audio Menu 40
Audio Processor 40
Audio processors 33
Auto Channel Search 17
Auto Color 42
AV adapter 73
AV adaptor 38
AV Jack 38
Available input sources 33
B
Back Panel 36
Back Panel Jacks
INPUT 1 36
Black Level 42
brightness 42
C
Cable box 25
Care and Cleaning 78
CH CTRL 33 H
CHAN 32, 43
Change the channel 32
Channel information 32
Channel list 32
Channel Menu 46
Channel menu 8
Channel numbers 32
Choice Lists 13 |
CLEAR 12, 33
Closed Caption Mode 44
Closed Captioning Display 44
CODE SEARCH 28
Color 42
Color Warmth 42
Connect a camcorder 38 K
Connecting a Camcorder 72, 73
Connecting a stereo amplifier 72
Connecting a Subwoofer 71
Connecting a tape deck 72 L
Connecting Audio Components 72
Connecting Speakers 71
Connecting to an A/V receiver 37
Contrast 42
Control Panels 12
Choice Lists 13
Sliders 12 /
Control panels 9
Current channel list 32
D
DISPLAY 32
DSS®receiver 32
DSSoCABLE 32
DSS°CABLE button 24, 25
E
Entering channel numbers 32
Equalizer 40
Exit 8
F
Favorite channel list 47
FREEZE33
FRNT 33
Front Panel 38
Front Speakers 71
G
GUIDE TO THE MENU SYSTEM
39
Hall Surround 40
Headphone 38
Headphone Audio 41
Headphone Volume 41
Home computers, note 36
INPUT 33
INPUT 1 36
Input sources 33
INPUT2 36
Interactive Setup 17
Key Combination chart 28
L/MONO audio jacks 36
M
Main Menu 33
Matrix Surround 40
MENU 13, 33
Menu commands 39
Menu system 9
Menus 9
MOVE 33
MOVE (Arrows) 33
MOVE arrows 8
MUTE 32
Mute 40
N
Number Buttons 32
Numeric entry control panel 14
O
On-screen menus 8
On-screen setup routine 17
Options 43
p
Picture Controls 43
Picture Quality 12
Picture Quality Menu 12,42
Picture-in-Picture 43
Picture-in-picture 33
Picture-outside-Picture 43
PIP 33, 43
PIPwindow 33
PIX+ 43
Point 8
Point and Select 8
POP 43
PREVCH 32
Previous channel 32
Projection TV adjustment 56
Program information 32
Program the VCR button using CODE
SEARCH 28
Program the VCR button using DIRECT
ENTRY 28
Programming the Remote 21
Programming the remote to control a
laserdisc play 24
Programming the remote to control a
satellite or c 25, 26
79
Page 84

Programming the remotes 22
Programming the Simple Remote
28
Programming the universal remote
to control a DSS® 24
Programming the Universal Remote
to Control a VCR 22, 26
Prologic 40
Q
Quick Reference 39
R
RearSpeakers 71
Remote 9
Remote Buttons 32
VCR1 32
RESET 33
ResetPicture Controls 43
Return to TV 13
REW, PLAY,FF, REC,STOP, PAUSE
32
RIGHT audio jacks 36
Sleep Timer 45
Sliders 12
Sound Check 41
Speaker Switch 71
Speakers 40
Split Screen 43
Stereo headphones 38
SWAP 33
T
Theatre 42
Three-digit channel 32
Time Display 45
Time Menu 45
Tint 12
Tour of the TV 31
Transport control 32
TV accessories 38
TV button 32
Tweak 41
U
Universal remote 21, 22
Universal Remote VCR Codes
23
S-VHS camcorder 73
S-VIDEO 36
SCAN 33
Schedule 45
Select 8
SetTime and Day 45
SetTime numeric entry control
panel 14
Sharpness 42
SIGNAL SOURCE 37
Signal Type 13
Signal Type Choice list 13
Simple remote 21
Simple Remote Buttons 34
CHAN DOWN 34
CHAN UP 34
MENU 34
POWER 34
TV 34
VCR 34
VOL < 34
VOL > 34
Simple Remote VCR Codes 29
Simple remote's VCR button 28
Single Picture 43
SKIP 32
V
VCR Codes 23
VCR mode 32
VCR1 32
VCR1 button 22, 26
VCR2oLD 32
VCR2oLD mode 32
VID1 33
VlD2 33
Video games, note 36
80
Page 85

General Cable Information
Antenna (or cable-TV) connections are made with either
coaxial antenna cable or twin-lead cable. Coaxial cables
are shielded so they are less susceptible to hum or
interference from adjacent cables.
Slip-on Connector
Screw-on Connector
Round75-ohmcoaxial cable
Flat300-ohmtwin-lead cable
Most audio/video connections between components can be
made with shielded audio and video cables that have RCA-
type phono connectors.
The following accessories are available from most ProScan
dealers and electronics supply stores in case you want to
position your components farther apart or need additional
cables.
Antenna Cables
Screw-on Cable attaches to the round
antenna connectors (called 75-ohm
F-type) on the back of your VCR or TV.
AH037 (3 fl)
The end5 screw onto the connectors for
a secure connection.
Push-on Cable attaches to the round
antenna connectors (called 75-ohm
F-type) on the back of your VCR or TV.
Gold-Tipped Cables
AH065G (6 ft)
AH066G (10 if)
Audio/Video Cables
Endspush on for a quick connection.
Standard Audio/VideoCable with
RCA-typephono plugs
Color-Coded Jacks
The jacks on the TV's monitor panel are color-coded for
easeof use. The VIDEO jacks are yellow, the right AUDIO
jacks are red, and the left AUDIO jacks are white. When
connecting components to each other, be sure that you
always connect left outputs to left inputs and right outputs to
right inputs. If a component has only one output (mono),
connect it to the R/MONO INPUT jack. To connect S-VHS
(Super-VHS) components, an S-Video cable is required.
Standard S-Video Cable
Gold-Plated Jacks and Gold-Tipped Cables
Your ProScan monitor panel is equipped with gold-plated
jacks. The gold plating helps prevent oxidation of contacts
which provides much less loss than conventional
contacts. A complete line of gold-tipped cables is
available to help you obtain optimum performance from
your equipment.
_ Audio/video Cable
Shielded cable for connecting AUDIO
Gold-TippedCables and VIDEO jacks. Has an RCA-type
AH069G(3ft) phono plug on each end.
AH070G (5 fl)
Monaural VCR Dubbing Cable Double
cable that lets you conne_:t the VIDEO
and AUDIO jacks of two VHS VCRs to
duplicate tapes. Can also be usecTto
connect a VCR to your TV. Cable is
Gold.'13pped Cable
AH075G (6 ft)
color-coded and shielded. Has RCA-
type phono plugs on each end.
Stereo VCR Dubbing Cable
Triple cable that lets you connect the
VIDEO and AUDIO jacks of stereo
components.
Gold-Tipped Cable
AH077G (6 ft)
Page 86

Accessory Order Form for ProScan TV Models
Audio/Video Cables continued
Gold.Tipped Cable
AH072G (3 ft)
VAA014 (3 ft)
VAA020 (8 fi)
Remote Controls
CRK81A CRK61A
Stereo Audio Cable
Double gold-tipped
cable generally used
for connecting stereo
audio components.
S-Video Cable has
multipin connectors on
each end for connecting
components with
S-Video output to your
TV.
Remote Controls
These are the remote
controls that came
packed with your
TV. Replacements or
spares can be ordered
as needed.
Description
_ignal Splitter
3old-Tipped Antenna Cable (6-ft)
Gold-Tipped Antenna Cable (I 0-if)
Gold-Tipped Audio/Video Cable (3-ft)
Gold-Tipped Audio/Video Cable (5-ft)
Gold-Tipped Stereo Cable (3-ft)
Gold-Tipped Dubbing Cable (6-ft)
Gold-Tipped Dubbing Cable (6-if)
Screw-on Antenna Cable (3-ft)
Wireless Headphone System
S-Video Cable (8-if)
S-Video Cable (3-if)
Remote Control (CRK61A)
Remote Control (CRK81A)
Prices are subject to change without notice.
Total Merchandise ($10 Minimum Order) ............................
Sales Tax .............................................................................
PartNo.
AH047 $ 3.99
AH065G $ 6.99
AH066G' $ 8.99
AH069G $ 5.99
AH070G $ 7.99
AH072G $ 8.99
AH075G $ 10.99
AH077G $ 14.99
AH037 $ 3.95
PSWH100 $199.95
VAA020 $ 29.95
VAA014 $ 27.55
206799 $ 28.05
225617 $ 67.90
Total
$
$
We are required by law to collect the appropriate sales taxm
for each individual state, country, and locality to which
the merchandise is being sent.
Shipping, Handling, and Insurance ......................................
Total Amount Enclosed ........................................................
Use VISA or MasterCard preferably.
Money order or check must be in U.S. currency only.
No COD or CASH.
All accessories are subject to availability.
Where applicable, we will ship a superseding model.
¢J
$ 5.00
$
Page 87

Charge your order on your VISA
or MasterCard by
filling in below
To order accessories, contact your local ProScan Dealer.
If a dealer is not nearby, you can also follow the instructions
below to order by telephone.
USE YOUR CREDIT CARD
IMPORTANT: Copy complete account number
from your VISA card
I-l-T--] I I I I
Mycardexp esI--r--1I--N
IMPORTANT: Copy complete account number
IIII I[--YY- I-T-T--VIlIIII
Copy Number
above your
name on
MasterCard
I Pricesare subject to change without notice.
I
PLEASE
from your MasterCard
My.card _
exptres:
AUTHORIZED SIGNATURE
Print or type your name and
address clearly. This will be your
mailing label.
A complete and correct order will
save you days of waiting.
VISA"
United Statesand Canada Orders
To place your order by phone, have your Visa or
MasterCard ready and call the toll-free number listed below
between 8 AM and 8 PM Eastern Standard Time. Use this
number only to place an order for accessoryitems listed on
this order form.
1 - 800 -338 - 0376
Most times your order will be shipped UPS within 72 hours
of receipt. If ever it is not possible to ship within 30 days,
we will notify you with an update on your order and an
option to cancel.
To place your order by mail, detach and mail the completed
order form with credit card information, money order, or
check in U.S. currency (made payable to Thomson
Consumer Electronics, Inc.) to the following address:
ProScan Video Accessories
P.O. Box 8419
Ronks, PA 17573
For more information on these accessories(or current
prices), write to the following address:
Video Accessories Customer Service
Thomson Consumer Electronics, Inc.
Distributor & Special Products
2000 Clements Bridge Rd
Deptford, NJ08096-2088
Name:
Street:
City:
State:
Apt:
Zip:
International Orders
This offer is valid only in the 50 United Statesand Canada.
For international orders, please send your request for
quotation (not an order) to:
International Customer Service
Thomson Consumer Electronics, Inc.
Distributor & Special Products
2000 Clements Bridge Rd
Deptford, NJ08096-2088
Page 88

PROSCAN
We are committed to your complete satisfaction and viewing enjoyment.
Any time you have a question or want information about your ProScan
product, call our friendly toll-free number listedbelow.
1-800-PROSCAN
( 1-800-776-7226)
An RCA Entertainment Product
_ 1HOMSONCONSUMERELECTRONICS
10330 N. Meridian St.
Indianapolis, IN 46209
©1995 Thomson Consumer Electronics, Inc.
Trademark(s)@ Registered
Marca(s) Registrada(s)
Printed in U.S.A.
TOCOM #15077550
RECYCLEDPAPER
50%
MINIMUM10%POSTCONSUMER
 Loading...