


mouse set-up guide
guide de programmation de souris
manual de instalación del ratón
PC7320_NA_IB_REVA 10/10/03 2:47 PM Page 1
2
3
System Requirements
Getting Ready
• Windows® 98, Windows® 2000, Windows® XP, or ME and USB capability
version 1.0 or higher is required.
• CD-ROM drive
Before Installation
If you have installed Special mouse drivers or mouse software on your system, other than the
Standard PS/2 Port Mouse or Microsoft PS/2 Port Mouse, please uninstall them before
installing this software.
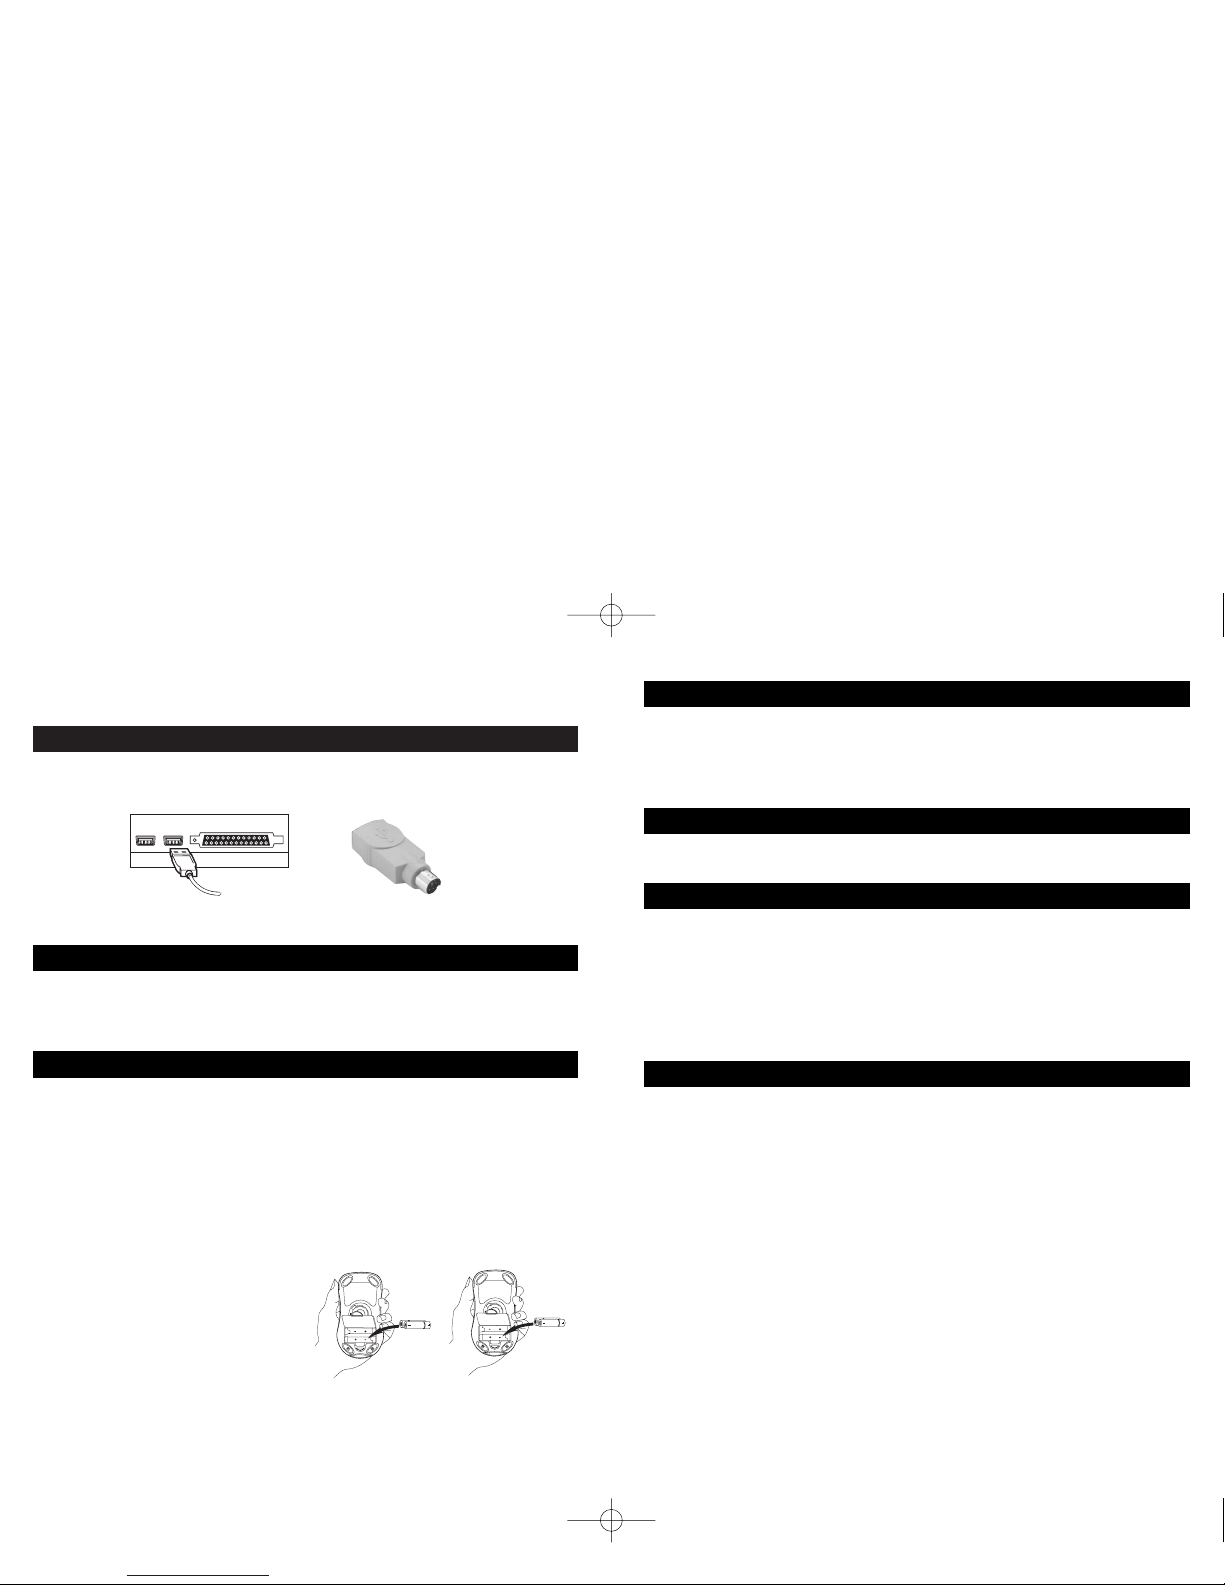
Connecting Your Mouse
Using the USB Port:
• Locate the USB connector on your computer or Hub and plug in the cable.
Using the PS/2 Port:
• Locate the PS/2 port on your computer and plug in the adaptor, then plug in your mouse.
Plug & Play
If you have model PC7330, no software installation is required. Your mouse is ready to use.
Quick Installation
Place the CD Driver Software in your CD-ROM drive and follow the on-screen menu
instructions. If the set-up menu does not appear, do the following:
1. Click on the Start Button and then click Run.
2. Now type <drive> :\ setup. If the Mouse CD is in drive D:, type D:\ setup.
3. Click on OK and follow the on-screen instructions.
4. Once your computer is restarted, the mouse icon will appear in the Windows
®
system tray.
Double click on the icon to bring up your mouse control menu.
USB Port
It is important to read this instruction book before
you use your new product for the first time.
PS/2 Adapter
1. Shut down your computer.
2. Remove the existing keyboard and mouse.
3. Install the AAA alkaline batteries in the
wireless mouse.*
• Remove the battery compartment cover
on the bottom or top of the mouse by
pressing down on the tab.
• Insert the batteries as shown inside the
battery compartment.
• Replace the cover.
*Note: There are 2 ways to load batteries.
• Illustration A is an example of
a bottom loading mouse.
• Illustration B is an example of
a top loading mouse.
Installation Guide
You may install the mouse driver manually as follows:
Running setup.exe for the Operating System you have from this CD is the fastest way to install
this software.
Windows® 98
1. Click on the “Start” button and point to “Settings.”
2. Click on the “Control Panel.”
3. Double click on the “System” icon and display “System Properties.”
4. In the “Device Manager” tab, double click on the mouse icon in the device list.
5. Select the proper pointing device under mouse and click the “Properties” button.
6. A property page about this mouse will appear, select the “Driver” tab and then click the
“Update Driver” button.
7. Follow the instructions on the screen to complete the driver update procedure.
AB
PC7320_NA_IB_REVA 10/10/03 2:47 PM Page 2

4
5
Français
Uninstall
Windows® 98
1. In “Control Panel,” open “Add/Remove Programs.”
2. In “Install/Uninstall” tab, select this software from the list and click on the
“Add/Remove” button.
3. Follow the instructions on the screen to complete the uninstall procedure.
Troubleshooting
1. Check the batteries to ensure they are fully charged.
2. Check the receiver’s USB connection. Be sure the receiver is securely connected to the
USB port.
3. If your mouse (model PC7310 or PC7330) does not respond properly, you may need to
change the frequency on which the item is operating. On model PC7330, press the learn
button on the receiver, then press the ID button on the mouse. On model PC7310, make
sure both your receiver and mouse are set to channel 1 or channel 2, and that both are on
the same channel.
4. Make sure the USB port is properly configured in the system BIOS (either “enabled” or
“disabled”). Refer to your computer’s documentation for correct port configuration. You
may also have other system device conflicts. Please change the settings as required.
Special Instructions For PC7330
Making the wireless radio frequency connection:
1. Press the “ID” button on the bottom side of the receiver, until the “Status” LED slowly
flashes. (approximately 1-2 seconds)
2. Press the “ID” button located on the bottom of the mouse to connect with the receiver.
The “Status” LED on the receiver will begin to flash rapidly. (Approximately 3-5 seconds).
When the rapid flashing has ceased, the mouse is ready to use.
Installation Guide (Continued)
For USB mouse installation, you should run SETUP.EXE once before or after you
connect the mouse.
Windows® 2000
1. Click on the “Start” button and point to “Settings.”
2. Click on the “Control Panel.”
3. Double click on the “Mouse” icon and display “Mouse Properties.”
4. Click on the “Hardware” tab in the “Mouse Properties” dialog box.
5. Choose the mouse you want to install from the “Devices:” list and then click on the
“Properties” button.
6. Click on the “Driver” tab in the showing dialog box.
7. Click on the “Update Driver...” button and display the “Upgrade Device Driver Wizard.”
8. Click on the “Next>” button and display “Install Hardware Device Drivers.”
9. Choose “Display” a list of the known drivers for this device so that you can choose a
specific “driver,” item and then click “Next.”
10. Click on the “Have Disk...” button and display “Install From Disk.” Insert this disk and
change “Copy manufacturer’s files from” to this directory (e.g., “D:\”) and then click
the “OK” button.
11. Click on the “OK” button after displaying “Select a Device Driver” with the supported
items and selecting the appropriate one.
12. Follow the instructions on the screen to complete the driver update procedure.
PC7320_NA_IB_REVA 10/10/03 2:47 PM Page 4
 Loading...