

Page 1
CO
Page 2
WARNING
To reduce the risk of fire or
shock hazard, do not expose
I i i
this TV to rain or moisture,
i
To reduce the risk of electric shock, do not remove
cover (or back). No user serviceable parts inside.
CKDO NOTOPENIRefer servicing to qualified service personnel,
This symbol indicates
"dangerous voltage" inside
the product that presents a
This symbol indicates
important instructions
accompanying the product.
risk of electric shock or
personal injury.
•Caution: To reduce the risk of electric shock, match wide
blade of plug to wide slot, fully insert.
Attention: Pour eviter les chocs _lectriques, introduire la
lame la plus large de la fiche dans la borne
correspondante de la prise et pousser jusq_ au fond.
Refer to the identification/rating label located on the back panel of your
product for its proper operating voltage.
FCCRegulations state that unauthorized changes or modifications to this
equipment may void the user's authority to operate it.
If fixed (non-moving) images are left on the screen for long periods, they
may be permanently imprinted on the screen. Such images include
network Iogos, phone numbers, and video games. This damage is not
covered by your warranty. Extended viewing of channels displaying these
images should be avoided.
Cable TV Installer: This reminder is provided to call your attention to
Article 820-40 of the National Electrical Code (Section 54 of the Canadian
Electrical Code, Part 1) which provides guidelines for proper grounding
and, in particular, specifies that the cable grou.nd shall be connected to the
grounding system of the building as close to the point of cable entry as
practical.
VCR Plus+, PlusCode and GUIDE! Plus+ are trademarks of Gemstar |
Development Corporation. TV GUIDE is a trademark of TV Guide
Financial, Inc. The VCR Plus+ and TV GUIDE Plus+ systems are
manufactured under license from Gemstar Development Corporation
and VCR Index Systems B.V., respectively.
1
Page 3
FIF'ST THINGS FIRST ....................................... 3
I-onnecting your TV ....................................................... 4
TV Only ..................................................................... 4
TV with other Components ..................................... 4
TV GUIDE Plus+ Controller .......................... :........... 5
USING THE MENU SYSTEM ..... ...................... 7
The Menu Rule: Point and Select ................................. 8
What is Point and Select? ........................................ 8
Menus and Control Panels ........................................... 10
Menus ..................................................................... 10
Control Panels ........................................................ 11
Sliders .............................................. :................. ...... 11
Choice Lists ................. :........................................... 12
Numeric Entry ......................................................... 13
TV GUIDE Plus+ Menus ........................................... 14
INTE RACTIVE SETU P ..................................... 15
Entering Setup ............................................................. 16
Select a Language ....................................................... 16
Auto Channel Search ................................................... 16
TV GUIDE Plus+ System ............................................... 17
Set the Time ................................................................. 23
Set the VCR1 Channel ................................................. 24
Set the DVDNCR2 Channel ........................... .............. 25
Set the SAT/CABLE Channel ........................................ 26
Label the Channels ...................................................... 27
PROGRAMMING THE REMOTE .................. 29
Programming the Remote .......................................... 30
To Control a VCR .................................................... 30
To Control a DVD Player or Laserdisc Player ........ 32
To Control an RCA Audio Device: ......................... 32
To Control a Satellite Receiver or Cable Box ........ 33
Using the Remoteto Control a Device ....................... 33
'TOUR OF THE TV ........................................... 35
Remote Buttons ........................................... :............... 36
Back Panel .................................................................... 38
Front Panel ................................................................... 40
Channel Marker ........................................................... 41
1
Page 4
QUICK REFERENCE ........................................ 43
Audio Menu ................................................................. 44
Picture Quality Menu .................................................. 45
Screen Menu ................................................................ 46
Channel Menu ............................................................. 47
Time Menu ................................................................... 49
Parental Controls Menu .............................................. 50
TV GUIDE Plus+ Menu ................................................. 51
Setup Menu ................................................................. 52
ADVANCED FEATURES ................................. 53
TV GUIDE Plus+ Operation .......................................... 54
Surf Menu ............................................................... 54
Next Menu .............................................................. 55
Scan Menu .............................................................. 55
Sort Menu ............................................................... 56
One Touch Recording ............................................ 57
PIP (Picture-in-Picture) Operation .............................. 58
Two Tips for Using PIP Buttons .............................. 59
Choosing an Audio Processor ..................................... 60
Choosing an audio processor from the remote ... 60
Closed Captioning ....................................................... 61
To display Closed Captioning ................................ 61
Closed Captioning Modes ...................................... 62
On-screen Program Details ......................................... 63
APPENDIX A: TV CONNECTIONS ............... 65
APPENDIX B: OTHER COMPONENTS ........ 76
APPENDIX C: TROUBLESHOOTING ............ 78
APPENDIX C: TROUBLESHOOTING ............ 79
APPENDIX D: LIMITED WARRANTY ........ 80
APPENDIX E: CARE AND CLEANING .......... 81
ACCESSORIES ................................................. 82
INDEX ............................................................. 85
2
Page 5
HI, I'M ROGER.
I wrote this manual to help you get the most
from your TV. I know you expect a lot from your
TV, so I designed this user manual to give you
the information you need.., when you need it.
READ THE FIRST FOUR CHAPTERS
The manual is designed to get you started
quickly.., and let you catch up on the details
when you get a chance. The first four sections of
the manual will get your TV up and running.
You'll learn how to use the menu system, run the
interactive setup routine and program the
remote.
The rest of the manual gives you the specifics: a
tour of the TV, a quick reference guide, details
on the TV GUIDE Plus+ system, advanced
features, and appendices.
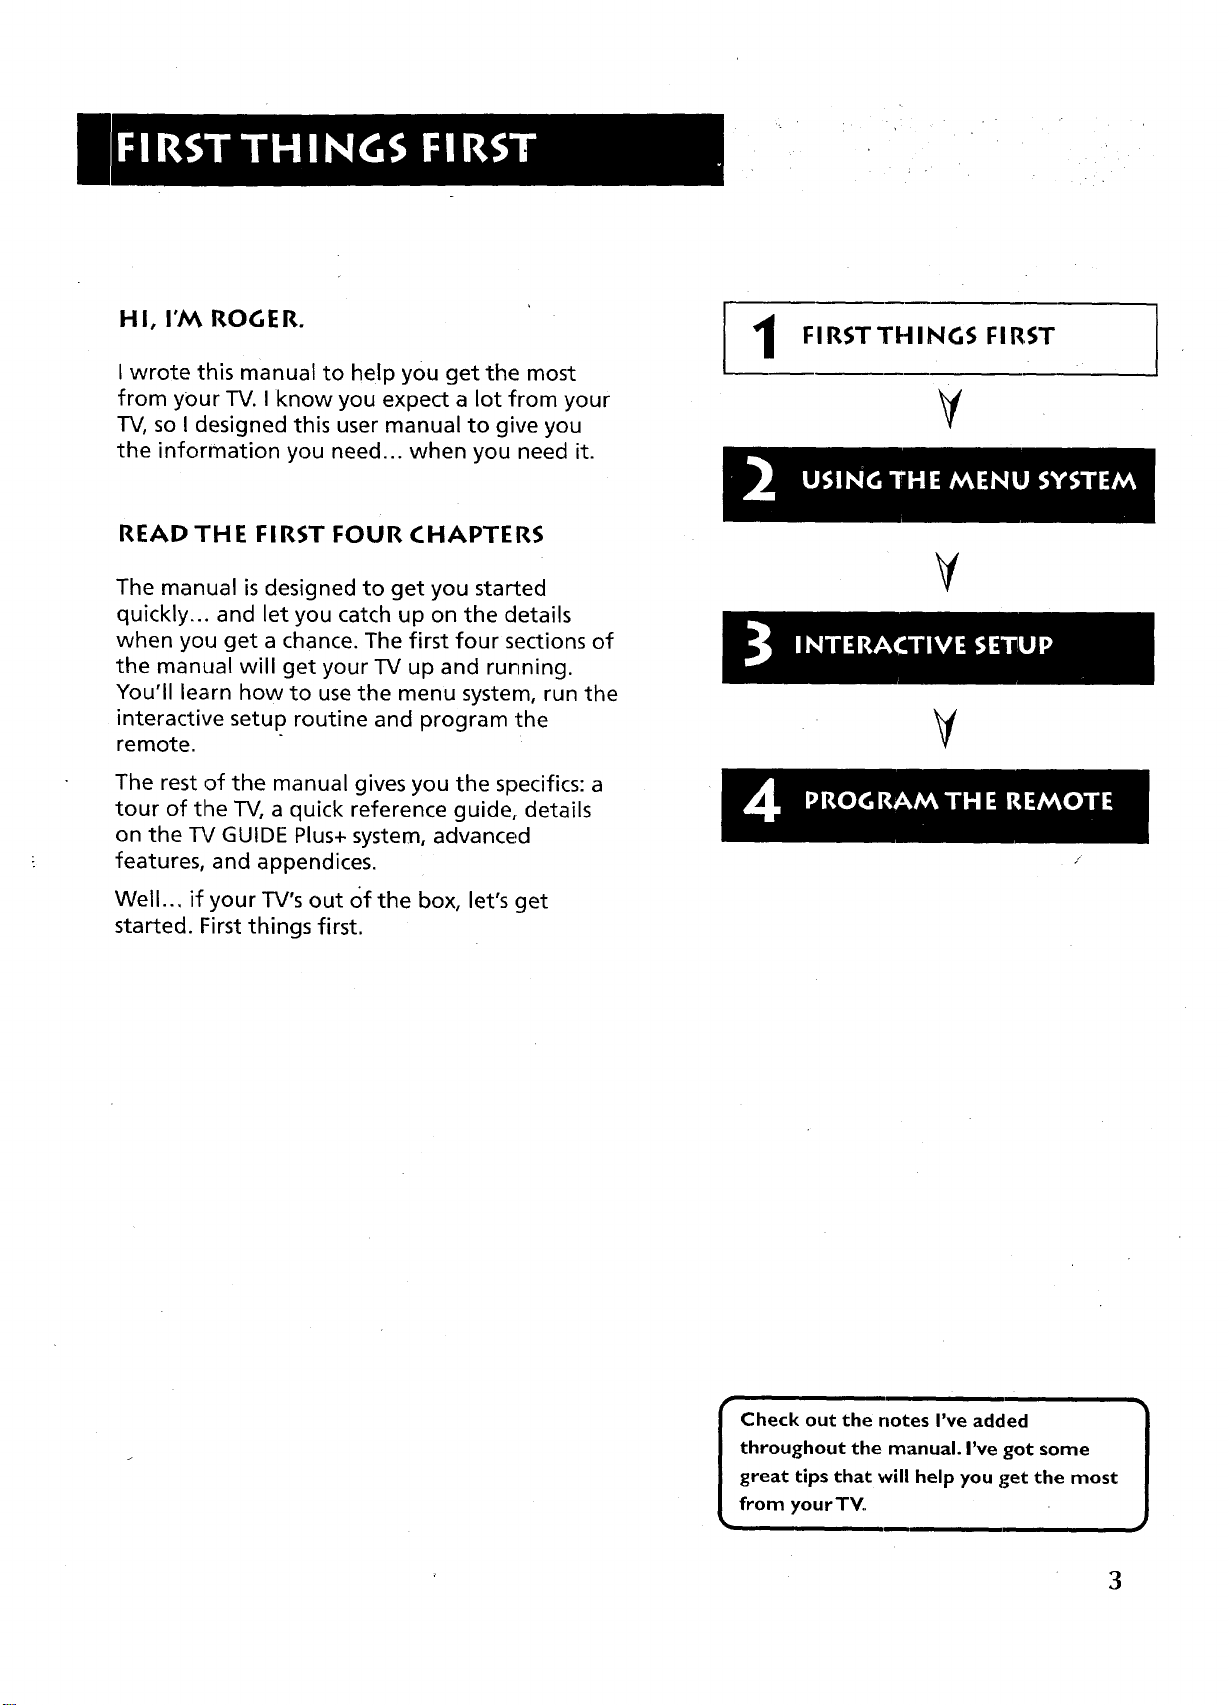
FIRSTTHINGS FIRST
v
V
Well... if your TV's out of the box, let's get
started. First things first.
throughout the manual. I've got some
great tips that will help you get the most
I Check out the notes I've addled 1
from your TY.
3
Page 6

STEP 1
Unpack the TV. Make sure to locate the remote control and
Connections Foldout.
STEP 2: CONNECTING YOUR TV
If you're only going to connect the TV to your home antenna or
cable system, use the "TV Only" connection shown below. If
you're going to connect the TV to a VCR, satellite receiver, DVD
player or other component, look at the Connections Foldout. The
Connections Foldout details recommended connection schemes
for hooking up the TV to a cable box or antenna, one or two
VCRs, a laserdisc player, and a satellite receiver.
TV ONLY
This is a basic connection from an antenna or cable system to
your TV, Connect the cable as shown. If you have a VCR or other
components to connect to the TV, skip to the top of the next
page.
CABLE, CABLE BOX, OR ANTENNA
TV WITH OTHER COMPONENTS
Use the Connections Foldout to connect your TV to a VCR, DVD
player; and/or satellite receiver. After connecting your TV and
other components, proceed to the next step. See Appendix A for
detailed information about using each of these connections.
If your components don't match those shown on the foldout, or
if you prefer a different connection, see your dealer or specific
component user manuals.
_, I _l@F-_a_ _
I / III I
(
TVOnly Connection •
| ...........
2..........
.._ -._=_._._--.--_-_:
|
ANTENNA
•-_.-.- ............
Page 7

TV GUI DE PLUS+ CONTROLLER
The TV GUIDE Plus+* controller allows direct control of a cable
box and VCR using a pair of IR (infrared) controllers.
• Plug the TV GUIDE Plus+ controller into the VCR CONTROL
jack on the back of the TV.
• Affix the IR controllers directly over the IR remote sensors on
your cable box and VCR.
Back of TV
Conne_ IR Controllers to the infrared remote
sensors on your cable box and VCR
STEP 3
Plug in the TV.
Plug the end into the wall outlet, matching the wide blade of
the plug with the wide slot in the outlet. Be sure to insert the
plug completely.
Locating the IR (infrared)
Remote Control Sensor on
Your Cable Box or VCR
The IR controlllers must be affixed
directly over _theIR remote sensors on
your cable box or VCR.
Some cable boxes and VCRs label the
IR sensors; others do not. If the
sensors are labeled, affix the IR
controllers directly over them.
IR Remote 5en:;or
For those that do not label the IR_
sensor, you need to use the cable box
or VCR's remote to locate the sensor
before affixing the IR controllers.
1. Hold the remote control so that it
is touching the front of the cable
box or V('R.
.
Slowly move the remote over the
front of the cable box or VCR
while pressing the remote's
POWER button on and off
3. When the cable box o,r VCR turns
off or on,, you've located the
sensor.
r ii _\
t II h\
* GUIDE Plus+ is a trademark of Gemstar Development Corporation.
TV GUIDE is a trademark of TV Guide Financial, Inc.
You should test the IR controllers
after setting up the TV GUIDE Plus+
system. Temporarily attach the IR
controllers with clear tape to the
spots where you think the sensors
are located. After determining that
the controllers are working correctly,
affix them permanently.
5
Page 8
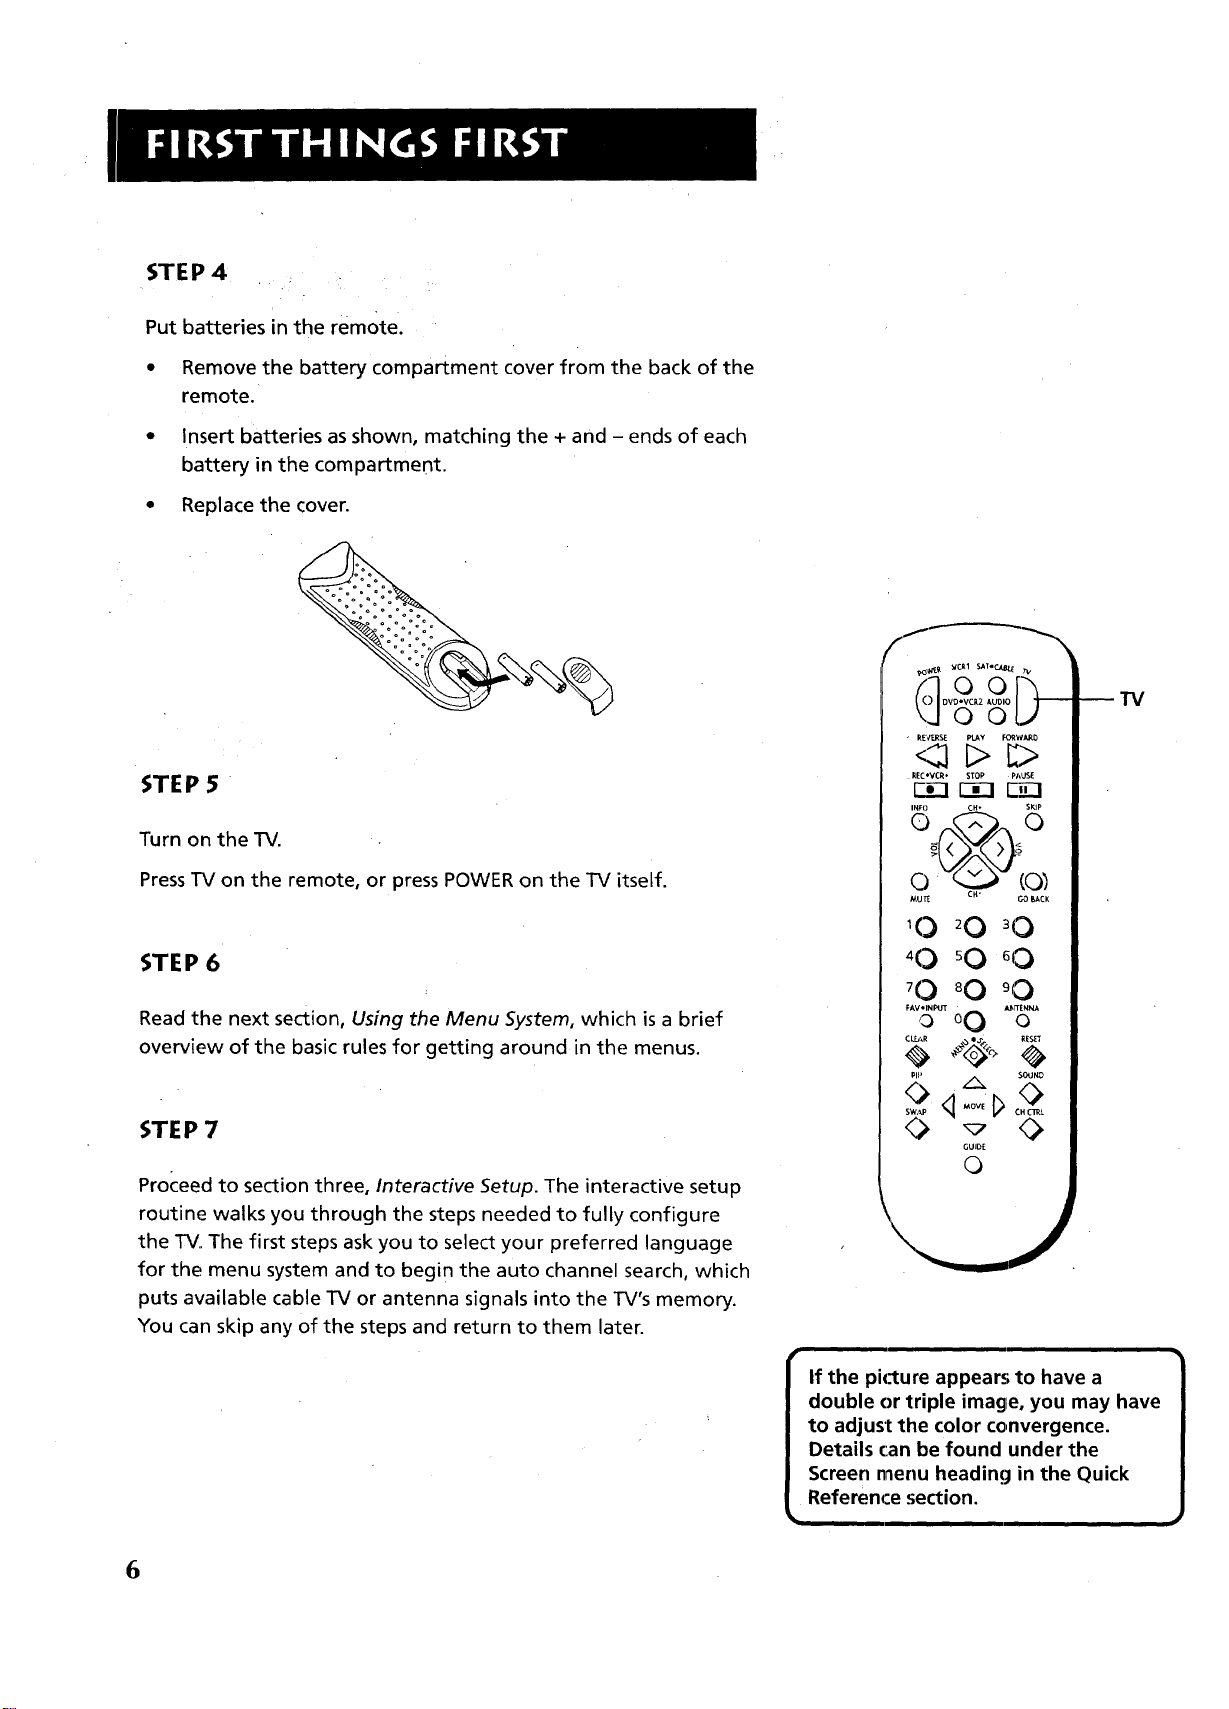
STEP 4
Put batteries in the remote.
Remove the battery compartment cover from the back of the
remote.
• Insert batteries as shown, matching the + and - ends of each
battery in the compartment.
• Replace the cover.
"IV
• R_¢ERSE _LAY fORW_
STE P 5
Turn on the TV.
Press TV on the remote, or press POWER on the TV itself.
STEP 6
Read the next section, Using the Menu System, which is a brief
overview of the basic rules for getting around in the menus.
STE P 7
Proceed to section three, Interactive Setup. The interactive setup
routine walks you through the steps needed to fully configure
the TV. The first steps ask you to select your preferred language
for the menu system and to begi n the auto channel search, which
puts available cable TV or antenna signals into the TV's memory.
You can skip any of the steps and return to them later.
REC*VCR. STOP P/,_
•Ce__1_3 C,,-q
INF{] GH. SKIP
MU_ ct{- Go _ACK
'O 20 30
GUIDE
©
If the picture appear.,; to have a
double or triple image, you may have
to adjust the color convergence.
Details (:an be found under the
Screen menu heading in the Quick
Reference section.
6
Page 9
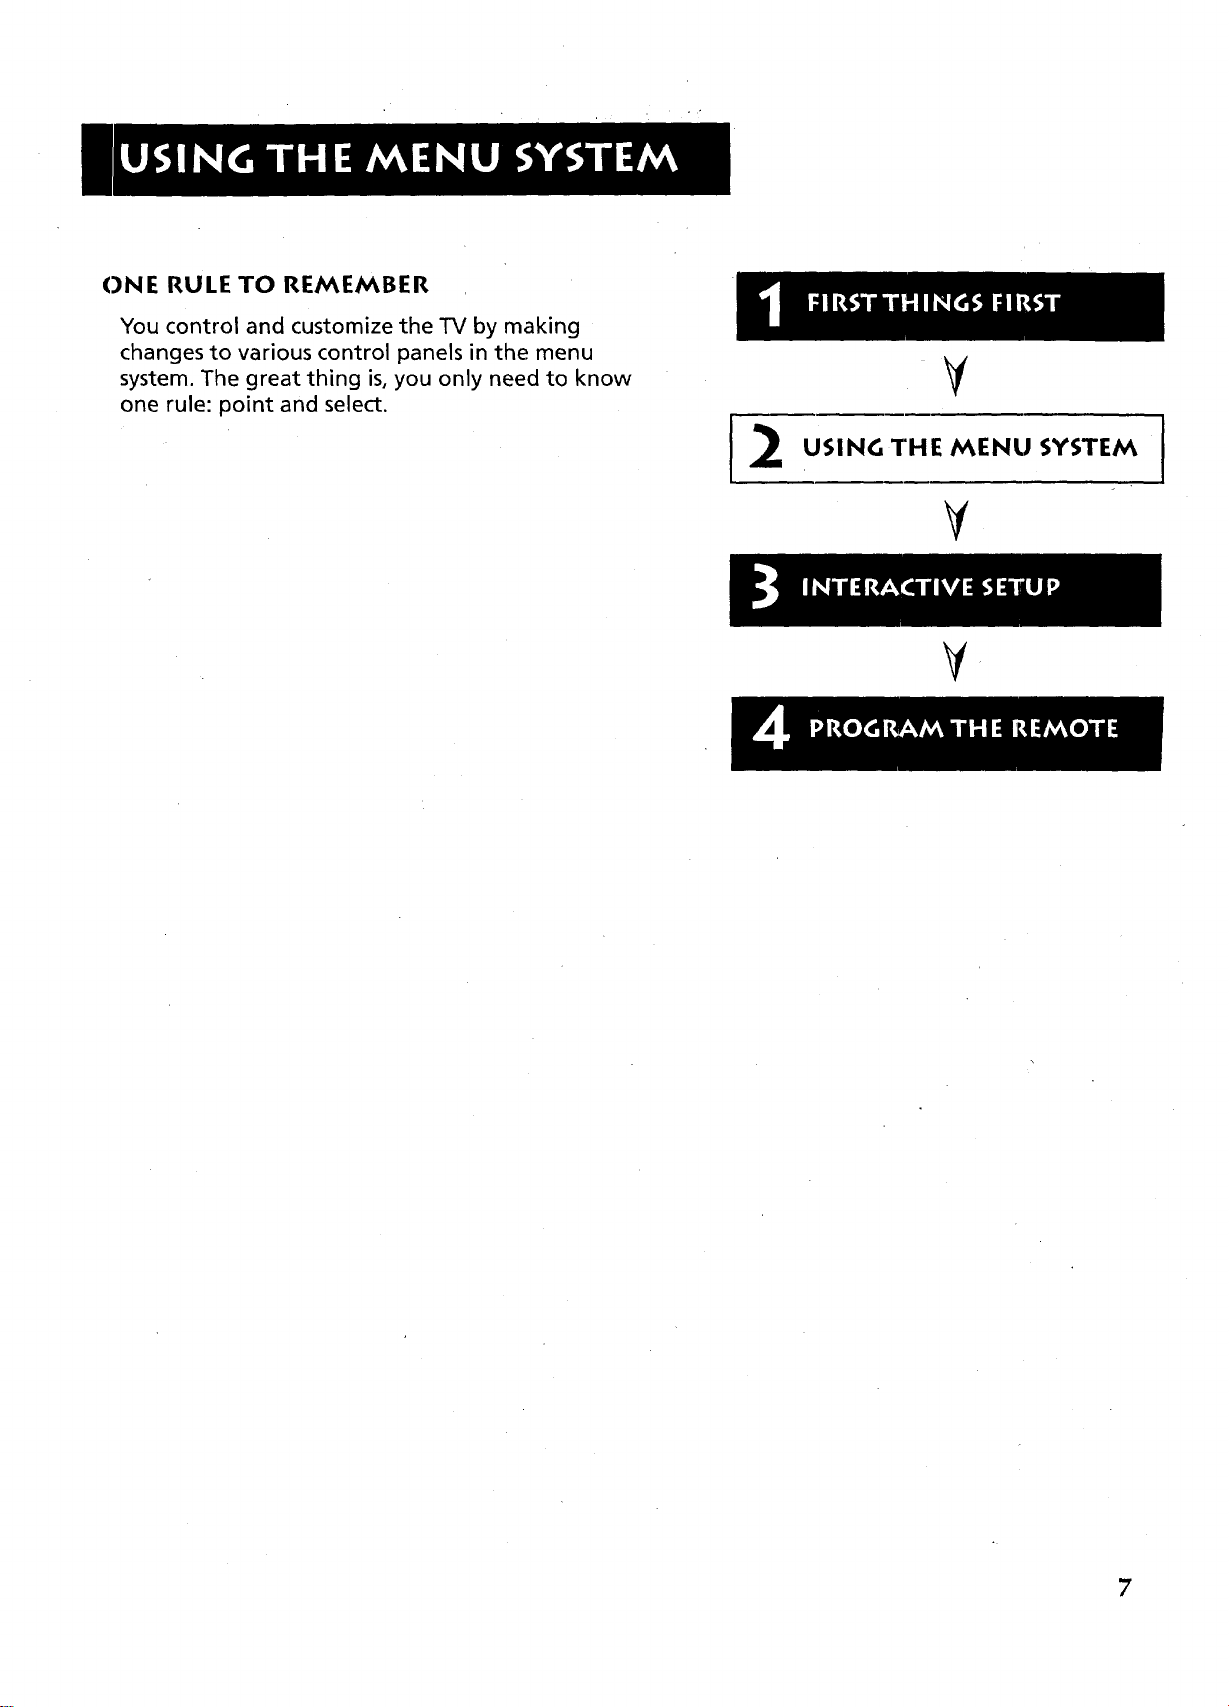
ONE RULE TO REMEMBER
You control and customize the TV by making
changes to various control panels in the menu
system. The great thing is, you only need to know
one rule: point and select.
V
USING THE MENU SYSTEM
¥
V
I
7
Page 10
THE MENU RULE: POINT AND SELECT
You only need to know one rule to use the onIscreen menus and
control panels: point and select.
WHAT IS POINT AND SELECT?
The point and select method has two steps.
1. Point to a menu item using the MOVE arrows on the
remote.
To point up or down, press the up or down arrows. To point
left or right, press the left or right arrows.
2. Select a menu item by pressing MENUoSELECT.
Selecting an item tells the TV's menu system to go ahead and
make the change or go to a place you have indicated.
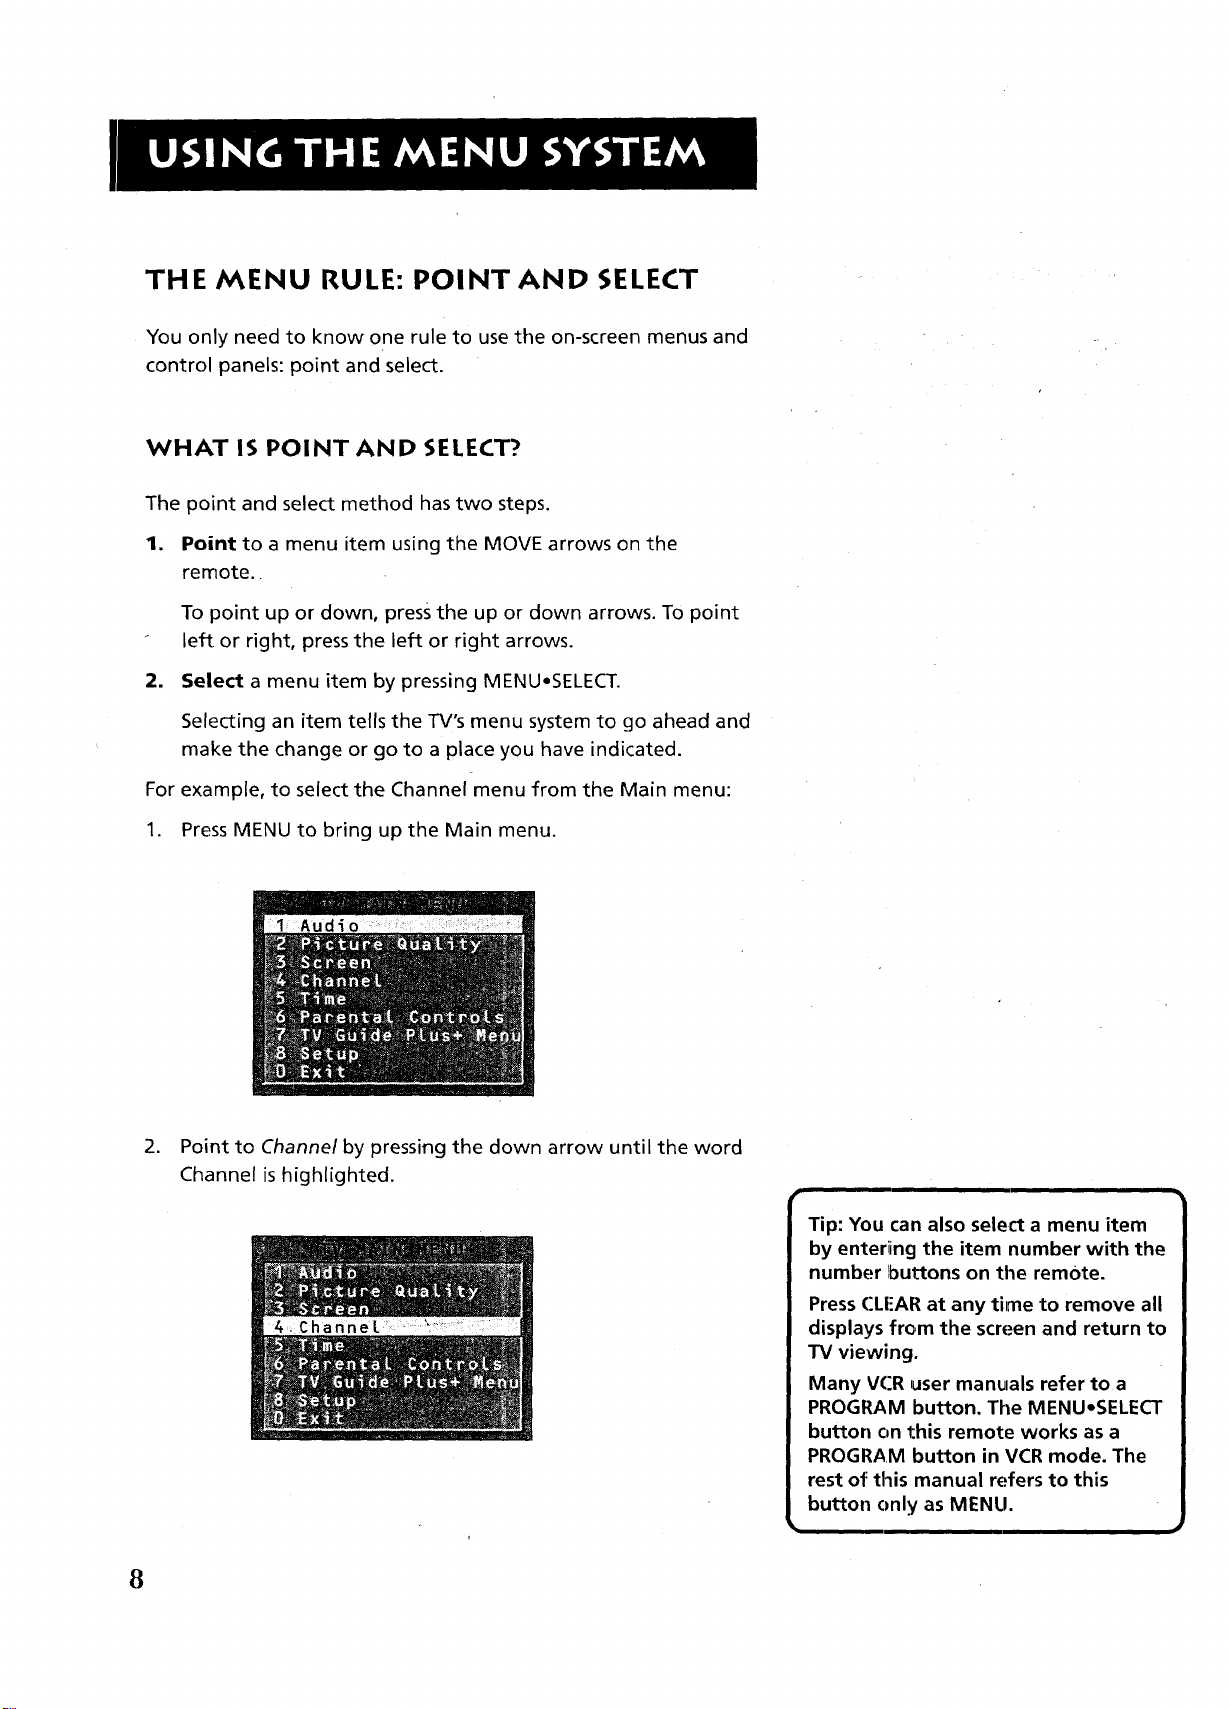
For example, to select the Channel menu from the Main menu:
1. Press MENU to bring up the Main menu.
.
Point to Channel by pressing the down arrow until the word
Channel is highlighted.
8
Tip: You can also select a menu item
by enteriing the item number with the
number buttons on the remote.
Press CLI-AR at any time to remove all
displays from the screen and return to
TV viewing.
Many VCR user manuals refer to a
PROGRAM button. The MENU*SELECT
button on this remote works as a
PROGRAM button in VCR mode. The
rest of this manual refers to this
button only as MENU.
Page 11
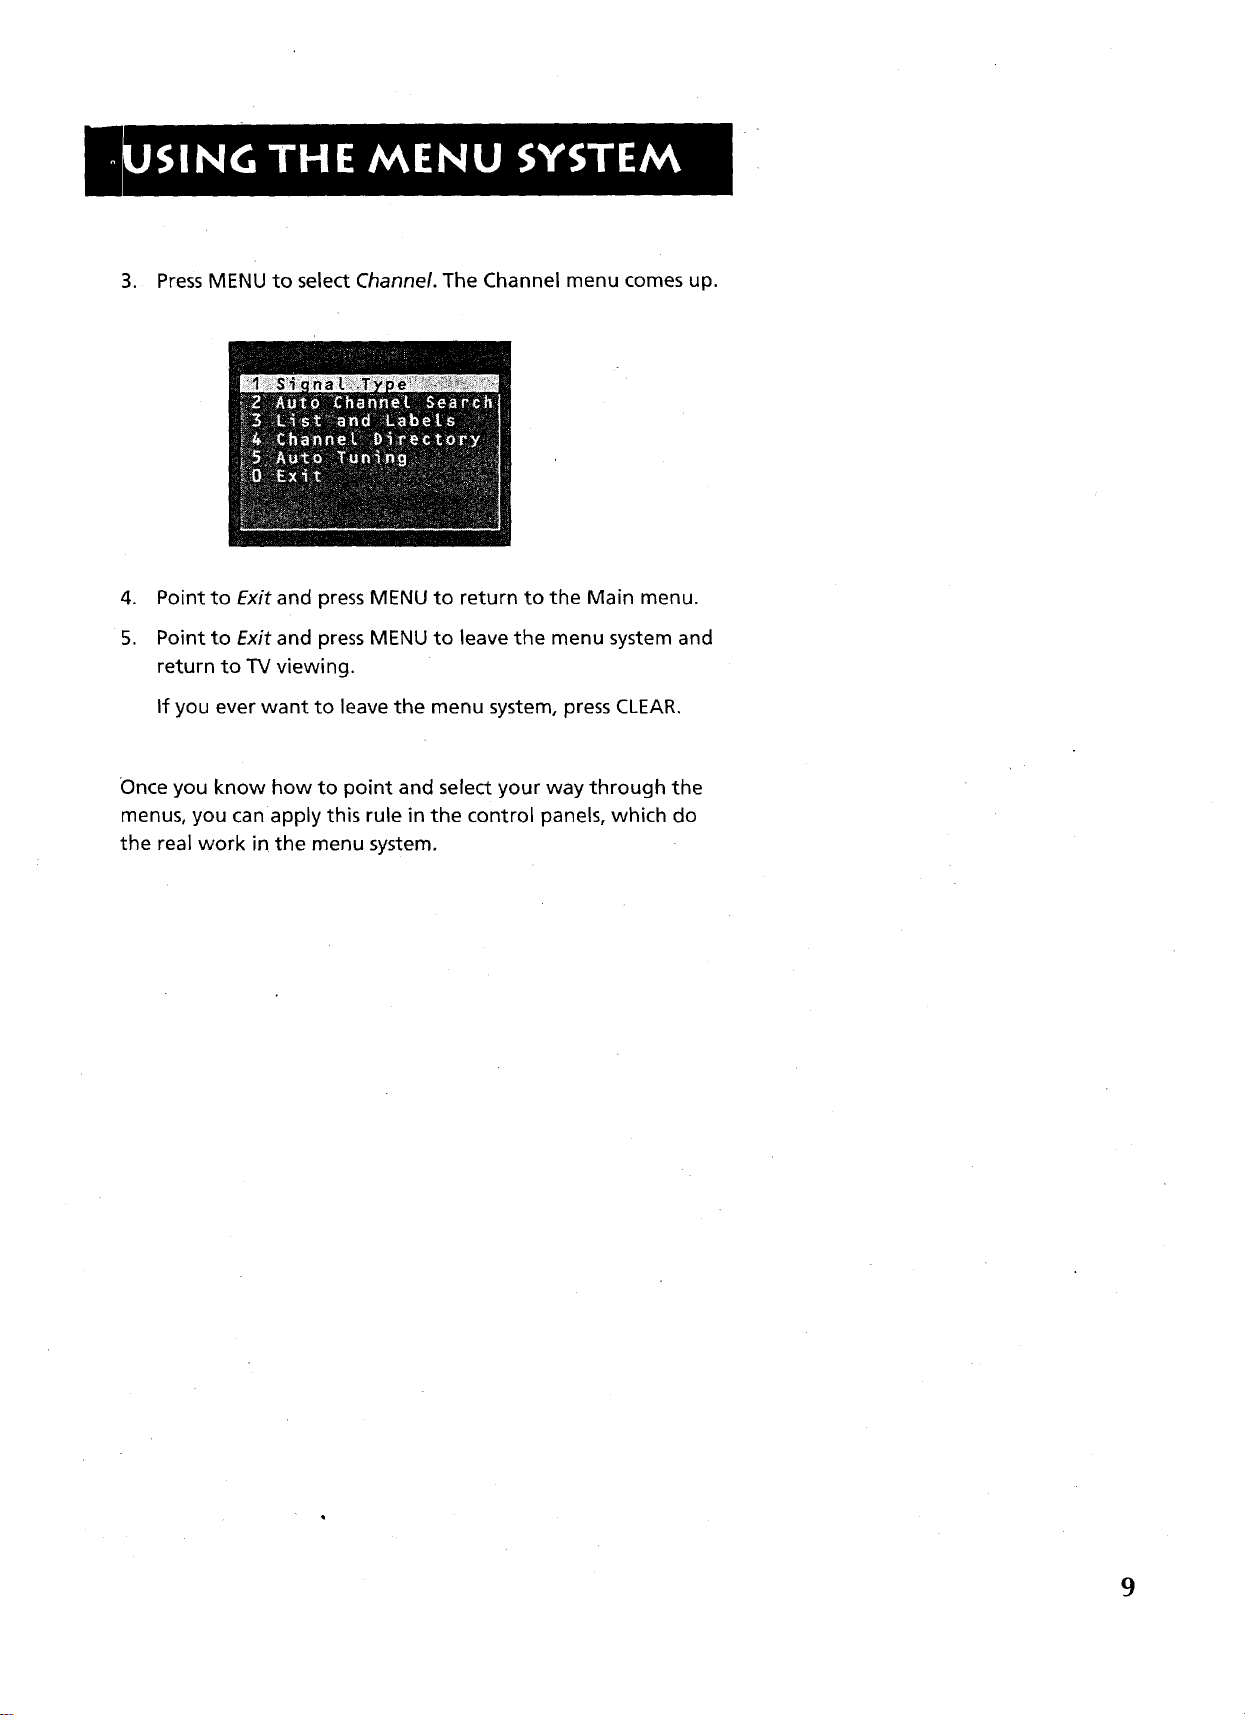
3. Press MENU to select Channel. The Channel menu comes up.
.
Point to Exit and press MENU to return to the Main menu.
5.
Point to Exit and press MENU to leave the menu system and
return to TV viewing.
If you ever want to leave the menu system, press CLEAR.
Once you know how to point and select your way through the
menus, you can apply this rule in the control panels, which do
the real work in the menu system.
9
Page 12
MENUS AND CONTROL PANELS
There are three parts to the menu system: menus, control panels,
and the TV GUIDE Plus+ system. But before you can use control
panel_ or the TV GUIDE Plus+ system, you first have to move
through at least one menu--the Main menu.
MENUS
The first menu is called the Main menu. To bring up the Main
menu:
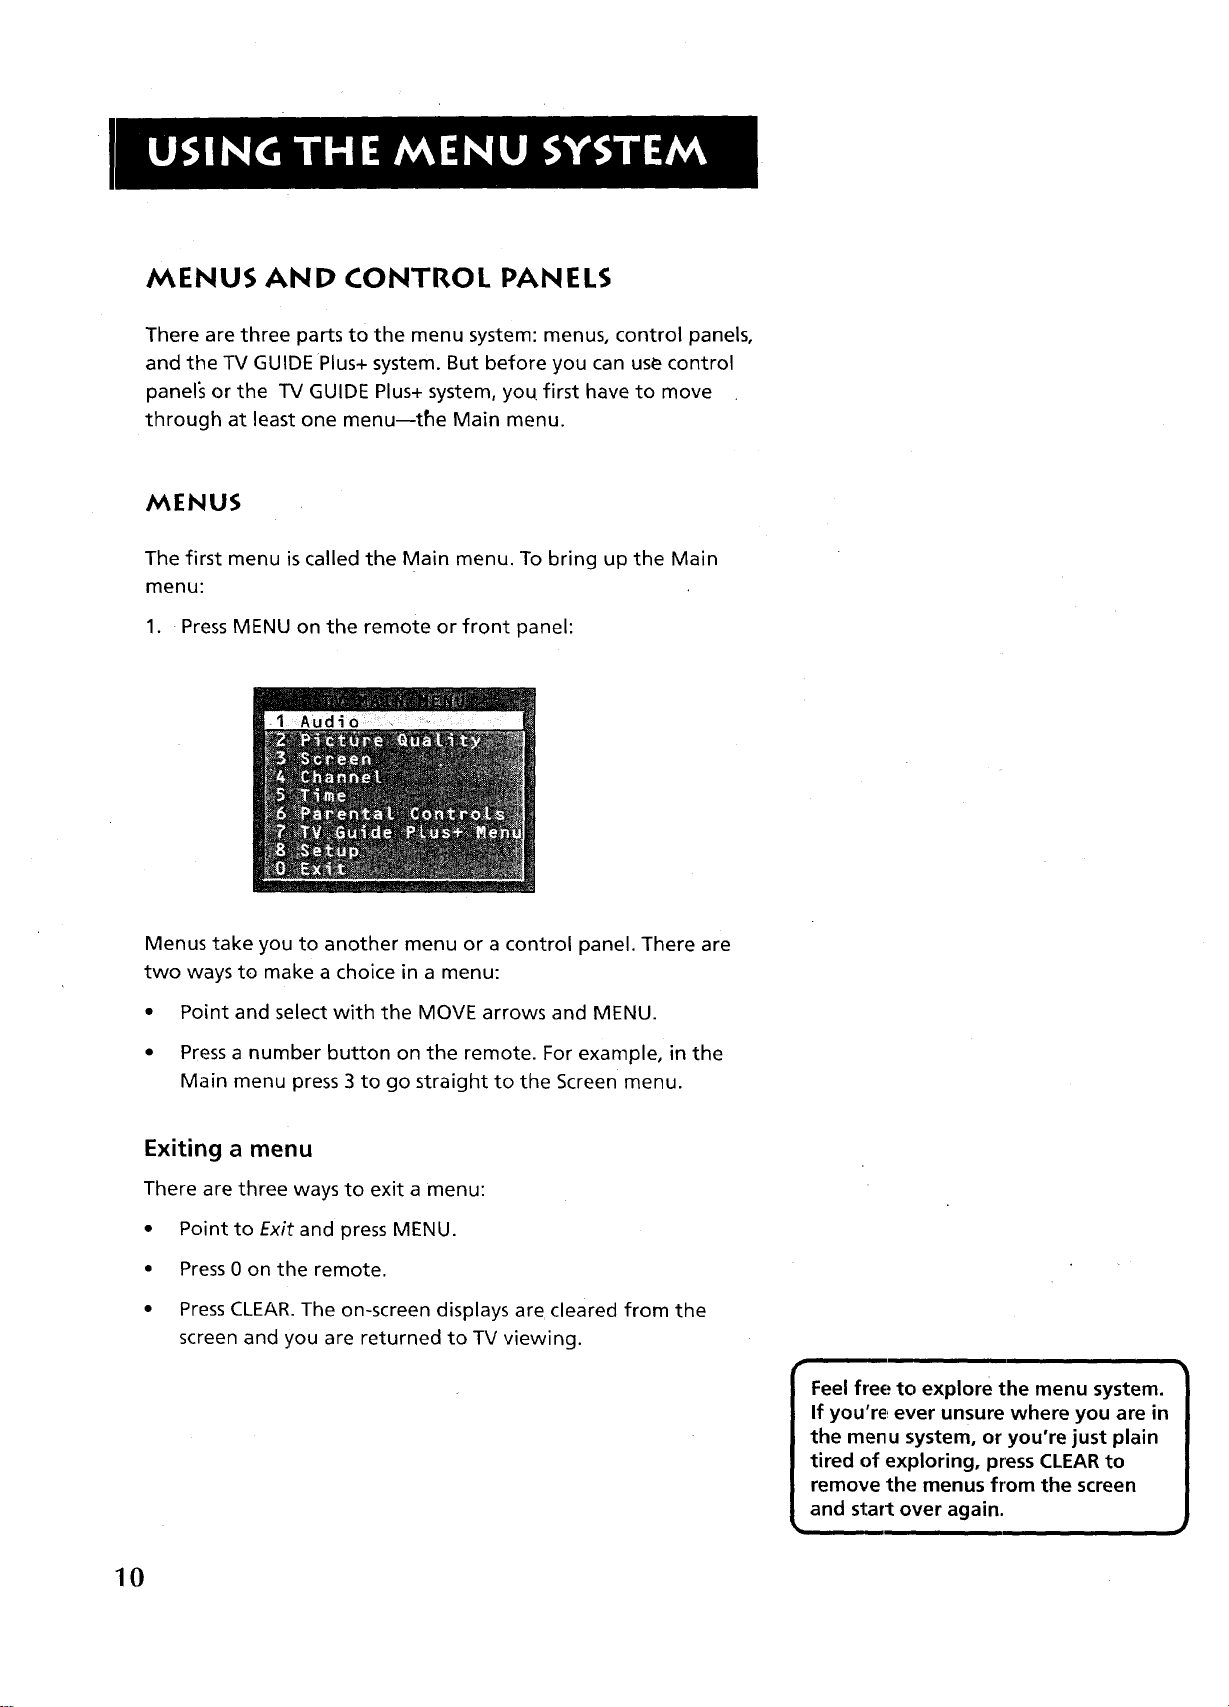
1. Press MENU on the remote or front panel:
Menus take you to another menu or a control panel. There are
two ways to make a choice in a menu:
• Point and select with the MOVE arrows and MENU.
• Press a number button on the remote. For example, in the
Main menu press 3 to go straight to the Screen menu.
Exiting a menu
There are three ways to exit a menu:
• Point to Exit and press MENU.
• Press 0 on the remote.
• Press CLEAR. The on-screen displays are cleared from the
screen and you are returned to TV viewing.
i
Feel free to explore the menu system.
If you're ever unsure where you are in
the menu system, or you're just plain
tired of exploring, press CLEARto
remove the menus from the screen
and start over again.
10
Page 13
CONTROL PANELS
Control Panels do the work in the menu system: it's where you
choose a setting, enter a number, or adjust a level such as tint or
brightness. There are three kinds of control panels: sliders, choice
lists, and numeric entry.
Sliders
Sliders are used to make adjustments to a particular control.
For example, to adjust the TV's contrast:
1. PressMENU to bring up the Main menu.
2. Point to Picture quality and press MENU. The Picture Quality
menu comes up.
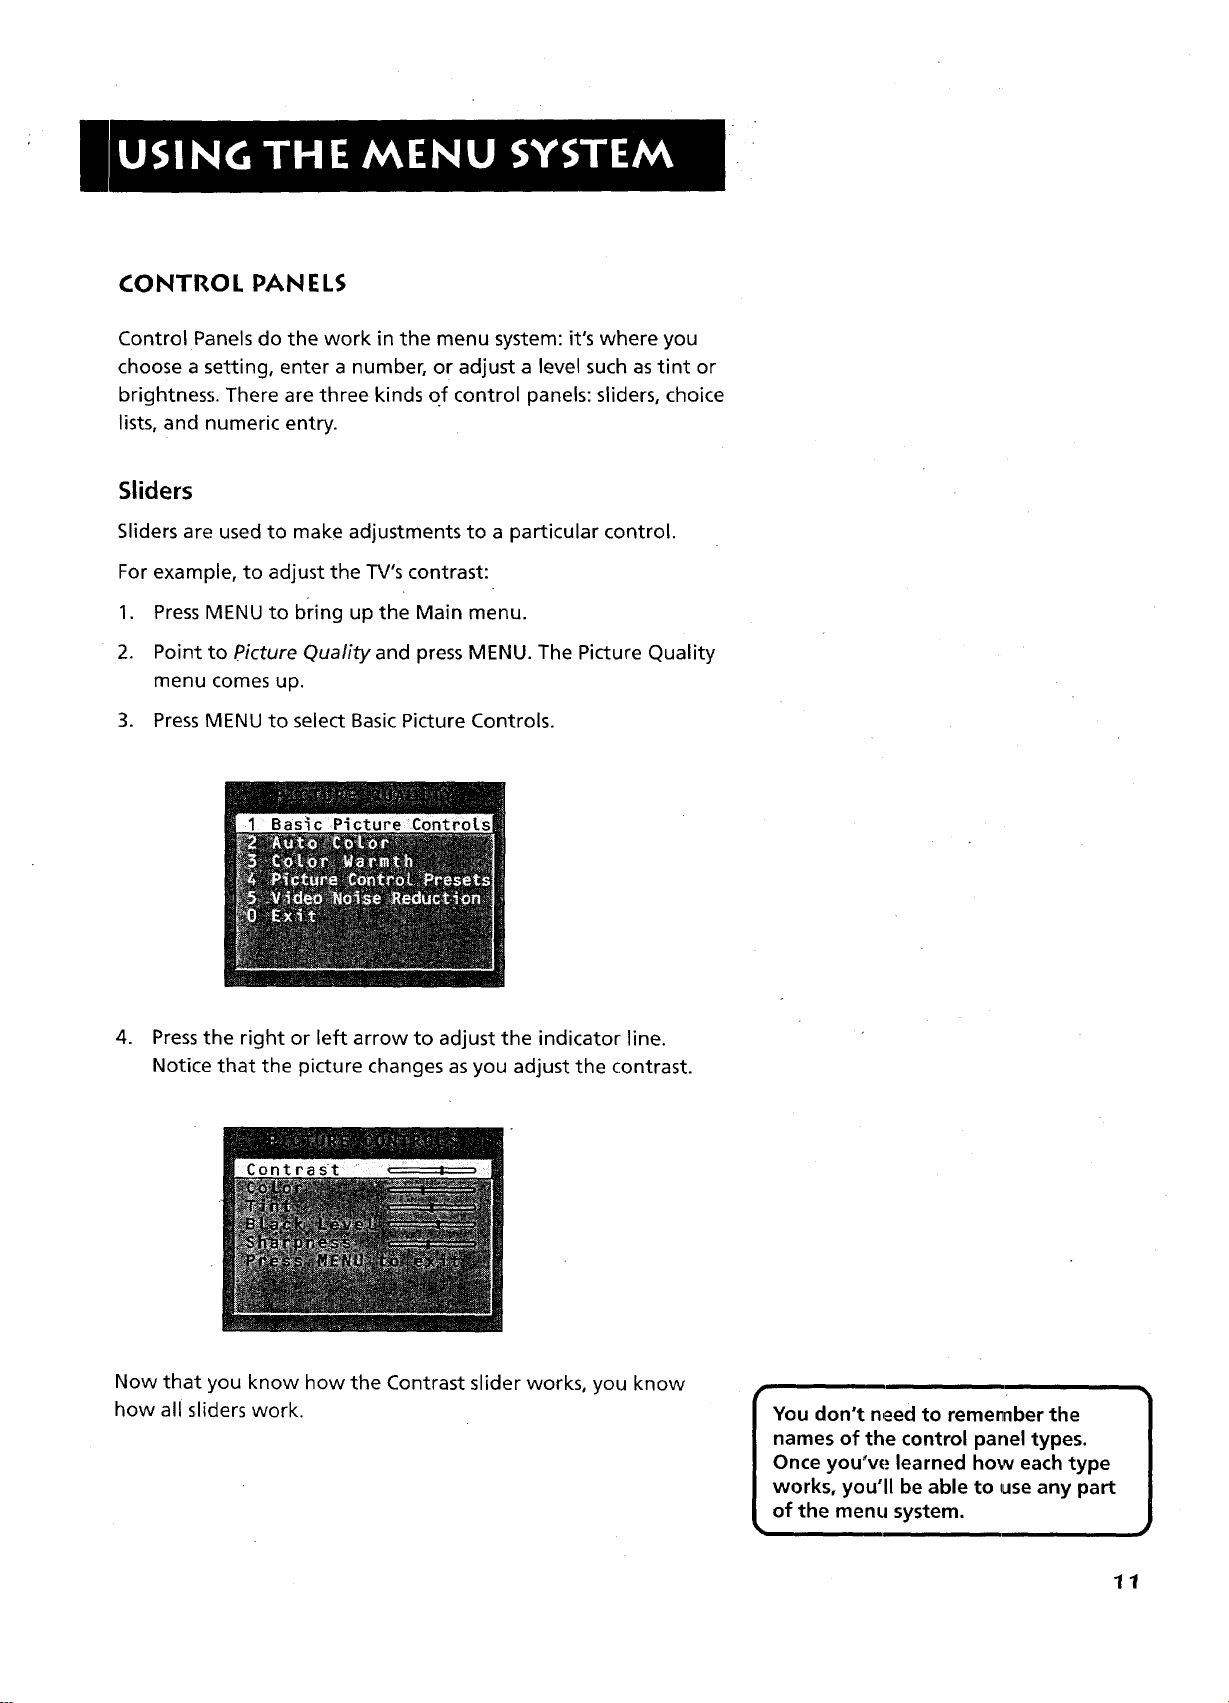
3. PressMENU to select Basic Picture Controls.
4. Press the right or left arrow to adjust the indicator line.
Notice that the picture changes as you adjust the contrast.
Now that you know how the Contrast slider works, you know
how all sliders work.
names of the control panel types.
Once you'w. _ learned how each type
works, you'll be able to use any part
I You don't need to remember the 1
of the menu system.
11
Page 14
CHOICE LISTS
Choice lists are used to choose a particular setting from a list of
settings. The current setting in a choice list is always the
highlighted item.
For example, to indicate whether you're currently using a home
antenna or a cable TV signals:
1. Press MENU to bring up the Main menu.
\
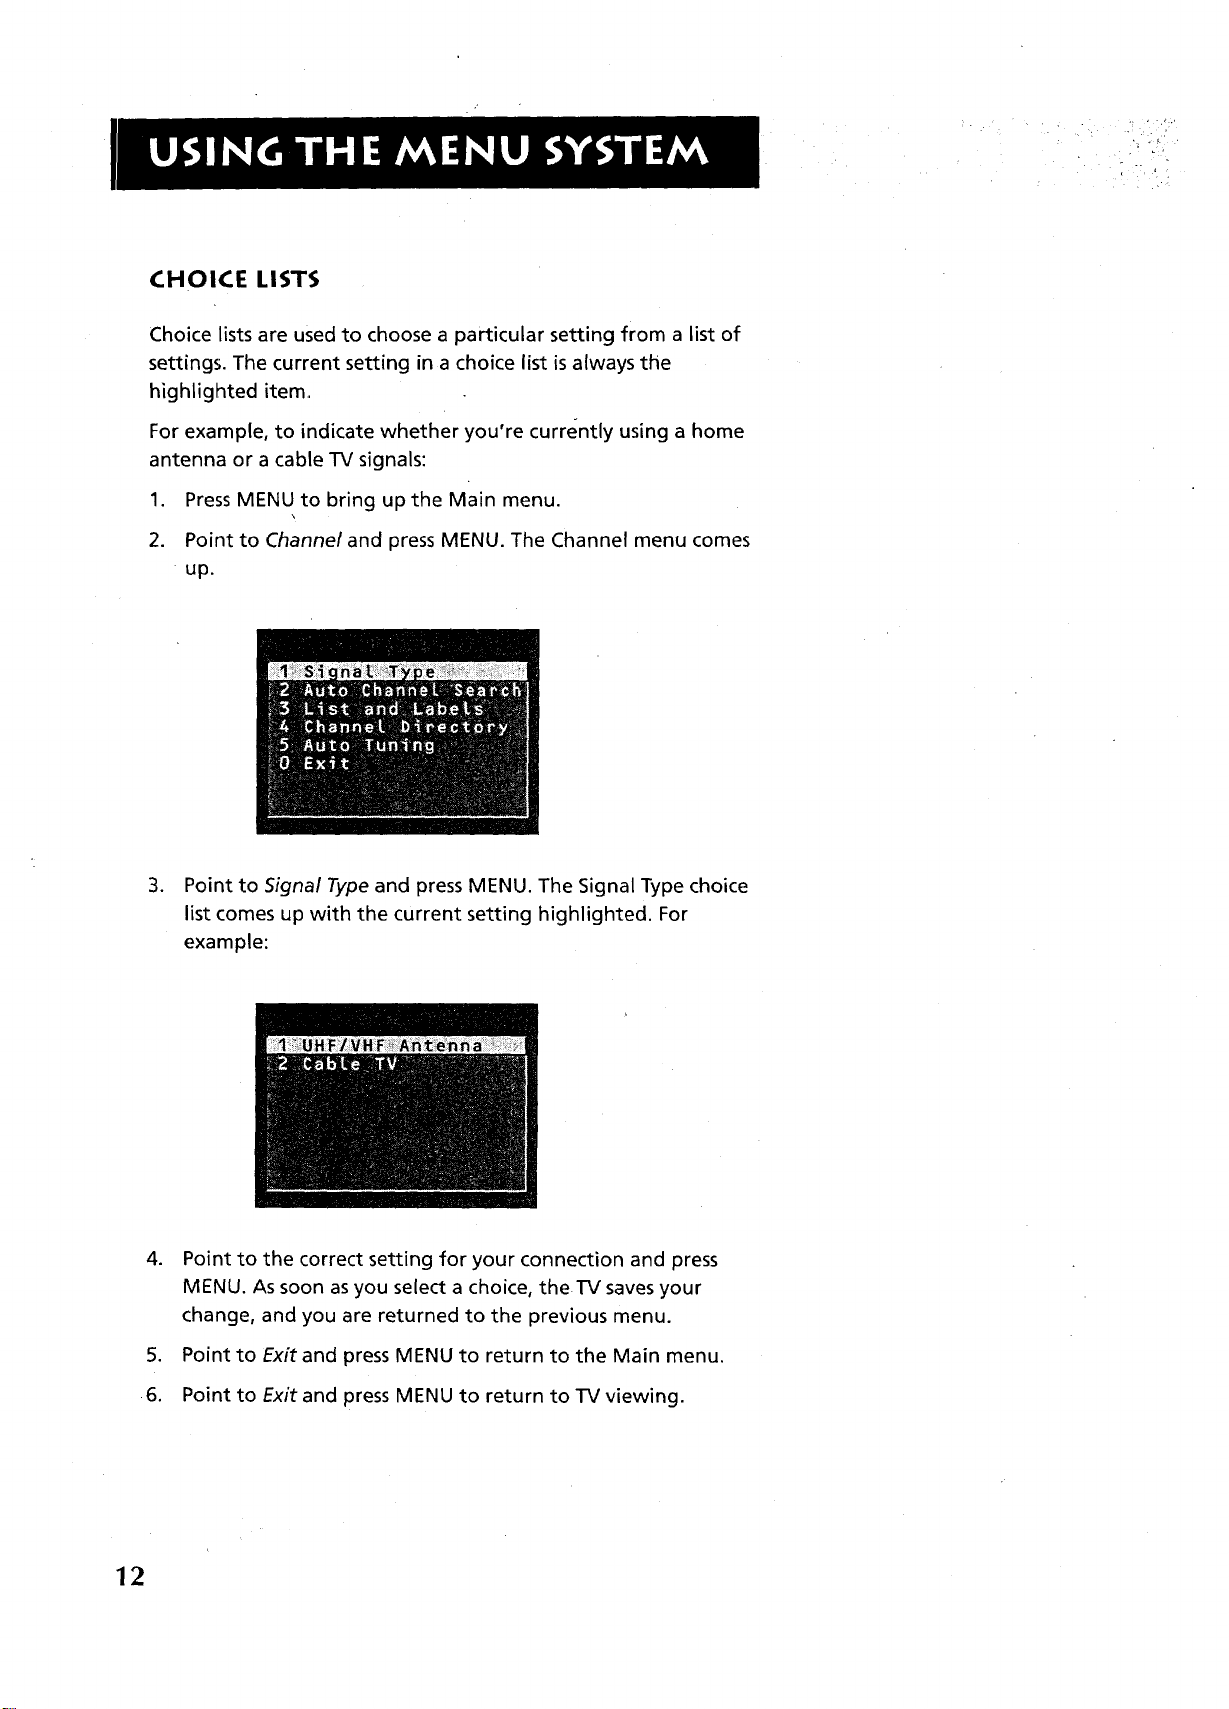
2. Point to Channel and press MENU. The Channel menu comes
up.
3. Point to Signal Type and press MENU. The Signal Type choice
list comes up with the current setting highlighted. For
example:
12
.
Point to the correct setting for your connection and press
MENU. As soon asyou select a choice, theTV saves your
change, and you are returned to the previous menu.
,
Point to Exit and press MENU to return to the Main menu.
.6.
Point to Exit and press MENU to return to TV viewing.
Page 15
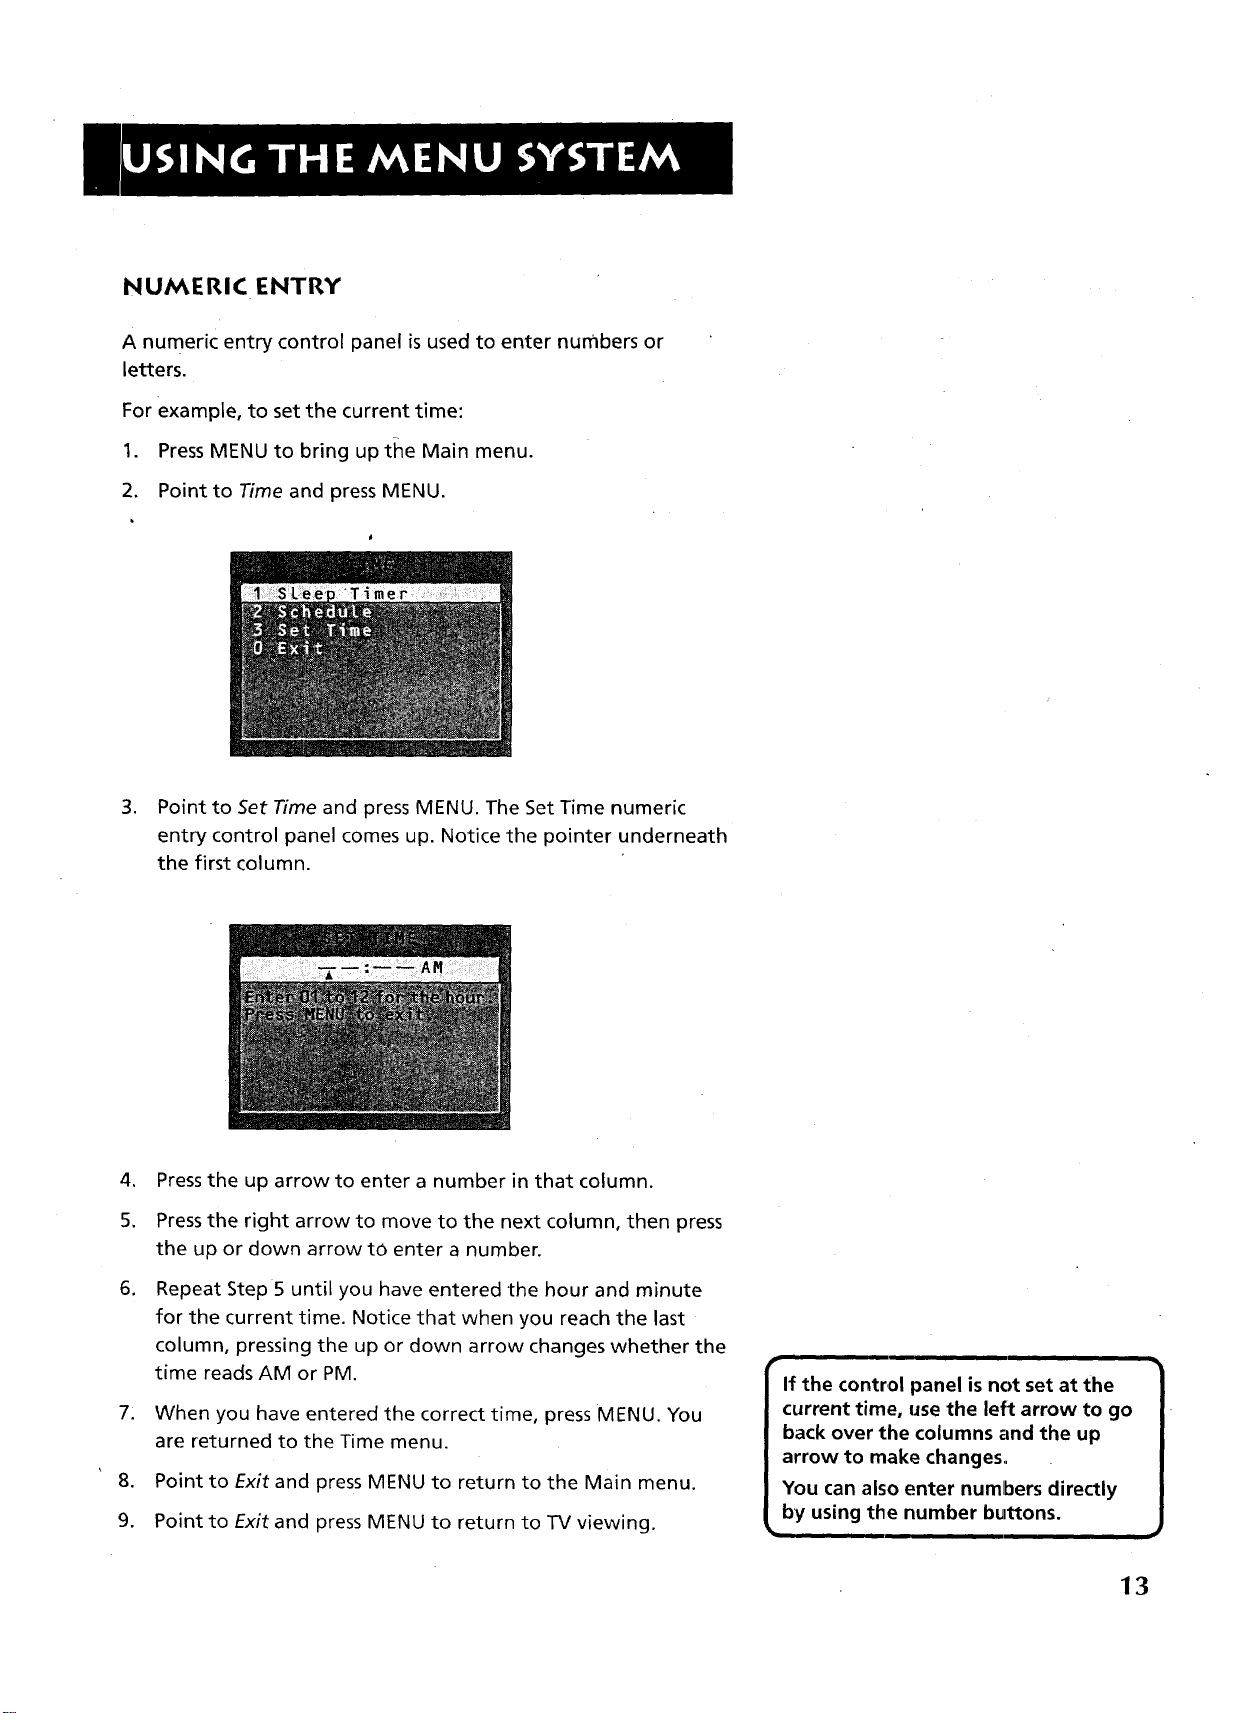
NUMERIC ENTRY
A numeric entry control panel is used to enter numbers or
letters.
For example, to set the current time:
1. Press MENU to bring up tlqe Main menu.
2. Point to Time and press MENU.
3. Point to Set Time and press MENU. The Set Time numeric
entry control panel comes up. Notice the pointer underneath
the first column.
.
Press the up arrow to enter a number in that column.
5.
Press the right arrow to move to the next column, then press
the up or down arrow to enter a number.
,
Repeat Step 5 until you have entered the hour and minute
for the current time. Notice that when you reach the last
column, pressing the up or down arrow changes whether the
time reads AM or PM.
7.
When you have entered the correct time, press MENU. You
are returned to the Time menu.
8. Point to Exit and press MENU to return to the Main menu.
9. Point to Exit and press MENU to return to TV viewing.
i
If the control panel is not set at the
current time, use the left arrow to go
back over the columns and the up
arrow to make changes..
You can also enter numbers directly
by using the number buttons.
13
Page 16
TV GUIDE PLUS+ MENUS
The TV GUIDE Plus+ system is an interactive on-screen program
guide that lists TV schedules for your area, and allows your TV
direct control of a cable box and VCR. Use of the system's menus
differs slightly from the point and select method described
earlier.
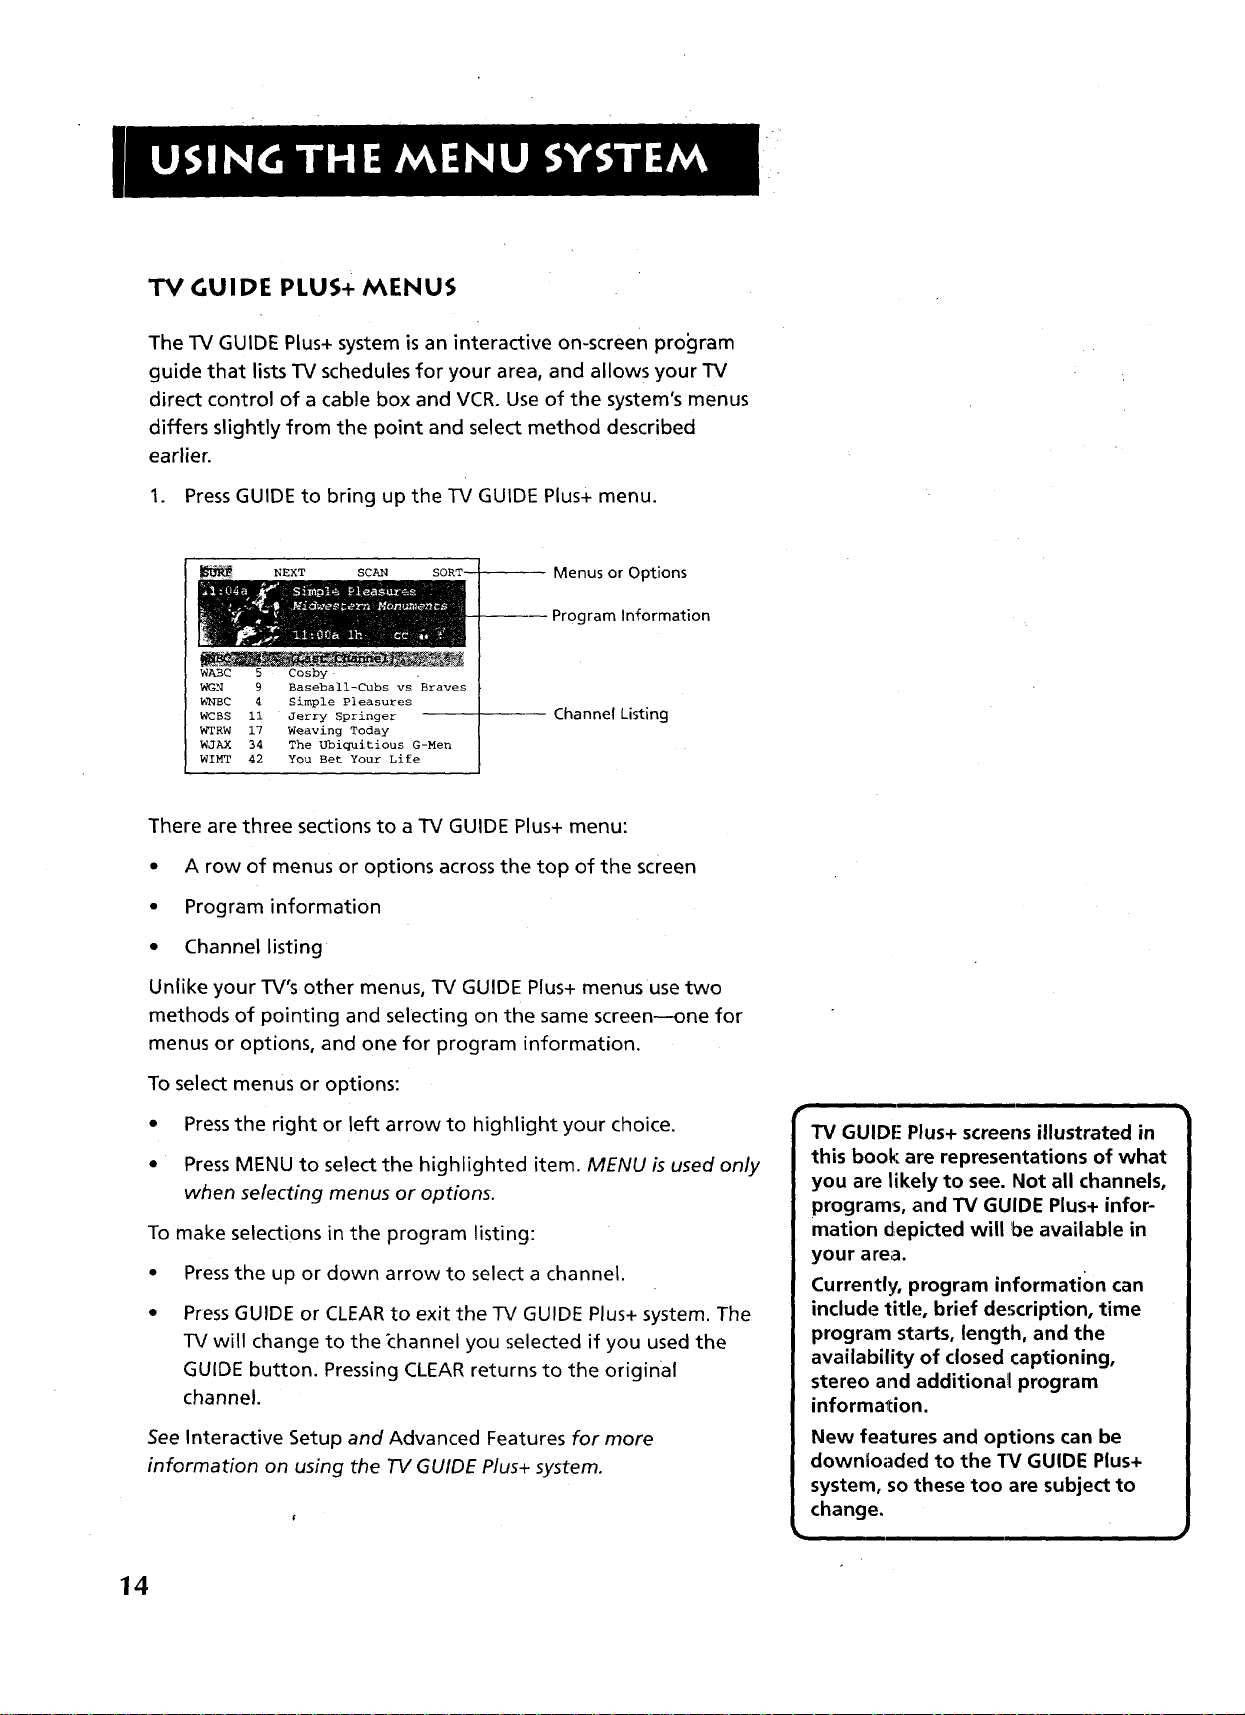
1. Press GUIDE to bring up the TV GUIDE Plus+ menu.
NEXT SCAN
WABC 5 Cosby
WGN 9 Baseball-Cubs vs Braves
WNBC 4 Simple Pleasures
WCBS ii Jerry Springer
WTRW 17 Weaving Today
WJAX 34 The Ubiquitious G-Men
WIMT 42 YOU Bet Your Life
---- Menus or Options
ram Information
Channel Listing
There are three sections to a TV GUIDE Plus+ menu:
• A row of menus or options across the top of the screen
• Program information
• Channel listing
Unlike your TV's other menus, TV GUIDE Plus+ menus use two
methods of pointing and selecting on the same screen--one for
menus or options, and one for program information.
To select menus or options:
• Press the right or left arrow to highlight your choice.
• Press MENU to select the highlighted item. MENU is used only
when selecting menus or options.
To make selections in the program listing:
• Press the up or down arrow to select a channel.
• Press GUIDE or CLEAR to exit the TV GUIDE Plus+ system. The
TV will change
GUIDE button.
to the _hannel you selected if you used the
Pressing CLEAR returns to the original
channel.
See Interactive Setup and Advanced Features for more
information on using the "IV GUIDE Plus+ system.
TV GUIDE Plus+ screens illustrated in
this book are representations of what
you are likely to see. Not all channels,
programs, and TV GUIDE Plus+ infor-
mation diepicted will be available in
your area.
Currenth.!, program information can
include title, brief description, time
program starts, length, and the
availability of closed captioning,
stereo and additiona!l program
information.
New features and options can be
downloaded to the TV GUIDE Plus+
system, so these too are subject to
change.
14
Page 17
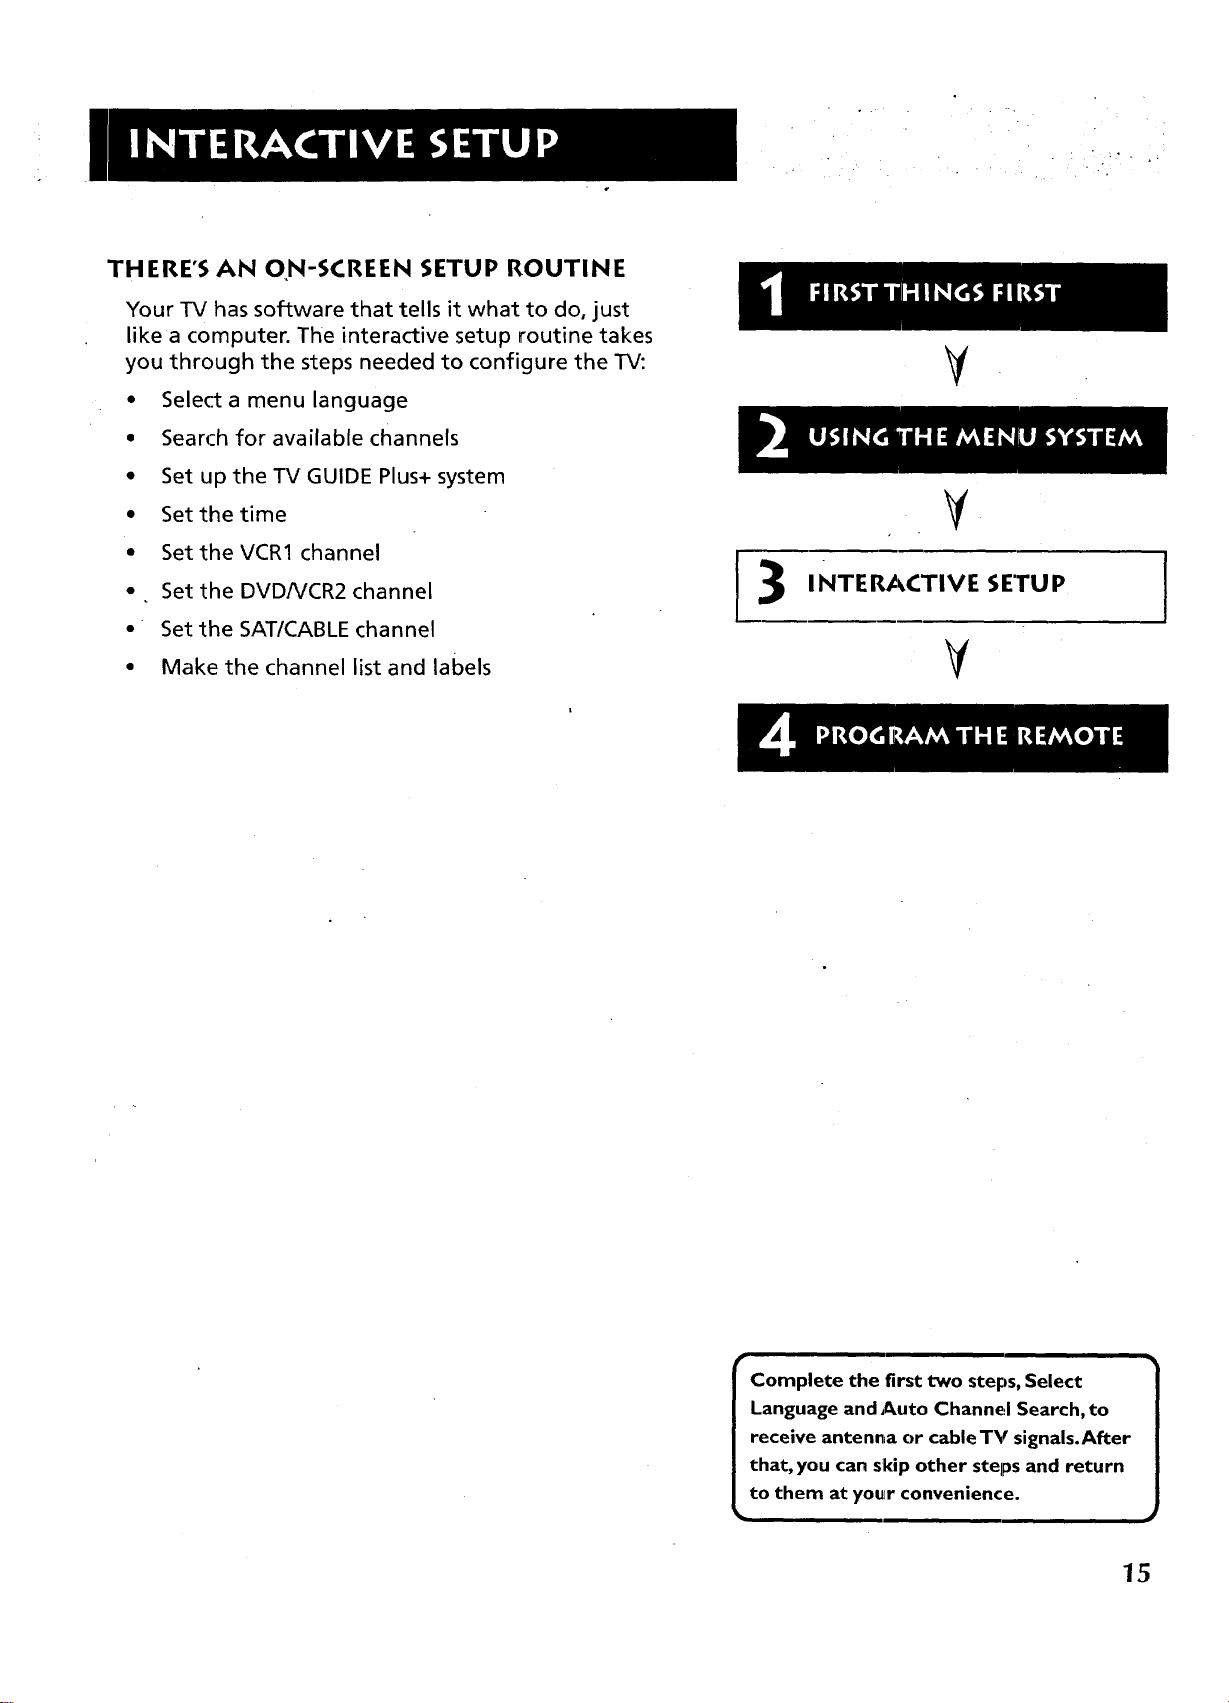
THERE'S AN ON-SCREEN SETUP ROUTINE
Your TV has software that tells it what to do, just
like a computer. The interactive setup routine takes
you through the steps needed to configure the TV:
• Select a menu language
• Search for available channels
• Set up the TV GUIDE Plus+ system
• Set the time
• Set the VCR1 channel
• Set the DVDNCR2 channel
• Set the SAT/CABLE channel
V
¥
I NTERACTIVE SETU P
I
• Make the channel list and labels
¥
15
Page 18
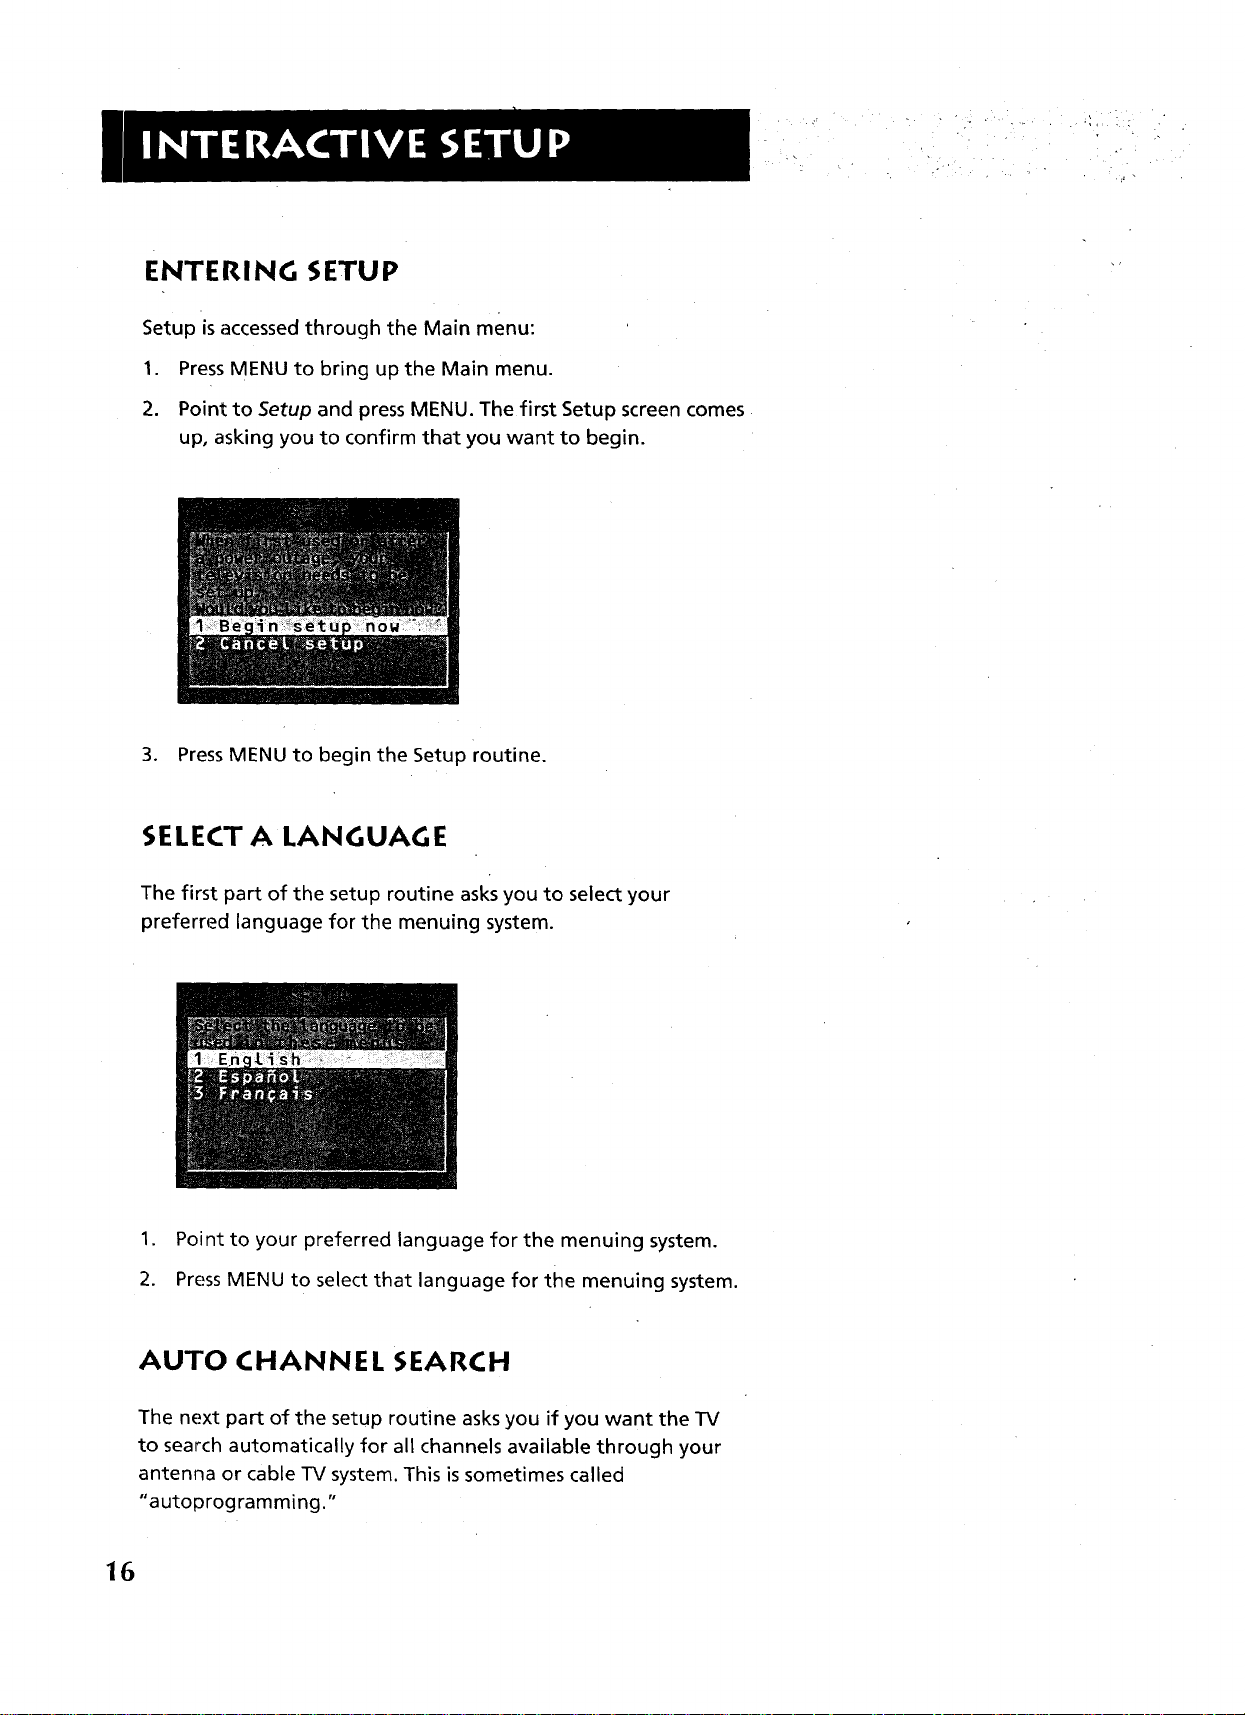
ENTERING SETUP
Setup is accessed through the Main menu:
1. Press MENU to bring up the Main menu.
2. Point to Setup and press MENU. The first Setup screen comes
up, asking you to confirm that you want to begin.
• •_r
3. Press MENU to begin the Setup routine.
SELECT A LANGUAGE
The first part of the setup routine asks you to select your
preferred language for the menuing system.
1. Point to your preferred language for the menuing system.
2. Press MENU to select that language for the menuing system.
AUTO CHANNEL SEARCH
The next part of the setup routine asks you if you want the TV
to search automatically for all channels available through your
antenna or cable TV system. This is sometimes called
"autoprogramming."
16
Page 19
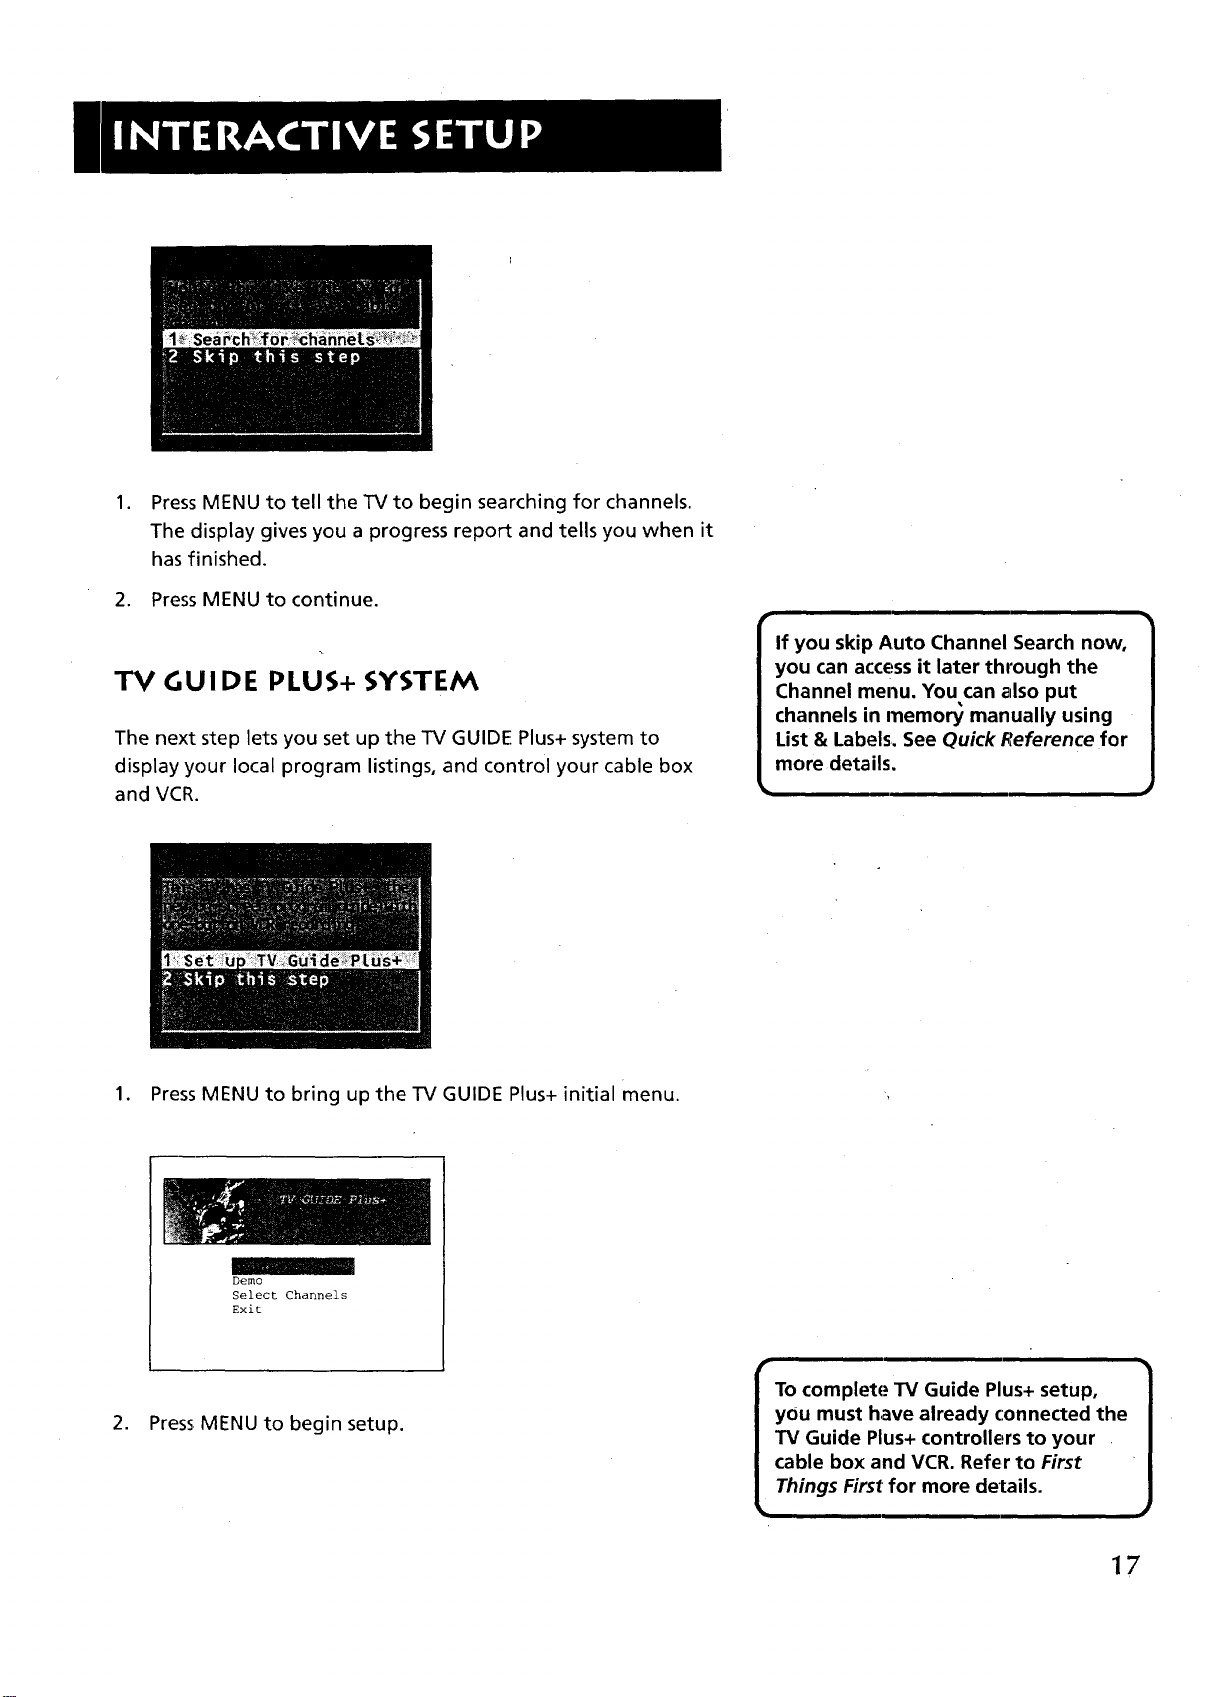
.
Press MENU to tell the TV to begin searching for channels.
The display gives you a progress report and tells you when it
has finished.
2. Press MENU to continue.
TV GUIDE PLUS+ SYSTEM
The next step lets you set up the TV GUIDE Plus+ system to
display your local program listings, and control your cable box
and VCR.
If you skip Auto Channel Search now,
you can access it later through the
Channel menu. You can also put
channels in memory manually using
List & Labels. See Quick Reference for
more details.
1. Press MENU to bring up the TV GUIDE Plus+ initial menu.
Demo
Select Channels
Exit
2. Press MENU to begin setup.
you must have already connected the
Things First for more details.
17
Page 20
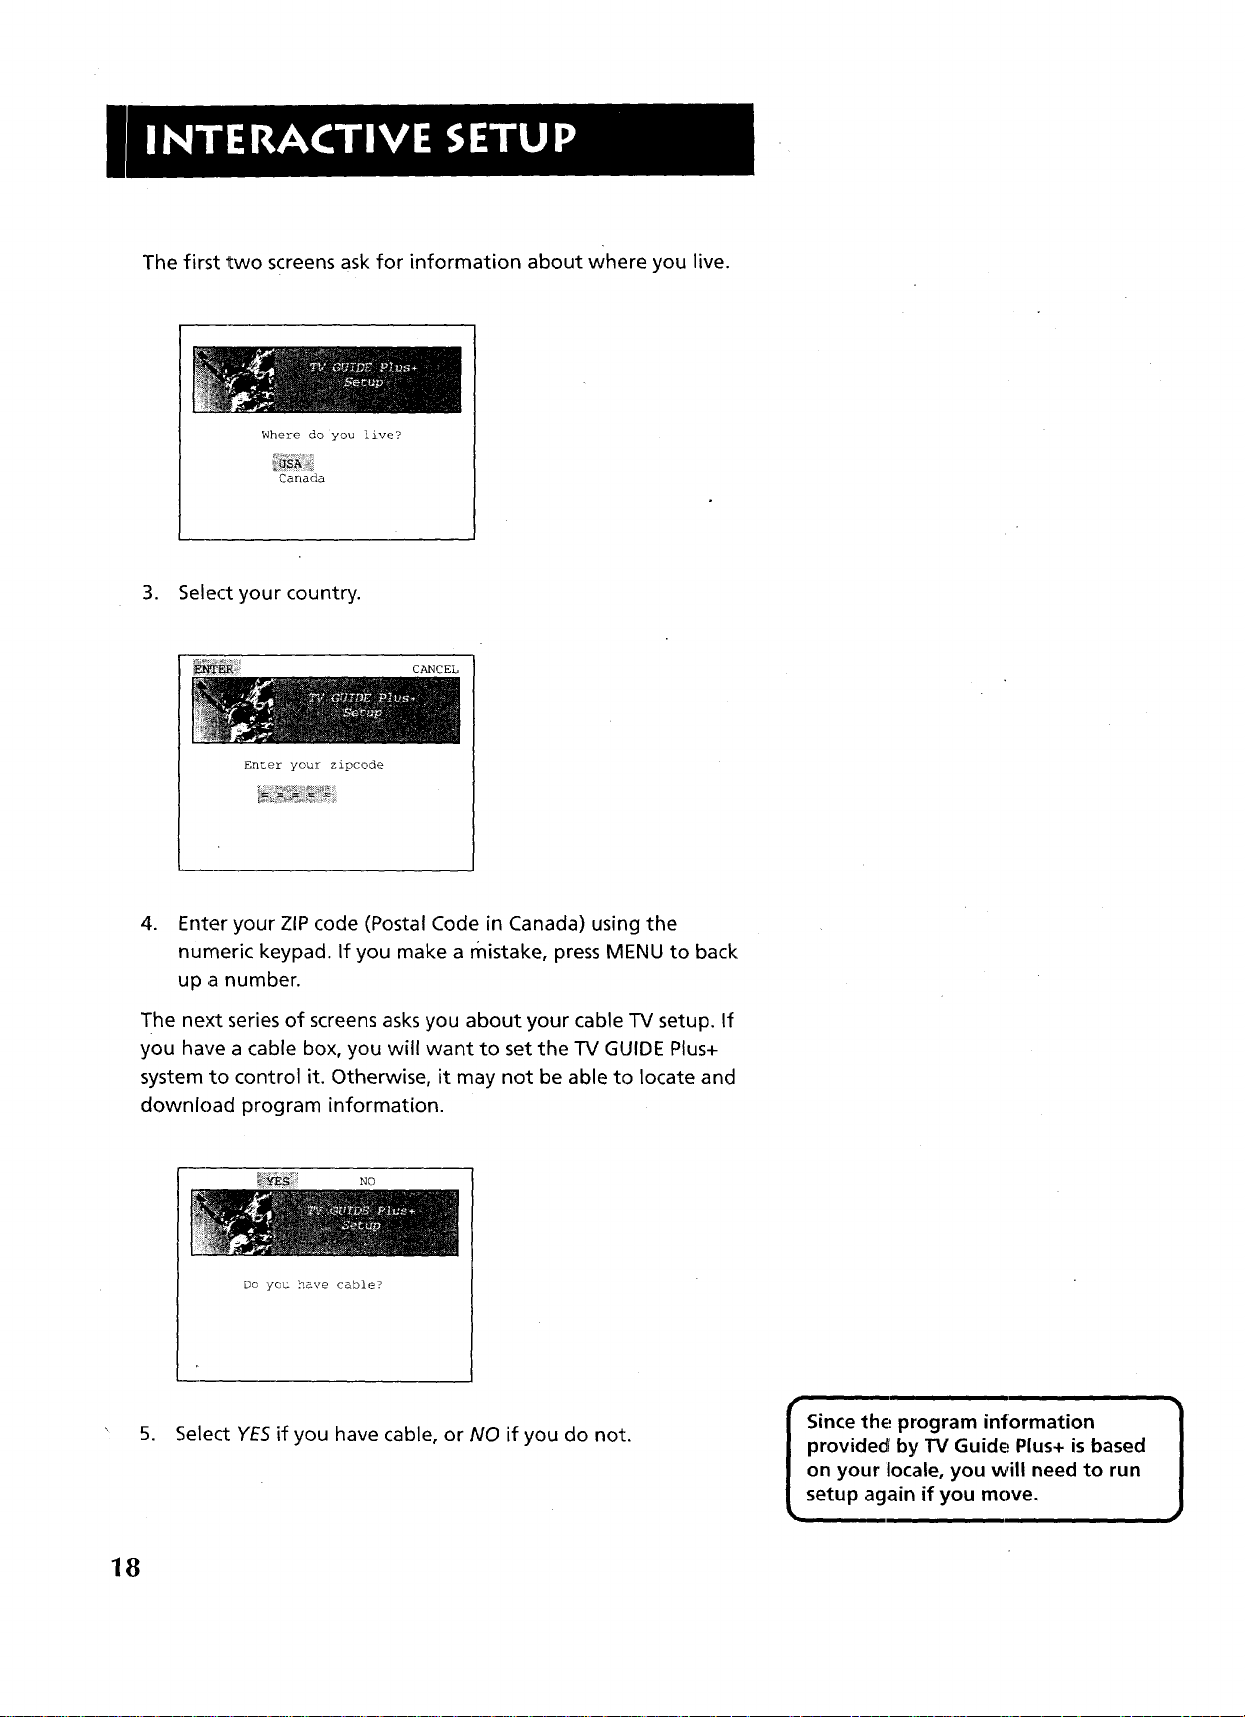
The first two screens ask for information about where you live.
Where doyou live?
Canada
3. Select your country.
Enter your zipcode
4. Enter your ZIP code (Postal Code in Canada) using the
numeric keypad. If you make a mistake, press MENU to back
up a number.
The next series of screens asks you about your cable TV setup. If
you have a cable box, you will want to set the TV GUIDE Plus+
system to control it. Otherwise, it may not be able to locate and
download program information.
Do you have cable?
5. Select YESif you have cable, or NO if you do not.
provided by TV Guide Plus+ is based
on your locale, you will need to run
Since the program infrormation ]
setup again if you move I
18
Page 21
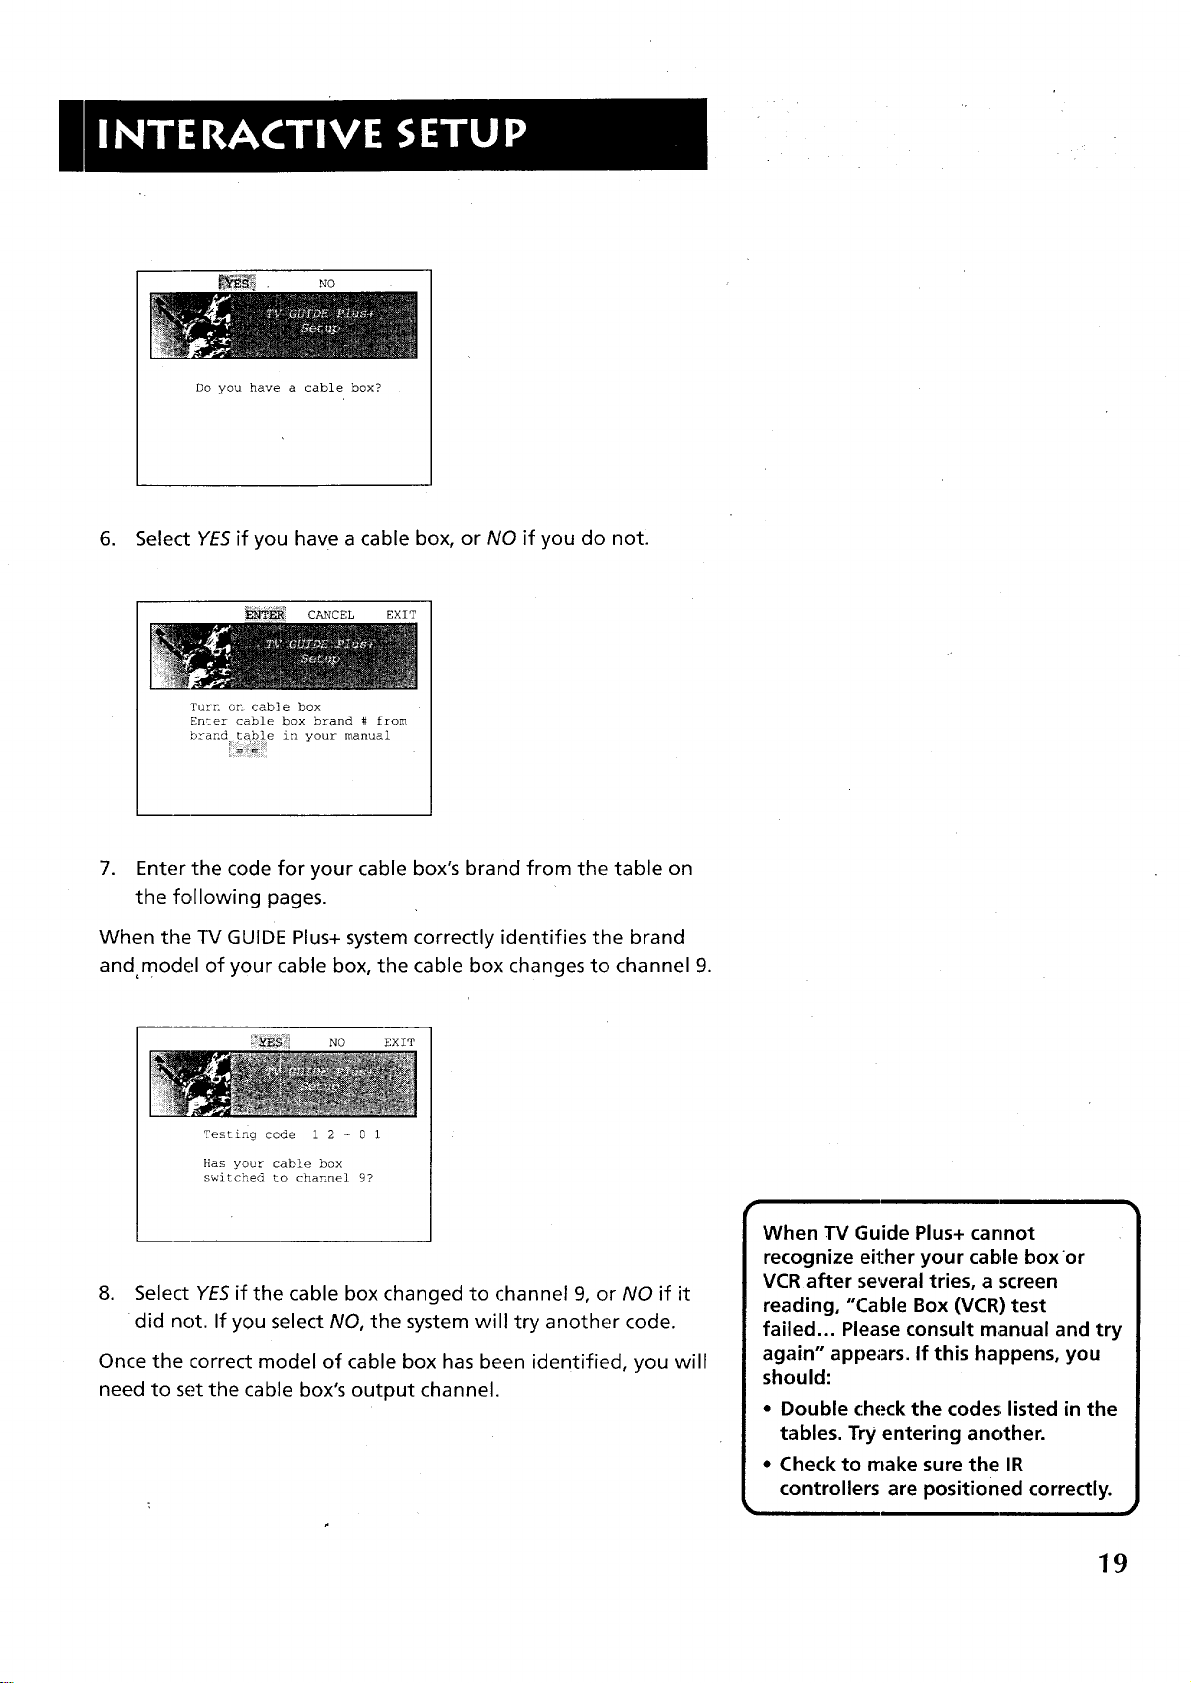
_ . NO
DO you have a cable box?
6. Select YESif you have a cable box, or NO if you do not.
_ CANCEL EXIT
Turn on cable box
Enter cable box brand # from
brand table in your manual
7. Enter the code for your cable box's brand from the table on
the following pages.
When the TV GUIDE Plus+ system correctly identifies the brand
andmodel of your cable box, the cable box changes to channel 9.
Testing code 1 2 - 0 1
Has your cable box
switched to channel 9?
8. Select YESif the cable box changed to channel 9, or NO if it
did not If you select NO, the system will try another code.
Once the correct model of cable box has been identified, you will
need to set the cable box's output channel.
When TV Guide Plus+ cannot
recognize either your cable boxor
VCR after several tries, a screen
reading, "Cable Box (VCR) test
failed... Please consult manual and try
again" appears. If this happens, you
should:
• Double check the codes listed in the
tables. Try entering another.
• Check to make sure the IR
controllers are positioned correctly.
19
Page 22
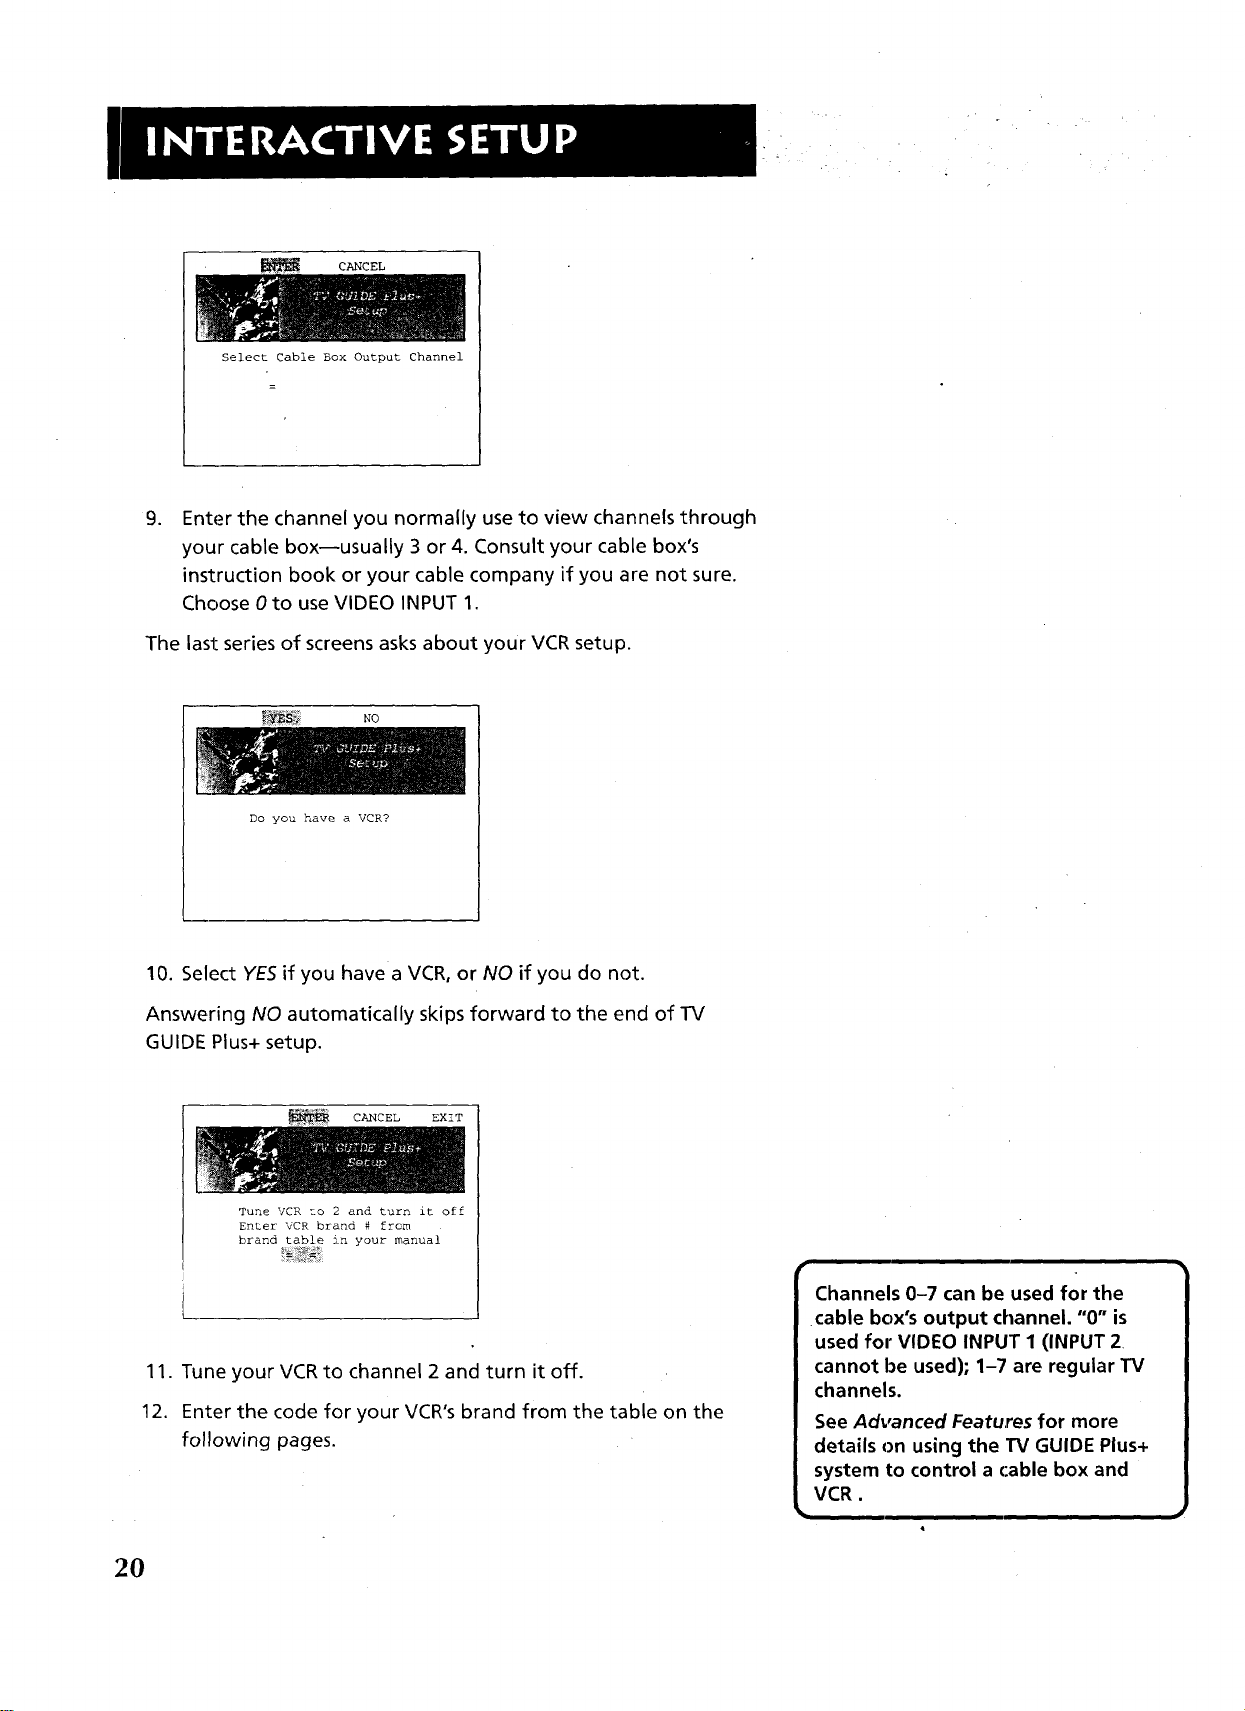
CANCEL
Select Cable Box Output Channel
.
Enter the channel you normally use to view channels through
your cable box--usually 3 or 4. Consult your cable box's
instruction book or your cable company if you are not sure.
Choose 0 to use VIDEO INPUT 1.
The last series of screens asks about your VCR setup.
_; No
DO you have a VCR?
10. Select YES if you have a VCR, or NO if you do not.
Answering NO automatically skips forward to the end of TV
GUIDE Plus+ setup.
CANCEL EXIT
Tune VCR to 2 and turn it off
Enter VCR brand # from
brand table in your manual
11. Tune your VCR to channel 2 and turn it off.
12. Enter the code for your VCR's brand from the table on the
following pages.
channels.
VCR.
2O
Page 23
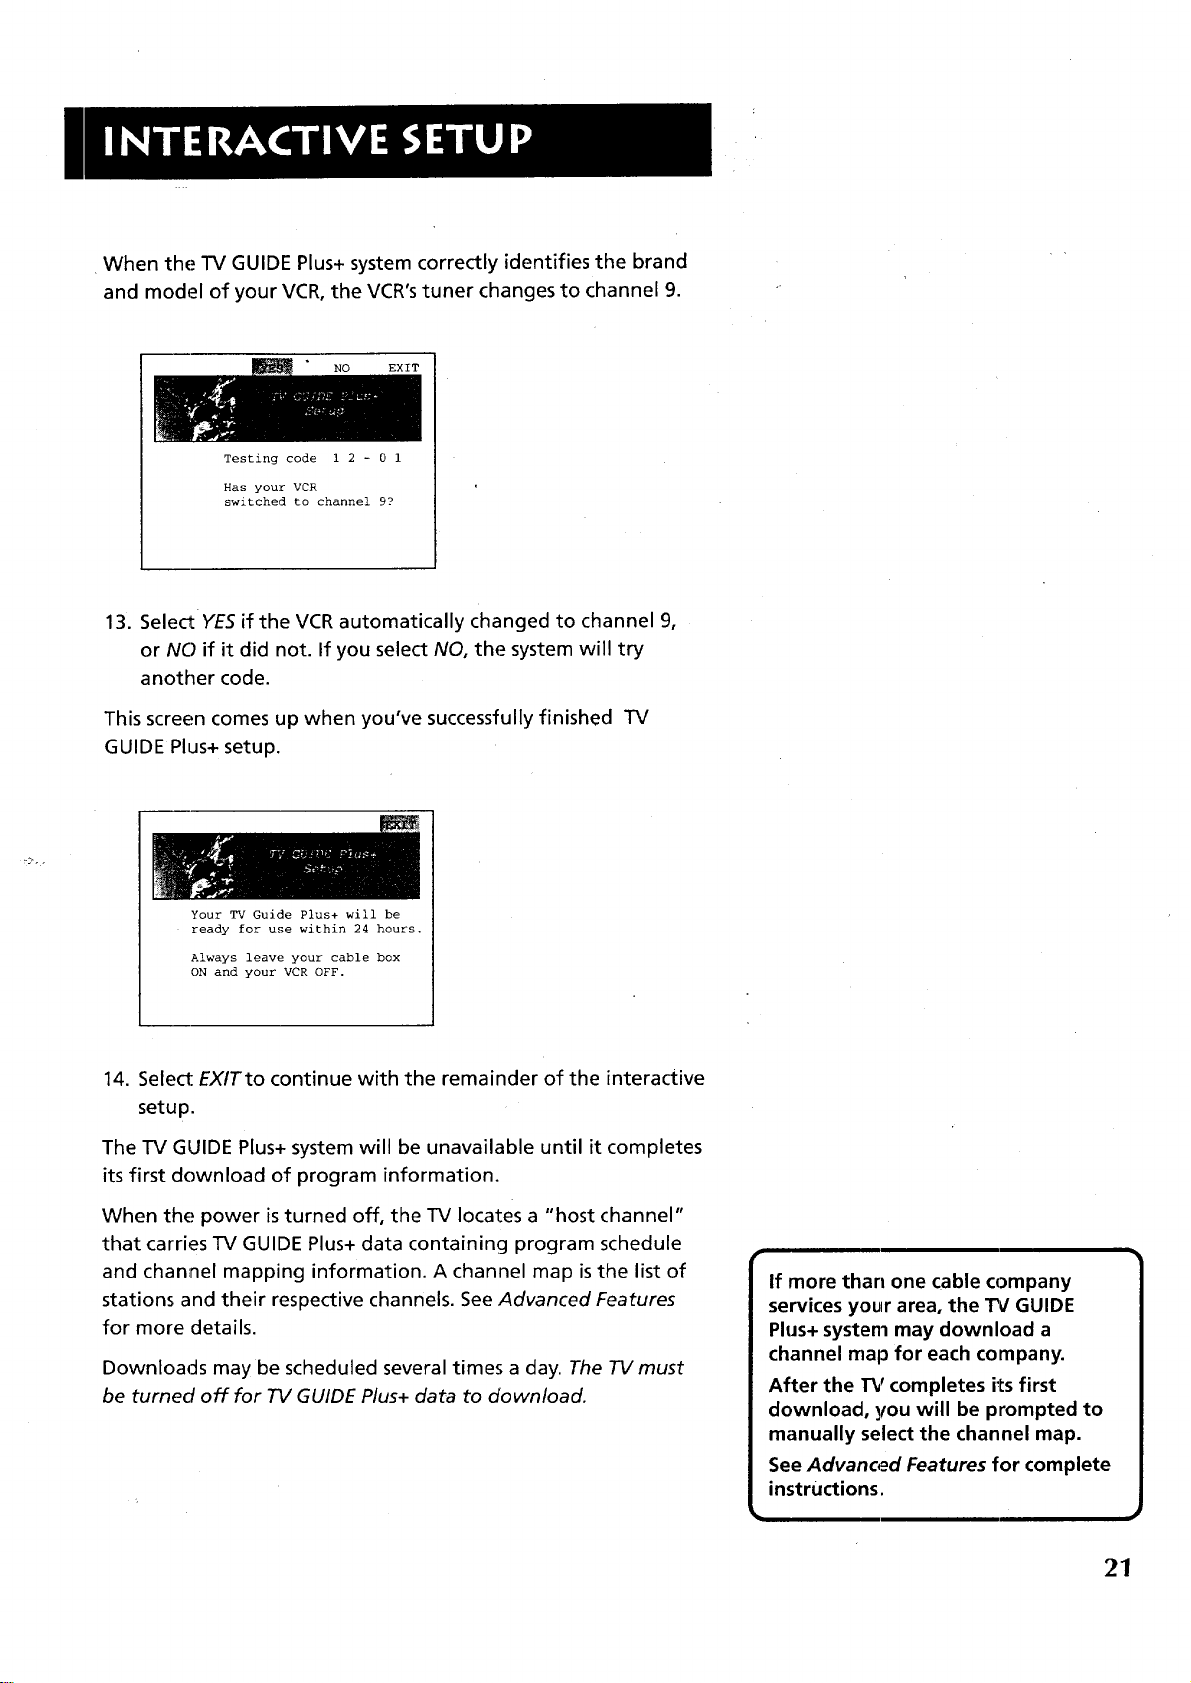
When the TV GUIDE Plus+ system correctly identifies the brand
and model of your VCR, the VCR'stuner changes to channel 9.
NO EXIT
Testing code 1 2 - 0 1
Has your VCR
switched to channel 9?
13. Select YESif the VCR automatically changed to channel 9,
or NO if it did not. If you select NO, the system will try
another code.
This screen comes up when you've successfully finished TV
GUIDE Plus+ setup.
Your TVGuide Plus+ will be
ready for use within 24 hours.
Always leave your cable box
ON and your VCR OFF.
14. Select EXITto continue with the remainder of the interactive
setup.
The TV GUIDE Plus+ system will be unavailable until it completes
its first download of program information.
When the power is turned off, the TV locates a "host channel"
that carries TV GUIDE Plus+ data containing program schedule
and channel mapping information. A channel map is the list of
stations and their respective channels. See Advanced Features
for more details.
Downloads may be scheduled several times a day. The TV must
be turned off for TV GUIDE Plus+ data to download.
If more than one cable company
services your area, the T_/GUIDE
Plus+ system may download a
channel map for each company.
After the 1_r completes its first
download, you will be prompted to
manually select the channel map.
See Advanced Features for complete
instructions.
21
Page 24
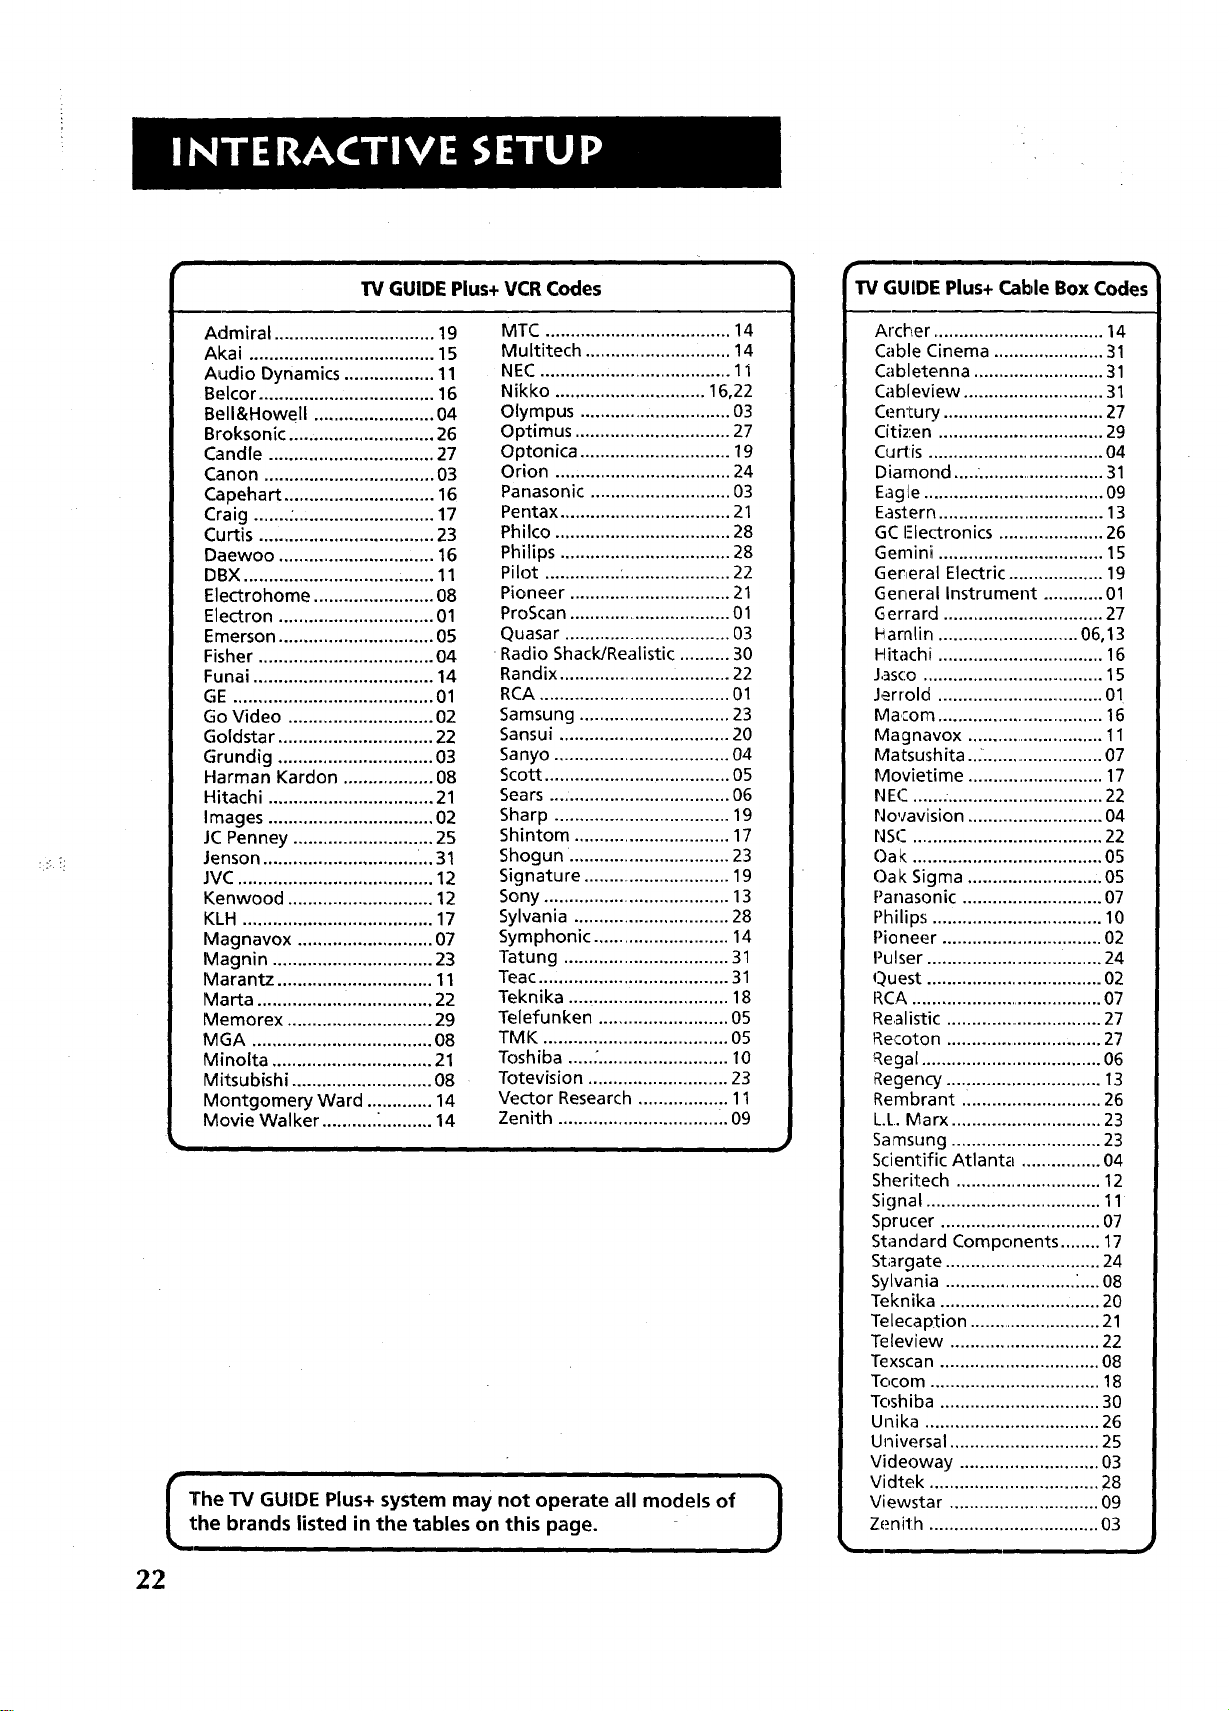
TV GUIDE Plus+ VCR Codes
TV GUIDE Plus+ Cable Box Codes
Admiral ................................ 19
Akai ..................................... 15
Audio Dynamics .................. 11
Belcor ................................... 16
Bell&Howell ........................ 04
Broksonic ............................. 26
Candle ................................. 27
Canon .................................. 03
Capehart .............................. 16
Craig ....... ;............................ 17
Curtis ................................... 23
Daewoo ............................... 16
DBX ............................... :...... 11
Electrohome ........................ 08
Electron ............................... 01
Emerson ............................... 05
Fisher ................................... 04
Funai .................................... 14
GE ........................................ 01
Go Video ............................. 02
Goldstar ............................... 22
Grundig ............................... 03
Ftarman Kardon .................. 08
Hitachi ................................. 21
Images ................................. 02
JC Penney ............................ 25
Jenson ............................... ...31
JVC ....................................... 12
Kenwood ............................. 12
KLH ...................................... 17
Magnavox ........................... 07
Magnin ................................ 23
Marantz ............................... 11
Marta ................. .................. 22
Memorex ............................. 29
MGA .................................... 08
Minolta ................................ 21
Mitsubishi ............................ 08
Montgomery Ward ............. 14
Movie Walker ........... _.......... 14
The TV GUIDE Plus+ system may not operate all models of |
he brands listed in the tables on this page. J
MTC ..................................... 14
Multitech ...................... ....... 14
NEC ..................................... 11
Nikko .............................. 16,22
Olympus .............................. 03
Optimus ............................... 27
Optonica .............................. 19
Orion ................................... 24
Panasonic ............................ 03
Pentax .................................. 21
Philco ................................... 28
Philips .................................. 28
Pilot ............... :..................... 22
Pioneer ................................ 21
ProScan ................................ 01
Quasar ................................. 03
Radio Shack/Realistic .......... 30
Randix .................................. 22
RCA ...................................... 01
Samsung .............................. 23
Sansui .................................. 20
Sanyo ................................... 04
Scott ..................................... 05
Sears .................................... 06
Sharp ................................... 19
Shintom ............................... 17
Shogun. ............................... 23
Signature ............................. 19
Sony ...................................... 13
Sylvania ............................... 28
Symphonic ........................... 14
Tatung ................................. 31
Teat..., .................................. 31
Teknika ................................ 18
Telefunken .......................... 05
TMK ..................................... 05
Toshiba ..... :.......................... 10
Totevision ............................ 23
Vector Research .................. 11
Zenith ................................ .. 09
Archer .................................. 14
Cable Cinema ...................... 31
Cabletenna .......................... 31
Cableview ............................ 31
Cen'tury ................................ 27
Citizen ................................. 29
Curl:is ................................... 04
Diamond .....".......................... 31
Eagle ..................................... 09
Eastern ................................. 13
GC I-lectronics ..................... 26
Gemini ................................. 15
Ger,eral Electric ................... 19
General Instrument ............ 01
Gerrard ................................ 27
Piarnlin ............................ 06,13
Hitachi ................................. 16
Jasco ..................................... 15
Jerrold ................................. 01
Macom ................................. 16
Magnavox ............................ 11
Matsushita.._ ......................... 07
Movietime ........................... 17
NEC ...... ................................ 22
Novavision ........................... 04
NS(- ...................................... 22
Oa/<....................................... 05
Oak Sigma ........................... 05
Panasonic ............................ 07
Philips .................................. 10
Pioneer ................................ 02
Pulser ................................... 24
Quest ................................... 02
RCA ....................................... 07
Realistic ................................ 27
Recoton ................................ 27
Regal .................................... 06
Regency .... ........................... 13
Rembrant ............................ 26
L.L. Marx .............................. 23
Samsung .............................. 23
Scientific Atlanta ................ 04
Sheritech ............................. 12
Signal ................................... 11
Sprucer ................................ 07
Standard Components ........ 17
Stargate ............................... 24
Sylvania .......................... _....08
Teknika ................................. 20
Telecaption ........................... 21
Teleview .............................. 22
Texscan ................................ 08
Tocom .................................. 18
Toshiba ................................ 30
Unika ................................... 26
Universal .............................. 25
Videoway ............................ 03
Vidtek .................................. 28
Viewstar .............................. 09
Zenith ................................... 03
22
Page 25

SET THE TIME
The next step lets you set the time of day.
1. Press MENU to bring up the Set Time control panel.
I
.
Use the left and right arrows to point to the hour and minutes
spaces. Use the up and down arrows to scroll through the
numbers and change from AM to PM.
3. Press MENU to continue.
Page 26
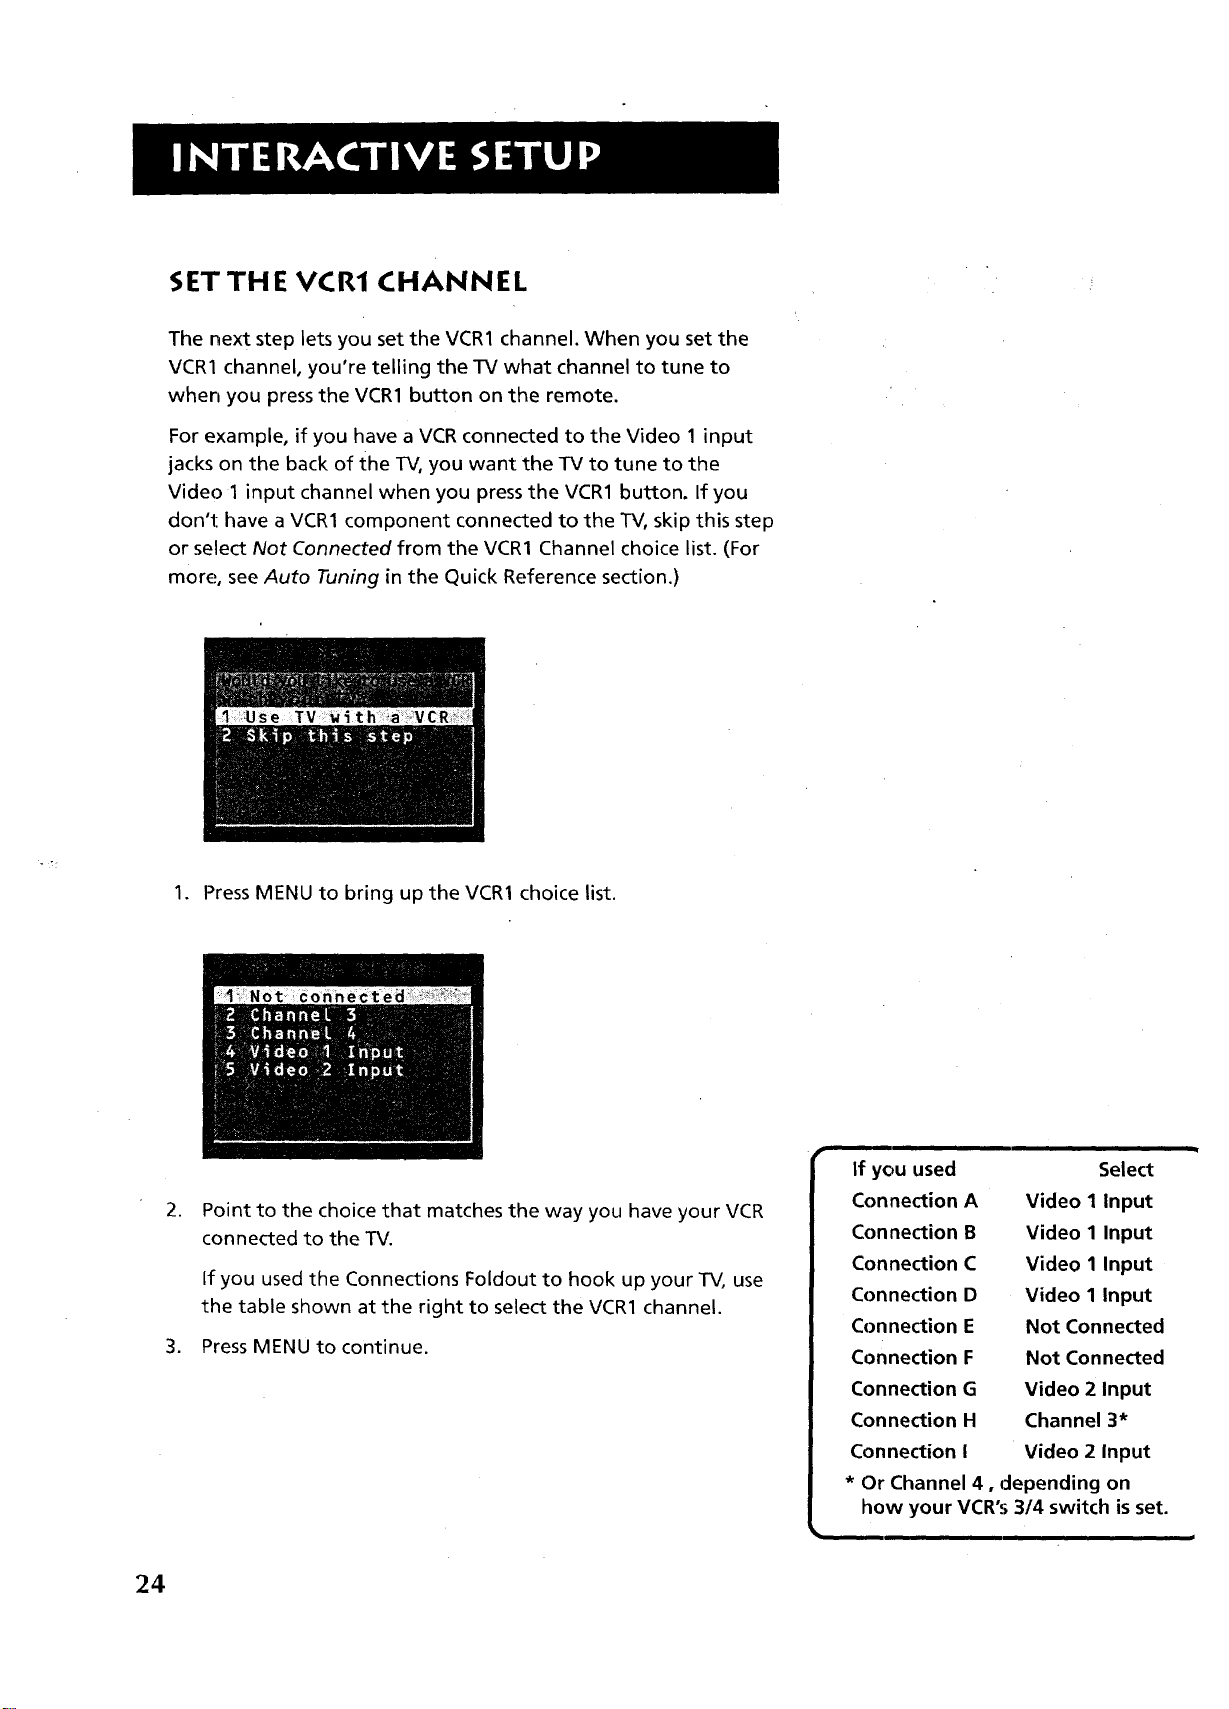
SET THE VCR1 CHANNEL
The next step lets you set the VCR1 channel. When you set the
VCR1 channel, you're telling the TV what channel to tune to
when you press the VCR1 button on the remote.
For example, if you have a VCR connected to the Video 1 input
jacks on the back of the TV, you want the TV to tune to the
Video 1 input channel when you press the VCR1 button. If you
don't have a VCR1 component connected to the TV, skip this step
or select Not Connected from the VCR1 Channel choice list. (For
more, see Auto Tuning in the Quick Reference section.)
1. Press MENU to bring up the VCR1 choice list.
.
Point to the choice that matches the way you have your VCR
connected to the TV.
If you used the Connections Foldout to hook up your TV, use
the table shown at the right to select the VCR1 channel.
3. Press MENU to continue.
r
If you used
J
Connection A
Connection B
Connection C
Connection D
Connection E
Connection F
Connection G
Connection H
Connection I
* Or Channel 4, depending on
how your VCR's 3/4 switch is set.
Video I Input
Video 1 Input
Video 1 Input
Video I Input
Not Connected
Not Connected
Video 2 Input
Channel 3*
Video 2 Input
Select
24
Page 27

SETTHE DVD/VCR2 CHANNEL
The next step lets you set the DVD/VCR2 channel. When you set
the DVD/VCR2 channel, you're telling the TV what channel to
tune to when you press the DVD-VCR2 button on the remote.
For example, if you have a DVD player connected to the Video 2
input jacks on the back of the TV, you want the TV to tune to
the Video 2 input channel when you press DVDoVCR2. If you
don't have a DVDoVCR2 component connected to the TV, skip
this step or select Not Connected from the DVD/VCR2 Channel
choice list. (For more, see Auto Tuning in the Quick Reference
section.)
1. Press MENU to b[ingup the DVD/VCR2 choice list.
2.
Point to the choice that matches the way you have your DVD
player or second VCR connected to the TV.
If you used the Connections Foldout to hook up your TV, use
the table at right to select the DVD/VCR2 channel.
3. Press MENU to continue.
If you used Select
Connection A Not Connected
Connection B Not Connected
Connection C Video 2 input
Connectiion D Channel 3*
Connection E Video 1 Input
Connectiion F Not Connected
Connectiion G Not Connected
Connection H Video 2 Input
Connectiion I Channel 3*
* Or Channel 4, depending on how
your VCR's 3/4 switch is set.
_'bt"
Page 28

SET THE SAT/CABLE CHANNEL
The next step lets you set the SAT/CABLE channel. When you set
the SAT/CABLE channel, you're telling the TV what channel to
tune to when you press the SAT-CABLE button on the remote.
For example, if you have a cable box connected to the Antenna
jack on the back of the TV, and you usually tune your TV to
channel 3 to see cable stations, you want the TV to tune to
channel 3 when you press SAT-CABLE. If you don't have a
satellite receiver or cable box connected to the TV, skip this step
or select Not Connected from the SAT/CABLE Channel choice list.
(For more, see Auto Tuning in the Quick Reference section.)
1. Press MENU to bring up the SAT/CABLE choice list
Important:
If you |lave both a satellite receiver
and a cable box con,nected to the TV...
...The remote cannot control both a
cable box and the satellite receiver.
The chart details how to set the
SAT,CABLE button to control the
satellite receiver. You must then use
your cable box remote to control the
cable box. You may, however, prefer
to use the satellite receiver remote
for satellite programming, and set
your SAT=CABLE button to control
your cable box. It's your choice.
,
Point to the choice that matches the way you have your
satellite receiver or cable box connected to the TV.
If you used the Connections Foldout to hook up your TV, use
the table at the right to select the SAT/CABLE channel.
,
Press MENU to complete the Setup routine and return to TV
viewing.
If you used With Cable Box
Select
Connection A Channel 3*
Connection B Channel 3*
Conne_ction C Channel 3*
Connection D Channel 3*
Connection E Channel 3*
If you used With Satellite
Receiver Select '
Connection F Video 1 Input
Connection G Video 1 Input
Connection H Video 1 Input
Connection I Video 1 Input
* Or Channel 4, depending on how
your VCR's 3/4 switch is set.
Page 29

LABEL THE CHANNELS
The next step lets you make your channel list and label your
•channels. (For more, see List and Labels in the Quick Reference
section.)
1. Press MENU to bring up the List and Labels control panel.
.
Use the left and right arrows to point to the three different
areas of the control panel (called "fields").
.
Use the up and down arrows to scroll through the numbers
and letters and select Yesor No in the Normal List field. You
may ,wish to refer to the call letters listed in your newspaper's
TV section for ideas on labelling the channels.
,
Repeat this process for each of your channels. Then press
MENU to continue. The TV can store up to 27 labels in
memo_.
Use the CH ^ (channel up) or CH v
(channel down) buttons to change
channels in the Chan # field. This
works even if you're not in the Chan
# field. Or, enter the channel number
directly using the number buttons on
the universal remote. To enter a
number greater than 99, press and
hold "1" to enter the hundreds digit,
then press the two remaining
numbers.
The list and labels feature can also be
accessed from the Channel menu.
Because this procedure can be time
consuming, feel free to skip this step
and come back to it later.
Page 30

What Now?
Now that you've finished the interactive setup, you can sit back,
relax, and enjoy the TV. Or...
Program the Remote
Since you've gone this far, you can take a few minutes to
program the remote to control your VCR, DVD player, laserdisc
player, and other component. To find out how to program the
remote, go to the next section.
28
Page 31

IF YOU HAVE A VCR OR OTHER
COMPONENT..,
The universal remote can be programmed to control
most brands of remote controllable VCRs, satellite
receivers, DVD players and cable boxes. If you have
an RCA, GE, or ProScan component, you probably
don't need toprogram it at all---other
manufacturers' brands need to be programmed.
NOW WATCH SOME TV!
Once you've programmed the remote, you will have
completed all four setup sections. Now you can sit
back and enjoy the TV. If you want to know more
about the different parts of the "IV, see the next
section, Tour of the TV. Refer to the other sections
and appendices as needed.
V
V
V
PROG RAMMI NG -rH E REMOTE
Page 32

PROGRAMMING THE REMOTE
The universal remote can be programmed to control most
brands of remote controllable VCRsand cable boxes. The remote
is already programmed to control most RCA0GE and ProScan TVs
VCRs, DVD players, laserdisc players and satellite receivers. Other
manufacturers' brands need to be programmed.
PROGRAMMING TH E REMOTE TO CONTROL
A VCR
To determine whether the universal remote needs to be
programmed, turn the VCR on, point the remote at the VCR,
and pressthe VCR1 button. Then press POWER or CH ^ (channel
up) or CH v (channel down) to see if the VCR responds to the
remote commands. If not, the remote needs to be programmed.
-, •" '" r
Follow these steps to program your universal remote to control
your VCR:
.
Turn on the VCR to be programmed.
2.
Look up your VCR brand and code number(s) on the code list
on the next page.
,
Press and hold the VCR1 button on the remote.
4.
Enter the two-digit code from the code list.
5.
Release VCR1 then press POWER to see if the VCR responds
1:othe remote commands. If it doesn't, try pressing VCR1 and
POWER to see if the VCR responds.
.
Repeat these steps using the next code listed for your brand,
until the VCR responds to the remote commands.
10 2G_) 30
4 0 50 60
oO
You'll use these buttons when you
program the remote to control any
devices.
This remote may not operate all
models;of the brands that are shown.
Use the codes shown at right or on
the sheet packed in with your remote.
3O
To program the DVDoVCR2 button to
control a second VCR, follow these
steps but use the DVD,VCR2 button
instead of the VCR1 button.
Page 33

r
Universal Remote VCR Codes
Admiral ................................. 06,79
Aiwa ........................ ................. .. 15
Akai ................... 03,17,22,23,63,66
Audio Dynamics .................... 14,16
Bell&Howell ............................... 02
Broksonic ................................... 10
Candle ........................ 07,09,13,44,
.......................................... 45,46,52
Cannon .................................. 08,53
Capehart .................................... 01
Citizen ........................ 07,09,13,44,
.......................................... 45,46,52
Colortyme ................................... 14
Craig ...................................... 07,12
Curtis-Mathes ............ 00,07,08,14,
........................... 15,44,46,53,64,67
Daewoo ....................... 13,45,52,76
DBX ....................................... 14,16
Dimensia .................................... 00
Dynatech .................................... 15
Electrohome .............................. 27
Emerson ...... 08,09,10,13,15,20,23,
.......................... 27,34,41_42,47,49,
........................... 57,62,65,67,68,70
Fisher ............ 02,12,18,19,43,48,58
Funai .......................................... I 5
GE ...................... 00,07,08,32,37,53
Goldstar ...................... 09,14,46,60
Harman Kardon ......................... 14
Hitachi ......................... 05,15,35,36
Instant Replay ............................ 08
JCL .............................................. 08
JC Penney .............. 02,05,07,08,14,
................................ 16,30,35,51,53
JVC ..................... 02,14,16,30,46,74
Kenwood .......... 02,14,16,30,44,46
KLH ............................................. 73
Lloyd ........................................... 15
Logik ..................................... -.... 31
Magnavox ................... 08,29,53,56
Marantz ................ 02,08,14,16,29,
...................................... 30,44,46,61
Maria .......................................... 09
MEI .............................................. 08
Memorex ..................... 08,09,12,15
MGA ....................................... 04,27
Midland ....................................... 32
Minolta .................................. 05,35
Mitsubishi .............. 04,05,27,35,40
Montgomery Ward .................... 06
MTC ....................................... : 07,15
Multitech .................... 07,15,31,32
NEC ..... 02,14,16,30,44,46,59,61,64
Panasonic .................... 08,53,75,77
Pentax .............................. 05,35,44
Pentex Research + ..................... 46
Philco ........................... 08,29,53,56
Philips .................................... 08,29
Pioneer ............................. 05,16,50
Portland ........................... 44,45,52
ProScan ...................................... 00
Quartz ........................................ 02
Quasar ................................... 08,53
Radio ShacklRealistic ...... 02,06,08,
...................... 09,12,15,19,27,43,53
RCA ..... 00,05,07,08,28,35,37,54,69
Samsung ................. 07,13,22,32,42
Sansui .................................... 16,71
Sanyo ..................................... 02,12
Scott ....................... 04,13,41,49,68
Sears ... 02,05,09,12,18,19,35,43,48
Sharp ...................... 06,24,27,39,45
Shintom ....................... 17,26,31,55
Signature ................................... I 5
Sony ................... ............... 17,26,38
Sylvania .................. 08,15,29,53,56
Symphonic ................................. 15
Tandy ..................................... 02,15
Tashiko ....................................... 09
Tatung ........................................ 30
Teac .................................. 15,30,69
Technics ...................................... 08
Teknika ........................ 08,09,15,21
Toshiba ................... 05,13,19,48,49
Totevision .............................. 07,09
TMK ............................................ 67
Unitech ....................................... 07
Vector Research ............... 14,16,44
Victor .......................................... 16
Video Concepts ................ 14,16,44
Videosonic .................................. 07
Wards .................... 05,06,07,08,09,
...................... 12,13,15,25,27,3'1,35
Yamaha .................. 02,14,16,30,46
Zenith ..................... 11,17,26,72,79
31
Page 34

PROGRAMMING TH E REMOTE TO CONTROL
A DVD PLAYER OR LASERDISC PLAYER
The remote's DVDoVCR2 button is preprogrammed to control the
primary functions of an RCA, GE, or ProScan DVD player. If you
would like this button to control a device other than a DVD
player; you may program the remote to control a laserdisc player
or VCR. To program the DVDoVCR2 button to control a device,
use the DVD player or laserdisc player codes at the right or the
VCR codes on the previous page.
GE 78
ProScan ...................................... 78
I DVD Player Codes 1
RCA .............................................. 78
i
1. Turn on the DVD player, laserdisc player or VCR.
2. Look up your brand and its code number(s) on the code lists.
3. Piressand hold the DVD.VCR2 button on the remote.
.
Enter the two-digit code from the code list.
5.
Release the DVDoVCR2 button and press POWER or another
button to see if the device responds to the remote
commands.
.
Repeat these steps using the next code listed for your brand,
until the device responds to the remote commands.
PROGRAMMING TH E REMOTE TO CONTROL
AN RCA AUDIO DEVICE:
Your remote controls only RCA audio equipment such as an
audio receiver or amplifier--it does not control other brands of
audio equipment. Also, the remote may need to be programmed
for your equipment. This remote may not operate all models of
the brands that are shown at right. Use the codes below or on
the :sheet packed in with your remote.
1. Turn on the component to be programmed.
Pior_eer .................................. 33,37
ProScan ................................. 33,37
I Laserdisc Player Codes 1
RCA ......................................... 33,37
Audio Codes
RCA/Dimensia
AM/FM ....................................... 03
CD ................................................ 07
Tape .............................. ................ 06
Phono ......................................... 05
Aux ............................................. 04
2. Look up your brand and its code number(s) on the code list.
3. Press and hold the AUDIO button.
.
Enter the two-digit code from the code list.
5.
Release the AUDIO button and press POWER or CH ^
(channel up) or CH v (channel down) to see if the audio
device responds to the remote commands.
.
Repeat these steps using the next code listed for your brand
until the audio device responds to the remote commands.
32
Page 35
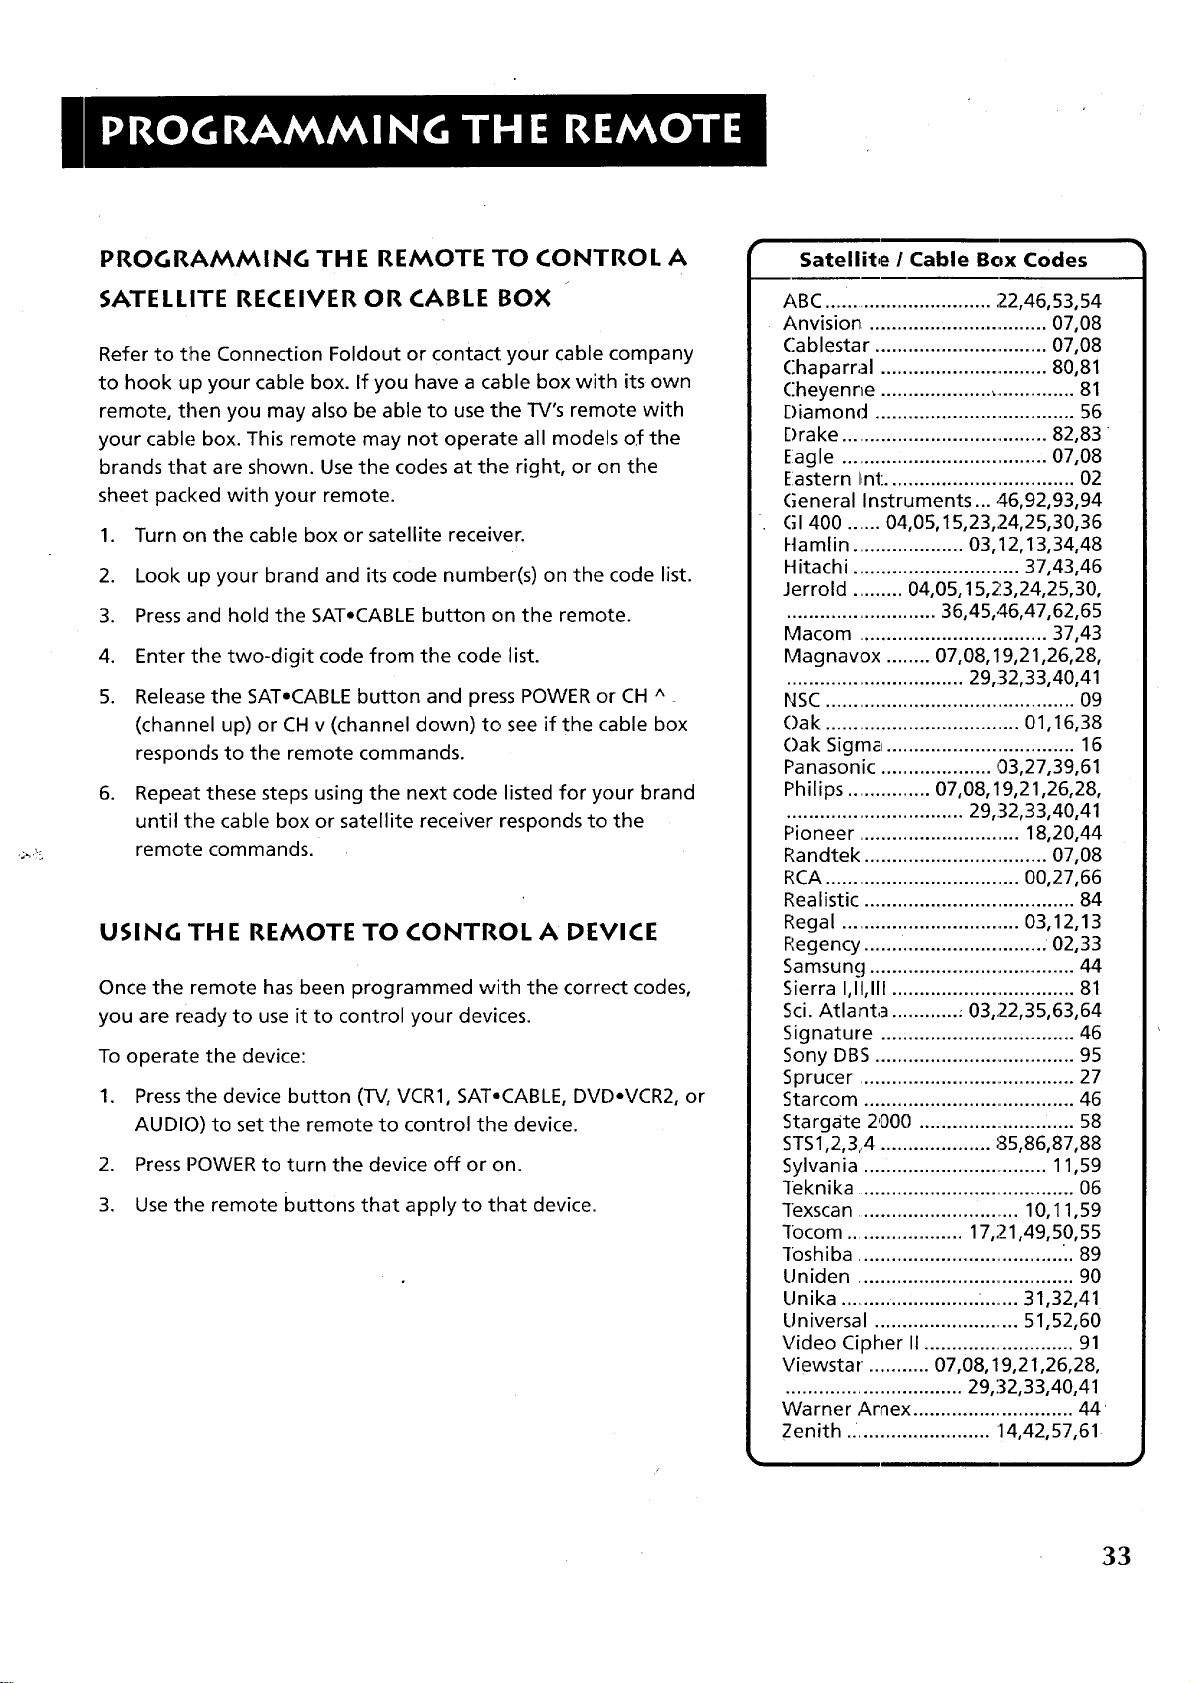
PROGRAMMING THE REMOTE TO CONTROL A
r
Satellite / Cable Box Codes
SATELLITE RECEIVER OR CABLE BOX
Refer to the Connection Foldout or contact your cable company
to hook up your cable box. If you have a cable box with its own
remote, then you may also be able to use the TV's remote with
your cable box. This remote may not operate all models of the
brands that are shown. Use the codes at the right, or on the
sheet packed with your remote.
1. Turn on the cable box or satellite receiver.
2. Look up your brand and its code number(s) on the code list.
3. Press and hold the SAT-CABLE button on the remote.
.
Enter the two-digit code from the code list.
5.
Release the SAT.CABLE button and press POWER or CH ^
(channel up) or CH v (channel down) to see if the cable box
responds to the remote commands.
.
Repeat these steps using the next code listed for your brand
until the cable box or satellite receiver responds to the
remote commands.
USING THE REMOTE TO CONTROL A DEVICE
Once the remote has been programmed with the correct codes,
you are ready to use it to control your devices.
To operate the device:
1. Pressthe device button (TV, VCR1, SAT.CABLE, DVD-VCR2, or
AUDIO) to set the remote to control the device.
2. Press POWER to turn the device off or on.
3. Use the remote buttons that apply to that device.
ABC ............................... 22,46,53,54
Anvision .............. .................... 07,08
Cablestar ................................ 07,08
Chaparral ............................... 80,81
Cheyenne .................................... 81
Diamond ..................................... 56
r)rake ...................................... 82,83
Eagle ..................................... 07,08
Eastern I,nt .................................. 02
General Instruments ... ,46,92,93,94
GI 400 ...... 04,05,15,23,;24,25,30,36
Hamlin .................... 03,12,13,34,48
Hitachi .............................. 37,43,46
Jerrold ......... 04,05,15,23,24,25,30,
........................... 36,45,,46,47,62,65
Macom .................................. 37,43
Mag navox ........ 07,08,19,21,26,28,
................................ 29,;32,33,40,41
NSC ............................................. 09
Oak ................................... 01,16,38
Oak Sigma ................................... 16
Panasonic .................... 03,27,39,61
Philips ............... 07,08,19,21,26,28,
................................ 29,132,33,40,41
Pioneer ............................. 18,20,44
Randtek ................................. 07,08
RCA ................................... 00,27,66
Realistic ...................................... 84
Regal ................................. 03,12,13
Regency ................................. 02,33
Samsung ...................................... 44
Sierra I,II,III .................................. 81
Sci. Atlanta ............ .03,22,35,63,64
Signature .................................... 46
Sony DBS ..................................... 95
Sprucer ........................................ 27
Starcom ....................................... 46
Stargate 2000 ............................. 58
STSI,2,3,.4 .................... :35,86,87,88
Sylvania .................................. 11,59
leknika ......................................... 06
Texscan ............................... 10,11,59
]ocom ..................... 17,21,49,50,55
]oshiba ........................................ 89
Uniden ........................................ 90
Unika ......................... ........ 31,32,41
Universal .......................... 51,52,60
Video Cipher II ........................... 91
Viewstar. .......... 07,08,19,21,26,28,
................................ 29,!32,33,40,41
Warner Ar_ex ............................. 44'
Zenith .......................... 14,42,57,61
33
Page 36

L
Page 37

A PICTURE BOOK TOUR
This section talks about the TV's main parts (at least
the parts you'll actually use):
• The remote control
• The back panel
• The front panel
• The channel marker
35
Page 38

REMOTE BUTTONS
POWER When in TV mode, turns off the TV. In VCR mode, and if
programmed, turns on and off most VCRs.
VCR1 If programmed, turns on VCR and puts the remote in VCR
mode. Also turns on the TV.
SAT,CABLE If programmed, turns on satellite receiver or cable
box. Puts the remote in SAT.CABLE mode. Also turns on the TV.
DVD-VCR2 If programmed, turns on DVD player or second VCR
or laserdisc player. Puts the remote in DVD-VCR2 mode. Also
turns on the TV.
AUDIO If programmed, turns on RCA audio component and puts
the remote in audio mode.
TV Turns on the TV and puts the remote in TV mode. Also
displays channel information.
REVERSE, PLAY, FORWARD, REC*VCR+, STOP, PAUSE If
programmed, provides transport control for some remote-
controllable VCRs, DVD players, laserdisc players, tape decks, and
CD players. Pressing REC-VCR+ when using the TV GUIDE Plus+
system sets the VCR to record a program.
MOLl- or VOL + Decreases or increases the TV's volume.
CH " or CH v Scans up or down through the current channel list.
Press once to change the channel up or down; press and hold to
continue changing channels.
INFO Brings up channel information. Press repeatedly to see
detailed program information, if available.
© O
DVDoVCR2 AUDIO
R VCR1 SAT_CABLE TD
© Q
REVERSE PLAY FORWARD
REC'_VCR÷ STOP PAUSE
r-.-1 _______1rT_
INFC) CH÷ SkIP
o
MUtE GO BACK
FAV°INPUT ANTENNA
0 00J 0
CLEAR , RESET
PIP _ SOUND
<> <>
SWAP q MOVE [_ CHCTRL
CHo
GUI£,E
©
SKIP Press once before changing channels and the TV will wait
30 seconds before returning you to the original channel. Press
repeatedly to add more time.
MUTE Reduces the TV's volume to its minimum level. Press
again to restore the volume.
GO BACK Returns you to the previous channel.
(0-9) Number Buttons Enters channel numbers and time
settings directly though the remote control. To enter a two-digit
channel, press the two digits. To enter a three-digit channel,
press and hold the first digit, then add the second two. Example:
to tune to channel 123, press and hold 1, press 2, then press 3.
36
section, Programming the Remote.
I For more details, see the previous
Page 39

FAV°INPUT In TV mode, press to toggle through the available
input sources (VID1, VID2, previous channel). In SAT mode, press
to select available channel lists.
ANTENNA Functions as TV/VCR button in VCR mode and TV/
receiver button in SAT,CABLE mode.
CLEAR Removes any menu or display from the screen and
returns you to TV viewing.
MENU.SELECT Brings up the Main menu. When in the menu
system, selects highlighted items or returns you to the previous
menu. When in VCR mode, it functions as a PROGRAM button.
RESET Resets picture quality controls to the Bright Lighting
Picture Control Preset. Point and select to choose a different
Picture Control Preset.
MOVE (Arrows) Used to point to different items in the menu
system. Also used to adjust the menu controls. Also move the PIP
window when no menus are on the screen.
PIP Brings up the small picture-in-picture window. Press again to
remove the PIP window.
SOUND Press once to display theaudio processor control panel.
Point and select to choose a different processor or press CLEAR to
exit.
SWAP Swaps the main picture with the PIPwindow.
CH CTRt. Selects the picture window, (that is, the main or PIP
window) that ischanged by the CH ^ (channel up) or CH v
(channel down) buttons.
GUIDE Brings up TV GUIDE Plus+ menus. In SAT°CABLE mode
brings up available on-screen guides.
Page 40

BACK PANEL
INPUT 1 Lets you connect a video component such as a VCR,
satellite receiver, DVD player or laserdisc player.
L/MONO Provides left audio connection. Or, if you are
connecting a mono component, use the L/MONO input. The
left audio connector is usually white.
RIGHT Provides right audio connection. The right audio
connector is usually red.
VIDEO Provides video connection. The video connector is
usually yellow.
S-VIDEO Lets you connect a component with S-Video
capability, such as an S-video satellite receiver, DVD player or
VCR. When using S-Video, make sure to connect the three
audio/video cables as well as the S-Video connector.
INPUT 2 Provides a connection for a second video component
such as a VCR, satellite receiver, DVD player or laserdisc player.
IJMONO Provides left audio connection. Or, if you are
connecting a mono component, use the L/MONO input. The
left audio connector is usually white.
RIGHT Provides right audio connection. The right audio
connector is usually red.
VIDEO Provides video connection. The video connector is
usually yellow.
ANT (Antenna) Provides connection to a home antenna or cable
TV system.
If you are connecting a component to
the VIDEO 1 INPUT and you are using
S-Video, remember to connect the
regul=ar VIDEO 1 INPUT video cable as
well.
Hooking up components isn't hard,
but double-checking the cable and
jack connections may help you avoid
problems.
38
Page 41

AUDIO OUTPUT Provides variable-controlled or fixed-level
stereo audio output.
Variable output is ideal when connecting the TV to an
amplifier that does'not have its own volume control or
remote control.
Fixed output is ideal when connecting to an AN receiver or
amplifierthat has its own remote control.
You can choose the type of audio output by selecting the Audio
Output & Speakers control panel in the Audio menu.
VCR CONTROL Lets you connect the TV Guide Plus+ controller,
which allows direct control of your cable box and VCR.
the TV, use the left (L) AUDIO OUTPUT
To connect an amplified subwoofer to
jack.
_q
Page 42
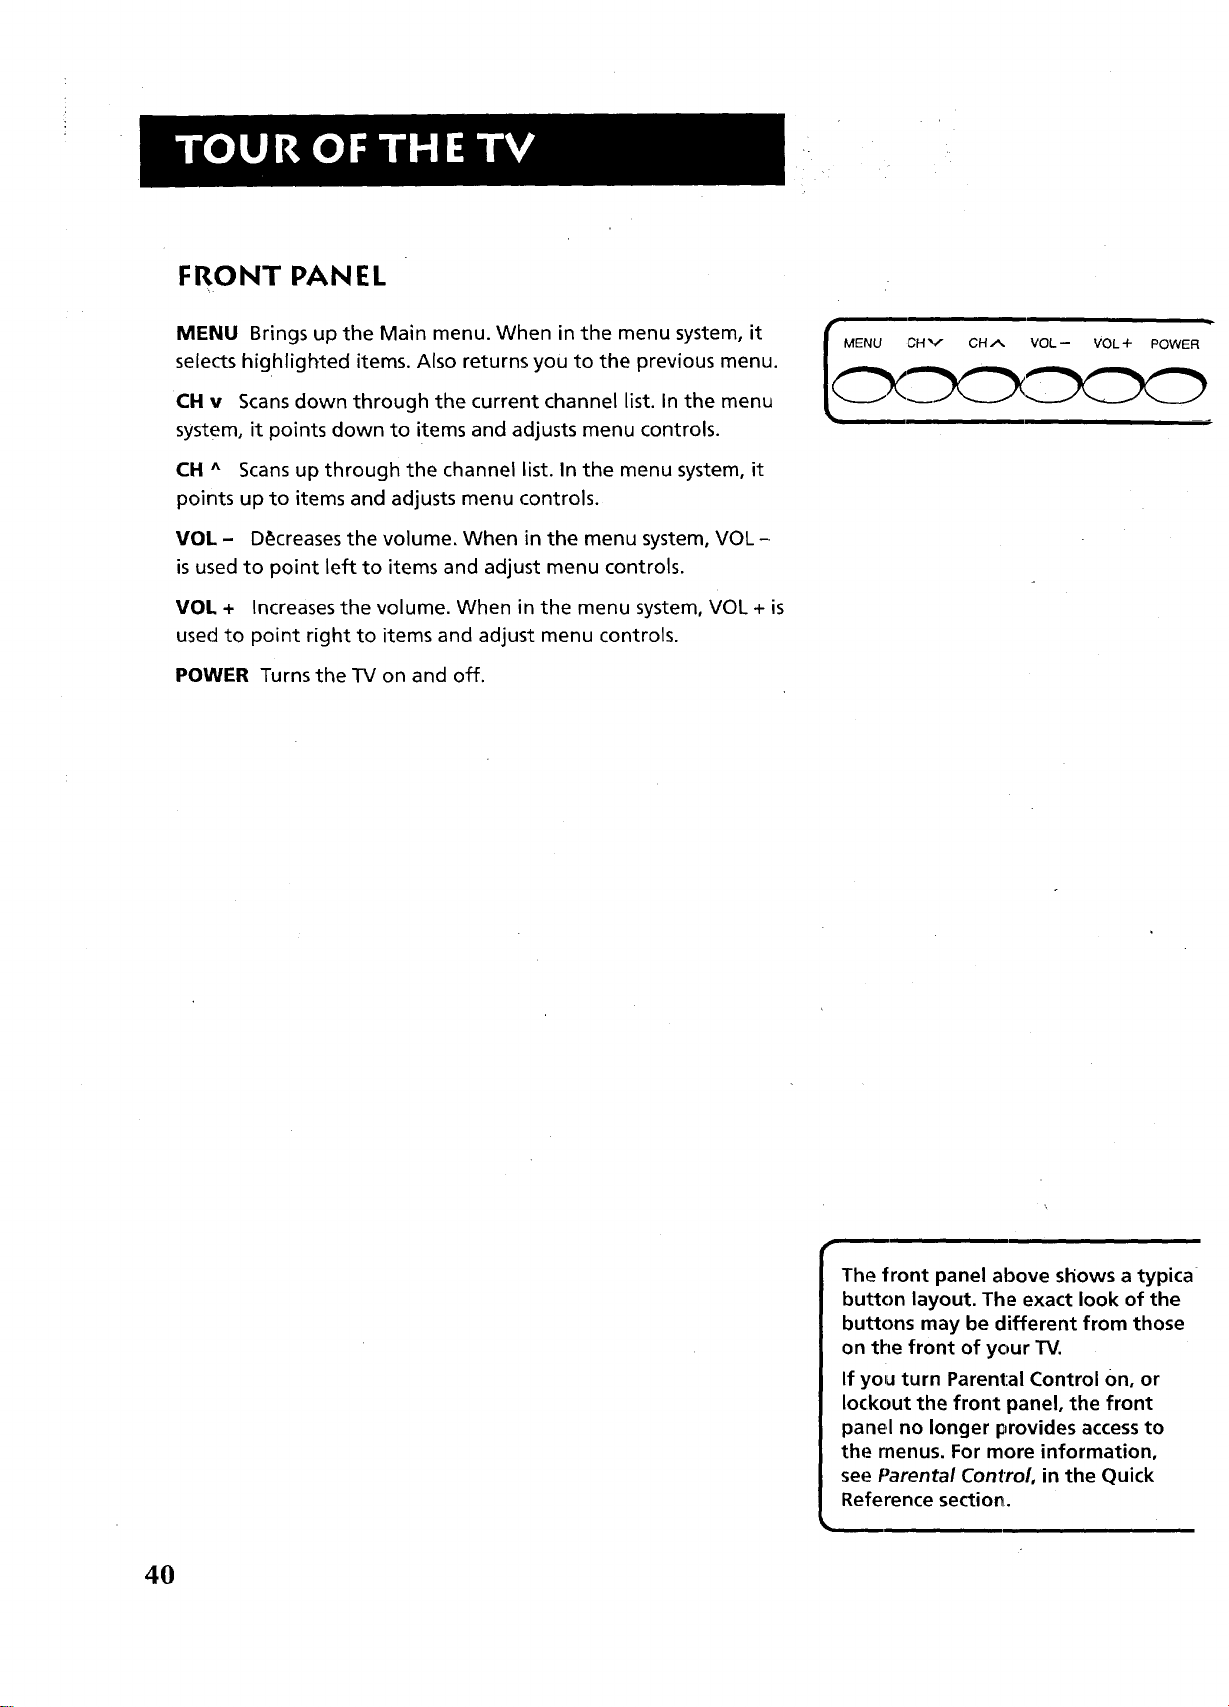
FRONT PANEL
MENU Brings up the Main menu. When in the menu system, it
selects highlighted items. Also returns you to the previous menu.
CH v Scans down through the current channel list. In the menu
system, it points down to items and adjusts menu controls.
CH ^ Scans up through the channel list. In the menu system, it
points up to items and adjusts menu controls.
VOL - D_creases the volume. When in the menu system, VOL -
is used to point left to items and adjust menu controls.
VOL + Increases the volume. When in the menu system, VOL + is
used to point right to items and adjust menu controls.
POWER Turns the TV on and off.
I MENU CH v CH _. VOL -- VOL + POWER
4O
The front panel above shows a typica
button layout. The exact look of the
buttons may be different from those
on the front of your TV.
If you turn Parental Control On, or
lockout the front panel, the front
panel no longer provides access to
the menus. For more information,
see Parental Control, in the Quick
Reference section_.
Page 43

CHANNELMARKER
There are several indicators that come up when you change
channels, press the INFO button, or press the TV button. This
display is called the Channel Marker.
12:01 Displays the current time.
CC Displayed when Closed Captioning is available on the current
channel.
VCR1 Displays the label assigned to the current channel.
VID1 Displays the current channel or input channel.
Mute {or Stereo) Mute is displayed when you mute the audio.
Stereo is displayed when the current channel is broadcasting in
Stereo.
SAP Displayed when the current channel is broadcasting SAP
(Second Audio Program) information.
PIP 59 (PIP than) Displays the current PIP channel.
Remote batteries are low Displayed when the batteries in the
remote need to be replaced.
Sleep Displayed when the Sleep Timer has been set.
00:00 Displayed to count down time left on the commercial skip
(SKIP) timer.
just an example, of course.
I he channel marker shown above is 1
/11
Page 44

Page 45
A SHORT GUI DE TO TH E MENU SYSTEM
This section provides a brief explanation of all the
menu commands. These commands are organized in
the chapter by their location in the Main menu.
Audio Contains the controls that let you adjust
the way the TV sounds.
• Picture Quality Contains the controls that let
you adjust the picture.
• Screen Contains the controls that let you adjust
the projection tubes' alignment, menu language,
and closed-caption mode and display.
Channel Contains all the commands used to
control your channels, including custom-building
your channel list and setting up your TV to
control the components connected to the TV.
Time Contains the controls that let you set the
time and schedule the TVto turn off and on at
specific times.
Parental Controls Contains the controls that
let you block out specific channels and locks the
TV's front panel controls.
TV GUIDE Plus+ Menu Contains the controls
that let you set up the TV Guide Plus+ menu, run
a demonstration, or turn the Label & Title display
on and off.
• Setup Begins an interactive setup routine that
lets you adjust your TV's menu system, channel
list and how your TV receives signals from other
components.
/!"2
Page 46
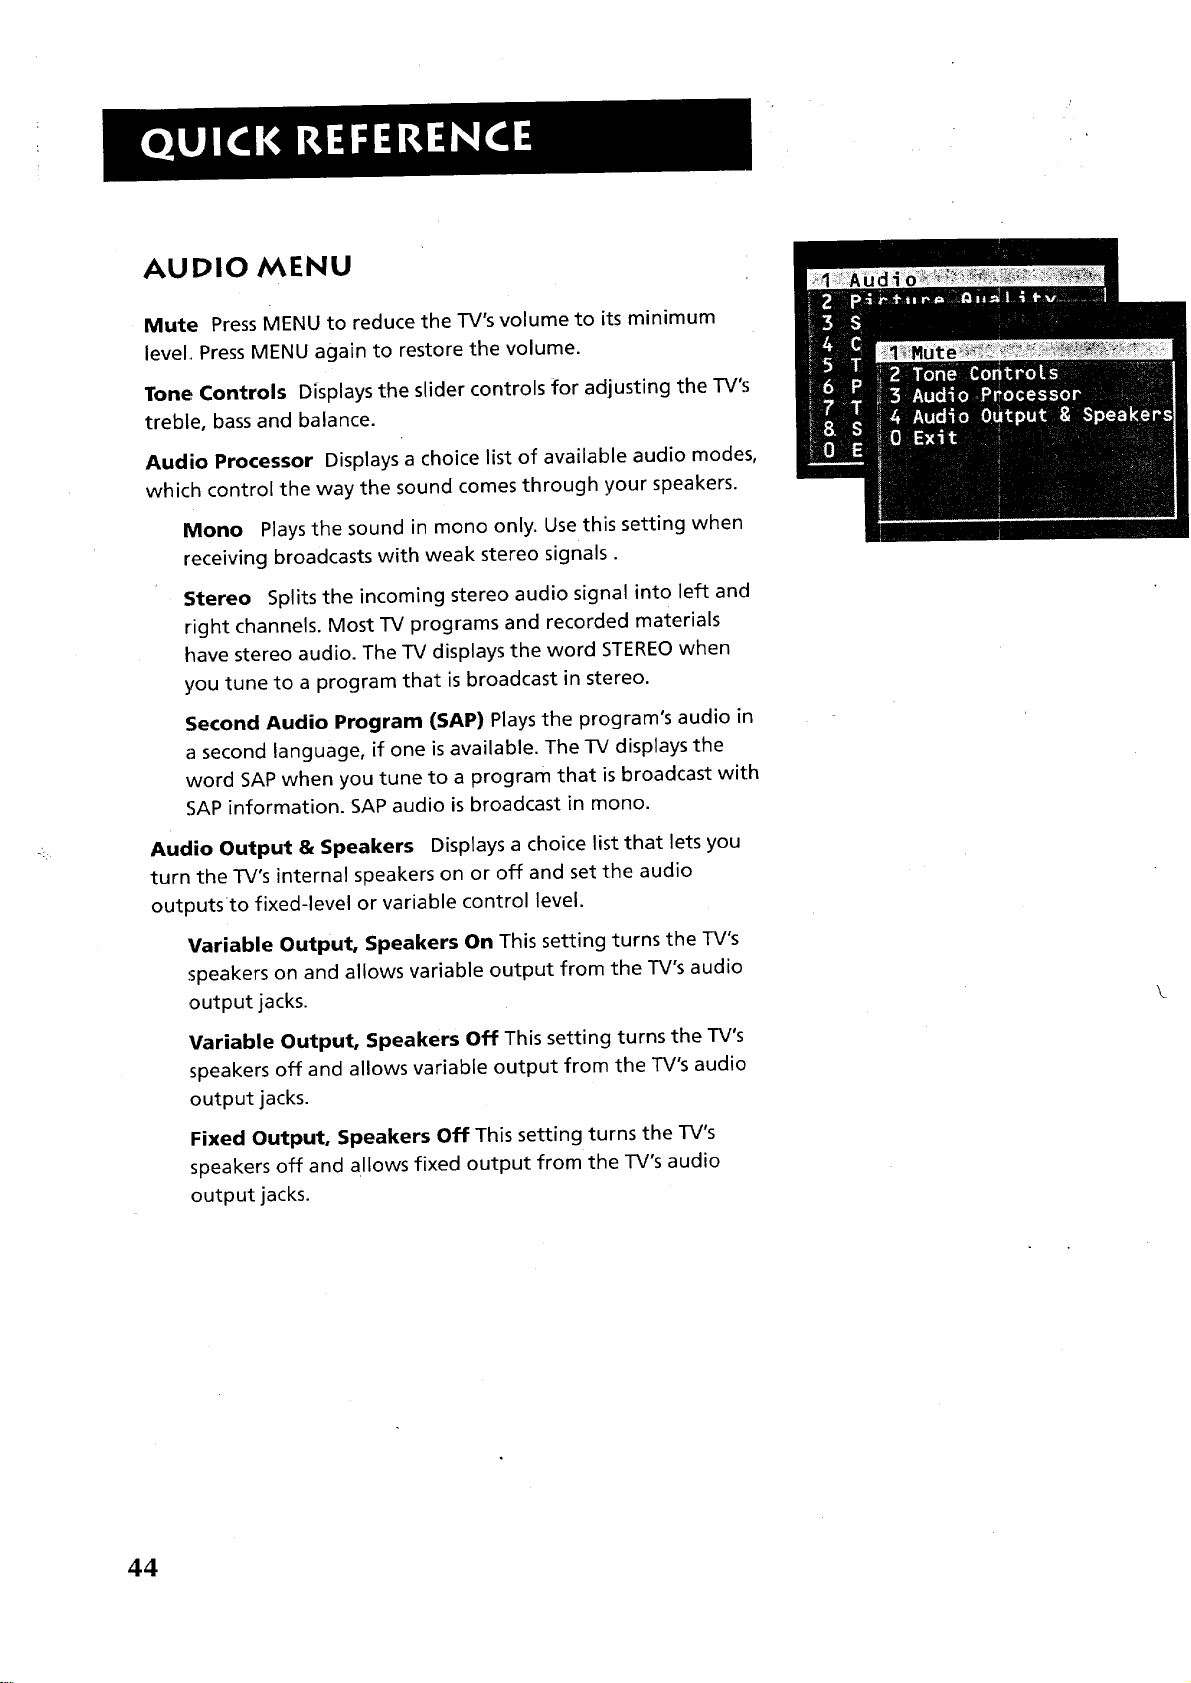
AUDIO MENU
Mute Press MENU to reduce the TV's volume to its minimum
level, Press MENU again to restore the volume.
Tone Controls Displays the slider controls for adjusting the TV's
treble, bass and balance.
Audio Processor Displays a choice list of available audio modes,
which control the way the sound comes through your speakers.
Mono Plays the sound in mono only. Use this setting when
receiving broadcasts with weak stereo signals.
Stereo Splits the incoming stereo audio signal into left and
right channels. Most TV programs and recorded materials
have stereo audio. The TV displays the word STEREOwhen
you tune to a program that is broadcast in stereo.
Second Audio Program (SAP) Plays the program's audio in
a second language, if one isavailable. The TV displays the
word SAP when you tune to a program that is broadcast with
SAP information. SAP audio is broadcast in mono.
Audio Output & Speakers Displays a choice list that lets you
turn the TV's internal speakers on or off and set the audio
outputsto fixed-level or variable control level.
Variable Output, Speakers On This setting turns the TV's
speakers on and allows variable output from the TV's audio
output jacks.
Variable Output, Speakers Off This setting turns the TV's
speakers off and allows variable output from the TV's audio
output jacks.
Fixed Output, Speakers Off This setting turns the TV's
speakers off and allows fixed output from the TV's audio
output jacks.
44
Page 47

PICTURE QUALITY MENU
Basic Picture Controls Displays the five slider controls for
adjusting the way the picture looks.
Contrast Adjusts the difference between the light and dark
areas of the picture.
Color Adjusts the richness of the color.
Tint Adjusts the balance between the red and green levels.
Black Level Adjusts the brightness of the picture.
Sharpness Adjusts the crispness of edges in the picture.
Auto Color Displays a choice list that lets you turn on the
feature that automatically corrects the color of the picture. (This
isespecially useful for tracking realistic flesh tone colors as you
switch from channel to channel.) Choose On or Off, depending
on your preference. It's your choice.
Color Warmth Displays a choice list that lets you set one of
three automatic color adjustments: Cool for a more blue palette
of picture colors; Normal; and Warm for a more red palette of
picture colors.
Picture Control Presets Displays a choice list that lets you
select one of three preset picture settings: Bright Lighting,
Normal Lighting or Soft Lighting. Choose the setting that isbest
for your viewing environment.
Video Noise Reduction Displays a choice list that lets you turn
on the feature that automatically reduces noise, or "snow," from
the picture.
to bring up the Picture Control Presets
choice list. Point to the desired setting;
I Pressthe RESETbutton on the remote |
press MENU to select it.
J
Page 48

SCREEN MENU
Closed-Caption Display Displays a choice list that lets you
choose the way closed captioning information is shown on the
screen.
Off No captioning information displayed.
On Always Captioning information shown always, when
available.
On When Sound is Muted Displays captioning
information, when available, whenever the TV's sound is
muted by pressing the MUTE button. The captioning
information isnot displayed when the sound is not muted.
Closed-Caption Mode Displays a choice list that lets you
choose which captioning mode isused for displaying captioning
information.
Menu Language Displays a choice list that lets you select your
preferred language: English, Spanish or French.
Adjusting Projection TV Lets you adjust the TV's three color
projection tubes for precise picture alignment.
Selecting Green Centering brings up a control panel that lets you
center the green projection tube on the screen. Selecting Red
Convergence or Blue Convergence lets you align the red and blue
proiection tubes.
Center the green projection tube first. Then, adjust the red and
blue projection tubes until the test patterns on the TV screen
appear white.
Your projection TV has three color
projection tubes-one for red, one for
green, and one for' blue. When the
tubes are precisely aligned they
create the color images you see on
the TV screen. Over time, the picture
can drift out of alignment due to
normal bumps and vibrations or
moving the TV. If you notice rings or
halos around objects in the picture,
you may want to adjust the picture
tubes.
46
Page 49

CHANNEL MENU
Signal Type Displays a choice list that lets you select the
current antenna type. This option does not appear when the TV
GUIDE Plus+ system isset up.
UHFNHF Antenna Choose this if you are currently using an
off-air antenna for TV signals.
Cable TV Choose this if you are currently using cable or a
cable box for TV signals.
Auto Channel Search Tells the TV to search automatically for
all the channels available through the antenna input. When the
TV finds an active channel, it places it in the channel list; inactive
channels (weak stations or channels with no signal at all) will be
removed from the channel list.
List and Labels Displays a control panel that lets you custom-
build your Normal channel list and choose a six-character label
for each channel. Follow the on-screen directions to enter your
channels and other information.
Chan# Use the up and down arrows to scroll up and down
through the channel scan list. You can enter the channel
number directly using the number buttons.
Normal List Only the channels included in the Normal list
are available when you scan up and down using the CHAN
buttons. Use the up and down arrows to indicate whether
the channel number indicated is included (Yes) or isnot
included (No) in the Normal channel list.
Chan Labels Use the up and down arrows to enter a six-
character label for each channel. Hold the button down to
scroll quickly through the characters. Press RESETto clear a
label. The TV can store up to 27 labels in memory.
Channel Directory Displays all of the labeled channels. In the
Channel Directory control panel, you can select a channel by
entering the channel number, or by pressing MENU to return to
the current channel. This option does not appear when the TV
GUIDE Plus+system is set up.
AIm/
Page 50

(Channel Menu continued)
Auto Tuning Displays a choice list that lets you set up the TV to
automatically tune to the correct input channel when you press a
component button (VCR1, DVD,VCR2, or SAT,CABLE).
Set VCR 1 Channel Displays a choice list that lets you select:
the channel that the TV tunes to when you press the VCR1
button.
Set DVD/VCR 2 Channel Displays a choice list that lets you
select the channel that the TV tunes to when you press the
DVDoVCR2 button.
Set SAT/Cable Channel Displays a choice list that lets you
select the channel that the TV tunes to when you press the
SAT.CABLE button.
The choices are:
Not Connected Choose this if you do not have a
component connected to an antenna or video input on the
back of the TV, or if you don't want the TV to tune to a
channel when the particular component button is pressed.
Channel 2 (SAT/Cable only) Choose this if your component
is connected to the antenna jack on the back of the TV, and
you want the TV to tune to channel 2 when you press the
specified component button. Reminder: Make sure the
component's Ch 2/3/4 switch is set to channel 2.
48
Channel 3 Choose this if your component is connected to
the antenna jack on the back of the TV, and you want the TV
to tune to channel 3 when you press the specified
component button. Reminder: Make sure the component's
Ch 3/4 switch isset to channel 3.
Channel 4 Choose this if your component is connected to
the antenna jack on the back of the TV, and you want the TV
to tune to channel 4 when you press the specified
component button. Reminder: Make sure the component's
Ch 3/4 switch is set to channel 4.
Video 1 Input Choose this if your component isconnected
to the Video 1jacks on the back of the TV and you want the
TV to tune to Video1 input when you press the specified
component button.
Video 2 Input Choose this if your component is connected
to the Video 2 jacks on the back of the TV and you want the
TV to tune to Video 2 input when you press the specified
component button.
Page 51

TIME MENU
Sleep Timer Displays a control panel that lets you select the
amount of time you want to give the TV before it shuts itself off.
Schedule Displays a control panel that lets you set up a
schedule for turning the TV on and off automatically. Make
sure to turn the sdhedule On. The on-screen directions guide
you through the steps needed to set the schedule.
Set Time Displays a control panel that lets you enter the
current time. The on-screen directions guide you through the
steps needed to set the time.
4q
Page 52

PARENTAL CONTROLS MENU
Displays the menu items that let you adjust the Parental Controls
feature.
Parent Approved Channels Displays a control panel that lets
you q_lecidewhat channels can be viewed or selected using the
TV's front panel controls.
Chan# Use the up and down arrows to scroll up and down
through the channel scan list. You can enter the channel
number directly using the number buttons.
Parent Approved Use the up and down arrows to choose
whether the channel indicated should be shown when the
Channel Block feature isturned on. Select Yes to indicate
that the channel can be shown at any time, regardless of
whether Channel Block isturned on. Select No to indicate
that the front panel cannot tune to that channel when
Channel Block isturned on. Important: You must turn the
Channel Block feature on. (See Channel Block, below.)
L
Channel Block Displays a control panel that lets you decide
when a channel can be viewed.
Off All channels are available
On Always The front panel CH (channel) buttons will
tune only to channels that you have marked as "Parent
Approved." The remote will still tune to any channel.
Scheduled Selected channels will be blocked out
between start and stop times you enter in the control
panel. The front panel CH (channel) buttons will tune only
to channels that you havemarked as "Parent Approved."
The remote will still tune to any channel.
Front Panel Lockout Displays a control panel that lets you lock
(disable) the TV's front control panel, or unlock (enable) the TV_s
front control panel. The remote will still tune to any channel.
If you can't access a channel or use
the TV's front panell control, maybe
you've forgotten to turn off a
parental control. Check the Channel
Block and Front Panel Lockout control
panels.
50
Page 53

.TV GUIDE PLUS+ MENU
TV GUIDE Plus+ Setup Displays the TV GUIDE Plus+ setup
screen.
Setup Setting up the TV GUIDE Plus+ system is detailed
earliier in Interactive Setup.
Demo Runs the TV GUIDE Plus+ demonstration.
Select Channels Allows you to choose which channels
appear in the TV GUIDE Plus+ program schedule.
TV GUIDE Plus+ Label & Title Displays the TV GUIDE Plus+
Label & Title menu.
On Displays the station name and show title when you
change channels.
Off Disables the Label & Title feature.
Continuous Demo Runs the TV GUIDE Plus+ demonstration
until it isturned off.
51
Page 54

SETUP MENU
The setup routine is detailed earlier in the manual in the
Interactive Setup section.
52
Page 55

THIS SECTIONS DETAILS SOME OF THE
TV'S IMPORTANT FEATURES:
• TVGUIDE Plus+ operation
• PIP (Picture-in-Picture) operation
• Choosing an audio processor
• Using closed captioning
• Displaying on-screen program
details
$3
Page 56

TV GUIDE PLUS+ OPERATION
The TV GUIDE Plus+ system offers four different menus for
browsing program listings: SURE NEXT, SCAN, and SORT.
1. Press GUIDE to bring up the TV GUIDE Plus+ display.
WABC 5 Cosby
WGN 9 Baseball-Cubs vs Braves
WNBC 4 Simple Pleasures
WCBS Ii Jerry Springer
WTRW 17 Weaving Today
WJAX 34 The Ubiquitious G-Men
WIMT 42 You Bet Your Life
.
To choose a menu, select CHOICE. The Surf Menu comes up
by default.
.
Use the left and right arrows to access another menu. Press
MENU to select your choice.
Surf Menu
The Surf Menu displays the current program on each channel.
The live program displayed in the video window changes as you
surf: channel listings.
Channel Mapping
If more than one cable company
services your area, you may be
promptedwith this Channel Mapping
screen after the first TV GUIDE Plus+
down!load. You will need to identify
your cable company by selecting the
correct channel numbers for the
stations in question.
_i_ NEXT sc_ SORT
WABC 5 Cosby
WGN 9 Baseball-Cubs vs Braves
WNBC 4 Simple Pleasures
WCBS II Jerry Springer
WTRW 17 Weaving Today
WJAX 34 The Ubiquitious G-Men
WIMT 42 YOU Bet Your Life
• Use the up and down arrows to surf channel listings.
• TO select another menu, use the left and right arrows, and
then press MENU.
Press GUIDE or CLEAR to exit the TV GUIDE Plus+ system.
Pressing GUIDE changes to the last channel highlighted.
Pressing CLEAR returns to the original channel.
54
LEFT RIGHT _:
WNBC 9
WURW _<; 22
1. Determine the correct channels for
the stations. Check your local
listings if you are not sure.
2. Se_lectLEFT or flIGHTto change the
channel group.
3. Select SELECTwhen the correct
channel group is highlighted.
|
Page 57

Next Menu
The Next Menu displays the programs on a selected channel
from the current time to midnight of the next day.
WNBC CH 4
L==_ If| .... --- I
12:30p The Flintstones
l:00p Tom and Jerry
l:30p Jenny Jones
2:30p Quincy
3:30p Extra!
4:00p Roseanne
Use the up and down arrow buttons to move through the
schedule. An asterisk after the time indicates that the
program is scheduled for tomorrow.
Use the right and left arrows to select a different menu, or
press GUIDE or CLEARto exit the TV GUIDE Plus+ system.
Scan Menu
The Scan Menu shows programming schedules for all channels
from the current time to midnight on the following day.
4:30p 5:00p
WGN 9 Baseball-Cubs vs Braves
W_[BC: 4 Simple Pleasures
WCBS Ii Extreme Dieting
WTRW 17 Tomorrow Never Knows
WJA-X 34 Sculpture Review
W]M_ 42 You Bet Your Life
Use the left and right arrows to select the time of day.
Use the up and down arrows to move through the schedute.
The channel displayed in the video window remains on the
initial channel.
Select SURFto return to the surf menu, or press GUIDE or
CLEAR to exit the TV GUIDE Plus+ system.
The Info Center
If this icon _appears in the program
information, you may access
additional information about that
program by pressing INFO. This
feature is available in all four menus.
Even if the _r icon isn't displayed,
pressing INFO will show a PlusCode
programming number which allows
you to program your VCR to record
using VCR Plus+.
Press INFO a second time to return to
the TV GUIDE Plus+ menu.
Alternately, you will find the Info
Center in tlhe Surf and Sort menus.
Select it to view additional
information.
Along with, additional programming
information, the Info Center may
contain information on local events,
or on the TV GUIDE Plus.+ system
itself. Information contained in the
info center will vary from area to
area, so not all of these options may
be available to you at this time.
PressINFO to exit back 1:othe menu.
Page 58

Sort Menu
The Sort Menu lets you browse programs by category. The channel
you are currently tuned to is displayed in the video window and by
name.
1. Use the up and down arrows to select a category. In this ex-
ample we'll choose Sports. A listing of subcategories comes up.
r
Customizing Your Channel
Listing
You may customize the channel
listing by enabling or disabling the
display of certain channels. For
instance, you may disable channels
that you never watch. You can restore
disabled channels at a later point in
time, of course.
1. From the TV's Main Menu, select
TV Guide Plus+ Menu.
2. Select TV Guide Plus+ Setup. The
TV GUIDE Plus+ menu comes up.
3. Select Select Channels.
EXIT
SURF
All Racing
Baseball Skating
Bgxing Soccer
Equestrian Tennis
Football Track
Golf Water Sports
Hockey Wrestling
.
Use the up and down arrows to select a subcategory, in this
Skiing
example Basketball. The message, "Searching in progress.
Please Wait" comes up.
PgDn PgUp BACK
Sports---Basketball Tue Mar25
College Basketball 7:00p WTTV
NBA Basketball 8:00p TNT
TV GUIDE Plus+ Select Channels
WN]_C
WABC WWOR
WGN
WTI{W
ESPN
WILkp
WJAX
4. Use the up and down arrows to
select a channel.
5. Select ENABLE or DISABL to add
or remove a cthannel from the
guide's listing. Note that this
button's name changes
depending on the activation
status of the selected channel.
6. Select EXIT wlhen you are
finished.
Selected channels will be added or
removed from the list during the nex
download.
Sort Menu Options
.
When the listing comes up, select PgDn to view more entries.
Seven days of programming are listed in the Sort Menu.
.
Select SURFto return to the surf menu, or press GUIDE or
CLEAR to exit the TV GUIDE Plus+ system.
PgDn shows more listings
PgUp returns to the previous screen.
BACK allows you to select another
category to sort.
• , ,,, ,,
Page 59

One-Button Recording
The TV GUIDE Plus+ system allows one-button recording if you
have connected the IR controller to your VCR. See First Things
First for more details on connecting the IR controller.
1. Press GUIDE to bring up the TV GUIDE Plus+ menu.
WABC 5 Cosby
WGN 9 Baseball-Cubs vs Braves
WCBS ii Jerry Springer
WTRW 17 Weaving Today
WJAX 34 The Ubiquitious G-Men
WIMT 42 You Bet Your Life
T:. .i . '"
' r
.
Select a program to record. You may choose a program from
any of the four browsing menus.
3. Press REC,VCR+. A screen confirming your selection comes
up.
SURF DAILY WEEKLY
Plus Code # 12345 , for
Simple Pleasures WNBC 4
To Record Select
4. Select a recording option: DAILY, ONCE, or WEEKLY
SURF REVIEW
Simple Pleasures WNBC 4
Yhis show is pro_ra_eJ
to be recorded:
Remember to turn your VCR off.
5. Insel-t a blank tape into your VCR and turn it off.
Recording Options
DAILY records the same program
Monday through Friday.
ONCE records only on that day.
WEEKLY records the program each
week at the same time,
REVIEW displays a list of programs
set to be recorded. You may delete
programs :from this list.
Tip: You can record the program you
are currently watching by simply
pressing RFC.VCR+.
m
Page 60
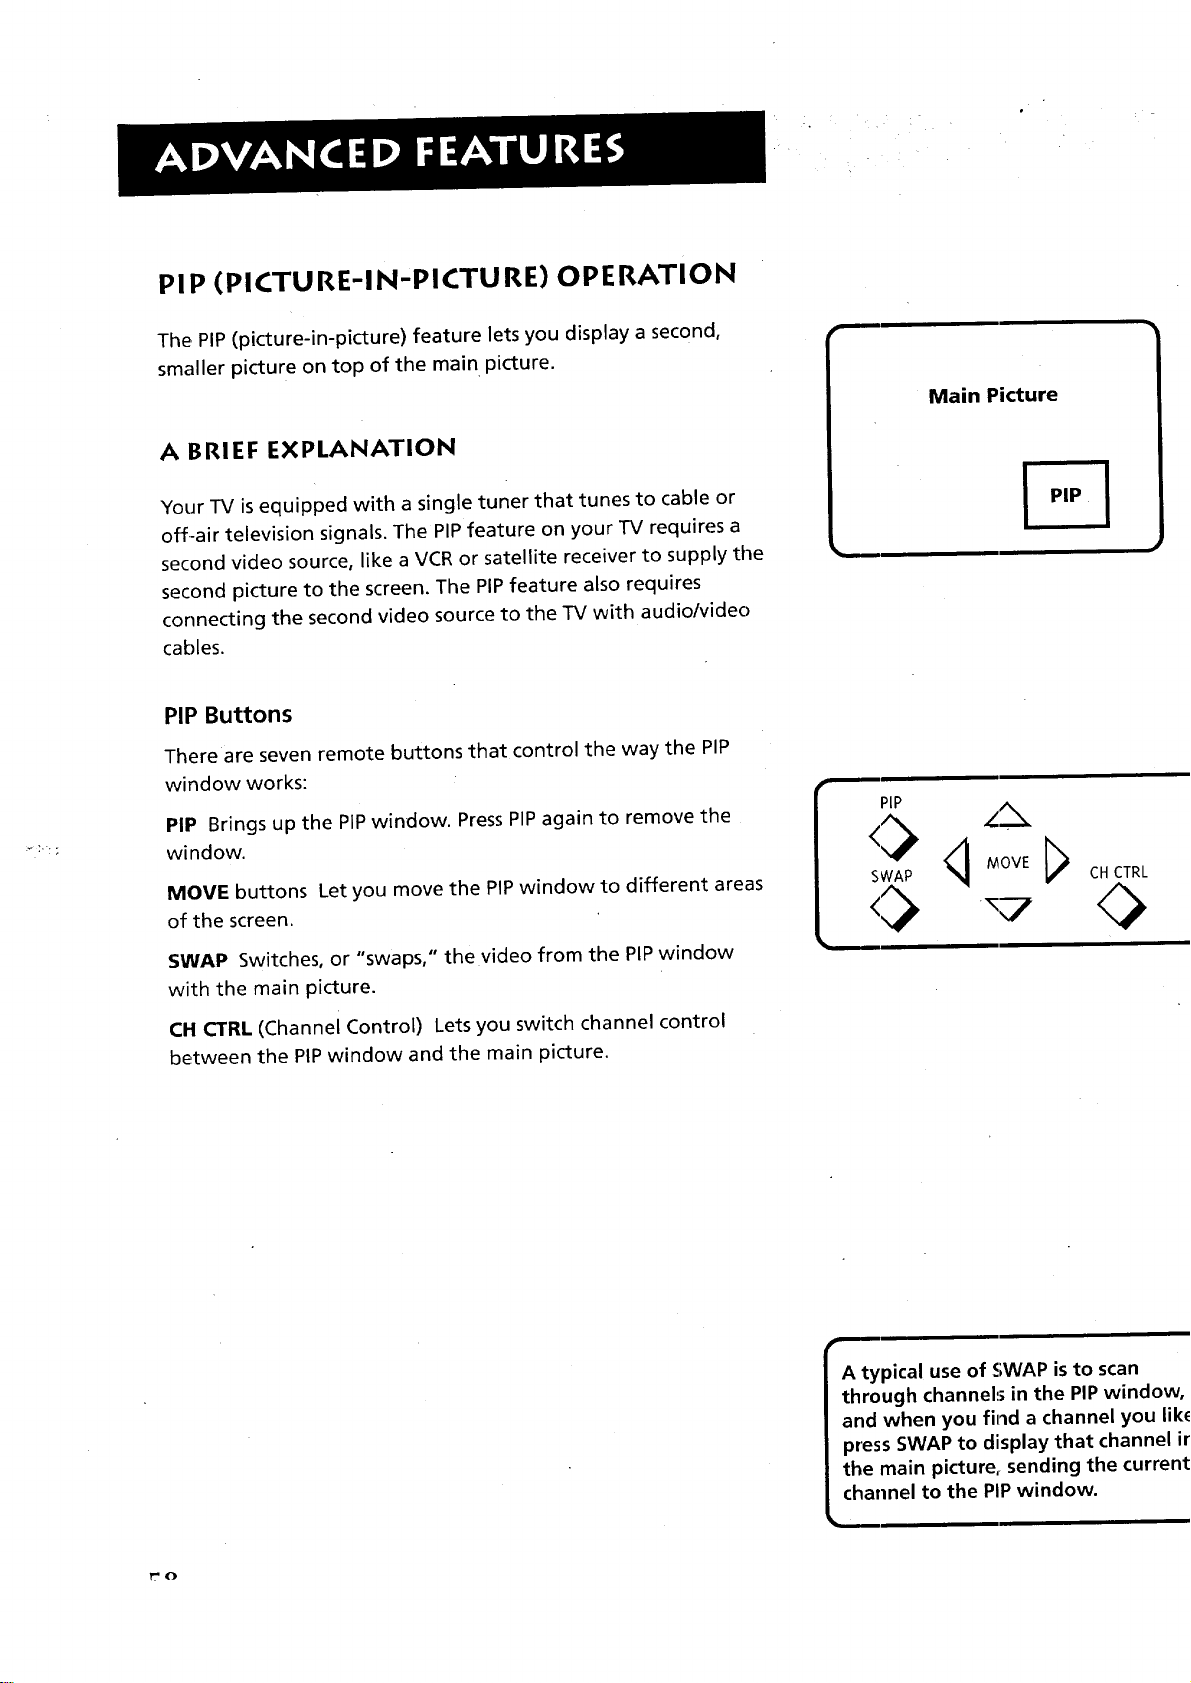
PIP (PICTURE-IN-PICTURE) OPERATION
The PIP (picture-in-picture) feature lets you display a second,
smaller picture on top of the main picture.
A BRIEF EXPLANATION
Your TV is equipped with a single tuner that tunes to cable or
off-air television signals. The PIP feature on your TV requires a
second video source, like a VCR or satellite receiver to supply the
second picture to the screen. The PIPfeature also requires
connecting the second video source to the TV with audio/video
cables.
PIP Buttons
There are seven remote buttons that control the way the PIP
window works:
Main Picture
PIP Brings up the PIPwindow. PressPIPagain to remove the
window.
MOVE buttons Let you move the PIPwindow to different areas
of the screen.
SWAP Switches, or "swaps," the video from the PIP window
with the main picture.
CH CTRL (Channel Control) Lets you switch channel control
between the PIPwindow and the main picture.
PIP Z_
SWAP _ MOVE
CH CTRL
-- .x7
A typical use of SWAP is to scan
through channels in the PIPwindow,
and when you find a channel you lik_
press SWAP to display that channel il
the main picture, sending the currenl
channel to the PiP window.
Page 61

Using the PIP Feature
While you may use PIP in different ways, this basic PIPscenario
should get you started. While watching the TV, follow these steps
to use your VCR to supply the picture for PIR
1. Press the PIPbutton on the remote. The PIPwindow appears
on the screen. Notice the channel marker at the bottom of
the screen displays the current PIP channel, not the main
picture channel.
2.' Turn on the VCR and tune the PIPchannel to receive the VCR
signal (Video1 or Video2).
Tip: You can turn the VCR on and tune to the VCR channel
with the press of a button. For example, if you program the
Autotune feature, you can tune to the Video1 input channel
when you press the VCR1 button on the remote. In PIP mode,
pressing the VCR1 button tunes the PIPwindow to the
Video1 input channel.
3. Use the channel up and down buttons and the other PIP
buttons, MOVE, SWAP and CH CTRLto adjust the two
pictures.
. • . 7 ¸ • .
CABLE OR Af'JTENNA
VCR 1
OUT
_DEO R
?
IN FROM ANT
PIP Problems?
Make sure the remote is in the right mode. For example,
once you turn on the VCR with the VCR1 button, you can't
SWAP the pictures until you put the remote in "IV mode. Just
press the TV button.
No signal or bad reception? Most VCRsand satellite receivers
have an antenna or TV button. If your cable or off-air
antenna goes into your VCR or satellite receiver, then into
your TV, try pressing the antenna or TV button on the front
of the component.
Tip: if programmed to control your VCR, the ANTENNA
button on the remote acts as a TV/VCR button.
Check the connections. PIP requires a second video source,
like a VCR or satellite receiver, connected to your "IV with
audio/video cables. If you use a cable box, you may need
extra equipment. Contact your cable company for more
information.
e-- goo ] ,.,
6-- e
AUDIO
3UT_'UT
----1--
To see a different picture in the PIP
window, you must connect another
video source, like a VCR. This
connection also require:; audio/video
cables.
You can program the TV to tune to a
specific channel when you press the
VCR1, SAT, CABLE, and IDVDoVCR2
buttons. This is an easy way to tune
the PIPwindow to the correct video
input channel.
Check out the Autotunirlg feature in
the Interactive Setup and Quick
reference sections.
Page 62

CHOOSING AN AUDIO PROCESSOR
Changing the audio processor changes the way your TV sounds.
There are two ways to change the audio processor: a) from the
Audio menu, and b) by pressing SOUND on the remote. For
more, see Audio menu in the Quick Reference section.
Choosing an audio processor from the Audio menu
1. Press MENU to bring up the Main menu.
2. Press MENU again to select the Audio menu.
,
Point to Audio Processor and press MENU. The Audio
Processor choice list comes up, with the current mode
highlighted.
4. Point to an audio processor mode and press MENU to select it
and return to the Audio menu. The options are:
Mono Plays the sound in mono only.
Stereo Splits the incoming stereo audio signal into left and
right channels.
Second Audio Program (SAP) Plays the program's audio in
a second language, if one is available. Setting the audio
processor to SAP tells the TV to play the program's audio in
this second language, if one is available.
Choosing an audio processor from the remote
1. Press SOUND to display the audio processor choice list.
2. Point to and select a different audio processor or press CLEAR
to exit.
f_
The number of au_dioprocessor
choices available depends on the type
of signal you are currently using. For
example, depending on the way you
have your VCR connected to the TV,
the number of choices is greater
when you are watching TV than
when you are watching a video tape.
Page 63

CLOSED CAPTIONING
Many programs are encoded with closed captioning information,
which lets you display the audio portion of a program as text on
the TV screen. You can tell the TV to display closed captioning:
a) never,, b) whenever it is available, or c) whenever the program
is muted.
TO DISPLAY CLOSED CAPTIONING
1. Press MENU to bring up the Main menu.
2. Point to Screen and press MENU. The Screen menu comes up
with Closed-Caption Display highlighted.
3. Press MENU to select Closed-Caption Display.
Off No closed captioning information will be displayed.
On Always Closed captioning will be displayed whenever it
is available.
On when sound is muted Closed captioning will be
displayed only when you have muted the sound by pressing
the MUTE button.
.
Point to your choice and press MENU to select it and return
to the Screen menu.
• Closed captioning is not available on
/
all channel:; at all times. Only specific
programs encoded with closed
captioning information are applicable.
When a program isclosed captioned,
the letters CC are displayed in the
channel marker.
Page 64

CLOSED CAPTIONING MODES
The -IV offers eight closed-captioned modes, including four text
modes.
To Set the Closed-Captioning Mode:
1. Select Screen from the Main menu
2. Point to Closed-Caption Mode and press MENU. This choice
list comes up:
3. Point to your choice and press MENU to select it and return
to the Screen menu.
Turning off Closed Captioning
1. Select Screen from the Main menu.
2. Press MENU to select Closed-Caption Display
3. Point to Off and press MENU. The closed captioning isturned
off and you are returned to the Screen menu.
If you are unsure of the differences
among the modes;,you may prefer to
leave the closed captioned mode set
to CC1, which displays complete text
of the program in the primary
language in your area.
Page 65

ON-SCREEN PROGRAM DETAILS
Program providers have the option of sending information
through the airwaves along with their programs. If this
information is available, the TV can display it up when you press
INFO on the remote. To display the on-screen program details:
1. Press INFO once to bring up the channel marker.
2. Press INFO again to bring up the program title, the program's
length and elapsed time.
3. Press.INFO again to bring up other program details such as
the story line and whether Closed-Captioning is available.
4. Press INFO again to clear the screen.
Whether all (or any) of the program details are displayed
depends on whether the program provider has sent the
information along with the program.
Page 66

_l_j_L_I_'_ _f_ _p!_l _ I I _ v
q
_ _ • _ _ i,_¸__ _Ir ri1_lll 11
Page 67

THINGS TO DO BEFORE CONNECTING
COMPONENTS
Protect your components from power surges
• C.onnect all components before plugging any power
cords into the wall outlet.
• Always turn off the TV and/or component before you
connect or disconnect any cables.
POSITION CABLES CORRECTLY TO AVOI D
AUDIO HUM OR INTERFERENCE
• Insert all cable plugs firmly into their jacks.
• Place the audio/video cables to the sides of the TV's
back panel instead of straight down the middle after
you connect your components.
• Try not to coil any twin-lead cables and keep them
away from the audio/video cables as much as possible.
• Make sure all antennas and cables are properly
grounded. Refer to the Safety Tips sheet packed with
your TV.
PROTECT YOUR COMPON ENTS FROM
OVE RH EATI NG
Do not block ventilation holes in any of the
components. Arrange the components so that air can
circulate freely.
• Do not stack components.
• Allow adequate ventilation when placing your
components in a stand.
Place an amplifier on the top shelf of the stand so
heated air rising from it will not flow around other
components.
Important:
This section assumes that you have
already used the Interactive Setup
and programmed the remote.
Page 68

TV AND MONO VCR
(CONNECTION A)
This information applies to Connection A in the Connections
Foldout.
Connection A provides:
• stereo sound from broadcast programs
• mono sound from VCR
• Picture in Picture (PIP)
• watch one channel on TV while recording another channel
To use this connection you must have:
• (2} audio/video cables
• (2) coaxial cables
To connect:
1. Connect cables as shown in Connection A.
2. Return to First Things First, then follow the steps in the
Interactive Setup.
USING CONNECTION A
To watch TV programs:
1. Turn VCR off.
2. Press TV and tune to a channel.
To record one program and watch another:
1. Press VCR1 and tune to a channel.
2. Begin recording.
3. Make sure the TVNCR switch on the VCR is set to TV.
4. PressTV and tune to a channeL.
To play a tape on the VCR:
1. PressVCR1.
2. Press PLAY.
CABLE, CABLE BOX, OR ANTENNA
VCR 1
_lOEC, AUDIO
out _v cH4_
n
TV
I
0* ....
See Connections Foldout,
Connection A
IN FROM ANT CH3 I
I
66
Page 69

TV AND STEREO VCR
(CONNECTION B)
This information applies to Connection B in the Connections
Foldout.
Connection B provides:
• stereo sound from broadcast programs
• stereo sound from VCR
• Picture in Picture (PIP)
• watch one channel on TV while recording another channel
To use this connection you must have:
• (2) coaxial cables
• (3) audio/video cables
• (1) S-Video cable (optional)
To connect:
1. Connect cables as shown in Connection B.
2. Return to First Things First, then follow the steps in the
Interactive Setup.
USING CONNECTION B
To watch TV programs:
1. Turn VCR off.
2. PressTV and tune to a channel.
To record one program and watch another:
1. Press VCR1 and tune to a channel.
2. Begin recording.
3. Make sure the TV/VCR switch on the VCR isset to TV.
4. Press TV and tune to a channel.
To play a tape on the VGR:
1. Pres._;VCR1.
2. Press PLAY.
CABLE, CAI_LE BOX, OR ANTENNA,
VCR 1
See Connections Foldout,
Connection B
67
Page 70

TV, VCR AND DVD PLAYER
(CONNECTION C)
This information applies to Connection Cin the Connections
Foldout.
Connection C provides:
• stereo sound from broadcast programs
• stereo sound from VCR
• Picture in Picture (PIP)
• watch one channel on TV while recording another channel
To use this connection you must have:
• (2) coaxial cable
• (6) audio/video cables
• (1) S-Video cable (optional)
To connect:
1. Connect cables as shown in Connection C.
2. Return to First Things First, then follow the steps in the
Interactive Setup.
USING CONNECTION C
To watch TV programs:
1. Turn VCR off.
2. Press TV and tune to a channel.
To record one program and watch another:
1, PressVCR1 and tune to a channel.
2. Begin recording.
3. Make sure the TV/VCR switch on the VCR is set to TV.
4. Press TV and tune to a channel.
To play a tape on the VCR:
1. PressVCR1.
2. Press PLAY.
To play a disc: •
1. Press DVD.VCR2.
2. Press PLAY.
i
CABLE, CABLE BOX, OR ANTENNA
VCR !
@
See Connections Foldout,
Connection C
68
Page 71

TV AND (2) VCRS
(CONNECTION D)
This information applies to Connection D in the Connections
Foldout.
Connection D provides:
• stereo sound from broadcast programs
• stereo, sound from VCR
• Picture in Picture (PIP)
• watch one channel on TV while recording another channel
• record from one VCR to the other
To use this connection you must have:
• (3) coaxial cable
• (6) audio/video cables
• (1) S-Video cable (optional)
To connect:
1. Connect cables as shown in Connection D.
2. Return to First Things First, then follow the steps in the
Interactive Setup.
You can record from ,one tape
to another' (tape dubbing):
1. Insert original tape into VCR2.
2. Insert blank tape into VCR1.
3. Press VCR1.
4. Set VCR1 to line input (for more,
see your VCR User Manual).
5. Press RECORD to begin recording.
6. PressDVD,VCR2, then press PLAY.
7. If you want to watch a different
channel, set both the ]_//VCR
switch on both VCRs to TV; press
TV; then tune to a channel.
Note: The unauthorized recording
of satellite broadcasts, television
programs, or other copyrighted
materials may infringe the rights
of others.
USING CONNECTION D
To watch TV programs:
1. Turn VCR off.
2. Press TV and tune to a channel.
To record one program and watch another:
1. Turn VCR2 off.
2. Press VCR1 and tune to a channel.
3.
Begin recording.
Make sure the TV/VCR switch on the VCR1 is set to TV.
4.
5. Press TV and tune to a channel.
To play a tape on the VCR:
1. Press VCR1.
2. Press PLAY.
CABLE, CABI.E EOX, OR ANTENNA
VCR 1
See Connections Foldout,
Connection ID
69
Page 72

TV AND DVD PLAYER
(CONNECTION E)
This information applies to Connection Ein the Connections
Foldout.
Connection E provides:
• stereo sound from broadcast programs
• Picture in Picture (PIP)
To use this connection you must have:
• (1) coaxial cable
• (3) audio/video cables
• (1) S-Video cable (optional)
To connect:
1. Connect cables as shown in Connection E.
2. Return to First Things First, then follow the steps in the
Interactive Setup.
USING CONNECTION E
To watch TV programs:
1. PressTV and tune to a channel.
To play a disc:
1. Press DVD-VCR2.
2. Press PLAY.
CABLE, CABLE BOX, OR ANTEtINA
70
See Connections Foldout,
Connection E
Page 73

TV AN D SATELLITE RECEIVER
(CONNECTION F)
This information applies to Connection F in the Connections
Foldout.
Connection F provides:
• stereo sound from broadcast programs
• stereo sound from the satellite receiver
• Picture in Picture (PIP)
To use this connection you must have:
• (3) coaxial cable
• (3) audio/video cables
• (1) S-Video cable (optional)
• stereo sound from satellite programming
To connect:
1. Connect cables as shown in Connection F.
2. Return to First Things First, then follow the steps in the
Interactive Setup.
USING CONNECTION F
To watch TV programs:
1. Turn satellite receiver off.
2. Press TV and tune to a channel.
To watch satellite programming:
1. Press SAT*CABLE and tune to a channel.
(_,BLE, CABLE BOX, OR ANTENNA
__ SATELLITETSIGNAL
SATELLITE RECEIVER r_
IN FROM ANT OI3
eou-r
Z!,J '\--
__ AUO_OL_T l_r ANTENNA
See Connections Foldout,
Connection F
Page 74

TV, VCR, AND SATELLITE RECEIVER
(CONNECTION G)
This information applies to Connection G in the Connections
Foldout.
Connection G provides:
• stereo sound from broadcast programs
• stereo sound from VCR
• Picture in Picture (PIP)
• watch one channel on TV while recording another channel
To use this connection you must have:
• (4) coaxial cable
• (6) audio/video cables
• (1) S-Video cable (optional)
To connect:
1. Connect cables as shown in Connection G.
2. Return to First Things First, then follow the steps in the
Interactive Setup.
USING CONNECTION G
To watch _/programs:
1. Turn VCR and satellite receiver off.
2. Press TV and tune to a channel.
To watch Satellite programming:
1. Press SAT.CABLE and tune to a channel.
To record off-air broadcasts and watch a different channel:
I. Turn satellite receiver off.
2. Press VCRI and tune to a channel.
3. Begin recording.
4. To watch another channel, make sure the TVIVCR switch on
the VCR is set to TV; then press TV and tune to a channel.
To p!ay a tape on the VCR:
1. Press VCR1 and then press PLAY.
CABLE, CABLE BOX, OR ANTI=NNA
SATELLITE SIGNAL
"3"
ou_ _ _, _N_I
@ @ @ @ ouTTo_l 5ATELL_ I
III,I s°,, d
ii)), LA==_ ,'-- I
___ AUDIO | _ ANTENNA
OUTPUTI
See Connections Foldout,
Connection G
i i w
Page 75

TV, VCR, SATELLITE RECEIVER, AND DVD
PLAYER (CONNECTION H)
This information applies to Connection H in the Connections
Foldout.
Connection H provides:
• stereo sound from broadcast programs
• stereo sound from VCR
• Picture in Picture (PIP)
• watch one channel on TV while recording another channel
To use this connection you must have:
• (4) coaxial cable
• (6) audio/video cables
• (1) S-Video cable (optional)
To connect:
1. Connect cables as shown in Connection H.
2. Return to First Things First, and do the Interactive Setup.
USING CONNECTION H
To watch TV programs:
1. Turn VCR and satellite receiver off.
2. Press TV and tune to a channel.
To watch satellite programming:
1. Press SAT.CABLE and.tune to a channel.
To record off-air (cable or antenna) broadcasts and watch
a different channel:
1. Turn satellite receiver off.
2. Press VCR1 and tune to a channel.
3. Press RECORD to begin recording.
4. To watch another channel, make sure the TV/VCR switch on
the \/CR is set to TV; then press TV and tune to a channel.
To play a tape on the VCR:
1. PressVCR1 and then press PLAY.
To play a disc:
1. Press DVDoVCR2 and then press PLAY.
CABLE, CABLE BOX, OR ANTENNA
SATELLITE RECEIVER
oLrr g
_ _ _ OUT TO T_ !L_TE LLWE
_VIDEO VtDEO R L _ IN
I I IN FROM ANT CH3
OVD P _'_ '.R
VIDEO ORUT L
SATELLITE SIGNAL
i II oo,.
See Connections Foldout,
Connection H
e_
Page 76

TV, (2) VCRS, AND SATELLITE RECEIVER
CCONNECTION I)
This information applies to Connection I in the Connections
Foldout.
connection I provides:
• stereo sound from broadcast.programs
• stereo sound from VCR
• Picture in Picture (PIP)
• watch one channel on TV while recording another channel
To use this connection you must have:
• (5) coaxial cable
• (91)audio/video cables
• (11)S-Video cable (optional)
J
To connect:
1. Connect cables as shown in Connection I.
2. Return to First Things First, then follow the steps in the
Interactive Setup.
USING CONNECTION I
To watch TV programs:
1. Turn VCR and satellite receiver and laserdisc player off.
2. Press TV and tune to a channel.
To watch Satellite programming:
1. Press SAToCABLE and tune to a channel.
To record from one VCR to the other (tape dubbing):
1. ]urn satellite receiver off.
2. Insert original tapeinto VCR2.
.
Insert blank tape into VCR1.
CABLE, C.a,BLE BOX, OR ANTENNA
SATELLITE RECEIVER
SATELLITE
Press VCR1.
4.
5. Set VCR1 to line input (for more, see your VCR User Manual).
6. Press RECORD to begin recording.
7. Press DVD,VCR2, then press PLAY.
8. If you want to watch a different channel, set the TV/VCR
switch on both VCRsto TV; press TV; then tune to a channel.
See Connections Foldout,
Connection I
Page 77

To record off-air (cable or antenna) broadcasts and watch
a different channel:
1.- Turn off VCR2.
2. Insert: blank tape into VCR1.
3 PressVCR1 and tune to a channel.
4. Press RECORD to begin recording
5. To watch another channel, make sure the TV/VCR switch on
the VCR is set to TV; then press TV and tune to a channel,
To play a tape on VCRI:
1. PressVCR1 and then press PLAY.
satellite broadcasts, television
programs, or other copyrighted
materials may infringe the rights of
I Note: The unauthorized recording of 1
others.
Page 78

CONNECTING AUDIO COMPONENTS
CONNECTING A STEREO AMPLIFIER
°
Connect the amplifier's TV audio inputs to the left (L) and
right (R) AUDIO OUTPUT jacks.
,
You may prefer to turn off the TV's internal speakers by
selecting Audio Output and Speakers from the Audio menu,
then turning the speakers off.
If your audio amplifier is part of a system that uses its own
remote control, you may prefer to select the fixed output
settings.
Important:'Do not use the amplifier's PHONO inputs. If the
amplifier is not stereo, use the left (L) AUDIO OUT jack.
Consult the amplifier's owner's manual for the
manufacturer's recommended hookup.
CONNECTING A SUBWOOFER
To connect a subwoofer to the TV:
1. Connect the subwoofer's audio input to the left (L) AUDIO
OUT jack_
CONNECTING ATAPE DECK
To use a tape deck to record audio' from TV:
1. Connect the tape deck's audio inputs to the AUDIO OUTPUT
jacks on the back of the TV.
Page 79

CONNECTING A CAMCORDER FOR
PLAYBACK
This connection is recommended for playing back from the
camcorder to the TV:
1. Connect the camcorder's audio/video outputs to the INPUT 1
or INPUT 2 audio and video jacks on the TV.
2. Press INPUT on the remote until the channel marker displays
VlD1 or VID2.
3. Start playback on the camcorder.
PLAYBACK FROM AN S-MHS CAMCORDER
To connect a camcorder with S-Video capability:
1. Connect an S-Video cable from the camcorder to the S-VIDEO
jack on the TV.
2. Connect the camcorder's audio/video outputs to the INPUT 1
audio and video jacks on the TV.
3. Press INPUT on the remote until the channel marker displays
VID1.
4. Start playback on the camcorder.
Page 80

TROUBLESHOOTING
Troubles sometimes are caused by simple/'faults" that you can correct without the help of a service technician.
If you experience any difficulty with your TV, check a few basic remedies before calling your service technician.
TV will not turn on
• Check to make sure it is plugged in.
• Check the wall receptacle (or extension cord) to make sure it is "live" by plucjging in something else.
• Maybe batteries in remote control are "dead."
• Maybe remote control is not aimed at remote sensor.
• The front panel controls may be locked (disabled). Use the remote control to unlock the front panel
controls by selecting the Front Panel Lockout in the Parental Controls menu and choosing Unlock.
Controls don't work
• If using remote control, make sure remote is in TV mode by first pressing 1A/button.
• Try unplugging set for two minutes and then plug it back in and turn it on again.
• The front panel MENU button may be disabled. Use the remote control to turn off channel blocking. Select
Channel Block in the Parental Controls menu and choose Off.
Problems with Remote
• Maybe something is between the remote and the remote sensor.
• Maybe the remote is not aimed directly at the component (TV or VCR) yo_Jare trying to control.
• Maybe remote is not in TV Mode. Press the TV button so remote will control TV.
• Maybe batteries in remote are weak, dead or installed incorrectly. Try replacing batteries. (Note, if you
remove the batteries, you may have reprogram the remote to control other components;.)
• Remove batteries and hold number 1 for at least 60 seconds to drain the microprocessor inside the remote.
Release number 1, replace the batteries, and (if necessary) reprogram the remote.
• Remove all batteries for approximately 12 hours. Then replace batteries and (if necessary) reprogram the
remote.
Turns off while playing
• Schedule function mayhave been activated.
• Electronic protection circuit may have been activated because of a power surge. Wait 30 seconds and then
_urn on again. If this happens frequently, the voltage in your house may be abnormally high or low.
TV Turns on unexpectedly
• Schedule On function may have been activated.
Page 81

Blank screen
• Maybe the device connected to the input jacks is not turned on.
• Try another channel.
• Press RESET,in case the picture controls are set too low.
No sound, picture okay
• Maybe sound is muted. Try pressing volume up button to restore sound.
• Maybe TV's speakers are turned off. Check the Audio Output and Speakers control panel in the Audio
menu.
• If using an S-VHS component, remember to also connect the component's L and RAUDIO OUT ja(:ks to the
TV's L and R INPUT 1 jacks.
Can't select certain channel
• Channel may be blocked or not approved in the Parental Controls menu.
• If using a VCR, check to make sure the TVNCR switch on the VCR is in the correct position.
Noisy stereo reception
• May be a weak station. Use SOUND button to change to mono mode instead of stereo.
No picture, no sound but TV is on
• Maybe the cable/air function is set to the wrong position.
• Maybe a vacant channel is tuned.
• If watching VCR (connected only through antenna input), make sure TV is tuned to channel 3 or 4 - same as
CH3/4 switch on VCR. Also check to make sure TVNCR switch on VCR is in correct position.
Sound okay, picture poor
• Check antenna connections.
• Try adjusting sharpness function to improve weak signals.
Black Box appears on the screen:
• Captioning may be turned on. Check the Closed-Caption Display control panel in the Channel menu.
TV GUIDE Plus+ IR Controllers not working,
I
Check to make sure the controllers are positioned correctly over the IR remote sensors.
t
Your remote may be interfering with the IR controller. Place a piece of dark tape over the IF[ controller.
TV GUIDE Plus+ control of a cable box is slower than direct control of the box itself. Keep this in mind when
changing channels.
7q
Page 82

What your warranty covers:
• Any defect in materials or workmanship.
For how long after your purchase:
• One year for labor charges.
• One year for parts.
• Two years for picture tube.
(The warranty period for rental units begins with the first rental or 45 days from ,date of shipment to the rental
firm, whichever comes first.)
What we will do:
• Pay any Authorized RCA Television Servicenter the labor charges to repair your television.
• Pay any Authorized RCA Television Servicenter for the new or, at our option, refurbished replacement parts
and picture tube required to repair your television.
How you get service:
• Request home service from any Authorized RCA Television Servicenter. To identify your nearest Authorized
RCA Television Servicenter, ask your dealer, look in the Yellow Pages, or Gall 1-800-336-1900.
• Show the service technician your evidence of purchase date or first rental.
What your warranty does not cover:
• Customer instruction. (Your Owner's Manual clearly describes how to install, adjust, and operate your
television. Any additional information should be obtained from your dea_er,)
• Installation and related adjustments.
• Signal reception problems not caused by your television.
• Damage from misuse or neglect.
• Batteries.
• Images burnt onto the screen.
• A television that has been modified or incorporated into other products or is used for institutional or other
commercial purposes.
• A television purchased or serviced outside the USA.
• Acts of God, such as but not limited to lightning damage.
Product Registration:
• Please complete and mail the Product Registration Card packed with your television. It will make it easier
to contact you should it ever be necessary. The return of the card is not required for warranty coverage.
How state law relates to this warranty:
• This warranty gives you specific legal rights, and you may have other rights that vary from state to state.
If you purchased your product outside the USA:
• This warranty does not apply. Contact your dealer for warranty information.
80
Page 83

CARE AND CLEANING
You can clean the TV as required, using a soft lint-free cloth. Be sure to occasionally dust the ven'_ilation slots in
the cabinet to help assure adequate ventilation.
The TV's screen may be cleaned with a soft, lint-free cloth as well. Take care not to scratch or mar the screen. If
necessary, you may use a cloth dampened with warm water.
Never use strong cleaning agents, such as ammonia-based cleaners, or abrasive powder. These types
of cleaners will damage the TV.
While cleaning do not spray liquid directly on the screen, or allow liquid to run down the screen
and inside the TV. Also, avoid placing drinks or vases with water on top of the TV. This could
increase the risk of fire or shock hazard or damage to the TV.
If fixed left on the for be
imprinted on the screen. Such images include network Iogos, phone numbers, and video games. Extended
ICaution" (non-moving) images are screen Ionq periods, they may permanently
viewing of channels displaying these images should be avoided.
Page 84

General Cable Information
Antenna (or cable-TV) connections are made with
either coaxial antenna cable or twin-lead cable.
Coaxial cables are shielded so they are less
susceptible to hum or interference from adjacent
cables.
Push-on
Connector
Screw-on Coaxial
Round 75-ohm coaxial cable
Flat 300-ohm twin-lead cable
Most audio/video connections between
components can be made with shielded audio and
video cables that I_ave RCA-type phono connectors.
Standard Audio/Video cable with RCA-type
phono plugs (such as No. VH83)
Color-Coded Jacks
The jacks on the TV's monitor panel are color-coded
for ease of use. The VIDEOjacks are yellow, the right
AUDIOjacks are red, and the left AUDIOJACKSare white.
When connectingcomponents to each other, be
sure that you always connect left outputs to left
inputs and right outputs to right inputs. If a
component ha:; only one output (mono), connect it
to the PJMONOINPUTjack.
•To connect S-VHS (Super-VHS) components, an
S-VHS video cable is required.
Connector
The following accessories are available from most "
dealers and electronics supply stores in case you want
to position your components farther apart or need
additional cables.
Antenna Cables
Screw-on Cable attaches to
the round antenna connectors
(called 75-ohm F-type) on the
VH81 (3.-ft)
VH82 (6,-ft)
_/H89 (6-ft)
back of your \/CR or TV. The
ends screw or_to the connectors
for a secure connection.
Push-on Cable attaches to the
round antenrLa connectors
(called 75-ohm F-type) on the
back of your VCR or TV. Ends
push on for a quick connection.
Audio/Video Cables
Monaural VCR Dubbing
Cable Double cable that lets
you connect the VIDEOand AUDJO
JACKS of two VHS VCRs to
duplicate tapes. Can also be
Gold-Tipped cable
VH83 (6-_)
used to connect a VCR to your
TV. Cable is color-coded and
shielded. Has R(-A-type phono
plugs on each end.
Stereo VCR Dubbing Cable
Triple cable "Lhatlets you
connect the WDEOand AUDIOjacks
of stereo components.
S-Video cable (such as No. VH913)
Gold-Plated Jacks and Gold-Tipped Cables
Gold plating helps prevent oxidation of contacts
which provides much less loss than conventional
contacts. A complete line of gold-tipped cables is
available to help you obtain optimum performance
from your equipment.
82
Gold-Tipped cable
AH84 (6,-ft)
GO:
VH976 (6-ft)
VH913 (12-ft)
S-Video Cable has multi-pin
connectors on each end for
connecting S-Video components
to your TV.
Page 85

CRK70M 1
238544
Splitter
VH47
ANT200
Remote Control This is
the remote control that
came packed with your TV.
Replacements or spares
can be ordered as needed.
2-way Signal Splitter
helps you connect to a
second TV or VCR.
Amplified VHF/UHF/FM
Antenna allows you to
easily switch from the
antenna signal to cable or
satellite easily without
disconnecting antenna.
Accessory Order Form
Description
Screw-on antenna cable (3-ft)
Screw-on antenna cable (6-ft)
Push-on antenna cable (6-ft)
Monaural VCR Dubbing Cable (6-ft)
Stereo VCR Dubbing Cable (6-ft)
S-Video Cable (6-ft)
S-Video Cable (12-ft)
2-way Signal Splitter
Amplified Antenna
Antenna Mixer
Remote Control (CRK70M1)
Audio,Video Adapter
VH82
VH89
VH83
VH84
VH976
VH913
VH47
ANT200
:193984
238544
1228449
$6.95
$5.95
$5.95
$9.95
$7.95
$8.95
$3.95
$49.95
$10.95
$33.50
$4.35
Prices are subject to change without notice.
Total Merchandise .............................................. $__
Sales Tax ................................................................
We are required by law to collect the
appropriate sales tax for each individual
state, country, and locality to which the
merchandise is being sent.
Shipping and Handling ..................................... $ 5.00
Total Amount Enclosed .....................................
Use VISA, MasterCard, or Discover Card
preferably.
Money order or check must be in U.S.
currency only.
No COD or CASH
0J
All accessories are subject to availability.
0J
-1-
Where applicable, we wil! ship a superseding model.
.C:
to
0J
r_
Page 86

Charge your order on your VISA,
MasterCard, orDiscover Card by
filling in below
USE YOUR CREDIT CARD
IMPORTANT: Copy complete account number
from your VISA card
I-1-T-1-11 I I IIII II-I-F-i
VISA"
United States and Canada Orders
To place your order by phone, have your Visa, MasterCard
or Discover Card ready and ,call the toll-free number
listed below between 8AM and 8PM (EST)Monday
through Friday or between 9AM and 5PM (EST)Satur-
day.
Use this number only to place on order for accessory
items listed on this order form.
Myo ex res:
IMPORTANT: Copy complete account number
VTS-Tq Vq--VTq VV-VVqN--VTq
CopyNumberabove your
name on
MasterCard
IMPORTANT: Copy complete account number
IIII I[--7---1-_ [--[--F--_ [7--1--_
(Credit card order will not be processed without signature)
from your MasterCard
MYCardexp,re :I I IIII
from your Discover Card
My card expires: _
AUTHORIZED SIGNATURE
Prices are subject to change without notice.
1-800-338-0376
To place your order by mail, detach and mail the
completed order form with credit card information,
money order or check in UScurrency (_Tade payable
to Thomson Consumer Electronics, _lnc.l_to the
following address:
Video Accessories
PO Box 8419
Ronks, PA 17573
addressPrint,our mailing label.°r typeclearly"This willy°ur name andbe _ orderAc°mpleteofwaitingWillsave youand c°rreCtdays
Name:
Street:
Apt'.
II City:
I
I State:
I
Please make sure that both sides of this form
have been filled out completely.
• Allow 4 weeks for delivery.
° All accessories are subject to availability.
• Prices are subject to change
Zip:
84
Page 87

A
Accessories 82
Amplifier 76
Antenna (ANT) 38
Audio menu 44
AUDIO OUTPUT 39
Audio Output Volume & Speakers 44
Audio Processor 44, 60
Auto Channel Search 16, 47
Auto Color 45
Auto Tuning 25, 26, 48 ,-
B
Eiack panel jacks 38
Basic Picture Controls 45
Batteries 5, 41
Black Level 45
Buttons
Front panel 40
Remote 36
C
Cables 82
Care and Cleaning 81
CC 41
CH CTRLbutton 58
Chan # 47
Chan Labels 47
Channel Block 50
Channel Directory 47
Channel Mapping 21, 54
Channel Marker 41
Channel menu 47
Channels
DVDNCR2 Channel 25, 48
SAT/CABLEChannel 26, 48
VCR1 Channel 48
Closed Caption
Display 46, 61
Mode 46, 62
Color 45
Color Warmth 45
Connections
Basic 4
Components 66
Foldout 4
Hints and tips 65
Contrast 45
Control Panels 11
INFO button 63
Inputs
Audio, video 38
INPUT 1,2 38
[
L/MONO 38
Labels 27, 47
Language 16, 46
M
Memory 47
Menu Language 16, 46
Menus 10
Mono 44, 60
MOVE buttons 58
Mute 44
N
Normal List 47
O
On-screen Program Details 63
One Touch Recording 57
Outputs 39
Parent Approved 50
Parental Controls
Channel Block 50
Front Panel Lockout 50
Parental Controls menu 50
Picture Control Presets 45
Picture Quality menu 45
PIP(Picture in Picture) 58
PIPChan 41
PIPbutton 58
Point and Select 8
Program details 63
Programming the remote to control
components 30, 32, 33
Projection TV, adjusting 46
R
Remote Control
Programming 30
Remote batteries are low 41
using the 33
RIGHT 38
S
S-VIDED 38
SAP 41
Schedule 49
Screen menu 46
Second Audio Program (SAP) 44, 60
Set
DVD/VCR2 Channel 25,, 48
SAT/CABLEChannel 26, 48
VCR1 Channel 48
Set Time 49
Setup, 16
Setup menu 51, 52
Sharpness 45
Signal Type
Cable TV 47
UHFNHF Antenna 47
Sleep 41
SleelSTimer 41, 49
SOUND button 60
Stereo 41, 44, 60
Subwoofer 39, 76
SWAP button 58
T
Tape Deck 76
Time
Current 41
Setrime 23
Time menu 49
Tint 45
Tone Controls 44
TV GUIDE Plus+ System 5, 14, 17-22,
5!, 54-57, 79
Channel Mapping 21, 54
IF'Controllers 5
Next Menu 55
One-Button Recording 57
Scan Menu 55
Sort Menu 56
Surf Menu 54
Troubleshooting 79
V
Variable output 39
Variable Output, Speakers Off 44
Variable Output, Speakers. On 44
VIDEO 38
Vide<) Noise Reduction 45
Fixed images 81
Fixed output 39
Fixed Output, Speakers Off 44
Front panel buttons 40
Front Panel Lockout 50
85
Page 88

CREATING A GREENER i-UTURE
At Thomson Consumer Electronics we are dedicated to the preservation of our
natural heritage and to a healthy and safe way of lifE: for current and future
generations. This is a global effort which encompasses every THOMSON facility
throughout the world.
We believe that clean air, clean water, a protectedl earth, and healthy people are not
only practical and desirable goals, but achievable ones as well. Our Corporate
Environmental, Health and Safety Charter acknowledges our commitment to protect
these precious assets and provides a challenging vision and gui¢leline for conducting
our business.
_ THOMSON CONSUMER ELECTRONICS
Below are a few examples of Thomson's achievements in our efforts to preserve our natural resources.
THE EARTH
Thomson reclaims millions of pounds
of hazardous waste annually, diverting
it from landfills.
Thomson treats millions of pounds of
waste water sludge annually and
renders it non-hazardous.
Thomson recycles over 50 million
pounds of non-hazardous material
annually that otherwise would have
been treated as trash, an overall
recovery rate of 50%.
Thomson globally recycles millions of
pounds of broken television picture
tube glass annually through both
internal and external reclaim processes.
Thomson has also increased its usage of recycled materials for packaging of our products. For example, in the U.S. and Mexico
our television plants use recycled content in our television cartons and instruction booklets. The inks used for the print on
cartons and instruction booklets are soy based. For a free brochure regarding Thomson's Environmental Health and Safety
Programs, write to Thomson Consumer Electronics' address below, attention Environmental Programs: INH340.
THE AIR
Thomson has replaced solvent-based
paints at many locations resulting in an
80% reduction in toxic air emissions for
equivelant material used.
Thomson has eliminated the use of
ozone-depleting substances at television
manufacturing facilities around the
world.
Thomson collects and returns over 1.5
million pounds of glass and furnace dust
to the glass making process annually.
Thomson has launched worldwide
energy savings programs which
contribute to efforts to reduce air
emissions from electrical generating
facilities.
TH E WATER
Thomson recovers over 2 million
pounds of fine glass particles from
p_o(:esswater each year and recycles
them back into its glass furnaces.
Thomson's state-of-the-art waste water
treatment plants i:iiter out over 26
million pounds of solids from process
water each year.
Thomson's U.S. glass factory recycles
2,5(}0 gallons of water per minute and
cleans 2.6 million gallons of water per
day.
Thomson is resea_rching new processes
and is developinq new manufacturing
equipment and technologies to further
reduce large volume water use.
Please do not send any products to the Indianapolis address listed in t_hismanual or on the carton. This will only add delays in
service for your product.
THOMSON CONSUMER ELECTRONICS
The following materials Were used in
printing this publication:
10330 North Meridian Street
Indianapolis, IN 46290
BECYI:LEDPAPER
(_,_ 50%
©1997 Thomson Consumer Electronics, Inc.
Trademark(s)® Registered
Marca(s) Registrada(s)
Printed in USA
TOCOM 15209180
MINIMUM10%POSTCONSUME
 Loading...