

Page 1

user manual
M38 series
M39 series
It is important to read this user manual prior to using your new product for the first time.
Page 2

Important safety instructions
IMPORTANT SAFETY INSTRUCTIONS
PLEASE READ AND SAVE FOR FUTURE REFERENCE
Some of the following information may not apply to your particular product; however, as with any electronic
product, precautions should be observed during handling and use.
• Read these instructions.
• Keep these instructions.
• Heed all warnings.
• Follow all instructions.
• Do not use this apparatus near water.
• Clean only with dry cloth.
• Do not block any ventilation openings. Install in accordance with the manufacturer’s instructions.
• Do not install near any heat sources such as radiators, heat registers, stoves, or other apparatus (including
amplifiers) that produce heat.
• Do not defeat the safety purpose of the polarized or grounding-type plug. A polarized plug has two
blades with one wider than the other. A grounding type plug has two blades and a third grounding
prong. The wide blade or the third prong is provided for your safety. If the provided plug does not fit into
your outlet, consult an electrician for replacement of the obsolete outlet.
• Protect the power cord from being walked on or pinched particularly at plugs, convenience receptacles,
and the point where they exit from the apparatus.
• Only use attachments/accessories specified by the manufacturer.
• Use only with the cart, stand, tripod, bracket, or table specified by the manufacturer, or
sold with the apparatus. When a cart is used, use caution when moving the cart/
apparatus combination to avoid injury from tip-over.
• Unplug this apparatus during lightning storms or when unused for long periods of
time.
• Refer all servicing to qualified service personnel. Servicing is required when the
apparatus has been damaged in any way, such as power-supply cord or plug is damaged, liquid has been
spilled or objects have fallen into the apparatus, the apparatus has been exposed to rain or moisture,
does not operate normally, or has been dropped.
]
Portable Cart Warning
• ADDITIONAL SAFETY INFORMATION
• Main plug is used as disconnect device and it should remain readily operable during intended use. In
order to disconnect the apparatus from the mains completely, the mains plug should be disconnected
from the mains socket outlet completely.
• The AC/DC adapter supplied with this product is intended to be correctly oriented in a vertical or floor
mount position.
• Do not use unauthorized chargers or power adapters. Use only chargers that came with your product or
that is listed in the user’s guide.
• Apparatus shall not be exposed to dripping or splashing and no objects filled with liquids, such as vases,
shall be placed on the apparatus.
• Always leave sufficient space around the product for ventilation. Do not place product in or on a bed,
rug, in a bookcase or cabinet that may prevent air flow through vent openings.
• Do not place lighted candles, cigarettes, cigars, etc. on the product.
• Connect power cord only to AC power source as marked on the product.
• Care should be taken so that objects do not fall into the product.
• Do not attempt to disassemble the cabinet. This product does not contain customer serviceable
components.
• The marking information is located at the bottom of apparatus.
• Caution marking is located at bottom of apparatus.
1
Page 3

This equipment is a Class II or double insulated electrical appliance. It has been designed
in such a way that it does not require a safety connection to electrical earth.
Important battery information
Warning: Your product contains a battery and charging system which is designed to work in temperatures
that do not exceed 50°C (122°F). Leaving this product in a closed automobile or the trunk of an automobile
where temperatures may exceed 50°C may result in permanent battery damage, fi re, or explosion. Please
remove your product from the automobile when you exit, do not place your product in the trunk of your
automobile, and do not leave your product in any location where temperatures may exceed 50°C or expose to
direct sunlight.
Ecology
Help protect the environment - we recommend that you dispose of used batteries by putting them into
specially designed receptacles.
Precautions for the unit
• Do not use the unit immediately after transportation from a cold place to a warm place; condensation
problems may result.
• Do not store the unit near fire, places with high temperature or in direct sunlight. Exposure to direct
sunlight or extreme heat (such as inside a parked car) may cause damage or malfunction.
• Do not expose to rain or moisture.
• Clean the unit with a soft cloth or a damp chamois leather. Never use solvents.
• The unit must only be opened by qualified personnel.
Headset safety
To use a headset safely, please keep the following in mind:
• Do not play your headset at a high volume. Hearing experts advise against continuous extended play.
• If you experience ringing in your ears, turn down the volume or stop using the headset.
• Do not use a headset while driving a motorized vehicle or riding a bike. It may cause a traffic hazard and
is illegal in many areas.
• Even if your headset is an open-air type designed to let you hear outside sounds, don’t turn up the
volume so high that can’t hear sounds around you.
2
Page 4

FCC Information
RCA
M3904
RCA
M3804
RCA
M3808
RCA
M3816
This equipment has been tested and found to comply with the limits for a Class B digital device, pursuant to
Part 15 of FCC Rules. These limits are designed to provide reasonable protection against harmful
interference in a residential installation. This equipment generates, uses, and can radiate radio frequency
energy and, if not installed and used in accordance with the instructions, may cause harmful interference to
radio communications.
However, there is no guarantee that interference will not occur in a particular installation. If this equipment
does cause harmful interference to radio or television reception, which can be determined by turning the
equipment off and on, the user is encouraged to try to correct the interference by one or more of the
following measures:
• Reorient or relocate the receiving antenna.
• Increase the separation between the equipment and receiver.
• Connect the equipment into an outlet on a circuit different from that to which the receiver is connected.
• Consult the dealer or an experienced radio/TV technician for help.
Modifications not expressly approved by the party responsible for compliance could void the user’s
authority to operate the equipment.
Manufacturer/Responsible Party
Audiovox Electronics Corp.,
150 Marcus Blvd., Hauppauge, NY 11788
1-317-810-4880 ( No technical /product support is available via this number. This phone number is for
regulatory matters only.)
Visit www.rcaaudiovideo.com for technical support
RCA
M3904
RCA
M3804
RCA
M3808
RCA
M3816
This Class B digital apparatus complies with
Canadian ICES-003.
Cet appareil numérique de la class B est
conforme à la norme NMB-003 du Canada.
3
Page 5

Contents
Important safety instructions
IMPORTANT SAFETY INSTRUCTIONS ................................................................................................1
Important battery information ..........................................................................................................2
Ecology ........................................................................................................................................................2
Precautions for the unit ........................................................................................................................2
FCC Information ...................................................................................3
End user license agreement ...............................................................7
Before you begin
Copyright warning ..................................................................................................................................10
Back up your data ...................................................................................................................................10
Unpacking your player ..........................................................................................................................10
Computer system requirements ........................................................................................................10
Secure music transfer requirements ................................................................................................10
Installing the belt clip ............................................................................................................................11
Removing the belt clip ..........................................................................................................................11
Connecting to the computer ..............................................................................................................11
Charging the player ................................................................................................................................12
Managing files on your RCA Player
Using RCA easyRip ..................................................................................................................................13
Using Windows Explorer .......................................................................................................................14
Deleting files from the player .............................................................................................................14
Disconnecting the player from the PC ............................................................................................14
General controls
Turning the player on and off .............................................................................................................15
Locking the player controls .................................................................................................................15
Resetting the player ...............................................................................................................................15
Using the menus
Menu types ................................................................................................................................................16
Menu navigation .....................................................................................................................................16
The Home menu ......................................................................................................................................18
Music
Playing music files ...................................................................................................................................19
Music playback .........................................................................................................................................20
4
Page 6

Videos
Playing video files ...................................................................................................................................22
Video viewing ...........................................................................................................................................22
Pictures
Playing picture files ................................................................................................................................23
Picture viewing ........................................................................................................................................23
Audiobooks
Playing audiobooks ................................................................................................................................24
Audiobooks playback controls ...........................................................................................................24
Skipping through audiobook sections ...........................................................................................25
Radio
Playing FM radio ......................................................................................................................................26
Storing and recalling preset stations ...............................................................................................26
Improving FM radio sound ..................................................................................................................27
Playing back FM radio recordings .....................................................................................................27
Copying recordings to your PC ..........................................................................................................27
Favorites
Creating a "Favorites" playlist .............................................................................................................28
Removing files from "Favorites" playlist .........................................................................................28
Downloading playlists to player ........................................................................................................28
Voice Memo
Recording voice memo .........................................................................................................................29
Playing back voice memo ....................................................................................................................29
Copying recordings to your PC ..........................................................................................................29
5
Page 7

Settings
Changing the player’s settings ...........................................................................................................30
Shuffle ........................................................................................................................................................30
Repeat .........................................................................................................................................................30
Equalizer .....................................................................................................................................................30
Customize menu .....................................................................................................................................30
Slideshow ...................................................................................................................................................30
Brightness .................................................................................................................................................30
Screensaver ...............................................................................................................................................30
Power save ................................................................................................................................................30
RecDur (Record duration) ....................................................................................................................31
FreqStep (Frequency Step) ..................................................................................................................31
Language ..................................................................................................................................................31
Protocol .......................................................................................................................................................31
System info ................................................................................................................................................31
Restore defaults .......................................................................................................................................31
Additional information
Tips and troubleshooting .....................................................................................................................32
For your records ......................................................................................................................................34
Visiting RCA website ..............................................................................................................................34
Technical specification ..........................................................................................................................34
Specifications ............................................................................................................................................34
Warranty information
Limited warranty .....................................................................................................................................35
6
Page 8

End user license agreement
This is a copy of the EULA that you need to agree to in order to use this product.
End user license agreement
IMPORTANT: READ CAREFULLY BEFORE DOWNLOADING OR INSTALLING THIS SOFTWARE!
THIS END USER LICENSE AGREEMENT (THIS “EULA”) IS A LEGAL AGREEMENT BETWEEN YOU AND AUDIOVOX CORPORATION AND, AS
APPLICABLE, ANY AUDIOVOX SUBSIDIARY, AS DEFINED BELOW (COLLECTIVELY “AUDIOVOX”), FOR THE RCA BRANDED PORTABLE
DIGITAL AUDIO/VIDEO DEVICE APPLICATION/DRIVER SOFTWARE PROGRAM WHICH MAY INCLUDE ASSOCIATED SOFTWARE
COMPONENTS, SOFTWARE LICENSED BY AUDIOVOX FROM THIRD PARTIES (“LICENSORS”) AND ASSOCIATED DOCUMENTATION, IF ANY
(COLLECTIVELY, THE “PROGRAM”). THIS EULA CONTAINS IMPORTANT LEGAL LIMITATIONS, RESTRICTIONS AND DISCLAIMERS, AND
ALSO SPECIFIES THE DURATION OF YOUR LICENSE.
BY INSTALLING THE PROGRAM OR CLICKING ON THE ACCEPTANCE BUTTON OF THE PROGRAM, COPYING OR OTHERWISE USING THE
PROGRAM, YOU ACKNOWLEDGE AND AGREE THAT YOU HAVE READ THIS EULA, UNDERSTAND IT, AND AGREE TO BE BOUND BY ITS
TERMS AND CONDITIONS. THIS PROGRAM IS PROTECTED BY COPYRIGHT LAWS AND INTERNATIONAL COPYRIGHT TREATIES, AS WELL
AS OTHER INTELLECTUAL PROPERTY LAWS AND TREATIES. YOU MAY USE THE PROGRAM ONLY IN ACCORDANCE WITH THIS EULA,
AND ANY SUCH USE IS HEREBY UNDERSTOOD TO BE CONDITIONAL UPON YOUR SPECIFIC AGREEMENT TO THE UNMODIFIED TERMS
SET FORTH HEREIN. IF YOU DO NOT AGREE WITH ALL OF THE TERMS OF THIS EULA, CLICK ON THE REJECTION BUTTON AND/OR DO
NOT INSTALL THE PROGRAM AND/OR DO NOT USE THE PROGRAM.
1. LICENSE
(a) Under this EULA, you are granted a non-exclusive, non-sublicenseable, non-assignable and non-transferable (except as expressly
set forth below) license (i) to use and install the Program on a single workstation, and (ii) to make one (1) copy of the Program
into any machine-readable form for backup of the Program, provided the copy contains all of the original Program’s proprietary
notices.
(b) You may transfer the Program and license to another party only as a part of the RCA branded Portable Digital Audio/Video Device
(“A/V Device”), and only if the other party agrees to accept the terms and conditions of this EULA. If you transfer the Program,
you must at the same time either transfer all copies to the same party or destroy any copies not transferred.
(c) The terms of this EULA will govern any software upgrades or updates provided by AUDIOVOX that replace and/or supplement the
original Program, unless such upgrade or update is accompanied by separate license terms and conditions in which case the
terms of that separate license will govern. You acknowledge and agree that AUDIOVOX may automatically download upgrades or
updates to the Program software to your computer in order to update, enhance, and/or further develop the Program.
2. LICENSE RESTRICTIONS
(a) Except for the licenses expressly granted to you in this EULA, no other licenses or rights are granted or implied.
(b) You may not (i) make the Program available over a network where it could be used by multiple computers at the same time; (ii)
modify, translate, reverse engineer, decompile, disassemble (except to the extent that this restriction is expressly prohibited by
law), or create derivative works based upon the Program; (iii) copy the Program, except as expressly permitted herein; (iv) remove
or alter any copyright notices on all copies of the Program; or (v) rent, lease or lend the Program. You agree that you shall only
use the Program in a manner that complies with all applicable laws in the jurisdictions in which you use the Program, including,
but not limited to, applicable restrictions concerning copyright and other intellectual property rights.
(c) The Program may contain pre-release code that does not perform at the level of a final code release. In such case, the Program
may not operate properly. Updated versions of the Program may be downloaded from www.rcaaudiovideo.com/downloads
(d) AUDIOVOX is not obligated to provide support services for the Program.
(e) The Program is provided with “RESTRICTED RIGHTS”. Use, duplication, or disclosure by the U.S. Government is subject to
restrictions as set forth in subparagraph (c)(1)(ii) of DFARS 252.227-7013, or FAR 52.227-19, or in FAR 52.227-14 Alt. III, as
applicable.
3. TERM AND TERMINATION
(a) Your license is effective on the date you accept this EULA and remains in effect until this EULA is terminated by either party.
(b) You may terminate this EULA and the associated license, without any notice or delay, by destroying or permanently erasing the
Program and all copies thereof.
(c) If you fail to comply with any of the terms of this EULA, in whole or part, your license will automatically terminate without notice
from AUDIOVOX.
(d) Upon termination of this EULA and your associated license, you shall cease all use of the Program and destroy or permanently
erase the Program and all full or partial copies thereof.
4. WARRANTY DISCLAIMER
THE PROGRAM IS PROVIDED “AS IS” WITHOUT WARRANTY OF ANY KIND, EITHER EXPRESSED OR IMPLIED, INCLUDING, BUT NOT
LIMITED TO THE IMPLIED WARRANTIES OF MERCHANTABILITY, FITNESS FOR A PARTICULAR PURPOSE, TITLE OR NON-INFRINGEMENT.
THE ENTIRE RISK AS TO THE QUALITY AND PERFORMANCE OF THE PROGRAM IS WITH YOU. SHOULD THE PROGRAM PROVE
DEFECTIVE, YOU (AND NOT AUDIOVOX, ITS SUPPLIERS, OR ITS DEALERS) ASSUME THE ENTIRE COST FOR ALL NECESSARY REPAIR OR
CORRECTION.
This exclusion of warranty may not be allowed under some applicable laws. As a result, the above exclusion may not apply to you,
and you may have other rights depending on the law that applies to you.
7
Page 9

5. OWNERSHIP RIGHTS
All title and intellectual property rights, including but not limited to copyrights, in and to the Program and any copies thereof are
owned by AUDIOVOX, its Licensors or its suppliers. All title and intellectual property rights in and to the content which may be
accessed through use of the Program is the property of the respective content owner and may be protected by applicable copyright
or other intellectual property laws and treaties. This license grants you no rights to use such content. All rights not expressly granted
are reserved by AUDIOVOX or its Licensors.
6. LIMITATION OF LIABILITY
(a) TO THE MAXIMUM EXTENT PERMITTED BY APPLICABLE LAW, IN NO EVENT SHALL AUDIOVOX, OR ITS DEALERS BE LIABLE FOR ANY
SPECIAL, INCIDENTAL, INDIRECT, OR CONSEQUENTIAL DAMAGES WHATSOEVER (INCLUDING, WITHOUT LIMITATION, DAMAGES
FOR LOSS OF PROFITS, BUSINESS INTERRUPTION, CORRUPTION OF FILES, LOSS OF BUSINESS INFORMATION, OR ANY OTHER
PECUNIARY LOSS) REGARDLESS OF CAUSE OR FORM OF ACTION, INCLUDING CONTRACT, TORT, OR NEGLIGENCE, ARISING OUT OF
YOUR USE OF OR INABILITY TO USE THE PROGRAM, EVEN IF AUDIOVOX HAS BEEN ADVISED OF THE POSSIBILITY OF SUCH
DAMAGES. BECAUSE SOME STATES AND JURISDICTIONS DO NOT ALLOW THE EXCLUSION OR LIMITATION OF LIABILITY OF
CONSEQUENTIAL OR INCIDENTAL DAMAGES, THE ABOVE LIMITATION MAY NOT APPLY TO YOU.
(b) YOU ASSUME RESPONSIBILITY FOR THE SELECTION OF THE APPROPRIATE PROGRAM TO ACHIEVE YOUR INTENDED RESULTS, AND
FOR THE INSTALLATION, USE, AND RESULTS OBTAINED.
7. WINDOWS MEDIA
The software embedded within your A/V Device (the “Device Firmware”) contains software licensed from Microsoft that enables you
to play Windows Media Audio (WMA) files (“WMA Software”). The WMA Software is licensed to you for use with your A/V Device
under the following conditions. By installing and using this version of the Device Firmware, you are agreeing to these conditions. IF
YOU DO NOT AGREE TO THE END USER CONDITIONS OF THIS SECTION 7, DO NOT INSTALL OR USE THIS VERSION OF THE DEVICE
FIRMWARE.
The WMA Software is protected by copyright and other intellectual property laws. This protection also extends to documentation for
the WMA Software, whether in written or electronic form.
GRANT OF LICENSE: The WMA Software is only licensed to you as follows:
You may use this version of the Device Firmware containing the WMA Software only as such use relates to your A/V Device.
You may not reverse engineer, decompile, or disassemble the WMA Software, except and only to the extent that such activity is
expressly permitted by applicable law.
You may transfer your right to use the Device Firmware only as part of a sale or transfer of your A/V Device, on the condition that the
recipient agrees to the conditions set forth herein. If the version of the Device Firmware that you are transferring is an upgrade, you
must also transfer all prior versions of the Device Firmware that you have which include the WMA Software.
MICROSOFT IS NOT PROVIDING ANY WARRANTY OF ANY KIND TO YOU FOR THE WMA SOFTWARE, AND MICROSOFT MAKES NO
REPRESENTATION CONCERNING THE OPERABILITY OF THE WMA SOFTWARE.
The WMA Software is of U.S. origin. Any export of this version of the Device Firmware must comply with all applicable international
and national laws, including the U.S. Export Administration Regulations, that apply to the WMA Software incorporated in the Device
Firmwa re.
Content owners use Windows Media digital rights management technology (“WMDRM”) to protect their intellectual property,
including copyrights. This device uses WMDRM software to access WMDRM-protected content. If the WMDRM software fails to
protect the content, content owners may ask Microsoft to revoke the software’s ability to use WMDRM to play or copy protected
content. Revocation does not affect unprotected content. When you download licenses for protected content, you agree that
Microsoft may include a revocation list with the licenses. Content owners may require you to upgrade WMDRM to access their
content. If you decline to accept an upgrade, you will not be able to access content that requires the upgrade.
8. THIRD PARTY SOFTWARE
ANY THIRD PARTY SOFTWARE THAT MAY BE PROVIDED WITH THE PROGRAM IS INCLUDED FOR USE AT YOUR OPTION. IF YOU CHOOSE
TO USE SUCH THIRD PARTY SOFTWARE, THEN SUCH USE SHALL BE GOVERNED BY SUCH THIRD PARTY’S LICENSE AGREEMENT, AN
ELECTRONIC COPY OF WHICH WILL BE INSTALLED IN THE APPROPRIATE FOLDER ON YOUR COMPUTER UPON INSTALLATION OF THE
SOFTWARE. AUDIOVOX IS NOT RESPONSIBLE FOR ANY THIRD PARTY’S SOFTWARE AND SHALL HAVE NO LIABILITY FOR YOUR USE OF
THIRD PARTY SOFTWARE.
9. GOVERNING LAW
If you acquired this A/V Device in the United States, this EULA shall be governed and construed in accordance with the laws of the
State of Indiana, U.S.A. without regard to its conflict of laws principles. If you acquired this A/V Device outside the United States or the
European Union, then local law may apply.
8
Page 10

10. GENERAL TERMS
This EULA can only be modified by a written agreement signed by you and AUDIOVOX, and changes from the terms and conditions
of this EULA made in any other manner will be of no effect. If any portion of this EULA shall be held invalid, illegal, or unenforceable,
the validity, legality, and enforceability of the remainder of the Agreement shall not in any way be affected or impaired thereby. This
EULA is the complete and exclusive statement of the agreement between you and AUDIOVOX, which supersedes all proposals or
prior agreements, oral or written, and all other communications between you and AUDIOVOX, relating to the subject matter of this
hereof. AUDIOVOX’S Licensors shall be considered third party beneficiaries of this Agreement and shall have the right to enforce the
terms herein.
“AUDIOVOX SUBSIDIARY” shall mean any person, corporation, or other organization, domestic or foreign, including but not limited to
subsidiaries, that is directly or indirectly controlled by Audiovox Corporation including, but not limited to, Audiovox Consumer
Electronics, Inc. and Audiovox Electronics Corporation. For purposes of this definition only, the term “control” means the possession
of the power to direct or cause the direction of the management and policies of an entity, whether by ownership of voting stock or
partnership interest, by contract, or otherwise, including direct or indirect ownership of at least fifty percent (50%) of the voting
interest in the entity in question.
9
Page 11

Before you begin
Dear RCA Customer,
Thank you for purchasing the Player. This product will play mp3 and Windows Media™ audio (WMA)
content as well as content purchased from most online music download services.
RCA easyRip™ Media Software, installed automatically when you connected this player to your PC, lets you
import music files from CDs and other sources, organize your music library, and transfer unprotected MP3
and WMA files to and from this player.
To transfer DRM-protected files to this player, you must use the application provided by the online music
store.
Copyright warning
This player is for your personal use only. Unauthorized recording or duplication of copyrighted material may
infringe upon the rights of third parties and may be contrary to copyright laws.
Back up your data
As with any portable player, you must back up the drive regularly. The manufacturer is not responsible for
lost data.
Unpacking your player
All of the items listed below should have been packed in the box with your player.
• RCA player (contains music management software installer and user manual)
• Quick Start Guide
• USB cable
• Earphones
• Clip
Computer system requirements
• Pentium III 500MHz or higher recommended
• Windows® XP (service pack 1 or higher) or Windows Vista™ or Windows® 7
• Internet Explorer 6.0 or higher with Internet access
• Windows Media Player 10 or higher
• 250MB or more free hard disk space for the software
• 128MB RAM (256MB recommended)
• CD-ROM drive capable of digital audio extraction
• USB port (2.0 recommended)
• Sound card
Secure music transfer requirements
The default setting of this player is in MSC (Mass Storage Class) mode when connected to your PC. To
enable function of transferring subscription music content to the player, select MTP (Media Transfer
Protocol) mode under Protocol in the player's Settings menu (refer to page 30).
Windows, Windows Media, and Windows Vista are trademarks or registered trademarks of Microsoft Corporation in the United States and other
countries.
10
Page 12

Installing the belt clip
Step 2:
Push here
until the
belt clip
completely
locks in
place
Player
Removing the belt clip
Lift up the
clip here
Player
Step1:
Place the
belt clip
here
Belt clip
Belt clip
Connecting to the computer
• Connect the player to your computer with the USB cable provided. The player will turn on automatically.
• The player will be connected in MSC (Mass Storage Class) mode. It will appear as a drive letter on your
computer and behave as a detachable drive for file transfer in one or both directions.
• The RCA easyRipTM Media Software installer is stored in the player, go to MyComputer in the Start
menu, nd and open the drive letter associated with the player (i.e. LYRA) and then double-click the
rcaeasyrip_setup le to launch the installer.
• The software installer can be deleted from the player after installation to free up more storage spaces.
Player
USB cable
* The latest software can be downloaded from www.rcaaudiovideo.com.
USB port of your
computer
11
Page 13

To enable function of launching RCA easyRip installer stored in the player, the player must be in
MSC mode which can be selected under Protocol in the Settings menu. The default setting of
this player is already in MSC mode. Refer to page 30 for more information.
• It might take several seconds for the player to be detected. Click Refresh in My Computer
or Windows Explorer to make sure the player has been detected.
• The player is capable of transferring files at USB 2.0. If USB 2.0 port is available on your
computer, use it to connect to your player. The player is still backward compatible with the
older USB 1.1 ports. However, you will not be able to take full advantage of the potential speed
increase.
• IMPORTANT: Don’t disconnect the USB cable to the PC or the player during the software
installation.
Charging the player
The player charges automatically every time you connect it to your computer. To fully charge the player,
make sure your computer is on and the device is connected for at least 3 hours. Refer to the battery level
icon on the display to check the battery level. Recharge the player when the icon is empty.
12
Page 14

Managing files on your RCA Player
Before you begin using your RCA player, you’ll want to copy your media files to the player. You can use any of
the following methods to transfer content:
• RCA easyRip
• Drag and drop files in Windows Explorer
• Software provided by online music stores
To transfer DRM-protected content, use the software provided by the online music store.
The following sections explain how to copy unprotected files to the player. For instructions on transferring
protected files, please refer to the documentation for the software you use to transfer the files.
Using RCA easyRip
The RCA easyRip software was installed automatically the first time you connected this player to your
PC.
easyRip lets you:
• Import music from CDs
• Organize your music library on your PC
• Create playlists
• Copy files from your library to the player
• Copy files from the player to your library
• Delete files from the player
• Drag-and-drop picture files onto the root level or a specific folder of the player for viewing.
• Video files must be converted and transferred via RCA easyRip for playback.
To start easyRip:
• Click on the RCA system tray icon and select RCA easyRip from the menu.
• Double-click the easyRip icon on your PC’s desktop. The easyRip dock appears at the side of your screen.
• Video les must be transferred via easyRip, which automatically converts the les to
optimal format.
• Help – For detailed explanation on using easyRip, click the Help widget on the module
dock.
13
Page 15

Using Windows Explorer
To copy files in Windows XP with Windows Media Player 10 installed:
1. Open the player in Windows Explorer.
2. Drag and drop music files onto the Music folder.
To copy files in Windows Vista or Windows® 7 or Window XP with Windows Media Player 11 installed:
1. Open the player in Windows Explorer
2. Open Internal Storage.
3. Drag and drop music files.
Deleting files from the player
For any files you have transferred to the player, you may delete them while you have connected the player
with your computer.
1. Open the player in Windows Explorer and then navigate to the folder containing the files.
2. Select the files you want to remove and then press the Delete key on the keyboard of your PC.
• It is best to remove subscription files from the player by using Windows Media Player.
Disconnecting the player from the PC
If Windows sees the player as an MTP device:
• Unplug the player from the PC when no file transfer is in progress.
If Windows sees the player as a removable disk:
1. In the Windows system tray, click the Safely Remove Hardware icon
the list of devices.
2. When the Safe to remove hardware message appears, unplug the player from the PC.
Do not disconnect the USB connection during file download. Doing so may corrupt system files
or the files being downloaded.
14
and then select the player from
Page 16

General controls
MIC
RESET
Display
Power on/off,
Lock/Unlock
button
Micro
-phone
USB jack
Earphones JackReset
Navigate to the left/
skip back/reverse/
menu back
Return
Navigate or scroll up/
increase volume
Option menu
Navigate to the
right/skip forward/
fast forward/menu
advance
Play/pause/select
menu option
Navigate or scroll
down/decrease
volume
Turning the player on and off
To turn the player on, slide / downward. Slide downward again to turn the player off.
Locking the player controls
To lock the player controls to prevent them from being activated accidentally, slide / upward. To unlock,
/ to the middle position. When the controls are locked, the message "Keys Locked" appears on the
slide
display.
Resetting the player
If the player stops operating properly, you can reset it by pressing the RESET button on the back of the
player with a non-metal pointed object (e.g. toothpick).
15
Page 17

Using the menus
Menu types
The player has two types of menu:
Player menu
The player menu appears when you turn on the player or if you press and hold
player. It lets you:
• Browse for and play music, audiobook, video and picture files
• Listen to the radio
• Record and play back voice memos
• Change the player’s settings – language, display brightness, etc.
Menu titles
Menu items
Option menu
The option menu appears if you press
at the playback (Now playing) screen while listening to the player. It
provides different options depending on what you are listening to when you press
"Now playing" screen
while listening to the
.
Menu navigation
When a menu is displayed:
• Press + and – to scroll up and down the list of menu items.
• Press to go to the next menu level. Press to return to the previous menu level.
Press +
Press
Press
16
Play All Songs
Down
Getting Out
Going Down Slow
Press –
Page 18

• If the highlighted item is playable (for example, an audio file), press
Press
to start playback.
• If the highlighted item indicates the current setting (for example, the repeat mode setting), press
change the setting.
Add to Favorites
Repeat O
Press
On
Add to Favorites
Repeat One
On
to
17
Page 19

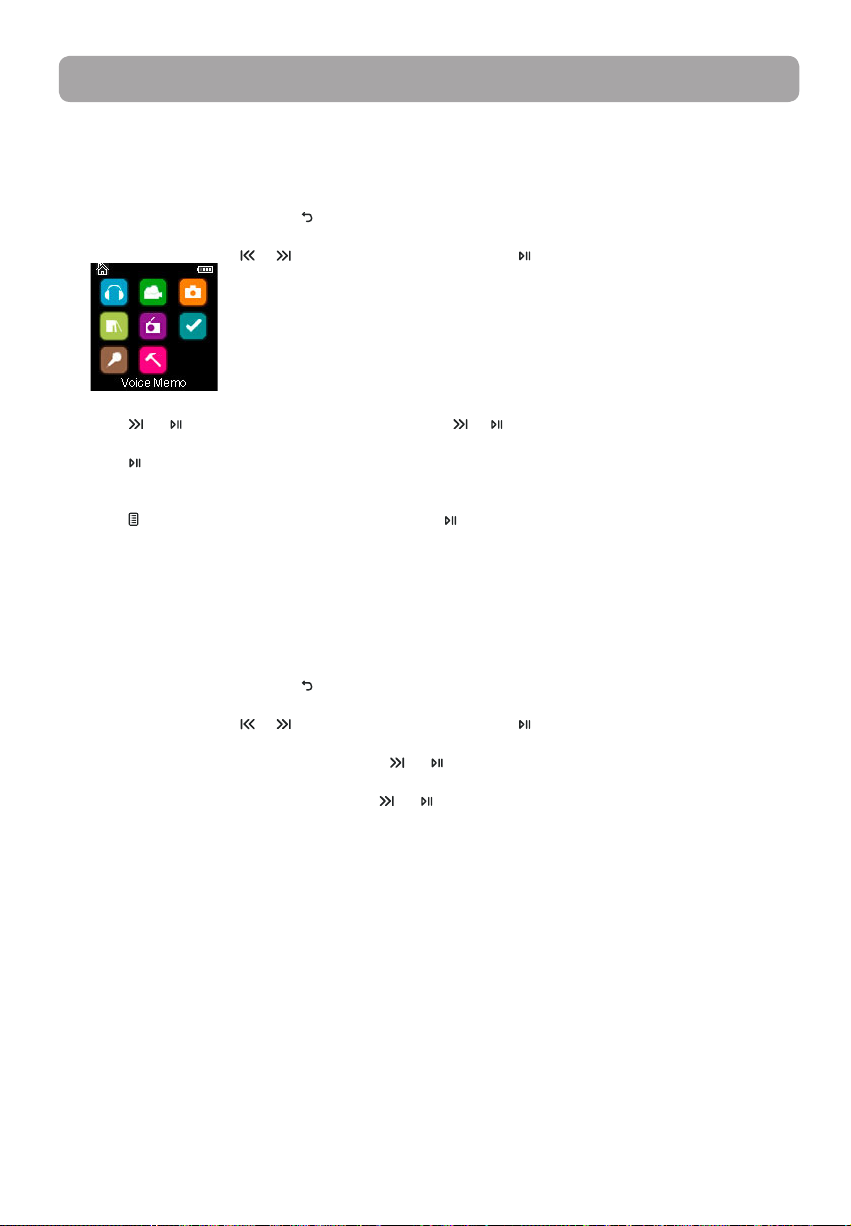
The Home menu
The top-level or “Home” menu is always displayed when you press and hold . The menu options are:
Music
Press
to enter the Music menu and choose an artist, album, genre or individual title.
Videos
Press to enter the Videos menu and choose a particular video for viewing.
Pictures
Press
to enter the Pictures menu and choose a particular image for viewing.
Audiobooks
Press to enter the Audiobook menu and choose a particular audiobook for listening.
Radio
Press to enter the Radio menu and choose to either listen to the radio or play vrecordings of
previous radio shows.
Favorites
As you listen to music, you can add individual titles to a “favorites” playlist. Press
Favorites menu and choose a particular title or edit the playlist.
Voice memo
Press to enter the Voice memo menu and choose to either start recording or play recordings
of previous voice memo.
Settings
Press
to enter the Settings menu, which lets you:
• Choose the shuffle playback mode
• Choose a repeat playback mode
• Choose an equalizer setting
• Customize the music menu
• Set the slideshow image duration
• Change the screen brightness
• Change the screensaver setting
• Choose the power saving setting
• Choose a record duration setting
• Switch between US and European radio frequency steps
• Change the language of the player’s menus
• Switch between MTP and MSC modes
• Display the firmware version, space used, and space available
• Reset the player’s settings to the factory defaults
Now Playing
Available only during playback.
to return to the currently playing file.
Press
to enter the
18
Page 20

Music
Playing music files
The player sorts your music files by track name (title), artist, album and genre.
1. In other modes, press and hold
2. Press to enter the Music menu.
3. Use + or – and
start listening.
or to navigate through the menus and select the desired item, then press
to display the Home menu. Press + or – and
or to select Music.
or
to
19
Page 21

Music playback
+ or –
Option menu (music playback)
Press
and then press to confirm the selection or change the setting.
The following options are available:
• Add to Favorites/Clear from Favorites – to add the current file in the Favorites playlist (read page 28). If
• Repeat – press
• Shuffle – to play randomly when shuffle is activated.
• Album Art – to show the album art.
• Equalizer – to select an equalizer mode. Options available: Flat, Bass, Pop, Rock and Jazz.
• Delete – to remove current file from the player.
Skips to the previous file, press and
hold to scan backwards within a file
Skips to the next file, press and hold to
scan forward within a file
Starts/ pauses playback
Increases or decreases the volume
during playback
Shows/hides option menu
Back to previous navigation level. Press
and hold to enter Home menu
at the playback (Now playing) screen to show the Option menu. Press + or – to highlight an option
the file is already in the playlist, this option changes to Clear from Favorites to remove the current file
from the playlist
repeatedly to select repeat current 1 or all files (corresponding icon shows on the
display)
20
Page 22

Music playback display
1
2
3
4
5
1. Current file number/total number of files
2. Song name
3. Artist name
4. Album name
5. Elapsed playback time
6. File total time
7. Playback progress bar
8. File bitrate
9. File type
The information provided in the playback screen depends upon the ID3 tags that have been set up for the
music file.
9
8
7
6
21
Page 23

Videos
Playing video files
1. In other modes, press and hold to display the Home menu. Then press + or – and or to select
Videos.
2. Press to enter Videos.
3. Use + or – and
start viewing.
Video viewing
or to navigate through the menus and select the desired item, then press or to
+ or –
Option menu (video playback)
Press
and then press to confirm the selection or change the setting.
The following option is available:
• Delete Video – to remove current file from the player
Video files must be converted to optimal format for playback on this player. The RCA easyRip
Media Software can convert the video files automatically while transferring to the player.
22
Goes back, skips backward. Press and
hold to scan backwards within a file
Advances, skips forward. Press and hold
to scan forward within a file
Starts/pauses playback
Increases or decreases the volume
during playback
Shows/hides option menu
Back to previous navigation level. Press
and hold to enter Home menu
to pause the video playback. Press to show the Option menu. Press + or – to highlight an option
Page 24

Pictures
Playing picture files
1. In other modes, press and hold to display the Home menu. Then press + or – and or to select
Pictures.
2. Press
3. Use + or – and or to navigate through the menus and select the desired item, then press or
Picture viewing
to enter Pictures.
to start viewing.
Option menu (picture viewing)
Press
option and then press
The following options are available:
• Slideshow Timing– to select the viewing time for each picture during a slideshow. Press repeatedly
to select among options
• Delete Photo – to remove current file from the player
Refer to page 13 for transferring picture files to the player.
Goes back, skips backward
Advances, skips forward
Starts/pauses slideshow if it is activated
Shows/hides option menu
Back to previous navigation level. Press
and hold to enter Home menu
to pause the picture playback. Press
to confirm the selection or change the setting.
show the Option menu. Press + or – to highlight an
to
23
Page 25

Audiobooks
Playing audiobooks
Audiobook playback is similar to music playback.
1. In other modes, press and hold
Audiobooks.
2. Press to enter Audiobooks.
3. Use + or – and
to start listening.
or to navigate through the menus and select the desired item, then press or
to display the Home menu. Then press + or – and
Audiobooks playback controls
Skips to previous file/section, press and
hold to scan backward within a file
Skips to the next file or section, press
and hold to scan forward within a file
or to select
+ or –
Option menu (Audiobook playback)
Press
Press + or – to highlight an option and then press to confirm the selection or change the setting.
The following options are available:
• Skip – to select section-by-section or file-by-file skipping (read below section for details)
• Delete – to remove current file from the player
• CoverArt – to select to show the cover at of the playing audible file or not
24
Starts/pauses playback
Increases or decreases the volume
during playback
Shows/hides option menu
Back to previous navigation level. Press
and hold to enter Home menu
at the playback (Now playing) screen to pause the playback and press to show the Option menu.
Page 26

Skipping through audiobook sections
If the currently playing audiobook contains sections, you can choose to skip forward and back between
sections when you press
To choose section-by-section skipping:
1. Press
to pause playback and press to display the Option menu.
or , instead of skipping between files.
2. Press + or – to select Skip, then press
3. Press to resume playback.
• Section-by-section skipping is indicated by Sect on the display. Press
• The player returns to file-by-file skipping automatically when you play another file or turn the player off.
to switch to Section.
to resume playback screen.
or
25
Page 27

Radio
The radio uses the earphones as an antenna. For better reception, extend the earphone cable
as far as possible.
Playing FM radio
To turn the radio on:
1. In other modes, press and hold to display the Home menu.
2. Press + or – and or to select Radio and press to enter the radio menu.
3. While Listen is highlighted, press
To tune the radio:
• Press and hold or to start scanning through the frequency range. The player stops scanning when it
detects the next station.
or to start listening. The frequency screen appears.
• Press
To turn the radio off:
• Turn the player off
• In other modes, press and hold
or to step through the frequency range.
to display the Home menu and select other modes.
Storing and recalling preset stations
You can store up to 20 preset stations in the player.
To store the currently playing station as a preset:
1. Press
2. Press + or – to highlight Save to Preset and then press
• If all 20 preset station numbers are occupied, you will replace the existing station with the new station.
3. The first available preset number is displayed. Press + or – to select a different preset number if desired.
• If you choose a preset number that already contains an FM station, you will replace the existing station
4. Press to highlight Ye s and then press
To listen to a preset station:
1. When the radio is playing, press
2. Press + or – to highlight Tuning and press to switch from Manual to Preset.
3. Press or
4. Press or to choose the desired station preset number.
26
to display the Option menu.
.
with the new station.
to display the Option menu.
to exit the menu.
Page 28

Improving FM radio sound
If stereo reception is noisy, you can often reduce the noise by switching to mono.
To switch between stereo and mono:
1. While the radio is playing, press
2. Press + or – to highlight Mode and then press
3. Press or to exit the menu.
to display the Option menu.
to switch between Stereo and Mono.
Recording FM radio
You can record the radio and play back recordings as well as copy the recordings (WAV files) to your PC.
To record the currently playing radio station:
1. Press to display the Option menu.
2. Press + or – to highlight Start Recording and then press
• Press to pause or resume recording.
3. Press and then select Stop Recording by pressing . The player names each recording FMRecXXX
where XXX is a unique number.
to start recording.
Playing back FM radio recordings
To play back a recording:
1. In other modes, press and hold to display the Home menu.
2. Press + or – and or to select Radio and press to enter the radio menu.
3. Press + or – to highlight Playback and press or to see the list of recordings.
4. Press + or – to select a recording and press or to start playback.
Copying recordings to your PC
Recordings are stored as WAV files in the “Recordings\FMRecord” folder on the player.
To copy recordings to the PC:
1. Plug the player into the PC.
2. Open the player’s Record folder.
3. Select the files you want to copy and drag and drop them onto a folder on the PC.
• Almost all audio applications can play WAV files.
27
Page 29

Favorites
Creating a "Favorites" playlist
You can create a playlist of your favorite music by adding new files to the playlist as you listen to them.
This function is not available for other media formats such as videos, pictures, audiobooks and recordings.
To add the currently playing music file in the playlist:
1. Press
to display the Option menu.
2. Press + or – to highlight Add to Favorites and then press
• Added Successfully shows on the display.
• Repeat the above steps for adding more music files.
To listen to the Favorites playlist:
1. In other modes, press and hold
2. Then press + or – and or to select Favorites.
• To play back a particular file, press
Press + or – to select the desired file and press or .
to display the Home menu.
to enter the Favorites menu and then press or to list the files.
.
Removing files from "Favorites" playlist
To remove all music files from the playlist:
1. In other modes, press and hold
2. Then press + or – and or to select Favorites and press to enter.
3. Press + or – to highlight My Selection and press .
4. In the pop-up menu, select Delete and then press to remove all files from the playlist.
to display the Home menu.
Downloading playlists to player
You can also download playlists of your favorite music created on the RCA easyRip software. Please refer to
the Help section of the easyRip software for details on creating playlists and downloading the created
playlists to the player.
28
Page 30
Voice Memo
Recording voice memo
You can record voice and play back recordings as well as copy the recordings (WAV files) to your PC.
To record voice:
1. In other modes, press and hold
to display the Home menu.
2. Then press + or – and
3. Press or to highlight Start Recording and press or to start recording.
• Press
• The microphone is located at the back of the player.
4. Press
• The player names each recording VRecXXX.wav where XXX is a unique number.
To record for a specific duration:
Refer to RecDur on page 31.
to pause or resume recording.
and then select Stop Recording by pressing
or to select Voice Memo, and press to enter the Voice Memo menu.
.
Playing back voice memo
To play back a recording:
1. In other modes, press and hold to display the Home menu.
2. Then press + or – and or to select Voice Memo, and press to enter the Voice Memo menu.
3. Press + or – to highlight Playback and press or
4. Press + or – to select a recording and press
.
or
to start playback.
Copying recordings to your PC
Recordings are stored as WAV files in the “Recordings\VoiceRecord” folder on the player.
To copy recordings to the PC:
1. Plug the player into the PC.
2. Open the player’s Record folder.
3. Select the files you want to copy and drag and drop them onto a folder on the PC.
• Almost all audio applications can play WAV files.
29
Page 31

Settings
Changing the player’s settings
To change the player settings:
1. In other modes, press and hold
to display the Home menu.
2. Press + or – and
3. Press + or – to select a setting and then press to change it.
or to select Settings and press to enter the settings menu.
Shuffle
• Press repeatedly to select shuffle on or off. Music files (mp3/wma/wav) will be played randomly when
shuffle is activated.
• The shuffle icon (
) shows on display when shuffle is on.
Repeat
• Press repeatedly to select repeat current 1 or all files (corresponding icon shows on the display).
Equalizer
• Press repeatedly to choose an equalizer setting (Flat, Bass, Pop, Rock and Jazz).
Setting Graphic mode:
• Press repeatedly until Graphic appears and then press . In graphic mode, you can customize the five
band equalizer. Press or to select a band and then press + or – to adjust the band level. When
finished, press to exit Graphic mode.
Customize menu
To select what you wish to display in the submenu of the Music menu: Titles, Artists, Album and Genres.
Slideshow
To select the slideshow image duration. Press repeatedly to select among: off, 3, 5, 10 and 15 seconds.
Brightness
To adjust the display light brightness.
Screensaver
To set the duration (10s, 20s, 30s and 1m) before the screensaver activates.
Power save
To set the time interval (Off, 1m, 2m, 5m and 10m) before the player turns off if no key is pressed.
30
Page 32

RecDur (Record duration)
To change the duration (Max, 5 minutes, 30 minutes, 1 hour) for radio and voice memo recording.
FreqStep (Frequency Step)
To changes the way that the player scans through the radio frequencies. Switch to EU if you bring the player
to Europe; switch back to US when you return to North America.
Language
To change the language of the player menus.
Protocol
To switch between MSC (Mass Storage Class) and MTP (Media Transfer Protocol) modes when connected to
your PC. To enable function of transferring subscription music content, select MTP mode.
System info
To show the amount of free space available and the firmware version.
Restore defaults
To reset all menus to factory defaults.
31
Page 33

Additional information
Tips and troubleshooting
Cannot delete files on the player.
• For any files you have transferred to the player, you may delete them while you have connected the
player with your computer. Highlight the unwanted file in the player’s file directory on your computer
and press the delete key on your computer to delete the file. Subscribed files are best to be removed
through Windows Media® Player.
• For deleting files from the player, refer to Option menu from page 19-29 for details.
Player repeats same tracks or all tracks.
• Repeat play is turned on. Press during playback to show the Option menu and select Repeat Off. You
can also press to return to the Home menu. Then select Settings and press
menu to select Repeat Off.
Audio distorted at high volume.
• Change the Equalizer mode to Flat.
• Turn down the volume.
The audio tracks on my player keep skipping or popping.
• You’ll need to re-record the audio track – make sure you close all other applications on your PC when
you record.
• Try recording with Error Correction setting turned on.
Player turns itself off.
• Your player turns itself off if you leave it in pause mode or navigation mode for the duration specified in
PowerSave setting.
The player cannot be turned on.
• Battery is empty, please recharge.
• Ensure the keys lock is not activated.
• Reset the player by pressing the RESET button on the back of the player with a non-metal pointed
object (e.g. toothpick).”
• If the player still cannot be turned on after resetting, perform a firmware upgrade to restore it.
• Please go to www.rcaaudiovideo.com for more details.
to enter the settings
Player does not respond to key presses.
• Make sure the lock function is not activated.
• If the player stops operating properly, you can reset it by pressing the RESET button on the back of the
player with a non-metal pointed object (e.g. toothpick).
• This player may temporarily cease to function if subjected to electrostatic disturbance.
To resume normal operation, it may be necessary to cycle the power off and back on or you can reset it
by pressing the RESET button on the back of the player with a non-metal pointed object (e.g.
toothpick).
Player cannot play WMA songs.
• Secure music download files must be transferred to your player through the Windows Media Player or
the application recommended by your online music download service (Note: Services and applications
must be Windows Media audio-compliant and support Digital Rights Management.) (Apple iTunes music
content is not supported).
The player takes a long time to read files in a folder.
• File reading may take longer if too many files are put in a single folder. Re-organize your files into a
number of folders.
32
Page 34

Song information is not showing correctly.
• Song information may not match your current player’s language setting. Change the language setting.
Cannot view picture files.
• The player only supports .jpg extension file, and do not support other formats like .bmp, .tiff,
.jpeg.
Cannot play video files.
• All video contents must be converted by RCA easyRip software which comes with the player. Other
format of video file will not be supported.
Cannot play audible files.
• Make sure the file format is correct. The player supports Format 4 and AAX Audible file.
The player reports that it is full.
• You have filled the capacity of the internal memory of the player.
• You have exceeded the maximum number of items that this player supports. Your player can only
support up to 2000 media files within eight hierarchy of folder in maximum.
Cannot playback tracks on the player.
• Make sure audio tracks are encoded in the mp3 or Windows Media formats at supported bitrates.
• Bitrates support by the player:
mp3 – 32 to 320 kbps
wma – 48 to 192 kbps
• WMA files may be DRM protected and you don’t have the proper rights (license) to play the files.
• Check the website and/or application help system of the music download service provider from where
the content was purchased from for license acquisition details. For more information on how license
acquisition works, go to www.microsoft.com/windowsmedia/drm.
Cannot playback songs downloaded from my paid Music Server Provider subscription service.
• The internal clock in your portable player may not be up to date. Downloading a new subscription song
from your Music Server Provider should update your player's clock and allow it to playback all your
songs again.
• The license for your subscription songs may have expired. Synchronize your device with your PC again to
obtain an update to your license. If the problem persists, please contact your Music Service Provider for
additional support.
Cannot transfer subscription music content to the player.
• To enable function of transferring subscription music content, select MTP mode under Protocol in the
Settings menu. Refer to page 31 for more information.
Voice recording stops automatically after 5 hours.
• Maximum duration for each recording is 5 hours. Start a new recording after the maximum duration has
reached.
What is MTP mode?
• MTP (Media Transfer Protocol) mode is essential if you want to transfer DRM10 content to your player. In
MTP mode your player will no longer show up as a drive letter. So programs that were designed to work
with a player that shows up as a drive letter will not be able to work directly with the player.
Cannot launch RCA easyRip installer stored in the player to install easyRip on my PC.
• To enable function of launching RCA easyRip installer stored in the player, select MSC mode under
Protocol in the Settings menu. Refer to page 31 for more information.
33
Page 35

For your records
Keep your sales receipt for proof of purchase to obtain warranty parts and service. In the event that service
should be required, you may need both the model number and the serial number. In the space below,
record the date and place of purchase, and the serial number:
Model No.
Date of Purchase
Place of Purchase
Serial No.
Visiting RCA website
Please visit www.rcaaudiovideo.com for:
• Product registration
• Latest software and firmware
• Latest RCA easyRip software
• User manual
• Frequently asked questions (FAQ)
• Customer service and technical support information
Technical specification
Product: Digital Audio Player
Brand: RCA
Model: M3904, M3804, M3808 and M3816
Electrical Consumption: 3.7V Lithium battery (built-in)
Specifications
Hardware
• Dimensions: 72 mm H, 44.2 mm W, 9.9 mm D
• Unit Weight: 30 g
• Stereo Headphones jack
• USB Connection Jack
• Battery Operated: Rechargeable lithium battery.
USB Drive
• External USB Drive: When connected to a computer via USB, the player is capable of storing any file type
allowing the user a fast, convenient method of storing, retrieving, and transferring files. This includes
word processing files, presentations, spreadsheets and any other computer files.
• Capacity: 4GB (M3904, M3804), 8GB (M3808), 16GB (M3816)
• Connection: USB 2.0, Hi-speed capable
Software
• Includes the player applications and media management software.
34
Page 36

Warranty information
Limited warranty
12 Month Limited Warranty
Applies to RCA Audio/Video Products
AUDIOVOX ELECTRONICS CORP. (the Company) warrants to the original retail purchaser of this product that
should this product or any part thereof, under normal use and conditions, be proven defective in material or
workmanship within 12 months from the date of original purchase, such defect(s) will be repaired or
replaced with reconditioned product (at the Company's option) without charge for parts and repair labor.
To obtain repair or replacement within the terms of this Warranty, the product is to be delivered with proof
of warranty coverage (e.g. dated bill of sale), specification of defect(s), transportation prepaid, to the
Company at the address shown below.
This Warranty does not extend to the elimination of externally generated static or noise, to correction of
antenna problems, loss/interruptions of broadcast or internet service, to costs incurred for installation,
removal or reinstallation of product, to corruptions caused by computer viruses, spyware or other malware,
to loss of media, files, data or content, or to damage to tapes, discs, removable memory devices or cards,
speakers, accessories, computers, computer peripherals, other media players, home networks or vehicle
electrical systems.
This Warranty does not apply to any product or part thereof which, in the opinion of the Company, has
suffered or been damaged through alteration, improper installation, mishandling, misuse, neglect, accident,
or by removal or defacement of the factory serial number/bar code label(s). THE EXTENT OF THE COMPANY'S
LIABILITY UNDER THIS WARRANTY IS LIMITED TO THE REPAIR OR REPLACEMENT PROVIDED ABOVE AND, IN
NO EVENT, SHALL THE COMPANY'S LIABILITY EXCEED THE PURCHASE PRICE PAID BY PURCHASER FOR THE
PRODUCT.
This Warranty is in lieu of all other express warranties or liabilities. ANY IMPLIED WARRANTIES, INCLUDING
ANY IMPLIED WARRANTY OF MERCHANTABILITY, SHALL BE LIMITED TO THE DURATION OF THIS WRITTEN
WARRANTY. ANY ACTION FOR BREACH OF ANY WARRANTY HEREUNDER INCLUDING ANY IMPLIED
WARRANTY OF MERCHANTABILITY MUST BE BROUGHT WITHIN A PERIOD OF 24 MONTHS FROM DATE OF
ORIGINAL PURCHASE. IN NO CASE SHALL THE COMPANY BE LIABLE FOR ANY CONSEQUENTIAL OR
INCIDENTAL DAMAGES FOR BREACH OF THIS OR ANY OTHER WARRANTY. No person or representative is
authorized to assume for the Company any liability other than expressed herein in connection with the sale
of this product.
Some states do not allow limitations on how long an implied warranty lasts or the exclusion or limitation of
incidental or consequential damage so the above limitations or exclusions may not apply to you. This
Warranty gives you specific legal rights and you may also have other rights which vary from state to state.
How to make a warranty claim:
• If your product is capable of storing content (such as an mp3 player, digital voice recorder, etc), it is
recommended to make periodic backup copies of content stored on the product. If applicable, before
shipping a product, make a back up copy of content or data stored on the device. Also, it is advisable to
remove any personal content which you would not want exposed to others. IT IS LIKELY THAT CONTENTS
AND DATA ON THE DEVICE WILL BE LOST DURING SERVICE AND REFORMATTING. AUDIOVOX ACCEPTS NO
LIABILITY FOR LOST CONTENT OR DATA, OR FOR THE SECURITY OF ANY PERSONAL CONTENT OR DATA
ON THE RETURNED DEVICE. Product will be returned with factory default settings, and without any preloaded content which may have been installed in the originally purchased products. Consumer will be
responsible for reloading data and content. Consumer will be responsible to restore any personal
preference settings.
35
Page 37

• Properly pack your unit. Include any remotes, memory cards, cables, etc. which were originally provided
with the product. However DO NOT return any removable batteries, even if batteries were included with
the original purchase. We recommend using the original carton and packing materials.
• Include evidence of purchase date such as the bill of sale. Also print your name and address and a
description of the defect. Send via standard UPS or its equivalent to:
Audiovox Electronics Corp.
Attn: Service Department.
150 Marcus Blvd.
Hauppauge N.Y. 11788
1-800-878-5779
• Insure your shipment for loss or damage. Audiovox accepts no liability in case of damage or loss en
route to Audiovox.
• Pay any charges billed to you by the Exchange Center for service not covered by the warranty.
• A new or refurbished unit will be shipped to you freight prepaid.
What we will do:
Provide you with a new, or at our option, a refurbished unit. The exchange unit is under warranty for the
remainder of the original product’s warranty period.
For Canada Customers, please ship to:
Audiovox Return Centre
c/o Genco
6685 Kennedy Road,
Unit#3, Door 16,
Mississuaga, Ontario
L5T 3A5
36
Page 38

Illustrations contained within this publication are for representation only and subject to change.
The descriptions and characteristics given in this document are given as a general indication and not as a
guarantee. In order to provide the highest quality product possible, we reserve the right to make any
improvement or modification without prior notice.
Audiovox Electronics Corp.
150 Marcus Blvd., Hauppauge, NY 11788
© 2010 Audiovox Electronics Corp.
Trademark(s) ® Registered
Marca(s) ® Registrada(s)
Marque(s) ® Deposée(s)
www.rcaaudiovideo.com
v3.0 (1.0.3.0)
Page 39

manual de usuario
Serie M38
Serie M39
Es importante leer este manual antes de usar por vez primera su equipo.
Page 40

Información de seguridad
]
IMPORTANTE INSTRUCCIONES DE SEGRUIDAD
FAVOR DE GUARDAR ESTO PARA UNA REFERENCIA FUTURA
Alguna de la siguiente información quizá no se aplique a su producto en particular. Sin embargo, como con
cualquier producto electrónico, se deben tomar precauciones durante su manejo y uso.
• Lea estas instrucciones.
• Conserve estas instrucciones.
• Tome en cuenta todas las advertencias.
• Siga todas las instrucciones.
• No use este aparato cerca del agua.
• Limpie solamente con un paño seco.
• No bloquee ninguna de las aperturas de ventilación. Instale de acuerdo con las instrucciones del
fabricante.
• No instale cerca de fuentes de calor tales como radiadores, registros de calor, estufas, u otros aparatos
(incluyendo amplificadores) que produzcan calor.
• No elimine el propósito de seguridad de la clavija polarizada o del tipo a tierra. Una clavija polarizada
tiene dos cuchillas, una más ancha que la otra. Una clavija del tipo a tierra tiene dos cuchillas y una
tercera punta para conexión a tierra. La cuchilla ancha o la tercera punta son suministradas para su
seguridad. Si la clavija suministrada no se adapta dentro de su toma de corriente, consulte a un
electricista para que reemplace la toma de corriente obsoleta.
• Proteja el cable de corriente de pisotones o machucones particularmente en las clavijas, receptáculos de
conveniencia, y en punto donde salen del aparato.
• Use solamente accesorios/aditamentos especificados por el fabricante.
• Use solamente con el carro, soporte, trípode, consola, o mesa especificados por el
fabricante, o vendidos con el aparato. Cuando se utiliza un carro, tenga precaución al
mover la combinación de carro/aparato para evitar lesión ocasionada por volcadura.
• Desconecte este aparato durante tormentas eléctricas o cuando no sea utilizado por
largos períodos de tiempo.
• Refiera todo el servicio a personal de servicio calificado. El servicio es requerido cuando
el aparato ha sido dañado de alguna forma, tal como daño a la clavija o al cable de
corriente, cuando se ha derramado líquido o han caído objetos dentro del aparato, el
aparato ha sido expuesto a lluvia o humedad, no funciona normalmente, o ha sido
tirado.
• INFORMACION ADICIONAL DE SEGURIDAD
• La clavija principal es usada como el dispositivo de desconexión, deberá permanecer operable y no
deberá ser obstruida durante el uso. Para ser completamente desconectada del aparato desde la fuente
de poder, la clavija principal del aparato deberá ser desconectada completamente desde la toma de
suministro de corriente.
• El adaptador CA/CD suministrado con este producto está diseñado para estar orientado correctamente
en una posición de montaje vertical o en el piso.
• No use cargadores o adaptadores de corriente no autorizados. Utilice solamente los cargadores que
vinieron con su producto o que estén listados en la guía del usuario.
• El aparato no debe quedar expuesto a goteos o salpicaduras de líquidos, y, por lo tanto, no se deben
colocar sobre el aparato objetos que contengan líquidos, como por ejemplo vasos.
• Siempre deje suficiente espacio para ventilación alreadedor del producto. No ponga el producto en la
cama, alfombra, librero o gabinete que pueda obstruir la corriente de aire a través de apeturas de
ventilación.
• No pongan velas, cigarillos o cigarros encendidos encima de producto.
• Conecte sólo en receptáculos de corriente alterna como esta indicado en el producto.
• Tome precauciones para evitar que caigan objetos dentro del producto.
• Carros y Estantes–El artefacto deberá ser usado sólo con carros y estantes que hayan sido recomendados
por el fabricante.
• La información de señalamiento está ubicada en la parte inferior del aparato.
• La señal de precaución está ubicada en la parte inferior del aparato.
Advertencia
sobre el Carro
Portátil
1
Page 41

Este es un aparato CLASE II con doble aislamiento, y no se suministra elemento a tierra para
protección.
Información importante sobre la batería
Advertencia: su producto contiene una materia y un sistema de carga que están diseñados para trabajar a temperaturas que no excedan de 50°C (122°F). Dejar este producto en un automóvil cerrado o en la cajuela de un
automóvil donde las temperaturas puedan exceder de 50°C puede resultar en daño permanente a la batería,
fuego o explosión. Por favor retire su producto del automóvil al salir, no coloque el producto en la cajuela
de su automóvil, y no deje su producto en alguna ubicación donde la temperatura pueda exceder de 50°C o
quede expuesto a la luz directa del sol.
Medio ambiente
Ayude a cuidar el medio ambiente. Le recomendamos que deseche las baterías gastadas en los contenedores
especialmente diseñados para ello.
Precauciones para la unidad
• No utilice la unidad inmediatamente después de llevarla de un lugar frío a un lugar caliente puesto que
podría producirse algún problema de condensación.
• Ne rangez pas l’appareil près du feu, dans un endroit très chaud ou au soleil. L’exposition au soleil ou à
une chaleur intense (p. ex. : à l’intérieur d’une voiture stationnée) peut causer des dommages ou un
mauvais fonctionnement.
• No lo exponga a la lluvia o a la humedad.
• Limpie la unidad con un paño blando o con una gamuza húmeda. No utilice nunca disolventes.
• La unidad deberá ser utilizada por personal cualificado únicamente.
Seguridad de Audífonos
Para usar el audífono con seguridad, por favor tome en cuenta lo siguiente:
• No utilice su nuevo audífono a un alto volumen. Los expertos en el oído aconsejan contra la
reproducción extendida continua.
• Si usted experimenta zumbido en sus oídos, baje el volumen o deje de utilizar el audífono.
• No use audífonos mientras conduce un vehículo motorizado o monta en bicicleta. Puede causar un
riesgo de tráfico y es ilegal en muchas áreas.
• Aún si su audífono es del tipo para uso al aire libre diseñado para permitirle escuchar sonidos exteriores,
no suba el volumen tan alto que sea imposible escuchar sonidos a su alrededor.
2
Page 42

Información FCC
RCA
M3904
RCA
M3804
RCA
M3808
RCA
M3816
Se probó este equipo y podemos afirmar que cumple con las restricciones establecidas para un dispositivo
digital Clase B, de acuerdo con la Sección 15 de la Reglamentación de FCC. Estas restricciones fueron
designadas para brindar una protección razonable frente a la interferencia perjudicial en una instalación
residencial. Este equipo genera, usa y puede irradiar energía de radiofrecuencia y, si no está instalado o no
se lo utiliza de acuerdo con las instrucciones, puede ocasionar interferencias perjudiciales para las
comunicaciones de radio.
Sin embargo, no existe ninguna garantía de que no se vaya a producir una interferencia en una instalación
particular. Si este equipo produce una interferencia perjudicial con la recepción de la radio o la televisión, lo
cual podría determinarse apagando y encendiendo el equipo, se le pide al usuario que intente corregir la
interferencia siguiendo una o varias de las siguientes medidas.
• Reoriente o reubique la antena receptora
• Aumente la separación entre el equipo y el receptor
• Conecte el equipo a un toma corriente diferente al que conecta el receptor
• Consulte al distribuidor o a un técnico especializado en radio / TV para solicitar ayuda
De conformidad con los requerimientos FCC, cambios o modificaciones no aprobados expresamente por el
fabricante podrían invalidar la autoridad del usuario para operar este producto.
Fabricante / Parte responsable
Audiovox Electronics Corp.
150 Marcus Blvd., Hauppauge, NY 11788
1-317-810-4880
(Por favor tome nota que este número de teléfono es sólo para asuntos regulatorios. En este número no hay
disponibilidad de soporte de producto o técnico.)
Visite www.arinfiniteradio.com para soporte de técnico
RCA
M3904
RCA
M3804
RCA
M3808
RCA
M3816
This Class B digital apparatus complies with
Canadian ICES-003.
Cet appareil numérique de la class B est
conforme à la norme NMB-003 du Canada.
3
Page 43

Contenido
Información de seguridad
IMPORTANTE INSTRUCCIONES DE SEGRUIDAD ...........................................................................1
Información importante sobre la batería .......................................................................................2
Medio ambiente ......................................................................................................................................2
Precauciones para la unidad ...............................................................................................................2
Seguridad de Audífonos ......................................................................................................................2
Información FCC .................................................................................. 3
Contrato de licencia de usuario final ................................................. 7
Antes de comenzar
Advertencia de derechos de autor ...................................................................................................10
Respaldo de sus datos ...........................................................................................................................10
Para desempacar su reproductor ......................................................................................................10
Requerimientos del sistema de cómputo ......................................................................................10
Requerimientos de transferencia de música segura ..................................................................10
Instalación del clip para cinturón ......................................................................................................11
Levante aquí el clip .................................................................................................................................11
Conexión a la computadora ................................................................................................................11
Carga del reproductor ...........................................................................................................................12
Gestión de archivos en su Reproductor RCA
Uso de RCA easyRip................................................................................................................................13
Uso del Explorador de Windows........................................................................................................14
Para eliminar archivos del reproductor ...........................................................................................14
Para desconectar el producto de la PC ...........................................................................................14
Controles generales
Encendido y apagado del reproductor ...........................................................................................15
Bloqueo de los controles del reproductor .....................................................................................15
Reinició de reproductor ........................................................................................................................15
Uso de los menús
Tipos de Menú ..........................................................................................................................................16
Navegación de menú.............................................................................................................................16
El menú Inicio ...........................................................................................................................................18
4
Page 44

Música
Reproducción de archivos de música ..............................................................................................19
Reproducción de Música ......................................................................................................................20
Pantalla de reproducción de música................................................................................................21
Videos
Reproducción de archivos de video .................................................................................................22
Para ver videos .........................................................................................................................................22
Imágenes
Reproducción de archivos de imagen .............................................................................................23
Para ver imágenes ...................................................................................................................................23
Audiolibros
Reproducción de audiolibros ............................................................................................................24
Controles de reproducción de audiolibros ....................................................................................24
Salto a través de secciones del audiolibro .....................................................................................25
Radio
Reproducción de radio FM ..................................................................................................................26
Para almacenar y recuperar estaciones preseleccionadas .......................................................26
Mejora de sonido del radio FM ..........................................................................................................27
Grabación de radio FM ..........................................................................................................................27
Reproducción de grabaciones de radio FM ..................................................................................27
Para copiar grabaciones a su PC ........................................................................................................27
Favoritos
Para crear una lista de reproducción "Favoritos" .........................................................................28
Para remover archivos de la lista de reproducción “Favoritos” ...............................................28
Para descargar listas de reproducción al reproductor ..............................................................28
Memo de voz
Grabación de mensaje de voz ............................................................................................................29
Reproducción de mensaje de voz .....................................................................................................29
Para copiar grabaciones a su PC ........................................................................................................29
5
Page 45

Configuraciones
Cambio de las configuraciones del reproductor .........................................................................30
Aleatorio .....................................................................................................................................................30
Repetir .........................................................................................................................................................30
Ecualizador ................................................................................................................................................30
Menú personalizar ..................................................................................................................................30
Presentación de imágenes...................................................................................................................30
Brillo .............................................................................................................................................................30
Protector de pantalla .............................................................................................................................30
Ahorro de energía ...................................................................................................................................30
RecDur (Duración de grabación) .......................................................................................................31
FreqStep (Paso de frecuencia) ...........................................................................................................31
Idioma ........................................................................................................................................................31
Protocolo ....................................................................................................................................................31
Información de Sistema ........................................................................................................................31
Valores Predeterminados .....................................................................................................................31
Información adicional
Tips y solución de problemas .............................................................................................................32
Para su registro .........................................................................................................................................34
Visita al sitio web RCA ..........................................................................................................................34
Especificación Técnica ...........................................................................................................................34
Especificaciones ......................................................................................................................................35
Garantía limitada
Garantía limitada (EE.UU.) ....................................................................................................................36
6
Page 46

Contrato de licencia de usuario final
Esta es una copia del ALUF que usted necesita aceptar para usar este producto.
Contrato de licencia de usuario final
IMPORTANTE: LEA DETENIDAMENTE ANTES DE DESCARGAR O INSTALAR ESTE PROGRAMA!
ESTE ACUERDO DE LICENCIA DE USUARIO FINAL (ACUERDO) ES UN ACUERDO LEGAL ENTRE USTED Y AUDIOVOX CORPORATION Y, SEGÚN SEA
APLICABLE, CUALQUIER SUBSIDIARIA DE AUDIOVOX, CONFORME SE DEFINE A CONTINUACIÓN (COLECTIVAMENTE “AUDIOVOX”), PARA EL
PROGRAMA DE SOFTWARE DE APLICACIÓN/CONTROLADOR DEL DISPOSITIVO DE AUDIO/VÍDEO DIGITAL PORTÁTIL DE LA MARCA RCA EL CUAL
PUEDE INCLUIR COMPONENTES DE SOFTWARE ASOCIADO, SOFTWARE CON LICENCIA DE AUDIOVOX DE TERCERAS PARTES (“LICENCIANTES”) Y
DOCUMENTACIÓN ASOCIADA, SI LA HAY (COLECTIVAMENTE, EL “PROGRAMA”). ESTE ACUERDO CONTIENE IMPORTANTES LIMITACIONES,
RESTRICCIONES Y RENUNCIAS LEGALES, Y TAMBIÉN ESPECIFICA LA DURACIÓN DE SU LICENCIA.
POR EL HECHO DE INSTALAR EL PROGRAMA O DE HACER CLIC EN EL BOTÓN DE ACEPTACIÓN DEL PROGRAMA, COPIAR O UTILIZAR DE
CUALQUIER OTRA MANERA EL PROGRAMA, VD. RECONOCE Y ACEPTA QUE HA LEÍDO ESTE ACUERDO, QUE LO HA ENTENDIDO, Y QUE CONSIENTE
EN SOMETERSE A SUS TÉRMINOS Y CONDICIONES. ESTE PROGRAMA ESTÁ PROTEGIDO POR LEYES DE DERECHOS DE AUTOR Y TRATADOS DE
DERECHOS DE AUTOR INTERNACIONALES, ASÍ COMO POR OTRAS LEYES Y TRATADOS DE PROPIEDAD INTELECTUAL. SÓLO PODRÁ HACER USO
DEL PROGRAMA SEGÚN ESTE ACUERDO, Y CUALQUIER USO SERÁ ENTENDIDO POR LA PRESENTE COMO CONDICIONAL SEGÚN EL ACUERDO
ESPECÍFICO CON LOS TÉRMINOS SIN MODIFICACIÓN QUE SE PRESENTAN A CONTINUACIÓN. SI NO ESTÁ DE ACUERDO CON TODOS LOS
TÉRMINOS DE ESTE ACUERDO, HAGA CLIC EN EL BOTÓN DE RECHAZO Y/O NO INSTALE EL PROGRAMA Y/O NO UTILICE EL PROGRAMA.
1. LICENCIA
(a) Bajo este Acuerdo, a usted se le otorga una licencia no exclusiva, no sub-licensiable, no asignable, y no transferible, (excepto según sea
expresamente establecido a continuación) (i) para instalar y usar el programa en una sola terminal, y (ii) para realizar una (1) copia del
Programa en cualquier formato legible por máquina con el fin de disponer de una copia de seguridad del Programa, siempre que la copia
contenga todos los avisos de derecho de propiedad originales del Programa.
(b) Puede transferir el programa y su licencia a cualquier otra ubicación siempre como parte del Dispositivo de Audio/Vídeo Digital Portátil de
la marca RCA (“Dispositivo A/V”), y únicamente si la otra parte acuerda aceptar los términos y condiciones del Acuerdo. Si transfiere el
programa deberá al mismo tiempo transferir todas las copias a la misma parte o destruir cualquier copia no transferida.
(c) Los términos de este Acuerdo gobernarán cualquier actualización del programa suministrada por AUDIOVOX que reemplacen y/o
suplementen el Programa original, a menos que dicha actualización sea acompañada por términos y condiciones de licencia
independientes, en cuyo caso, gobernarán los términos de dicha licencia. Usted acepta y acuerda que AUDIOVOX puede descargar
automáticamente actualizaciones al Programa en su equipo en caso de que se desarrollen actualizaciones, mejoras y/o otros cambios en el
Programa.
2. RESTRICCIONES DE LICENCIA
(a) Excepto por las licencias que le han sido otorgadas expresamente en este Acuerdo, no se otorga ninguna otra licencia o derecho implícito.
(b) Usted no deberá (i) poner el Programa en servicio a través de una red en la que pudiera ser utilizado por varios ordenadores al mismo
tiempo; (ii) modificar, traducir, practicar ingeniería inversa, descompilar, desensamblar (excepto en el caso de que esta restricción haya sido
expresamente prohibida por la ley), o crear trabajos derivados basados en el Programa, o (iii) copiar el Programa excepto los casos
permitidos expresamente aquí, o (iv) remover o alterar los avisos de derechos de autor en todas las copias del Programa; o (v) prestar el
Programa. Usted acuerda que sólo utilizará el Programa de tal forma que cumpla con todas las leyes aplicables en las jurisdicciones en las
que utilice el Programa, incluyendo, sin limitación, las restricciones aplicables relacionadas con los derechos de copia u otros derechos de
propiedad intelectual.
(c) El programa puede contener código prelanzamiento que no se comporte al nivel de la versión final del código. En tal caso, el Programa
podría no funcionar correctamente. Las versiones actualizadas del Programa deben descargarse desde www.rcaaudiovideo.com/downloads.
(d) AUDIOVOX no está obligada a ofrecer servicios de soporte para el Programa.
(e) El programa se entrega con “DERECHOS RESTRINGIDOS”. El uso, duplicación o publicación por el Gobierno de los EE.UU. se encuentra
sometido a ciertas restricciones según lo establecido en el subpárrafo (c)(1)(ii) de DFARS 252.227-7013, o FAR 52.227-19, o en FAR 52.227-14
Alt. III, según lo aplicable.
3. TÉRMINOS Y FINALIZACIÓN
(a) Si licencia es efectiva a la fecha de aceptación de este Acuerdo y permanecerá siendo efectiva hasta que este Acuerdo sea finalizado por
cualquiera de las partes.
(b) Puede finalizar este Acuerdo y la licencia asociada, sin aviso o retardo, destruyendo o borrando permanentemente el Programa y todas las
copias derivadas.
(c) Si no cumple con alguno de los términos de este Acuerdo, total o parcialmente, su licencia será revocada automáticamente sin aviso previo
por parte de AUDIOVOX.
(d) Tras la finalización de este Acuerdo y su licencia asociada, deberá cesar cualquier uso del Programa y destruir o borrar permanentemente el
Programa y todas las copias derivadas del mismo.
4. DENEGACIÓN DE GARANTÍA
EL PROGRAMA SE ENTREGA “TAL CUAL”, SIN GARANTÍA DE NINGÚN TIPO, EXPLÍCITAS O IMPLÍCITAS, INCLUYENDO SIN LIMITACIÓN LAS
GARANTÍAS IMPLÍCITAS DE COMERCIABILIDAD, AJUSTE A UN PROPÓSITO PARTICULAR, TÍTULO O NO INFRACCIÓN. EL RIESGO ABSOLUTO
REFERENTE A LA CALIDAD Y COMPORTAMIENTO DEL PROGRAMA ES ÚNICAMENTE SUYO.
SI EL PROGRAMA RESULTA DEFECTUOSO, USTED (Y NO AUDIOVOX, SUS PROVEEDORES O DISTRIBUIDORES) ASUMIRÁ TODO EL COSTE DE LA
REPARACIÓN O CORRECCIÓN NECESARIA.
Esta exclusión de garantía podría no haber sido permitida según algunas leyes aplicables. Como resultado, la exclusión anterior podría no ser
aplicable a usted, y es posible que tenga otros derechos, dependiendo de la ley que le sea de aplicación.
7
Page 47

5. DERECHOS DE PROPIEDAD
Todos los títulos y los derechos de propiedad intelectual, incluyendo pero sin limitación los derechos de autor, en y al Programa y cualquier copia
del mismo son propiedad de AUDIOVOX, sus Licenciatarios o sus proveedores. Todos los derechos de propiedad intelectual del contenido al que
puede accederse por medio del uso del Programa son propiedad de sus respectivos propietarios y podrían estar protegidos por los derechos de
copia aplicables u otras leyes o tratados de propiedad intelectual. Esta licencia no le otorga ningún derecho para utilizar dicho contenido. Todos
los derechos no otorgados expresamente son reservados por AUDIOVOX o sus Licenciatarios.
6. LIMITACIÓN DE RESPONSABILIDAD
(a) HASTA DONDE LO PERMITAN LAS LEYES VIGENTES, NI AUDIOVOX, NI SUS DISTRIBUIDORES SERÁN RESPONSABLES EN NINGÚN CASO POR
NINGÚN DAÑO ESPECIAL, FORTUITO, INDIRECTO O CONSECUENTE DE NINGÚN TIPO (INCLUYENDO, SIN LIMITACIONES, LOS DAÑOS POR
PÉRDIDA DE BENEFICIOS, INTERRUPCIÓN DEL NEGOCIO, CORRUPCIÓN DE ARCHIVOS, PÉRDIDA DE INFORMACIÓN COMERCIAL O CUALQUIER
OTRA PÉRDIDA PECUNIARIA), SEA CUAL SEA LA CAUSA O FORMA, INCLUYENDO EL CONTRATO, EL DELITO O LA NEGLIGENCIA, QUE RESULTE
DEL USO O DE LA IMPOSIBILIDAD DE USAR EL PROGRAMA, NI TAN SIQUIERA EN EL CASO QUE AUDIOVOX HAYA SIDO ADVERTIDA DE LA
POSIBILIDAD DE TALES DAÑOS. PUESTO QUE ALGUNOS ESTADOS Y JURISDICCIONES NO PERMITEN LA EXCLUSIÓN O LIMITACIÓN DE
RESPONSABILIDAD POR DAÑOS CONSECUENCIALES O FORTUITOS, LA ANTERIOR LIMITACIÓN PUEDE NO SERLE APLICABLE.
(b) VD. ASUME LA RESPONSABILIDAD DE LA SELECCIÓN DEL PROGRAMA APROPIADO PARA CONSEGUIR LOS RESULTADOS DESEADOS, DE LA
INSTALACIÓN Y USO, Y DE LOS RESULTADOS OBTENIDOS.
7. WINDOWS MEDIA
El programa integrado en su Dispositivo A/V “el “Firmware de Dispositivo”) contiene un programa con licencia de Microsoft que le permite
reproducir Archivos de Sonido Windows Media (WMA) (“Programa WMA”). El programa WMA tiene una licencia que le permite utilizarlo en su
dispositivo A/V bajo las siguientes condiciones. Al instalar y utilizar esta versión del Firmware de Dispositivo, acepta estas condiciones. SI NO ESTÁ
DE ACUERDO CON LAS CONDICIONES DE USUARIO FINAL DE ESTA SECCIÓN 7, NO INSTALE O UTILICE ESTA VERSIÓN DE FIRMWARE DE
DISPOSITIVO.
El Programa WMA está protegido por las leyes de derechos de copia y otras leyes de propiedad intelectual. Esta protección se extiende también a
la documentación del Programa WMA, en formato escrito o electrónico.
CONCESIÓN DE LICENCIA. El Software WMA se le entrega bajo licencia en las siguientes condiciones:
Puede utilizar esta versión del Reproductor con el Software WMA sólo con el Dispositivo A/V.
No puede investigar los secretos, descompilar ni decodificar el Programa WMA, excepto y solo hasta el punto en que tal actividad esté permitida
de manera expresa por las leyes vigentes a pesar de esta limitación.
Puede transferir su derecho a utilizar el Firmware de Dispositivo sólo como parte de una venta o transferencia del Dispositivo A/V, en condiciones
en las que el destinatario acuerde las condiciones anteriormente establecidas. Si la versión del Firmware de Dispositivo que está transfiriendo es
una actualización, también deberá transferir todas las versiones anteriores del Firmware de Dispositivo que posea, incluyendo el Programa WMA.
MICROSOFT NO LE OFRECE NINGUNA GARANTÍA DE NINGÚN TIPO CON RELACIÓN AL SOFTWARE WMA, Y MICROSOFT NO PRESENTA NINGUNA
OBSERVACIÓN RELATIVA AL FUNCIONAMIENTO DEL PROGRAMA WMA.
El Software WMA procede de los EE.UU. Cualquier exportación de esta versión del Firmware de Dispositivo debe ser conforme a todas las leyes
nacionales e internacionales vigentes, incluyendo las Disposiciones de la Administración para Exportaciones de los EE.UU., que se apliquen al
Programa WMA incorporado en el Firmware de Dispositivo.
Los propietarios de contenido usan la tecnología de administración de derechos digitales de Windows Media (“WMDRM”) para proteger su
propiedad intelectual, incluyendo los derechos de autor. Este dispositivo usa un software WMDRM para accesar contenido WMDRM protegido. Si
el software WMDRM falla en la protección del contenido, los propietarios de contenido pueden pedir a Microsoft revocar la capacidad del
software de usar WMDRM para reproducir o copiar contenido protegido. La revocación no afecta contenido que no esté protegido. Cuando usted
descarga licencias para contenido protegido, usted está de acuerdo que Microsoft puede incluir una lista de revocación con las licencias. Los
propietarios de contenido pueden requerir que usted mejore con la modalidad WMDRM para accesar su contenido. Si usted declina aceptar una
mejora, usted no podrá accesar contenido que requiere dicha mejora.
8. PROGRAMAS DE OTROS FABRICANTES
CUALQUIER PROGRAMA DE OTRO FABRICANTE QUE HAYA SIDO SUMINISTRADO CON EL PROGRAMA SE INCLUYE PARA SU USO A SU ELECCIÓN. SI
DECIDE UTILIZAR DICHO PROGRAMA DE OTRO FABRICANTE, SU USO SERÁ GOBERNADO POR EL ACUERDO DE LICENCIA DE DICHO FABRICANTE,
COPIA ELECTRÓNICA DEL CUAL SE INSTALARÁ EN LA CARPETA ADECUADA DE SU ORDENADOR DESPUÉS DE LA INSTALACIÓN DEL PROGRAMA.
AUDIOVOX NO SE HACE RESPONSABLE DE NINGÚN PROGRAMA DE OTRO FABRICANTE Y NO SERÁ RESPONSABLE DEL USO QUE HAGA DEL
MISMO.
9. LEY EN VIGOR
Si ha adquirido este Dispositivo A/V en los Estados Unidos, este CLUF será gobernado y construido según las leyes del Estado de Indiana, EE.UU.
independientemente de los posibles conflictos con los principios legales. Si ha adquirido este Dispositivo A/V fuera de Estados Unidos o la Unión
Europea, serán de aplicación las leyes locales.
8
Page 48

10. TÉRMINOS GENERALES
Este CLUF sólo podrá ser modificado por medio de un acuerdo escrito firmado por usted y AUDIOVOX, y cualquier cambio en los términos y
condiciones de este CLUF realizado de otra forma no tendrá efecto. Si cualquier parte de este CLUF se considera inválida o impracticable, la
validez, legalidad y practicabilidad del resto del Acuerdo no deberá verse afectada o modificada en consecuencia. Este CLUF es la declaración
completa y exclusiva del acuerdo entre usted y AUDIOVOX, que reemplaza todas las propuestas o acuerdos previos, orales o escritos, y cualquier
otra comunicación entre usted y AUDIOVOX, relacionada con el asunto de que es objeto este acuerdo. Los Licenciatarios de AUDIOVOX serán
considerados terceras partes beneficiarias de este Acuerdo y tendrán el derecho para aplicar los términos aquí establecidos.
“SUBSIDIARIA DE AUDIOVOX” significará cualquier persona, corporación, u otra organización, doméstica o extranjera, incluyendo pero sin
limitación subsidiarias, que estén directa o directamente controladas por Audiovox Corporation, incluyendo, pero sin limitarse a Audiovox
Consumer Electronics, Inc. Para propósitos de esta definición solamente, el término “control” significa la posesión del poder para dirigir o causar
la dirección de la gestión y políticas de una entidad, sea mediante la propiedad de acciones con derecho a voto o participación en la sociedad,
mediante contrato, o de otra forma, incluyendo la propiedad directa o indirecta de al menos cincuenta por ciento (50%) de la participación con
derecho a voto en la entidad en cuestión.
9
Page 49

Antes de comenzar
Estimado Cliente RCA,
Gracias por comprar el Reproductor. Este producto reproducirá contenido de audio mp3 y Windows Media™
(WMA) así como contenido comprado de la mayoría de los servicios de descarga de música en línea.
El Software de Medios RCA easyRip™ , instalado automáticamente cuando usted se conecta con este
reproductor a su PC, le permite importar archivos de música desde CD y otras fuentes, organizar su librería
de música, y transferir archivos WMA y MP3 no protegidos a y desde este reproductor.
Para transferir archivos protegidos por DRM a este reproductor, usted debe utilizar la aplicación
suministrada por la tienda de música en línea.
Advertencia de derechos de autor
Este reproductor es para su uso personal solamente. La grabación o duplicación no autorizada de material
con derechos de autor puede violar los derechos de terceras partes y puede ser contraria a las leyes de
protección de derechos de autor.
Respaldo de sus datos
Al igual que con cualquier reproductor portátil, usted debe respaldar con regularidad la unidad. El
fabricante no es responsable por la pérdida de datos.
Para desempacar su reproductor
Todos los elementos listados a continuación deberán haber sido empacados en la caja con su reproductor.
• Reproductor RCA (contiene el instalador del software de gestión de música y manual del usuario)
• Guía de Inicio Rápido
• Cable USB
• Audífonos
• Clip
Requerimientos del sistema de cómputo
• Pentium III 500MHz o superior, recomendado
• Windows® XP (service pack 1 o superior) o Windows Vista™ o Windows® 7
• Explorador de Internet 6.0 o superior con acceso a Internet
• Reproductor de Medios de Windows 10 o superior
• 250 MB o más de espacio libre en disco duro para el software
• 128 MB RAM (256 MB recomendado)
• Unidad CD con capacidad de extracción de audio digital
• Puerto USB (2.0 recomendado)
• Tarjeta de sonido
Requerimientos de transferencia de música segura
La configuración predeterminada de este reproductor es el modo MSC (Clase de Almacenamiento Masivo)
cuando está conectado a su PC. Para activar la función de transferencia de contenido de música de
suscripción al reproductor, seleccione el modo MTP (Protocolo de Transferencia de Medios) bajo Protocol en
el menú Settings (consulte la página 30).
Windows, Windows Media, y Windows Vista son marcas registradas o marcas registradas de Microsoft Corporation en los Estados Unidos y otros
países.
10
Page 50

Instalación del clip para cinturón
Paso 2:
Empuje
aquí hasta
que el clip
para cinturón
quede
completamente asegurado en
su lugar
reproductor
Paso 1:
Coloque
aquí el clip
para
cinturón
clip para
cinturón
Levante aquí el clip
Para quitar
el clip para
cinturón
reproductor
clip para
cinturón
Conexión a la computadora
• Conecte el reproductor a su computadora con el cable USB suministrado. El reproductor se encenderá
automáticamente.
• El reproductor se conectará en el modo MSC (Clase de Almacenamiento Masivo). Este aparecerá como
una letra de unidad en su computadora y se comportará como una unidad desmontable para
transferencia de archivos en una o ambas direcciones.
• El instalador del Software de Medios RCA easyRip TM está almacenado en el reproductor, vaya a
MyComputer en el menú Inicio, y abra la letra de la unidad asociada con el reproductor (por ejemplo,
LYRA) y luego doble clic en el archivo rcaeasyrip_setup para lanzar el instalador.
• El instalador de software puede ser eliminado del reproductor después de la instalación para liberar más
espacio de almacenamiento.
Reproductor
Cable USB
* El software más reciente puede descargarse desde www.rcaaudiovideo.com.
Puerto USB de su
computadora
11
Page 51

Para habilitar la función de lanzamiento del instalador RCA easyRip almacenado en el
reproductor, el reproductor debe estar en el modo MSC el cual puede ser seleccionado bajo
Protocol en el menú Settings. La configuración predeterminada de este reproductor ya está
en el modo MSC. Para más información consulte la página 30.
• Puede llevarse varios segundos para que el reproductor sea detectado. Haga clic en
Refresh en M PC o Explorador de Windows para asegurarse que el reproductor haya sido
detectado.
• El reproductor puede transferir archivos al puerto USB 2.0. Si el puerto USB 2.0 está
disponible su computadora, uselo para conectar a su reproductor. El reproductor es todavía
compatible con versiones anteriores del puerto USB 1.1. Sin embargo, usted no podrá aprovechar
completamente el potencial de incremento de velocidad.
• IMPORTANTE: no desconecte el cable USB a la PC o el reproductor durante la instalación del
software.
Carga del reproductor
El reproductor carga automáticamente cada vez que lo conecta a la computadora. Para cargar
completamente el reproductor, asegúrese de que su computadora esté encendida y que el dispositivo esté
conectado por al menos 3 horas. Consulte el icono del nivel de batería en la pantalla para checar el nivel
de la misma. Recargue el reproductor cuando el icono este vacío.
12
Page 52

Gestión de archivos en su Reproductor RCA
Antes de comenzar a usar su Reproductor RCA, puede ser que usted quiera copiar su música al reproductor.
Puede utilizar cualquiera de los métodos siguientes para transferir el contenido
• RCA easyRip
• Arrastrar y soltar archivos en el Explorador de Windows
• Software suministrado por tiendas de música en línea
Para transferir contenido protegido por DRM, use el software suministrado por la tienda de música en línea.
Las siguientes secciones explican cómo copiar archivos no protegidos al reproductor. Para instrucciones
sobre transferencia de archivos protegidos, por favor consulte la documentación para el software que usted
usa para transferir los archivos.
Uso de RCA easyRip
El software RCA easyRip fue instalado automáticamente la primera vez que usted conectó este
reproductor a su PC.
easyRip le permite:
• Importar música de CDs
• Organizar su librería de música en su PC
• Crear listas de reproducción
• Copiar archivos de su librería al reproductor
• Copiar archivos del reproductor a su librería
• Eliminar archivos del reproductor
• Arrastrar y soltar archivos de imagen en el nivel raíz o una carpeta específica del reproductor
para verlos.
• Los archivos de video deben ser convertidos y transferidos vía RCA easyRip para su
reproducción.
Para inicial easyRip:
• Haga clic en el icono de la bandeja de sistema RCA y seleccione RCA easyRip del menú.
• Haga doble clic en el icono easyRip en el escritorio de la PC. El acoplador easyRip aparece a un lado de su
pantalla.
• Los archivos de video deben transferirse vía easyRip, el cual convierte automáticamente los
archivos al formato óptimo.
• Help – para información detallada sobre el uso de easyRip, haga clic en el asistente de
ayuda en el acoplador de módulo.
13
Page 53

Uso del Explorador de Windows
Para copiar archivos en Windows XP con el Reproductor de Medios de Windows 10 instalado:
1. Abra el reproductor en el Explorador de Windows.
2. Arrastre y suelte los archivos de música en la carpeta Music.
Para copiar archivos en Windows Vista o WindowsR 7 o Windows XP con el Reproductor de Medios de
Windows 11 instalado:
1. Abra el reproductor en el Explorador de Windows
2. Abra Internal Storage (Almacenamiento Interno).
3. Arrastre y suelte los archivos de música.
Para eliminar archivos del reproductor
Cualquier archivo que haya transferido al reproductor, usted puede eliminarlo mientras el reproductor esté
conectado a su computadora.
1. Abra el reproductor en el Explorador de Windows y luego navegue a la carpeta que contiene los
archivos.
2. Seleccione los archivos que usted quiere remover y presione la tecla Eliminar en el teclado de su PC.
• Es mejor quitar los archivos de suscripción del reproductor usando el reproductor de medios de
Windows.
Para desconectar el producto de la PC
Si Windows ve el reproductor como un dispositivo MTP:
• Desconecte el reproductor de la PC cuando no haya transferencia de archivos en progreso.
Si Windows ve el reproductor como un disco removible:
1. En la bandeja de sistema de Windows, haga clic en el icono Safely Remove Hardware
seleccione el reproductor de la lista de dispositivos.
2. Cuando el mensaje Es seguro remover el equipo (Safe to remove hardware) aparezca, desconecte el
reproductor de la PC.
No retire la conexión USB durante la descarga de archivos. Hacer eso puede corromper los
archivos de sistema o los archivos que están siendo descargados.
14
y luego
Page 54

Controles generales
MIC
RESET
pantalla
Encendido/
Apagado,
Bloqueo/
Desbloqueo
Botón de
reinicio
Micró
-fono
Receptáculo USB
Receptáculo para
audífonos
Navega a la izquierda/salta atrás/
reversa/retroceder menú
Regresar/Inicio
Navegar o desplazarse
arriba/subir volumen
Menú Opciones
Navegar a la derecha/saltar
hacia adelante/avance
rápido hacia adelante
rápido/avanzar menú
Reproducir/pausa/
seleccionar opción de
menú
Navegar o
desplazarse abajo/
bajar volumen
Encendido y apagado del reproductor
Para encender el reproductor, deslice/hacia / abajo. Deslice hacia / abajo otra vez para apagar el
reproductor.
Bloqueo de los controles del reproductor
Para bloquear los controles del reproductor para evitar que sean activados por accidente, deslice / hacia
arriba. Para desbloquear, deslice
mensaje "Teclas bloqueadas" aparece en la pantalla..
/ a la posición de en medio. Cuando los controles estén bloqueados, el
Reinició de reproductor
Si el reproductor deja de funcionar apropiadamente, usted puede reiniciarlo presionando el botón RESET en
la parte posterior del reproductor con un objeto puntiagudo no metálico (por ejemplo, un palillo)
15
Page 55

Uso de los menús
Tipos de Menú
El reproductor tiene dos tipos de menú:
Menú del reproductor
El menú del reproductor aparece cuando usted enciende el reproductor o si presiona y sostiene
mientras
escucha el reproductor. Esto le permite:
• Navegar y reproducir archivos de música, audiolibros, imagen y video
• Escuchar el radio
• Grabar y reproducir mensajes de voz
• Cambiar las configuraciones del reproductor, idioma, brillo de la pantalla, etc.
Títulos de menú
Elementos de menú
Menú de Opciones
El menú de opciones aparece si usted presiona
en la pantalla de reproducción (ahora en reproducción)
mientras escucha el reproductor. Esto suministra diferentes opciones dependiendo de lo que usted esté
escuchando al presionar
.
Pantalla "ahora en
reproducción"
Navegación de menú
Cuando se visualice un menú:
• Presione + y – para desplazarse arriba y abajo de la lista de elementos de menú.
• Presione para ir al siguiente nivel de menú. Presione para regresar al nivel de menú anterior.
Presione
Presione
Play All Songs
Down
Getting Out
Going Down Slow
Presione +
Presione –
16
Page 56

• Si el elemento resaltado es reproducible (por ejemplo, un archivo de audio), presione
la reproducción.
Presione
para comenzar
• Si el elemento resaltado indica la configuración actual (por ejemplo, la configuración de modo repetir),
presione
para cambiar la selección.
Add to Favorites
Repeat O
Presione
On
Add to Favorites
Repeat One
On
17
Page 57

El menú Inicio
El nivel superior o Menú Inicio se visualiza siempre que usted presione y sostenga . Las opciones de menú
son:
Música
Presione
Videos
Presione para entrar al menú Videos y elegir un video en particular para ver.
Imágenes
Presione
Audiolibros
Presione para entrar al menú Audiolibro y elegir uno en particular para escuchar.
Radio
Presione para entrar al menú Radio y elegir si escuchar el radio o reproducir grabaciones de
shows de radio anteriores.
Favoritos
Conforme escuche la música, puede agregar títulos individuales a una lista de reproducción
“favoritos”. Presione
lista de reproducción.
para entrar al menú Música y elegir una vista, álbum, género o título individual.
para entrar al menú Imágenes y elegir una imagen en particular para ver.
para entrar al menú Favoritos y elegir un título en particular o editar la
18
Mensaje de voz
Presione
reproducir grabaciones de mensajes de voz previos
Configuraciones
Presione
• elegir el modo de reproducción aleatorio
• elegir un modo de reproducción de repetición
• elegir una configuración de ecualizador
• personalizar el menú música
• establecer la duración de la presentación de imágenes
• cambiar el brillo de la pantalla
• elegir la configuración de protector de pantalla
• elegir la configuración de ahorro de energía
• elegir una opción de duración de grabación
• alternar entre los pasos de frecuencia de radio Europea y de los Estados Unidos
• cambiar el idioma de los menús del reproductor
• alternar entre los modos MT y MSC
• visualizar la versión de firmware, el espacio usado, y el espacio disponible
• restablecer las configuraciones del reproductor a los valores predeterminados de fabrica
Ahora en reproducción
Disponible sólo durante la reproducción.
Presione
para entrar al menú Mensaje de Voz y elegir sea comenzar la grabación o
para entrar al menú configuraciones, el cual le permite:
para regresar al archivo actualmente en reproducción.
Page 58

Música
Reproducción de archivos de música
El reproductor clasifica sus archivos de música por nombre de pista (título) artista, álbum, y género.
1. En otros modos, presione y sostenga
seleccionar Music.
2. Presione para entrar al menú Música.
3. Use + ó – y
presione para
ó para navegar a través de los menús y seleccionar el elemento deseado, luego
ó comenzar a escuchar.
para mostrar el menú Inicio. Presione + ó – y
ó para
19
Page 59

Reproducción de Música
+ ó –
Menú opciones (reproducción de música)
Presione en la pantalla la reproducción (ahora en reproducción) para mostrar el menú Opciones. Presione
+ ó – para resaltar una opción y luego presione
Las opciones siguientes están disponibles:
• Add to Favorites/Clear from Favorites – para agregar el archivo actual a la lista de reproducción
• Repeat – presione repetidamente para seleccionar repetir actual 1 o todos los archivos (el icono
• Shuffle – para reproducir en forma aleatoria cuando shuffle es activado.
• Album Art – para mostrar la portada de álbum
• Equalizer – para seleccionar un modo de ecualizador. Las opciones disponibles: Flat, Bass, Pop, Rock y
• Delete – para quitar el archivo actual del reproductor.
Salta al archivo anterior, presione y sostenga para explorar hacia atrás dentro de un archivo
Salta al siguiente archivo, presione y sostenga para explorar hacia adelante dentro de un
archivo
Inicia/pausa la reproducción
Aumenta o disminuye el volumen durante la reproducción
Muestra/oculta el menú opciones
Regresa al nivel de navegación anterior. Presione y sostenga para entrar al menú Inicio
para confirmar la selección o cambiar la configuración.
Favoritos (lea la página 28). Si el archivo ya está en la lista de reproducción, esta opción cambia a Clear
from Favorites para remover el archivo actual de la lista de reproducción
correspondiente se muestra en la pantalla)
Jazz.
20
Page 60

Pantalla de reproducción de música
1
2
3
4
5
1. Número de archivo actual/número total de archivos
2. Nombre de la canción
3. Nombre de artista
4. Nombre de álbum
5. Tiempo de reproducción transcurrido
6. Tiempo total de archivo
7. Barra de progreso de reproducción
8. Tasa de transferencia de bits de archivo
9. Tipo de archivo
La información suministrada en la pantalla de reproducción depende de las etiquetas ID3 que se han
establecido para el archivo de música.
9
8
7
6
21
Page 61
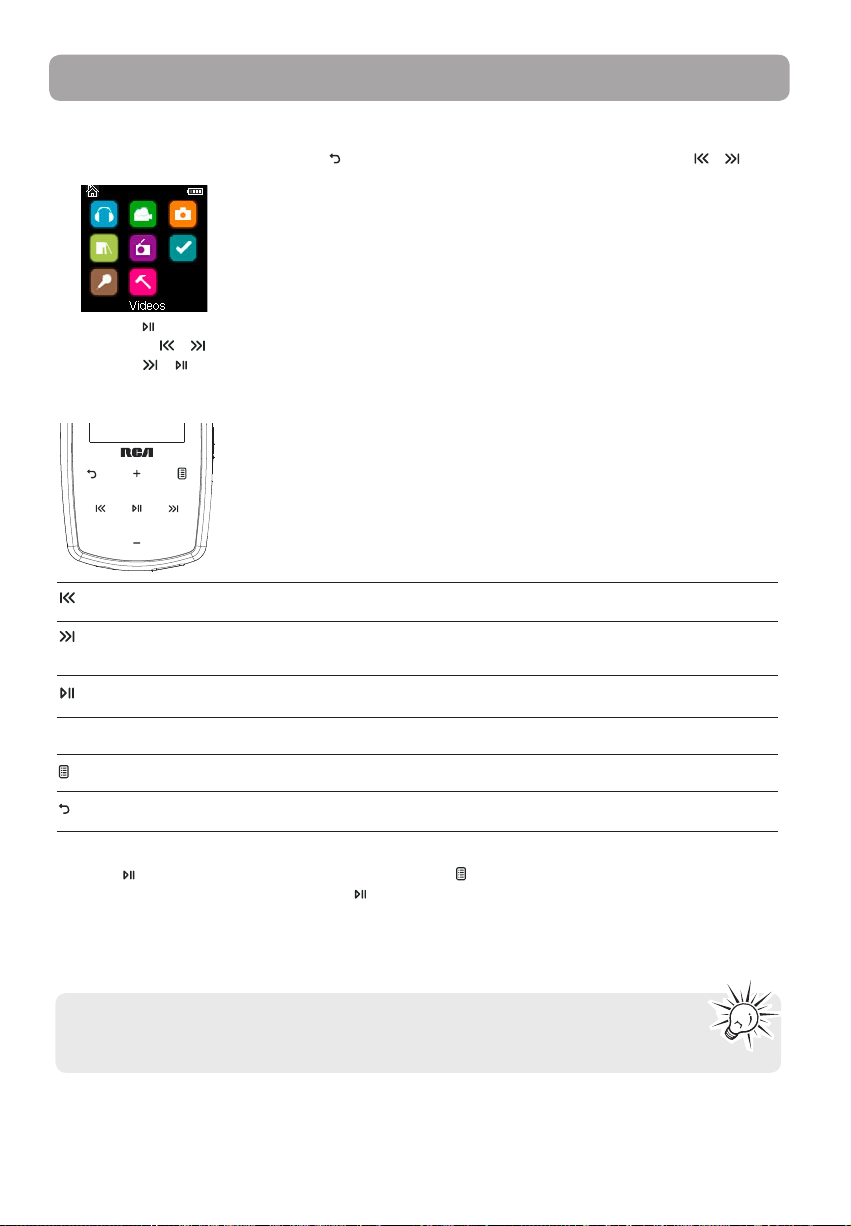
Videos
Reproducción de archivos de video
1. En otros modos, presione y sostenga para mostrar al menú Inicio. Luego presione + ó – y ó para
seleccionar Videos.
2. Presione para entrar a Videos.
3. Use + ó – y
presione ó para comenzar a ver.
Para ver videos
ó para navegar a través de los menús y seleccionar el elemento deseado, luego
+ ó –
Menu Opciones (reproducción de video)
Presione para pausar la reproducción de video. Presione para mostrar el menú Opciones. Presione + ó
– para resaltar una opción y luego presione
La opción siguiente está disponible:
• Delete Video – para quitar el archivo actual del reproductor
Los archivos de video deben ser convertidos a un formato óptimo para reproducción en este
reproductor. El Software de Medios RCA easyRip puede convertir los archivos de video
automáticamente al transferirlos al reproductor.
22
Retrocede, salta hacia atrás. Presione y sostenga para explorar hacia atrás dentro de un archivo
Avanza, salta hacia adelante. Presione y sostenga para explorar hacia adelante dentro de un
archivo
Inicia/pausa la reproducción
Aumenta o disminuye el volumen durante la reproducción
Muestra/oculta el menú opciones
Regresa al nivel de navegación anterior. Presione y sostenga para entrar al menú Inicio
para confirmar la selección o cambiar la configuración
Page 62

Imágenes
Reproducción de archivos de imagen
1. En otros modos, presione y sostenga para mostrar el menú Inicio. Luego presione + ó – y ó para
seleccionar Pictures.
2. Presione
3. Use + ó – y ó para navegar a través de los menús y seleccionar el elemento deseado, luego
presione ó para comenzar a ver.
Para ver imágenes
para entrar a Imágenes.
Menu Opciones (para ver imágenes)
Presione para pausar la reproducción de imágenes. Presione para mostrar el menú Opciones. Presione
+ ó – para resaltar una opción y luego presione para confirmar la selección o cambiar la configuración.
Las opciones siguientes están disponibles:
• Slideshow Timing– para seleccionar el tiempo de visión para cada imagen durante una presentación.
Presione repetidamente para seleccionar entre opciones
• Delete Photo – para quitar el archivo actual del reproductor
Consulte la página 13 para transferir archivos de imágenes al reproductor.
Regresa, salta hacia atrás
Avanza, salta hacia adelante
Inicia/pausa la presentación de imágenes si esta está activada
Muestra/oculta el menú opciones
Regresa al nivel de navegación anterior. Presione y sostenga para entrar al menú Inicio
23
Page 63

Audiolibros
Reproducción de audiolibros
La reproducción de audiolibros es similar a la reproducción de música.
1. En otros modos, presione y sostenga
para seleccionar Audiobooks.
2. Presione para entrar a Audiolibros.
3. Use + ó – y
presione
ó para navegar a través de los menús y seleccionar el elemento deseado, luego
ó para comenzar a escuchar.
para mostrar el menú Inicio. Luego presione + ó – y
Controles de reproducción de audiolibros
Salta al archivo/sección anterior, presione y sostenga para explorar hacia atrás dentro de un
archivo
Salta al archivo o sección siguiente, presione y sostenga para explorar hacia adelante dentro de
un archivo
Comienza/inicia la reproducción
ó
+ ó –
Menú Opciones (Reproducción de audiolibros)
Presione en la pantalla de reproducción (ahora en reproducción) para pausar la reproducción y presione
para mostrar el menú Opciones.
Presione + ó – para resaltar una opción y luego presione
configuración.
Las opciones siguientes están disponibles:
• Skip –para seleccionar saltar sección por sección o archivo por archivo (lea la siguiente sección para
• Delete – para quitar el archivo actual del reproductor
• CoverArt – para seleccionar mostrar o no la portada en el archivo audible en reproducción
24
Aumenta o disminuye el volumen durante la reproducción
Muestra/oculta el menú opciones
Regresa al nivel de navegación anterior. Presione y sostenga para entrar al menú Inicio
para confirmar la selección o cambiar la
detalles)
Page 64

Salto a través de secciones del audiolibro
Si el audiolibro actualmente en reproducción contiene secciones, usted puede elegir saltar hacia adelante y
atrás entre secciones cuando presione
Para elegir saltar sección por sección:
1. Presione
para pausar la reproducción y presione para mostrar el menú Opciones.
ó , en lugar de saltar entre archivos.
2. Presione + ó – para seleccionar Skip, Luego presione
3. Presione para reanudar la reproducción.
• El salto sección por sección está indicado por Sect en la pantalla. Presione ó
pantalla de reproducción.
• El reproductor regresará automáticamente a saltar archivo por archivo cuando usted reproduzca otro
archivo o apague el reproductor.
para alternar a Section.
para regresar a la
25
Page 65

Radio
El radio usa los audífonos como antena. Para mejor recepción, extienda el cable del audífono
tanto como sea posible
Reproducción de radio FM
Para encender el radio:
1. En otros modos, presione y sostenga para mostrar el menú Inicio.
2. Presione + ó – y ó para seleccionar Radio y presione para entrar al menú radio.
3. Mientras Listen esté resaltado, presione
aparece.
Para sintonizar el radio:
• Presione y sostenga ó para comenzar la exploración a través del rango de frecuencia. El reproductor
detiene la exploración cuando detecta la siguiente estación.
• Presione
Para apagar el radio:
• Apague el reproductor
• En otros modos, presione y sostenga para mostrar el menú Inicio y seleccione otros modos.
ó para pasar a través del rango de frecuencia.
ó para comenzar a escuchar. La pantalla de frecuencia
Para almacenar y recuperar estaciones preseleccionadas
Usted puede guardar hasta 20 estaciones de preselección en el reproductor.
Para guardar la estación actualmente en reproducción como una preselección:
1. Presione para mostrar el menú Opciones.
2. Presione + ó – para resaltar Save to Preset y luego presione .
• Si todos los 20 números de estación de preselección están ocupados, usted reemplazará la estación
existente con la nueva estación.
3. El primer número de preselección disponible se visualiza. Presione + ó – para seleccionar un número de
preselección diferente si lo desea.
• Si usted elige un número de preselección que ya contiene una estación FM, usted reemplazará la
estación existente con la nueva estación.
4. Presione
para resaltar Ye s y luego presione
Para escuchar una estación de preselección:
1. Cuando el radio esté en reproducción, presione
2. Presione + ó – para resaltar Tuning y presione
26
para mostrar el menú Opciones.
para alternar de Manual a Preset.
Page 66

3. Presione
ó para salir del medio.
4. Presione
ó para elegir el número de preselección de estación deseado.
Mejora de sonido del radio FM
Si la recepción en estéreo es ruidosa, frecuentemente se puede reducir el ruido cambiando a mono.
Para alternar entre estéreo y mono:
1. Mientras el radio esté en reproducción, presione
2. Presione + ó – para resaltar Mode y luego presione
3. Presione ó para salir del menú.
para mostrar el menú Opciones.
para alternar entre Stereo y Mono.
Grabación de radio FM
Usted puede grabar el radio y reproducir grabaciones así como copiar las grabaciones (archivos WAV) en su
PC.
Para grabar la estación de radio actualmente en reproducción:
1. Presione
2. Presione + ó – para resaltar Start Recording y luego presione
• Presione para pausar o reanudar la grabación.
3. Presione
FMRecXXX donde XXX es un número único
para mostrar el menú Opciones.
para iniciar la grabación.
y luego seleccione Stop Recording presionando . El reproductor nombra cada grabación
Reproducción de grabaciones de radio FM
Para reproducir una grabación:
1. En otros modos, presione y sostenga
para mostrar el menú Inicio.
2. Presione + ó – y
3. Presione + ó – para resaltar Playback y presione ó para ver la lista de grabaciones.
4. Presione + ó – para seleccionar una grabación y presione ó para iniciar la reproducción.
ó para seleccionar Radio y presione para entrar al menú radio.
Para copiar grabaciones a su PC
Las grabaciones se guardan como archivos WAV en la carpeta “Grabaciones\FMGrab” en el reproductor.
Para copiar grabaciones a la PC:
1. Conecte el reproductor en la PC.
2. Abra la carpeta Grabaciones del reproductor.
3. Seleccione los archivos que quiere copiar y arrastre y suéltelos en una carpeta en la PC.
• Casi todas las aplicaciones de audio pueden reproducir archivos WAV.
27
Page 67

Favoritos
Para crear una lista de reproducción "Favoritos"
Usted puede crear una lista de reproducción de su música favorita agregando nuevos archivos a la lista de
reproducción conforme los escucha. Esta función no está disponible para otros formatos de medios tales
como videos, imágenes, audio libros y grabaciones.
Para agregar el archivo de música actualmente en reproducción a la lista de reproducción:
1. Presione
2. Presione + ó – para resaltar Add to Favorites y luego presione .
• Added Successfully se muestra en la pantalla.
• Repita los pasos anteriores para agregar más archivos de música.
para mostrar el menú Opciones.
Para escuchar la lista de reproducción Favoritos:
1. En otros modos, presione y sostenga
2. Luego presione + ó – y ó para seleccionar Favorites.
• Para reproducir un archivo en particular, presione
para listar los archivos. Presione + ó – para seleccionar el archivo deseado y presione ó .
para mostrar el menú Inicio.
para entrar al menú Favoritos y luego presione ó
Para remover archivos de la lista de reproducción “Favoritos”
Para remover todos los archivos de música de la lista de reproducción:
1. En otros modos, presione y sostenga para mostrar el menú Inicio.
2. Luego presione + ó – y ó para seleccionar Favorites y presione para aceptar.
3. Presione + ó – para resaltar My Selection y presione
4. En el menú emergente, seleccione Delete y luego presione
reproducción.
.
para quitar todos los archivos de la lista de
Para descargar listas de reproducción al reproductor
Usted puede también descargar listas de reproducción de su música favorita creada en el software RCA
easyRip. Por favor consulte la sección de Ayudar del software easyRip para detalles sobre la creación de listas
de reproducción y descarga de las listas de reproducción creadas al reproductor.
28
Page 68

Memo de voz
Grabación de mensaje de voz
Usted puede grabar voz y reproducir grabaciones así como copiar las grabaciones (archivos WAV) en su PC,
Para grabar voz:
1. En otros modos, presione y sostenga
para mostrar el menú Inicio.
2. Luego presione + ó – y
Memo.
3. Presione ó para resaltar Start Recording y presione ó para comenzar la grabación.
• Presione para pausar o reanudar la grabación.
• El micrófono se ubica en la parte posterior del reproductor.
4. Presione y luego seleccione Stop Recording presionando
• El reproductor nombra cada grabación VRecXXX.wav donde XXX es un número único.
Para grabar por una duración específica:
Consulte RecDur (DurGrab) en la página 30.
ó para seleccionar Voice Memo, y presione para entrar al menú Voice
.
Reproducción de mensaje de voz
Para reproducir una grabación:
1. En otros modos, presione y sostenga para mostrar el menú Inicio.
2. Luego presione + ó – y
Memo.
3. Presione + ó – para resaltar Playback y presione
ó para seleccionar Voice Memo, y presione para entrar al menú Voice
ó .
4. Presione + ó – para seleccionar una grabación y presione
ó para comenzar la reproducción.
Para copiar grabaciones a su PC
Las grabaciones se guardan como archivos WAV en la carpeta “Grabaciones\VozGrab” en el reproductor.
Para copiar grabaciones a la PC:
1. Conecte el reproductor en la PC.
2. Abra la carpeta Grabaciones del reproductor.
3. Seleccione los archivos que quiere copiar y arrastre y suéltelos en una carpeta en la PC.
• Casi todas las aplicaciones de audio pueden reproducir archivos WAV.
29
Page 69

Configuraciones
Cambio de las configuraciones del reproductor
Para cambiar las configuraciones del reproductor:
1. En otros modos, presione y sostenga
2. Presione + ó – y
3. Presione + ó – para seleccionar una configuración y luego presione para cambiarla.
ó para seleccionar Settings y presione para entrar al menú configuraciones.
Aleatorio
• Presione repetidamente para seleccionar activar o no activar el modo aleatorio. Los archivos de
música (mp3/wma/wav) se reproducirán en forma aleatoria cuando este modo esté activado.
• El icono aleatorio (
) se muestra en la pantalla cuando este modo está activado.
Repetir
• Presione repetidamente para seleccionar repetir actual 1 o todos los archivos (el icono
correspondiente se muestra en la pantalla).
Ecualizador
• Presione repetidamente para elegir una opción de ecualizador (Flat, Bass, Pop, Rock y Jazz).
para mostrar el menú Inicio.
Para establecer el Modo Gráfico:
• Presione
puede personalizar el ecualizador de cinco bandas. Presione
presione + ó – para ajustar el nivel de banda. Al terminar, presione para salir del modo Gráfico.
repetidamente hasta que Gráfico aparezca y luego presione . En modo gráfico, usted
ó para seleccionar una banda y luego
Menú personalizar
Para seleccionar lo que usted desea mostrar en el submenú del menú Música: Títulos, Artistas, Álbum y
Géneros.
Presentación de imágenes
Para seleccionar la duración de la presentación de imágenes. Presione repetidamente para seleccionar
entre: off, 3, 5, 10 y 15 segundos.
Brillo
Para ajustar el brillo de la luz de la pantalla.
Protector de pantalla
Para establecer la duración (10s, 20s, 30s y 1m) antes de que se active el protector de pantalla.
Ahorro de energía
Para establecer el intervalo de tiempo (Off, 1m, 2m, 5m y 10m) antes de que el reproductor se apague si no
se presiona alguna tecla.
30
Page 70

RecDur (Duración de grabación)
Para cambiar la duración (Máx, 5 minutos, 30 minutos, 1 hora) para grabación de radio y mensajes de voz.
FreqStep (Paso de frecuencia)
Para cambiar la forma en que el reproductor explora las frecuencias de radio. Cambie a EU si usted lleva el
reproductor a Europa; regrese a US cuando usted retorne a Norteamérica.
Idioma
Para cambiar el idioma de los menús del reproductor.
Protocolo
Para alternar entre los modos MSC (Clase de Almacenamiento Masivo) y MTP (Protocolo de Transferencia de
Medios) cuando está conectado a su PC. Para habilitar la función de transferir contenido de música de
suscripción, seleccione el modo MTP.
Información de Sistema
Para mostrar la cantidad de espacio libre disponible y la versión firmware.
Valores Predeterminados
Para restaurar todos los menús a los valores predeterminados de fábrica.
31
Page 71

Información adicional
Tips y solución de problemas
No se puede eliminar archivos en el reproductor.
• Cualquier archivo que usted haya transferido al reproductor puede ser eliminado mientras que esté
conectado el reproductor a su computadora. Resalte el archivo no deseado en el directorio de archivos
del reproductor en su computadora y presione la tecla eliminar en su computadora para eliminar el
archivo. Es mejor remover los archivos suscritos a través del reproductor de medios de Windows.
• Para eliminar archivos del reproductor, refiérase al Menú Opciones en las páginas 19-20.
El reproductor repite las mismas pistas o todas las pistas.
• Repetir está activado para reproducir. Presione durante la reproducción para mostrar el Menú
Opciones y seleccionar Repetir desactivado (Repeat Off). Usted también puede presionar para
regresar al menú Inicio. Luego seleccione Settings y presione para entrar al menú configuraciones
para seleccionar Repetir Off.
El audio está distorsionado en volumen alto.
• Cambie el modo de Ecualizador a Flat.
• Baje el volumen.
Las pistas de audio en mi reproductor siguen saltando o surgiendo.
• Usted necesitará volver a grabar la pista de audio. Asegúrese de cerrar todas las otras aplicaciones en la
PC cuando grabe.
• Trate de grabar con la opción Corrección de Error activada.
El reproductor se apaga solo.
• Su reproductor se apaga sólo si usted lo deja en modo pausa o modo navegación durante el tiempo
especificado en la configuración de Ahorro de Energía.
El reproductor no puede encender.
• La batería está vacía, por favor recargue.
• Asegúrese de que el bloqueo de teclas no esté activado.
• Reinicie el reproductor presionando el botón RESET en la parte posterior del reproductor con un objeto
puntiagudo no metálico (por ejemplo, un palillo)*
• Si el reproductor aun no puede encender después de reiniciar, lleve a cabo una actualización de
firmware para reiniciarlo.
• Para más detalles visite el sitio www.rcaaudiovideo.com
El reproductor no responde presiones de tecla.
• Asegúrese de que el bloqueo de teclas no esté activado.
• Si su reproductor deja de responder a las presiones de tecla, puede reiniciarlo presionando el botón
RESET en la parte posterior del reproductor con un objeto puntiagudo no metálico (por ejemplo, un
palillo)
• Este reproductor puede dejar temporalmente de funcionar si es sometido a interferencia electrostática.
Para reanudar la operación normal, puede ser necesario apagar y encender o puede usted reiniciarlo
presionando el botón RESET en la parte posterior del reproductor con un objeto puntiagudo no
metálico (por ejemplo, un palillo)
El reproductor no puede reproducir canciones WMA.
• Archivos de descarga de música seguros deben ser transferidos a su reproductor a través del
Reproductor de Medios de Windows o la aplicación recomendada por su servicio de descarga de música
en línea (Nota: los servicios y aplicaciones deben ser compatibles con audio de medios de Windows y
soportar la Gestión de Derechos Digitales - DRM) (el contenido de música Apple iTunes no es
soportado).
32
Page 72

El reproductor se toma demasiado tiempo para leer archivos en una carpeta.
• La lectura de archivos puede tomar más tiempo si hay demasiados archivos en una sola carpeta.
Reorganice sus archivos en varias carpetas.
La información de la canción no se muestra correctamente.
• La información de la canción puede no coincidir con su configuración de idioma actual del reproductor.
Cambie la configuración del idioma.
No se pueden ver archivos de imagen.
• El reproductor sólo soporta archivos con extensión .jpg , y no soporta otros formatos como .bmp, .tiff,
.jpeg.
No se pueden reproducir archivos de video.
• Todos los contenidos de video deben ser convertidos por el software RCA easyRip el cual viene con el
reproductor. Otro formato de archivo de video no será soportado.
No se puede reproducir archivos audibles.
• Asegúrese de que el formato del archivo sea correcto. El reproductor soporta archivos de formatos
Format 4 y AAX Audible.
El reproductor informa que está lleno.
• Usted ha llenado la capacidad de la memoria interna del reproductor.
• Usted ha excedido el número máximo de elementos que este reproductor soporta. Su reproductor sólo
puede soportar hasta 2000 archivos de medios dentro de ocho jerarquías de carpeta máximo.
No se puede reproducir pistas en el reproductor.
• Asegúrese de que las pistas de audio estén codificadas en los formatos MP3 o Windows Media a las tasas
de transferencia de bits soportadas.
• Tasas de transferencia de bits soportadas por el reproductor:
mp3 – 32 a 320 kbps
wma – 48 a 192 kbps
• Los archivos WMA pueden tener protección DRM y usted no tiene los derechos apropiados (licencia)
para reproducir los archivos.
• Cheque el sistema de ayuda de la aplicación y/o web del proveedor de servicio de descarga de música
desde donde el contenido fue comprado para los detalles de adquisición de licencia. Para más
información sobre el funcionamiento de adquisición de licencia, vaya al sitio www.microsoft.com/
windowsmedia/drm.
No se puede reproducir canciones descargadas de mi servicio de suscripción del Proveedor del
Servidor de Música de pago.
• El reloj interno en su reproductor portátil. Descargar una nueva canción de suscripción desde su
Proveedor del Servidor de Música debería actualizar el reloj de su reproductor y permitir reproducir
todas sus canciones nuevamente.
• La licencia para sus canciones de suscripción puede haber expirado. Sincronice su dispositivo con su PC
otra vez para obtener una actualización para su licencia. Si los problemas persisten contacte a su
Proveedor de Servicio de Música para soporte adicional.
No se puede transferir contenido de música de suscripción al reproductor.
• Para habilitar la función de transferencia de contenido de música de suscripción, seleccione el modo
MTP bajo el menú Protocol en el medio Settings. Para más información consulte la página 30.
La grabación de voz se detiene automáticamente después de 5 horas.
• La duración máxima para cada grabación es de 5 horas. Comience una nueva grabación después de que
la duración máxima se haya alcanzado.
33
Page 73

¿Qué es el modo MTP?
• El modo MTP (Protocolo de Transferencia de Medios) es esencial si usted quiere transferir contenido
DRM10 a su reproductor. En modo. MTP su reproductor ya no se mostrará como una letra de unidad. Por
lo tanto programas que fueron diseñados para funcionar con un reproductor que se muestre como una
letra de unidad no podrán trabajar directamente con el reproductor.
No se puede lanzar el instalador RCA easyRip almacenado en el reproductor para instalar easyRip en
mi PC.
• Para activar la función de lanzamiento del instalador RCA easyRip almacenado en el productor,
seleccione el modo MSC bajo Protocol en el menú Settings. Para más información consulte la página 30.
Para su registro
Conserve su recibo de ventas como prueba de compra para obtener partes y servicio en garantía.
En el caso de que se requiriera servicio, puede ser que usted necesite tanto el número de modelo como el
número de serie.
En el espacio a continuación, registre la fecha y lugar de compra, y el número de serie:
Modelo No.
Fecha de compra
Lugar de compra
Número de serie.
Visita al sitio web RCA
Por favor visite www.rcaaudiovideo.com para:
• Registro de producto
• El software y firmware más recientes
• El software RCA easyRip más reciente
• Manual del usuario
• Preguntas frecuentes (FAQ)
• Información de servicio al cliente y soporte técnico
Especificación Técnica
Producto: reproductor de audio digital
Marca: RCA
Modelo: M3904, M3804, M3808 y M3816
Consumo eléctrico: 3.7V batería de litio (incorporada)
34
Page 74

Especificaciones
Equipo
• Dimensiones: 72 Mm. A, 44.2 Mm. L, 9.9 Mm. A
• Peso unitario: 30 g
• Receptáculo para audífonos estéreo
• Receptáculo de conexión USB
• Funciona con baterías: batería de litio recargable.
Unidad USB
• Unidad USB externa: cuando se conecta a una computadora vía USB, el reproductor puede almacenar
cualquier tipo de archivo permitiéndole al usuario un método práctico y rápido de almacenar, recuperar,
y transferir archivos. Esto incluye archivos de procesamiento de palabra, presentaciones, hojas de cálculo
y cualquier otro archivo de cómputo.
• Capacidad: 4GB (M3904, M3804), 8GB (M3808), 16GB (M3816)
• Conexión: USB 2.0, con capacidad de alta velocidad
Software
• Incluye las aplicaciones del reproductor y el software de gestión de medios.
35
Page 75

Garantía limitada
Garantía limitada (EE.UU.)
12 meses de garantía limitada
Aplica a productos de audio/video RCA
AUDIOVOX ELECTRONICS CORP. (la Compañía) garantiza al comprador original a través de minorista de este
producto, que en el caso de que este producto o alguna parte del mismo, sometido a uso y condiciones
normales, y probando que tenga defectos en material o mano de obra, en un plazo de 12 meses desde la
fecha de la compra original, tal(es) defecto(s) será(n) reparado(s) o reemplazado(s) con producto
reacondicionado (a opción de la Compañía) sin cargo por las partes y labor en la reparación.
Para obtener reparación o reemplazo dentro de los términos de esta Garantía, el producto debe ser
entregado con prueba de cobertura de la garantía (por ejemplo, nota de venta con fecha), especificación de
defecto(s), transporte prepagado, a la Compañía a la dirección que se indica a continuación
Esta garantía no se extiende a la eliminación de ruido o estática generados externamente, a la corrección de
problemas de antena, a la pérdida/interrupciones de transmisión o servicio de Internet, a costos incurridos
por instalación, remoción o reinstalación del producto, a corrupciones causadas por virus de computadora,
software espía u otro tipo de software malicioso, a la pérdida de medios, archivos, datos o contenido, o al
daño a cintas, discos, dispositivos o tarjetas de memoria removible, bocinas, accesorios, computadoras,
periféricos de computadoras, otros reproductores de medios, redes caseras o sistemas eléctricos de vehículo.
Esta Garantía no aplica a algún producto o parte del mismo que, en la opinión de la Compañía, haya sufrido
o haya sido dañado mediante la alteración, instalación inapropiada, mal manejo, mal uso, negligencia,
accidente o mediante la remoción o borrado del número de serie de fábrica/etiqueta(s) de código de barras.
EL GRADO DE LA RESPONSABILIDAD DE LA COMPAÑÍA BAJO ESTA GARANTÍA ESTÁ LIMITADO A LA
REPARACIÓN O REEMPLAZO QUE SE INDICA ANTERIORMENTE, Y, EN NINGÚN CASO, LA RESPONSABILIDAD
DE LA COMPAÑÍA EXCEDERÁ EL PRECIO DE COMPRA PAGADO POR EL COMPRADOR POR EL PRODUCTO.
Esta Garantía reemplaza todas las otras garantías o responsabilidades expresas. CUALQUIER GARANTÍA
IMPLÍCITA, INCLUYENDO CUALQUIER GARANTÍA IMPLÍCITA DE COMERCIABILIDAD, ESTARÁ LIMITADA A LA
DURACIÓN DE ESTA GARANTÍA ESCRITA. CUALQUIER ACCIÓN POR VIOLACIÓN DE ALGUNA GARANTÍA BAJO
LA PRESENTE INCLUYENDO ALGUNA GARANTÍA IMPLÍCITA DE COMERCIABILIDAD DEBE SER PRESENTADA EN
UN PERIODO DE 24 MESES DESDE LA FECHA DE LA COMPRA ORIGINAL. EN NINGÚN CASO LA COMPAÑÍA
SERÁ RESPONSABLE POR DAÑO ALGUNO INCIDENTAL O CONSECUENCIAL POR LA VIOLACIÓN DE ESTA O DE
CUALQUIER OTRA GARANTÍA. Ninguna persona o representante está autorizado a asumir por la Compañía
responsabilidad alguna distinta que la expresada en el presente documento en relación con la venta de este
producto.
Algunos estados no permiten limitaciones en cuanto a la duración de una garantía implícita o la exclusión o
limitación de daño incidental o consecuencial, por lo tanto las limitaciones o exclusiones anteriores pueden
no aplicar a usted. Esta Garantía le da derechos legales específicos y puede ser que usted tenga también
otros derechos que pueden variar de estado a estado.
Cómo efectuar una reclamación en garantía:
• Si su producto tiene la capacidad de almacenar contenido (tal como un reproductor MP3, una grabadora
de voz digital, etc.), se recomienda que efectúe respaldos periódicos de copias del contenido almacenado
en el producto. Si es aplicable, antes de enviar un producto, haga una copia de respaldo del contenido o
de los datos almacenados en el dispositivo. También, es aconsejable remover cualquier contenido
personal que usted no querría exponer a otros. ES PROBABLE QUE LOS CONTENIDOS Y DATOS EN EL
DISPOSITIVO SE PIERDAN DURANTE EL SERVICIO Y REFORMATEO. AUDIOBOX NO ACEPTA
RESPONSABILIDAD POR LA PÉRDIDA DE CONTENIDO O DATOS, O POR LA SEGURIDAD DE ALGÚN
36
Page 76

CONTENIDO O DATO PERSONAL EN EL DISPOSITIVO QUE SEA RETORNADO. El producto será devuelto
con las configuraciones predeterminadas de fábrica, y sin contenido alguno precargado que pudiera
haber sido instalado en los productos comprados originalmente. El consumidor será responsable por
recargar los datos y el contenido. El consumidor será responsable de restaurar cualquier configuración
de su preferencia personal.
• Empaque apropiadamente su unidad. Incluya cualquier control remoto, tarjetas de memoria, cables, etc.
que fueron suministrados originalmente con el producto. Sin embargo, NO regrese batería removible
alguna, aún si las baterías estaban incluidas con la compra original. Recomendamos usar el empaque y
materiales de empaque originales.
• Incluya a evidencia de la fecha de compra tal como la nota de venta. También escriba su nombre y
dirección, y la descripción del defecto. Envíe mediante UPS estándar o su equivalente a:
Audiovox Electronics Corp.
At’n: Departamento de Servicio.
150 Marcus Blvd.
Hauppauge N.Y. 11788
1-800-878-5779
• Asegure su embarque por pérdida o daño. Audiovox no acepta responsabilidad en caso de daño o
pérdida en ruta a Audiovox.
• Pague todos los cargos que le sean facturados por el Centro de Intercambio por servicio que no esté
cubierto por la garantía.
• Una unidad nueva o reconstruida le será enviada con flete prepagado.
Lo que nosotros haremos:
Suministrarle una unidad nueva, o a opción nuestra, una reconstruida. La unidad de intercambio está bajo
garantía por el remanente del período de garantía del producto original.
Para clientes en Canadá, favor de enviar a:
Audiovox Return Centre
c/o Genco
6685 Kennedy Road,
Unit#3, Door 16,
Mississuaga, Ontario
L5T 3A5
37
Page 77

Las ilustraciones contenidas dentro de esta publicación son para propósitos de ilustración solamente y están
sujetas a cambio.
Las descripciones y las características presentadas en este documento son dadas a modo de indicación
general y no de garantía. Con el fin de proporcionarle la más alta calidad de producto posible, nos
reservamos el derecho a hacer mejoras o modificaciones sin previo aviso.
Audiovox Electronics Corp.
150 Marcus Blvd., Hauppauge, NY 11788
© 2010 Audiovox Electronics Corp.
Marca(s) ® Registrada(s)
v3.0 (1.0.3.0)
Page 78

guide de l’utilisateur
Séries M38
Séries M39
Nous vous recommandons de lire ce manuel d’instructions avant d’utiliser votre nouveau produit pour la
première fois.
Page 79

Information de sécurité
]
IMPORTANTES INSTRUCTIONS DE SECURITE
BIEN LIRE ET CONSERVER POUR RÉFÉRENCE ULTÉRIEURE
Il est possible que certains des articles ci-dessous ne s’appliquent pas à votre appareil. Cependant, il faut
prendre certaines précautions quand on manipule et utilise tout appareil électronique.
• Lisez ces instructions.
• Conservez ces instructions.
• Portez attention à tous les avertissements.
• Observez toutes les instructions.
• N’utilisez pas cet appareil près de l’eau.
• Nettoyez avec un chiffon sec seulement.
• N’obstruez pas les ouvertures de ventilation. Exécutez l’installation selon les instructions du fabricant.
• N’installez pas près d’une source de chaleur tel que radiateur, grille de chauffage, poêle ou autres
appareils (incluant les amplificateurs) qui produisent de la chaleur.
• Ne déjouez pas le dispositif de sécurité des fiches polarisées ou avec mise à la terre. Une fiche polarisée
comprend deux lames, l’une étant plus large. Une fiche avec mise à la terre comprend deux lames et une
broche de mise à la terre. La lame la plus large ou la broche de mise à la terre assurent votre sécurité. Si la
fiche fournie ne convient pas à la prise murale, consultez un technicien pour remplacer la prise murale.
• Assurez-vous que personne ne marche sur le cordon d’alimentation ou qu’il n’est pas coincé près des
fiches, des prises et à la sortie des appareils.
• N’utilisez que les accessoires spécifiés par le fabricant.
• N’utilisez qu’avec le chariot, support, trépied, crochet ou table spécifiée par le fabricant
ou vendue avec l’appareil. Lorsque vous utilisez un chariot, portez attention lorsque
vous déplacer le chariot et l’appareil pour éviter les blessures dues au renversement.
• Débranchez l’appareil pendant les orages ou si vous ne l’utilisez pas pendant de
longues périodes.
• Confiez l’entretien à du personnel compétent. Les réparations sont nécessaires si
l’appareil a été endommagé de quelque façon que ce soit, comme un cordon
d’alimentation ou une fiche en mauvais état, si un liquide a été renversé sur l’appareil, si des objets sont
tombés sur l’appareil, si l’appareil a été exposé à l’eau ou à l’humidité, si l’appareil ne fonctionne pas
normalement ou s’il est tombé.
Avertissement pour
transport par chariot
• INFORMATIONS DE SECURITES SUPPLEMENTAIRES
• La fiche pour prise murale est utilisée en tant que moyen de déconnexion; elle doit rester en état de
fonctionnement et ne pas être gênée pendant l’utilisation. Pour déconnecter complètement l’appareil de
l’alimentation électrique, la fiche pour prise murale doit être déconnectée de la prise murale.
• L’adaptateur CA/CC fourni avec cet appareil est conçu pour être orienté correctement à la verticale ou
dans une position de support sur le plancher.
• N’utilisez pas des chargeurs ou des adaptateurs non autorisés. N’utilisez que le chargeur fourni avec
votre appareil ou un chargeur indiqué dans la liste du guide de l’utilisateur.
• L’appareil ne doit pas être exposé à des infiltrations ou éclaboussures d’eau et aucun objet rempli de
liquide – tel qu’un vase – ne doit jamais être placé sur l’appareil.
• Toujours laisser suffisamment d’espace autour de l’appareil pour assurer la ventilation. Ne pas placer
l’appareil sur un lit, un tapis ou sur un étagère ou dans un meuble qui pourrait bioquer les ouvertures de
ventilation.
• Ne pas placer de chandelles, de cigarettes, de cigares, etc, sur l’appareil.
• Ne brancher le cordon d’alimentation que dans une prise de courant c.a. comme indiqué sur l’appareil.
• Prendre garde que des objets ne tombent pas dans l’appareil.
• Ne pas tenter de démonter l’appareil. Celui-ci ne contient pas de composants pouvant être réparés par
l’utilisateur.
• Les renseignements sur les caractéristiques sont situés sur le dessous de l’appareil.
• Les mises en garde sont situées sur le dessous de l’appareil.
1
Page 80

Cet appareil de classe II possède une double isolation; aucune mise à la terre n’est fournie.
Renseignements importants sur la pile
Avertissement : Votre appareil est muni d’une pile et d’un système de recharge conçus pour fonctionner à
une température ne dépassant pas 50 °C (122 °F). Si cet appareil est laissé dans une automobile ou dans le
coffre d’une automobile où la température peut dépasser 50 °C, cela pourrait causer des dommages
permanents à la pile, un incendie ou une explosion. Veuillez retirer votre appareil de l’automobile lorsque
vous sortez; ne placez pas votre appareil dans le coffre de votre automobile et ne laissez pas votre appareil
dans un endroit où la température peut dépasser 50 °C ou exposé à la lumière directe du soleil.
Environnement
Aidez à protéger l’environnement : nous vous recommandons de disposer des piles en les déposant dans les
endroits prévus pour les recevoir.
Précautions envers l’appareil
• N’utilisez pas l’appareil immédiatement après le transport d’un endroit froid à un endroit plus chaud; des
problèmes de condensation pourraient surgir.
• Ne rangez pas l’appareil près du feu, dans un endroit très chaud ou au soleil. L’exposition au soleil ou à
une chaleur intense (p. ex. : à l’intérieur d’une voiture stationnée) peut causer des dommages ou un
mauvais fonctionnement.
• N’exposez pas votre appareil à la pluie ou à l’humidité.
• Nettoyez l’appareil avec un chiffon doux ou avec un chamois humide. N’utilisez jamais de solvants.
• L’appareil doit être ouvert seulement par du personnel compétent.
Sécurité du casque d’écoute
Pour utiliser un casque d’écoute de façon sécuritaire, suivez les instructions suivantes :
• N’utilisez pas un volume élevé avec votre casque d’écoute. Les experts en audition déconseillent une
écoute continue pendant de longues périodes.
• Si vos oreilles bourdonnent, réduisez le volume ou arrêtez l’utilisation du casque d’écoute.
• N’utilisez pas un casque d’écoute lorsque vous opérez un véhicule motorisé ou une bicyclette. Cela peut
être dangereux et est illégal en plusieurs endroits.
• Même si votre casque d’écoute est ouvert et vous permet d’entendre les sons extérieurs, n’augmentez
pas le volume au point de couvrir ce qui se passe autour de vous.
2
Page 81

Information FCC
RCA
M3904
RCA
M3804
RCA
M3808
RCA
M3816
Cet appareil a été testé et fonctionne à l’intérieur des limites déterminées pour les appareils numériques de
Classe B, en vertu de la section 15 des règlements de la FCC. Ces normes sont conçues pour fournir une
protection raisonnable contre l’interférence nuisible dans les installations domestiques. Cet appareil génère,
utilise et peut émettre de l’énergie sous forme de fréquences radio et, s’il n’est pas installé conformément
aux instructions, peut causer de l’interférence nuisible pour les communications radio. Cependant, il n’est
pas assuré que de l’interférence ne se produira pas dans une installation spécifique.
Si cet appareil cause de l’interférence nuisible à la réception de signaux de radio ou de télévision, ce qui
peut être validé en fermant et en allumant l’appareil, l’utilisateur est invité à corriger cette interférence par
une ou plusieurs des mesures suivantes :
• Réorienter ou déplacer de l’antenne de réception.
• Augmenter de la distance entre l’appareil et le récepteur.
• Brancher de l’appareil dans une prise murale faisant partie d’un circuit d’alimentation électrique autre
que celui du récepteur.
• Consultez votre revendeur ou un technicien radio/télévision compétent pour obtenir de l’aide.
Selon les exigences de la FCC, tout changement ou modification non expressément approuvé par le
fabricant pourrait annuler l’autorisation accordée à l’utilisateur d’utiliser cet appareil.
Fabricant/Partie responsable
Audiovox Electronics Corp.,
150 Marcus Blvd., Hauppauge, NY 11788
1-317-810-4880 (Sachez que ce numéro de téléphone est utilisé pour les affaires réglementaires seulement.
Ce numéro n’offre aucun soutien technique ou aide pour cet appareil.)
Visitez www.rcaaudiovideo.com pour soutien technique
RCA
M3904
RCA
M3804
RCA
M3808
RCA
M3816
This Class B digital apparatus complies with
Canadian ICES-003.
Cet appareil numérique de la class B est
conforme à la norme NMB-003 du Canada.
3
Page 82

Table des matières
Information de sécurité
IMPORTANTES INSTRUCTIONS DE SECURITE ................................................................................1
Renseignements importants sur la pile ..........................................................................................2
Environnement ........................................................................................................................................2
Précautions envers l’appareil ..............................................................................................................2
Sécurité du casque d’écoute ...............................................................................................................2
Information FCC ................................................................................. 3
Entente de licence de l’utilisateur ......................................................7
Avant de commencer
Avertissement à propos du droit d’auteur ....................................................................................10
Sauvegardez vos données ...................................................................................................................10
Déballage de votre lecteur ..................................................................................................................10
Exigences relatives à l’ordinateur ......................................................................................................10
Exigences pour le transfert de musique sécurisée .....................................................................10
Installation de la pince pour ceinture ..............................................................................................11
Retrait de la pince pour ceinture .......................................................................................................11
Branchement à l'ordinateur.................................................................................................................11
Recharge du lecteur ...............................................................................................................................12
Gestion des fichiers sur votre lecteur RCA
Utilisation de RCA easyRip ...................................................................................................................13
Utilisation de l’Explorateur Windows ...............................................................................................14
Suppression de fichiers du lecteur ...................................................................................................14
Débranchement du lecteur de l’ordinateur ..................................................................................14
Commandes générales
Démarrage et fermeture du lecteur .................................................................................................15
Verrouillage des commandes du lecteur .......................................................................................15
Réinitialisation du lecteur ....................................................................................................................15
Utilisation des menus
Types de menus .......................................................................................................................................16
Navigation dans les menus .................................................................................................................16
Menu principal .........................................................................................................................................18
4
Page 83

Musique
Lecture de fichiers musicaux ..............................................................................................................19
Lecture musicale ......................................................................................................................................20
Affichage de la lecture musicale .......................................................................................................21
Vidéos
Visionnement de fichiers vidéo .........................................................................................................22
Visionnement de vidéos .......................................................................................................................22
Images
Visionnement de fichiers d’image ....................................................................................................23
Visionnement d’images ........................................................................................................................23
Audiobooks
Lecture d’audiobooks ............................................................................................................................24
Commandes de la lecture d’audiobooks........................................................................................24
Saut de sections d’audiobooks ..........................................................................................................25
Radio
Écoute de la radio FM ............................................................................................................................26
Enregistrement et rappel des stations préréglées ......................................................................26
Amélioration de la réception FM .......................................................................................................27
Enregistrement de la radio FM ...........................................................................................................27
Lecture des enregistrements de la radio FM .................................................................................27
Copie des enregistrements sur votre ordinateur ........................................................................27
Favoris
Création d’une liste de lecture « Favoris » ......................................................................................28
Suppression de fichiers de la liste de lecture « Favoris » ..........................................................28
Téléchargement de listes de lecture vers le lecteur ...................................................................28
Enregistrement vocal
Enregistrement d’un mémento vocal ..............................................................................................29
Lecture d’un enregistrement vocal ..................................................................................................29
Copie des enregistrements sur votre ordinateur ........................................................................29
5
Page 84

Réglages
Modification des réglages du lecteur ..............................................................................................30
Lecture aléatoire ......................................................................................................................................30
Répétition...................................................................................................................................................30
Égalisateur .................................................................................................................................................30
Personnalisation du menu ...................................................................................................................30
Diaporama .................................................................................................................................................30
Luminosité .................................................................................................................................................30
Économiseur d’écran ..............................................................................................................................30
Économiseur d'énergie .........................................................................................................................31
RecDur (durée d’enregistrement) ......................................................................................................31
FreqStep (pas en fréquence) ...............................................................................................................31
Langue ........................................................................................................................................................31
Protocole ....................................................................................................................................................31
Infos système ............................................................................................................................................31
Valeurs par défaut ...................................................................................................................................31
Renseignements additionnels
Conseils et dépannage ..........................................................................................................................32
Pour vos dossiers .....................................................................................................................................34
Visitez le site web de RCA ....................................................................................................................34
Caractéristiques techniques ................................................................................................................34
Caractéristiques techniques ................................................................................................................35
Garantie limitée
Garantie limitée .......................................................................................................................................36
6
Page 85

Entente de licence de l’utilisateur
Ceci est un exemplaire du CLUF, que vous devez accepter avant de pouvoir utiliser cet
appareil.
Entente de licence de l’utilisateur
IMPORTANT : LISEZ ATTENTIVEMENT AVANT DE TÉLÉCHARGER OU D’INSTALLER CE LOGICIEL
CETTE ENTENTE DE LICENCE D’UTILISATEUR (CETTE « ENTENTE ») EST UNE ENTENTE LÉGALE ENTRE VOUS ET AUDIOVOX CORPORATION ET, SI
APPLICABLE, TOUTE FILIALE DE AUDIOVOX, TELLE QUE DÉFINIE CI-DESSOUS (LE TOUT ÉTANT DÉSIGNÉ PAR « AUDIOVOX »), RELATIVEMENT AU
LOGICIEL ET AUX PILOTES DE L’APPAREIL AUDIOVIDÉO PORTATIF NUMÉRIQUE DE MARQUE RCA, POUVANT INCLURE DES COMPOSANTS
LOGICIELS ASSOCIÉS, DES LOGICIELS INCLUS PAR AUDIOVOX SOUS LICENCE DE TIERCES PARTIES (« CONCÉDANT ») ET LES DOCUMENTS
ASSOCIÉS, S’IL Y A LIEU (LE TOUT ÉTANT DÉSIGNÉ PAR « LOGICIEL »). CETTE ENTENTE CONTIENT DES LIMITES, RESTRICTIONS ET AVIS DE NONRESPONSABILITÉ LÉGAUX ET SPÉCIFIE AUSSI LA DURÉE DE VOTRE LICENCE.
EN INSTALLANT CE LOGICIEL OU EN CLIQUANT SUR LE BOUTON D’ACCEPTATION DU LOGICIEL, EN COPIANT OU EN UTILISATION D’UNE AUTRE
MANIÈRE CE LOGICIEL, VOUS RECONNAISSEZ ET CONVENEZ QUE VOUS AVEZ LU CETTE ENTENTE, QUE VOUS LA COMPRENEZ ET QUE VOUS
CONSENTEZ À ÊTRE LIÉ PAR SES DISPOSITIONS ET CONDITIONS. CE LOGICIEL EST PROTÉGÉ PAR LES LOIS SUR LE DROIT D’AUTEUR ET LES TRAITÉS
INTERNATIONAUX SUR LES DROITS D’AUTEUR AINSI QUE LES AUTRES LOIS ET TRAITÉS SUR LA PROPRIÉTÉ INTELLECTUELLE.
VOUS NE POUVEZ UTILISER CE LOGICIEL QU’EN ACCORD AVEC CETTE ENTENTE ET CETTE UTILISATION EST, PAR LES PRÉSENTES, ASSUJETTIE À
VOTRE CONSENTEMENT EXPLICITE AUX DISPOSITIONS NON MODIFIÉES DES PRÉSENTES. SI VOUS N’ACCEPTEZ PAS TOUTES LES DISPOSITIONS ET
CONDITIONS DE CETTE ENTENTE, CLIQUEZ SUR LE BOUTON DE REJET ET (OU) N’INSTALLEZ PAS LE LOGICIEL ET (OU) N’UTILISEZ PAS CE LOGICIEL.
1. LICENCE
(a) En vertu de cette entente, vous obtenez une licence non exclusive, non sous-licenciable, non assignable et non transférable (sauf dans les
conditions spécifiées ci-dessous) (i) pour utiliser et installer le logiciel sur un seul ordinateur, et (ii) pour faire une (1) copie de sauvegarde du
Logiciel sous un format permettant sa lecture pourvu que cette copie contienne tous les avis originaux à propos de la propriété du Logiciel.
(b) Vous pouvez transférer le Logiciel et sa licence à une autre partie seulement avec un dispositif portatif audio vidéo numérique RCA (désigné
par « Dispositif AV » et seulement si l’autre partie accepte les dispositions et conditions de cette Entente. Si vous transférez le Logiciel, vous
devez transférer en même temps toutes les copies à l’acquéreur ou détruire les copies non transférées.
(c) Les dispositions de cette Entente s’appliquent à toutes les mises à jour et mises à niveau fournies par AUDIOVOX qui remplace ou s’ajoute
au Logiciel de départ à moins que cette mise à jour ou mise à niveau ne soit accompagnée de dispositions et conditions distinctes de
licence, auquel cas, les dispositions et conditions de cette licence distincte s’appliquent. Vous reconnaissez et acceptez que AUDIOVOX
puisse automatiquement télécharger des mises à jour ou des mises à niveau au Logiciel sur un ordinateur afin de mettre à jour, améliorer
ou ajouter des mises au point éventuelles au Logiciel.
2. RESTRICTIONS À LA LICENCE
(a) Sauf pour les licences accordées expressément par cette Entente, aucune autre licence et aucun autre droit ne sont octroyés ou mis en
cause.
(b) Vous ne pouvez pas (i) offrir le Logiciel sur un réseau où il pourrait être utilisé par plusieurs ordinateurs simultanément; (ii) modifier,
traduire, désosser, décompiler, désassembler (à moins que cette restriction soit expressément interdite par la loi) ou créer des ouvrages
dérivés basés sur le Logiciel ou (iii) copier le Logiciel, sauf si cela est expressément permis par les présentes ou (iv) retirer ou modifier tout
avertissement concernant le droit d’auteur sur toutes les copies du Logiciel; ou (v) louer ou prêter le Logiciel. Vous convenez d’utiliser le
Logiciel seulement d’une manière qui respecte toutes les lois en vigueur dans les juridictions où vous utilisez le logiciel, incluant, mais sans
limitation, les restrictions en vigueur relativement au droit d’auteur et aux autres droits relatifs à la propriété intellectuelle.
(c) Le Logiciel peut contenir du code avant publication qui n’offre pas le rendement propre à du code final. Dans ce cas, le Logiciel pourrait ne
pas fonctionner correctement. Des versions à jour du Logiciel peuvent être téléchargées du site www.rcaaudiovideo.com/downloads.
(d) AUDIOVOX n’a aucune obligation d’offrir un soutien au Logiciel.
(e) Le Logiciel est fourni avec des « DROITS RESTREINTS ». L’utilisation, la reproduction ou la divulgation par le gouvernement des États-Unis
sont soumises aux restrictions mentionnées au sous-paragraphe (c)(1)(ii) de DFARS 252. 227-7013 ou FAR 52. 227-19 ou FAR 52. 227-14 Alt.
III, s’il y a lieu.
3. TERME ET RÉSILIATION
(a) La licence entre en vigueur à la date à laquelle vous acceptez cette Entente et demeure valide tant que cette Entente n’est pas résiliée par
l’une ou l’autre des parties.
(b) Vous pouvez résilier cette Entente et la licence qui l’accompagne sans avis ou délai en détruisant ou en supprimant de manière permanente
le Logiciel et toutes ses copies.
(c) Si vous contrevenez, en tout ou en partie, à l’une des dispositions de cette Entente, la licence est automatiquement résiliée sans avis de
AUDIOVOX.
(d) Au moment de la résiliation de cette Entente et de la licence qui l’accompagne, vous devez cesser d’utiliser le Logiciel et détruire ou
supprimer de manière permanente le Logiciel et toutes ses copies, partielles ou entières.
4. EXONÉRATIONS DE GARANTIE
CE LOGICIEL EST FOURNI « TEL QUEL » SANS AUCUNE GARANTIE DE QUELQUE NATURE, EXPRESSE OU IMPLICITE, INCLUANT, SANS LIMITATION,
LES GARANTIES IMPLICITES DE QUALITÉ MARCHANDE, D’APTITUDE À UN USAGE PARTICULIER, DE TITRE OU D’ABSENCE DE CONTREFAÇON. VOUS
PRENEZ TOUS LES RISQUES QUANT À LA QUALITÉ ET À LA PERFORMANCE DU LOGICIEL.
SI LE LOGICIEL S’AVÉRAIT DÉFECTUEUX, VOUS (ET NON PAS AUDIOVOX, SES FOURNISSEURS OU SES REVENDEURS) ÊTES RESPONSABLE DE TOUS
LES FRAIS REQUIS PAR TOUTE RÉPARATION OU CORRECTION NÉCESSAIRE.
Cette exclusion de la garantie peut ne pas être permise par les lois en vigueur. Dans ce cas, cette exclusion pourrait ne pas s’appliquer à vous et
vous avez d’autres droits selon la législation à laquelle vous êtes assujetti.
7
Page 86

5. DROITS RELATIFS À LA PROPRIÉTÉ
Tous les titres et droits de propriété intellectuelle, incluant, mais sans être limités à, les droits d’auteur, relatifs au Logiciel et à ses copies
appartiennent à AUDIOVOX, à ses Concédants ou à ses fournisseurs. Tous les droits en titre et de propriété intellectuelle relatifs aux contenus
accessibles en utilisant le Logiciel appartiennent à leurs propriétaires respectifs et peuvent faire l’objet de droit d’auteur ou d’autres lois ou traités
sur la propriété intellectuelle. Cette licence ne vous donne aucun droit d’utiliser ces contenus. Tous les droits non expressément accordés sont
réservés à AUDIOVOX ou à ses Concédants.
6. LIMITES DE RESPONSABILITÉ.
(a) DANS TOUTE LA MESURE PERMISE PAR LES LOIS EN VIGUEUR, EN AUCUN CAS AUDIOVOX OU SES REVENDEURS NE SONT RESPONSABLES POUR
TOUT DOMMAGE PARTICULIER, INCIDENT, INDIRECT OU CONSÉCUTIF DE QUELQUE NATURE QUE CE SOIT (INCLUANT, SANS S’Y LIMITER, LES
DOMMAGES RELATIFS AUX PERTES DE PROFITS, D’INTERRUPTION DES AFFAIRES, DE CORRUPTION DE FICHIERS, DE PERTE DE RENSEIGNEMENTS
COMMERCIAUX OU DE TOUTE AUTRE PERTE FINANCIÈRE) SANS ÉGARD À LA CAUSE OU GENRE D’ACTION INCLUANT LES CONTRATS, LES TORTS
OU LES NÉGLIGENCES PROVENANT DE VOTRE UTILISATION OU INCAPACITÉ D’UTILISER LE LOGICIEL MÊME SI AUDIOVOX A ÉTÉ PRÉVENUE DE LA
POSSIBILITÉ DE TELS DOMMAGES. COMME CERTAINS ÉTATS OU CERTAINES JURIDICTIONS NE PERMETTENT PAS L’EXCLUSION OU LA LIMITATION
DE LA RESPONSABILITÉ POUR DES DOMMAGES INCIDENTS OU CONSÉCUTIFS, LA LIMITE CI-DESSUS PEUT NE PAS S’APPLIQUER DANS VOTRE
CAS.
(b) VOUS ÊTES RESPONSABLE DE LA SÉLECTION DU LOGICIEL APPROPRIÉ POUR ATTEINDRE LES RÉSULTATS QUE VOUS RECHERCHEZ AINSI QUE
POUR L’INSTALLATION, L’UTILISATION ET LES RÉSULTATS OBTENUS.
7. WINDOWS MEDIA
Le logiciel intégré au Dispositif AV (le « Micrologiciel ») contient un logiciel licencié par Microsoft qui permet de jouer des fichiers Windows Media
Audio (WMA), (nommé le « Logiciel WMA). La licence du Logiciel WMA vous est octroyée pour utilisation avec le Dispositif AV aux conditions
suivantes. En installant et en utilisant cette version du Micrologiciel, vous acceptez ces conditions. SI VOUS N’ÊTES PAS D’ACCORD AVEC LES
CONDITIONS IMPOSÉES À L’UTILISATEUR FINAL DE CETTE SECTION 7, N’INSTALLEZ PAS OU N’UTILISEZ PAS CETTE VERSION DU MICROLOGICIEL.
Le Logiciel WMA est protégé par le droit d’auteur et par d’autres lois sur la propriété intellectuelle. Cette protection comprend aussi la
documentation du Logiciel WMA, qu’elle soit électronique ou imprimée.
OCTROI DE LICENCE. Le Logiciel WMA vous est licencié seulement aux conditions suivantes :
Vous pouvez utiliser cette version du Micrologiciel contenant le Logiciel WMA seulement en rapport avec le Dispositif AV.
Vous n’avez pas le droit de désosser, décompiler ou désassembler le Logiciel WMA, sauf et seulement dans la mesure où cela est expressément
permis par les lois en vigueur.
Vous pouvez transférer votre droit d’utilisation de cette version du Micrologiciel seulement comme faisant partie de la vente ou du transfert du
Dispositif AV, à la condition que l’acquéreur accepte les conditions des présentes. Si la version du Micrologiciel que vous transférez est une mise à
jour, vous devez aussi transférer toutes les versions antérieures du Micrologiciel que vous possédez, ce qui comprend le Logiciel WMA.
MICROSOFT NE VOUS DONNE AUCUNE GARANTIE DE QUELQUE NATURE QUE CE SOIT POUR LE LOGICIEL WMA ET MICROSOFT NE FAIT AUCUNE
REPRÉSENTATION RELATIVE AU FONCTIONNEMENT DU LOGICIEL WMA.
Le Logiciel WMA provient des États-Unis. Toute exportation de cette version du Micrologiciel doit respecter toutes les lois nationales et
internationales en vigueur, y compris les règlements de la U.S. Export Administration relatifs au Logiciel WMA intégré au Micrologiciel.
Les propriétaires de contenus utilisent la technologie de gestion des droits numériques Windows Media (« WMDRM ») pour protéger leur propriété
intellectuelle, incluant les droits d’auteur. Cet appareil utilise le logiciel WMDRM pour lire le contenu protégé par le WMDRM. Si le logiciel WMDRM
ne protège pas adéquatement le contenu, les propriétaires des contenus peuvent demander à Microsoft de révoquer la capacité du logiciel
d’utiliser le WMDRM pour lire ou copier des contenus protégés. Cette révocation n’affecte pas le contenu non protégé. Lorsque vous téléchargez
les licences pour un contenu protégé, vous acceptez que Microsoft inclue une liste des révocations avec les licences. Les propriétaires des contenus
peuvent vous demander de mettre à jour le WMDRM pour lire leur contenu. Si vous refusez d’accepter une mise à jour, vous ne pourrez pas utiliser
le contenu nécessitant cette mise à jour.
8. LOGICIEL DE TIERCE PARTIE
TOUT LOGICIEL DE TIERCE PARTIE QUI POURRAIT ÊTRE FOURNI AVEC CE LOGICIEL EST INCLUS POUR UNE UTILISATION OPTIONNELLE. SI VOUS
CHOISISSEZ D’UTILISER UN TEL LOGICIEL DE TIERCE PARTIE, CETTE UTILISATION EST ASSUJETTIE À L’ENTENTE DE LICENCE
DE CETTE TIERCE PARTIE DONT UN EXEMPLAIRE
ÉLECTRONIQUE SERA INSTALLÉ DANS LE RÉPERTOIRE PERTINENT DE L’ORDINATEUR LORS DE L’INSTALLATION DU LOGICIEL. AUDIOVOX N’A AUCUNE
RESPONSABILITÉ ENVERS TOUT LOGICIEL DE TIERCE PARTIE ET NE POURRA ÊTRE TENUE RESPONSABLE RELATIVEMENT À L’UTILISATION DE LOGICIEL
DE TIERCE PARTIE.
9. LOI APPLICABLE
Si vous avez acquis ce Dispositif AV aux États-Unis, cette Entente est soumise et interprétée conformément aux lois de l’État de l’Indiana, États-Unis
d’Amérique, sans égard aux lois conflictuelles. Si vous avez acquis ce Dispositif AV hors des États-Unis ou de l’Union européenne, les lois locales
peuvent s’appliquer.
8
Page 87

10. DISPOSITIONS GÉNÉRALES
Cette Entente ne peut être modifiée que par une entente écrite signée par vous et par AUDIOVOX et toute modification aux dispositions et
conditions de cette Entente faite d’une autre manière sera nulle et sans effet. Dans le cas où une partie de cette Entente était non valide,
contraire à la loi ou impossible à appliquer, la validité, la légalité et l’application du reste de l’Entente n’en seront ni affectées, ni diminuées. Cette
Entente est l’énoncé complet et exclusif de l’entente entre vous et AUDIOVOX et elle remplace toute proposition ou entente antérieure, verbale
ou écrite, et toute autre communication entre vous et AUDIOVOX relativement à l’objet de cette Entente. Les Concédants de AUDIOVOX seront
considérés comme des tiers bénéficiaires de cette Entente et auront le droit d’exercer les clauses ci-incluses.
« FILIALE DE AUDIOVOX » devra signifier toute personne, entreprise ou autre organisation, nationale ou internationale, incluant, mais sans être
limitée à, les filiales, qu’elles soient contrôlées directement ou indirectement par Audiovox Corporation, incluant, mais sans être limitées à,
Audiovox Consumer Electronics, Inc. et Audiovox Electronics Corporation. Aux fins de cette définition seulement, l’expression « contrôle » signifie
le pouvoir de diriger ou d’influencer la haute direction et les politiques d’une entité, soit par la possession d’actions votantes, d’intérêts en
partenariat, de contrat ou autrement, incluant la propriété directe ou indirecte d’au moins cinquante pour cent (50 %) des droits de vote de
l’entité en question.
9
Page 88

Avant de commencer
Cher client de RCA,
Merci d’avoir acheté ce lecteur. Cet appareil peut lire les contenus audio mp3 et Windows MediaMC (WMA)
ainsi que les contenus achetés chez la plupart des services de téléchargement de musique en ligne.
Le logiciel multimédia RCA easyRipMC, installé automatiquement lorsque vous branchez ce lecteur à votre
ordinateur, vous permet d’importer des fichiers musicaux à partir de CD et d’autres sources, de gérer votre
bibliothèque musicale et de transférer des fichiers mp3 et WMA non protégés vers et à partir de ce lecteur.
Pour transférer des fichiers protégés par DRM sur ce lecteur, vous devez utiliser le logiciel fourni par le
fournisseur de musique en ligne.
Avertissement à propos du droit d’auteur
Ce lecteur est conçu pour une utilisation personnelle seulement. La reproduction ou l'enregistrement non
autorisé de contenus protégés par le droit d'auteur peut contrevenir aux droits de tierces parties et aux lois
sur le droit d'auteur.
Sauvegardez vos données
Comme pour n’importe quel lecteur portatif, vous devez sauvegarder vos données régulièrement. Le
fabricant n’est pas responsable des données perdues.
Déballage de votre lecteur
Tous les éléments ci-dessous devraient avoir été emballés avec votre lecteur.
• Lecteur RCA (contient l’installateur du logiciel de gestion musicale et le guide de l’utilisateur)
• Guide de démarrage rapide
• Câble USB
• Casque d’écoute
• Pince
Exigences relatives à l’ordinateur
• Pentium III 500 MHz ou plus puissant recommandé
• Microsoft WindowsMD XP (Service Pack 1 ou plus récent), Windows VistaMC ou WindowsMD 7.
• Internet Explorer 6.0 ou plus récent avec accès à Internet
• Lecteur Windows Media 10 ou plus récent
• 250 Mo ou plus d’espace libre sur le disque pour le logiciel
• 128 Mo de mémoire vive (256 Mo recommandés)
• Lecteur CD-ROM capable d’extraction audionumérique
• Port USB (2.0 recommandé)
• Carte de son
Exigences pour le transfert de musique sécurisée
Le réglage par défaut de ce lecteur est le mode MSC (classe de stockage de masse) lorsqu’il est branché à
votre ordinateur. Pour activer la fonction de transfert de contenus musicaux sécurisés vers le lecteur,
sélectionnez le mode MTP (protocole de transfert multimédia) sous Protocole dans le menu Réglages du
lecteur (consultez la page 30).
Windows, Windows Media et Windows Vista sont des marques de commerce ou des marques déposées de Microsoft Corporation aux États-Unis et
dans d’autres pays.
10
Page 89

Installation de la pince pour ceinture
Étape 2 :
Appuyez ici
jusqu’à ce
que la
pince pour
ceinture
soit fixée en
position
Lecteur
Étape 1 :
Placez la
pince pour
ceinture ici
Pince
pour
ceinture
Retrait de la pince pour ceinture
Soulevez la
pince ici
Pince
pour
ceinture
Lecteur
Branchement à l'ordinateur
• Branchez le lecteur à votre ordinateur à l’aide du câble USB fourni. Le lecteur démarre automatiquement.
• Le lecteur est connecté en mode MSC (classe de stockage de masse). Il apparaît comme une lettre de
lecteur sur votre ordinateur et se comporte comme un disque amovible pour les transferts de fichiers
dans l'une ou les deux directions.
• L'installateur du logiciel multimédia RCA easyRipMC est enregistré sur le lecteur; allez à Mon Ordinateur
dans le menu Démarrer; trouvez et ouvrez la lettre de lecteur associée au lecteur (c.-à-d., LYRA) puis
double-cliquez sur le fichier rcaeasyrip_setup pour démarrer l’installateur.
• L’installateur du logiciel peut être supprimé sur le lecteur après l’installation pour libérer de l’espace.
Port USB de votre
Lecteur
Câble USB
* La version la plus récente du logiciel peut être téléchargée sur www.rcaaudiovideo.com.
ordinateur
11
Page 90

Pour activer la fonction de démarrage de l’installateur de RCA easyRip enregistré sur le lecteur,
le lecteur doit être en mode MSC, que vous pouvez sélectionner sous Protocole dans le menu
Réglages. Le réglage par défaut de ce lecteur est le mode MSC. Consultez la page 30 pour plus
de renseignements.
• La détection du lecteur peut nécessiter plusieurs secondes. Cliquez sur Actualiser dans
Mon Ordinateur ou l’Explorateur Windows pour vous assurer que le lecteur a été détecté.
• Le lecteur est capable de transférer des fichiers par USB 2.0. Si un port USB 2.0 est
disponible sur votre ordinateur, utilisez-le pour brancher votre lecteur. Le lecteur est aussi
compatible avec les ports USB 1.1 plus anciens. Par contre, vous ne serez pas en mesure de profiter
pleinement de la vitesse supplémentaire.
• IMPORTANT : Ne débranchez pas le câble USB de l’ordinateur ou du lecteur pendant l’installation
du logiciel.
Recharge du lecteur
Le lecteur se recharge automatiquement lorsque vous le branchez à votre ordinateur. Pour le recharger
complètement, assurez-vous que l’ordinateur est en fonction et que l'appareil y est branché pendant au
moins trois heures. Consultez l'icône de puissance de la pile de l'affichage pour vérifier le niveau de la
pile. Rechargez le lecteur lorsque l’icône est vide.
12
Page 91

Gestion des fichiers sur votre lecteur RCA
Avant d’utiliser votre lecteur RCA, vous devrez copier des fichiers musicaux sur votre lecteur. Vous pouvez
utiliser l’une des méthodes suivantes pour transférer des contenus :
• RCA easyRip
• Glissez et déposez des fichiers avec l’Explorateur Windows
• Un logiciel fourni par un fournisseur de musique en ligne
Pour transférer des contenus protégés par DRM, utilisez le logiciel fourni par le fournisseur de musique en
ligne.
Les rubriques suivantes expliquent comment copier des fichiers non protégés sur le lecteur. Pour des
instructions sur le transfert de fichiers protégés, veuillez consulter la documentation du logiciel que vous
utilisez pour transférer les fichiers.
Utilisation de RCA easyRip
Le logiciel RCA easyRip est installé automatiquement la première fois que vous branchez ce lecteur à
votre ordinateur.
easyRip vous permet de :
• Extraire la musique des CD
• Gérer votre bibliothèque musicale sur votre ordinateur
• Créer des listes de lecture
• Copier des fichiers de votre bibliothèque sur votre lecteur
• Copier des fichiers de votre lecteur vers votre bibliothèque
• Supprimer des fichiers sur le lecteur
• Glissez et déposez des fichiers d’image dans le répertoire racine ou un répertoire en
particulier de votre lecteur pour les visionner
• Les fichiers vidéo doivent être convertis et transférés par RCA easyRip pour être lus
Pour démarrer easyRip :
• Cliquez sur l’icône RCA dans la zone de notification et sélectionnez RCA easyRip dans le menu.
• Double-cliquez sur l’icône easyRip sur le bureau de votre ordinateur. La fenêtre du module easyRip
s’affiche sur le côté de votre écran.
• Les fichiers vidéo doivent être transférés par easyRip, qui les convertit automatiquement
au format optimal.
• Aide – Pour des explications détaillées sur l’utilisation de easyRip, cliquez sur le gadget
Aide dans la fenêtre du module.
13
Page 92

Utilisation de l’Explorateur Windows
Pour copier des fichiers sous Windows XP lorsque le lecteur Windows Media 10 est installé :
1. Ouvrez le lecteur dans l'Explorateur Windows.
2. Glissez et déposez des fichiers musicaux dans le répertoire Musique.
Pour copier des fichiers sous Windows Vista, WindowsMD 7 ou Windows XP lorsque le lecteur
Windows Media 11 est installé :
1. Ouvrez le lecteur dans l'Explorateur Windows.
2. Ouvrez Mémoire interne.
3. Glissez et déposez des fichiers musicaux.
Suppression de fichiers du lecteur
Lorsque le lecteur est branché à votre ordinateur, vous pouvez supprimer tous les fichiers que vous avez
transférés sur le lecteur.
1. Ouvrez le lecteur dans l’Explorateur Windows puis naviguez jusqu’au répertoire contenant les fichiers.
2. Sélectionnez les fichiers que vous désirez supprimer puis appuyez sur la touche Supprimer du clavier de
votre ordinateur.
• Il est préférable de supprimer les fichiers protégés sur le lecteur à l’aide du lecteur Windows Media.
Débranchement du lecteur de l’ordinateur
Si Windows détecte le lecteur comme un dispositif MTP :
• Débranchez le lecteur de l’ordinateur lorsqu’aucun transfert de fichiers n’est en cours.
Si Windows détecte le lecteur comme un disque amovible :
1. Dans la zone de notification de Windows, cliquez sur l’icône Débrancher d’un périphérique en toute
sécurité puis sélectionnez le lecteur dans la liste des périphériques.
2. Lorsque le message Débranchement en toute sécurité s’affiche, débranchez le lecteur de l’ordinateur.
Ne débranchez pas la connexion USB pendant le téléchargement de fichiers. Cela pourrait
corrompre les fichiers systèmes ou les fichiers en cours de téléchargement.
14
Page 93

Commandes générales
MIC
RESET
Affi chage
Démarrage/
fermeture,
verrouillage/
déverrouillage
Bouton
RESET
Micro
-phone
Port USB
Prise pour le
casque d’écoute
Naviguer vers la gauche/sauter vers
l’arrière/balayer vers l’arrière/revenir
dans le menu
Retour/principal
Naviguer ou défiler vers le
haut/augmenter le volume
Menu des options
Naviguer vers la droite/
saut vers l’avant/balayer
vers l’avant/avancer
dans le menu
Lecture/pause/sélection
de l’option du menu
Naviguer ou défiler
vers le bas/réduire le
volume
Démarrage et fermeture du lecteur
Pour démarrer le lecteur, glissez / vers le bas. Pour fermer le lecteur, glissez / à nouveau vers le bas.
Verrouillage des commandes du lecteur
Pour verrouiller les commandes du lecteur afin d'éviter de les activer accidentellement, glissez / vers le
haut. Pour les déverrouiller, glissez
message « Touches verrouillées » s’affiche.
/ à la position médiane. Lorsque les commandes sont verrouillées, le
Réinitialisation du lecteur
Si le lecteur cesse de fonctionner correctement, vous pouvez le réinitialiser en appuyant sur le bouton
RESET situé à l’arrière du lecteur avec un objet pointu non métallique (par exemple, un cure-dent).
15
Page 94

Utilisation des menus
Types de menus
Le lecteur possède deux types de menus :
Menu du lecteur
Le menu du lecteur s’affiche lorsque vous démarrez le lecteur ou lorsque vous appuyez et gardez enfoncé
pendant la lecture. Il vous permet de :
• Naviguer et lire de la musique, des audiobooks, des vidéos et des fichiers d’image
• Écouter la radio
• Enregistrer et écouter des enregistrements vocaux
• Modifier les réglages du lecteur – langue, luminosité de l’affichage, etc.
Titres du menu
Éléments du menu
Menu des options
Le menu des options s’affiche si vous appuyez sur
offre différentes options selon ce que vous écoutiez lorsque vous avez appuyé sur
dans l’écran de lecture (En cours) pendant la lecture. Il
.
Écran « En cours »
Navigation dans les menus
Lorsqu’un menu est affiché :
• Appuyez sur + et – pour défiler vers le haut et vers le bas dans la liste des éléments du menu.
• Appuyez sur pour aller au niveau de menu suivant. Appuyez sur pour revenir au niveau de menu
précédent.
Appuyez
sur
Appuyez
sur
16
Appuyez sur +
Play All Songs
Down
Getting Out
Going Down Slow
Appuyez sur –
Page 95

• Si l’élément en surbrillance est lisible (par exemple, un fichier audio), appuyez sur
lecture.
Appuyez
sur
pour démarrer la
• Si l’élément en surbrillance indique un réglage courant (par exemple, le réglage du mode de répétition),
appuyez sur
pour modifier le réglage.
Add to Favorites
Repeat O
On
Appuyez
sur
Add to Favorites
Repeat One
On
17
Page 96

Menu principal
Le niveau supérieur ou menu principal s'affiche toujours lorsque vous appuyez et gardez enfoncé . Les
options du menu sont :
Musique
Appuyez sur
un titre en particulier.
Vidéos
Appuyez sur
visionnement.
Images
Appuyez sur pour ouvrir le menu Images et sélectionner une image en particulier pour le
visionnement.
Audiobooks
Appuyez sur pour ouvrir le menu Audiobook et sélectionner un audiobook en particulier
pour la lecture.
pour ouvrir le menu Musique et sélectionner un artiste, un album, un genre, ou
pour ouvrir le menu Vidéos et sélectionner une vidéo en particulier pour le
Radio
Appuyez sur
d'enregistrements d'émissions de radio.
Favoris
Lorsque vous écoutez de la musique, vous pouvez ajouter des titres individuels à une liste de
lecture des « favoris ». Appuyez sur pour ouvrir le menu Favoris et choisir un titre en
particulier ou modifier la liste de lecture.
Enregistrement vocal
Appuyez sur
l'enregistrement ou la lecture des enregistrements vocaux précédents.
Réglages
Appuyez sur pour ouvrir le menu Réglages, qui vous permet de :
• Sélectionner le mode de lecture aléatoire
• Sélectionner un mode de répétition de la lecture
• Sélectionnez un réglage de l’égalisateur
• Personnaliser le menu Musique
• Régler la durée d’affichage du diaporama
• Modifier la luminosité de l’affichage
• Modifier le réglage de l’économiseur d’écran
• Sélectionner un réglage d’économie d’énergie
• Sélectionner un réglage de durée d’enregistrement
• Basculer entre les pas de fréquence radio nord-américains ou européens
• Modifier la langue des menus du lecteur
• Basculer entre les modes MTP et MSC
• Afficher la version du micrologiciel, l’espace disponible et l’espace total
• Rétablir les réglages du lecteur à leur valeur par défaut
En cours
Disponible seulement pendant la lecture.
Appuyez sur
pour ouvrir le menu Radio et sélectionner l’écoute de la radio ou
pour ouvrir le menu Enregistrement vocal et sélectionner le démarrage de
pour retourner au fichier en cours de lecture.
18
Page 97

Musique
Lecture de fichiers musicaux
Le lecteur organise vos fichiers musicaux selon le nom de la piste (titre), l’artiste, l’album et le genre.
1. Dans les autres modes, appuyez et gardez enfoncé
et
ou pour sélectionner Musique.
2. Appuyez sur pour ouvrir le menu Musique.
3. Appuyez sur + ou – et
appuyez sur
ou pour démarrer la lecture.
ou pour naviguer dans les menus et sélectionner l’élément désiré, puis
pour ouvrir le menu principal. Appuyez sur + ou –
19
Page 98

Lecture musicale
+ ou –
Menu des options (lecture musicale)
Appuyez sur dans l’écran de lecture (En cours) pour ouvrir le menu des options. Appuyez sur + ou - pour
mettre en surbrillance une option puis appuyez sur pour confirmer la sélection ou modifier le réglage.
Les options suivantes sont offertes :
• Ajouter aux Favoris/Supprimer des Favoris – pour ajouter le fichier courant à liste de lecture des
Favoris (voir la page 28). Si le fichier est déjà dans la liste de lecture, cette option devient Supprimer des
Favoris pour supprimer le fichier courant de la liste de lecture.
• Répétition – appuyez à plusieurs reprises sur
de tous les fichiers
• Lecture aléatoire – pour activer la lecture aléatoire.
• Images de l’album – pour afficher les images de l’album.
• Égalisateur – pour sélectionner un mode d’égalisateur. Options offertes : Plat, Bass, Pop, Rock et Jazz.
• Supprimer – pour supprimer le fichier courant du lecteur.
Saut au fichier précédent; appuyez et
gardez enfoncé pour balayer un fichier
vers l'arrière
Saut au fichier suivant; appuyez et
gardez enfoncé pour balayer un fichier
vers l'avant
Démarrage/pause de la lecture
Augmenter ou diminuer le volume
pendant la lecture
Ouvrir/fermer le menu des options
Revenir au niveau de menu précédent.
Appuyez et gardez enfoncé pour ouvrir
le menu principal
pour sélectionner la répétition du fichier courant 1 ou
(l'icône correspondante s'affiche).
20
Page 99

Affichage de la lecture musicale
1
2
3
4
5
1. Numéro du fichier courant/nombre total de fichiers
2. Nom de la chanson
3. Nom de l’artiste
4. Nom de l’album
5. Temps de lecture écoulé
6. Temps total du fichier
7. Barre de progression de la lecture
8. Taux binaire du fichier
9. Type de fichier
L'information affichée pendant la lecture provient des tags ID3 qui ont été configurées pour le fichier
musical.
9
8
7
6
21
Page 100

Vidéos
Visionnement de fichiers vidéo
1. Dans les autres modes, appuyez et gardez enfoncé pour ouvrir le menu principal. Puis, appuyez sur +
ou – et
2. Appuyez sur pour ouvrir le menu Vidéos.
3. Appuyez sur + ou – et
appuyez sur
Visionnement de vidéos
ou pour sélectionner Vidéos.
ou pour démarrer le visionnement.
ou pour naviguer dans les menus et sélectionner l’élément désiré, puis
+ ou –
Menu des options (visionnement de vidéos)
Appuyez sur
Appuyez sur + ou - pour mettre en surbrillance une option puis appuyez sur pour confirmer la sélection
ou modifier le réglage.
L’option suivante est offerte :
• Supprimer – pour supprimer le fichier courant du lecteur.
Les fichiers vidéo doivent être convertis en format optimal pour leur visionnement sur ce
lecteur. Le logiciel multimédia RCA easyRip peut convertir les fichiers vidéo automatiquement
lors de leur transfert sur le lecteur.
22
Revenir, saut vers l’arrière. Appuyez et gardez enfoncé pour balayer un fichier vers l'arrière
Avancer, saut vers l’avant. Appuyez et gardez enfoncé pour balayer un fichier vers l'avant
Démarrage/pause du visionnement
Augmenter ou diminuer le volume pendant le visionnement
Ouvrir/fermer le menu des options
Revenir au niveau de menu précédent. Appuyez et gardez enfoncé pour ouvrir le menu
principal.
pour suspendre le visionnement de vidéos. Appuyez sur pour ouvrir le menu des options.
 Loading...