

Page 1
(Roku Ready @ version)Included
We've built a smarter TV= includes
Roku_Streaming Stick"(Roku Ready w,,lo.)
* No wires, MHL port powers streaming stick
, Enjoy more than 1000+ entertainment channels
, Control with Roku Ready TV remote
Please register your product at _ww,rca.¢or_
P!ensekeep your sale_ _ceipl and keep the I_COldof the _e_ialnur'/bel¸
and 1hed_e of pu_lsase in o_el ¸1o i_ceivewal_nW pal_!_andSol.ice
The selial rlumbel¸is;located at the back ofthe re
Serial Number
Date of Purchase
LED
Roku @ Streaming SticW M
MODEL
LRK40G45RQ
and mobile app
su_ptlon _ oth_ payment_ m_ be requlr_ to ac_s aont_t _ _ln chm_el_
For _ample, N_ ,_ulres a _ld ub_crlptl_, whl_ gt_esyou a_ totTc_le and W sh_ titles In the Ne_ _t_eaTiIng_t alc_
m,_or regl t_ tr_arks of Rok_, Inc la the United State_ andother oouat,e_
Part Na,: RNOS40R24014
MADE FOR TODAY
02
02
04
O5
Check Accessories 05
Setup TVTabb Stand 05
Select TV Location 05
' ' 05
O5
Cable Connections 05
Side Panel Connections 05
Connecting AWComposite video device 05
ConnectingYPbPr Component device 06
Connecting HDMI device 06
07
Keypad Buttons 07
Front Panel 07
O7
Turnin9 On and Off 07
EiJ/:,#i, h, hlL)f:4i/of/o, i_d h gf ) fr >
,<_Ulna:#i7 i t lla;e u'e 17// HTrkt )/I_dj/<f_l';J
:>f EiD61'/ t ic e/_slr_ 7 L[ :7
Choosing TV Channel 07
Selecting Input Source 07
Channel Bar 08
Adjusting Volume 08
08
Adjust the OSD Screen 08
Quick Menu 08
Channel Menu 08
Picture Menu 08
Audio Menu 09
Time Menu 09
Setup Menu 09
Lock Menu 10
ROKU 11
12
@
®
e
e
e
@
@
Co%rtulsdons on your purchase! As you enjoy your new produ_,
@
please keep these safety tips in mind :
@
®
e
e
e
The Issue
@
@
The home theater enlerlainrnent experience is a
@
growing trend and larger flat panel displays and
@
e
popular purchases,
e
However, flat panel displ%/s are not always supported
¢
e
on the proper stands or instaNed according to the
manufacturer's recomrnendations,
¢
@
Flat panel displays that are inapproprialely sitJaled
@
on dressers, bookcase shelw_s, desks, speakers,
e
chests or cab may fall over and cause injury,
e
¢
e
¢
@
e
This _anufacturer Cares!
@
e
The consumer electronics ind01strg is cornrnitted to
¢
rnakhbg home entertainment enjoyable and safe,
e
Wall _ounting : IF YON OlOlOE TO WALL MOUNT YOUR FLAT PANEL DISPLAY, ALWAYS :
@
e
- Use a rnount that has been recornrnended by the display manufacturer and/or listed by an independent
¢
laboratory (such as UL,CSA,ETL),
¢
- Fbllow all instructions supplied by the display and wall mount rnafmfacturers
@
- If yell have aqy doubts about your ability to <dely in tall your fiat p<_Jieldi play, contact your retailer about
e
professiefml installatien.
e
e
- Make sure that the wall where you are moundng the display is appropriate Some block corstruetiof_ If you are
e
unsure, contact a probssional installer.
@
@
- A rninirnurn of two people are required br installation F:latpanel disf)lays can be heavy.
@
@
e
e
Caution and Warning
e
e
e
@
@
@
e
e
¢
e
¢
¢
@
®
e
¢
e
e
e
A A
Caution:Toreducetheriskofelear cshock,do not remove
coverorback No iseP,servkeablepartsinsde
Referservc ngto qualiRsdservcepersonnel
eqabteral triangle s intended to ale_t the user to te
presence of uninsulated dangerous voltage within the
ploduct endoslre that may be of ,,tMdent
A The ligFtn ng flash wth arrowhead symbol, withil an
magatude to con Stute a rsk of electd shok
intendedto aler he user to he presenceof
important opemtng and m,Jntena,,ce(servdrg}
instructionsintheIiteratnreaccompanyingtherV
A The exclamation pc nt w 8_ _ an equ bteral tda/_gle }s
Tune Into Safety
- One size does NOT fit all, follow the manufacturer's
recornn/endation br the safe installation and use of
your flat panel display.
- Care[ully read and understand all enclosed
insRuctions for proper use of this product
- Don't allow children to cNrnb on or play with
furniture and television sets.
- Don't place fiat panel displays on furniture that can
easily be usc,das steps, such a:_a chest of drawers,
- Remember that children can become excited while
watching a prografn, espccially on a "larger than life" flat
panel display Care should be taken to place or install
the display where it cann(£ be pushed, pulled oveL or
knocked down,
- Care should be taken to route all cerds and cables
connected to the panel display so that they cannot be
pulled or grabbc,d by curious children,
= J
J
e
@
@
e
@
@
iPluchss grscias pot su uso del presente producto!
@
e
Cuando usted disfru_ de su nuevo producto, pot favor"
e
en cuensa los consejos de s%uridad:
@
@
e
@
Posihles Problemeas
@
@
- I_a.experiencia de entretenirniento de cine en casa
@
es una tendencia creciente y los grandes monitores
¢
@
de pan(alia plans son muy populares.
¢
embargo, los monitores de panlalla plans no se
¢
han instalado siempre en los soportes adecuados o
@
instalado de acuerdo con las reeomendaciones de
e
e
fabricanle
@
- Los monitores de pantaNa plans que se hart
¢
instalado inadecuadament en to(adores estante#as,
@
estantes escritorios oradores, baWe s o earFos se
¢
¢
pueden ca_r y eausar el daflo corporal
@
e
@
e
¢
@
iAI Fabrkante le Importa
@
¢
- La industria electr6nica del consumidor est,.
@
eomprometida a hacer el entretenirniento de casa
agradabb y seguro.
e
_ontaje de Pared: s_ USTED DECIDE A MONTAR SU MONITOR DE PANTALLA PLANA LA PARED, SIEMPRE
@
¢
- Use una mentura que se ha recomendadop or el fabricante de monitor y/o lislado pot un laboratorio
¢
independiente(como UL CSA, ETL).
e
e
- Siga todas las h_strucciones ofrecidas per el fabrieante de monitory rnontaje de pared.
@
- Si .............................................................
@
¢
¢
@
@
@
e
e
@
¢
¢
@
@
@
e
e
@
¢
¢
¢
e
@
@
¢
@
¢
¢
¢
e
@
@
u_,uu ,u_ e uu_qu_t;r _u_a. sobre su habilidad pars instalar seguraTient(_ st] tnonitor de i/mntalla ialana,
contacte a su distribuidor pars la instalaci6n profesional
- Compruebe que la pared adonde se estS. montande el rnonil.or es adecuada. Algunos montajes de la pared
no son diseflados pars set montados a paredes con tachenes de acero o la vieja consRuceiOn de bloque de
ceniza. Si usted estD. inseguro, con(acre aun instalador profesional.
- Por Io rnenos dos personas se requieren pars la instalaci6n, Los monilores de pan(alia plans puede ser pesados,
Fcc Information
this equipment has been tested and found 1:o comply with the
Nmils 1or a Class B digilal device, pursuant Io Pad 15 of the FCC
rules,
[hese Nmils are designed to provide reasonabb prolection againsl
harmful interf_mr_ce in a residerflial inslallalion,
This equipment generates, uses and can radiate radio
frequency energy and+ if not installed and used in accordance
with the instruc ions, may cause harmflJ irflederence to radio
Corr_rnurficalions,
I Iowever; (hera is rio Quararltee thai inlerf,amr/ce a/ill riot occur in a
particular installation,
ten_
I C6moy Doonde Usted um Su
Monito_ de Pannm!18 Plr_na
Ajustar Hasta Seguridad
Un tamafte fijo NO es adecuado pars todos, siga las
racomendadones de tabricante pata la inslalacion segura y
el uso da su monitor de pan(alia plana
Lea (son cuidado y entienda todas las instruccbnes
adiuntas para al uso prepk) de este preducb,
Na permits a los ni_k)s a subir al aquipo e jugar (;on
muables y tebvisbnes.
No doque los monitores de pantaNa plana en el muebla
quese puade usar fi']cllmente come escal6n, as[ como una
comoda,
Recuerde que k)s ni_k)s pu(xJen Ilegar a set exdtaclo£ al vet
una prograrnacion, aspe(;ialmente en el/nonilor de pan(alia
plans "m{_s grande que vida'L El cuidade se tiene que
e/npezar pot ponar o inslalar al meniolr donda no se puede
empuja< dolener al castado del (amine ni echat abajo,
El cuidado se tiene que empezm pot encaminar todos
k)s cordones y cables conectados al monitor de pan(alia
plana para que no se puedan tirar o agarrar conaclados
al monitar de pantalla plans para qua na se pueden tirar o
agarrar pot las nifSos curiosos,
If this equipment does cause harmful interference to radio or
intarferance by one or more of the following measures:
Reorient or relocate the receiving antenna,
increase the separa ion belween the equipment and the receiver.
Connect the equipment into an outlr,,I on a circuil diflorent from
that to which the receiver is connected,
Consull Ihe dealer or an ex )erienced radio/IV technician for
help,
Devbe complies with FDA radiation performance standards, 21
CFR subchapten
Caution: (invisible) laser Radiation when <)pen,
Do not slate inlo beam.
D_ NIHOS:
[Varc_L_Difelmnci8
I. Read these h]structions,
2. Kem_pthese inslruclions,
3, Heed all warnings.
4. Fallow all h-_si"n._cfions,
5, Do not use this apparalus near waler, For example, do not use
near a laundry tub, in a wal basement, or near a swin]n]ing pool,
and the like.
6. Clean only with dry cloth.
7. Do not block any ventilation openings. Inslall in accordance with
the manufacturer's inslrucIions. Slob and openings in he cabinc_"
back er bottom are provided for ventilation+ le ensure reliable
operalion of the Pd and to protect it from everhealing, These
openings must not be blocked or covered, The openings should
never be block_:t by placing the fV on a bed, sofa, rag, or othar
similar surb_ce,
S. Do not instaN near any heat sources such as radiators haat
registers, stoves, or ether apparalus (including ampNfiers) thai
produce Ixual,
9, Do not defeat Ihe saPaty purpose of the polarized or gr_)unding
type plug, A polarizcud plug has two blades with one wider han the
olher, A grounding type plug has Iwe blades and a third glounding
prong, Ihe wide blade er the thh'd prong is provided for your
saltily, If the pFavided plug does not fit inlo your ouflaL consult an
electrician for replacement of Ihe obsolete outlal,
I 0. Protect the power cord from being walked on or pinched
particularly al plugs, convenience receplacles, and the point where
thoy exit from the apparatus,
I 1, Only use altachmer_ts/accessories specified by the
manu_<_chJaSK
12. Use only with cart, stand, tripod, brackel, or table sp_;ifk_J by
the manufaclurer; or sold wilh the apparalus,
When a call is us_xJ, use caution when re(wing the carWapparalus
c(xnbination to avoid injury from tip over,
A TV and car combination should be moved with care, Quick
sops, excessive force, and unevan surfaces may cause the rv and
cad cornbinafion to overlun-i,
13. Unplug this apparatus during lightning storms or when unused
for long periods of lime,
For added protection 1or this TV receivar during a lightning storm,
or when it is loll unused for long periods of time, unplug il from the
wall oullal and disconn_;t antenna or cable syslem,
rhis will prevent damage to Ihe rv due to Iightnirlg arid power line
sun#es,
14, RaPar all servicing to qualified service personnel. Servicing is
raquired when the apparalus has been damaged in any way, such
as power-supply cord or plug is damaged, liquid has been spilled
or objects have fallen into the apparalus, the apparatus has been
exposed to lain or moislure, does not operale normally, or has
been dropped,
15. This 1'V should be operaled only from Ihe lype d power supply
indicated on Ihe raling label,
if customer is not sure the type o[ powe_ supply in your t_orne,
consult yeur appliance deale_ or local powe_ company, For ]V
ramote corllrol baltery power, refer to the operatirlg inslructiorls,
16, The rv sel shall not be exposed o dripping or splashing, No
objeds filk_ w_'h liquids, such as w_ses, shall be placed on the IV sot.
17, Never push objects of any kind into this 1'V through apenings
as thay may touch danger_us vol age or other electrical parts Ihal
could resull in firs or eb_;tdc shock, Naver spin liquid of any kind into
the rv.
18, Unplug the ]V from the wan ouIlel be[ore cleaning, Do n(X use
liquid or aare cleanars. Use a damp clolh for cleaning.
19, This IV should nuwer be placcxt near or over a radiator or heat
resource, This Pd should not be plac<q in a builtoin installation such
as a bookcase or rack unless proper ventilation is pr(wid_J or the
manufacturer's inslnJclions tlave been adhered to,
20, Do not place this 1'V on an unstabb cart, sland, tripod, bracket
or 1:able, the fV may fall, caush-lg serious h-ljury 1:o som_)rle, and
serious damage Io the appliance,
21. Do not allempl to service his IV by yourself because opening
or removing covers may expose you 1:o dangerous high voltage or
other hazards, Refar all sarvicing Io qualifi_J service personnel,
22, This dovice complies wih Pall 15 of the FCC Rules. Operufion
is subject a Ihe following two conditions: (1) his device may
not cause harmful interference, and (2)his device musl accept
any in erfemnce n:_ceived, ir_cluding h-_ted'arence that may cause
undesb_J operalion,
23. WARNING: [b prevent injury, this apparalus musl be securely
attached to the floor/wall in accordance wilh the installation
insln_ctions.
24, rb requce the risk of eleclric shock the grounding of center pin
of plug musl be maintained.
25, If an outside antenna or cable syslem is COl]Heclrx}t o the TV,
be sure the antenna or cable syslem is greund_J 1:oprovide some
protection against voltage surges and builloup stalic charges,
Section 810 of the Na ional Electrical Code, ANSI/NFPA NO,70,
pravides infennalion with rospect Io proper grounding of the mald
and supporting structure, grounding o[ the lead in wire to an
an enna discharge unil, size af grounding conduclors, location of
antenna discharge unil, connection 1:o grounding electrodes, and
r_4uirerner/ts for the grourlding ek_;trodes, (Roe figure A)
(NBC sdCeON 810=20/
(NEO SBOT_ON 810-21)
Safety Strap
Caution: Pushing, pulling or climbh-_g on the 1'V may cause the I'M
falling, Do not le/childran climb or hang on he fV, Always place Ihe
_ig_ A (NEC ART 28, PAKrH)
ELECTRODff SYSTBM
IV on a ,_;rurdy, level stable surhce thai carl hold the weight of fV,
And if possible, secure Ihe IV accordhlg Io the inslructiorl below
(Note: 1'he fasi"ening components suctl as screws are riot" supplied
wilh IV),
Step one: Insert the M6 mounting screws into the upper two wan
mounth_g screw holes and faslen Ihern (Figure B),
Step two: insert anchors to wan and connect the bolls and anchors
wilh ropes or chairls (Figura C),
@
@
¢
e
@
e
Before Turning On TV
@
e
Check Accessories
@
@
ehe, ck the accessories hal am pack,m1 wih your [M
¢
(refer Io Quick Sial(Quide,)
e
@
Setup TV Table Stand
e
Please refer 1:o Quick Star Guide to carry oul stand installing,
@
@
Select TV Location
@
¢
Select a flat, slable table Io place your IV set. Please follow the
¢
safely hstructions when placing the IV,
@
@
Connection and Using
@
After placing your 1'V properl% you carl conrlect the IV with power
@
supply and cable components. For fudher informatioM s_m_page 5
¢
to page 6,
@
¢
¢
@
@
@
@
¢
¢
@
The first slop in connecting your Pd is obtaining the signak Your
IV LRK40G45RQ has a back panel, whbh snows you to receive
analog and/or digital televbion channels via AN]/CABLE jack,
Before, connecting your IV, determine using an anlenna or a cable
@
service Io oblain Ihe signal,
¢
e
A. Antenna
e
¢
Connect the antenna to rv via c()axial cable on AN I/CABLE jack
@
of he back panek You are ready 1:o receive air local digilal and
¢
analog channels,
¢
¢
B. Cable TVserdce
@
Connect the cable IV wall jack to IV via coaxial cable on
e
ANI/CABLE jack of the back panel, You am raady o receive <)flair
@
local digilal and analog channels,
@
@
C. Set- 7:qp Box
¢
If you use a sol top box, you may ncmd to call your cable company
¢
¢
or salellile service provider; which use a sp_;ial connection, please
@
refer to the userb guide of s_ -top box,
e
/Wore: lo rot h/_g 2>e AC ca: u#i ax ht_/:, t<t:on_e/Pd_et _air tfe
@
co/7/a:cgar_s 77}u, 7'/:£s:s ao S 4eee/i (_/\i. ";__aa':_/:::ab/< :::baanei
@
s_a/:::b
@
¢
¢
@
¢
e
100=t20v llJ IJl i® Vx:,
@
¢
@
¢
@
@
@
e
@
¢
@
........................................................._ ' _ i-_-_%
80_z Ill _-pj_ i o, i_ i
C_ble TV At,re ina
Choose Your Connections
IV I RK40G4bRO supporls various conr_ections to other devices
(such as DVD, VCR, Set top box, etc,), Please follow the table to
choose Ihe cables whicl-_ adapl Io your device,
Jacks Cables Infermatioe
OOMPOSIT_
L-AUDIO_R Video/Audio cable
+
Audo Cable
COMPONENT % Pb Pr
L_AUDIO=R COMPONENT video _able
Fu_he_
See the below
Go te page 6
HDMI=DVIcable Go to page 6
HDMI IN 2/DVI, I/ARC
HDMI cable
MHLcable
Ge to page6
Roku/HDMB Roku Streaming Stick
.....> U>p/ g k> A( <<>/"14,_ > ,'ol<odst:to/>e tPst:_to
7t/
Connecffng A V Co_T@os/te device
(Good Video Quaff(y)
Composite connecbr will be shaetd with Component Y connector,
[o connect a composite/%/dovbe, such as a DVD player, foNow
(hess Sops:
1.Connect the COMPOSITE jack on the side of IV 1:o the video
output jacks of @_v}ce v}a v}deo cable (yellow),
2.Connect the L AUDIO R jacks on the side of IV 1:othe audio
output jacks of device via audio cable.
Notice the let channel jack and plugs are while and the right
channel jack and plugs are r_mt
Note: AV s/g; , / be/or.js to t:o/, pos/te vide _h/s k/r_/ via'<
sd_nt:/ !>as /o'.7 /:u go >d :k>p/:y c F_kt.:
Composite Video Connection
The picture below is an example of a connection using the
composite video jack,
¢
e
Connecting YPbAr Component device
¢
(Better Video Qua/it},;)
@
e
[o connect a component device, such as a DVD player, foNow
these sleps:
@
e
I ,Connect he COMPONENT iN Y/Pb/Pr jack on H_e side of 1'Vto
e
the video output jacks of device via video cable (greaM blue and
¢
red),
e
2.Connect the L AUDIO-R jacks on the side of rv to the audio
¢
oulput jacks a devbe via audio cable,
@
Notice I[_e left channel jack and plugs are white and the right
e
channel jack and plugs are red,
@
e
/\k>te: Y,7 'b//- __c/':, , /a cc," ;<>e_ et yP:7_<:>77/s/dnd of yP:i,::> s/{jt, d
@
f>, s beth/" d,<;f;/ny emir(}
@
¢
@
Component Video Connection
¢
the picture tx_low is an example of a conn_;tion using the componant
@
video jack.
@
e
@
¢
@
¢
@
@
e
@
¢
@
@
¢
¢
@
@
¢
@
e
ConnectD_g HDMI device
@
@
l(dest Video Quaff(),;)
¢
@
[b connect a HDMI device, such as a DVD player, please Connecl
e
the HDMI I/ARC 2/DVI, jack on tha sMa o[[\/ 1:o(ha oulpul
jacks of device via HDMI cable,
@
e
[b connect a DVI dovice, via DVI pod of PC or Davice and HDMI
e
jack of rv:
e
e
1, Connect the HDMI 2/DVI jack on the side of IV to the DVi port
of PC via HDMI DVI cable,
¢
@
2, Connect the L AUDIO_R jack on the side of IV to the audio
e
@
outpul jack of computer with audio cable (dual channel RCA jacks
e
to 3,5turn slereo jack or the L ALJDIO R jack),
e
ro connect an ARC HDMI OUT device, please connect Io the HDMI
e
inpul pod of the device such as amplifier,
e
¢
Note: 7 HDM/ f,H/f_h /k s},i#un A/",s/;t!:,et/_:/ ir k.i, ce/ /s a :o "@, ct
¢
at t:_o//8Jco i,}!r,/i':_t::e /o' tTUnSrh'itf27g ,rs::oi eaessed c_9,!,# t:/m_, it
¢
ca/7 (% Ye aLa2o arT(: Yi': (<) s/_¢Ta/ :///7 i/>e same ca),e arid/s_a.q iQ_
¢
best @.i}/a}. c _a//4,:
®
@
¢
@
¢
¢
@
¢
e
@
¢
)' ,_ ) / ) ';
h L / L I ..... t, , r ,_ > #y v,d t ,wpn/omL)_,i)o/
i)V/c'ePst ' > E,)M//ck >f 7I, /: x ,!0,'1/, :/_ :,
el/c c L_RUDiO i: /:_ /, >a 7!// _ /, _ _>e/
HDMI Connection e
The picture below is an exampb of a connection using the HDMI
video jack, e
Ne_c:: ./t_/e_ Struamklg St_ck i _ak_<td;_ connecN_,d Petb//D/V/3 e
2,/f vau want _a use itd i/ laa shou/d a,move /[, /k/,, Stmam/n U e
Slick/n:)m tiDM/,'_ e
How to Obtain Various Kinds of Input Sources
After connection is done, press iNPUT bullon on remote control
or IV top _anel to choose the h°lput source you nee,d, S_' page 7,
Basic Operation ef TV
H_AD PNON_; Connect a 3,Smm headphone for personal audio,
UdB** Connect your USB ,s_orage @Tvice to enjoy/nusic/pholo flies
on your Pd (/qso used for service purpose),
!tDI_II 11"7
ItDMI l/ARC, PJDVI, fbkuJ/tDMI3 : (Itigh-Definilion MtJ]timcsJR hW_rface)
It pmvkTas an tJnco[Tlpressed digital connaclien tha carrbs hoth vidco
and audio data by way ef an integraled mini plug cabla,
e
ARC: (Audio Ralum Channel) Adopted in PJ output or digital audio, can be
connected to the devbe supporting ARC, transmit the rv sound to the device,
MHL: (Mobile High Definition Link) Ta slandard HDMI input, translnit
the video/audb frem pod'abb electronb davbe (cellphone, digital
camera,digital video camera) to TV set,
Note: i:ok_, HD/t/fi3 port s ppo/t/,8*HL if }<:>, wart to ,se is'H!,
}o, ::ae _se it st'el :7/scasdeg R:>k_ St <am/eg stir:r<
eO1'4PON_NT W_b/Rr." Connect a device that has component
video jacks, such as a /)VD player, [b access devbe connected
to the Y/Pb/Pr jack, press the iNPUT buon on your remote; then
press the up/down arrow Io sebd Component, Press Ihe OK button
a lasl te confirm,
Y/_b/_r (Competent Video)." They provide good picture quali y
becausa Ihe vid_x) signal is separated inlo three components, Use
three video grade or componen video cables for the connection,
When using Y/Pb/Pr, make sure you connect left and right audio
cables Io Ihe AUDIO IN R/I jacks,
L-AUDIOoR_ OOt_a_O$1T_, * Connect an /W device thai has
composite video jacks+ such as a VCR or a/)VD player. % access
devbe connected to these jacks, press the iNPUT button on your
remote; then press the up/down arrow 1:osoled AM Press the
ENTER bullon all last Io confirm,
e AUDIO ![_ L." Lafl audio channel connection, The left audio
connector is usually white. For mono audio sources, be sure 1:o
use the left AUDIO INPUL
AUDIO IN R: Right audio channel connection. The right audio
connector is usually rsd,
ANT/CABLe; Connect 1:o receive Ihe signal from your anlenna or
cable via coaxial cable,
_igital A_dio eul.* Connecl a coaxial cable for digital audio
outpul.
¢
e
e
Keypad Buttons
e
If you cannot locate your remote, you can use the keypad buttons
®
e
on your Pd 1:o operate many IV features,
¢
e
e
e
e
e
®
e
¢
e
!1%?
e
e
INPUT
e
e
@
@
¢
@
e
e
e
@
e
e
¢
@
e
e
e
Displays the Source Select List,
MENU
Displays the IV Main Menu.
CH± Scann up through the channel Iksi",
In he 1'V menu syslem, it acts like the up arrow on the
remole contr<)l and can be used 1:oseled menu options,
CN_ Scans down thr_)ugh he chanr_el Iild, In the 1'V menu
sysi"em, il acts like the down arrow on he remote
conlrol and can be used to select menu oplions,
VOL+ Increases Ihe volume, In the ]V menu syslem, it acts
like the right arrow on the remote conlrol and can be
used Io select menu opt"ions,
VOL- Decreases Ihe volume, In the TV menu sys errh it acts
like the le/l anow on the rernote conlrol and can be used
to select menu oplions,
_b [urns the IV on and off.
Front Panel
About remole control
working dislance and
angle, see the quick
slart guide,
\\. PoweNStandby Indicato_r i
Powe_/S_a_dby ledicater; Light up in red when the TV is in
slandby mode., light oul whet/he IV is on.
Remote Control Set, sot. _ Remota control I1_ sensor, whicl-_
receives inframd ray sent by remote control,
Codes for Cox Communications: 0178
Codes for Comcast: 101 78
Codes for Dish Network: 627
Codes for Fios Verizom 0205, 0057, 0493, 0775
Turning On and Off
Connect the AC cord 1:o power the LED LCD Pd, At this time the
IV will enter standby mode and power indica or will turn rod, Use
Pawer buton ((._) on the top panel of IV or on the n:imote conlml
1:olurrl orl he fM After swilchh-lg off the fV k>r 5 seconds, you can
turn <)n IV again,
Choosing TV Channel
Tu_i_g Te AHatog Oba_r_els
an analog channel has a channel number bt_jh-lnhqg with "A%
Input the diqital number with /_urneric buttons directly and press
OK bu_on 1:oconfirm, For example, to watch analog channel "A51 ",
press '%", "1 ", "OK" on remote conlrol in secluence,
/Wot_: A/ttx:x g 2>e_+ s:, no ar a/c7 %/s/gm# r / u/a :>/,: /e A," e/ k a,
'/a U S_JVe/_Tt/ /HaC//OnS /<)/ SO/n_(- <x/)aas/b/l : idS<
Tu_ing Te _igital Oban_ele
A digital channel has a channel number beginning with "D'k Input
the main digilal number with numeric bullons directly, then press
'" butlon en remole control, and inpul the sub number a last
For example, 1:owalch analog channel "DS1 1", press "3", "1", "",
"I ", "OK" on lemole control in sequence.
Changing Channels Directly You can use CHA bullon 1:o increase
channel number and CHv to decrease channel number:
When no OSD (On Screen Display) is used, the up/down arrows
can also work as CHa,/CHv buttons,
Selecting Input Source
Press INPUT button on remote
control 1:o display Source Select list,
Use up/down arrows to highlight Ihe
source you need and press OK to
confirm,
Source Select
TV
AV
Component
HDMI 1
HDMI 2
Roku
USB
Page 2
Channel Bar
Press the OK button ors the remote control, when OSD (on se_een
display)is not used, the ehannel bar will appear on the Bottom of the
screen, It displays the current channel's information, The foUow[ng list
describes the items on the channel bar,
D!4ot ATdC-t
JanO/0Z:lO Sat
Bt4o!/k2 Ifthe channel is al alog A is displayed, If
t's a digital channel, D is dispByeG For
exampb, in the pbtures above, A2 is an
analog ehannel, and Dg0 1 is a digital
channel( 1 is a sub ehannel number),
A2
Air Slereo
DP?
CC 48()i
Jangl 0hlg Sal
APt
ATSC_t Display the current T\/signal type,
English[Stereo Dbplavs whether the current channel is
being broadcasted in stereo or mono, if
the eurrent channel is digital, this space
will be SAP (Second Audio Program)
langbage,
480i/480i Dbplays the signal resolution,
4:81C0 Displays the screen aspect ratio.
Display the CC status (on or of[),
Jano0t 07:! 0 Sat Displays current program date and time,
If the chanl_el is Dolby Digital AC 3, the
t,,ote: Ma_rnotu_ed _nae _O.;ense mm ©o'/:,5 La )e _a(yins Dr:4 atd
tie (Pa/7/e O s}tnho/ af tfaar a a)/s of Pc/)} _!:loesa/gdes
doubb D symbol is displayed,
Adjusting Volume
Press the VOI MVO[ button on the remote contrel to adjust the
volume, If you want to switch sound off, press MUTE, When OSD
(On Screen Display) is not used, the arrews loft/right can also wod<
as VO[/\iOI mbutk>ns,
EPG (Electronic Program Guide)
Press EPe button on the remote eontrel, the elecsronic pregram
guide will appear }n the eenter of screen, The ebeBo/ie aegram
guide g[vcs the TV program prying project, You can use left/right
arrows to switch pages.
Adiust the OSD Screen
The OSD {On Screen Display) inenu enables yeu to approach to the
FV functiol_s,
[o use OSD menu system, press MENU button on remote contreL
then use left/right arrow to dghlight an option from ©UICK,
CHANNEL, PICTURE, AUDIO, _ME, SETUP or I OCK a_d >tess
OK/down burro/,
To exit the CaB r¢_enu:
Press the/_- butk>n, The menu will clear from the scaa_n,
Press the MENU button repeatedly until the menus disappear.
Quick Menu
The Quick Menu contains inenus and provides you a quick way to
approached the main settings that may be most possibly and frequently
approached, Picture Mode, Sou]d Mode, Closed Caption Sleep
Thneh and Channel l ist,
Channel Menu
Fhe Channel Menu enabbs you to search, view and edit channels.
it s available in [V mode only.
Identifying Problems
if there are ally probbms when using the product, phase consult the
list below, If the list does not solve tile psoblem, call our Cuetomer
Service Center immediately,
TV Problems
The _# can't be tumad em
Make sum tile AC cons is plugged in,
Check lhe wall outlet, nlake sum tile AC output works normally
and stably
The side panel may be locked (dsabled), Use tile tamale contrnl
to furl on tile IN4
Select the Keypad Inck funclior_ in the PA[_EN 17\1 conml Menu
and press OK to uncheek the locking status.
The_ is Ha pictare Or eeand but the _ is on and there is a "No
Signar sign oH ecreerl.
Am you trying to use an input source with no device connected
to it? For usng other video/audio device, make sure} tile exten/al deN}ce
works normally first, then pines INPUT and choose tile rig -_tnput source,
The Signal Type option may be set incoeeclly, Go to page 8 for
detailed instruct}ors,
The channel nwy be blank, Try to seamh the chanllel agaill or ehange
another c[lanneL
The seand is f[r_o_ bat the picturo is peer_
if you car only get blank and white pictures from external device that
you've con lecled to your PZ maybe it is due to tie video cables is nol
connected weU, or they am connec[ed w/ongly, Check the conneclion
s[abihy frst, theh check tile correct -ass, For AV input, the yellow video
cable connecls to the yellow Vdeo h_iack orl the side of yore [M for
Component nput, the three Y, Pb, Pr video cables (rod, blue, and green)
should be connect to the correspond} _ginput jacks on the side of your [\/,
Check tile antenna connecUons, Make sum all of the cables am fimdy
connected to the ]M jack on side of your [M
hy adiusting the color fealums to improve,
There is no soand_ bat tha picture is fi_eo
Tile sound nlight be muted, hy pressing tile MUTE button to restore
sour}d,
For u@_g AV or Component, remember to collnect the dev}ceh left
and rght audio output correctly Tile }eft c lannel came is whie and the
right channel cable is red, Please match the cables and iacks according
to thor colors, The sound seWngs may nol be set cormclly, Go to
page 9 for more in[ormation.
Ifyour audio souree has ordy one jack or is a (mono) audio source, make
suv! you have plugged tile connection into the Audio In L iack (wh te} on
the [M
The b_attons ee the sido parlom dorPt work_
The side panel may be locked (disabbd), Use the mrnote conhnl to
turn olthe ]M
Select the Keypad Lock function in tile FM,RENTAI eontrel Menu and
press OK 1:ouncheck tile locking status,
Unplug the [M from tile AC power for 10 mh lusa_ and t}l_l plug il back.
rum the TV on aid try again,
The _7 turns off aeexpectedmy.
The eleclrenic protection ckeuit may have been activated because of
a power surge, Wait 30 ser;onds and then tun/tile IV on again, If this
happens frequently, tile voltage ill your house mar be abnormal, If the
other elec amic equipment in you/ iome e_n't work nonnaHy,
consul a qualified service personnel
Can't select a oertaie charmeL
The channel may be blocked or nol approved in tile PARENTAl
conhel Menu,
The charulel may be skipped ill channel list ill CHANNEL Menu.
Check the blocking u_d skipping st/tus of channel
The steroo sound performance is bad°
It may be a weak slalion, Use tire AUDIO Menu and set Analog oound
as Mono,
A bmack box appears oe the scree_.
Closed capUon[ng might be on, Check (}lose_} Caplioll in the SFUP
menu, Go to page 10 for more }nstmclions,
Problems v_iththa _B_'_I @o_r_eotie_o
Mare sure the HDMI deMce (IWD, video ga net, etc,) is turned on and tile
eables are firmly connected, If problems still occur, tunl off your device
and reconheet it, Reset the power by unplugging the power cord and
plugging it again,
if a "No Signal" message appears on screen , the NDMI devbe
isn't responding, Contact the T/anlJfaeturer o[ the qDM} dn,viee
o
®1: ! la
Auto Scan
Show / Ride
Channel List
CHANNEL
,_, Move _ seest
Auto Scan
Execute an auto channel search,
Show / Hide
Enter sub menu and press OK to show or hide the rv channel.
Channd LLst
Dbplays a chanl_el list, It shows the current e anneb, Press OK to
go to I\/channel directly il_ sub menu,
Signal Type
Select your I\/signal type: Air or Cable,
D7V Signal( In DiV Mode)
Display how streng your [V sigl al is.
Picture Menu
The Picture Menu contains menus and controls to configure the
way the pk;hlre appears, The Picture Menu options apply to the
video for the main PV and VIDEO INPUT selections, All >ichae
options can be ap:)lbd to eaO input.
PICTURE
_:_ Move @ Seect @_Retum
Pictare Mode
Choose the Deset vbual mode of your IV:
Standard, Movie, User, bynamic, Power Saving,(Only in User mode
you cal_ adjust Brightness, Contrast, Color Til_t and Sharpness.
Cha _ges to Power Saving mede can decrease the power
consumptiol L)
Color Mode
This option aUows you to select one of three a_itolnatic color
adjustments: Cool k>r a bluer palstte of pk'hse colors; Normal or
Warm for a redder palette of color.
Screen Size
Screen Size: Seb(,l a screen asped ratio, (i\vailabb ratio: Wide,
Cinema, Zoolu, and Norlnak) Please choose tile rado that ap :)lies
to your vk:teo signal format best.
Noise Reduction
Set noise re@ _ction as Off/low/Medium/Nigh,
/,A:;e Noise r ,@_cr;ot /r{.> f_ ro<J:,')e 27e p#f,m _;uiic or ury
tyf:e ofinh;krsr?( 7/is fs'_b/e is e3peci;,}') serf Lff i:)rodc/i:g _'
:haswpi:r,/,'ei re k e) idgs/g) /cesci/i},'ss
Dynamic Contrast
Set dynamic contrast Off/low/Medium/Nigh,
Video Style
If you connect the HDMFDVI port of PC to HDMI jack of the IV
and t_e video signal is 1080p, please choose the compatible
video style: Video, Graphic,
for further assistance,
If you have black bars on each side of your picture (which
T_eans the [V ean not dsplay a full screen image), the device
you conneeted might have a switeh or a menu option allowing
you to change the pieture quality output that will fix this,
Choose either 720p or 1080L
The Remote ce_tro_ doas_'t work.
Them may be an AC power fMlum or thn power cord unplugged in,
Romething might be blocking belween tire remole conlrol and the
remole sensor on the front panel of the ]M Make sum there b a clear path,
The remote may not be aimed directly at the [M
The batledes [is tire remote may be weak, dead, or installed incormcUy,
Put new ba reties [i the remo e,
Yea are exparieecir_ problems with V-Oh@lParor_tal Co_trols
If tile mh/g limits dent work, you must lock the seit ngs, Go to the
Main Menu (press MENU on your remote), select P/\REN]7\I control
to check lhe settiegs,
What a_se ca_ I de?
If you've been through the Tmubleshoo ing section and nolhhlg has fixed
your problern, try reboot[ng your [M Nole that after a reboot, you may
ieed to run your [M through the setup pmceee again, To reboot, unplug
the power cord from tire wall curie or power strip, Keep your ]M unplugged
€or about ininutee, Then plug in tire ]M and turn i on, See if the problem
is fixed, If tire problem renlains, then please vie[t the Customer Supporl
Menu at www,rea,com or updated fAQs or contact RCA Custonler
Support at the support lumber provided [n your Warren y card,
iiiiiiiiiiiiiiii_i_i_[iiiiiiiiiiiiiiiiiiiiiii
LRK40G45R© VESA 200 x 100 iM6 screws, length 12mm j
hkfe
/, 7no 4/:;/_/70UF?_9_O de,' a# e(i_ £e accesec/_o'> sod eu? nl(,wck>,'?
4,t> cry/xo/v/'.> _'t!e;,,s a;s g :._,ee/b.ah_; s bit o t e ; ,:;/; rla /ni h's6£
/ >,s/!n(c tu ;m,n/_i //, "eu co_s // ,ah ;c, k, cM <k,_/,,r h;r ;, W(,A
w,/,/!'onn
/7 Y/u s r;;i qiy 'mf#(d.r_" s /<' /m w_;; / ,c s _"wh'h !rug?mort. o,
:.pnc/N_u';o/! m ;;rire, i i m,_" ;_p;,ro/Wm v, ;_:_ ui;u g re# rx, nre
kmv_f/¢>o </</ace C/)m;_;/'
C,'Y>f!.sOom2 rm: ;..cuknc'/_.<u:7Y :,i/<*:;PdD ;mte:.//):rv #.;_rhe,
:m'/r{;/?muu:_:;::t:i<!_:n/£¢em :,
Wgsrnings
1, Do not set up the wall mount by yourself, Please contact
qualified p'ofessionals for nstalladon,
2, The PV should not be mounted on walls or surfaces which have
an angb more t_an 10 degrees with vedJeal direction. Otherwbe
the PV set may fall.
3, The walls for mounting must have enough strength to hold the
whole weight of PV see For example, conemre wall and brickwork
are eligible, Do not place the inount on soft walls such as earth
walls and plasterboard,
4, f spare parts of different specifications (such as screws) are
used dur}/g mounting consult with qualified profess}onak to
inake sure these parts are safe and effective,
5, Before attach}rig the base to wall, ensure the holes for anchors
are in keeping with tile installing rubs, Otherwbe there may exist
solne potential p_oblelns,
Signa_ T_vpe
D_" Signa_
Pk;tur_ Mode
Cole Mode
Screen Size
No{se Reduction
Dynamic Cent ast
Vdeo Style
200 mrn
< Warm
4 Wde
Low
4 Low
Vdeo
Audio Menu
The Audio Menu lets you adiust audio outpuL
Sound Mode
Audio Langsage < En@ish
AnMog Audio Output _ STEREO
AUDIO
O gita_ Audio Output 4 PCM
Su ound < Off
Audo Only _ <_ Off
'3' Move _ Seest
Sound Mode
Choose the preset sound mode of your TV:
Standard, Sort, User, bynalnic, Only }n User inode you ear/adjust
Bass, Irebb, Balance,
Audio Language
Select digital PV audio language type: English, Freneh or Spanish
(only ava[[abb for I)Pd channel),
Analog Audo Output
Select analog IV audio sound type: Stereo, SAP or Mo/o (only
avaHabb [n TV mode).
Digital Audio Output
Set the audio output type as Off, PCM ol Raw, Please set this
option accordil_g to your power amplifier,
Surround
Creates a 3D sound surround froln standard stereo material, with
deep and rich enhaneement,
Audio Only
a
Press OK button to activate audio only mode, The IV will o_itput only
@
sound and the rED LCD panel w}l[ be turned eft, To restore normal
a
playing, hold POWER button for three seeo/ds,
a
Auto Velume
@
Set auto ratine ooqtrol On/Off,
@
Equalizer Settings
@
The seven band graphic equalizer allows you to adiust tile audio
a
frequency settings, You can select one of the equalizer presets
e
(eft, Pop, Rock, Jazz) or create your own personal preset (Use0,
a
a
Time Menu
e
The Trine Menu eta you e[ ange the [V trifle settings,
@
@
@
® jts" j,mjej ja
@
@
a
a
e
@
@
@
e
a
a
@
4_' Move
@
Sleep Timer
¢
Set the sleep t[mer(()fi, 5, 10, 15, 30, 60, 90, 120, 180,240 Min.).
e
The IV will automatically enter standby mede after filnes up.
a
Yime Zone
a
Shewing the country's time zone. yot ean Set Time zone Off
@
Ea_:ern, Central, Meuntain, Pacific, Alaska, Nawaii, Samoa,
Newfoundland, Atlantic,
@
@
6. Do not place any heating source under your television, Or else,
@
t can cause fire,
@
7, Do not place the IV near anything dripping, Iransducers and
@
high voltage wires should be kept far away from the apparatus
@
too, Or else, t may cause ereepage, electric shock or bad
@
resorlance,
@
@
8, Do riot place rV in a location where collision or vibration is
e
}able to happen,
@
9, In order to avoid unexpected failing of the PV set, do net put
@
any strong foree on P_i or wail mount aher installin%
10, Be surs to unph_g the Pd betore installing, Keep anyt dng hard
@
or sharK> away froln the sersen panel to prevent the scuffil_g,
@
11, After il_stalling, if there is any need to inove the eabineh please
@
contact the qualified p_ofessionals,
@
@
@
@
@
@
e
@
With USB Media Play, you can enjoy music and pheto files stored
@
n a USB storage device on your ReA fM
@
Connecting a USB storage device
@
Connect a USB arc/age device to the USB port in the back of the rv,
@
Press INPUT" and select USB',
@
USB Media Play" rnenu will appear,
@
@
@
USB 20
@
@
@
@
@
@
@
@
@
@
@
@
@
@
@
@
@
@
@
@
@
@
@
@
@
@
@
@
@
@
@
@
@
@
@
@
@
@
e
@
@
@
@
PHOTO MUSIC MOVE TEXT
P/@,/ng baek _hoto files
Press arrow (</_) to select "Photo" and p_ss "OK",
The fib or folder list will show up, P/ess arrow(_/_) to seleet a
file or telder, Prass "OK" , and you will be given several eptions to
vkwv photo files,
Veu ean dimet}y open and playback the file, View thumbnails for
photo preview, or play sl deshaw,
Pt@,ing back Music files
Press arrew (_/_) to select "Music" and press "OK",
The fib or fulder }st will show up, Press an_)w{_/_) to seleet a
file or fc,lder, Press "OK" to p}nyback the music fib you seleeted,
Pt@,ing baek Movie fries
Press arrew (</_) to select "MOVIE" and Da_ss "OK",
The fib or folder Ist will show up, Press arK)w(_/_) to select a
file o/folder Press "OK" to playback the mevie file yeu seleeted,
P/ayLng back Text files
SPrdlar to the photo menu, You ear use TEXT menu to aceess and
display text on your RCA TV,
Media Support Specification
i * Photo JPG/JPEG files
i
i • Music WAV flies
i
i _ Movie MPG files
j _ USB Storage USB flash drive
i
j * Fi!e System formst FAT32
C_ :ea /)o: 4 a:7 oP ie 7/o: /,o.os:rtti:/::Bst_::E/e</,vue
l,'/:i':hr T/:; p/_s::/b m/<c;:t e- sr r!aa:
hi,, rre/ /::iv,:,:t </4,_cr d:,:r,tgc fe /u Ut:b tom::
<a ,;:t /:t}/,u, rrst;n:,#,v/)/eLr ,_rr:c':wt_::c>, <,:ira,:,or,
c'_,_c: i>:_iJgf:s,_:a{/_,,/:_,ac
Sleep Timer < Off
Time Zone _ Eastern
Auto Crock < On
Clock ....../----/------>-
Wake Up 2014/1/18 12:0 PM
OSD D sp_ay Duration _ 15 Seo
Auto Clock
Select auto clock on/off, Auto clock helps you synchronize your
Pd time to standard filne (from DTV signal).
Clock
Set your Pd time manually (needs to turn of_ auto dock), p_ess up/
down and kghdght arrow to eonfig the eurrent filne,
Wake Up
Set tile Wake Up time for your TV, after enters menu, you can
use the up/down and Idtiright arrow on the remote control to
adiust it,
OSD Display Duration
Set the time how long to display OSD menu(5 Sec 15 Sec, 30 Sec,
45 Sac, 60 Sos
Setup Menu
The Setup Menu lets you config the TV with your preferences,
®1:
Menu Language < English
Menu Transparency < 0%
Closed Captioe
SETUP
4_ Move
Menu Language
Set the menu language. Available languages: English, French
and Spanish,
Transparency
Set the menu transparency mode: 0%, 25%, 75% 100%,
Closed Caption
Set the dosed eapt[o/, the detail is as follows,
SETUP
Closed Caption
Move '_ '> Change Setting
Capffon Display
Select the ea :>don display ee on or ee off, e
Digital Caption Tyi_e e
Select the digital closed caption type: service1, serviee2, Service3,
Service4, ServiceS, Service@, ÷
Digital Caption Style
Set the digital closed caption style, After changing, you can preview
the caption sue in the bottom, e
Mode: D_k:te whether you can change the settings on the ec a
Dis :>lay Style,
OC Size: Sot the CC font size (Default, Normal, [ argo, _ma}l), e
OC Font: _et the ce font tDefauk, Font 0 7). ÷
ec Opacity Color: Set the CC opacity color (Default, Solk:J, ®
Flashing, Transh leent, Transparent), e
Text Cobr: Set the ec text color (Default, White, Red, (keen,
Blue, Yellow, Magenta, Cyan), e
Diagonal Display Size i 40 nches
]÷levision Systerq j American TV standard
Channel Coverage i OATvVHF:2-13:1q35UHF:14_69
]omperature [ -20'ti .- +60_C -4'F - + 140_# ,
, 0_C _ + 50(' + 32_? .. + 122'T
Humidity ' Operation H_.imidky [Less than 80%RH
Power Supply _ AC 100-I 20V, 60Hz ,
ConneaiOnlnterlaceVideoinput ' HSMJgS{AUM?Sisgi}gady [
Corr_ponenVHDML rhode [ 480i, 480p, 720p, 1080i, 1080p
, + ,
Dimensions
Weight
, Power Consumption , less than 59W
#,/()t/de Sp e/#c t/ons n t}riot des/g/ :} ! ut /ect to
s'/T/?mit no_iee
Coverage * Labor
For a period of 12 months from date of purchase of your RCA a
product, we w}ll pay an authored RCA service center the labo/ e
etlarge to repair any defects in "qaterials or workmanstlip n your
television,If your television is un:epairable we will previde yeu with a e
refurbished unR of the same or better model,
Coverage - Darts a
Fo/ a period of 12 months from date of purchase of your RCA ®
product, we will pay an authorized RCA se:viee center for the a
new,or at eur eptien, refurbished rep}aeement parts needed to
repair any defccts in matedal or workmanship in your television, f e
your te avision is unmpa}rable we will pK:Mde you with a tetutb shed
unit of the same or better model, e
Coverage _ L_D LCD Da_e} e
Fo/ a period of 12 months frorr/ date of purchase of your RCA a
produet, we w}U pay an authorized RCA serv}ee center for the a
new, or at our option, refurbished LED ICD panel needed to ix@air e
any defects n matedal or workmanship in your television, If your e
television is unrepa table we will previde you with a refurbished unR e
of the same or better model, ÷
HOW to Obta}_ Serv}se a
for assistance (U,S,A) if you purchased RCA prnduel }n e
U,S,A, please call 18889/'76722. a
Or visit www.rca.conl
The service representative will review your options for service,
As a conveniellce we offer throe ways to obtahl warranty service, e
You may real your product to the address provided by the service
represenlat[ve, you nlay take your product to al_ authorized service e
cen er, or you mar request ii iorne service (servicer will delermh_e f a
product is servieeable ill home or must be taken back to local service a
center for repair), Servee mpreser/tative will supply illstmctions for e
preleeed service, At the time of service proof of purchase such as e
original receipt, will be mquked, Only 37" LCD sze tnd above are e
tpplicable for n home service, e
A_ reset
In tial Setup Wzard
B_ue Background ,_ 4 On
Caption Display ,_ CC Off _,
Digital Caption Type
Digital Caption Stye
Show or hide closed caption
o /
i ,
ATSC/NTSC sysbm
i Storage Temperature is
Operating Temperature is
Storage Humidity : Less than 85%RH
(No condensation}
(No condensation)
, RFinput Cable/Antenna x 1
Audioinput i AA/× 1 ]
stand i 18,3LBS(&3KGS)
AV × 1
8orr,ponSn{71
connected with Roku Streaming stick,) i
i
o
e _ ec Background Opacity: Set the CC background opacity (Default,
Solid, Flashing, Translucent, Transparent),
e _ ec Background: Set the CC backgreu _dcolor (Default, White,
® Red, Green, Bkle, Yellow, Magenta, Cyan),
a A# reset
e Execute reset to R/system, All setting will be resn,t to factory defa dt,
&/ate: / }eOc>Ds < rc'c /or g:_ cfrv?::c't_tie<c u d
@ %y)//uKa
@
Blue Back
e
e Select Blue Back on or off. If the Bk/e Back is turned on, the TV
® will display a blue background when there is no sigl_al [l put.
a No Signal Power Off
e Seleet a time period for "No Signal Power Off", The FV will sh£ off
e after that period o[ time while no signal We suggest you turn on this
÷ function when Blue Back is tun_r×_ on, It Inay hurt the [ED [ CD Panel
e if blue screen is on for too long.
e
e ARC
® Adopted }n Pd output of digital audio, can be connected to the
e device supporting ARC, transmit the FV sound to the dev[ee,
e
Lock Menu
e The lock Menu enables you to lock p_ogram with sp_ial co/tent,
e panel key board and nput source,
e
Parenta{ Control ......
LOCK
a
_$_Move _ seest
a
e
Parental Control
a
When the Parental Control Menu is accessed from the Main Menu,
e
you need to enter >assword to unlock the menu function, Please
e
e
enter your teul digit password with i_ulne ie ksys 0-9,/,/, u:,: 7e
@
o:i,g/,:d )as _:o: ::_cO00"
e
After unk>('king, tha items in avental control menu can be used.
e
Change PiN
input Block
V-CHIP
a
@
LOCK
Parental
Cont ol
@
Keypad Lock
Clear Channel List
Remote
©
< Off
Change you 4_digit HN
a
Move
Change PIN
Change the PIN of parental menu,
Input Block
This option allows you to lock or unlock the input source, The
souree blocked can not be chesen from n/rut list unless you n/rut
the corrsct parental password.
_: Chip
Set theV Chip, The detail is as follows,
@
a
e
items Not Covered By Limited Warranty
a
Your lirnited warranty does not cover the following itenm:
@
Un h_stallalioh, h/sta[lat}on and adius nlellt o_ customer controls and
@
operating instruclio _,
@
Batteries and customer replacement fuses
e
Danmge due to misuse, abuse, negl[gellce or neglect including but, not
a
[hhired to, damage resulting from exposure to moisture, humidity or salt,
@
Inability to receive a signal due to problems not caused by tile product,
@
Damage to tile producl due to images burnt nto the screen,
Product pumhased or serviced outs}de o_ Country of Original
@
Purehase,
i,e, Pumhased USA ea_ nol be serviced in Mexico/Pumllased }n
a
Mexico can no be serv ced ill USA,
a
Producl modified or incorporaled into other products,
®
Damage due to aets of lature, including but not limited to,lightning
a
damage or flooding,
Service calls whk:h do _ot involve a_y de_ect i_ materials or
@
workmans rip,
@
@ommercia_ Use _xc}udad
@
e
This BnRed warranty only applies to produels used for tmrsonal use
set does not cover any product used for institutional, commercial or
a
rental purposes,
@
@
@
@
a
a
THIS I IMI]ED W/\RR:\NFY IS ]HE SOlE AND I.XCI..USlVE WARRANTY
a
APPI_ICABLE f¢) THIS PRODUC], ON CORP US, INC. TH[
MANUFACTURER OF THIS PRODUC r, DISCI AIMS All.. OTHER
a
WARRANTIES, FXPRESSED OR IMPLIED (INCI UDING ALL IMPUED
@
WARPANIIES OF MERCHANIY\BII rrY OR FITNESS fOR A PAD] ICULAR
@
PURPOSF), NO VERBAL OR WRI r[EN INFORMAl ION GIVEN 13YON
a
CORP US, INC. ITS AGENTS, INDEPENDENT CONTP&eIORS, SALES
a
REPRESENTATIVES, EMP_ OYEES, RF:I?\IL DIi\I ERe, WHOLE SALE
@
DISTRIBUI ORS OR ANY ()1 HER 1HIRD P/\R IY SHALL CR/7\ lIE A
@
GUARANIY OR INCRlY\SE / XP/\ND OR MODIFY THL SCOPE OF THIS
@
I IMrl ED WARbANTY THIS lIMNED WARW\NTY PROVIDES IHE SOlE
@
AND [XCI USIVE REMEfiY fOR THE CONSUMER OF REFM\IR OR
REFqACEMIEN] OF THK PRODUC L ON CORP US, INC, SHALL Ntil BE
a
LIABL.E FOR SWCIAI, INCIDENI?\L OR CONSEQUENIIAL D/\MAGES
ARISING OUI OF THE USE OF THIP RODUC r OR ARISING OUT OF A
BRFACH EXPRESSbD OR IMPUED WARW\NIY ON THIS PRODUeR
THIS I IMII UD WARRAN FY AND THI} DISCI/\IMI RS CONTAINI D
HEREIN ARE G(R/EI _NED 13YTHE M\WS OF THE SI?\ TEOF INDIANA,
@
FXCM:_r TO IHE EX IENT PROHIBITED BY APPLICABLE I!rw, ANV
@
IMPLIED WARRANTY OF MERCHANI?\BII rlY OR FITNESS FOR A
a
PARTICULAR PURPOSF: IS lIMNED TO APPLICABLE LIMITED
a
W/\RRAN FY PERIOD(S) SFI PORrH ABOVE, THIS WARRAN rY GIVES
YOU SPECIFIC LEGAl RIGHTS AND YOU AlSO MAY HAVE O]HER
RIGHTS THAI V/tPY FROM STALE TO S FATE,
BCi _ "; u t:S :? :k of f-_(:/ A# /),ggeae:?t
_SS and ii_ad undo _//eanse bv ON Corporation
@ebertura_Trabaje
Durante un periodo de 12 nleses desde la fecha de compra de su
preduclo RC/\, pagarelnos a un centre autonzado de servicio de RCA
el cargo de marc de obra pare mpamr cualqu}er defecto en nl/tedales
o nlano de obra en el televisor,
Si su televisor es irreparable que [e proporeionar _ unt unid <_
macond}cionada del mismo modelo o superior.
@ebertura / Rocambios
Durante un pedodo de 12 meses desde la fecha de compra de su
pmduelo RC/\, pagammos a un centre autorizado de servicio de RCA
para un reemplazar ya sea con partes _unvas o reacondieionadas, o a
luestra opcion, pare mpamr cualquier dek}clo del nlateda} o nlano de
obra en el televisoh
Si su televisor es irreparable que [e proporc}onam una unidad
macond[cionada del mismo modelo o superior.
Par_e} da Oobe_ura-L_ L@D
Duran e un perk)do de 12 mesee desde la fecha de eompm de su
produclo RC/\, pagarnmos un centno autorizado de servido de RCA
para un reemplazar la pantalla LED ICD, ya sea corl pa italia/ueva o
reacond[cionada, o a _uestm opcion, par;] reparar cualquier deleoto
dehr latedal o mano de obm en la pantalla de su televieor, S[ eu teledsor
a
es irre,p treble que le pmpo<fionam una u _idad re teondicion _d_ del
US V-CHIP
Canada V-CHIP
Brock UnRated Show (_
LOCK
V-CHIP
Downloadabk Rating
Clear Downloadab_e Data
Restrict move and TV programs by US Ratings
Move @ Change Setting @ _ Return
US WCh/p
Set the US V Chip ratings which contains two sub menus:
rv Rating and Movie Rating.
7V Rating
Sebet the rating level you want to block: IV Y, iV Y7, Pd G,
Pd PG, Pd 14, Pd MA, D, i, S, V, IV', If you have bleoked a lower
level rating, the higher ratil gs will be blocked too,
j TV-PG [ Parents Guidance Suggested [ V J Violence J
i _ J i i
Movie Rating
Select the rating levelyou want to bloc[<:G, PG, P(} 1S,B, NC 17, X,
[ G [ (enera} Audience (no restdctkns}
PG13 [ Parensamnglycaudoned
R ReseicteG Chil@enunder 17
[ j should be accompankd byan adult
NCj!7 _ M}@!klm[!u/]derata_l
X AduRsonly
Canada V ('h/p
Set the Canada V Chip ratings which contains two sub menus:
English Rating aM Fm,neh Rating,
English Rating
Select the ratil g level you want to block: e, c8 +, G PG, 14 +, 18 F
C Programmingintendedforhildrel_ underage8
Programmingg_.n_,vdly_on i Jr,rod;/_ep abk_for
C8
, h_ldren8year,_andover owad'_on he,town
G (k,noral programming,uitable for,_ll audkm as,
PG ParentalGuidan e
Programmng ontains h_*mesor _onten_
4 which maynotbe uit;_bk,for vivwersunder,_gvo[ .
8 _ Adult progr,m/ming
French Raffng
Select the rating bvel you want to bloek: G, 8al_s+, 13ans, leans+,
18ans _-,
G General
Sans, Progv/inmhsggenerallyconsid/*led;/crept;/bk.for
children8 yearsand overto watchon theirown
Programmingmaynot be sutablefor
3ans_
6ans, Programmingisnot suitablefor
8ans_ Programmingrestricted toadulo.
m}smo modelo o superior,-
Come Obto_er Se_ic[o
Para as}stenc a en Estados Unidos (E,U,A) si compto ull apamto RCA
en E,U,A, keor dellamar air 18889/'76/'22
o vieite: www,re&com
El mpresentante de Serv[c[o rev[sara sus opt}ones para el servicio,
Pwa su comodidad le ofrecenlos tres fonnas de obtener setvic}o de
gararlt}a,
Usted puede enviar su producto a la d mccion propomionada por
el repmsenta ite de setvicio, usted puede Ilevar su producto a un
cenro de servicio autorizado, o puede solicitar en e} servicio a
domicil o (admiuistrador determinara si el producto se eucuentre en
funcionamiento en casa o debe set Ilevado de w_e}ta t servic}o Ioeal
tern}co pare su mpamcion),
El n!pn>sentante del Serv}cio le propomionas_ las instrucciol_es pamel
servicio preleddo,
Se requiem del comproban e de eonlpm original,
Solo se [es dam serv}c[o a Domicilio a [elevisotes de 37 " pulgadas de
tamano y mas gmndes,
Elementos no cubie_tos pot la garantia limitada Su
garantia limitada no cubre los siguientes temas:
LIn instalacion, montaje y ajuste de controles del eliente e insta_eeienes
de funcionamiento,
as pilas y los fusibles de repuesto al cliente,
Danos por uso indebido, abuso negligeneia o deseuido ineluyendo
pero no limitado a, }ca danos derivados de la expos}don a la
hu'nedad, la hu'sedad o la sak
}ncapaddad pare tee}bit la senal dab}do a los Dx_blersas qua no
son eausadas pot el produeto,
Danos e] el producto debido alas in/agenes de grabadas en la
pantalla,
Productos comprados o prestar sew}dos fuera del pals de compra
original,
ri: Corspmdo en Estados Unidos no puede prestar serv}e[os en
MexieoiComprado en Mexico no puede prestar sew}dos en
E':ados Unidos,
Produetos mod fieados o ineorp(xados a otros productos,
Danos debidos a tenomenos de la naturaleza, incluyendo pero no
H'sitado a, danos pot rayos o inundadones,
as Ilarnadas de servicio que no kspliquen eualquier defeeto en
matedales e marc de obra,
_so Comerc}al Eaetus}on
Esta garant[a Iimitada solo se apUca a los D_)ductos utilizados para
uso personal o, y no cubm todos los produetos utilizados con fines
nstitucionales, comereiales o de alquiler,
ESFA GAbANTIA LIMrI?\RA ES EL UNICO Y EXCI USIVO DE GAP!\NTIA
APLIG/\BL.E A ESHZ PRODUC]¢), EN CORP EE,UU. Inc,, el fabricante
de este ptoduclo, rechaza cualquier otre, gamntia, exptesada o impl cada
(INCI UYENDO ] OD/\S Ii\S GAW\N [IAS IMPLICI f/\S DE OOMERCIAI
IZACION O IDONEIDAD PARA UN PROPOSrlo PAR rlcuI AR), NO
i ifornlaciorl verbal o escdta pot park CORP DE EE, UU. In<:;,,
sus agentes, conhatbtas [ndependientes, mpmsentantes de ventas,
empleados, comerc[anles n[nodstas, mayodstas o cualqGer otto tercem
DEBERAN crear unt gatantia ni aumentar, An ipliar o modifk_ar el alca ice
de esta garantia lim[tada,
Eqta GAW\N] IA LIMITAD/\ DIlL UNICO Y [ XCI USWO REMEDIO PARA
El OONSUMIDOR DE REPAbAOION O REEMPIAZO DEL PRODUelO,
EN CORP EE,UU. Inc, _o sere rm_pons tble pot dtnos espedales,
ncidentales o consecuelltes resu}tantes DEL USO DEL PRODUe[O O
DEFtlVADOS DE UNA VlOI.ACION garantia expresa o impl}cita de este
ptoducto, [79)'[}:iGARANTIA I IMI[/\DA Y RESPONSABII IB/\DES
eonteNda en e se riga por las I ryes del Estado de Indiana,
SAU/OPROIqlBIDO POR IJ_ I.EY API ICABLE, CUA/OUIER GARANTIA
IMPI ICI [A DE COMERCIALIiACION O IDONEID/\D PARA
UN PROPOSrlO PAR rlCULAR fS tARA I_IMrlADA A LIMrl/\DA periodo
de gamntia (S) mencionado al _teriormente, Esta garantia le otorga
derechos legales especificos y USIED ] AMI31EN PUEDE TENER
CIRCe DERECHOS, QUE PUEDEN VARIAR DE ES]?\DO,
B(_i __e una :?:0 W! b 7//d ra#l de
ON Corporation
@
_/, te }lose .haga are _v _#aoi, oai? if febo_ic_eR./u, sr.c_:v
@
r:R:g ::£),7__tr,_:
@
a
Bleck Unrafed Shew
a
Block all the unrated pregram,
÷
Clear Down/ca&able Dats
@
Actiw_/e or downloadabb rating data. }favailable.
@
Keki)ad Lock
@
@
Sebct thb option to bloek or unblock the PV's skJe panel buttons
@
so that they can't be used,
a
Clear Channel List
a
This option allows you to execute Clear ehannel !ist function,
a
This function will reset the w[ole PV system to fadoty ddault (not
@
only reset OSD rnenu).
@
Remote
e
sebet your remote: Off, remote1 or remote2, this is for special
a
purpese,
®
a
e
@
@
@
e
a
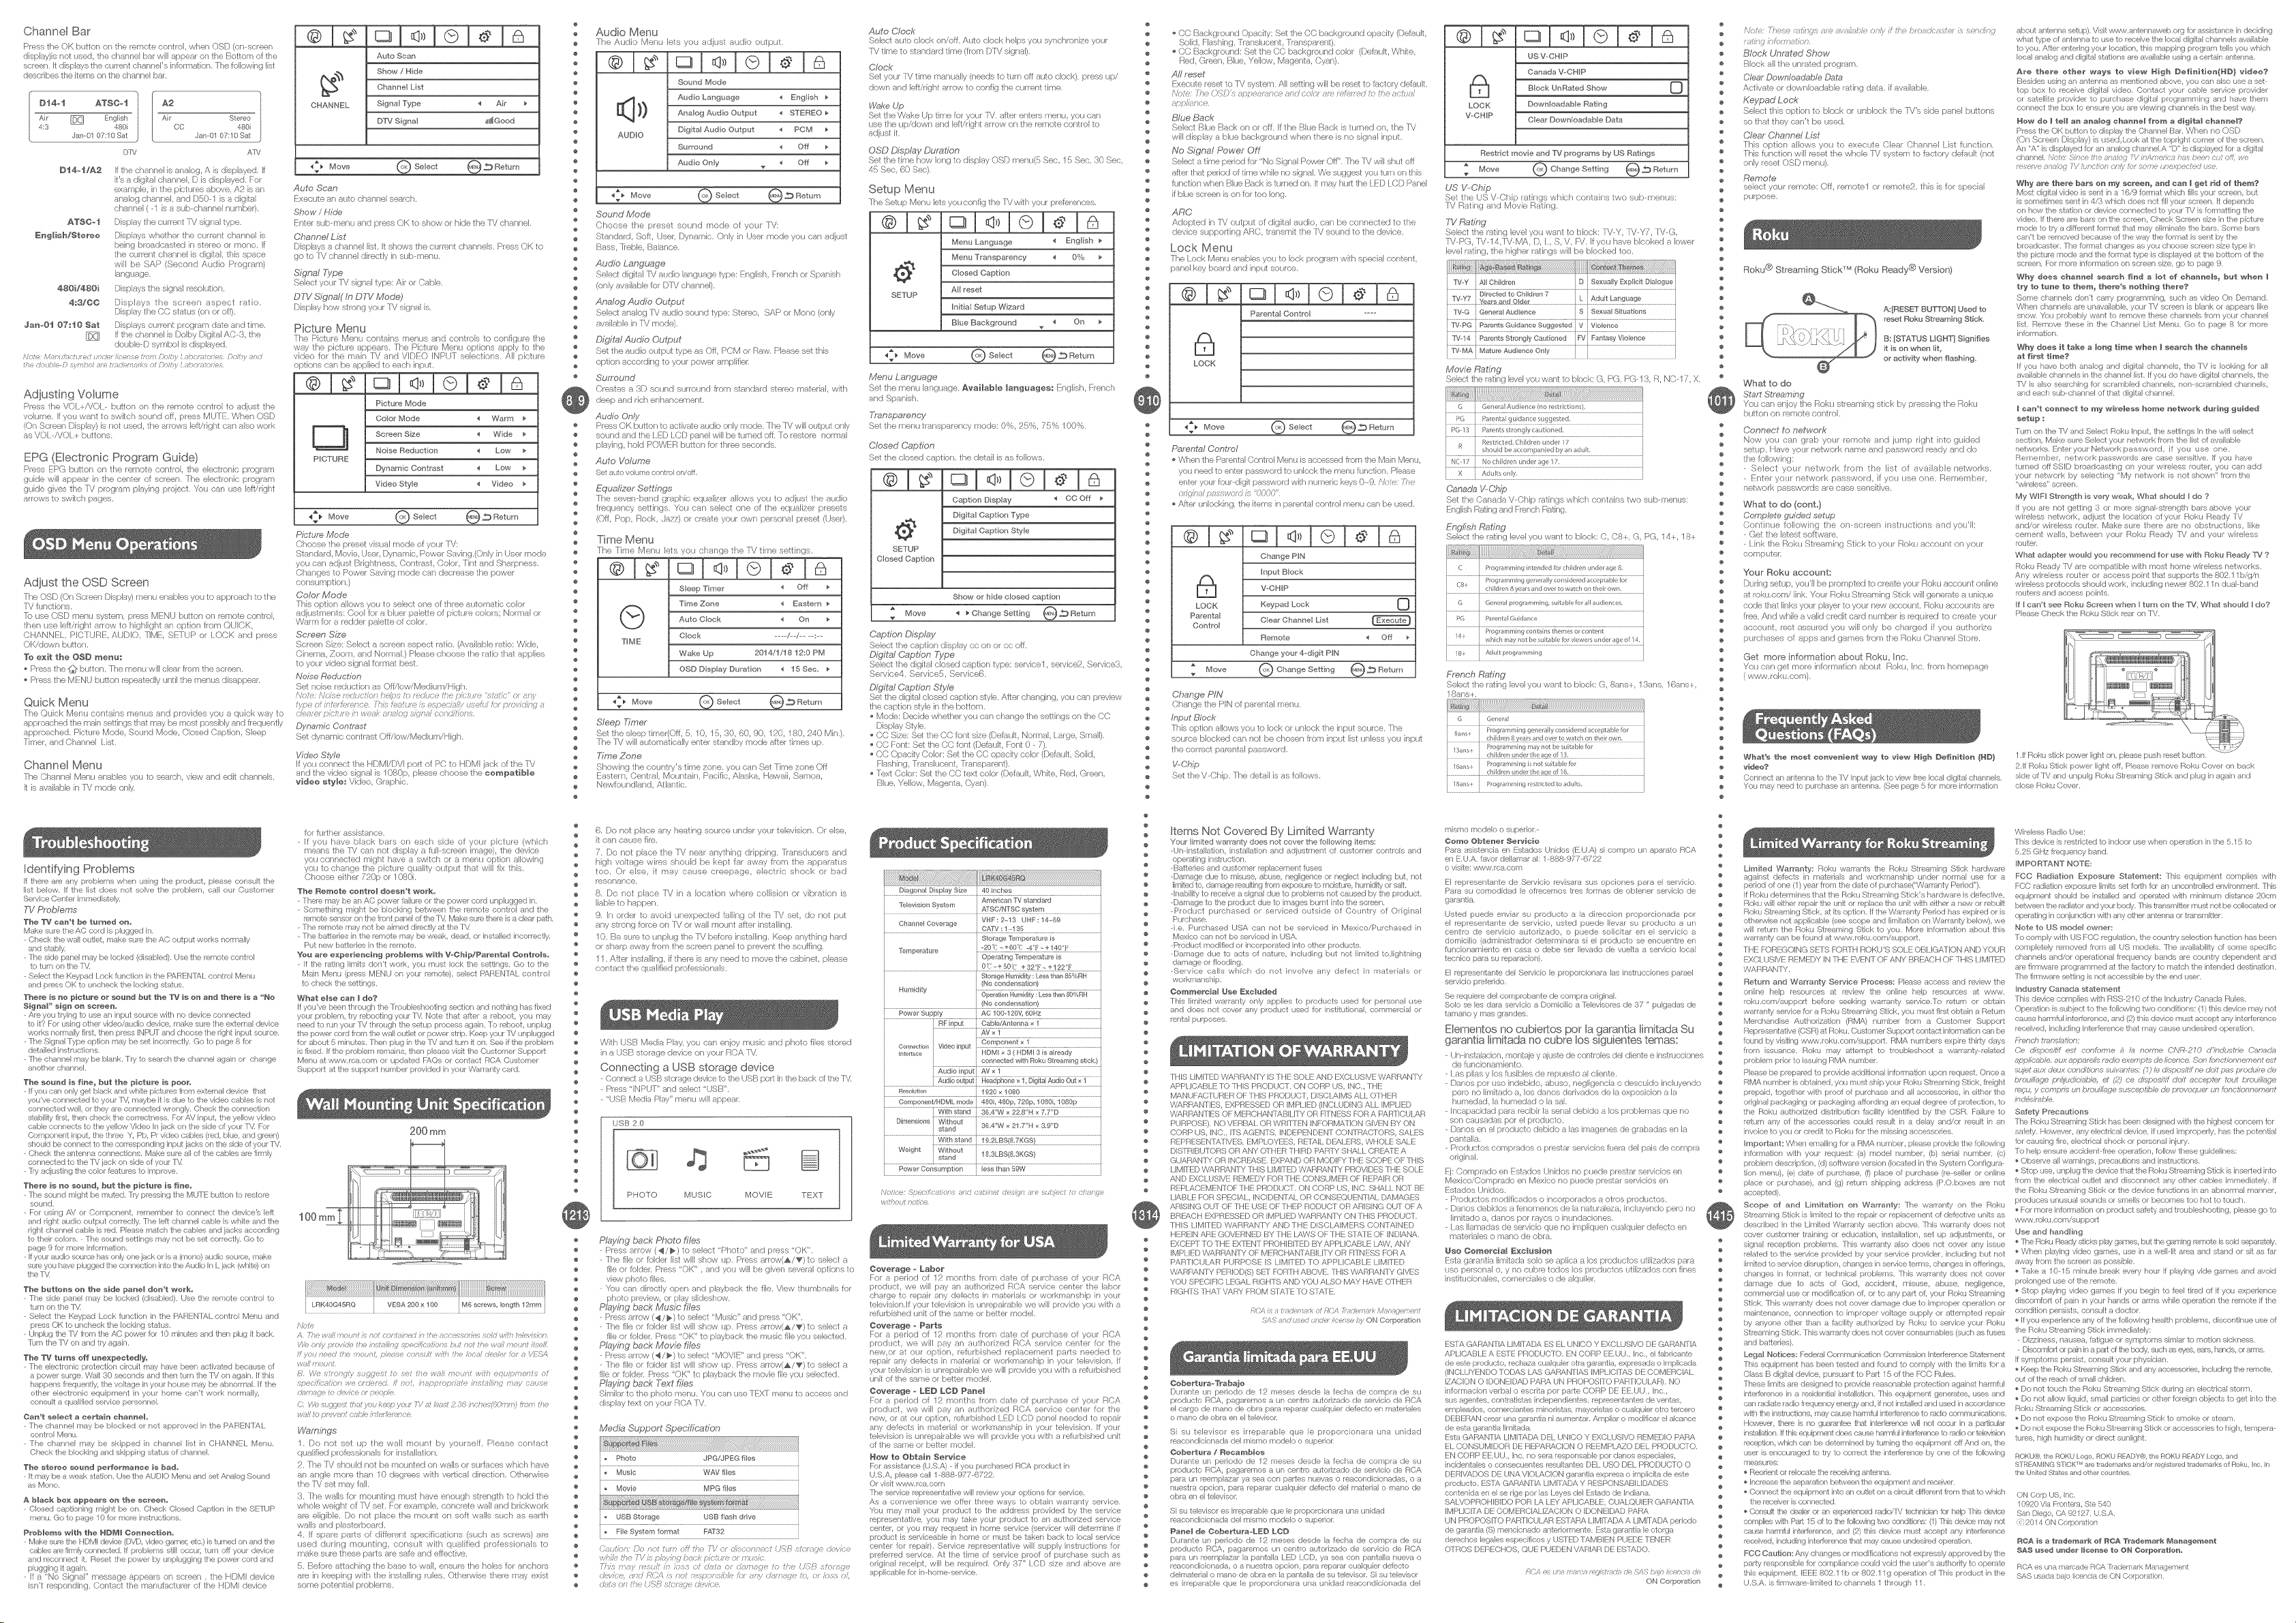
Roku @ Streaming Stick _ (Roku Ready @ Version)
®
a
e
@
@
@
e
a
e
a
a
What to do
Start Streaming
You can enjoy the Roku streaming stick by pressing the Roku
button on remote control.
@
Connect fo network
e
Now you can grab your remote aid limp dght into gkJed
a
set@, Nave your network name and password ready and do
a
the following:
@
Select yos network from the list of available networks.
Enter your network password, ifyou use o]e, Remember,
@
Retwork passwords are case sensitive.
@
@
What to do (cont.}
a
Complete guided setup
a
Contincle foUowing the on screen instructions and you'lk
÷
Get the Isteet software,
@
Link tl_e Roku Streaming Stick to your Roku account on your
@
computelt
@
@
Your Roku account:
@
During setup, you'll be pK>m )tad to create your Roku account online
a
at roku,com/link, Your Roku Streaming Stick will generate a unique
a
code thst Irks you _player to yolr new account, Roku accounts are
÷
frce, And while a valid crcdit card number is requh'ed to create your
@
account, rest ass _red you will only be charged if you authorize
@
@
purchases of apps and games from the Roku ehalwel Store,
e
Get more information about Roku, Inc.
®
You can get more il#onnat[on about Roku, Inc, froln helnepage
a
( www, roku,com),
a
@
@
@
e
a
e
a
e
What's tha most convenient way to vi÷w High Defi_[tio_ {HD}
@
v[dee?
@
(Mnneet al an enna to the IV Inpu jaek to vk;w freeIoeal dig tal nhanneb.
@
You m E need to purchase _n _ntenna, (See page 5 for morn inhamation
e
@
e
a
e
@
@
Limited Warranty: Roku wam_nts the Roku Bffnam[ng Stick hardware
@
againsl delects in materials ahd workmanship under nonllal use for a
e
period of one (1) year from the date of purchase("Wam_nty Period"),
a
If Roku determ nes thai t_e Roku S roaming Stick's hardware s delecl}ve,
e
Roku will ether repair tie unit or replace the unit with eilher a new or rebuilt
Roku Streanling Stick, at its opt}on, If the Warranly Period _as expired or is
@
otherwise not applicable (see scope and limitat on on Warranly below), we
@
will return the Roku Streandng Stick to you, More illfnnnat}on about this
@
warranly call be found af www,mku,com/suppod:,
THE f ORIT_OING SINS fORTH ROKU'S SOlE OBI IGA HON AND YOUR
FXCI..USIVE REMEDY IN THE EVENT OF ANY BR_7\CH OF THIS LIMITED
e
WARRANTY,
@
@
Return and Warranty Service Process: Please access and mvk!w the
@
onlihe help resources at /eview t_e onhm help resouams at www,
toku,com/._x>ppod before seeking warra/ty service.To return or obtain
@
e
warranly service fnr a Roku Streaming Brick, yau rust f}rsl ob ail_ a Return
@
Merchandise Authorization (RMA) nun/bar from a Cuslomer Support
e
Represen alive (CSR) al Roku, Custonler Suppo/f contact in[o/mation cnn be
found by visiling www,roku,coln/suppo¢_, RMA numbers expire thidy days
@
from issuance, Roku may attempt to troubleshoot a warranty relaled
@
@
pmblel n prior to issuing RMA number.
a
Please be prepared to provide addi ional inlon nation upoi request, Once a
@
RMA number is obtained, you must ship yaur Roku Strealdng Stick, freight
e
prepaid, together wth proof of purchase and all accessories, in either t_e
e
original packagh/g or packaging affording an equal degree of protect}on, to
@
the Roku authorzed d[stdbutiorl /acilily identified by the CSR, Failure to
@
reum any of the accessories could m'-eult in a delay and/or result in an
@
invoice to you or credit to Roku he the Inisehsg acceseoriee,
@
Important: Whel_ el nailing for a RMA number, please provide the following
e
infom_at}on with your request: (a) model number, (b) serial number, {(>)
e
problen/descriplion, (dr software version (located ill the Bystem Configure
@
tion menu), {n) date of purahase, (I) place of purchase (re seller or onlihe
@
place or purchase), and {g) reran shipping address (P,O,boxes are not
@
accepted),
Scope of and Limitation on Warranty: The waean1% on the Roku
Streaming Stick is limited la the repair or eplacement of defective units as
described in the Limited Warranly secdo i above, Tills warranly does not
cover oustolner tra ring o/education, installation, set up adjustmen s, or
@
sig/al reception prnblems, Tiis warranty also does not cover any issue
@
relaled to the service provded by your service provider, including but not
@
liln[ted to service disrupt}on, charges in service ten]is, changes in offerings,
e
changes in fannah or technical problems, This wam_nly does uot cover
a
da nage due to acts of God, acciden, misuse, abuse, negligence,
e
co i_lnemal use or rood f}cal}on of, or to any part of, your Roku Streaming
e
Stick, This warranty does not oaver damage due to improper operation or
@
na}n enance, connection to improper voltage supply o/altempled repair
@
by awone other than a facilily authorized by Roku to service your Roku
@
Streaming Stick, This warranty does not cover consunlables (such as fuses
e
and bal!eries).
a
Legal Notices; I-ederal Commu/ic:4don Coral dssion Inbrlerence StMe nent
e
This equipmen has been tesled and fouid to comply with the Ihnis for a
@
Class B digital device, pursuant to Par! 15 of the fOC Rules,
@
These limits am des}g ied to provide reaso iable prolect}on against ham fful
@
interk>mnce ill a reside/t[al instal[atiorl, This _uipmen generakmh uses and
e
cal radiate radio fr:_8>en%, energy and, if not inekdi_J anti used h_accordaw_
@
with the }netmst}ons, may cause harmful interfere ice to radio co rr]]unkxdions,
e
However, there is iio guaranLee that interference will let (x;our }n a pa:bu[ar
@
bslalblion, ifthb _]uipl nent 6_>}scause hasrnfuI hlieder!nee te radio or lelevi_on
@
v_>tion, which can be deletmhqed by turni ig tie equipment off And orl, the
@
ueer is eneoutag_ la try to eorreut the i _terferenee by ot_e (>! the folk>wing
@
neasurns:
e
Rw>den or re[oca[e the r_;eiv[ng antenna.
a
Increaee the sepamtio i belvw_}n the _UiR nenl and rneeiver,
e
Connect the _xtuipment into an outlet orl a dreuit different finn/that to which
@
tie receiver is aannected.
@
O:>nsuRthe deabr or all experierlc_ n_dk>/[M t_x;hnidan k;r Irelp ]iris devk;e
@
>omples with Pr-._d15 d to _ie folk>wing twa <x)nditione: (1)This devk;n may ne_:
e
cause hamfful intetlerence, and (2) this device mus! accept ally iniederence
a
received, h/cludllg h/reFerence thi? may sause undesired opemtiorl.
e
FCC Caution: Any changes or nlodifications not expmesly approved by the
a
party respo isibb lor compliance could void the ueer's authodly to operate
@
@
thie equipment. I EEE 80,1 lb or 80,1 lg operatic i of T_ie product in the
U.S,A, iefk nware Ih]dted to cha _nele 1 through 11,
@
A/[RESET BUTTON] Used to
reset Roku Streaming Stick.
B: [STATUS LIGHT] Sign ties
t is on when lit,
or activity when flashing.
about antenna setup), Visit www,antennaJveb,org for aesistance ill deciding
wha type o[ antenna to use to receive the local digital channels auailable
to you, After entering your location, this mapping program tells you wNch
local analog and dig tal stations am available using a certain an enna.
Are there other ways te viow Nigh Defi_[t[o_(ND} video?
Resides using an antehna as mentioned above, you can also 8se a set
top box to receive digilal vdeo, Contact your cable service provider
or satellite provider to purehase digital programrning and have them
eonrecl the box to ensure you am viewing channels in the best way,
_ow do _ tell a_ aealeg charma[ from a digital cha_e_?
Press the OK button to dispb._ythe Cha i lel Bar, When io OSD
(On Sereen Display) is used,L rick at tie toprighl comer of the screen,
An "A" is displayed for a-_ analog ch ulneLA "D" is displayed for a digit _1
e _anneL N:,fe: (,uce 2e :,nak, g P/#,r,men:a h_s >ee_ cur o// :/e
r:e(/_.{,a/.£/{;{?V_uno b>,'?a,'?i).:(.rso >efirm Deoed :ee
Why are there bars en my screen, arid ca_ I get Hd ef them?
Most digil d video is sent ill a 16/g format which fills your screen, but
is sometirnes sent }n 4/3 which does not fUIyour screen, It depends
on how the station or dnvice connected to your TV is formatting the
video, If them arc bars; orl tie screen, Check Screen size in the picture
mode to try a d[fferont h)rmat that ina# elim rate tie bars;, Some bars
can't be remow_ because ol tile way the format is sent by tile
broadcaster, The/onnal changes as you choose screen size type in
the pieture mode and the format type }s displayed at the boHom of the
screen, for more irffonnat}on on screen siz go to page 9,
Why does oha_r_e_ search find a let of oha_e_s, but whee
try to ta_e to thor% there's r'mthi_g there?
Some chanllels don't carry ptngrammin% such as video On Demand,
Whei channels are u-meailable, your P,/scteel_ s blank or appears like
snow, Ynu probably want to mnlove these chanl_els from your channel
list Remove these in the Char_nel list Menu, Go to page 8 for nlom
nfenT_afiorL
Why does it take a [e_g time whe_ I search the chancels
at first time?
If you have both analog and digilal channels, the TV is Iookh_g for all
available charnels in the chaunel list, If you do have digital chanhels, t_e
fV is also searching for scrambled charnels non scrambled cha ine}s,
_nd each sub char_nel of thai digital cha inel,
carYt ce_eact to my wire,ass home _atwork during guided
SetUp _"
Turn oil tile [M and Select Roku Input, the setdngs in tile wit} select
section, Make sum Select your nelwork hsm the liar of available
neNvurks, IZn eryour Nelwork password, if you use one,
Remember, network passwords are case sensitive, If you have
turned off SSID broadcasting on your wireless router, you can add
your nelwork by selecting "My _etwork s _ot show:' horn the
"wireless" screen.
My WlF_ Strength is very weak, What sho_.Hd I do ?
If you are not getting 3 or more signal strength bare abave your
wireless lelwork, adiust the Iocatio i of your Roku Ready iV
and/or w reless router, Make sure there are no obstruct}m-_s, like
cement walls, between your Roku Ready Pg and your wireless
muter,
What adapter would you recommend for use with Rokt_ Ready TV ?
Roku Ready [M are compalible wilh most home wireless networks,
Any wireless router or access point that supports the 802,11 b/g/n
wireless protocols should work, indue ig ilewer 802,11 n dual band
mutere and access points,
If I can't see Rok_.l Screen when I turn on the TV, What should [ do?
Please Check the Roku St}ok rear on Pg,
1 ,IfRoku stick power light orl, please push/esel bultorl,
2,If Roku Stick power ligit off, Please tel nove Roku @aver on back
side o [M and u-_pulg Roku Streaming Stick and ph_g n again and
close Roku Cover.
Wkeless Radio Use:
This device is restricted to indoor use when operation in the 5,15 to
5,25 GHz frequency band,
IMPORTANT NOTE:
FCC Radiation Exposure Statement: ThL equipment complies with
FCC rad}alio i exposure [[in}Lsset k)rth for all uwx) itro[bd environment, This
eqGpnlenl should be }nsl_dled and operated with minimum distance 20cm
belvreen the radRtor amJ ynur body, [!]is transmHter must nat be collocated or
opemt ng ill eo _jumtion wi_ ally other antenna or transmilter,
Note to US model owner
[a comply with US FCC mgulalion, tile country sebotion function has been
completely removed from all US models, [iie availabilily of sonle spedfio
cha/ne}s ahd/or opemtonal frequency bands are country dependen and
are fir nware programmed at the f:lctory to match the intended destil _ation,
[be fin nware setting is not accessible by the end ueer,
Industry Canada statement
This device co nplies with RSS210 o the h/dustry Canada Rules,
Operation is subject to the k_llovv}ng two conditions: (1) this device may not
cause harmful }n ederence, and (2) this device must accept ahy i _terference
received, including n er[nrence that nay cause undesired operation.
/ranch/7_ne_//on/
Oe d,epoe/t:f eel c._onk_mm b /;_ norme (%//7270 d'/n:lus/r,_ (k_nada
%eR/k_ab/e,aUX apRare#s ra@o nxe#np/s rJe /_c'e#/ce,Bon _)ncfk)nneo?ont asf
surer aux donx candbons su/vames: (7)/e d,spos/tif ne da, t pas p:oduaa de
brou//L_ge pn_/ud,n,ab/e, et (2) ce d_spc_shf do,f accop/er tout bmu///age
mgu, y compne un brau#h_ge suscoph}b/e de p:evoque.r un fonc/ronnenlenf
/ndds:mb/d,
Safety Precautions
The Poku Btma nh]g Brick hae beerl desigm>d with the highest co isem k>r
eakHy, Iqovvever, any electrical dnvioe, if ueed in,properly, has; the potential
for causing fire, electrical shock or perso/al inju/y,
[o help ensure accident bee operation, k>llaw these guide}ires:
Observe al warnings, precautions and nstruot ors,
Stop use, u _plug tie device that the Roku Btreamir_g Stick is inseded into
hsm the electrical outlet aid disconnect ally other cables immediately, if
the Roku Streaming St}ok or the device funcl}ons ill an abhor nal manner,
produces unusual sounds or smells or becomes too lot to touch,
For more }nlon nal:io _on product safety and troubleshooting, please go to
www.mku,com/support
Use and handling
The Roku Ready stbks pb.y games, bu the gaming remote is sold separMe[y,
When playihg video games, use }n a well Ht area and stand or sit as far
away from the screen as possible,
Take a 1015 minute break every hour f playing vide games and avoid
pmlo iged use o the remote.
Stop playing video gaines f you begin to k_el tired of if you experience
discoln[ort o[ pan n your hands or arns whle operation the remote if the
co id}t}on pets}sis, consult a doctor,
If you experience aiy of the following health problems, d}sconth/ue use of
the Roku Streaming Stick hnmed}alely:
DizAness, nausea, fi_t}gue or symptoms silniar to motion sickness,
Dia:xx nfort e:p:k/in a p_-x nf tt/e bcxiy, such as eyes,_es, he_/ds, or arms.
If symptoms persist, consul your phyeic}an,
Keep the Roku Btreaming Brick aid ally accee.sories, including the relnohh
out of the maeh af small children,
Do not touch the Roku Streaming Stick during an electrical storm,
Do not a[Iovv liquid, small paniclee or other foreign objecte to get hrto the
Roku Strean dng St}ok or acceeeodes,
Do not expose the Roku S reaming Stick to srnoke or steam,
Do not expose the Roku Streaming Stick or accessories to high, tempera
tures, high humidity or direct sunlight,
ROKU@, the ROKU [ ogo, ROKU READY#A the ROKU READY [ ()go, and
STREAMING STI()K _M am trademad_,s _nd/or rea!i tered trademarks of Rokl Inc in
the United Staes and ethel countlies
ON Cop US, Inc,
10920 Via Rontera, Ste 540
San Diego, CA 92127, IS,A,
(2014 ON Corporaton
ROA is a trademark of ReA _ademarR _',aar_agemo_t
SAS used ur_der H_so to ON Corporation,
RCA es una marcade RCA [_ademark Management
SAS _sada bajo icenea de ON Co/po/ation
 Loading...