

Page 1

I
I
mmn
ContentS
Model
LGB600
Ahuninum FOti 5,16,20,22,24
Oven Bottom
30
Anti-’HpD&ice
2,3,34,41
Oven Vents 4,5,14,32
Careand Clknimz
28-32
Roasting/Roasting Guide 20,21
ClocldTiie* 11,12
Self-cleaninfz 24-27
Features ~
6.7
Shelves 5,14,15,20,23,24,31
Installation Ihstnactions 33-44
Thermostat Adiustxnent-
Air Adiusbent
40
Do It Yourself
19
Flooring
I
35 TunedBaking
17,18
41 Power Outage
9
LP Conv&ion
42-44
Problem Solver 45,46
Oven
11-27
Safeti Instructions
2-5
15-17
Surface Cooking
8-1o
M@@iIing Guide 22-23
Burners
8,9
Control S&timzs
11,12,15,
Control Settings
9
17-20,22,25,26
Cooktop Comparison
8
Door RemOval
31
Fluoresce t Night Light 13
Light; Bulk
)Replacement 13,32
Cookware TIDS 10
Flame Size
9
Lijzhtins Instructions
9
I
I
Use and Care & Installation
of You~Gas Range
1
.
Ou
Page 2
Read this guiipCarefiluy.
$
It isintendedto h lp you operate and maintain your
new range proper .
Keep it handy for lanswersto your questions.
If you receiv+ a damaged range...
tiediately ~m+cxtie
dealer(or builder) that sold
you the range.
4
Save time an money.
Before you
Uestservice.
● ●
Check the Proble Solver in the back of this guide.
?
It lists causes of
“noroperatingproblem that you
can correct yourse f.
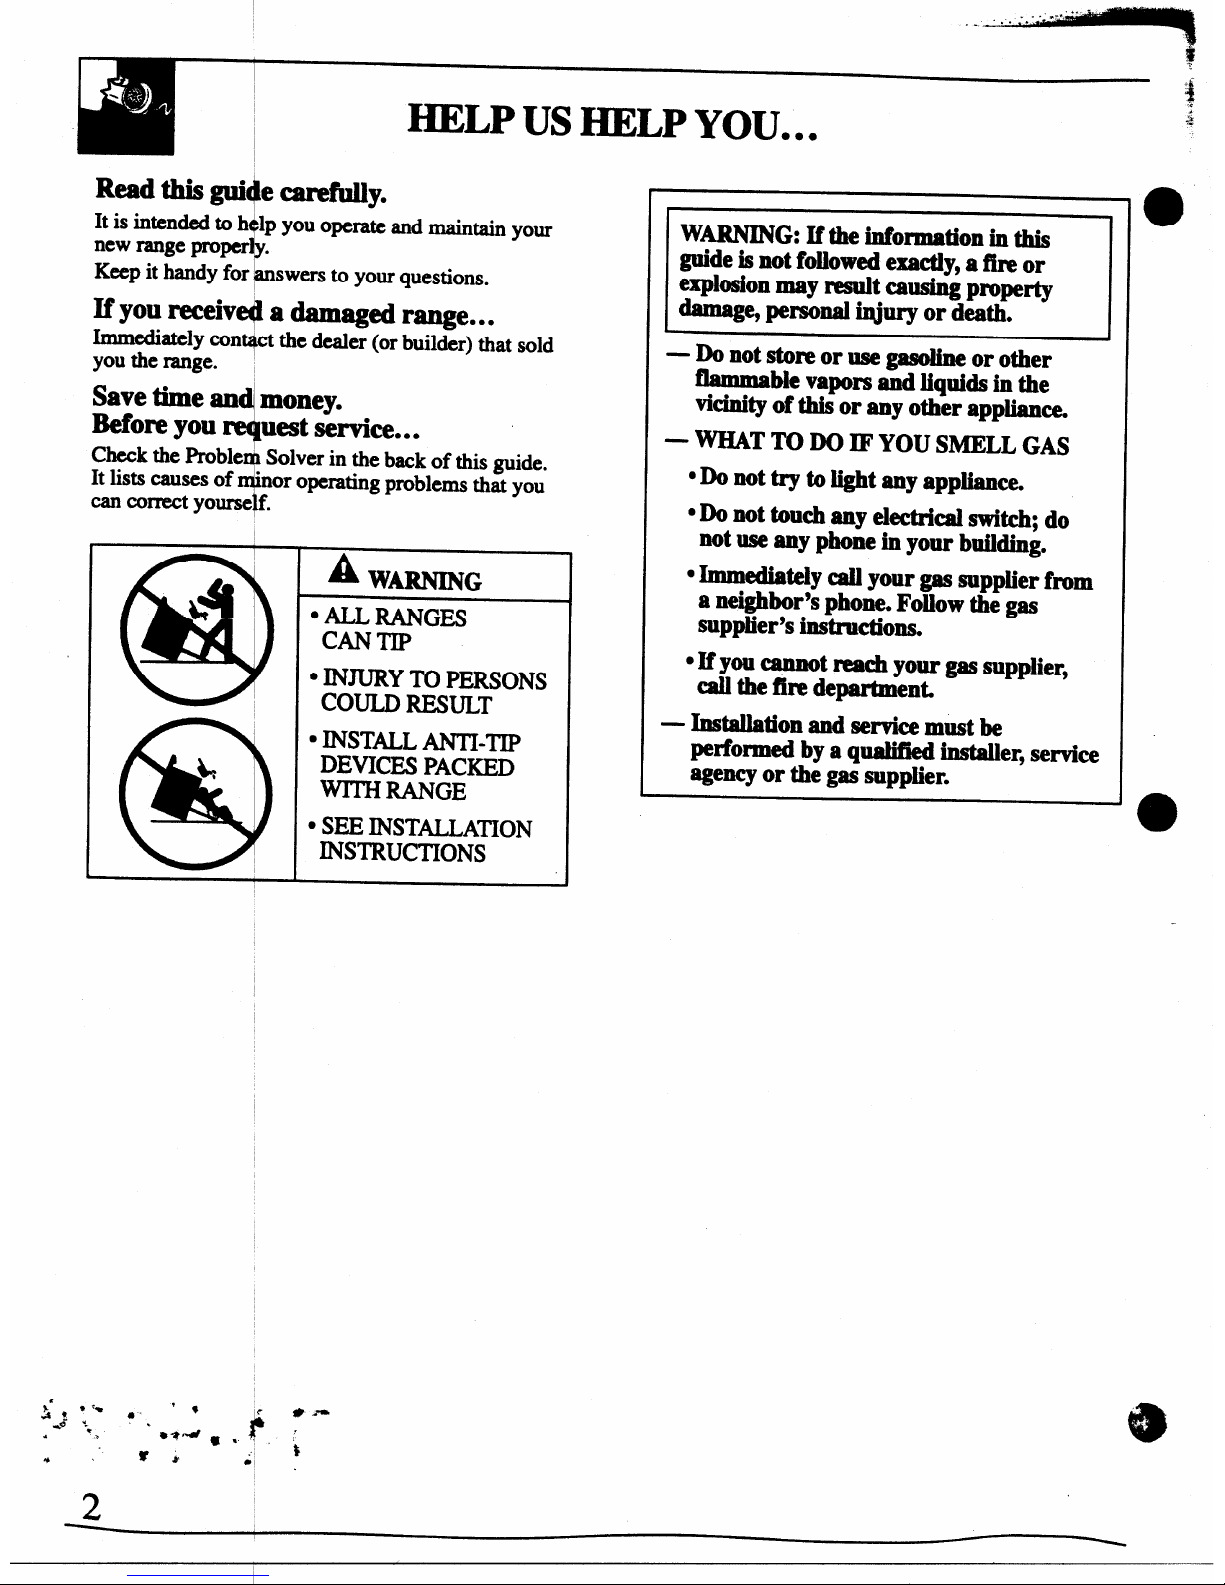
A
WARNING
● ALLRANGES
CANTIP
● INJURYTO PERSONS
COULD RESUET
. INSTALLANTI-TIP
DEVICES PACKED
_ RANGE
● SEE INSTALLATION
INS’IIWC~ONS
,10
WARNING: ~the iIlfOI’IMtiOn inthis
guide is not followed exactiy, a fire or
explosion may result causing property
. -e, pe~ti Wury or death.
h
—Donot*mor N
gasoihe or other
flammable vapors and liquids in the
vicinity of this or any other appliance.
— WHAT TO DO IF YOU SMELL GAS
● Do not @ to light any appliance.
● h) IIOt tOUCh my ektdd switch; do
not use any phone in your building.
● Immediately call your gas suppiier from
a neighbor’s phone. Follow the gas
supplier’s instructions.
● If you cannot reach your gas supplier,
call the fire department.
— Installation and service must be
performed by a qualifkd installer, service
wev or the gas supplier.
2
Page 3
IMPORTANT SAFETY INSTRUCTIONS
Read all instructions IX1ORuAg thisappiiance.
m
“ IMPORTAN’J’SAFETY NOTICE
● The~o
%
● Safe Drinking Water and Toxic
Enforcement
A requiresthe GovernorofCalifornia
to publish a list of substances known to the state
to cause cancerdbirth defects or other reproductive
h md requ@ businesses to warn customers
of potential ex~sure to such substances.
Gas
appiianc ean cause minor exposure to
1
four of these bstanees,
namely benzene, carbon
monoxide,formaldehydeand soot,caused primarily
by the incomplete combustion of natural gas or
LP fuels. Rope@y adjusted burners, indicated by a
bluish rather th~ a yellow flame, will minimize
incomplete co
T
ustion. Exposure to these
substances can
minimized by venting with an
open window o~using a ventilation fan or hood.
When You Q Your-e
5
● ~ve tie &
er show you the location of the
range gas cut ff valve and how to shut it off
if neeessary.
● Have your
e
T
installed and properiy
grounded by a qualified installer, in
accordance
with the InstW$ion Instructions. Any adjustment
and service sho@dbe performed only by qualifkd
gas range ins~ers or service technicians.
● Do not at@mpt’to repair or rephwe any part of
your range
+~
it is
NKommended
inthisguik other
semicing shouldbe referred
to a qualified ttx$mician.
“Plug your ranqe
into
a 120-volt grounded
outlet only.
Dopot remove the round grounding
*
prongfrom the $ug. Ifin doubt about& grountig
of the home ekx@cal sys~ it is your personal
responsibility@obligation tohave an ungrounded
outlet replaced ~th aproperly grounded; three-
prong outlet in +cordance with the National
Electrical Code;
•~~~ “
paekmg materials are removed fkom
the range
before operating it to prevent fmeor
smoke damage should the packing material ignite.
c Be sure your range is correctly adjusted by a
qualified serviee technician or installer for the
type
of gas (natural or LP) that is to be used.
Yourrange can be converted for use with either
type of gas. See the Installation Instructions.
W~G: Theseadjustmentsmust be made by a
qualiikd servicetechnicianin accordancewith the
manufacturer’sinstructionsand all codes and
requirementsofthe authorityhavingjurisdiction.
Failureto followthese instructionscould result in
seriousinjury or propertydamage. The qualified
agencyperformingthiswork assumesnxponsibility
for the conversion.
● After prolonged use of a range, high floor
temperatures may remit and many floor
coverings will not withstand this kind of use.
Never install the range over vinyl tile or linoleum
that cannot withstand such type of use. Never
install it directly over interior kitchen carpeting.
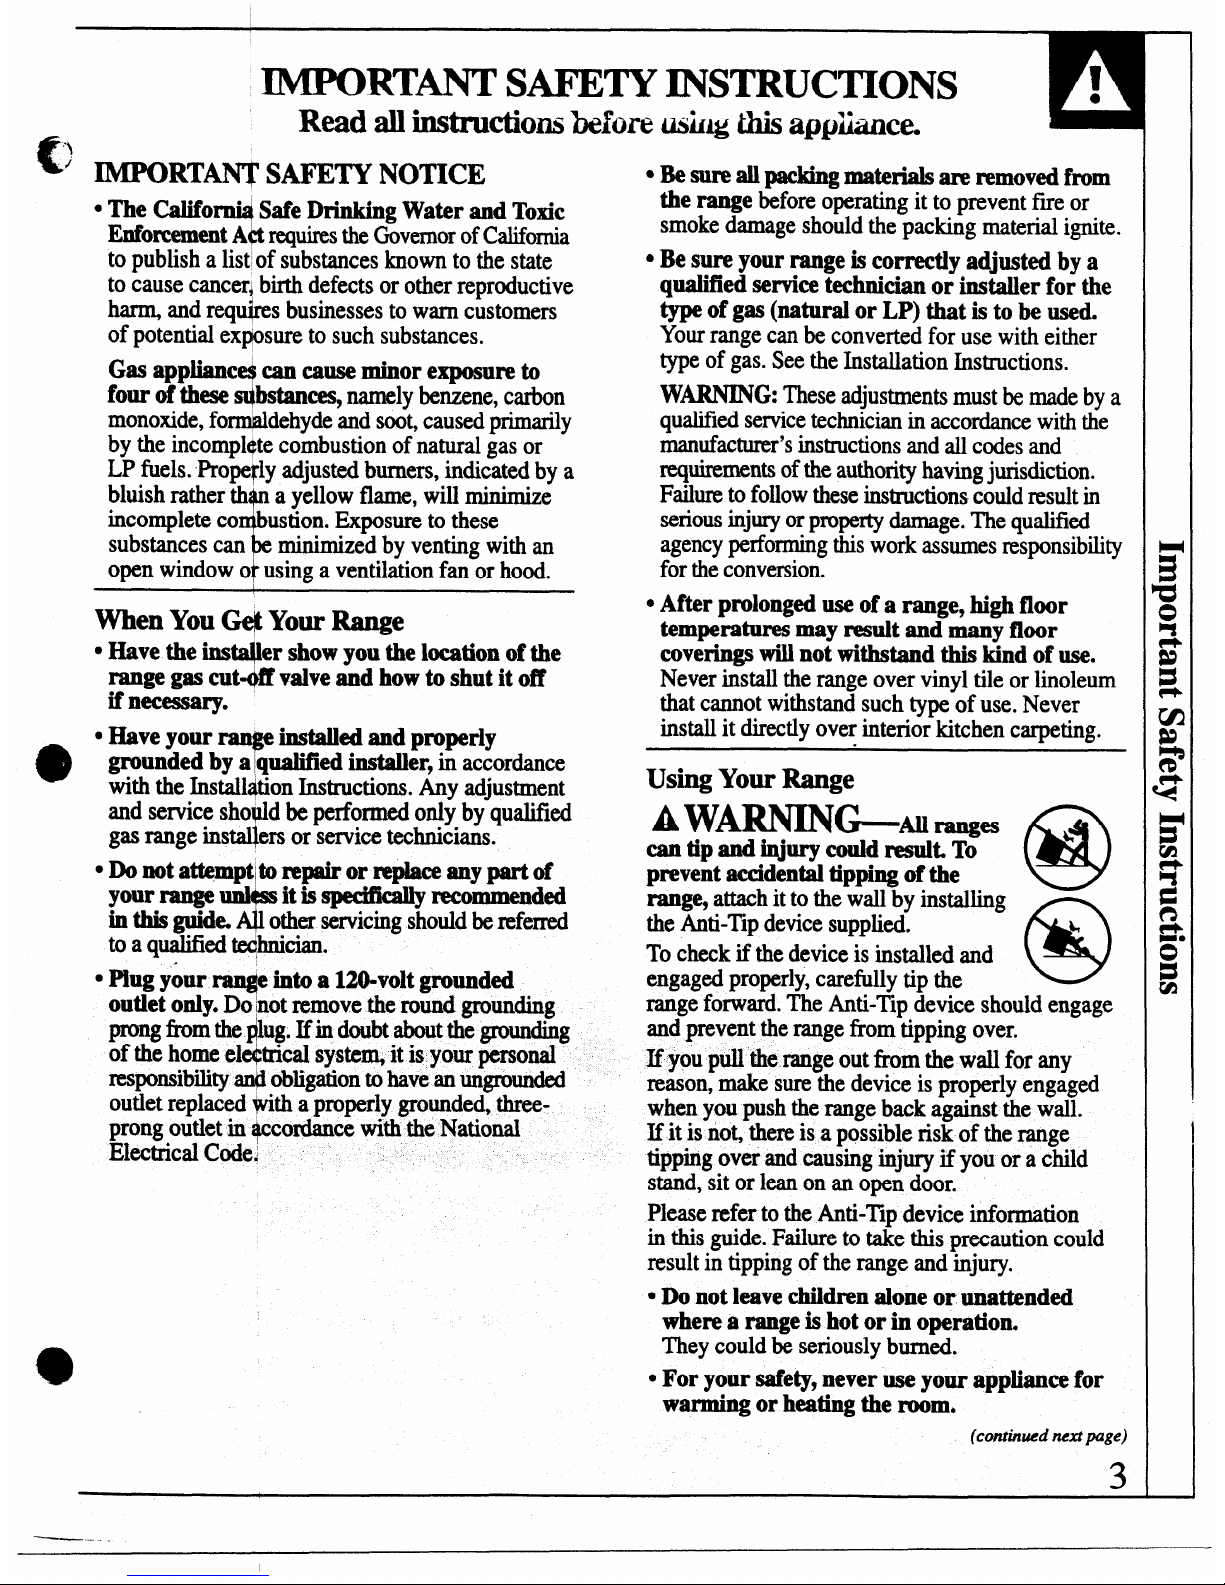
Using YourRange
AWARNING-MI~. ~
cantipandi@ryeo uldresuit.To
prevent aeeidentai tipping of the
@
range,
attach it to the wall by installing
the Anti-’Ilpdevice supplied.
To check if the device is installed and
m
engaged properly,carefully tip the
range forward. The Anti-’Ilp device should engage
and prevent the range from tipping over.
If you pull the range out fkom the wall for any
reason, make sure the device is properly engaged
when you push the range back against the wall.
If it is not, there is a possible risk of the range
tipping over and causing injury if you or a child
stand, sit or lean on an open door.
Please refer to the Anti-Tip device information
in this guide. Failure to take this precaution could
result in tipping of the range and injury.
● Do not l~ve ~@n done or ~a~nd~
where a range is hot or in operation.
They
could be seriously burned.
● For your safety, never use your appliance for
warming or heating the room.
(continued next page)
3
I
———, ._
Page 4
. —. .+-
1
IMPORTM SAFETY INSTRUCTIONS
(continued)
[
ocAmON: I MS OF INTEREST TO
CHILDREN H(XJLD NOT BE STORED IN
CABINETS OVE A IUWGE OR ON THE
BACKSPLA
OF A RANGE-CHILDREN
4
CLIMBING N THE RANGE TO REACH
ITEMS CO D BE SERIOUSLY INJUREI).
● Do not allow myone to climb, stand or hang on
the door or c@ktop. Theycould damage the range
and even tip it (wer,causing severe personal injury.
d
*Let the burne grates and other surfam cool
before tout “
g them or leaving them where
children can @achthem.
r
● Never wear 10 e fitting or hanging garments
while using th appliance.
Be careful when
reaching for ite~ stored in cabinets over the
Cooktop.Fl
%
able material could be ignited if
brought in con ct with flame or hot oven surfaces
and may cause ~everebums.
cDo not use wa~r on grease fires. Never
pick up
a flaming pan. ;Tum the
controls off. Smother a
flaming pan on a surface unit by covering the
pan completely with a well-fitting lid, cookie sheet
or flat tray. Usela multi-purpose dry chemical or
foam-type fwe~xtinguisher.
Flaming
grease ,outsidea pan can be put out by
covering it wiLbaking soda or, if available, by
using a multi-p
se dry chemical or foam-type
fue extinguisher.
Fiame in the ovpn can be smothered completely by
closing the eve+ door and turning the oven off or
by using a mul~-purpose dry chemical or foamtype f~e exting~isher.
.Donotstore lematerialsin theovenor
● DO NOT STO$E OR USE COMBUSTIBLE
MATERIALS,GASOLINE OR OTHER
A
I?LAMMABL VAPORSAND LIQ~S IN
THE VICINI OF T~ OR ANY OTHER
APPLIANCE.
$
● DO not let coo
g g-
or other flammable
Xl@erialsace ulate in or near the range.
● When cooking ~rk, follow the directions exactly
and always COOKthe meat to an internal
temperature of t least 170°F.This assures that, in
lb
the remote poss” ility that trichina maybe present
in the meat, it will be killed md fie meat will be
safe to eat.
4
Surface Cooking
● Alwaysheat fat slowly, and watch as it heats.
● Alwaysuse the LITE position when igniting the
topburners
and make sure the burners have ignited.
● Never leave the surface burners unattended at
highflame settings. Boilovers cause smoking
and greasy spillovers that may catch on fire.
. Adjust the top burner flame size so it does not
extend
beyond the edge of the cookware.
Excessive flame is hazardous.
● Useonly dry pot holdem+noist ordamppot holdem
onhot surfacesmay resultin burnsfinm steam.
● Do not let potholders come near open flames
when lifting cookware.
Do not use a towel or other
bulkyclothin place of a pot holder.
● To
minimim the possibility of burns, ignition
of flammable materials and spillage, turn cookware
handles toward the side or back of the range
without extending over adjacent burners.
● Always turn the surface burnem to off before
removing cookware.
cCarefully watch foods being fried at a high
flame setting.
@
● Never block the vents (air openings) of the
range.They
provide the air inlet and outlet that
arenecessary for the range to operate properly
with correct combustion. Air openings are located
at the rear of the cooktop, at the top and bottom of
the oven door, and at the
bottom of the range under
the storage drawer.
● Donot usea wok if the wok has a roundmetal
ringthat isplaced over the burner grate to
SUppOrtthe wok. Thisring acts as a heat trap,
which may damage the burner grate and burner
head. Also, it may cause the burner to work
improperly. T& may cause a carbon monoxide
level above that allowed by current standards,
resulting in a health hazard.
● F* for &yingshouldbeas dry as possible Frost
on fi-omnf~s or mois~ on fresh foods
can cause
hot
fat to bubble uP ~d over the sides of the pan.
● UW the kast possible amount offat for effective
ShdJOWor d~p.fat fr~g. Filling the pan too fill
of fat can cau5e Spillovem when food is added.
● Usea deepfat thermometerwhenever possible to
Prevent overheating fat beyond the smoking po~t.
● Never try to move a pan of ~ot fat5especially a
deep fat @cr. Wtit until tie fat is COOL
——
Page 5
/-
● When using
T
s cookware, make sure it is
L
designed for to -of-range cooking.
1
● If a combinati n of oils or fats will be used
in frying, stir t gether before heating or as fats
melt slowly.
1
● We proper pa size-Avoid pans that are
unstable or eas”ly tipped. Select cookware having
flat bottoms lar e enough to properly contain food
and avoid boil vers and spillovers and large
enough to covet burner grate. This will both save
cleaning time ~d prevent hazardous accumulations
of food, since ~avy spattering or spillovers left
on range can i$ite. Use pans with handles that
can be easily g$isped and remain cool.
● Keep all plasti+saway from the top burners.
too-dose”tothe Ivent.
I
Ventappearanceand locationvary
I
● Do not leave
3
y items on the cooktop.
Thehot air fro the vent may ignite
flammable
items and will @crease pressure in closed
4P”I
containers, whi+h may cause them to burst.
W ● TOavoid the ~ibility of a bum, always be
J
certain that th controls for all burners are at
the off positio and all grates are cool before
attempting to ~move them.
1
● When flaming oods are under the ho@ turn
the
fan off. Th fan, if operating, may spread
the flames.
●Ifrangeisl
T
near a window,do not hang
long curtains th t could blow over the top burners
and create a fm hazard.
+
●Ifyousmellg ,tumoffthe gastotherangeand
call a qualified
“cetechnician. Never use an open
flame to locate leak
Baking, Broi+g and Roasting
● Do not use the ~ven for a storage area.
Items stored id the oven can ignite.
● Place the oven Shelvesin the desired position
while the oven b cool.
\
● Stand away fr m the range when opening the
door of a hot
o en. Thehot air and steam that
9
1
escapes can cau e bums to hands, face and eyes.
● Keep the oven ree from grease buildup.
● Pulling outtheshelftothe shelf-stopisa
conveniencein lifting heavy foods. It is also a
precaution against burns from touching hot
surfaces of the door or oven walls. The lowest
~ition “R” is not designed to slide.
● Do notheat unopenedfood containers.Pressure
couidbuildup andthecontainercouldburst,
causing an injury.
● Do not use aluminum foil anywhere in the oven
except as described in this guide.
Misuse could
result in a f~e hazard or damage to the range.
● When using cooking or roasting bags in the
oven, follow the manufacturer’s directions.
cUse only glass cookware that is recommended
for use in gas ovens.
● Always remove the broiler pan from range as
soon as you finish broiling. Grease left in the pan
can catch f~e if oven is used without removing
the grease from the broiler pan.
cWhen broiling, if meat is too close to the flame,
the fat may ignite. Trim excess fat to prevent
excessive flare-ups.
cMake sure the broiler pan is in place correctly
to reduce the possibility of grease f~es.
● If you should have a grease fire in the broiler p-
turn offoven control,andkeep the oven door closed
to containfire until it burnsout
Self-Cleaning Oven
● cl= ()~ypm listedinthisUseand CareGuid&
● Do not clean door gaskek The door gasket is
essential for a good seal. Care should be taken not
to rub, damage or move the gasket.
cDo not use oven cleaners. No
commercial oven
cleaner or oven liner protective coating of any kind
should be used in or around any part of the oven.
Residue from oven cleaners will damage the inside
of the oven when the self-clean cycle is used.
. Beforeself-cieaningthe
oven, remove the shelves,
the
broiler pan and grid and other cookware.
cBe sure to wipe up excess spillage before
starting the self-cleaning operation.
● If the self-cleaning mode malfunctions, turn
the oven off and disconnect the power supply.
Have it serviced by a qualified technician.
SAVE THESE
INSTRUCTIONS
5
Page 6
0-
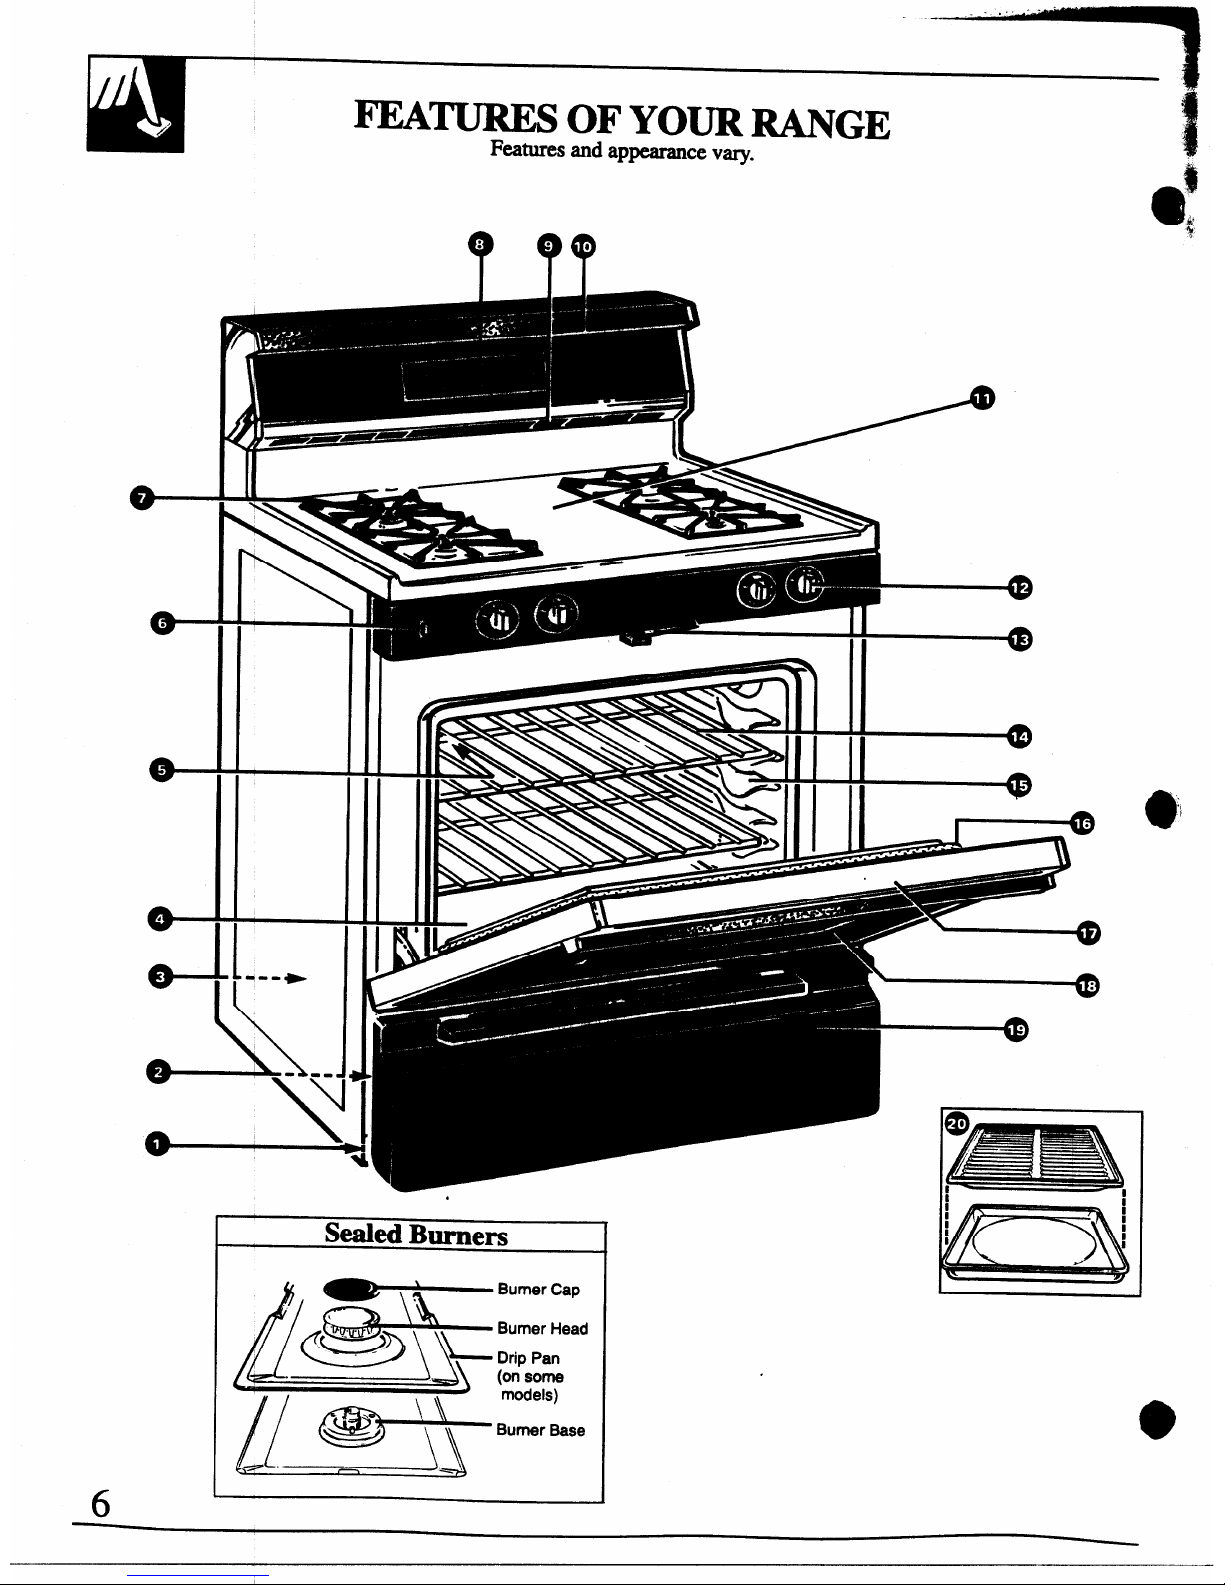
FEA-S OF YOUR RANGE
—
Features and appearance vary.
? ?7
1 --+
.
Sealed Burners
f+.L.
__--_J_~
6
.
Page 7
FeatureIndex (Appearance of features varies.)
1 Air Wake (under storage drawer)
2 Modql and Serial Numbers
(on front frame of range, behind the storage drawer)
3 Anti-rip Device
(Lower right rear comer on range back. See the Installation Instructions.)
4 Oven Bottom
5 Oven Interior Light
See page
4,32
2,3,34,41
30
13,32
6
Oven LightOn/OffSwitch
13
7 Grat~ Drip Pans (on some models) and Surface Burners
4,5, 8–10,
28,29
8 Elect~nic Oven Control Clock and Timer
11, 12
9 Oven Vent
4,5, 14,32
10 Fluo@scent Surface Light
13,29
11 Cookfop
4, 8–10, 30
12 Surf~e Burner Control Knobs
4,9, 10,32
13 Oven Door Latch
15,20,23
(use for Self-Cleaning only) 24-26
14 Oven Shelves
5,14, 15,20,
(easilyremovedor repositionedon shelf supports)
23,24,31
15 Oven Shelf Supports
I
5,14,15,20,
22,23
16 Oven Door Gasket
5,24,31
17 Air
V+ntin Oven Door (top of ovendoor) 4, 13,32
18 Lift-QH Oven Door
31
19 Storage Drawer 4,29
20 Broi16r Pan and Grid
5,20,
(Do n@clean in the self-cleaning oven.)
22-24,31
7
Page 8
*
“i
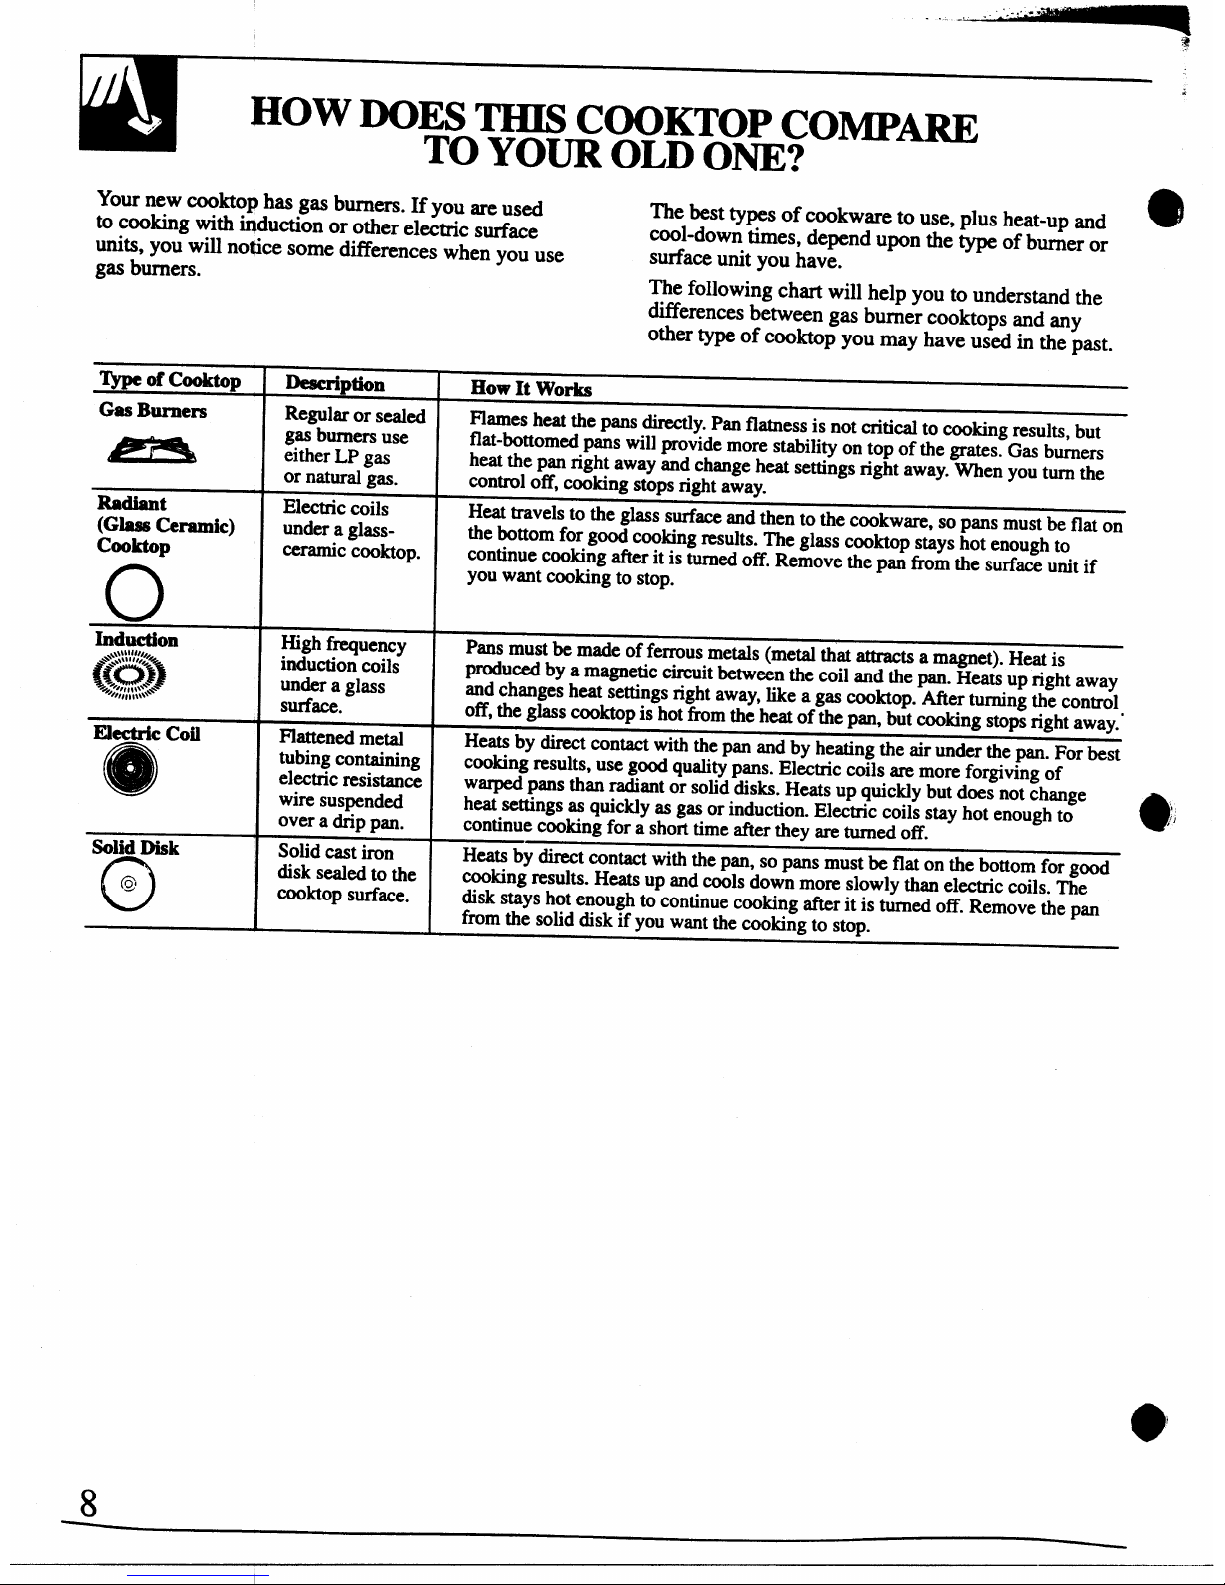
HOVVDOES THIS COOKTOP COM,I?M
TO YOUR OLD ONE?
Your new cooktop has gas burners. If you are used
The best types of cookware to use, plus heat-up and
8J
to cooking with @duction or other electric surface
cool-down times, depend upon the type of burner or
units, you will notice some differences when you use
swface unit you have.
gas burners.
‘&p of Cooktop
!
Description
Gas
Burners
I Regukror seakd
I
gmburners use
either
LP gas
or naturalg~.
Radiant
El-c coils
(Glass
(hlIIliC)
undera glass-
Cookt.op
ceramiccooktop.
o
Indupon
Highfrequency
#
@Qg
.0
inductioncoils
+
\-
//,,,,,,,\s\
undera glass
surface.
Electriccoil
e
Flattenedmetal
tubingcontaining
electricresistance
wiresuspended
overa drip pn.
Solid Disk
o
Solidcast iron
disk sealedto the
~1
cooktOpsurface.
The following chart will help you to understand the
differences between gas burner cooktops and
any
othertypeof cooktopyou may have usedin thepast.
RowIt Works
Flamesheat the pansdirectly.Panflatnessis not titical to cookingresults,but
flat-bottomti pans willprovidemore stabilityon top of the grates.Gasburners
kat the panright away and changeheat settingsright away.Whenyouturnthe
controloff,cookingstopsrightaway.
Heattravelsto the glasssurfaceandthen to the cookware,so pans mustbeflat on
thebottomforgoodcookingresults.The glass cooktopstayshot enoughto
continuecookingafterit is turnedoff.Removethepan tim the surfaceunit if
youwantcookingto stop.
Pansmustbe madeofferrousmetals(metalthatattractsa magnet).Heatis
producedby a magneticcircuitbetweenthe coil and thepan.Heatsupright
away
andchangesheatsettingsrightaway,likea gascooktop.Afterturningthe control
off,theglasscooktopis hotfromtheheatofthepan,but cookingstopsright away.”
Heatsby directcontactwiththepan andby heatingtheair under the pan. Forbest
cookingresults,use goodqualitypans. Electriccoils aremoreforgivingof
warped pansthanradiantor soliddisks.Heatsup quicklybut does not change
heatsettingsas quicklyasgasor induction.Electriccoilsstayhot enoughto
continuecookingfor a shorttimeafterthey areturnedoff.
Heatsby directcontactwiththepan, sopansmust beflat on the bottomfor good
cookingresults.Heatsup andcoolsdownmoreslowlythanelectriccoils.The
diskstayshotenoughto continuecookingafterit is turnedoff.Removethepan
fromthe soliddisk if youwantthecookingto stop.
8
Page 9
SURFACE COOKING
e
Surface Burner Controls
The knobs that turn the surface burners on and off are
locatedon the control panel in frontof the burners.
The two knobson the leftcontrol the left frontand
left rear burners.The two knobs on the rightcontrol
the right frontand right rear burners.
Before Lighting a Burner
● If drip pans are supplied with your range, they
should be Usedat all times.
● Makesure all grates on the range are in place
before using any burner.
cThe smaller burner (right rear position) will give
the best simmer results. It offers precise cooking
performance for delicate foods, such as sauces or
foods which need to cook over low heat for a
long time. It can be turned down to a very low
simmer setting.
● The right front burner is higher powered than the
others and will bring liquids to a boil quicker.
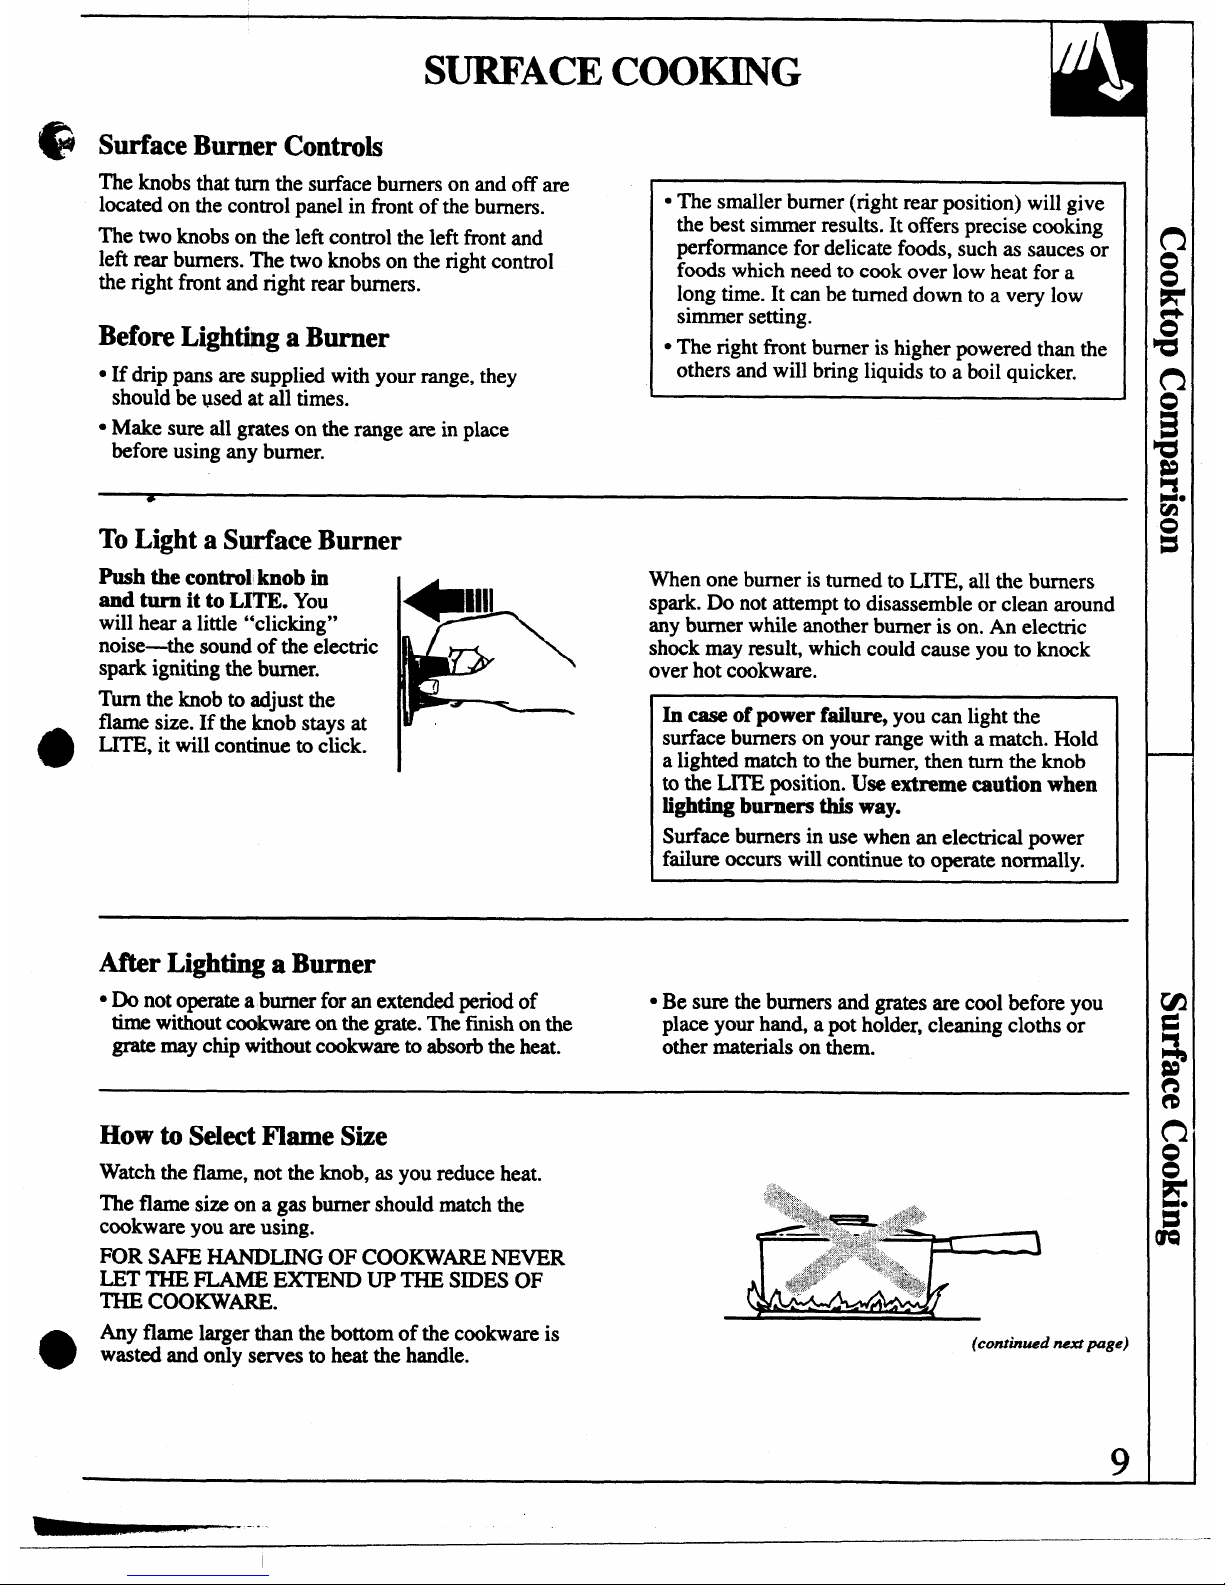
To Light a Surface Burner
Push the control knob in
and turn it to
LITE. You
will hear a little “clicking”
noise—the sound of the electric
spark igniting the burner.
Turn the knob to adjust the
o
flame size. If the b-ob stays at
LITE, it will continue to click.
*A
When one burner is turned to LITE, all the burners
spark. Do not attempt to disassemble or clean around
any burner while another burner is on.
An electric
~\
sh&k may result, which could cause you to knock
over hot cookware.
lP%----
L
In ease of power fdure, you can light the
surface burners on your range with a match. Hold
a lighted match to the burner, then turn the knob
to the LITE position. Use
extreme caution when
lighting burners this way.
Surface
burners in use when an electrical power
failure occurs will continue to operate normally.
After Lighting a Burner
● Donot operate a burner for an extended period of
. Be sure the burners and grates are cool before you
time without codkware on the grate. The finish on the
place your hand, a pot holder, cleaning cloths or
grate may chip without cookware to absorb the heat.
other materials on them.
How to Select Flame Size
Watch the flame, not the knob, as you reduce heat.
The flame size on a gas burner should match the
~.i,.
.pv~>:>
cookware you are using.
-— ~+;,::~,,’,,,,..
FOR SAFE HANDLING OF COOKWARE NEVER
LET THE FLAME EXTEND UP THE SIDES OF
THE COOKWAIW.
@
Any flame larger than the bottom of the cookware is
wasted and only serwx to heat the handle.
(continued next page)
Page 10
SURI?ACE COOKING
(continued)
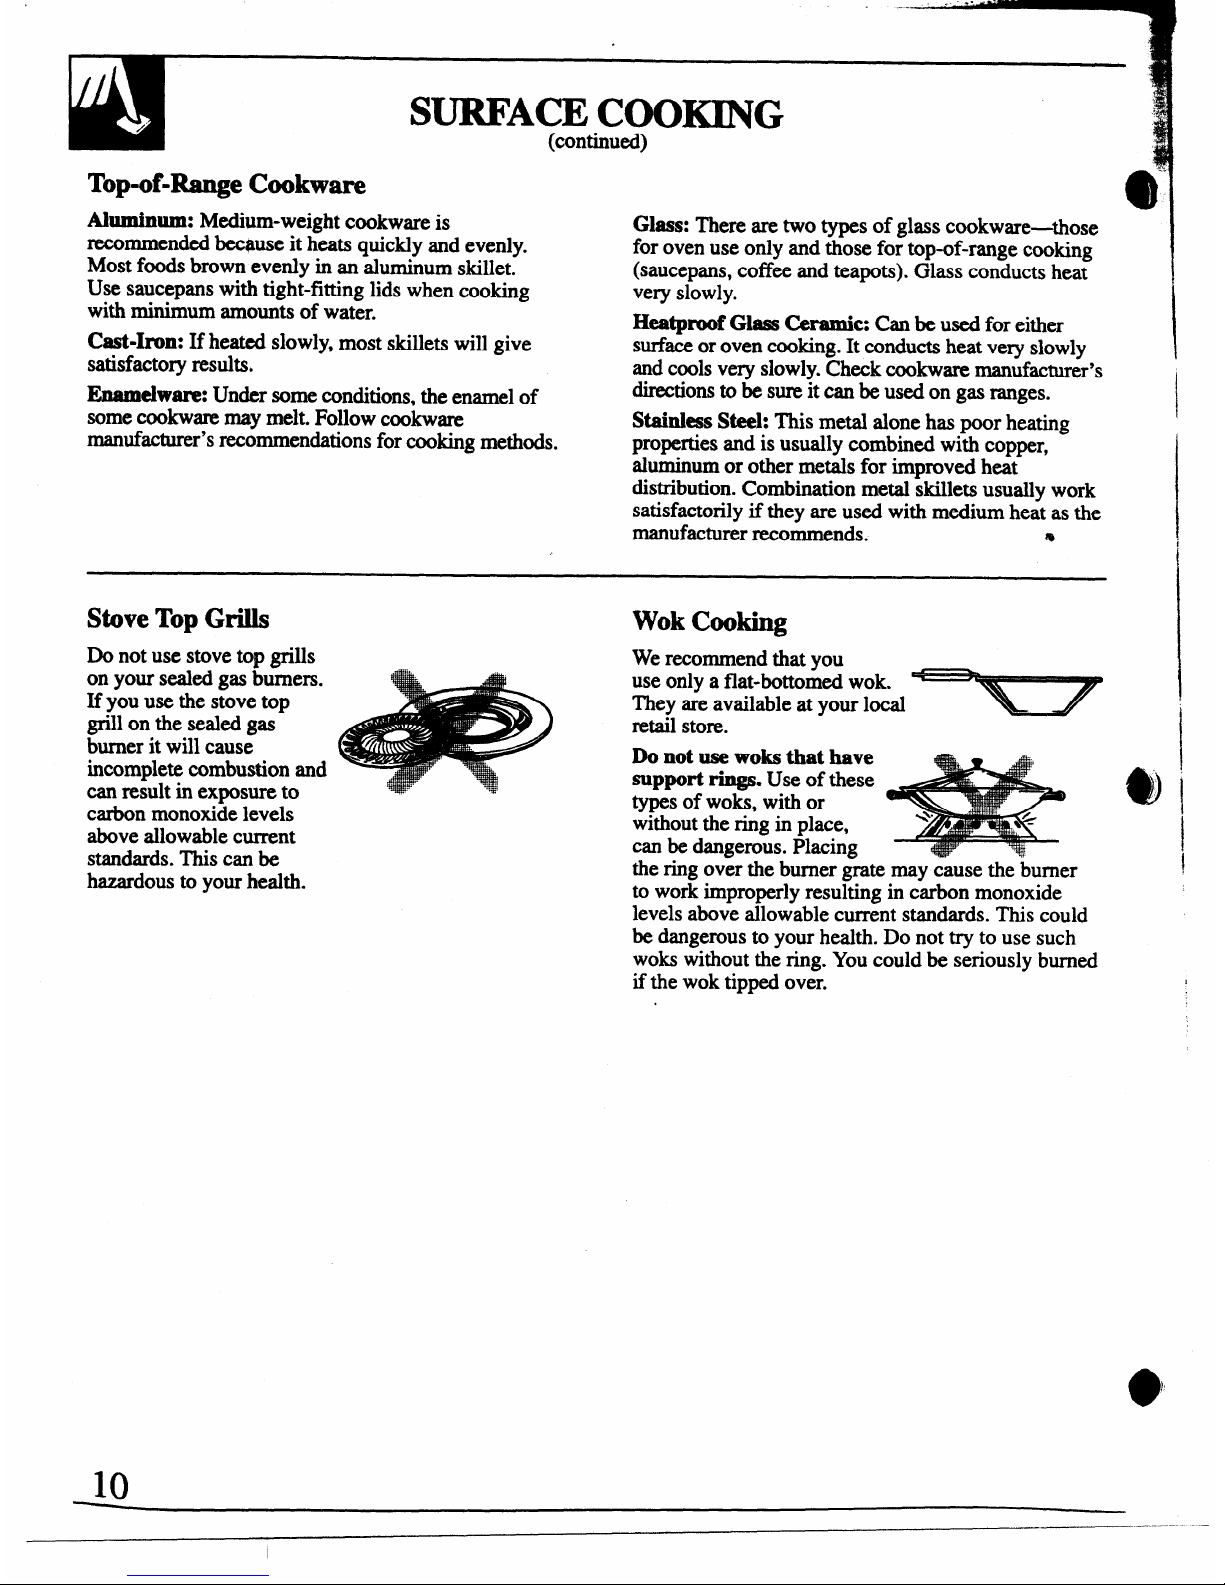
Top-of-Range Cookware
Aluminum: Medium-weight cookware is
recommended &c@useit heats quickly and evenly.
Most foods brown evenly in an aluminum skillet.
Use saucepans with tight-fitting lids when cooking
with
minimum amounts of water.
Cast-Iron: If heated slowly, most skillets will give
satisfactory results,
Enamelware: Undersomeconditions,theenamelof
somecookwaremaymelt.Followcookware
manufacturer’srecommendationsforcookingmethods.
Glass:
There are two types of glass cookware+ose
for oven use only and those for top-of-range cooking
(saucepans, coffee and teapots). Glass conducts heat
very slowly.
Heatproof Glass Ceramic: Can be used for either
surfaceor oven cooking. It conducts heat very slowly
and cools very slowly. Check cookware manufacturer’s
directions to be sure it can be used on gas ranges.
Stainless
Steel: This metal alone has poor heating
properties and is usually combined with copper,
aluminum or other metals for improved heat
distribution. Combination metal skillets usually work
satisfactorily if they are used with medium heat as the
manufacturer recommends.
*
Stove TopGrills
Do not use stove top grills
on your sealed gas burners.
If you use the stove top
grill on the sealed gas
burner it will cause
incomplete combustion and
can result in exposure to
carbon monoxide levels
above allowable current
standards.
T’hiSCan be
hazardous to yOUrhealth.
Wok Cooking
We recommend that you
use only a flat-bottomed wok.
They are available at your local
retail store.
Do not use woks that have
4
k=
A&
support rings.
Use of these
types of woks, with or
without the ring in place,
can be dangerous. Placing
&
the ring over the burner grate may cause the burner
to work improperly resulting in carbon monoxide
levels above allowable current standards. This could
be dangerous to your health. Do not try to use such
woks without the ring. You could be seriously burned
if the wok tipped over.
10
_——
.
Page 11
[
ON
OVEN
IJGHT
OFF
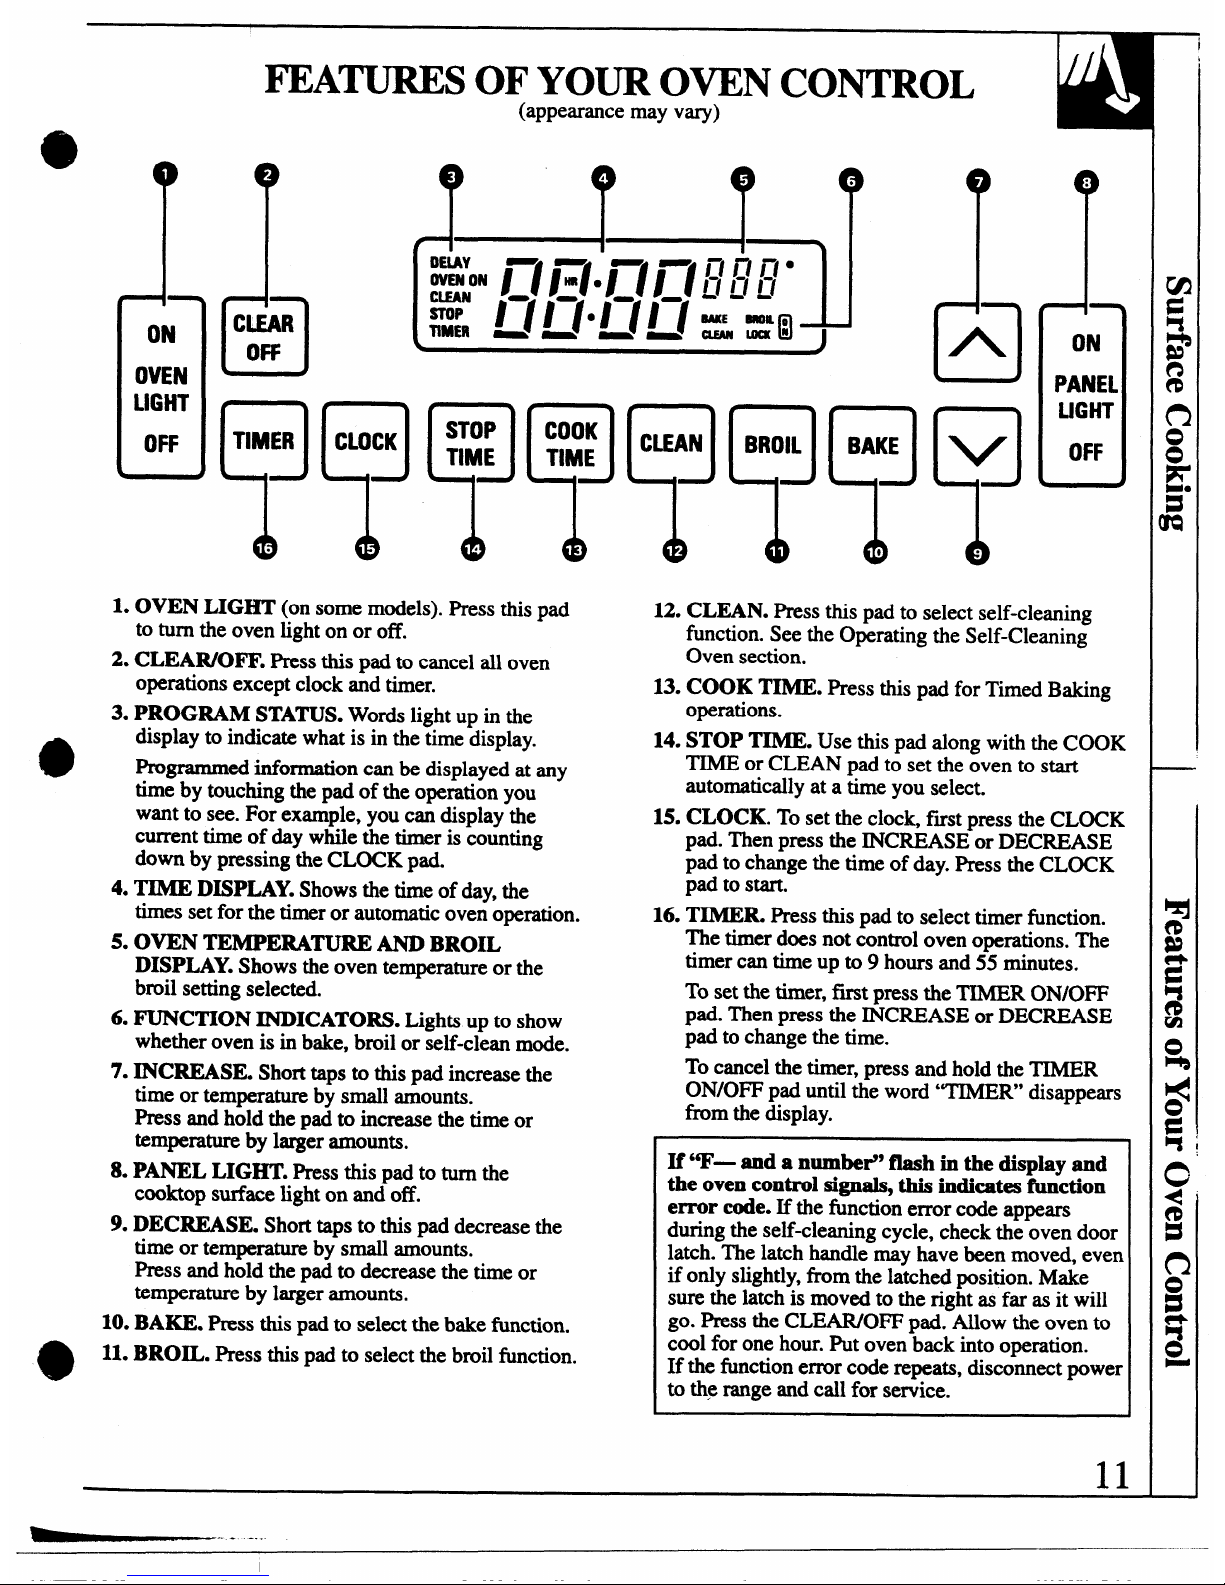
FICA-S OF YOUR OVEN CONTROL
(appearance may vary)
(b(b (b&
1. OVENLIGHT(on some models). Press this pad
to turn the oven light on or off.
2. CLEAR/OFF. Press this pad to cancel all oven
operations except clock and timer.
3. PROGRAM STATUS. Words light up in the
9
display to indicate what is in the time display.
Programmed information can be displayed at any
time by touching the pad of the operation you
want to see. For example, you can display the
current time of day while the timer is counting
down by pressing the CLOCK pad.
4. TIME DISPLAY. Shows the time of day, the
times set for the timer or automatic oven operation.
5. OVEN TEMPERATURE AND BROIL
DISPLAY. Shows the oven temperature or the
broil setting selected.
6. FUNCTION INDICATORS. Lights up to show
whether oven is in bake, broil or self-clean mode.
7. INCREASE. Short taps to this pad increase the
time or temperature by small amounts.
Press and hold the pad to increase the time or
temperature by larger amounts.
8. P-L LIGHT. Press this pad to turn the
cooktop surface light on and off.
9. DECREASE. Short taps to this pad decrease the
time or temperature by small amounts.
Press and hold the pad to decrease the time or
temperature by brger amounts.
10. BAKE. Press this pad to select the bake function.
o
11. BROIL. Press this pad to select the broil fimction.
I-
:
ON
PANEL
LIGHT
OFF
12. CLEAN. Press this pad to select self-cleaning
function. See the Operating the Self-Cleaning
Oven section.
13.
COOK TIME. Press this pad for Timed Baking
operations.
14. STOP TIME. Use this pad along with the COOK
TIME
or CLEAN pad to set the oven to start
automatically at a time you select.
15.
CLOCK. To set the clock frostpress the CLOCK
pad. Then press the INCREASE or DECREASE
pad to change the time of day. Press the CLOCK
pad to start.
16. TIMER. Press this Dadto select timer function.
The timer does not ;ontrol oven operations. The
timer can time up to 9 hours and 55 minutes.
To set the timer, first press the TIMER ON/OFF
pad. Then press the INCREASE or DECREASE
pad to change the time.
To cancel the timer, press and hold the TIMER
ON/OFF pad until the word “TIMER’ disappears
tim the display.
If ‘T— and a numbed’ flash in the display and
the oven control signals, this indicates fhnction
error code. If the
function error code appears
during the self-cleaning cycle, check the oven door
latch. The latch handle may have been moved, even
if only slightly, horn the latched position. Make
sure the latch is moved to the right as far as it will
go. Press the CLEAR/OFF pad. Allow the oven to
cool for one hour. Put oven back into operation.
If the function error code repeats, disconnect power
to the range and call for service.
11
I
—
Page 12
OVEN CONTROL, CLOCK ANDTIMER
Clock
The clock must be set for the automatic oven timing
functions to work properly.The time of day cannot be
changed during a T- Baking or Self-Cleaning cycle.
ToSet the Clock
o
1. Press the CLOCK pad.
CLOCK
2. Press the INCREASE or DECREASE pad to set the
time of day.
3. Press the CLOCK pad to start.
I%ner
ToSet the Timer
The timer is a minute time~
o
1. Press the
it does not control oven operations.
TIMER pad.
The maximum setting on the timer
TIMER
is
9 hours and 55 minutes.
c1
2. Press the
A
NCREASE or
DECREASE pad to
set the amount of
time on the timer.
o
v
The timer will start automatically
within a few seconds of releasing
the pad. The timer, as you are
setting it, will display seconds until
1minute is reached. Then it will
display minutes and seconds until
60 minutes is reached.
After 60 minutes, it will display
hours (“HR” now appears in
display) and minutes until the
maximum time of 9 hours and
55 minutes is reached.
ToReset the Timer
To Cancel the Timer
If “TIMER” is displayed, press the INCREASE or
Press and hold the TIMER pad until the word
DECREASE pad until desired time is reached.
‘TIMER’ disappears born the display.
If “TIMER’ is not displayed, press the TIMER pad
first, then follow the instructions above to set the timer.
. .
End of Cycle Tone
Display Messages
The end of cycle tone is a series of
M~~d~ti~ap~ in the *play,
three beeps followed by one beep
the dmr is open. Close the door. If
every six seconds. If you would
“LOCK’ appws in the
display,
liketo remove the signalthat beeps
the oven dooris in the locked
everysix seconds,press andhold
position.BAKE,BROILand
theCLEAR/OFFpadfor 10seconds.
COOKTIMEcannot be set if the
Toreturnthe signalthat beeps
dooris in the lockedposition.
everysix seconds,press andhold
theCLEAR/OJWpadfor 10seconds.
Power Outwe
u
After a power outage, when power
is restored, the display will flash
and time shown will no longer be
correct-for example, after a 5minute power intemuption the
clock will be 5 minutes slow.
All other functions that were in
operation when the power went out
will have to be programmed again.
*
12
Page 13
USING YOUR OVEN
C
●:4 Before Using Your Oven
Be sure you understand how to set the controls properly. Practice removing
and replacing the shelves while the oven is cool. Read the information and
tips on the following pages. Keep this guide handy where you can refer to
it, especially during the first weeks of using your new range.
Electric Ignition
Power Outage
CAUTION: Do not make any attempt to operate the electric ignition
oven during an electrical power failure.
The oven or broiler cannot be lit during a power failure. Gas will not flow
unless the glow bar is hot.
If the oven is in use when a power failure occurs, the oven burner shuts
off and cannot be re-lit until power is restored. This is because the flow
of gas is automatically stopped and will not resume when power is
restored until the glow bar has reached operating temperature.
Oven Moisture
*
Asyour oven heats up, the temperaturechange of the air inthe ovenmay
cause waterdropletsto form on the door glass.Thesedroplets are harmless
and will evaporate as the oven continuesto heatup.
Fluorescent Night Light (on some models)
Oven Light
Usethe switch on the upper control panel to turn
The oven light comes on automatically when the door
the light on and off.
is opened. Use the pad on the control panel to turn
the light on and off when the door is closed.
Automatic Oven Shut Off
ASa safety feature, thisoven will automatically shut itself off if it has been
left on for more than 12 hours.
(continued next page)
13
I
——.—....
Page 14

.
USING YOUR OVEN
$
(continued)
$
Oven Vents
The oven is vented through duct openings at the rear
of the cooktop. See the Features section. Do not block
these openings when cooking in the oven—it is
important that the flow of hot air from the oven and
fksh air to the oven burners be uninterrupted.
● The vent openings and
nearby surfaces may
become ho~ Do not
touch them.
● Do not leave plastic
Vent appearance and location vary
items on the cookto~
they may melt if leR too
close to the venk
● Handles of pots and pans on the cooktop may
become hot if left too close to the ven~
● Metal items will beeome very hot if they are left
on the cooktop and could cause burns.
● Do not leave any items on the cooktop. The hot air
from the vent may ignite flammable items and will
increase pressure in closed containers, which may
cause them to burst.
Oven Shelves
The shelves are designed with stop-locks so when
placed correctly on the shelf supper@ they will
stop before coming completely out of the oven and
will not tiIt when you are removing f- from them
or placing food on them.
When placing cookware on a shelf, pull the shelf out
to the bump on the shelf support. Place the cookware
on the shelf, then slide the shelf back into the oven.
This will eliminate reaching into the hot oven.
To remove a shelf fkom the oven, pull it toward you,
tilt the front end upward and pull the shelf out.
To replacq place the shelf on the shelf support with
the stop-locks (curved extension of the shelf) facing
up and toward the rear of the oven. Tilt up the front
and push the shelf toward the back of the oven until it
goes past the bump on the shelf support. Then lower
the front of the shelf and push it all the way back.
Bump
,
Shelf Positions
The oven has five shelf supports for baking,
roasting and broiling identified in this illustration
–T -
\\
as A (6&tom), B, C; D and E (top). It also has a
J
1 i
b
.*
special low shelf position (R) for roasting extra
large items, such as a large turkey-the shelf is not
designed to slide out at this position. Shelf positions
~
for cooking are suggested in the Baking, Roasting
and Broiling sections.
*’
q:
14
_.———..-—
Page 15

BAKING
Do not leek the oven door with the latch during
If you think an adjustment is necessary, see the Adjust
baking. The latch is used for self-cl-g only.
the Oven Thermostat section. It gives easy Do It
Youroven temperatureis controlledusingthe latest
Yowxe~instructionson howto adjust the thermostat.
technologyin ovencontrolsystems.Itis recommended
that you operateyour newoven fora numberof
weeksto becomefamiliar withits performance.
How to Set Your Range for B-g
Toavoid possible burns,
place shelves in the correct
3. Press the CLWUUOFF pad when baking is finished
position before you turn the oven on.
and then remove the food from the oven.
1. Press the BAKE pad.
2. Press the INCREASE or DECREASE pad until the
To change the oven temperati during BAKE
desired temperature is displayed.
cycle, press the BAKE pad and then the INCREASE
The oven will start automatically.The word “ON” and
or DECREASE pad to get the new tempem~re.
“100°” will be displayed. As the oven heats up, the
display will show the changing temperature. When the
oven reaches the temperatm you set a tone will sound.
Oven Shelves
9
Arrange the oven
shelf or shelves in
the desired
locations while
the oven is cool.
The correct shelf
position depends
on the kind of
fti and the
browning desired
As a general rule,
place most fti in the middle of the oven, on
either shelf position B or C. See the chart for
suggested shelf positions.
Q
o
0
Q
.
Q
.
I‘lJpe of Food
I
Shelf Position
I
Angel food cake
A
1
Biscuits or muffhs
Bor C
1
Cookies or cupcakes
Bor C
Brownies
Bor C
Layer cakes
Bor C
Bundt or pound cakes
Aor B
Pies or pie shells
Bor C
—
Frozen pies
A (on cookie sheet)
Casseroles
Bor C
Roasting
Bor R
Preheating
Preheat the oven if the recipe calls for it. Preheat
means bringing the oven up to the specified
temperature before putting the food in the oven.
TOpreheat, set the oven at the correct tempera~—
e
selecting a higher temperature does not shorten
preheat time.
Reheating is necessary for good results when baking
cakes, cookies, pastry and breads. For most casseroles
and roasts, preheating is not necessary. For ovens
without a preheat indicator light or tone, preheat 10
minutes. After the oven is preheated place the food
in the oven as quickly as possible to prevent heat ,
—
from escaping.
(continued next page)
15
---
Page 16

1
‘w!
.
‘.
BAKING
~.
.“’
;
(continued)
‘+?
,.
$,,
Pan Placement
61
For even cooking and proper browning, there must be
Pans should not touch each other or the walls of the -
enough room for air circulation in the oven. Baking
oven. Allow 1-to 1%-inch space between pans as
I
results will be better if baking pans are centered as
well as from the back of the oven, the door and the
much as possible rather than being placed to the front
sides. If you need to use two shelves, stagger the pans
or to the back of the oven.
so one is not directly above the other.
Baking Guides
When using prepared baking mixes, follow package recipe or instructions
for best baking results.
cookies
When baking cookies,
flat cookie sheets (without
sides) produce betterlooking cookies. Cookies
baked in ajelly roll pan
(short sides all around)
may have darker edges
and pale or light browning
may occur.
Aluminum Foil
Never entirely cover a
shelf with aluminum foil.
This
will disturb the heat
circulation and result in
poor baking. A smaller
sheet of foil may be used to
catch a spillover by placing
it on a lower shelf several
inches below the food.
Cookies can be baked on several shelves at the same
Do not put aluminum foil on the oven bottom.
time but browning may be uneven because of reduced
air circulation.
Do not usea cookie sheet so large that it touches
the walls or the door of the oven.
Pies
For best results, bake pies
in dark, rough or dull pans
to produce a browner,
crisper crust. Stagger the
pies for most even
browning. Frozen pies in
foil pansshould b- placed I~
~1
on & aluminum cookie
~
/y
sheet for baking since the shiny foil pan reflects
heat away from the pie crust; the cookie sheet helps
retain it.
Cakes
For best browning when
f 1 I \
baking several 8“-or
9“
cakes,
stagger them so one
pan is not directly above
another. Warped or bent
pans will cause uneven
baking results and poorly
shap~ products. A-cake
y)
baked in a pan larger than the recipe recommends will
usually be crisper, thinner and drier than it should be.
If baked in a pan smaller than recommended, it may
be undercooked and batter may ovefflow.
Baking Pans
Use the proper baking pan. The type of ftish on the
● Shiny, bright and smooth pans reflect heat, resulting
pan determines the amount of browning that will occur.
in a lighter, more delicate browning. Cakes and
s Dark, rough or dull pans absorb heat resulting in a
cookies require this type of pan.
browner, crisper crust. Use this type for pies.
● Glass baking dishes also absorb heat. When baking
in glass baking dishes, the temperature may need to
be reduced
by 25”F.
16
Page 17

.
49
Don’t Peek
Set the timer for the estimated cooking time and do
DO NOT open the door to check until the minimum
not open the door to look at your food. Most recipes
time. Opening the oven door frequently during
provide minimum and maximum baking times such
cooking allows heat to escape and makes baking
as “bake 30-40 rninu~s.”
times longer. Your baking results may also be tiected.
How to Tme Bake
TIMED BAKING
Do not lock the oven door with the latch
NOTE:
Before beginning make sure the clock shows
during Tiied Baking. The latch is used for
the correct time of day.
Self-ckxmillg only.
To set the clock, fmt press the CLOCK pad. Press the
The oven control allows you to turn the oven on or
INCREASE or DECREASE pad until the correct time
off automatically at specific times that you set.
of day is displayed.
How to Set Immediate Start and Automatic Stop
To avoid possible burns, place the shelves in the The oven will start automatically. The word “ON’
correct position before you turn the oven on.
and”1 00°” will be displayed. The Cook Time will
The oven will turn on immediately and cook for a
begin to count down. As the oven heats up, the
*
selected length of time. At the end of Cook Time,
display will show the-changing temperature.
the oven will turn off automatically.
When the oven reaches the temperature you set,
R
1. Press the COOK TIME pad.
a tone will sound. The oven will continue to cook
for the programmed amount of time, then shut off
. .-
[ ‘MEI
automatically.
~ 5. Press the CLEAIUOFF mid to clear
w #
2. Press the INCREASE Dad until the desired lenti
I
CLEAR
of baking time appea&”in the display. “
L
OFF
3. Press the BAKE pad.
4. Press the INCREASE or DECREASE mtd until the
the display if necessary~Remove the
food from the oven. Remember, even
though the oven shuts off automatically,
foods continue cooking after the
desired temperature is displayed. An a&ntion tone
controls are off.
NOTE: Foods that spoil easily, such as milk, eggs, f@
will occur if step 3 is not done.
stuffings, poultry and po~ should not be allowed to sit
for more than one hour before or after cooking. Room
temperature promotes the growth of harmful bacteria.
Be sure that the oven light is off because heat fi=omthe
bulb will speed harmful bacteria growth.
(continued next page)
17
-
——.. ——
Page 18

“’--7
:
TIMED BAKING
(continued)
How to Set Delay Start and Automatic Stop
Quick Reminder:
1. Press the COOK TIME
pad.
2. Press the INCREASE or DECREASE pad to
set the Cooking Time.
30Press the STOP TIME pad.
4. Press the INCREASE or DECREASE pad to
set the length uf Cooking Time.
5. Press the BAKE pad.
6. Press the INCREASE or DECREASE pad
until the desired temperature appears
in the display.
To avoid possible bums, place the shelves in the
correct position befbre you turn the oven on.
You can set the oven control to delay-start the oven,
cook for a specitlc length of time ar-dthen turn off
automatically.
For example: Let’ssayit’s2:00 and dinner time is
shortly after 7:00. The recipe suggests 3 hours baking
time at 325”F. Here’s how:
c1
1. Press the COOK TIME pad.
COOK
TIME
2. For 3 hours of cooking time, press the INCREASE
pad until “3:00” appears in the display.
c1
3. Press the STOP TIME pad.
STOP
TIME
“5:00” appears in the display and “STOP TIME”
flashes. The control automatically sets the Stop
Time by adding the Cook Time to the time of day.
In this example, the time of day is 2:00 and the
Cook Time is 3 hours. Adding 3 hours to the time
of day equals 5:00.
4. Change the Stop Time from 5:00 to 7:00 by
pressing the INCREASE pad until “7:00” appears
in the display.
5. Press the BAKE pad.
I‘AKEI
6. Press the INCREASE or DECREASE pad until
“325°” is displayed.
At 4:00, the oven will turn on automatically. The
word “ON” and “100°” will be displayed. The Cook
Time will begin to count down. As the oven heats
up, the display will show the changing temperature.
The oven will continue to cook for the programmed
3 hours and shutoff automatically at 7:00.
7. Press the CLEAR/OFF pad to clear the display
if necessary. Remove the food fkom the oven.
Remember, even though the oven shuts off
automatically, foods continue cooking after the
controls are off.
NOTE:
● The low temperature zone of this range (between
150”F.and 200”F.) is available to keep hot cooked
foods warm. Food kept in the oven longer than two
hours at these low temperatures may spoil.
s Foods that spoil easily, such as milk, eggs, fish,
stuffhgs, poultry and pork, should not be allowed to
sit for more than one hour before or after cooking.
Room temperature promotes the growth of harmful
bacteria. Be sure the oven light is off because heat
from the bulb will speed harmfhl bacteria growth.
*
./
18
.—
—.———
—
Page 19

ADJUST THE OVEN THERMOSTAT—
DO IT YOURSELF!
u
“r
You may find tliat your new oven cooks differently
than the one it teplaced.
We recommend that you
use your new oven for a few weeks to become more
familiar with it, following the times given in your
recipes as a guide.
If you think your new oven is too hot or too cold,
you can adjust the thermostat yourself. If you think
it is too hot, adjust the thermostat to make it cooler. If
YOU think it is too cool, adjust the thermostat to make
it hotter.
We do not recommend the use of inexpensive
thermometer,
such as those found in grocery stores,
to check the tempeti setting of your new oven.
These thermometers may vary 20-40 degrees.
To Adjust the Thermos&t:
n
1. Press the
BAKE pad.
BAKE
2. Select an oven tempera~re between 500”F.
and 550”F.
3. Immediately, before the BAKE indicator stops
flashing, press and hold the BAKE pad for about
4 seconds. The display will change to the oven
adjustment display.
4. The oven temperature can be adjusted up to
(+) 35*F. hotter or (-) 35”F. cooler. Use the
INCREASE or DECREASE pads to select the
desired change in the display.
o
5. After you have made the adjustment,
CLEAR
press the CLEAR/OFF pad to go back
OFF
to the time of day display. Use your
oven as you would normally.
NOTE: This adjustment will not tiect the broiling
or self-cleaning temperatures. It will be retained in
memory after a power failure.
.
I
.
Page 20

. .
..
Do not lock the oven door with the door latch
during roasthg. This is used for self-cleaning only.
q
Roasting is cooking by dry heat. Tender meat or
poultry can be roasted uncovered in your oven.
Roasting temperatures, which should be low and
steady, keep spattering to a minimum.
The oven has a s~ial
low shelf (R.)position
7#db”= ~1
just abovethe oven
-~G
bottom Use it when ‘!
extracookingspace is
r
needed,for example,
whenroastinga large
=
turkey.The shelfis not
designed to slide out at this position.
Roasting is really a baking procedure used for meats.
Therefore, oven controls are set for Baking or Timed
Baking. (You may hear a slight clicking sound,
indicating the oven is working properly.) Timed
Baking will turn the oven on and off automatically.
Most meats continue to cook slightly while standing,
after being removed from the oven. The standing time
recommended for roasts is 10 to 20 minutes. This
allows roasts to firm up and makes them easier to
carve. The internal temperature will rise about 5° to
10°F.;to compensate for the temperature rise, if
desired, remove the roast from oven sooner (at 5° to
10”F.less than the temperature in the Roasting Guide).
Remember that food will continue to cook in the hot
oven and therefore should be removed when the
desired internal temperature has been reached.
1. Position the oven
at shelf(B) position
II
~w
for small size roast
-’—
(3 to 5 lbs.) and at . .z::’.f~~~
(R) position for $-’”.~$jj
Q
larger roasts. _
2. Check the weight of the meat. Placethe meat fat-s~deup, or poul~ breast-side-up,on roastinggrid in a
shallowpan. The melting f~ will baste themeat.
Selecta pan as close to the sizeof the meat as possible.
(Thebroilerpan with gridis a good pan for this.)
n
3. Press the BAKE pad.
BAKE
4. Press the INCREASE or DECREASE pad until the
desired temperature is displayed.
The oven will start automatically. The word “ON”
and”1 00°” will be displayed. As the oven heats up,
the display will show the changing temperature.
When the oven reaches the temperature you se~ a
tone will sound.
n
5. Press the CLEAR/OFF pad when
CLEAR
roasting is finished and then remove
OFF
the food from the oven.
To change the oven temperature during the
roasting cycle,
press the BAKE pad and then
the INCREASE or DECREASE pad to get the new
temperature.
Use of Aluminum Foti
You can use aluminum foil to line the broiler pan.
This makes clean-up easier when using the pan for
marinating, cooking with fkuits, cooking heavily
cured meats or basting food during cooking. Press
the foil tightly around the inside of the pan.
Dual Shelf Cooking
This allows more than one food to be cooked at the same time. For example: while roasting a
20 lb. turkey on shelf (R) a second shelf maybe added on position D so that scalloped potatoes
can be cooked at the same time. Calculate the total cooking time to enable both dishes to
complete cooking at the same time. Allow 15–20 minutes of additional cooking time.
20
..-___
_-
——..
Page 21

‘@ @leStiOIISand Answers
Q.Is
itnecessary to check for doneness with a
Q. Do I need to preheat my oven each time I cook
meat thermometer?
a roast or
poultry?
A. Checking the finished internal temperature at the
A. It is not necessary to preheat your oven.
completion of cooking time is recommended.
Temperatures are shown in Roasting Guide. For
Q. When buying a roas~ are there any special tips
that
would help me cook it more evenly?
roasts over 8 lbs., check with thermometer at halfhour intervals after half the time has passed.
A. Yes. Buy a roast as even in thickness as possible,
Q. my is my roast crumbling when I try to
or buy rolled roasts.
carve it?
Q. Can I seal the sides of my foil ‘%ent39when
A. Roasts are easier to slice if allowed to cool 10 to
roasting a turkey?
20 minutes after removing from oven. Be sure to
A. Sealing the foil will steam the meat. Leaving
cut across the grain of the meat.
it unsealed allows the air to circulate and brown
the meat.
ROASTING GUIDE
Frozen Roasts
Frozen roasts of beef, pork lamb, etc., can be started
Make sure poultry is thawed before roasting.
without thawing, but allow 15 to 25 minutes per pound
Unthawed poultry often does not cmk evenly.
additional time (15 minutes per pound for roasts under
Some commercial fimen poultry can be cooked
e
5 pounds, more time for larger roasts.)
successfully without thawing. Follow directions
given on package label.
Meat
Tender cuts; rib, high quality sirloin
tip,rump ortop round*
Lamb leg or bone-in shoulde@
Vealshoulder, leg or loin*
Pork loin, rib
or shoulded
Ham,precooked
Poultry
Chicken or Duck
Chicken pieces
Thrlcey
Oven
Temperature
325°
325°
325°
325°
325°
325°
350°
325°
Doneness
Rare:
Medium
WellDone:
Rare:
Medium:
WellDone:
Well
Done
WellDone:
ToWarm
WellDone:
WellDone:
WellDone:
Approximate RoastingTiie
in Minutesper Pound
3t051bs9
6t081bs.
24-35
18-25
35-39 25-31
39-45
31-33
21-25
20-23
25-30
24-28
30-35 28-33
35-45
30-40
35-45 30-40
18-23
IlliIIUtCSperpound (IUlyweight)
3t051b& Over 5 lbs.
35-40
30-35
35-40
10to
15 Ibs.
Over 15 lb
16-22 12-19
Internal
Temperature “F.
140°-1500~
150°-1600
170°-1850
140°-1500~
150°-1600
1700-185°
170°-1800
1700-180°
115°-1250
185°-1900
185°-1900
In thigh:
185°-1900
*For boneless rolled roasts over 6inches thick, add 5 to 10minutes per pound to times given above.
lThe U.S. DepartmentofAgriculturesays“Rarebeef is popular,but you shouldknowthat cookingit to only 140”F.means
somefoodpoisoningorganismsmay survive.”(Source:
S&&XBxK Your~tchen Guide.USDA Rev.
June 1985.)
~- --
__——— - -
—
Page 22

.-
‘%2”
# .
...
BROILING
Do not kxk the oven door with the latch during
The oven door must be closed during broiling.
broiling. The latch is used for self-cleaning only.
Turnthe food
only once during broiling. Time the
@
Broiling is cooking food by direct heat ikom above the
foods for the first side according to the Broiling
food. Most fish and tender cuts of meat can be
Guide. Turn the food, then use the times given for the
broiled. Follow these directions to keep spattering and
second side as a guide to the preferred doneness.
smoking to a minimum.
1. If the meat has fat or gristle around the edge, cut
vertical slashes through both about 2“ apart. If
desired, the fat may be trimmed, leaving layer
about 1/8”thick.
L Place the meat on the broiler grid on the broiler pan
which comes with the range. Always use the grid
so the fat drips into the broiler pan; otherwise the
juices may become hot enough to catch on free.
3. Position the shelf on the recommended shelf
position as suggested in the Broiling Guide.
4. Close the oven door.
n
5. Press the BROIL pad.
BROIL
\ J
6. Press the
INCREASE pad once for LO Broil
(450”F) or press the INCREASE pad twice for HI
Broil (550”F).
To change from HI Broil to LO Broil, press the
BROIL pad and then the DECREASE pad once.
7. When broiling is completed, press the CLEAWOFF
pad. Serve the food immediately, and leave the
pan outside the oven to cool during the meal for
easiest cleaning.
.
Use of Aluminum Foil
You can use aluminum foil to line your broiler pan
and broiler grid. However, you must mold the foil
tightly to the grid and cut slits in it just like the grid.
Wkhout the slits, the foil will prevent fat and meat
juices from draining to the broiler pan. The juices
could become hot enough to catch on fire. If you do
not cut the slits, you are frying, not broiling.
Questions and Answers
Q. When broiling, is it necessary to always use a
A.
Q.
grid in the pan?
Yes.
Using the grid suspends the meat over the
pan. As the meat cooks, the juices fall into the
pan,
thus keeping meat drier. Juices are protected by the
grid and stay cooler, thus preventing excessive
spatter and smoking.
Should I salt the meat before broiling?
A. No.
Salt draws out the juices and allows them to
evaporate. Always salt after cooking. Turn the
meat with tongs; piercing the meat with a fork also
allows the juices to escape. When broiling poultry
or fish, brush each side often with butter.
22
Q. Why are my meats not turning out as brown as
they should?
A.
Check to see if you are using the recommended
shelf position. Broil for the longest period of time
indicated in the Broiling Guide. Turn the food only
once during broiling.
-—.—.—.—
—
Page 23

BROILING GUIDE
I
(4
,
.“:
.
The oven door must be closed during broiling.
s If desired, marinate meats or chicken before broiling.
Or brush with barbecue sauce last 5 to 10 minutes only.
● Always use the broiler pan and grid that comes with
your range. It is designed to minimize smoking and
spattering by trapping juices in the shielded lower
part of the pan.
● When arranging food on the pan, do not let fatty
edges hang over the sides because dripping fat could
soil the oven.
● For steaks and chops, slash the fat evenly around
the outside edges of the meat. To slash, cut crosswise
through the outer fat surface just to the edge of the
meat. Use tongs to turn the meat over to prevent
piercing the meat and losing the juices.
● Use LO Broil to cook fds such as poultry or thick
● The broiler compartment does not need to be
preheated. However, for very thin foods, or to
increase browning, preheat if desired.
● Frozen steaks can be broiled by positioning the shelf
at next lowest shelf position and increasing cooking
time given in this guide 1% times Wr side.
pork chops thoroughly without over browning them.
—
.
I
Quantity and/or
Food
ThiClmess
IP2%.12:=I%%:
Comments
Bacon
I
1/2 lb. (about 8
thin slices)
IC 1413
Arrange in single layer.
Ground
Beef
I
1lb. (4 patties)
1/2 to 3/4 inch thick
lDll&’ll 7
Space evenly. Up to 8 patties take
about same time.
Beef steaks
Medium
Well Done
1 inch thick
(1 to 1%Ibs.)
c
c
c
9
12
13
7
5-6
8-9
Steaks less than 1 inch thick will cook
through before browning.
,.
4$
Medium
WellDone
1 inch tick
(2 to 2XIbs.)
c
c
c
10
12-15
25
6-7
10-12
16-18
Slash fat. -
Chicken 1 whole
(2 to 2Xlbs.),
split lengthwise
Bone-in
4 bone in brmsts
B
B
3&35
I
15–20
Brush each side with melted butter. Broil skinside-down first.
25-30
10-15
Bakery Products
Bread (Toast) or
Toaster Pastries
English MuffIns
2 to 4 slices
1pkg. (2)
2, split
D
D
2-3
3-5
m-l Space evenly. Place English muffins cut-
side-up and brush with butter if desired.
Lobster Tails
2t04
(6 to 8 oz. each)
c 13-16 Do not
turn over.
Cut through back of shell and spread open.
Brush with melted butter before broiling and
after half of time.
Fish
l-lb. fillets
1/4 to 1/2 inch thick
D
6 6
Handleand turn verycarefilly. Brush with lemon
butter before broiling and during broiling if
desired. Preheat broiler to increase browning.
Ham
slices
I
1inch thick
Precooked 1/2 inch thick
1:1:1:
Pork Chops
Well Done
2 (1/2 inch thick)
D
2(1 inch thick),
D
about 1 lb.
10
15
8
8
Slash fat.
Lamb Chops
Medium
e
WellDone
Medium
Well Done
2(1 inch thick),
D
about 10 to 12 oz.
D
2 (1Z inch thick),
D
about 1 lb.
D
8
10
10
17
4-7
10
12-14
Slash fat.
Wieners
l-lb. pkg. (10)
D 6 1-2
If desired, split sausages in half
lengthwise; cut into 5-to 6-inch pieces.
72
similar precooked
sausages, bratwura
Ud
~.
——.——..—
—
Page 24

- *
,,
4
J ;
OPERATING THE SELF-CLE-G OVEN
,“
,r,
Normal Cleaning Time: 4 hours
,.i“4
s
;
“,
Before a Clean Cycle
Quick Reminder:
1.
Prepare the oven for cleaning.
2. Close and latch the oven door.
3. Press the CLEAN pad.
4. Press the INCREASE pad.
If you wish to change the preset Clean Time of
4 hours, press the INCREASE or DECREASE
pad until the desired Stop Time appears
in the display.
We recommend venting with an open window
or using a ventilation fan or hood during the frst
self-clean cycle.
1. Remove the broiler pan, broiler grid, all cookware
and any aluminum foil from the&en-they cannot
withstand the high cleaning temperatures.
NOTE: Take the shelves out of the oven before
you begin the self-clean cycle.
2. Wipe up heavy soil on the oven bottom. If you
use soap, rinse thoroughly before self-cleaning
to prevent staining.
Wvwl I
light
k @en
J
front
.
frame
3. Clean spatters or spills on the oven front fiarne, and
the oven door outside the gasket with a dampened
cloth. The oven front Ikameand the oven door outside
the gasket do not get cleaned by the self-clean cycle.
On these areas use detergent and hot water or a soapfilled steel wool pad. Rinse well with a vinegar and
water solution. This will help prevent a brown residue
from forming when the oven is heated. Buff these
areas with a dry cloth. Do not clean the gasket
Clean the top, sides and outside front of the oven
door with soap and water. Do not use abrasives or
oven cleaners.
Make sure the oven light bulb cover is in place.
I& not rub or clean the door gasket—
the fibe@ass material of the gasket has an
extremely low resistance to abrasion. An intact
and well-fitting oven door gasket is essential for
energy-efficient oven operation and good baking
results. If you notice the gasket becoming worn,
frayed or damaged in any way or if it has become
displaced on the door, you should have it replaced.
4. Close the door and make sure the oven light is off. If
the oven light is not turned off, the life of the bulb
will be shortened or it may burn out immediately.
CAUTION: The grates and drip pans
4
(on some models) should never be cleaned in
the self-cleaning oven.
Do not use commercial oven cleaners or oven
protectors in or near the self-cleaning oven.
A combination of any of these products plus the
high clean cycle temperatures may damage the
porcelain finish
of the oven.
-1~~~
Area Area
Oven door
outside inside
gasket
gasket gasket
24
Page 25

(!
\
How to Set the Oven for Cleaning
.
Quick Reminder:
1.
Prepare the oven for cleaning.
2. Close and latch the oven door.
3. Press the CLEAN pad.
4. Press the INCREASE pad.
If you wish to change the preset Clean Time of
4 hours, press the INCREASE or DECREASE
pad until the desired Stop Time appears
in the display.
1. Follow the directions in the Before a Clean Cycle
section.
n
3. Press the CLEAN pad.
CLEAN
\
J
4. Press the INCREASE or DECREASE
pad until the desired Clean Time is
displayed.
The Clean Time is normally 4 hours. You can change
the Clean Time to any time between 2 and 4 hours,
depending on the amount of soil in your oven.
The self-clean cycle will automatically begin
after “CLEAN” is displayed and the word “ON”
appears in the display. When the oven heats to a
high temperature, the word “LOCK” will be displayed
2. Close the oven door and slide
~
ma ash&t time later, the door latch handle will-be-
the latch handle to
the right as
locked in position. It will not be possible to open the
far as it will go.
11111*
oven door until the LOCK light goes off and the oven
Never force the door latch
has cooled below locking temperature.
handle. Forcing the handle
r
5. When the LOCK light is off,
may damage the door lock
slide the latch handle to the
mechanism.
left as far as it will go and
T
open the door.
*
ml
To Stop a Clean Cycle
Press the CLEAR/OFF pad. This will stop the cleaning cycle but
you will not be able to open the door until the oven cools below the
locking temperature.
After a Clean cycle
Whenthe clean cycle is finished, the word “CLEAN”
If white spots remain, remove them with a soap-filled
will go out in the display and the oven will begin to steel wool pad. Be sure to rinse thoroughly with a
cool. When the oven temperature has fallen below the
vinegar and water mixture. These deposits are usually a
‘~cv.in.g
kmperat’um,
the WOKI“LOCK” goes OULand salt residue hat cannot be removed by the clean cycle.
the
door can be opened.
If the oven is not clean after one clean cycle, the cycle
After a clean cycle, you may notice some white ash
may be repeated.
in the
oven. Just wipe it up with a damp cloth.
(continued next page)
&
.,*
.,,
.
25
L--
‘-
Page 26

–~
OPERATING THE SELF-CLEANING OVEN
(continued)
How to Delay Start of Cleaning
Delay Start is setting the oven timer to start the clean
cycle automatically at a later time than the present
time of day.
NOTE: Before beginning make sure the oven clock
shows the correct time of day.
Quick Reminder-Delay Start for Self-Clean:
1.
Prepare the oven for cleaning.
2. Close the oven door.
30Press the CLEAN pad.
4. Press the INCREASE or DECREASE pad until
the desired Clean Time appears.
5. Press the STOP TIME pad.
6. Press the INCREASE or DECREASE pad until
the desired Stop ‘Ilrne appears in the display.
For example: Let’ssay it’s7:00 and you want the
oven to begin self-cleaning at 9:00 after you’re
finished in the kitchen.
1. Prepare the oven for cleaning.
2. Close the
ovendoorand slide
the latchhandleto the right
as faras it willgo.Makesure
the ovenlightis off.
s
Never force the door latch handle. Forcing the
handle may damage the door lock mechanism.
n
3. press the CLEAN
pad.
CIEAru
L
J
4. press the INCREASE pad. The
oven is set.
G)
5. The Clean Time is preset for 4 hours. You can chamze
the Clean Time to&y time between 2 and 4 hours:
depending on the amount of soil in your oven. If a
shorter Clean Time is desired, press the DECREASE
pad until the desired Clean Tme is displayed.
c1
6. Press the STOP TIME pad. “11:00”
STOP
appears in the display and “STOP
TIME
ME” flashes.
The control automatically sets the
Stop Time by adding the Clean Time
to the time of day.
In this example, the time of day is 7:00
and the Clean Time is 4 hours. Adding 4
hours to the time of day equals 11:00.
7. Change the Stop Time fmm 11:00 to 1:00 by
pressing the INCREASE pad until”1 :00” appears
in the display. The words “DELAY CLEAN” will
also appear in the display.
The self-clean cycle will automatically begin at 9:00
and finish at 1:00. The word “ON” will appear in the o
display at 9:00.
When the oven locks, the word “LOCK” will be
displayed and a short time later the door latch handle
will be locked in position. It will not be possible to
open the oven door until the temperature drops below
the lock temperature.
When the clean cycle is finished, the word “CLEAN”
will go out in the display and the oven will begin to
cool. When the oven temperature has fallen below the
locking temperature the word “LOCK” goes out and
the door can be opened.
8. When the LOCK light is off, slide the latch handle
to the left as far as it will go and open the door.
Never force the latch handle. Wait until the
word “LOCK” goes out in the display. Forcing
the latch handle may damage the lock.
26
-—.——..—.—
Page 27

~ Qw40nsandAnswers
Q. If my oven clock is not set to the correct time of
day, can I still self-clean my oven?
A. If the clock is not set to the correct time of day you
will not be able to set a delay clean to end at a
specific time.
Q. Can I use commercial oven cleaners on any part
of my self-cleaning oven?
A.Nocleaners or coatings should be used around any
part of this oven. If you do use them and do not
thoroughly rinse the oven with water, wiping it
absolutely clean afterwards, the residue can scar
the oven surface and damage metal parts the next
time the oven is automatically cleaned.
Q. What should I do if excessive smoking occurs
during cleaning?
A. This is caused by excessive soil. Press the
CLEAWOFF pad. Open the windows to rid the
room of smoke. Wait until the oven has cooled
and the word “LOCK” is off in the display. W@e
up the excess soil and reset the clean cycle.
Q. Is the 64cracklin# or ‘@ppin# sound I hear
during cleaning normal?
@
A. Yes. This is the sound of the metal heating and
cooling during both the cooking and cleaning
functions.
e
Q. Should there be any odor during the cleaning?
A. Yes, there
will be an odor during the first few
cleanings. Failure to wipe out excessive soil tight
also cause a strong odor when cleaning.
Q. What causes the hair-like lines on the enameled
surface of my oven?
A. This is a normal condition, resulting from heating
and cooling during cleaning. These lines do not
affect how your oven performs.
Q. Why do I have ash left in my oven after
cleaning?
A. Some types of soil will leave a deposit which is ash.
It can be removed with a damp sponge or cloth.
Q. Can I cook food on the cooktop while the oven
is self-cleaning?
A. Yes. While the oven is self-cleaning, you can use
the cooktop just as you normally do.
Q. The word “dood’ appeared in the display when
I selected the Clean Cycle. What’s wrong?
A. The door latch handle must be moved all the way
to the right. Move the latch handle and cleaning
will start.
.
77
__—...
—
Page 28

CARE AND CLEANING
Propercare andcleaningare importantsoyour range
BE SURE ELECTRICAL POWER IS
will give
you effkient and satisfactory service. Follow
e
DISCONNECTED BEFORE CLEA~G ANY ‘
Y
these directions carefully in caring for it to help assure
PART OF YOUR RANGE.
safe and proper maintenance.
Y
CAUTION: DO NOT OPEIUTE THE BURNER WITHOUT ALL BURNER PARTS AND DRIP PANS
(IF SO EQUIPPED) IN PLACE.
Sealed Burner Assemblies
Grate
h
Burner Cap
I
lhrn all controls OFF before removing burner
parts and drippans (iiso equipped).
The burner gra~ caps, burner heads and drip
p= (if ~ eqdpped) =n be lifted off, making them
easyto clean.
The electrode
of the
Electrode
spark igniter is
exposed. When
one burner is turned
to LITE, all the burn
spark. Do not attempt to
disassemble or cleanaround any burner while
another burner is on. An electric shock may result,
which could causeyou to knock over hot cookware.
Burner Heads
The holes in the burners of your range, and the spark
electrodes, must be kept clean at all times for proper
ignition and an even, unhampered flame.
Ya should dean the burner ~- _
Clean these
heads rOUtine@,=-Y
after bad spillovers,
which
-~:Y.n
each
burner.
could clog these holes.
Wipe off burner heads. If heavy spillover occurs,
remove burner heads fiwm range.
Remove the burner grate. Then lift the burner head
straight
Up.
To get rid of burned-on f- soak the burner head
upside-down in a solution of mild liquid detergent and
hot water. Soak the burner head for 20 to 30 minutes.
If the food doesn’t rinse off completely, scrub it with
soap and water and a soft brush or plastic scouring pad.
For more stubborn stains, use a cleanser like Soft
Scrub” brand or Bon Arni” brand. Rinse welI to
remove any traces of the cleanser that might clog
the burner openings. Do not use steel wool because
it will clog the burner openings and scratch the
burners. If the holes become clogged, clean them with
a sewing needle or twist tie.
Before putting the burner
head ba~ shake out
excess water and dry it thoroughly by setting it in a
warm oven for 30 minutes. Then place it back in the
range, making sure the pin in the burner base goes in
the hole in the burner head, and that the burner heads
are properly seated and level.
Burner Caps)
Burner Base
Lift off when cool. Wash burner
The burner base (the part of the
caps in hot, soapy water and rinse
@
I
burner fastened to the cooktop) may - 0
with clean water. If desired, soak
be cleaned with a soft brush and a
\$S
up to 30 minutes and scour with
mild cleanser. Clean all food residues
a-plastic scouring pad to remove
from around spark electrode. Do not
burned-on food particles. Dry them in a warm use steel wool; small bits of steel wool
oven or with a cloth-don’t reassemble them wet. will short out the electrode. Rinse well.
o
*
.
/
e.
28
——.. —--—.
Page 29

Drip Pans (on some models)
Remove the grates and lift out the drip pans.
CAUTION:
Drip pans can be cleaned in a dishwasher or by hand.
Do not clean the
$--~
$
To get rid of burned-on food, place them in a covered drip pans in the
container (or plutic bag) with 1/4 cup ammonia to self-cleaning oven. ,
loosen the soil. Then scrub with a soap-filled scouring
[Q’!
/
pad if necessary.
Metai Parts
Glass Surfaces
Do not use steel wool, abrasives, ammonia or
To clean the outside glass finish, use a glass cleaner.
commercial oven cleaners. To safely clean surfaces:
Rinse and polish with a dry cloth. Do not allow the
wash, rinse, and then dry with a soft cloth.
water or cleaner to run down inside openings in the
glass while cleaning.
Surface Light and Starter (on some models)
CAUTION: Do not touch the bulb with wet hands
or when bulb is hot. Never wipe the light area with
a wet cloth. Electrical power must be shut off if
you have to replace a bulb.
Canopy
up
Stafter
k
\\kA
“[
,
J!g!g
/’1
‘ Light bulb
To replace bulb:
1.
With one hand at each end of the hinged canopy,
-P it by the fkont edge and flip it up.
2. Removefluorescentlightbulb. Replacethebulb
withone of the samelengthand wattage.
3. Lower the canopy.
To replace starter:
1.
Open canopy and remove bulb as explained above.
Z
Graspstarter, tum it counterclockwise about one-
quarter turn and lift out. Replace with one of the
9
same wattage.
3. Replace bulb and lower the canopy.
,“
Removable Storage Drawer (on some models)
The storage drawer is a good place to store cookware
and bakeware. Do not store plastics and flammable
material in the drawer.
The storage drawer may be removed for cleaning
under the range. Clean the storage drawer with a
damp cloth or sponge. Never use harsh abrasives or
scouring pads.
To remove the storage drawer:
1. Pull the drawer straight
out until it stops.
2. Tilt the fkont of the
drawer up and free of
the range.
To replace the storage drawer:
1.
Set the stops on the back of the drawer over the
stops in the range.
2. Slide the drawer evenly and straight back, so that
the rails in the range are engaged.
(conthwed next page)
29
.. ... .
.—--———
Page 30

.-
CARE AND CLEANING
(continued)
Burner Grates
Lift out when cool. Grates should be washed regularly
and, of course, after spillovers. Wmh them in hot,
soapy water and rinse with clean water. After cleaning,
dry them thoroughly by putting them in a warm oven
for a few minutes. Don’t put the grates back on the
range while they are wet. When replacing the grates,
be sure they’re positioned securely over the burners.
To get rid of burned-on f- place the grates in a
covered container (or plastic bag) with 1/4 cup
ammonia to loosen the soil. Then scrub with a
soap-fdled scouring pad if necessary.
Although they’re durable, the grates will gradually
lose their shine, regardless of the best care you can
give them. This is due to their continual exposure to
high temperatures. You will notice this sooner with
lighter color grates.
Do not operate a burner for an extended period of
time without cookware on the grate. The
finish on
the grate may chip without cookware to absorb the heat.
CAUTION: Do not clean the grates in the self-
cleaning oven.
CooktopSurfke
To avoid dam- the Porceiain enamel surface
11
of the cooktop &tdto p&went it fbm becoming
dull, clean
up spills right away. Foods with a lot of
acid (tomatoes, sauerkraut, fruit juices, etc.) or foods
with high sugar content could cause a dull spot if
allowed to set.
When the surface has cooled, wash and rinse. For
other spills such as fat smatterings, etc., wash with
soap and water once the surface has cooled. Then
rinse and polish with a dry cloth.
Do not store flammable materials in an oven or
near the cooktop. Do
not storeor use combustible
materials, gasoline or other flammable vapors and
liquids in the vicinity of this or any other
appliance.
.
e“
Oven Bottom
The oven bottom has a porcelain enamel finish.
We don’t recommend using aluminum foil on the
To make cleaning easier, protect the oven bottom oven bottom It can af%ct airflow if the holes are
from excessive spillovers by riacing a cookie sheet blocked and it can concentrate heat at the bottom
on the shelf belo~ the shel~~”ouare-cooking on. This of the oven, resulting in poor baking performance.
.
is particularly important when baking a frufi pie or
-.
To cleanup spillovers, use soap and water, an
other foods with a high acid content.
Hot fruit fillings
abrasive cleaner or scouring pad. Rinse well to
or other foods that are highly acidic (such as milk,
tomatoes or sauerkrau~ and sauces with vinegar or
remove any soap before self-cleaning.
lemon juice) may cause pitting and damage to the
porcelain enamel surface and should be wiped up
immediately.
30
—..—-—————
Page 31

.
0
.
e
..
Lift-Off Oven Door
The oven door is removable,
but it is heavy. You may need help
removing and replacing the door.
To remove the door, open it a few
inches to the special stop position
that will hold the door open. Grasp
fdy on each side and lift the door
3
straight up and off the hinges.
\
~
NOTE: Be careful not to place hands\
between the hinge and the oven door
frame as the hin~e could snap back and pinch fingers.
To replace the dwr, make sure the hinges are in the
special stop position. Position the slots in the bottom
of the door squarely over the hinges. Then lower the
door slowly and evenly over both hinges at the same
time. If the hinges snap back against the oven frame,
pull them back out.
TO CLEAN THE DOOR:
(Do not immerse the door in water.)
Inside of the door:
● Because the area inside the gasket is cleaned during
the self clean cycle, you do not need to clean this
by hand. Any saap left on the liner causes additional
stains when the oven is heated.
● The area outside the gasket can be cleaned with
a scouring pad.
s Do not rub or clean the door gasket-the
fiberglass material of the gasket has an extremely
low resistance to abrasion. An intact and well
fitting oven door gasket is essential for energy
efficient oven operation and good baking results.
If you notice the gasket becoming worn, frayed or
damaged in any way or if it has become displaced
on the door, you should have it replaced.
Inside Gasket
Gasket
Outside Gasket
I
Outside of the door:
● Use soap and water to thoroughly clean the top,
sides and front of the oven door. Rinse well. You
may also use a glass cleaner to clean the glass on
the outside of the door.
● Spillage of marinades, fruit juices, tomato sauces
and basting materials containing acids may cause
discoloration and should be wiped up immediately.
When the surface is cool, clean and rinse.
● Do not use oven cleaners, ckansing powders or
harsh abrasives on the outside of the door.
Broiler Pan @d Grid
After broiling, remove
Grid
the broiler pan from the
Joven. Rem&e the grid
ffom the pan. W&idly
pour out grease from the
pan into a proper
c
container. Wash and
1
I
rinse the broiler pan and \
grid in hot water with a
soap-filled or plastic
?
scouring pad. -
P;n
If fd has burned o% sprinkle the grid with detergent
while hot and cover with wet paper towels or a
dishcloth. Soaking the pan will remove burned on foods.
The broiler pan may be cleaned with a commercial oven
cleaner.Do not use an oven cleaner on the grid.
Both the broiler pan and grid can also be cleaned in
the dishwasher.
Do not store a soiled broiler pan and grid anywhere
in the range.
Do not clean the broiler pan or grid in the
self-cleaning oven.
Oven Shelves
~~
the shelveq with an abrasive cleanser
or steel
WOOI. Af’ter cleaning, rinse the shelves
with
cl~ wa~r ~d dry with a clean cloth.
NOTE: Take the shelves out of the oven before
Youbegin the self-clean cycle.
(continued next page)
31
e
.,,
J
. .
>,.
—.
—
Page 32

CARE AND CLEANING
(continued)
Oven Light Replacement
CAUTION: Before replacing your oven light bulb,
disconnect the electrical power to the range at the
main fhse or circuit breaker panel. Be sure to let
the light cover and bulb cool completely.
The oven light bulb is covered with a removable
glass cover that is held in place with a bail-shaped
wire. Remove the oven door, if desired, to reach
cover easily.
To remove:
1.
Hold a hand under the
cover so it doesn’t fall
when released. TWth
fingers of the same
han~ firmly push back
the wire cover holder.
DO NOT REMOVE ANY SCREWS TO
REMOVE COVER.
2. Do not touch hot bulb with a wet cloth. Replace
bulb with a 40-watt household appliance bulb.
To replace cover:
1. Place it into the groove of the light receptacle. Pull
the wim forward to the center of the cover until it
snaps into place. When in place, the wire holds the
cover firmly. Be certain the wire is in the
depression in the center of the cover.
2.
Connect electrical power to the range.
Lifi off the cover.
Wire
cove(holder
Control Panel and Knobs
It’s a good idea to wipe the control panel after each
The control knobs may be
use of the oven. Clean with mild soap and water or
removed for easier cleaning.
vinegar and water, rinse with clean water and polish
To remove a knob, pull it
dry with a soft cloth.
straight off the stem. Wash
Do not use abrasive cleansers, strong liquid cleaners,
the knobs in soap and water
plastic scouring pads or oven cleaners on the control
or a vinegar and hot water
panel-they will darnage the finish. A 50/50 solution
solution.
of vinegar and hot water works well.
Metal parts can be cleaned with soap and water.
Do not use steel wool, abrasives, ammonia, acids or
commercial oven cleaners. Dry with a soft cloth.
Oven Air Vents
Never block the vents (air openings) of the range.
They
provide the air inlet and outlet that are necessary
for the range to operate properly with correct
combustion. Air openings are located at the rear of the
cooktop, at the top and bottom of the oven door, and at
the bottom of the range, under the kick panel.
Vent appearance and location vary.
fib
.’.&
,
.
32
Page 33

(!!3
..
FOR YOUR SAFETY
If
you smell gas:
1. Open windows.
2. Don’t touch electrical switches.
3. Extinguish any open flame.
4. Immedia*ly call your gas supplier.
FOR YOUR SMTY
Do not store or use combustible
materials, ~oline or other flammable
vapors and liquids in the vicinity of this
or any other appliance.
BEFORE YOU DEW
Read these tistructions completely and
IMPOR’&NJ3 Save these instructions
for the local electrical inspectors use.
INSIXIXEIL Leave these instructions
with the appliance after installation is
completed.
CONSUMEIQ Keep this Use and Care
Guide and the Instxdlation Instructions
fir Wure use.
This
applitmcp must be propedy grounded.
WARHIH6
Improper installation, adjustmen~
alteration, seq=vice or maintenance can
cause injury or property damage. Refer to
this guide. For assistance or additional
information, consult a qualified installer,
service agenqy, mandhcturer (dealer) or
the gas supplier.
CAUTBOU
Do
not attempt to Operate the oven of
this range cl- a prover fkilwe.
..
--6 ------
UMIPORTMT
Remove all packing material and
literature from oven before connecting
gas and electrical supply to range.
DMMEIISIOHSMD CLEARANCES
Provide adequate clearances between the range
and adjacent combustible surfaces.
Depth with Door Closed
1-
1
(Includes Door Handle):
30”~
28%”
Height
47%”
Depth with
Door Open:
\
\
\
46%”
\
-d-
>“”-”””
18”
(continued next page)
33
—
—.
———.——
.-. .
Page 34

. ,,-.,-
.... ..
. .
-..
A
IMPORTMX SMT’Y MSTRUCTIONS
Installation of this range must conformwith
local codes, win the absence
of local codes,
~=tile
=~tiFel Gas Code, ANSI
#*
~s ~ge has been de~ign-certified by the
American Gas Association according to ANSI
221.1,latest edition As with any appliance using
gas and generating h- there are certain safety
precautions yowshould follow.Youwillfind these
precautions in *e Important Safety Instructions
in the ikont of this guide. Read them carefully.
● Have your-e installed by a qualified
installer or service technician.
s Your range must be electrically grounded in
accordance with local codes or, in the absence
oflocal codes, @accordance with the National
Electrical Code @NSI/Nl?PA 70, latest edition).
See Electrical Connections in this section.
c Before ins@ing your range on linoleum or
any other synthetic floor covering, make sure
the floor cover@g can withstand 180°1?without
shrinking, warping or discoloring. Do not install
the range over carpeting unless a sheet of 1/4”
thick plywood or similar insulator is placed
between the range and carpeting. -
s Make sure the wall coverings around the
range can withstand heat generated by the
range up to 200PI?
. Avoid placin~ cabinets above the range. T’o
reduce the h-d caused by reaching over the
open fkunes of operating burners, install a
ventilation hood over the range that projects
forward at least 5“beyondthe fi-ontofthe cabinets.
Y
● The ventila” hood must be constructed of
sheet metxilnot ess than 0.0122”thick. Install
above the cooktop with a clearance of not less
than 1/4” betw~en the hood and the underside
ofthe combustible material or metal cabinet
The hood must beat least as wide as the
appliance and centered over the appliance.
Clearance between the cooking surface and the
va&atitio$4su~hCcrf~~ NEVER BE
EXCEPTION: Installation if a
listed microwave
oven or cooking appliance over the cooktop shall
conform to the tistallation instructions packed
with that appliance.
● If cabinets are placed above the range, allow a
minimum cle
T
ce of 30” between the cooking
surface and the ottom of unprotected cabinets.
● If a 30” clearance between cooking surfiice
and overhead combustible material or metal
cabinets cannot be maintained, protect the
underside of the cabinets above the cooktop with
not less than 1/4” insulating millboard covered
with sheet metal not less than 0.0122”thick,
● Clearance between the cookin surfkce and
protected cabinets MUSI’
d RBEIESS
THAN 24 INCHES. The vertical distance from
the plane ofthe cooking surface to the bottom of
adjacent overhead cabinets extending closer than
1“to the plane ofthe range sides must not be
less than 18”.(See Dimensions and Clearances
illustration in this section.)
c CAUIION Items ofinterest to children should
not be stored in cabinets above a range or on the
backsplash ofa range-children climbmg onthe
range to reach items could be seriously injured.
WARWIUG
Allranges can tip and injury could result To
prevent accidental tipping of the range, attach an
approved Anti-Tip device to the wall. (See
Installing the Anti-TipDevice in this section.) To
check ifthe device is installed and engaged
properly, carefdly tip the range
@
forward. The Anti-Tip device should
L
engage and prevent the range from
tipping over.
Ifyou pull the range out from the
wallfor anv reason. make sure the
m
J%
Anti-Tipd&ice is engaged when
you push the range back against the
wall.
● For your safety, never use your
range for warming or heating the room. Your
oven and cooktop are not designed to heat your
kitchen. Top burners should not be operated
without coolmmre on the grate. Such abuse could
result in iire and damage to your range and will
void your warranty.
c
Do not store or use combustible materials,
gasoline or other flammable vapors and liquids
in the vicinity of this or any other appliance.
Explosions or fires could result
● Do not use oven for a storage area Items
stored in the oven can i@te.
● Do not let cooking grease or other flammable
materials accumulate in or near the range.
34
_————-——--
Page 35

GENERAL
● SeeDimensions and Clearances in this section
for all rough-in and spacing dimensions. These
dimensionsmu~tbe met for safeuse ofyourrange.
The locationofthe electricaloutlet and pipeopening
(see Gas Pipe and Electric Outlet bcations) may
be adjusted to meet specific requirements.
● The range maybe placed with 0“ clearance
(flush)at the bmk walland sidewalls ofthe range.
LOCATION
Do not locate the range where it may be subject
to strong drafts. Any openings in the floor or wall
behind the range should be sealed. Make sure
the openings around the base ofthe range that
supply fresh air for combustion and ventilation
are not obstructed by carpeting or woodwork.
PROTECT YOtlR FLOOR
Your range, like many other household items, is
heavy and can settle into soft floor coverings
such as cushioned vinyl or carpeting. Use care
when moving the range on this type of flooring.
It is recommended that the foIlowingsimple and
inexpensive instructions be followed to protect
your floor.
The range should be installedon a sheet ofplywood
(or similar material). W%en
the~r coven”ngends
at thefront of the mnge, the
area that the range
willrest on sho@d be built up with plywoodto
the same level m=higher than the floor covering.
This willallowthe range to be movedfor cleaning
or servicing. Al$o,make sure your floor covering
willWithstid l$(YI? (See the Important %fety
Instructions seation of the Installation
Instructions.)
KITCHEN C@HETS
Make sure the wall coverings around your range
can withstand Me heat generated (up to 200°E)
by the range. (se the hqn=tant Safety
Instructions Section of the Installation
Instructions.)
&
.,
,,.
MODELANDSERIAL NUMBER LOCATION
Youl find the model and serial numbers on a
label on the tkont frame of the range, behind the
storage drawer.
TOOLS YOU WILL HEED
s
Phillips and flat-blade screwdrivers
s Pencil and ruler
● Two pipe wrenches (one for backup)
● l%”open-end or adjustable wrench
s Nut drivers or wrenches 3/16” and 1/4”
ADD9TIOUM MATERWLS YOU MAYNEED
● Gas line shut-off valve
● Pipejoint sealant or Unapproved pipe thread
tape with Teflon’ that resists action of natural
and LP gases
s Flexible metal appliance connector (1/2” I.D.)
A 5-footlength is recommended for ease of
installation but other lengths are acceptable.
Never use an old connector when installing a
new range.
c Flare union adapter for connection to gas
supply line (3/4” or 1/2” NPT x 1/2” I.D.)
c Flare union adapter for connection to pressure
regulator on range (1/2” NIT x 1/2” I.D.)
Teflon Registeredtrademafk of DuPont
PREPARATION
c
Remove all tape and packaging.
c Take the accessory pack out of the oven.
c Check to be sure that no range parts have
come loose during shipping.
(continued next page)
Page 36

. ..+ -,
A
~-~~QtMATE GAS SUPPLY
Yourrange is designed to operate at a pressure
of4“ ofwater column on natural gas or,if designed
for LP gas (propane or butane), 10”ofwater
column. Make sure you are supplyingyour range
with the type ~fgas for which it is designed. This
range is convertible for use on natural or propane
-s, ifYOUdecide to use this range on a different
type of gas, conversion adjustments must be
made by a service technician or other qualikl
person before attempting to operate the range on
that gas.
For proper operation, the pressure of natural gas
supplied to the regulator must be between 4“and
13”ofwater column. For LP gas, the pressure
supplied must be between 10”and 13”of water
column. When checking for proper operation of
the regulator, the inlet pressure must beat least
1“greater than the operating (manifold)pmssure
as given above. The pressure regulator located
at the inlet of the range manifold must remain in
the supply Iine regardless of whether nati or
LPgas is being used. Aflexible metal appliance
connector useci to connect the range to the gas
supply line should have an I.D. of 1/2” and be
5feet in length for ease ofinstallation.In Canad~
flexiblecomectors must be single wdl metal
connectors no longer than 6feet in length.
36
❑
hHJ-TTHE RABJ6E T06AS
Shut off the main gas supply valve before
disconnecting the old range and leave it off until
new hook-up has been completed. Don’tforget
to relight the pilot on other gas appliances when
you turn the gas back on.
Because hard piping restricts movement ofthe
range, the use of an lLGJL+ertified flexible
metal appliance connector is recommended
unlesslocalcodes require a hard-pipedconnection.
Never use an old connector when installing a
new range. Ifthe hard piping method is used,
you must carefully align the pipe; the range
cannot be moved after the connection is made.
To prevent gas leaks, put pipe joint compound
on, or wrap pipe thread tape with Teflon*
around, all male (external) pipe threads.
?IkfloIx Registered trsdemsrk of DuPont
moipu8dEbdrkod8tLoatluns
4
.
/
,*1I
———....—.
Page 37

Fldbb Ccaimtw Hookup
‘ressure
~egulator
4-
●
o
—
~OEl~w~%&QJ >
(provided)
+9
I%
Flex
Adapter
~ Connector
(6 ft. max.)
=] IE,:,,+bz::;
Ri@ * M*
4 m_
Pressure
*Regulator
90” Elbow +
W@ ‘
(provided)
90° Elbow
++
Nipple Union
T
Black
~ Iron Pipe
13++ Jnio”
-J.
tWpple
Gas
~
Shut-off
Installec inform the
1/2’ or 3/4”
+ Valve
consumer of the
Gas Pipe
location of the gas
shut-off valve.
1. Install a manual gas line shut~ff valve in the
gas limein an easily accessed location outside of
the range. Make
sure everyone operating the
range knows where and how to shut off the gas
supply to the range.
2. Install male 1/2” flare union adapter to
the 1/2” NIT internal thread elbow at inlet of
regulator.
When installing the range fi-om the fron$
remove the 90° elbow for easier installation.
3. Install male 1/2” or 3/4” flare union adapter
to the IWI’ internal thread of the manual shutoff valve, taking care to back-up the shut-off
valve to keep it from turning.
4. Connect flexible metal appliance comector
to the adapter on the range. Position range
to permit comection at the shut~ff valve.
5. When all connections have been made, make
sure all range controls are in the off position and
turn on the main gas supply valve. Use a liquid
leak detector at all joints and connections to
check for leaks in the system.
CA~ON: DO N~ USE A lWlM13 TO
CHECK FOR GAS XIZ/UKS.
When using test pressures greater than 1/2 psig
to pressure test the gas supply system of the
residence, disconnect the range and individual
shut-off valve horn the gas supply piping. When
using test pressures of 1/2 psig or less to test the
gas supply system, simply isolate the range fi-om
the gas supply system by closing the individual
shut-off valve.
(continued nextpage)
*.,
.,~,t
+-
L.......
37
—.——...
—
Page 38

❑mmucoau~~~
Electrical Requimm ents
120-vol~60Hertz, properly grounded branch
Wcuit protected by a M-amp or 20-amp circuit
breaker or time delay fuse.
ExtensionCord Cautions
Because of potential safety hazards associated
withcertain conditions, we strongly recommend
~ainst the use of an extension cord. However,
ifyou still elect to use an extension cord, it is
absolutely necessary that it be a ULlisted,
3-wiregrounding-type appliance extension cord
and that the current carrying rating of the cord
inamperes be equivalent to, or greater than,
the branch circuit rating.
IMPORTAN’IqPla read ~)
FORPERSONALSAIWIY,THIS APPLIANCE
MUSI’BE PROPERLYGROUNDED.
The power cord of this appliance is equipped
witha threeprong (grounding) plug which
mates with a standard three-prong grounding
PREFERRED
METHOD
(s%
e
‘-Ill’!
Ensure proper
ground exists
before use
wall receptacle
to minimize the
possibility of
electric shock
hzua.rdfrom
this appliance.
The customer
should have the
wall receptacle
and circuit
checked bv a
qualified electrician to make sure the recep-&le
is properly grounded.
Where a standard two-prong wall receptacle is
encountered, it is the personal responsibility and
obligationofthe customer to have it replaced with
a properly grounded three-prong waUreceptacle.
DO NOT, UNDER ANY CIRCuM=mCES,
CUTOR REMOVETHE THIRD (GROUND)
PRONG FROM THE POWER CORD.
III Usage Situations where Ap@iance
Power cord win be Disconnected Ir&eqllmtly.
Anadapter maybe used only on a
15-amp
circuit Do not use an adapter on a 20-amp
circuit Where local codes permit a
TEMPORARY CONNECI’ION maybe
made to a properly grounded two-prong waII
receptacle by the use of a ULlisted adapter,
available at most hardware stores. The larger
slot in the adapter must be aligned with the
larger slot in the wall receptacle to provide
proper polaxity in the connection of the
power cord.
TEMPORARY
METHOD
(Adapter plugs not
permitted in Canada)
Align large
prongs/slots
a
m
If
@
l-$-k;-“ .-
a
/
W-’Ensure
proper
ground and
1111
firm connection
before use
CAUTION.Attachingthe adapter ground
terminal to the wallreceptacle cover screw
does not ground the appliance unless the cover
screw is metal, and not insulated, and the wall
receptacle is grounded through the house
wiring.The customer should have the circuit
checked by a qualifiedelectrician to make sure
the receptacle is properly grounded.
When disconnecting the power cord from the
adapter, always hold the adapter with one hand.
Ifthis is not done, the adapter ground terminal
is very likely to break with repeated use. Should
this happen, DO NOT USE the appliance until a
proper ground has again been established.
ii)
.
38
.—-———. -
Page 39

4!!!
.
8
l@ U- situations WhereAppliance Power
Cordwillbel)i
SCO..ected Frequently.
1)0 not use an adapter plug in these situations
because disconnecting ofthe power cord places
undue strain on the adapter and leads to eventual
failure of the adapter ground terminal. The
customer should have the two-prong wall
receptacle replaced with a threeprong (grounding)
receptacle by a qualitied electrician before using
the appliance.
The installation of appliances designed for mobile
home installation must conform with the
Manufactured Home Construction and Safety
Standard, Title 24 Cm Part 3280 (formerly the
Federal Standard for Mobile Home Construction
and Safety,Title 24,HUD, Part 280)or,when such
standard is not applicable, the Standard for
Manufactured Home Installations, latest edition
(Manufactured Home Sites, Communities and SetUps), ANSIA225.1,latest edition, or with local
codes.
Ei9ctrk Wc09med
1. LXate disconnect
plug on the range
back.
2. Pinch sides of
connector and pull
out of range back.
Seal
any openings inthe wall behind the range
and in the floor under the range when hookups
are completed.
R CHECK 9GUITIH OF SURFACE BURNERS
Suwfaeo Bumu ignition
Operation ofall cooktop and oven burners should
be checked after the range and gas supply lines
have been carefully checked for leaks.
Select atop burner knob and simultaneouslypush
in and turn to LITE position. Youwillhear a
snapping sound indicating proper operation of the
spark module. Once the air has been pur ed from
&n
the supply lines, burners should light wi
● 4
seconds. Afterburner lights, rotate knob out ofthe
~ positiomT each burner in succession until
L
allburners have
n checked.
L
,.
‘..
—-. -
-M ofFiamws
The
combustion quality of burner flames needs
to be determined visually.
(A) Yellow flamesCallfor service
(B) Yellow tips on
outer conesNormalfor LPgas
(C) Soft blue fiames-
Normal
for natural gas
If burner flames look like (A), call for service.
Normal burner flames should look like (B) or
(C), depending on the type of gas you use.
With LP gas, some yellow tipping on outer
cones is normal.
~
CHECKISHITIOH OF OVEN BURNER
Your oven is designed to operate quietly and
automatically.To operate the oven, press the
BAKEpad and then press the INCREASEpad
until “350°”appears in the display After 30-90
seconds, the oven burner will ignite and bum
until the set temperature is reached. The oven
burner will continue to cycle on and off as
necessary to maintain the oven at the temperature
indicated by the OVENTEMP knob.
To check ignition ofthe broil burner, press the
BROILpad and then the INCREASEor
DECREASEpad. After 30-90seconds, the broil
burner will ignite.
Electric ignition models
require electrical
power to operate. In case of a power ou e, the
Y
oven burners on these models cannot be “t
manually with a match. Gas will not flow unless
the glow bar is hot
If the oven is in use when a power outage occurs,
the burner will shut off and cannot be re-lit until
power is restored.
(continued next page)
39
——.————.... ——
-.
Page 40

. . .._- -
~
~u~ -k AND OVEN BURHERNR
ADJusTmMm SuUITERS w mESSARY
Air
adjustment shuttersfor the top and bottom
burners regulate the flowof air to the flames.
‘l%eair adjustment shutter for the&p
(broil) burner is in the center ofthe rear
wall ofthe oven.
The shutter for the bottom (oven) burner is
near the back wall behind the storage drawer.
Remove the drawer. See the Care and Cleaning
section in this guide.
To adjust the flowof air to either burner, loosen
the Phillips head screw and rotate the shutter
toward open or closed position as needed.
The flames for the top (broil) burner should be
steadywithapproximately1“blue cones and should
not extend out over the edges ofthe burner baffle.
To determine if the bottom burner flames are
burning properly, remove the oven bottom
Flames should have appro~tely 1“blue
cones and, ifrange is supplied with n-
gZM,
should burn with no yellowtipping. (Wth most
LP gas, small yellowtips at the end of outer
cones are normal.) Flames should not lift off
burner ports. If lifting is observed, gradually
reduce air shutter opening until flames are
stabilized.
Oven
Bottom
To remove the oven bottom:
1. Removethe knurled screws holding downrear
ofthe oven bottom.
2. Grasp the oven bottom at finger slots on
each side.
3. Liftthe rear ofthe oven bottom enough to
clear the lip of the range frame, then pull out
40
—
Page 41

❑LEVEL9U6THE RAU6E
1. Removethe storage drawer.
2. Use a 3/16” open-end or
socket wrench to back out
both rear leveling legs
approximately two turns.
3. Use a l%”open-end or
adjustable wrench to back
out the front leveling legs
two turns.
4. Install the oven shelves
in the oven and position the
mmzewhere it will be
ins~ed.
5. Check for levelness by placing a spirit level or
a cup, partially fiIledwith water, on one ofthe
oven racks. If using a spirit level, take two
readings-with the level placed diagonally first
in one direction and then the other.
6. Adjustthe leveling legs until the range is leveL
7. Atter the range is level, slide the range
awayfrom the wall so that the Anti-Tipdevice
can be installed.
WARNING:
Q Range MUSX’ be secured with an
approved Anti-Tipdevice.
s Unless properly installed, the range could
be tipped by you or a child standing, sitting
or leaning on an open door.
● After installing the Anti-Tip device, veri&
that it is in place by carefully attempting to
tilt the range forward.
● This range has been designed to meet all
recognized industry tip standards for all
normal conditions.
● The use ofthis device does not preclude
tippip::f the range when not properly
.
● If the Anti-’Hpdevice supplied with the
range does not fit this application, use the
universal Anti-Tip device WB02X7909.
1. Mark the wallwhere the RIGHTEDGEofthe
range isto be located. Be sure to allowforthe
countertop overhang ifyou intend to installthe
range next to cabinets.
Slotted
Head
*’*W %
2. Lncate the outside edge of the device 2%”
toward the center of the range from the marked
edge ofthe range.
3. Using the device as a template, mark the
position of the hole for the screw.
4. For wood construction, drill a pilothole at an
angle of 20 degrees from the horizontal. A
nail
or awl maybe used if a drill is not available.
Mount the Anti-Tipdevicewith the screw provided.
For cement or concrete construction. vou
will need a 1/4” x 1%”lag bolt and a l& O.D.
sleeve anchor, which ar~not provided. Drill
the recommended size hole for the hardware.
Install the sleeve anchor into the drilled hole
and then install the lag bolt through the device.
The bolts must be properly tightened as
recommended for the hardware.
L
Back of
Range
5. Slide the range against the wall, and check
for proper installation b grasping the front
Jedge of the cooktop an carefully attempting
to tilt the range forward.
WHEN All HOOKUPS ARE COMPLETE*
MAKE SURE ALL CONTROLS ARE LEFT 9H THE
OFF POS9TW.
MAKE SURE THE FLOW OF COMBUST90M AND
vEmunoaNRToTHEMn6Elsu~.
41
L....
Page 42

HOWTOCONVERT THE RAH6E FOR USE
wn’lllP6AsoRuluRu6m
This range leaves the factory set for use with natural
gas. If you convert to LP gas, keep these instructions
and orifices in case you want to convert back to
mtural gas.
The conversion should be done by a qualiied
technician or installer.
TOOIS
REQUIRE*
Adjustable wrench
1/2” and 3/4” open+md wrench
Flat blade screwdriver (smaU)
Nut drivers or wrenches 7- 5/16” or a small
adjustable (depending on the size of the spuds)
T-10Torxdriver
❑ -p= -E FOR COWVERSOW
(1) Turn off gas supplyatthewall.
(2)
Turn off the electrical power to the range.
Erangehas not yet been connected to gas SUPPly,
or ifflexible connection was made, range maybe
pulled out from the wallto make conversion easier.
❑ OWEn ~E PRESSUREREGULATOR
WARNING: Do not remove the pressure
regulator from the range.
1. Remove the broiler drawer and locate the
pressure regulator at the rear of the range.
J
Remove Screws
L
Acoess Cover
+q-Jq,
On some models, you may have to remove an
access cover also.
2. Followthe directions in box
❑ or ❑ that
match your regulator type.
42
@hfltlsThisRe,duton
1. Use an adjustable wrench to remove the
nut from the pressure regulator.
*
. .. ..
_
i;~ Range
LP
NAT v
2. Apply sideward finger pressure to remove
the plastic pin from the nut
HIN’R To remove the pin, place the nut on
a flat surf&ceand presi the-pin sideways with
your fingers.
3. Push down on the disc edges to replace the
pin in the nut
NAT
v
LP
q
I
1
1
@
r
4. Reinsert the assembly into the regulator.
Lever shown closed.
Gas Flow
PULL TO OPEN. , k
-J!WRange~
“\
q&
...
Do not
remove this ‘> ~
protective
/’L
oap exoept
e)
:=ti;~
for conversion ~
1. Unscrew the plastic-protected hex-nut ‘S=mbly
cap from the regulator.
2. Carefully pry the protective plastic cap off
the threaded metal cap. Gently pull the plastic
washer off the threads on the other side ofthe
metal cap.
3. Push the plastic cap onto the end ofthe metal
cap displaying the type of gas you are converting
to. Press the attached plastic washer onto the
threads on the other side of the metal cap.
4. Screw the hex-nut cap back into the regulator.
Do not overtighten.
_—————
Page 43

❑ COHVER’HW6 THE SURFACEBURNERS
‘“mer-p~
‘U”::=*
,&JA
BumerB~-&& ‘)
Orifice Spud “
\
Gas Inlet Tube
~L
d
1. Removethe grates, burner capsand burner heads.
2. Using the torxdriver, remove the burner bases
by unscrewing the 3 small screws in each base.
Iift the burner straight out
DO
N(YI’disconnect the wires from the burner
bases unless the cooktop needs to be raised.
3. Remove the brass orifice spud under each
burner base by unscrewing spud from fitting with
a 7mm, 5/16” or small adjustable wrench
(depending on the size ofyour spuds).
Applya
3/4” wrenchto the hex on the gas inlettube
as a back-upWhenremovingspud to prevent
the aluminum fiwmtwisting.
4. Install orifice spuds according to one of
the following diagrams (see
❑or ❑), for LP
gas or natural gas, depending on which you are
converting to.
❑Oriflc@Sptl&k bvutiagio LPGum
.—
LP orifice
spuds are in a small plastic bag packed
with this Use and Care Guide. LP orifice spuds
have a 2digit number and the letier “L”on one
side. Each orifice spud will also have 1 or 2
grooves on one side, denoting the location on the
range where it is to be installed as shown below.
mOrMcQSIW&forconvoHhogt@ Haturalfhs%
Natural gas ofice spuds have a 3-digitnumber
on one side. Each orifice spud willalso have 1,2
or 3 grooves on one side, with the letter “N”
underneath denoting the location on the range
where it is to be installed as shown below.
5. To prevent leakage, make sure the orifice
spuds are securely screwed into the gas inlet
tubes. Use a small wrench to hold the inlet tube
hex to prevent it from twisting.
6. Put old orifice spuds back in the bag to save
for possible future conversion.
NWI’E: If an orifice spud is accidentally dropped,
the cooktop can be raised
by disengaging the 2
front clips with a large
flat blade screwdriver.
e’
DO N(YI’attempt to raise the cooktop without
removing all 4burner bases.
Ifwires were disconnected to remove the cooktop,
feed wires through the burner holes in the
cooktop. Attach to each burner electrode terminal
carefully, making sure not to bend the terminal.
Then lower cooktop until it snaps over the clips.
7. Carefully insert burner
bases straight down
with the tube over the
orifice spud. Replace
thh~tie~s4sing
screw is opposite the burner
electrode in each burner base.
❑ mv~~ IMEOVENMRNSR 0R9FICES
Ovem Bum8r
1. Remove oven door, storage drawer and oven
bottom. The lower burner ofice spud is located
behind the storage drawer. (On some models, a
metal shield must be removed to access the
orifice.)
2. To convert to U gas, use a
1/2” wrench to turn the lower
burner orifice spud clockwise.
‘Rghten the spud only until it
is snug. To prevent damage,
do not overtighten the spud.
To convert to natural gas, loosen the spud
about 2 turns.
Ml Burner
To convert to LP
gas, use a 1/2”
wrench to turn
the upper burner
orifice spud
clockwise.
Tighten spud
only until it is snug with the base. To prevent
damage, do not overtighten spud.
To convert to natural gas, loosen the spud
about 2 turns.
(continued next page)
43
&
. . . . .
——
_-——.
Page 44

..
.. . . . . . . . . ... .,._,
❑-m AiRAWUSTMEtiT SHUTTER
For U? gas, loosen the
Phillips head screw and
rotate the shutter to the
screw
Ml
open position. Wkh
Air Shutter
baffle in place, flames
should have approximately
I-iich blue cones and
should not extend beyond
the edges ofthe burner baffle.After 30 seconds
ofburner operation, check for flames lifting off
burner ports. Iflifting is observed, gradually
reduce air shutter opening until flames are
stabilized.
For natural gas, the shutter should be open
1/2” or about 3/4 of the way open.
kbECKFORLEAKS
When all connections have been made, make sure
allrange controls are in the offposition and turn
on the main gas supply valve. Use a liquid leak
detector at alljoints and connections to check for
leaks in the system.
I
CAUTION:DO N~ USE A FLAMETO
CHECKFOR GAS IJ2AKS.
When using test pressures greater than 1/2 psig
to pressure test the gas supply system ofthe
residence, dkconnect the range and individual
shut-offvalvefrom the gas supply piping.When
using test pressures of 1/2 psig or less to test the
gas supply system, simply isolate the range from
the gas supply system by closing the individual
shutdf valve.
~ ADJUST LOW
FLAME SETTIH6
1. Light the top burners and continue turning all
ofthe surface knobs to LOW.
2. Remove all four knobs.
3. With a small flat
l\\ \
blade screwdriver,
turn the valve set
screws clockwise to
@==?&+~
\
decrease flame size,
counterclockwise to
\
.
increase flame size.
Adjust until the flame is about the same height
as tie top of the burner.
4. Replace the knobs.
5. Check for flame outage bv ommimzand
closing the oven door s&e~ &nes. E the flame
goes out increase the flame size.
❑ CUKKQUALITYOF FUMES
The combustion quality of burner flames needs
to be determined visually.
(A) Yellow flames-
Call for service
(B) Yellow tips on
outer comesNormal for LJ?gas
(C) Soft blue flarnes-
Normal for natural gas
Ifburner flames look like (A),call for service.
Normal burner flames should look like (B)or
(C), depending on the type of gas you use.
With IX gas, some yellow tipping on outer
cones is normal.
The conversion is now complete.
44
Page 45

QUESTIONS?
●
USE THIS PROBLEM SOLVER
*d
.,
PROBLEM
OVEN WILL NOT WORK
SURFACE BURNERS
LIGHT BUT OVEN
DOES NOT
..
TOP BURNERS DO NOT
●
LIGHT OR DO NOT
BURN EVENLY
BURNER
FLAMESVERY
LARGEORYELLOW
“F—AND A NUMBER”
FLASH IN THE DISPLAY
OVEN CONTROL SIGNALS
AFI’ER ENTERING COOK
TIME OR STOP TIME.
.
POSSIBLE CAUSE
. Phlg on rage is not Completelyinse~ intheelectrical outlet.
● The circuit breaker in yow hou~ h~ ~n tipped, or a fuse has been blown.
.
Oven controls not properly set.
● Door left in locked position after cleaning.
● The oven gu shut off valve ~Y have accidentally been moved during
cleaning or moving.
TO
check the oven gas shut off v~ve, remove the storage drawer and look
for the gas shut
offlev~ at the back of the r~ge. On some models you
may
have to remove ~ ac~ss cover ~SO. FO11OW the directions in box
A or B that match your regulator type.
I
\ Lever shown olosed. /I!
\
. Make sureelectricalplug is plugged intoa livepoweroutlet.
● Burnerholes on the sideor aroundthe top of burnermay be clogged.Remove
the burnerheadsandthe burnercaps.Cleanthem with a sewingneedleor twist
tie. Makesureyou do not enlargethe holes.Check andclean the electrodearea
for burned-onfoodor grease.
. ~ ~ge iSco~- to LP gas; checkall stepsin the ImtaIlation Instructions.
,,. .
.,
... .”. . .
. H we ~
&play tihed “F-and a number,” YOUhave a function error code.
If
a fiction errorcodeappearsduringthe self-cleaningcycle, check theoven
doorMch. The latchhandle may havebeenmoved,even if only slightly,tim
the latchedposition.Makesure the latch is movedto the right as far as it will go.
‘Press the CLEAR/OFFpad. Allow the ovento coolfor onehour.Put the oven
back intooperation.
* Disconnectall power tothe rangefor 5 minutesand then reconnectpower.
If the failure cock‘repeats,then callfor service.
● Self-cleaning cycle has been selected but latch handle was not moved all the
way to the right. Move the latch handle.
● Latch handle was ‘mov~ to the ‘rightbut a program other than self-ckani.ng
was selected, Move the latch handle to the ‘rightonly when setting the -
● This is reminding you to enter a bake temperature (see the Baking section).
(continued next page)
A<
1
I
—
Page 46

THE PROBLEM SOL~R
(continued)
PROBLEM
FOODDOESNOT ROAST
ORBAKEPROPERLY
CLOCK DOES NOT WORK
OVENLIGHTDOESNOT
COME ON
STRONG ODOR
OVENWILLNOT
SELF-CLEAN
OVEN DOOR
WILL
NOT UNLOCK
OVEN NOT CLEAN -R
CLEAN CYCLE
OVEN TEMPEIUTURE
TOOHOT ORTOOCOLD
OVEN DOOR
ACCIDENTALLY LOCKED
WHILE BAKING
@
POSSIBLE CAUSE
● Oven controls not properly se~ Seethe Broiling section.
s Oven door not closed.
● Improper shelf position being used Seethe Broiling section.
● Food is being cooked on a hot pan.
● Cookware is not suited for broiling.
● Ahuninurn fofi used on the broiler pan grid has not been fi~ properly
.,
and slit as recommended.
● Oven bottom not securdy seated in position.
s Oven controls not properly set. Seethe Baking or Roasting section.
● Shelf position is not correct.
cIncorrect cookware or cookware of improper size is being used.
● Oven thermostat needs adjustment. See the Adjust the Oven Thermostat—
Do
ItYoume~section.
s Clock not set comctly.
● Aluminum foil used improperly in the oven.
● Oven bottom not securely seated in position.
.
. Range electrical plug must be securely seated in alive power outlet. Check for
blown fuse or tripped circuit breaker.
GBulb may be loose or burned out.
e
● El&trical plug mustbe pluggedinto a live poweroutlet.
● ~WWX ~lgm ~tio in oven. Adjust oven burner air shutter.
● An odor from the insulation around the oven liner is normal for the f~st few
times oven is used. This is temporary.
● Oven temperature is too high to set self-clean operation. Allow the range to cool
to room temperature and reset the controls.
● Door latch handle not moved all the way to the right.
● Oven must cool below locking temperature. Do not lock the door with
door latch except when using self-clean feature or the oven may lock.
. Oven controls not set properly. Review Operating the Self-Cleaning Oven section.
. Heavily soiled oven requires 31/zto 4 ho~s of cleaning time.
. Heavy spillovers should be cleaned up before starting clean cycle.
● The oven thermostatneedsadjustment. See the Adjust the oven
Thwmostat-llo ZIYourse§ion.
● Turn the oven thermostat to OFF. Allow the oven to cool and
then unlatch the door.
46
 Loading...