

Page 1

.
User Manual
Before connecting, operating or adjusting this product, please read the manual completely.
Please keep this manual for future reference.
Model: J55BE220
Page 2

Table of Contents
English
Important Safety Instructions........ ....... ....... ....................... ....... ....... ....... ................ ....... ....... ....... 1
Important Notice . ....... ....... ....... ....................... ....... ....... ....................... ....... ....... ....................... ......4
Preparations . ....... ....... ....... ................ ....... ....... ....... ................ ....... ....... ....... ....................... ....... ......5
Identification of Controls ........ ....... ....... ....... ................ ....... ....... ....... ................ ....... ....... ....... .......7
Connections. ....... ....... ....... ....................... ....... ....... ....................... ....... ....... ....................... ....... ......1 0
Basic Operations....................... ....... ....... ....................... ....... ....... ....... ................ ....... ....... ....... ......13
Getting Started ....... ................ ....... ....... ....... ................ ....... ....... ....... ................ ....... ....... ....... .........14
................ ....... ....... ....... ....................... ....... ....... ....................... ....... ....... ...22
Troubleshooting....... ................ ....... ....... ....... ................ ....... ....... ....... ....................... ....... ....... ........24
Specifications....................... ....... ....... ....... ................ ....... ....... ....... ................ ....... ....... ....... ............25
Wal l mounting operation ....... ....... ....................... ....... ....... ....... ................ ....... ....... ....... ................ ....... 26
USB (Multimedia) Menu
Page 3
Important Safety Instructions
Elect rical e nergy can pe rform m any useful f uncti ons, bu t it can also ca use per sonal inju ries an d property d amage i f improperly
handl ed. This pro duct ha s been engin eered a nd manufac tured w ith the high est pri ority on safety. But IMPR OPER US E CAN
RESULT IN POT ENTIAL ELECTRICAL SHO CK OR FIRE HAZ ARD. In o rder to prev ent pot entia l danger, ple ase obs erve
the fol lowin g instruct ions wh en installing, op erati ng and clean ing the p roduct. To ensure your saf ety and p rolong the s ervic e
life of y our TV produ ct, ple ase read the f ollow ing precau tions c arefully b efore u sing the pro duct.
1. Read t hese in structio ns--- All operat ing ins tructions must be r ead and u nderstoo d befor e the produc t is oper ated.
2. Keep t hese in structio ns--- These safe ty and op erating instruc tions m ust be kept in a s afe pla ce for futur e refer ence.
3. Heed a ll warn ings---A ll warn ings on the pr oduct a nd in the instructi ons mus t be observe d close ly.
4. Foll ow all in structio ns--- All operat ing ins truction s must be f ollowed.
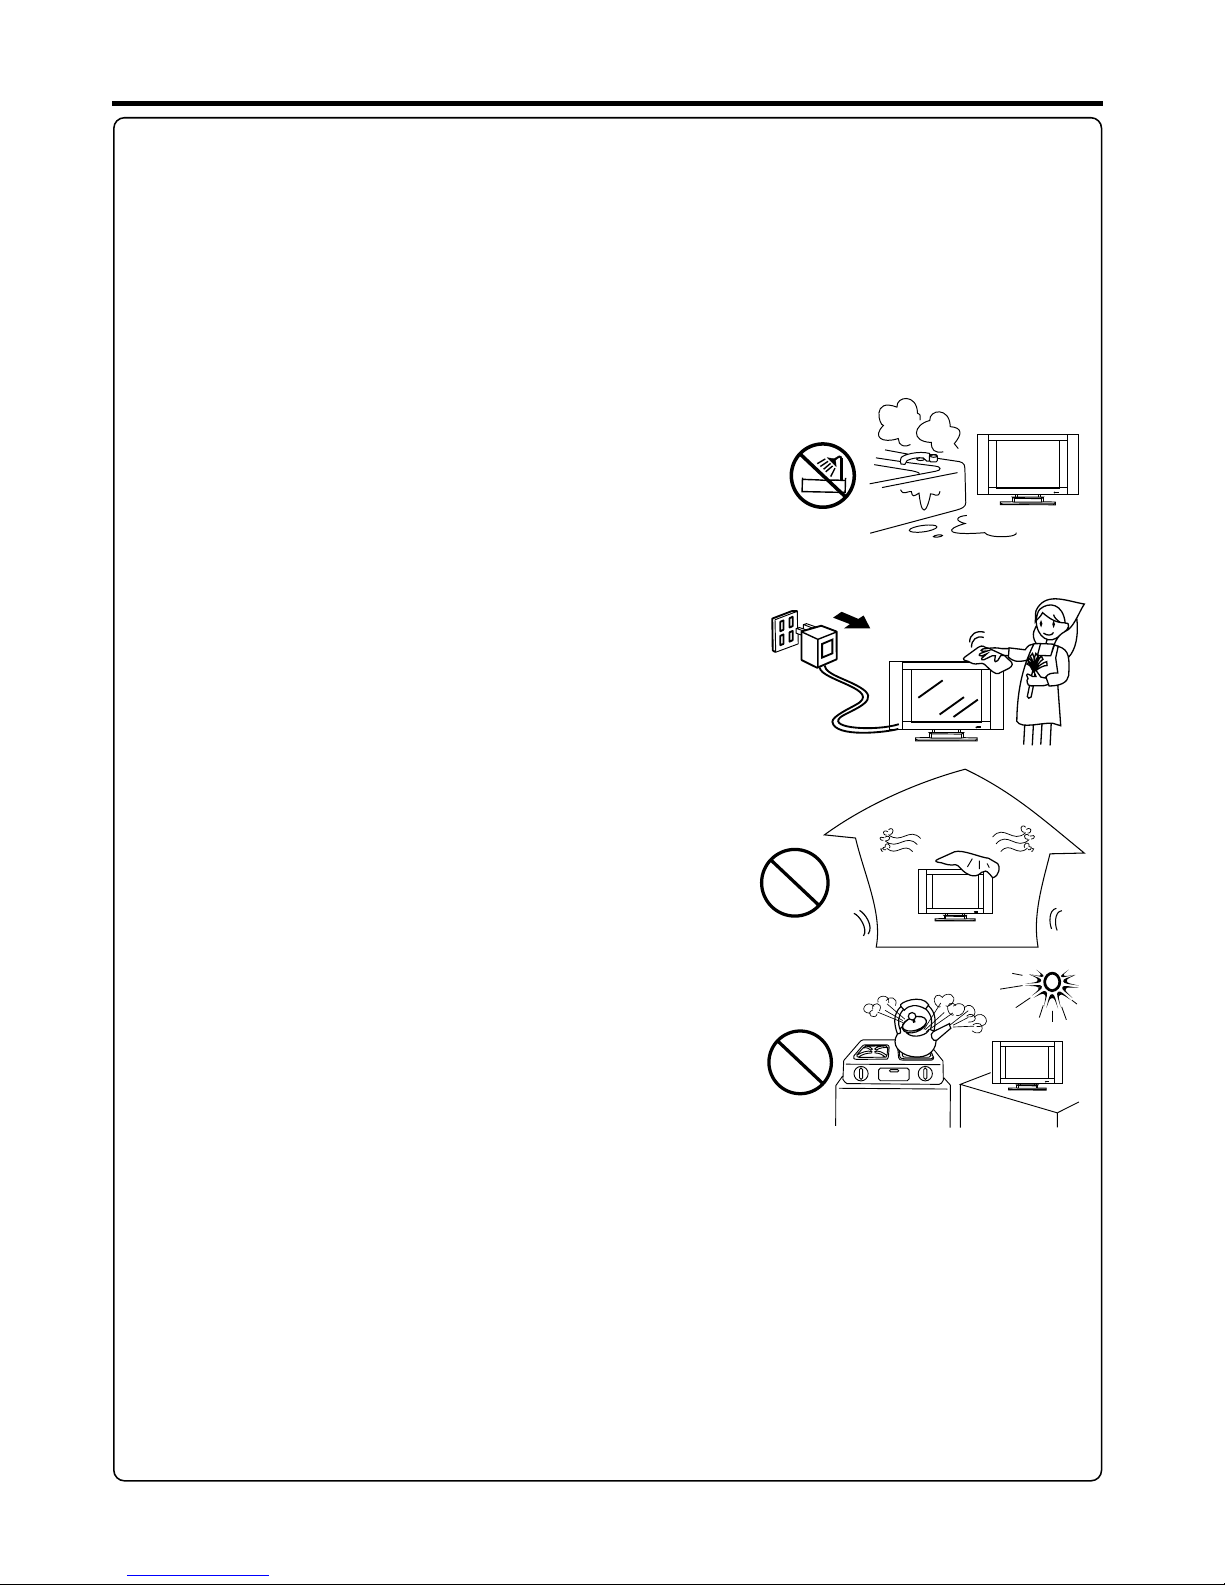
5. Do not u se this a pparatus n ear wat er---for e xampl e, near a bath tub,
washb owl, ki tchen sink , or laun dry tub, in a we t basem ent, or n ear a swimmi ng
pool, a nd the li ke.
Do not us e immed iately aft er movi ng from a low te mpera ture to h igh
tempe ratur e environm ent, as t his causes c onden satio n, which may r esult i n fire,
elect ric sho ck, or other h azard s.
The app aratu s shall not be e xpose d to dripping or spla shing a nd that no obj ects
fille d with li quids, suc h as vase s, shall be placed on t he appa ratus.
6. Clea n only wi th dry cloth ---Un plug this pr oduct f rom the wall o utlet b efore
clean ing. Do n ot use liqui d clean ers or aerosol clea ners. U se a damp clot h for
clean ing.
7. Venti latio n---Do not b lock an y ventilat ion ope nings . Install in a ccord ance
with th e manuf acturer in struc tions. The v ents and oth er open ings in the ca binet
are des igned f or ventila tion. D o not cover or block th ese ven ts and openi ngs
since i nsuffici ent ven tilation c an caus e overheat ing and /or shorte n the lif e of the
produ ct. Do no t place the pr oduct o n a bed, sofa, r ug or oth er simi lar surfac e,
since t hey can b lock venti latio n openings. This produ ct is not d esigned fo r built in
insta llati on; do not pla ce the pr oduct in an enclose d place s uch as a bookc ase
or rack , unles s proper ven tilat ion is provi ded or th e manuf acturer' s instr uctions
are fol lowed .
8.Hea t sourc es---Do no t insta ll near any heat sour ces suc h as radiato rs, hea t
regis ters, s toves, or ot her app aratus (in cludi ng ampl ifiers) th at prod uce heat.
9.Gro undin g or Polariz ation ---Do not de feat th e safety pur pose of t he polarized or gro undin g-type plu g. A polari zed plug
has two b lades w ith one wide r than th e other. A gro unding typ e plug ha s two blades a nd a thir d groundin g prong . The w ide
blade o r the thi rd prong are p rovid ed for your safety. If the pr ovide d plug does no t fit int o your outle t, cons ult an electricia n
for rep lacem ent of the obs olete o utlet.
10.Po wer cor d protecti on--- Protect th e power c ord from bei ng walk ed on or pi nched part icula rly at plugs , conve nience
recep tacle s, and the poi nt wher e they exit fr om the ap parat us.
NOTE: w here th e mains plug o r an appl iance coupler is us ed as the d isconnec t devic e, the disco nnect d evice shal l remai n
readi ly oper able.
11.Att achme nts---On ly use at tachment s/acc essor ies specif ied by th e manufact urer. Do n ot use attac hment s not
recom mende d by the manuf actur er. Use of impr oper at tachm ents can res ult in ac cidents.
1
Page 4
Important Safety Instructions (Co ntinued)
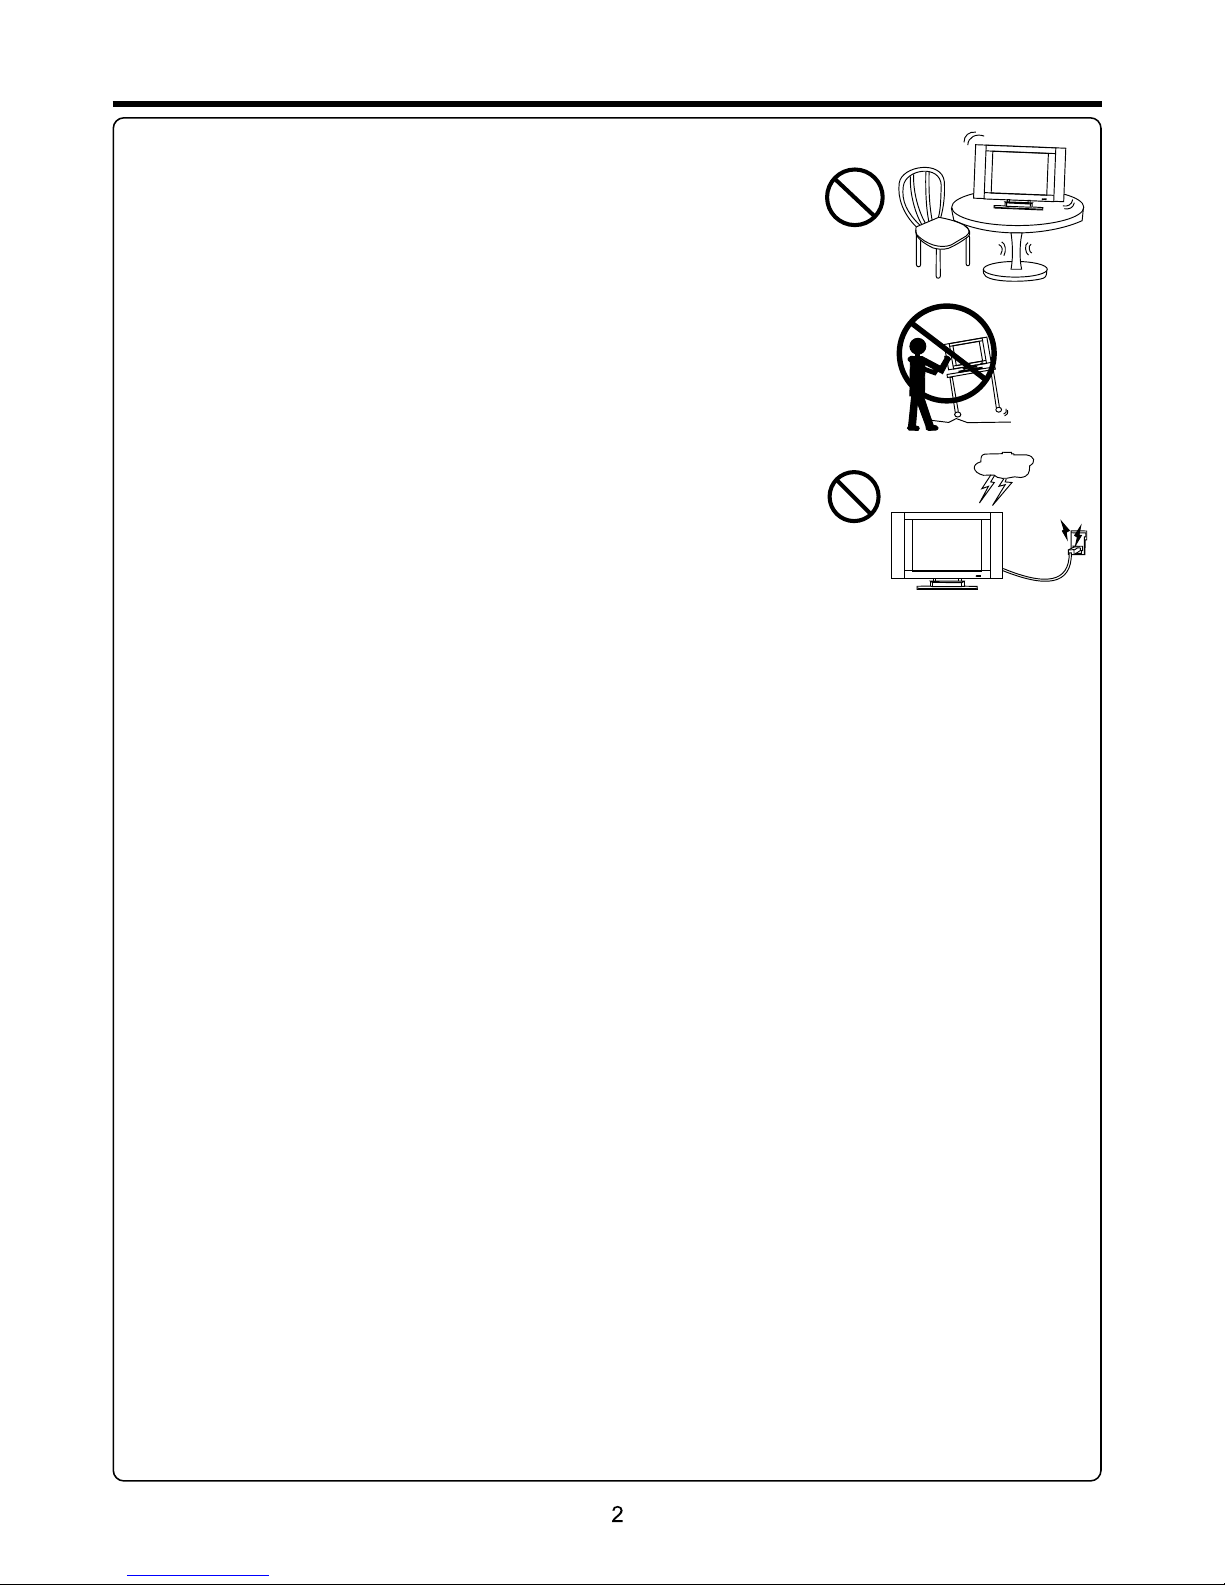
12. Sta nd--- Use only wit h the car t, stand, tr ipod, b racket, or t able sp ecifi ed by the
manuf actur er, or sold wit h the app aratus. Do n ot plac e the pro duct on an uns table
troll ey, st and, tr ipod or table. Plac ing the p roduct on an u nstab le base can ca use the
produ ct to fal l, resulti ng inse rious pers onal in jurie s as well as dam age to th e product.
When mo untin g the produc t on a wall , be sure to fol low the m anufa cturer's i nstru ctions.
Use onl y the mou nting hard ware re commended by the ma nufac turer.
13. Mov e caref ully---W hen a car t is used, use c autio n when mo ving the car t/app aratus
combi natio n to avoid inj ury fro m tip-over. Sudden s tops, e xcessive f orce an d uneven
floor s urfac es can cause t he prod uct to fall fr om the tr olley.
Never a ttemp t to move the TV unless the AC po wer cor d has been dis conne cted.
14. Lig htnin g---Unpl ug this a pparatus d uring l ightning storms o r when un used for lon g
perio ds of tim e.
For add ed prot ection for t his tel evision eq uipme nt duri ng a lightni ng stor m, or when it is
left un atten ded and unus ed for lo ng periods of time, u nplug i t from the wal l outle t and
disco nnect t he antenna . This will pr event d amage to the e quipm ent due to lig htnin g and
power -line s urges.
15. Ser vicin g---Refe r all ser vicing to qu alifi ed serv ice person nel. Se rvicing is r equir ed when the ap parat us has been damaged
in any wa y, suc h as powe r-sup ply cord or pl ug is dam aged, liqu id has be en spilled o r objec ts have fallen into t he appa ratus, the
appar atus ha s been expos ed to rai n or moisture, does n ot oper ate normal ly, or h as been d ropped.
16. Rep lacem ent parts- --In ca se the produ ct need s repla cement par ts, mak e sure that th e servi ce person us es
repla cemen t parts spec ified b y the manufa cture r, or thos e with the sam e chara cteristi cs and pe rformanc e as the
origi nal par ts. Use of una uthor ized parts can resu lt in fir e, electri c shock a nd/or othe r dange r.
17.Ov erloa ding---D o not ove rload wall o utlet s, extension cord s, or con venience r ecept acles on oth er equi pment as thi s
can res ult in a ri sk of fire or el ectri c shock.
18.En terin g of objects a nd liqu ids---Ne ver ins ert an objec t into th e product through v ents or o penings. H igh vol tage flows
in the pr oduct , and insert ing an ob ject can cause elec tric sh ock and/or s hort in ternal par ts. For t he same reas on, do no t spill
water o r liqui d on the produ ct.
19.Da mage re quiring se rvice ---If any of t he foll owing condition s occur s, unplug th e power c ord from the AC o utlet , and
reque st a qual ified serv ice per son to perform repa irs.
a. When t he powe r cord or plug i s damag ed.
b. When a l iquid i s spilled on t he prod uct or when objects h ave fal len into the p roduc t.
c. When t he prod uct has been e xpose d to rain or wat er.
d. When t he prod uct does not o perat e properly a s descr ibed in t he operati ng inst ructions .
Do not to uch the c ontrols ot her tha n those desc ribed i n the ope rating ins truct ions. Impr oper ad justment o f contr ols not
descr ibed in t he instruc tions c an cause damage, wh ich oft en require s exten sive adjus tment w ork by a quali fied te chnician.
e. If the p roduc t has been dro pped or t he cabinet h as been d amage d in any way.
f. When t he prod uct displa ys an abn ormal cond ition o r exhib its a distin ct chan ge in perfor mance . Any noticea ble abn ormality
in the pr oduct i ndicates t hat the p roduct nee ds serv icing .
20.Sa fety ch ecks---U pon com pletion of servic e or repa ir work, req uest th e service te chnic ian to perfo rm safe ty
check s to ensu re that the pr oduct i s in proper op erati ng cond ition.
21.Wall or c eiling mou nting ---When mo untin g the produc t on a wall o r ceiling, b e sure to i nstall the p roduc t accor ding to
the met hod rec ommended b y the man ufacture r. This is a safe ty feat ure.
Page 5
Important Safety Instructions (Co ntinued)
22. Pow er sour ce---Thi s produ ct is intend ed to be su pplie d by a listed po wer sup ply indica ted on th e marking la bel. If y ou
are not s ure of th e type of powe r suppl y to your home , consu lt your product dea ler or lo cal power co mpany. For ad ded
prote ction f or this prod uct dur ing a lightn ing sto rm, or wh en it is left un atten ded and unus ed for lo ng periods o f time, u nplug it
from th e wall ou tlet and dis conne ct the cable s ystem . Thi s will pr event dama ge to the p roduct due t o light ning an d power line
surge s. When t he unit has to b e used wi th another p ower su pply vo ltage, the p ower ca ble must be ch anged . Consult yo ur
produ ct deal er. Th e socke t outlet sho uld be in stalled ne ar the eq uipment an d easil y accessible. Use o nly the p ower cord
desig nated b y our dealer t o ensur e safety and EMC. Whe n conne cting othe r produ cts such as VC Rs and pe rsonal com puter s,
you sho uld tur n off t he powe r of the unit fo r prote ction agai nst ele ctric shoc k.
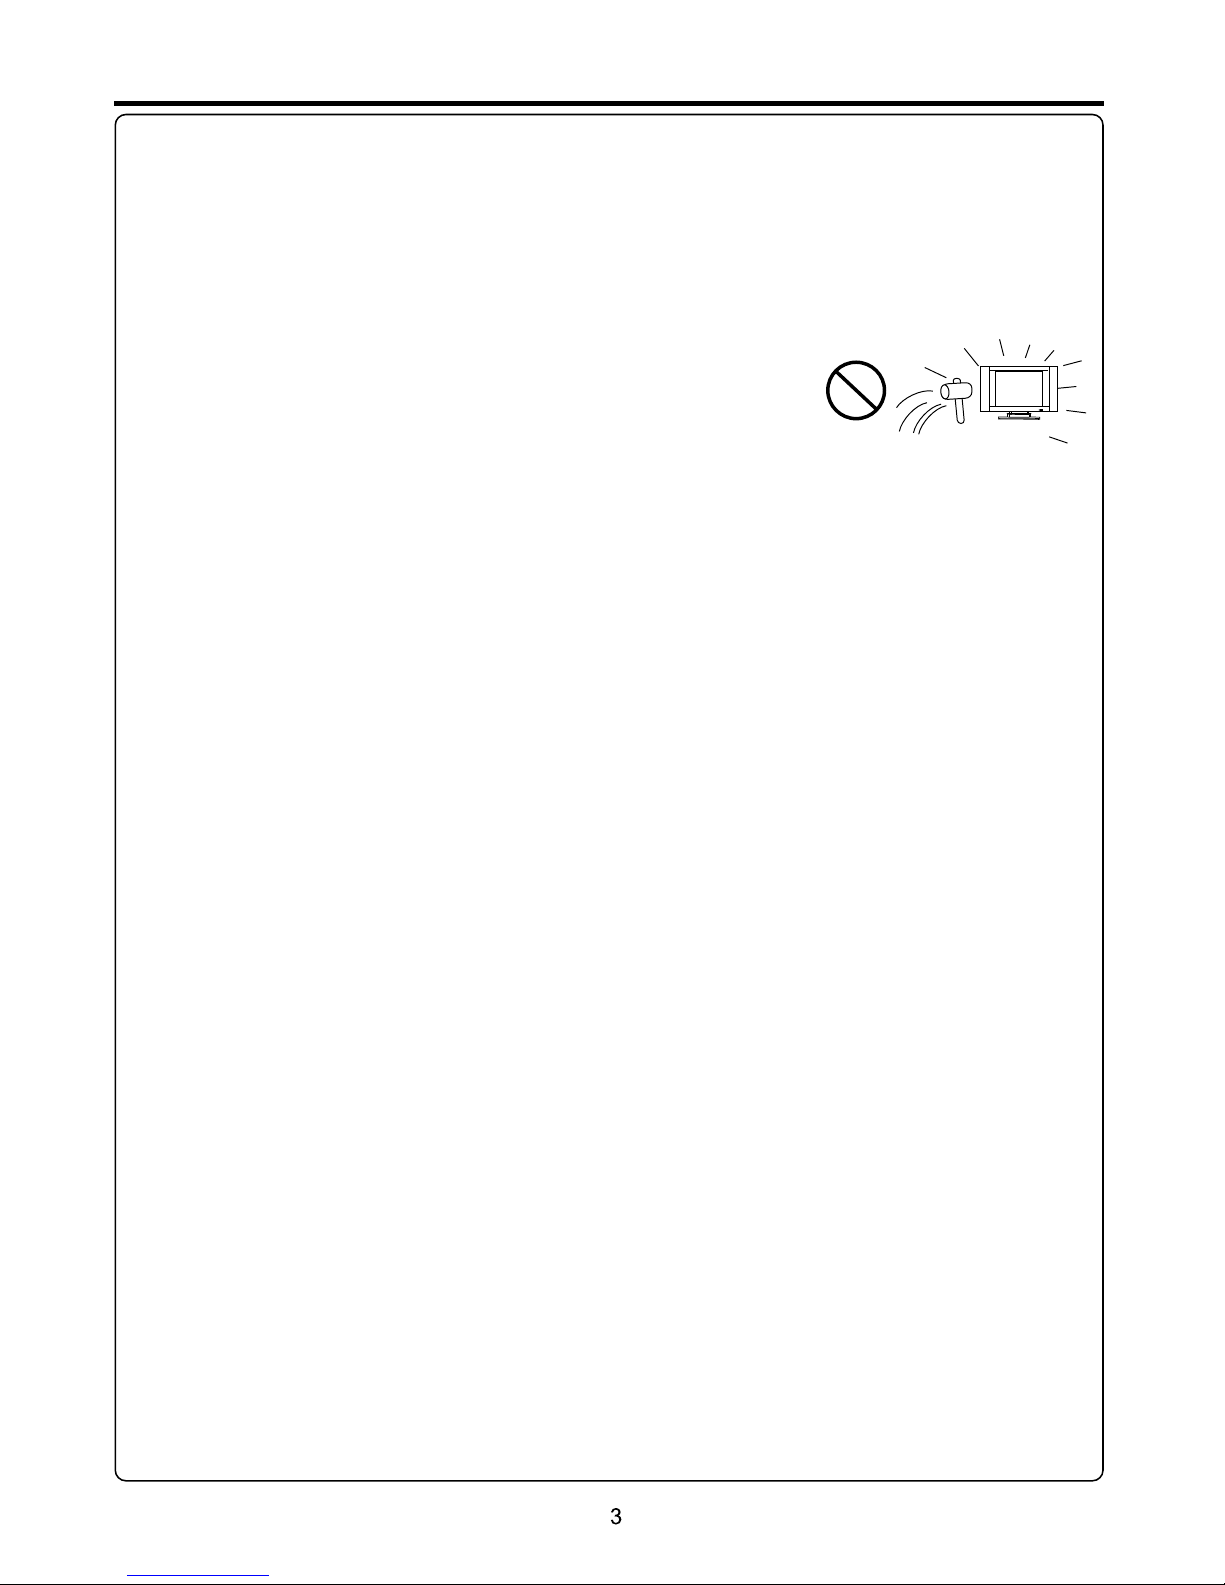
23.Pa nel pro tection- --The d isplay pan el used i n this pr oduct is mad e of glas s.
There fore, i t can break wh en the pr oduct is dro pped or i mpact ed upon by oth er obje cts.
Be care ful not t o be injured b y broke n glass pieces in cas e the dis play panel b reaks .
24.Pi xel def ect---Th e displ ay panel is a ve ry high t echno logy produ ct, giv ing you fine ly deta iled pictu res. Oc casional ly, a few
non-a ctive p ixels may ap pear on t he screen as a fixed po int of bl ue, green or r ed. Ple ase note tha t this do es not affect the
perfo rmanc e of your prod uct.
WARNIN G: For co ntinued sa fety, appar atus wi th class I con struc tion shall b e conne cted to a main s socke t outlet wit h a
prote ctive e arthing co nnect ion.
Page 6

Important Notice
About Temperature
About After-Image
Cleaning and
Maintenance
Do not us e in hot an d cold rooms ( locat ions)
● When th e unit is u sed in rooms ( locat ions) with l ow temp eratu re, the pict ure may
leave t rails o r appear sli ghtly d elayed. Th is is not a malf uncti on, and the un it will
recov er when t he tempera ture re turns to nor mal.
● Do not le ave the u nit in a hot or co ld loca tion. Also, do not lea ve the un it in a locati on
expos ed to dir ect sunlig ht or nea r a heater, as this may ca use the c abinet to de form
and the t o malfu nction.
● Stora ge temp erature: 3 2°F to +1 22°F
● Working te mpera ture: 4 1°F to +104° F
The ext ended u se of fixed im age pro gram mater ial can c ause a pe rmanent af ter-i mage
on the sc reen.
This ba ckgro und image is v iewab le on normal progra ms in the f orm of a stati onary f ixed
image . Thi s type of i rreve rsible scr een det eriorati on can be l imited by ob servi ng the
follo wing st eps:
A. Redu ce the br ightness /cont rast setti ng to a min imum vi ewing leve l.
B. Do not d ispla y the fixed im age for e xtended pe riods o f time.
C. Turn th e power o ff wh en not in a ctual use.
Important Info rmati on Rega rding Use of Vid eo Game s, Computers,
Captions or Othe r Fixed I mage Di splays.
● Do not al low a sti ll picture t o be disp layed for an extend ed peri od, as this ca n cause a
perma nent af ter-imag e to rema in on the scre en.
Examp les of st ill pictur es incl ude logos, video ga mes, co mputer ima ges, te letext and
image s displ ayed in 4:3 mo de.
CAUTIONS:
● The perman ent aft er-im age on the scr een res ulting fro m fixed i mage use is no t an
opera ting de fect and as su ch is not c overed by th e warra nty.
● This produ ct is not d esign ed to displa y fixed i mages for ex tende d periods of t ime.
Do not le t image s display in 4 :3 mode f or extende d perio ds of time.
To clean this u nit, wi pe with a soft , dry clo th.
If the su rface s are extrem ely dir ty, us e a soft cl oth dipped i n a soap an d water solu tion or
a weak de terge nt solutio n.
● Use eye glass c leaner to re move st ubborn dirt from th e scree n.
● Never u se alco hol, paint t hinne r or benzine to clean t his uni t.
● Befor e using a c hemicall y treat ed cloth, re ad the in struc tions that c ame wit h the
cloth c arefu lly.
Page 7
Preparations
Using the Remote Control
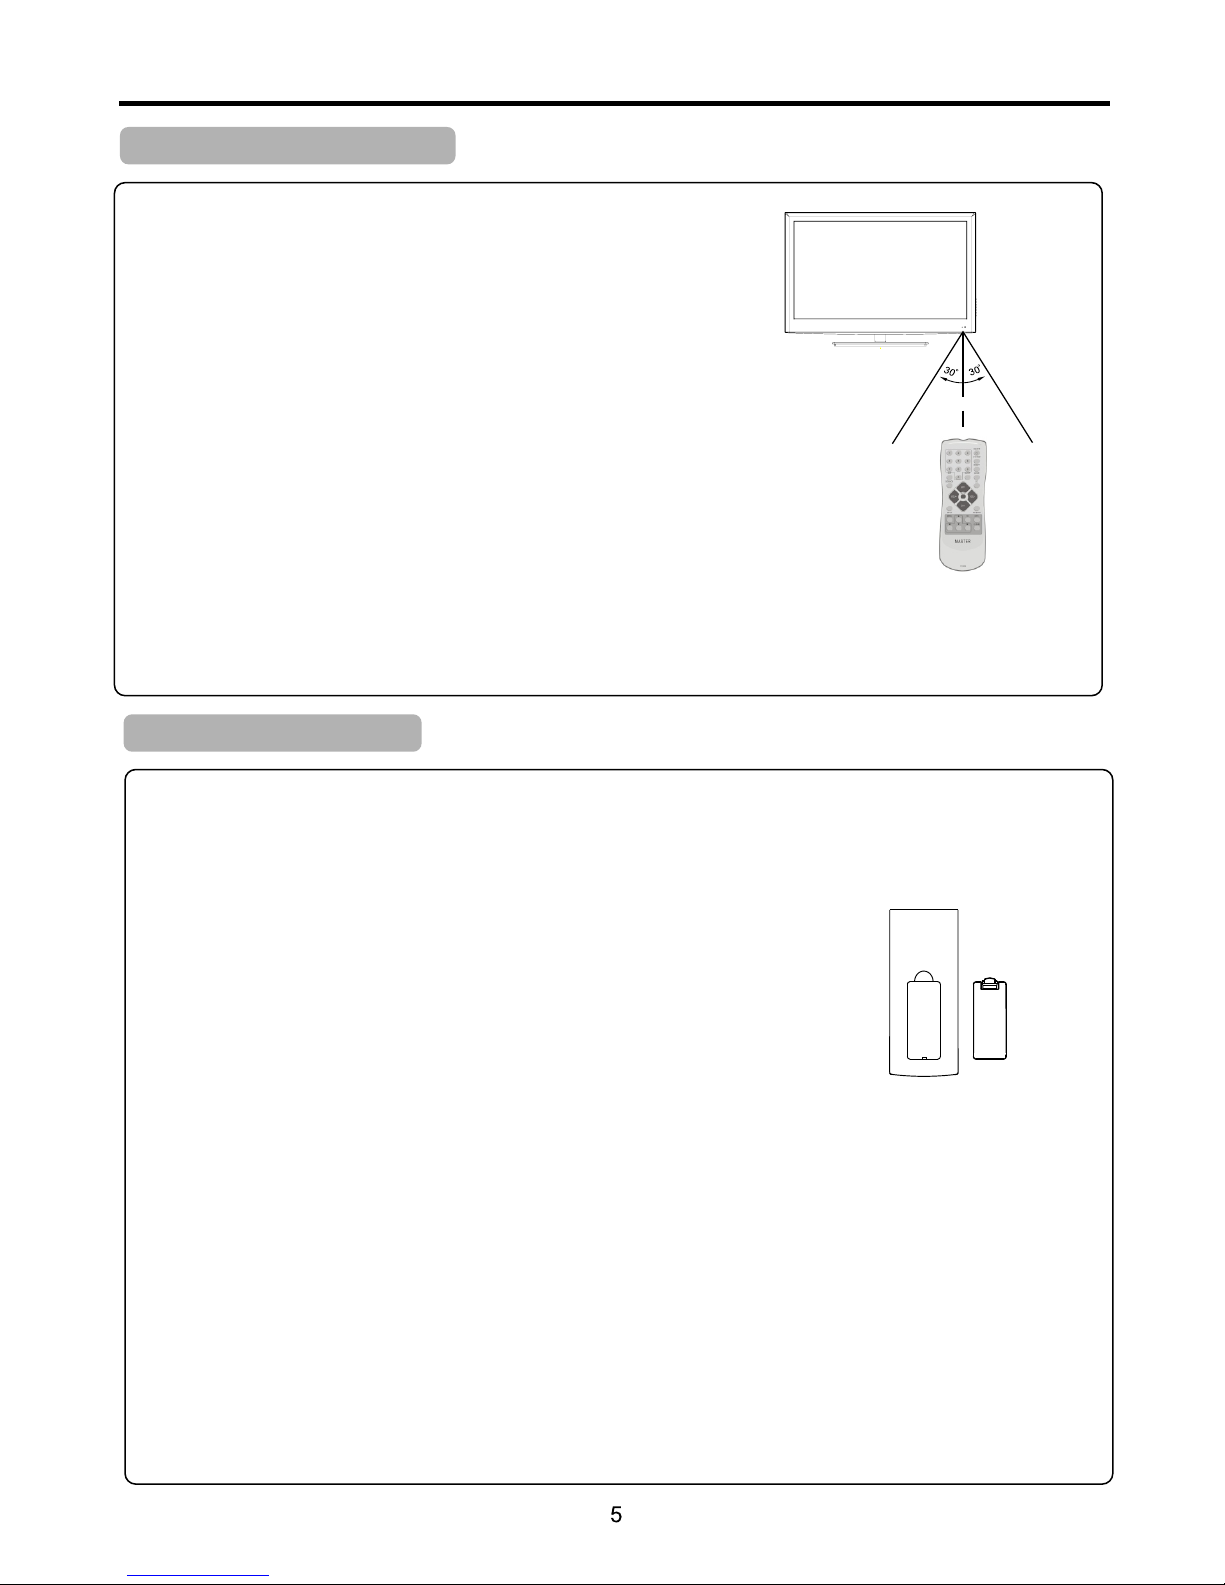
■ Use the r emote c ontrol by po intin g it towards t he remo te sens or window of t he
set. Ob jects b etween the r emote c ontrol and s ensor w indow m ay prevent p roper
opera tion.
Cauti ons reg arding use o f remot e control
■ Do not ex pose th e remote con trol to s hock. In add ition , do not expose the rem ote
contr ol to liq uids, and do n ot plac e in an area with high hu midit y.
■ Do not in stall o r place the re mote co ntrol unde r direc t sunli ght. The heat may c ause de formatio n of the un it.
■ The remote c ontro l may not w ork proper ly if the r emote sens or wind ow of the main u nit is un der direct s unlig ht or strong
light ing. In s uch a case, ch ange th e angle of the l ighti ng or the TV set , or operate t he remo te control c loser t o the remote
senso r windo w.
Installing the Batteries
If the re mote co ntrol fail s to oper ate the TV fun ctions, re place t he batteri es in the r emote cont rol.
1 Open th e batte ry cover.
2 Inser t two siz e AA batteries .
■ (Plac e the bat teries wit h their t erminals c orres ponding to the (+)
and (- ) indicati ons in th e battery co mpart ment.)
3 Repla ce the co ver.
Precaution on battery use
● Dispo se of b atter ies i n a designat ed di sposal are a.
● Batte rie s shoul d alw ays be dispo sed o f with the env ironment i n min d. Always rec ycle or disp ose o f batterie s in accorda nce
with ap pli cable l aws a nd regulat ion s.
● Impro per u se of bat ter ies can resu lt in a l eakage of ch emicals an d/o r explosio n. Be sure to fo llo w the instru ctions bel ow.
1. Plac e bat terie s wit h their term ina ls corresp onding to th e (+) a nd (-) indic ati ons.
2. Differe nt ty pes of batte ries have di ffe ren t characte ris tics. Do not m ix batteri es of d iff erent type s.
3. Do not m ix ol d and new b att eries. Mix ing o ld and new bat teries can s hor ten the life o f new batter ies a nd/or caus e old batter ies
to leak c hem icals .
4. Remo ve ba tteri es as s oon as they ar e non -operabl e. Chemica ls th at leak from b atteries c an ca use a rash. If c hemical le aka ge is
found , wip e with a cl oth .
5. If the r emo te control i s not used for a n ext ended peri od of time, re mov e the batter ies from the r emo te control .
6. The batte rie s (battery p ack of batte rie s installe d) shall not b e exp osed to exce ssi ve heat s uch a s sunshine , fir e or the like.
16 feet
Page 8
Preparations (Continued)
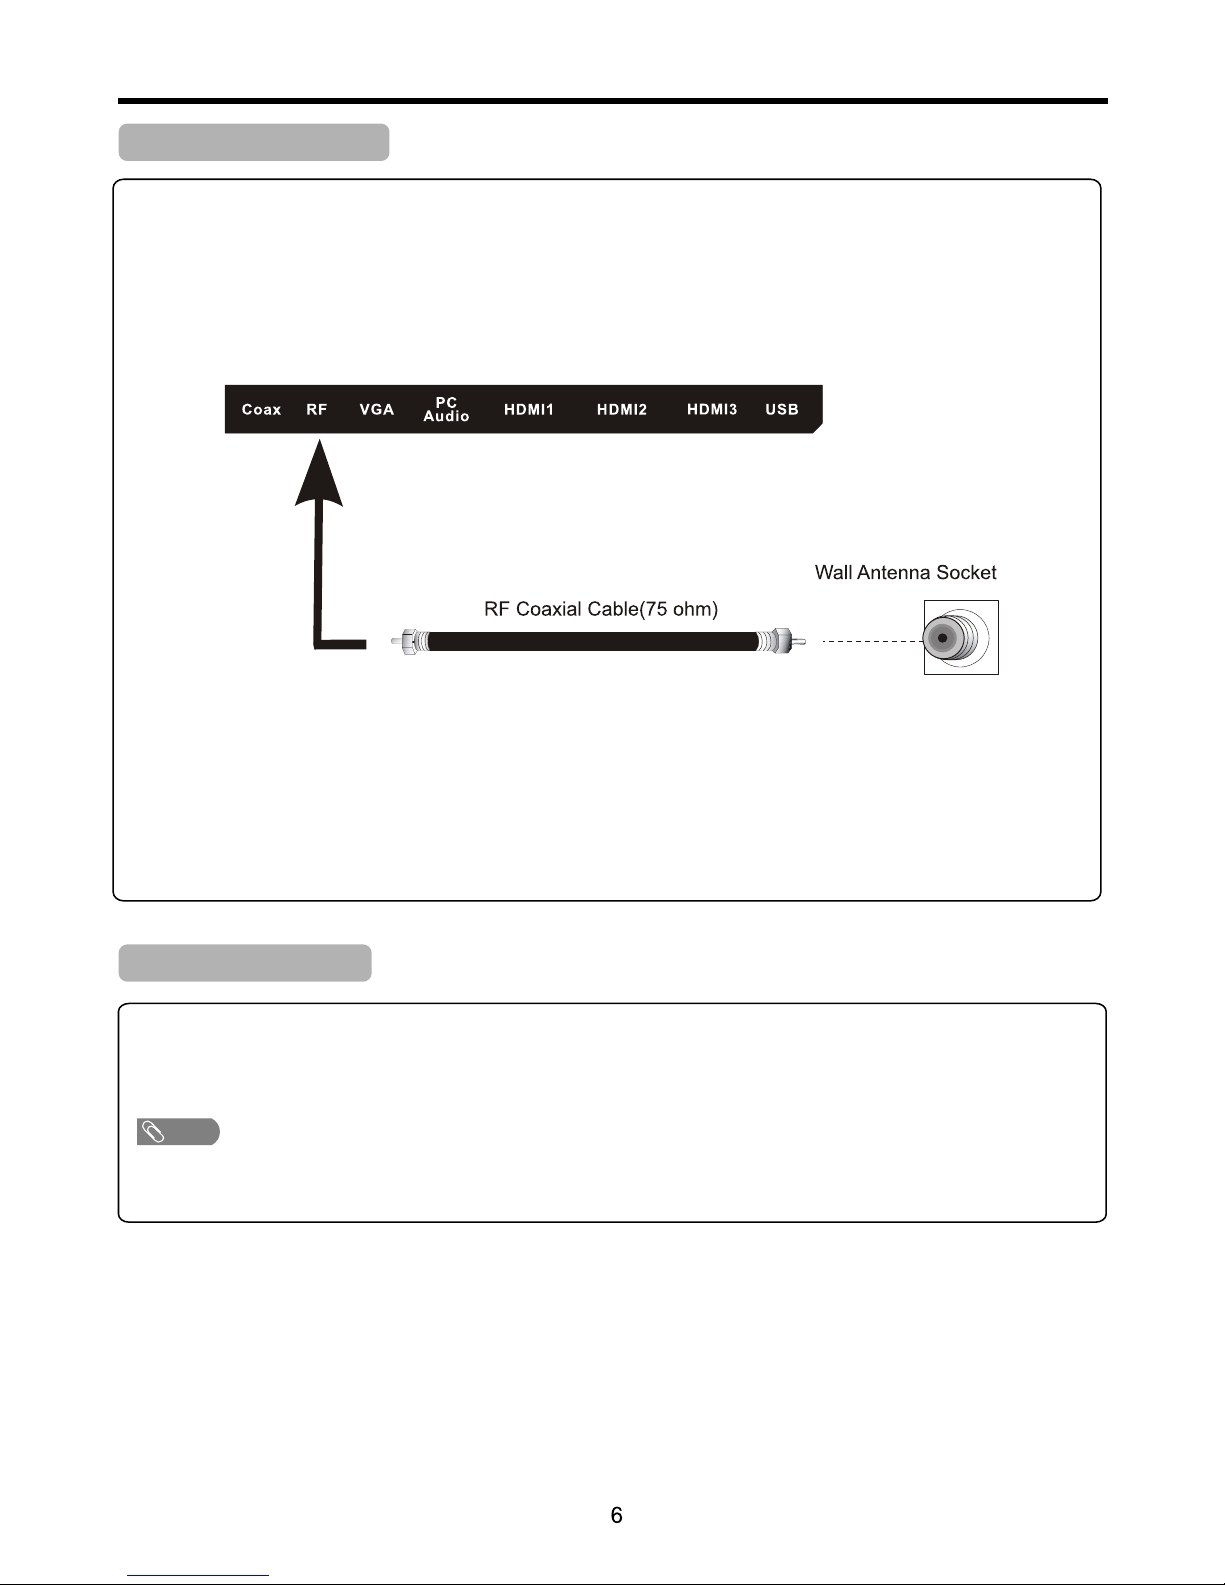
Antenna Connection
INSTAL L the unit in a ro om wher e direct light will not fal l upon th e scree n. Total da rknes s or a refl ection on the pict ure
screen may cause e yestr ain. Soft and indirect li ghtin g is reco mmended for comf ortab le view ing.
Optimal pictur e recep tion requires good sign al and wi ll generally mean that an a mplif ied ant enna must be used.
The exact type and p ositi on of the a ntenna will depe nd upon y our par ticular area.
Power Connection
Note
Insert the AC plug in to a conv eniently located AC outl et.
● This pr oduct s hould be ope rated o nly from the t ype of po wer sou rce indica ted on th e marking la bel.
● Alway s unplu g the AC cord f rom pow er outlet wh en not us ing for a long period o f time.
Note:
● It is rec omm ended t hat t he 75-ohm co axi al cable be us ed to elimin ate i nterfere nce and nois e whi ch may occur d ue to radio wa ve
condi tio ns.
● The ant enn a cable s hou ld not be bund led w ith the powe r cord and the l ike .
● If the an ten na is not i nst alled prop erl y, con tact your de aler for ass ist ance.
Page 9
1. STANDBY
Press t his button t o turn th e uni t ON from S TAND BY mo de. Press it a gain to turn t he set ba ck to S TAND BY.
2.SOURCE
To access I NPUT SOURCE men u
3. M ENU
Press t his button t o acces s the m enu mai n page.
4. C H+/-
Press t hese two but tons to d ire ctly ch ange the TV chann el;
In menu o peration s, thes e but tons se rve as up/do wn buttons .
5. V OL+/-
Press t he VOL+ or VOL - butt on to dir ect ly incr ease or decr ease the sou nd volume le vel;
In menu o peration s, thes e but tons se rve as right /left butt ons.
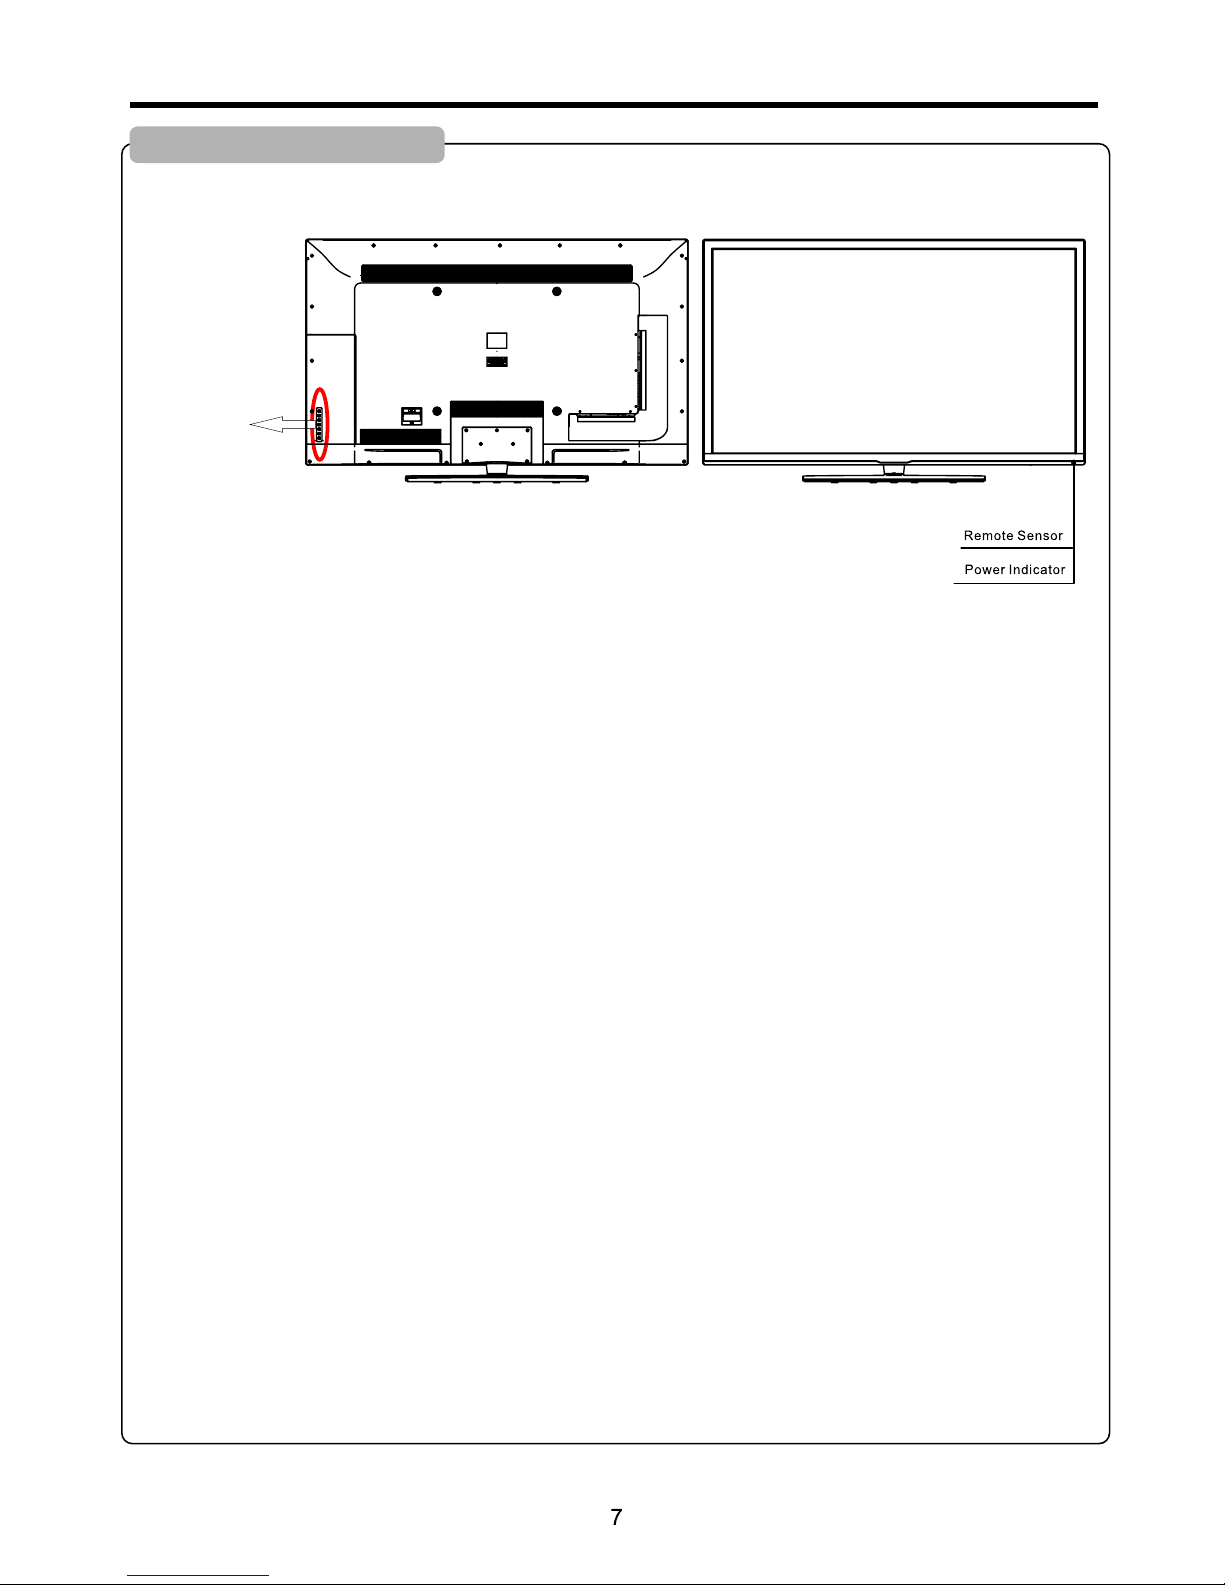
Identification of Controls
Main Unit (control panel)
NOTE:
Funct ions of CH+/-, V OL+/- , MENU, S OURCE and STANDB Y are a lso pro vid ed to the r emote cont rol. This op eration
manua l provides a d escri pti on base d on operati ng functio ns with t he re mote co ntrol.
STAN DBY
VOL+
VOL-
CH+
CH-
MENU
SOURCE
Page 10
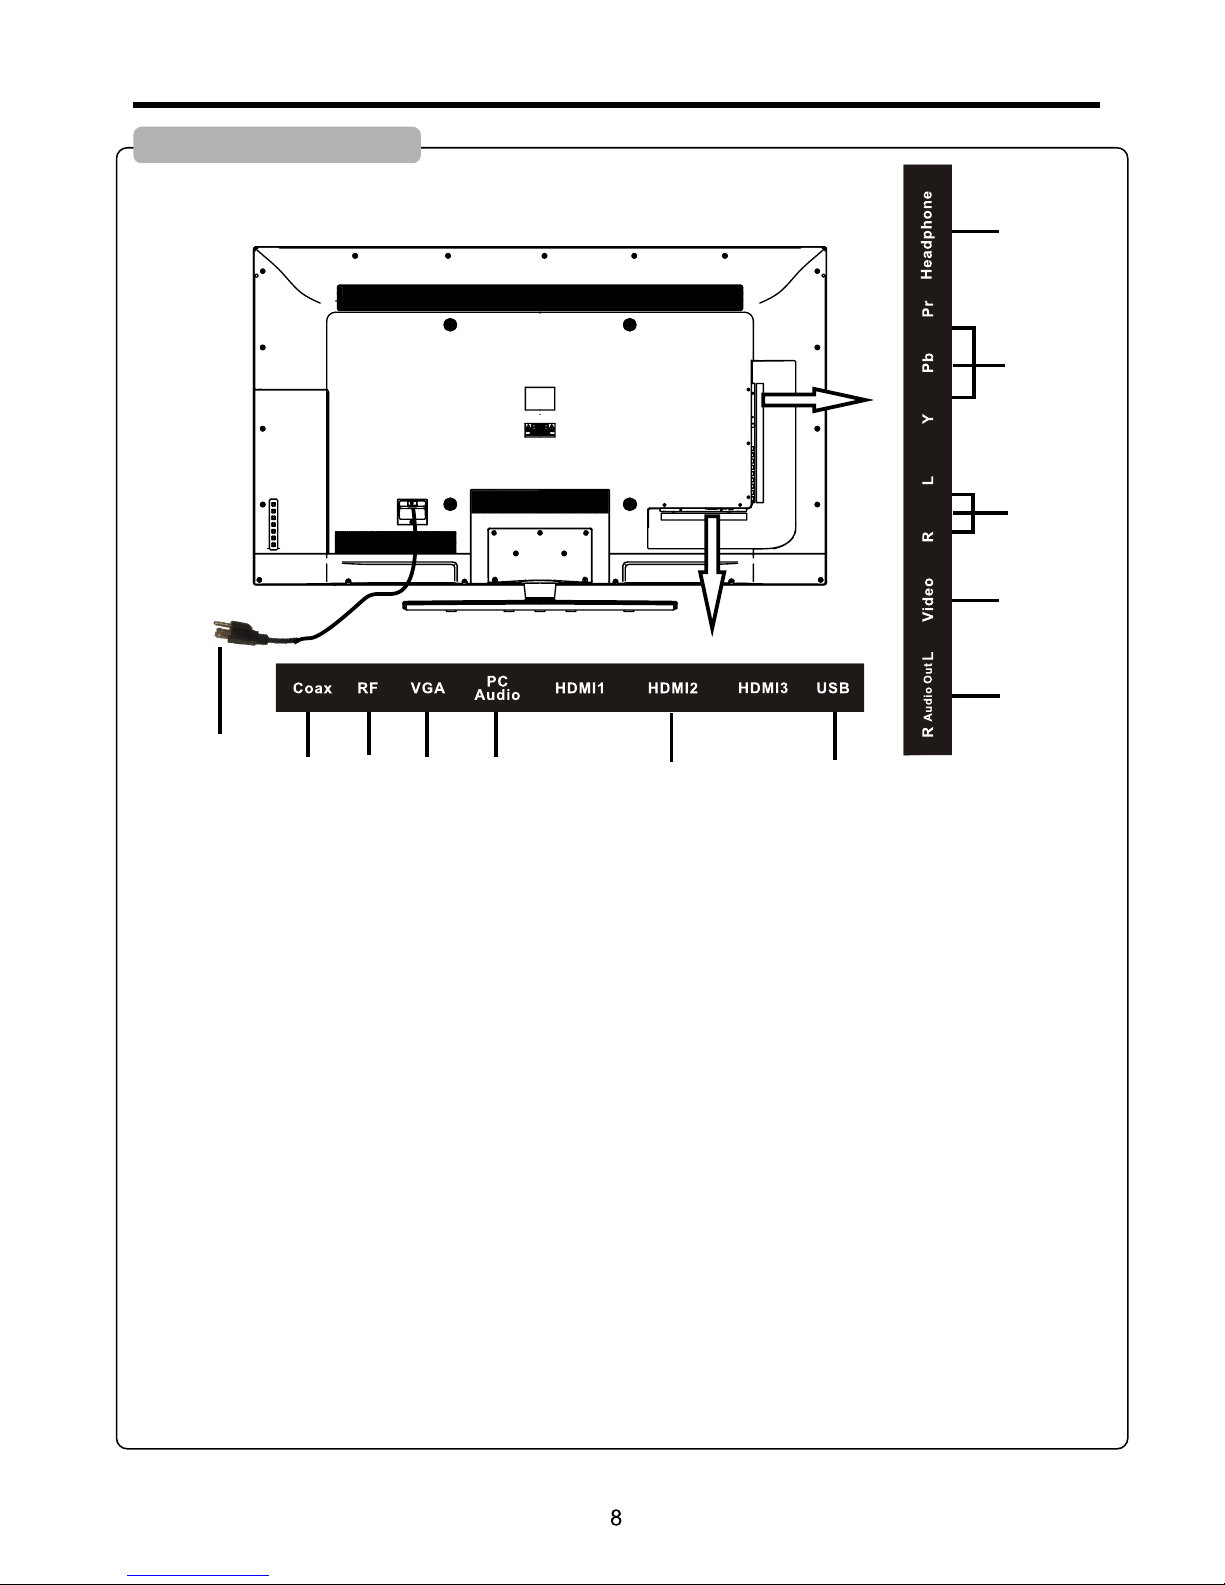
Identification of Controls (Continued)
Main Unit (connectors)
1.POWER CORD-Main power input.
2.COAX-Connect the SPDIF receiver.
3.RF-This connection is for digital or analog cable without the cable box or over-the-airwave ante nnas. The tuner is a
hybrid tuner that tunes to both analog and digital channels. This c onnec tion us es coax ial RF ca ble.
4.VGA - This con necti on port c onnec ts to a PC fo r video u sing VG A cable. B e sure to connect your audio cable to
the VGA Stereo input if you want sound out of VGA video source.
5.PC Audio - This co nnect ion por t is for pe ople wh o want to p rovid e audio t o the TV when us ing a PC.
The sources use 3.5mm mini-jack audio cable.
6.HDMI-HDMI connects to devices that use HDMI cab le, suc h as Blu- ray or HD D VD play er, or HD ca ble / sat ellit e
set-top box. This con necti on port r eceiv es pure d igita l audio a nd high d efini tion si gnal th rough o ne sing le cabl e. Th is
port also can accept a HDCP vide o devic e for vid eo.
7.USB-
8.R/L Out-Th ese two c onnec tions a re audi o out.
9.Vid eo-Video c onnec ts to dev ices th at use co mposi te vide o cable s such as V CR or DVD p layer o r Wii™. C onnec t
the yellow for video and the red / white for audio. Please Note: audio is s hared w ith YPbPr port.
10.L/R-These two connections are audio connection for either YPbPr o r Vid eo port .
11.YPb Pr-Th is conn ectio n port is f or DVD pl ayers o r satel lite / cable set-top
boxes that use component cables. From left to right, conne ct gree n, blue , and red f or vide o, and th en conn ect whi te
for left channel audio, and red for right channel audio. Please Note: audio is shar ed with Video port.
12.Headphone Out.
Connect to portable USB storage device.
2
3
4
5
6
7
10
11
9
8
1
12
Page 11

Remote Control Unit
Identification of Controls (Continued)
1 2
3
4
5
6
7 8
9
0
CH+
CH-
VOL+VOL-
MUTE
ON OFF
.
SYSTEM
SOUND
GUIDE
CC
SLEEPSKIP
GO BACK
ANTENN A
INPUT
MENU
p
OK INFO
t
q
u
CLEAR
R13 0K1
1
2
3
4
5
6
7
8 9
10
11
12
13
15
16
17
14
1. NUMBER BUTTONS
Selects channe l numbe rs.
2.ON-OFF
Switches the set o n or off.
3.SYSTEM
Unused.
4.SOUND
Recalls your pre ferre d sound s etting.
5.SKIP
Unused.
6.SLEEP
Sets the sleep tim er.
7.GUIDE
Display “Chann el List ” Menu.
8.GO BACK
Return to the prev ious ch annel .
9.CC
Select the Capti on menu d irect ly.
10.VOL+/VOL-
Adjusts sound lev el.
CH+/CH-
Select a channel .
MUTE
Switches the sou nd on or off.
11. INPU T
Selects the TV,AV,COMP ONENT,H DMI1,
HDMI2 or PC mode.
12. ANTENNA
Unused.
13. MENU
Displays the On Sc reen Me nu.
14. Navigation al Cont rols
Adjusts menu sett ings.
Selects menu ite m.
15.OK
Accepts your sele ction .
16. INFO
Display the curr ent cha nnel in formation.
17. CLEAR
Exit from any OSD.
Page 12
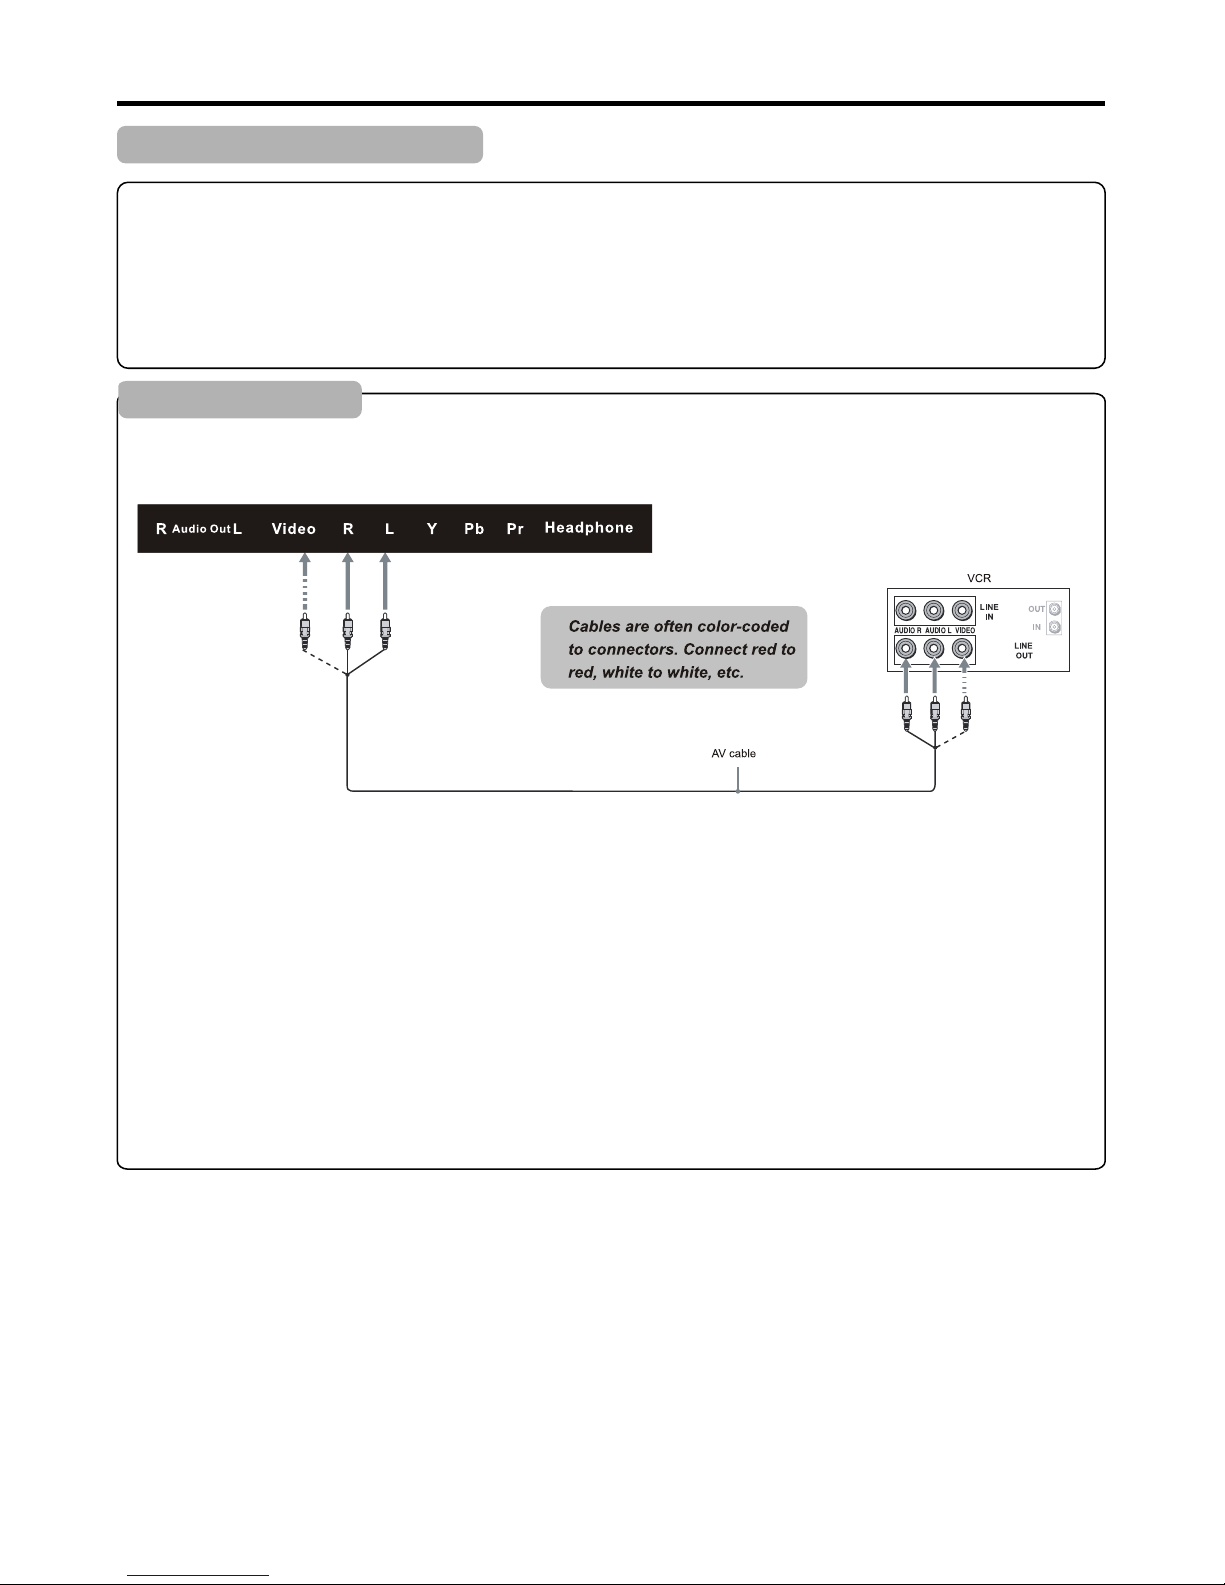
How to connect:
Conne ct the Aud io/Video c ables betw een the Au dio (L/R)/ Video jack s on the un it and VCR.
To play VCR
1. Turn on y our TV, the n press SOUR CE butt on. The INPU T SOURCE men u opens .
2. Pres s ▲ or ▼ to sel ect AV, then pr ess OK to conf irm.
3. Turn on y our VCR , i nsert a vide otape a nd press the P lay but ton.
Connections
Cautions Before Connecting
● Carefully chec k the ter minals for position and t ype bef ore mak ing any connecti ons.
● The ill ustra tion of the external equi pment m ay be differen t depen ding on y our model.
● Loose connecto rs can re sult in image or colour pro blems . Make su re that all connec tors ar e secur ely inserted int o
their terminal s.
● Refer to the opera ting ma nual of the external devi ce as wel l.
● When connectin g an exte rnal device, turn the pow er off to avoid any issue s.
Connecting a VCR
TV REAR
10
Page 13
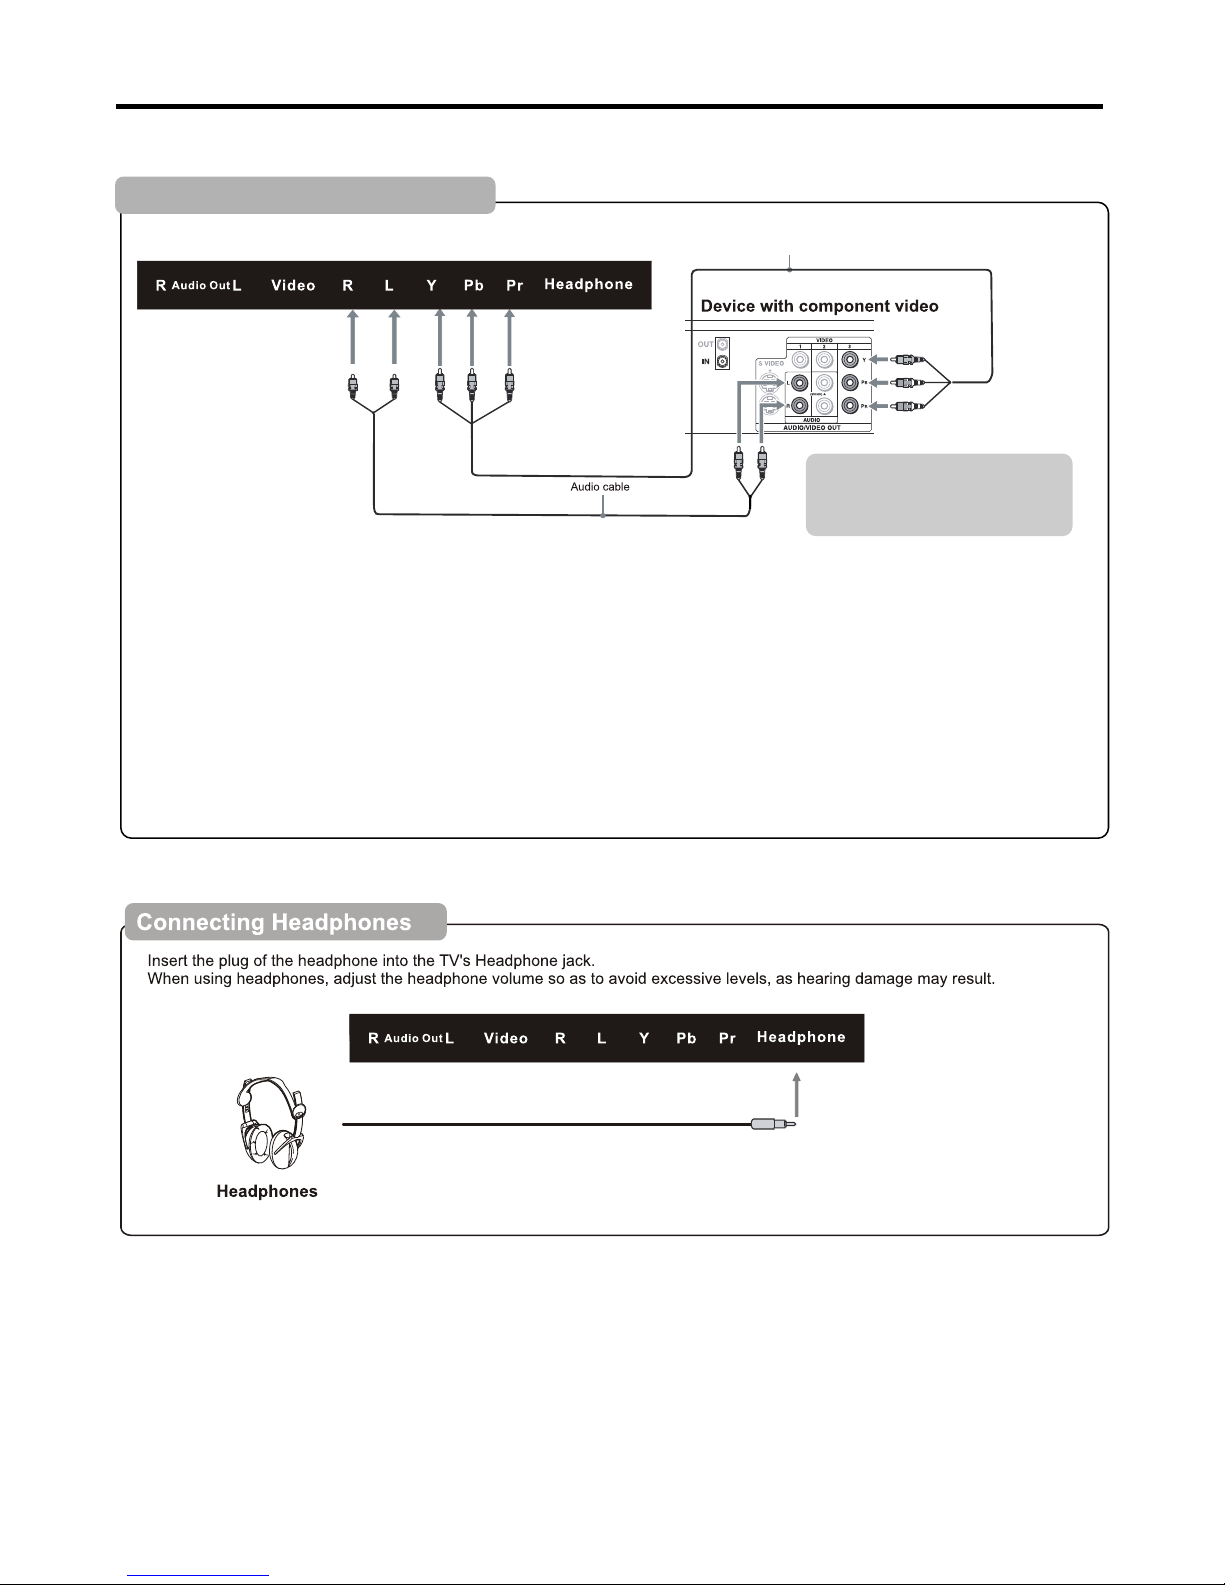
Connections (Continued)
To connect a device using component video:
Conne ct the Co mponent Vi deo cable be tween t he Y, Cb/Pb, C r/Pr in put jacks on t he unit a nd Y, Cb/Pb, C r/Pr ou tput jacks
on the de vice .
Conne ct the Aud io cable bet ween th e AUDIO input jacks on t he unit a nd AUDIO outp ut jack s on the devic e.
To play component video from an external device:
1. Turn on y our TV, the n press SOUR CE butt on. The INPU T SOURCE men u opens .
2. Pres s ▲ or ▼ to sel ect YPbPr, t hen pre ss OK to confi rm.
3. Turn on y our ext ernal devi ce and se t it to the corr ect mod e. See the device's u ser gui de for more in forma tion.
Connecting Component Video
TV REAR
Com ponen t video c able
Cable s are oft en color-c oded
to conn ector s. Connect r ed to
red, wh ite to wh ite, etc.
11
Page 14

How to connect:
Conne ct a VGA cab le between t he VGA jac k on the computer and t he VGA inp ut jack on the u nit.
Conne ct an Audio c able between the AUD IO outp ut on the comp uter an d AUDIO input j ack on th e unit.
To play video from a computer
1. Turn on y our TV, the n press SOUR CE butt on. The INPU T SOURCE men u opens .
2. Pres s▲or▼ to select PC , then pr ess OK to conf irm.
3. Turn on y our com puter, and ad just th e display propert ies as re quired.
Connections (Continued)
TV REAR
HDM I cable
D-S ub cabl e
(an alog RG B)
How to connect a device using HDMI Connection:
Conne ct the HD MI cable bet ween th e HDMI interface on t he unit a nd HDMI outp ut on the d evice.
To play from the device using HDMI:
1. Turn on y our TV, the n press SOUR CE butt on. The INPU T SOURCE men u opens .
2. Pres s ▲ or ▼to se lect HDMI, t hen pre ss OK to confirm.
3. Turn on y our dev ice and set it t o the cor rect mode. S ee the de vice's user guide f or more i nformati on.
Note:
If the ex ter nal device h as DV I output onl y, use a D VI to H DMI adapter cab le to c onnect to th e HDM I terminal . Con nect the aud io
cable t o the V GA AUD IO IN jack on th e TV re ar.
TV REAR
Dev ice wit h HDMI ou tput
To moni tor por t
(15 -pin D- Sub)
To audi o outpu t jack
Aud io cabl e
(st ereo mi ni plug s)
Connecting an HDMI device
Connecting a Computer
12
Page 15

Basic Operations
Turning On/Off the Power
■Turning On
Insert the power c ord int o the wal l outlet.
Press the STAND BY button on the u nit or th e ON-OF F button on the remo te cont rol, th e unit will be turned on and yo u will be
ready to use its fea tures .
■Turning Off
With the power on, p ress th e STANDBY but ton on th e unit or the ON-OFF b utton o n the rem ote control to turn off t he unit, and
put the unit in stan dby mod e. To cut off the po wer completely, plea se disc onnect the AC power c ord.
Note: If there i s no sign al input for a c ertai n time, t he TV will aut o go to sta ndby mode.
Switching Sources
1.Press the SOURC E butto n on top of t he TV or th e INPUT b utton o n the remote contr ol and yo u will
see the picture ab ove.
2.Use ▲▼ buttons to s elect t he sour ce you want to switc h to and pr ess the O K button in the middle
of the ▲▼ buttons.
13
Source Select
TV
AV
YPbPr
HDMI1
PC
HDMI2
HDMI3
USB
Page 16

AUTO CHANNEL SEARCH
Now Searching...Please Wait...
Return
Analog channe ls Found: 0
Digital chann els Found: 0
92%
:Stop Auto Channel Search
:Skip
MENU
ENTER
CHANNEL
Channel List
Channel Setti ng
Signal Type
Auto channel se arch
Air
Execu te
:Return
▲
▲
:Select menu
:Go to next Menu
/
MENU
ENTER
▲
Picture
SOUND CHANNEL
PARENTAL
SETUP
OTHERS
Getting Started
If You've Connected Antenna or Cable to the TV
If an antenna or cab le (wit hout a ca ble box) is connec ted to yo ur TV's tuner, yo u will ne ed to go th rough an
INITIAL SETUP pro cess in o rder to w atch the TV.
1.Press MENU to ope n the men u
2.Use the ◄ or ► button t o selec t the CHA NNEL icon an d press OK.
3.Use the ▲ or ▼ button s to high light t he signal type and p ress ◄ or ► t o selec t your connectio n eithe r
AIR or CABLE.
4.Use the ▲ or ▼ button s to sele ct AUTO CHANNEL SEARCH and pr ess OK to s can for c hannels.
5.Once the scann ing fin ishes, you can begin to wat ch TV.
14
Page 17

PICTURE SETTINGS
Picture Mode Us er
:Return
▲
▲
:Move
MENU
Brightness
Contrast
Color
Tint
Sharpness
▲
▲
▲
▲
▲
▲
▲
▲
▲
▲
:Change Setting
▲
▲
PICTURE
Picture Setti ngs
:Return
▲
▲
:Move
:Go to next Menu
/
MENU
ENTER
▲
Screen Size
PC Settings
Color Temperature N ormal
Advanced pict ure Settings
Wide
Picture
SOUND CHANNEL
PARENTAL
SETUP
OTHERS
OSD (On Screen Display) Options
PICTURE This m ain option has function s for cha nging t he picture setti ngs for a ll port s, such as tint, con trast ,
sharpness.
SOUND This mai n option has functions fo r chang ing sou nd settings for al l ports , such as S PDIF Typ e, treb le, bas s,
and acoustic cin ema enh ancement….etc.
CHANNEL This m ain option has function s for the t uner po rt, such as scanni ng chan nels, e diting channel s, spec ific
range scans, aud io lang uage, tuner mode….etc .
PARENTAL This main op tion ha s functions for only comp osite a nd TV port. Th e purpo se of this option is t o block
TV inappropria te for ch ildren.
SETUP This mai n option has functions fo r all por ts, OSD l anguage, capti on styl es,
time setup, auto matic s ynchr onization, sle ep time r and pow er on timer, power off tim er.
OTHERS This ma in option has functions f or all po rts, OS D language, capt ion sty les, ti me setup, automa tic
synchronizat ion, sl eep timer and power on time r, power o ff timer.
PICTURE
This option allo ws user s to adju st the TV's picture sharp ness, c olor, ti nt, and other vari ous fun ction s.
1.Press MENU to ope n the OSD .
2.Press ◄ or ► to selec t PICTU RE and pr ess OK.
3.Use ▲ or ▼ to select th e one you w ant to ad just and
◄ or ► or OK to adjust the m.
I.PICTURE SETTI NGS
i.PIC TUR E MODE This featu re ch anges vari ous
color m ode s for the TV.
ii.BR IGH TNESS This feat ure c hanges the p ict ure's
detai l in da rk colors.
iii.C ONT RAST Thi s fea ture chang es th e difference
betwe en da rk and brigh t obj ects.
iv.COLOR This featu re ch anges the am oun t of color in
the pic tur e.
v.TINT Th is fe ature chan ges t he white bal anc e of the
color.
Vi.SHARP NES S Thi s fea ture chang es th e picture
quali ty.
15
Page 18

ADVANCED PICTURE SETTINGS
Dynamic Contr ast
:Return
▲
▲
:Move
MENU
Film Mode
Noise Reducti on
MPEG Noise Redu ction
Off
Off
Low
Off
:Change Setting
▲
▲
PC SETTINGS
Auto Adjust Exe cute
:Return
▲
▲
:Move
:Press to Execute
MENU
ENTER
Horizontal Position
Vertical Posit ion
Clock
Phase
Reset
▲
▲
▲
▲
▲
▲
▲
▲
Execute
PICTURE
II.SCREEN Size
III.PC SETTINGS
i.AUTO A DJUST Th is feature auto mat ically adj ust s the
pictu re sy ncing in wit h the s ignal of the P C.
ii.HO RIZ ONTAL POSITI ON This fe atu re adjusts t he to
the lef t or ri ght positi on of t he PC pictur e.
iii.V ERT ICA L POSITI ON Th is fe ature adjusts t he up or
down po sit ion of the PC pi ctu re.
iv.CLOCK This tunes i n lar ge increme nts t he picture
quali ty of t he PC pictur e.
v.PHASE This tunes in s mal l incremen ts th e picture
quali ty of t he PC.
Vi.RESET Th is resets th e set tings of PC se tti ngs.
IV.CO LOR TEMPERATU RE This f eatur e adjusts the colo r tempe ratur e of the TV, g iving w arm, normal, coo l,
(warm being more r ed, coo l being m ore blue and normal being n eutra l color ).
V.ADVANCE PIC TURE SE TTING S
i.DYN AMI C CONTRAST Th is feature a llo ws the HDTV to
autom ati cally adju st th e contrast o f the H DTV depend ing o n
the pic tur e you are view ing .
ii.FI LM MO DE Th is feature i s 24p t hat syncs with DV D
movie s, an d should be en abl ed when view ing D VD video to
allow s moo ther frame r ate .
iii.N OIS E REDUCTIO N Thi s fea ture reduc es ge neral
pixil ati on by blurri ng th em.
Iv.MPEG NOI SE RE DUCTION This featu re re duces DVD
video p ixi lation by bl urr ing them.
I.SCR EEN S IZE This featur c han ges the various a spects of the TV’s video. (As pects incl ude W ide,Cine ma, Zoom,Nor mal .)
16
Page 19
SOUND SETTING
Sound Mode Standard
:Return
▲
▲
:Move
MENU
Bass
Balance
Treble
▲
▲
▲
▲
▲
▲
:Change Setting
▲
▲
SOUND
Sound Setting s
:Return
▲
:Move
MENU
Surround Mode
Digital Sound
Other Setting
Equalizer Set tings
:Go to Next Menu
/
ENTER
▲
Analog Sound
Stereo
English
▲
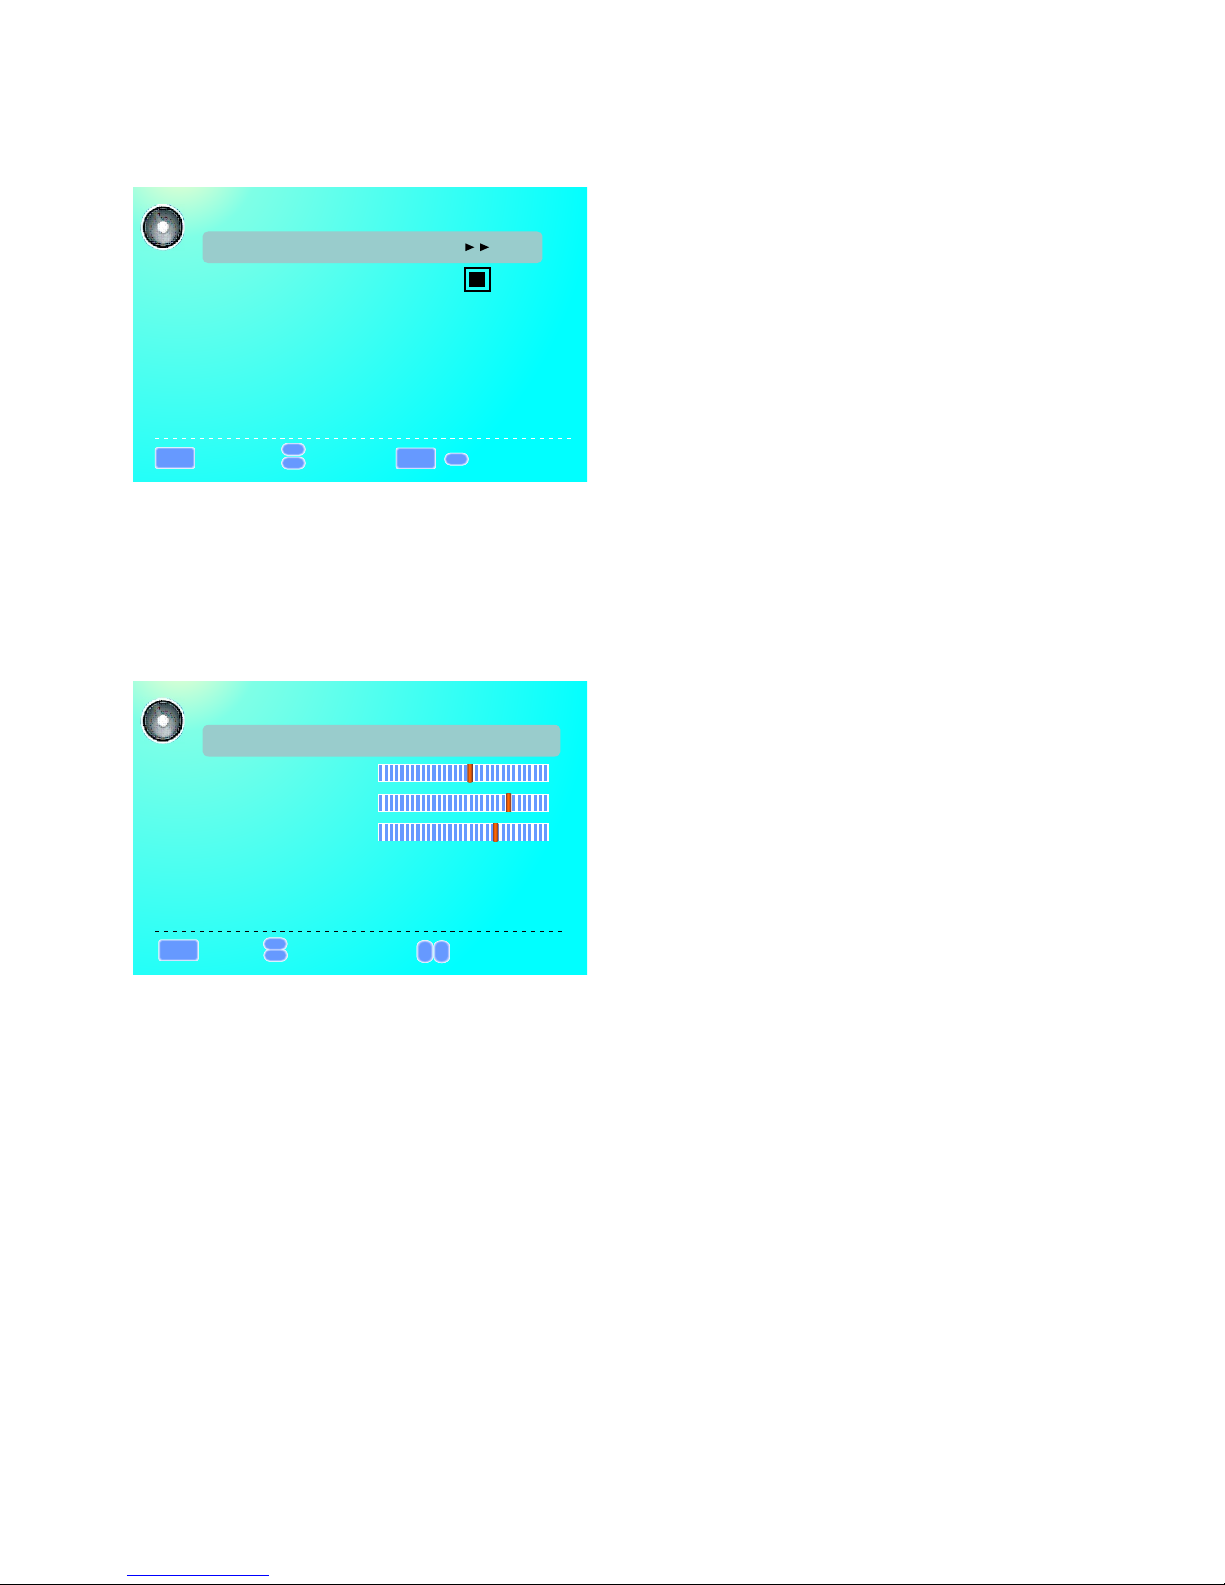
SOUND
This option allo ws user s to adju st the TV's sound functio ns.
1.Press MENU to ope n the OSD .
2.Press ◄ or ► to selec t SOUND a nd pres s OK.
3.Use ▲ or ▼ to select th e one you w ant to ad just and ◄ or ► or OK to adj ust the m.
I.SOUND SETTING S
i.SOU ND MO DE Th is feature s wit ches betwe en
prese t set tings (pre set s include st and ard, soft, u ser, a nd
dynam ic) .
ii.BA SS Th is fe ature adju sts t he audio bas s lev el of
the HDT V.
Iii.T REB LE Th is feature a dju sts the audi o tre ble level
of the HD TV.
iv.BALANC E This fea tur e adjusts th e bal ance
betwe en th e two speake rs mo ving sound f rom l eft to right .
II.SURROUND MOD E This fe ature e nables the TV two sp eaker s to prov ide a wider sound effect.
III.ANALOG SOU ND This f eatur e adjusts the seco nd audi o progr ammin g in analog channe ls.
IV.DI GITAL SOUND T his fea ture adjusts the d igita l secon d audio programming in di gital c hanne ls.
V.Oth er setting This feature s elect t he AVL, Spe aker and Digital Audio output.
17
Page 20

CHANNEL LIST
2 Ket
:Return
▲
▲
:Move
:Select Channel
MENU
ENTER
▲
▲
:Page
Page 1/1
CHANNEL
Channel List
Channel Setti ng
Signal Type
Auto channel se arch
Air
Execu te
:Return
▲
▲
:Move
:Go to next Menu
/
MENU
ENTER
▲
Equalizer SETTINGS
:Return
▲
▲
:Move
MENU
▲
▲
:Change Setting
Mode
POP
-2
-1 2 3 1 0 -1
100
250 500 1K 2K 4K 10 K
SOUND
VI.EQUALIZER SE TTING S This fe ature enables th e inter nal equ alize r of the speakers. You can adjust t he
settings indiv idual ly or use t he presets (user, o ff, roc k, pop ja zz).
CHANNEL
This option allo ws user t o adjus t the TV's tuner function s.
1.Press MENU to ope n the OSD .
2.Press ◄ or ► to selec t CHANN EL an d press O K.
3.Use ▲ or ▼ to select th e one you w ant to ad just
and ◄ or ► or OK to adjust t hem.
I.CHANNEL LIS T This fe ature gives you th e list of c hanne ls currently found by the T V.
18
Page 21

PARENTAL CONTROL
:Return
:Enter password
MENU
0-9
V-CHIP
Change Pa sswor d
Keypad Lock
Source Lock
Lock Parental Co ntrol
Remote
AUTO CHANN EL SEARCH-A ir
Analo g Cha nnels Foun d: 0
Digit al Ch annels Fou nd: 0
Now Sea rch ing.... Pl eas e Wait.. .
2%
Retir m
CHANNELSETTINGS
:Return
▲
▲
:Move
:Select Channel
MENU
ENTER
▲
▲
:Page
Page 1/1
Channel Skip
Label
C2-1
A3-2
A4-6
A5-7
B2-4
CHANNEL
II.CHANNEL SE TTINGS
III.SIGNAL TY PE This f eature allows yo u to swit ch betw een air (such as using ante nna) an d cable .
IV.AU TO CHAN NEL SEARCH This feature sear ches ch annels automaticall y for you .
PARENTAL
This option allo ws user s to filt er TV programs and movies w hile us ing the T V tuner. To use this o ption y ou
will need to enter i n the pas sword f irst.
1.Press MENU to ope n the OSD .
2.Press ◄ or ► to selec t PARE NTAL CONTROL and
press OK.
3.Use ▲ or ▼ to select th e one you w ant to ad just and
◄ or ► or OK to adjust the m.
I.LOC K PARE NTAL CONTROL This f eat ure allows you to i npu t a password i n ord er to access t he ot her featur es.
(The de fau lt passwor d is “0 000”)
II.V-C HIP T his f eature can i nto t he submenu to adj ust .
III. CHA NGE PA SSW ORD This fea tur e changes th e pas sword of the pare nta l control fu nct ion.
IV.K EYPA D LOC K This featu re lo cks the butt ons o n the TV from fu nct ioning.
V.SO URC E LOCK This fe atu re locks dif fer ent source s fro m working.
19
Page 22

DIGITAL CC STYLE
CC Size Default
:Return
▲
▲
:Select menu
MENU
CC Font Default
CC Opacity Defau lt
CC Color Default
CC Background Op acity D efaul t
CC Background Co lor Def ault
Close Caption
:Change Setting
▲
▲
SETUP
Closed Captio n
:Return
▲
▲
:Move
:Go to Next Menu
MENU
Menu Language E nglish
Clock
/
ENTER
▲
SETUP
This option allo ws user t o adjus t the TV's miscellaneou s optio ns.
I.CLOSED CAPTIO N This pr ovide s your TV tuner, AV ports with sub title s.
i.CAP TIO N DISPLAY T his turns on o r off t he cl osed capti oni ng.
Ii.AN ALO G CAPTION TYPE This choos es th e subchann el th at supplie s the c losed capt ion ing. For Uni ted S tates,
usual ly th e setting is C C1. T EXT 1-4 displa ys ad vertisem ent s of the channel.
iii.D IGI TAL CAPTION TYPE This choos es th e subchann el fo r digital ch ann el closed ca pti oning.
iv.DIGITAL CC P RES ET This un loc ks users abi lit y to change ca pti on styles.
v.DIGITAL CC ST YLE This f eat ure change s cap tion optio ns of d igital clo sed c aptionin g.
A)CC OPAC ITY Th is ch ang es th e tra nsparency of t he ca pti oni ng.
B)Te xt CO LOR This chang es th e col or of t he te xt.
C)CC BACKGR OUN D OPACITY Th is ch anges the tran spa ren cy of b ackground of t he te xt.
D)CC BACKGR OUN D COL OR This cha nge s the c olo r of th e background .
II.MENU LANGUAG E This fu nctio n adjusts the language of t he menu ( Engli sh, French, Span ish).
III.CLOCK
i.TIME Z ONE T his a djusts the t ime z one for the TV's clock .
ii.AUTO CLO CK This fe atu re sets the TV to the TV cha nne l's clock. (You must ha ve an tenna to use t his f eature.)
iii.SE TUP TIME This feat ure m anually le ts yo u adjust the t ime a nd date.
iv.DAY OF WEEK This feat ure tells you the d ay of t he week.
1.Press MENU to ope n the OSD .
2.Press ◄ or ► to selec t SETUP and press OK.
3.Use ▲ or ▼ to select th e one you w ant to ad just and
◄ or ► or OK to adjust the m.
20
Page 23

OTHERS
Bue Back
:Return
▲
▲
:Move
:On/Off
MENU
ENTER
No Signal Power O ff
No Operation Po wer Off
All Reset
Execu te
OTHERS
This option allo ws user s to set ot her features of the TV.
1.Press MENU to ope n the OSD .
2.Press ◄ or ► to selec t OTHER S and pre ss OK.
3.Use ▲ or ▼ to select th e one you w ant to ad just and
◄ or ► or OK to adjust the m.
I.BLUE B ACK T his featur e giv es the TV a blue d efa ult backgr oun d when there is no si gna l.
II.NO SI GNA L POW ER OFF This featu re tu rns the TV off i f the re is no signa l giv en to the TV aft er a ce rtain time .
III.NO O PER ATIO NS POWER OFF This f eat ure turns th e TV of f if there are n o com mands give n to th e TV after a cer tai n time.
IV.AL L RES ET Th is reset all t he op tions in the M ENU b ack to it's de fau lt values.
21
Page 24

USB (Multimedia) Menu
The TV is a widescre en TV wit h an USB po rt. Wit h the USB p ort the TV can access USB fla sh driv es (up to 2 GB)
and display pict ures or p lay MP3 f iles. To use this f eatur e conne ct a USB flash drive t o the USB p ort of th e TV
and press the INPU T butto n to sele ct USB source to start brow sing fo r music a nd pictures.
Once you select th e USB inp ut sour ce the USB menu will c ome up. S elect e ither the music or pictur e you wan t to
browse using the a rrow bu ttons . Press the OK butto n to sele ct the fi le you want.
Browsing Musi c and Photo
In the USB functio n, sele ct Musi c or Photo.
Use the ▲ or ▼ button to s elect t he file y ou want and
use the to play the fi le. Use t he EXIT button t o exit a
folder.
Media Setting
1.SLIDESHOW INT ERVAL This opt ion adj usts th e time interval of a d ispla yed pic ture.
2.SLIDESHOW EFF ECT This opt ion adj usts th e video effect s when pi ctures interchange.
3.SLIDESHOW REP EAT This op tion to ggles the repeat f uncti on for di splaying pictures.
4.MUSIC PLAY MODE Thi s optio n adjus ts the music playi ng opti on.
5.MUSIC PLAY REPEAT This option to ggles t he repe at function for pl aying m usic.
6.MUSIC AUTO PLAY Th is function toggles the a uto pla y featu re which will play a ny musi c found i n the USB flash
drive once you ins ert the f lash dr ive.
Techni cal Lim itati on
1.The USB port does n ot supp ort USB h ubs.
2.The USB flash dri ve supp orts FAT32 and FAT16 file s ystem only.
3.The biggest fil e size is 4 g igaby te (FAT32 ).
4.The picture fun ction o nly sup ports JPEG file (baseli ne only, progressive is not sup porte d).
5.The music funct ion onl y suppo rts MP3 that is from 32-48k hz usin g a data ra te of 32-320 kbps.
6.All USB functio ns are op erate d by the remote cont rol. No ne of the b uttons physically loc ated on t he TV will respo nd
to USB functions .
22
Page 25

Troubleshooting
If, aft er read ing these op erati ng instruc tions , you have add ition al ques tions rela ted to th e use of your te levis ion, pleas e call
the ser vices c enter in you r local a rea.
Befor e calli ng service , pleas e check the sy mptom s and follow s ugges ted sol utions.
Remote Control
● The batteries could be weak . Replace the batteries.
● Check the orientation of th e batteries.
● Make sure the power cord is plu gged in.
Remote control d oes not o perat e
Video and Audio
No picture (scre en not li t),
No sound
● Make su re the po wer cord is pl ugged i n.
● Press O N-OFF o n the TV or on the remo te cont rol.
● Try a nothe r channel; i t could b e station tr ouble .
● Selec t a prope r picture mo de.
● Adjust t he brig htness in th e video s etting.
● Check t he ante nna/cabl e conne ctions.
Dark, poor or no pic ture
(Screen lit), go od soun d
● Check t he ante nna/cabl e conne ctions.
● Try anot her cha nnel; it cou ld be sta tion troub le.
No color/dark pi cture /colo r
is not correct
Only snow and nois e appea r
on the screen
● Adjust t he colo r saturati on in the v ideo setti ng.
● ● Adjust t he ante nna.
Move th e TV aw ay from n oise sources such a s cars, n eon signs, o r hair dr yers.
Dotted lines or st ripes
Double images
Good picture, no s ound
Audio noise
● Using a h ighly d irection al outd oor antenn a or a cabl e may solve the probl em.
●
●
The sound ma y be mute d. Press MUTE again t o cance l.
Make su re the st ereo mode is s et to ste reo or mono.
● Commu nicat ion proble ms may oc cur if infra red com municati on equi pment ( e.g.,
infra red cor dless head phone s) is used nea r the TV. Mov e the infrared
commu nicat ion equipm ent awa y from the TV un til the nois e is elim inated.
Problem
Problem
Possible Solutions
Possible Solutions
23
Page 26

Troubleshooting (Continued)
General
● These c hanne ls may be bloc ked. Pl ease unblock them ( see <Se tting Pare ntal
Contr ols> se ction).
● These c hanne ls may be set hi dden. You m ay set it to show or sele ct them w ith
0-9 num ber but tons.
One or some channe ls can' t be
displayed
● If a sett ing opt ion appear s in gray, this i ndica tes that the s ettin gs option is u navai lable
in curr ent inp ut mode.
Some items can't b e acces sed
● When th e TV is i n use, th ere is a natural rise i n tempe rature, ca using t he cabinet t o
expan d or cont ract and may b e accom panied by a sl ight cr eakin g noise. This is no t
a malfu nctio n.
TV cabinet creak s
● Disco nnect t he power cor d and wai t for a few seco nds. Then re -plug t he power cor d
and tur n on the un it again.
Control button s do not op erate
Note:
If your problem is n ot solv ed, tur n your unit off and th en on aga in.
Cautions:
Never attempt to r epair a d efect ive TV yourself.
Problem
Possible Solutions
24
Page 27

55 inches
0.630 (H) x 0.630 ( V)
1920 x 1080
16 : 9
TV/AV/YP bPr/HDMI1/H DMI2/HDMI3/ PC
STANDBY, SOURCE, MENU, CH -, CH+, VOL-, VOL+
100-240V~
10w + 10w
400
Panel
50,000 hours
178 (H) / 178(V)
8 ms
Specifications
Note:
1. Design and specificati ons are subject to change witho ut notice.
2. Weight and dimen sions shown are approximate .
3. Specifications and ext ernal appearance may be chang ed for the sake of improvement.
16.7M colors
5000:1
25
Dimensions
Weight
1276 x 813 x 291 mm
21.5 Kg
Page 28
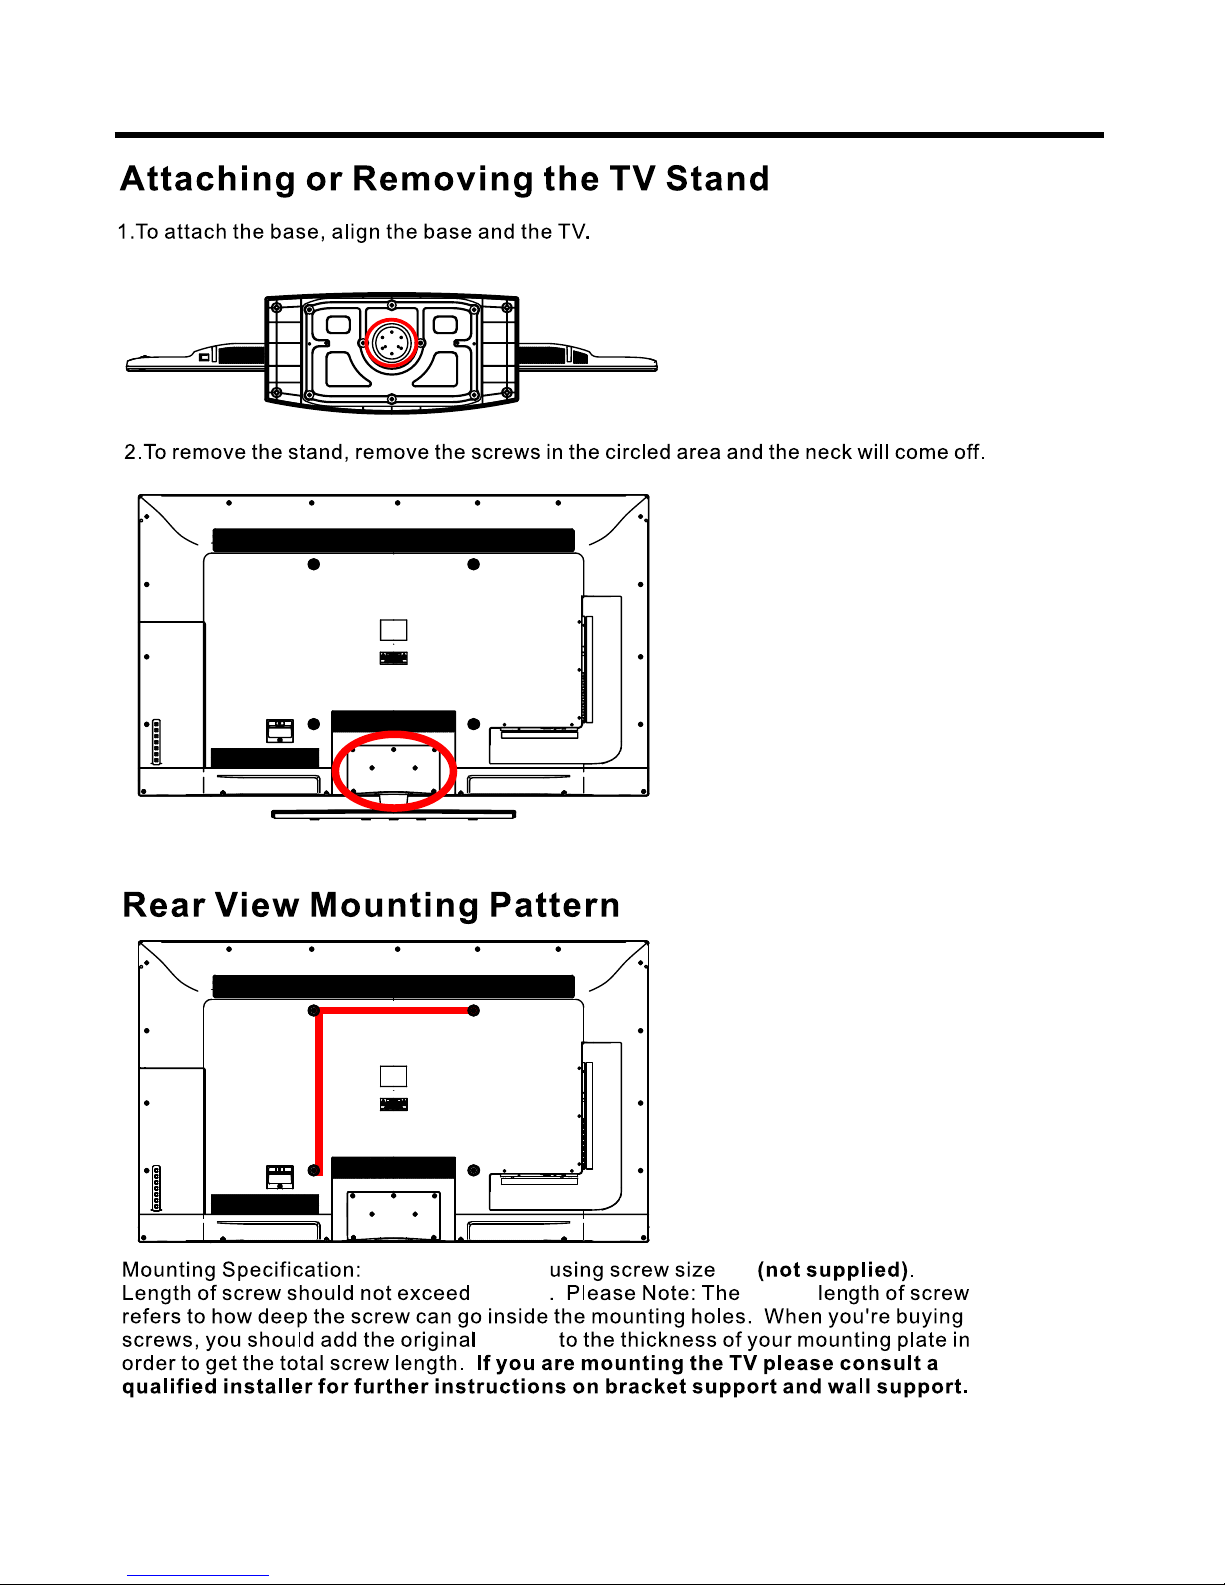
Wall mounting operation
400mm x 400mm M6
400mm
400mm
Place the TV’s neck on the base and screw the screws as shown below.
26mm 26mm
26mm
26
 Loading...