

RCA HSDB1 User Manual

1
NOW YOU NEVER HAVE TO ASK…
WHO’S THERE?
HSDB1 QSG 00
2
WiFi doorbell
camera
with 1 faceplate
installed
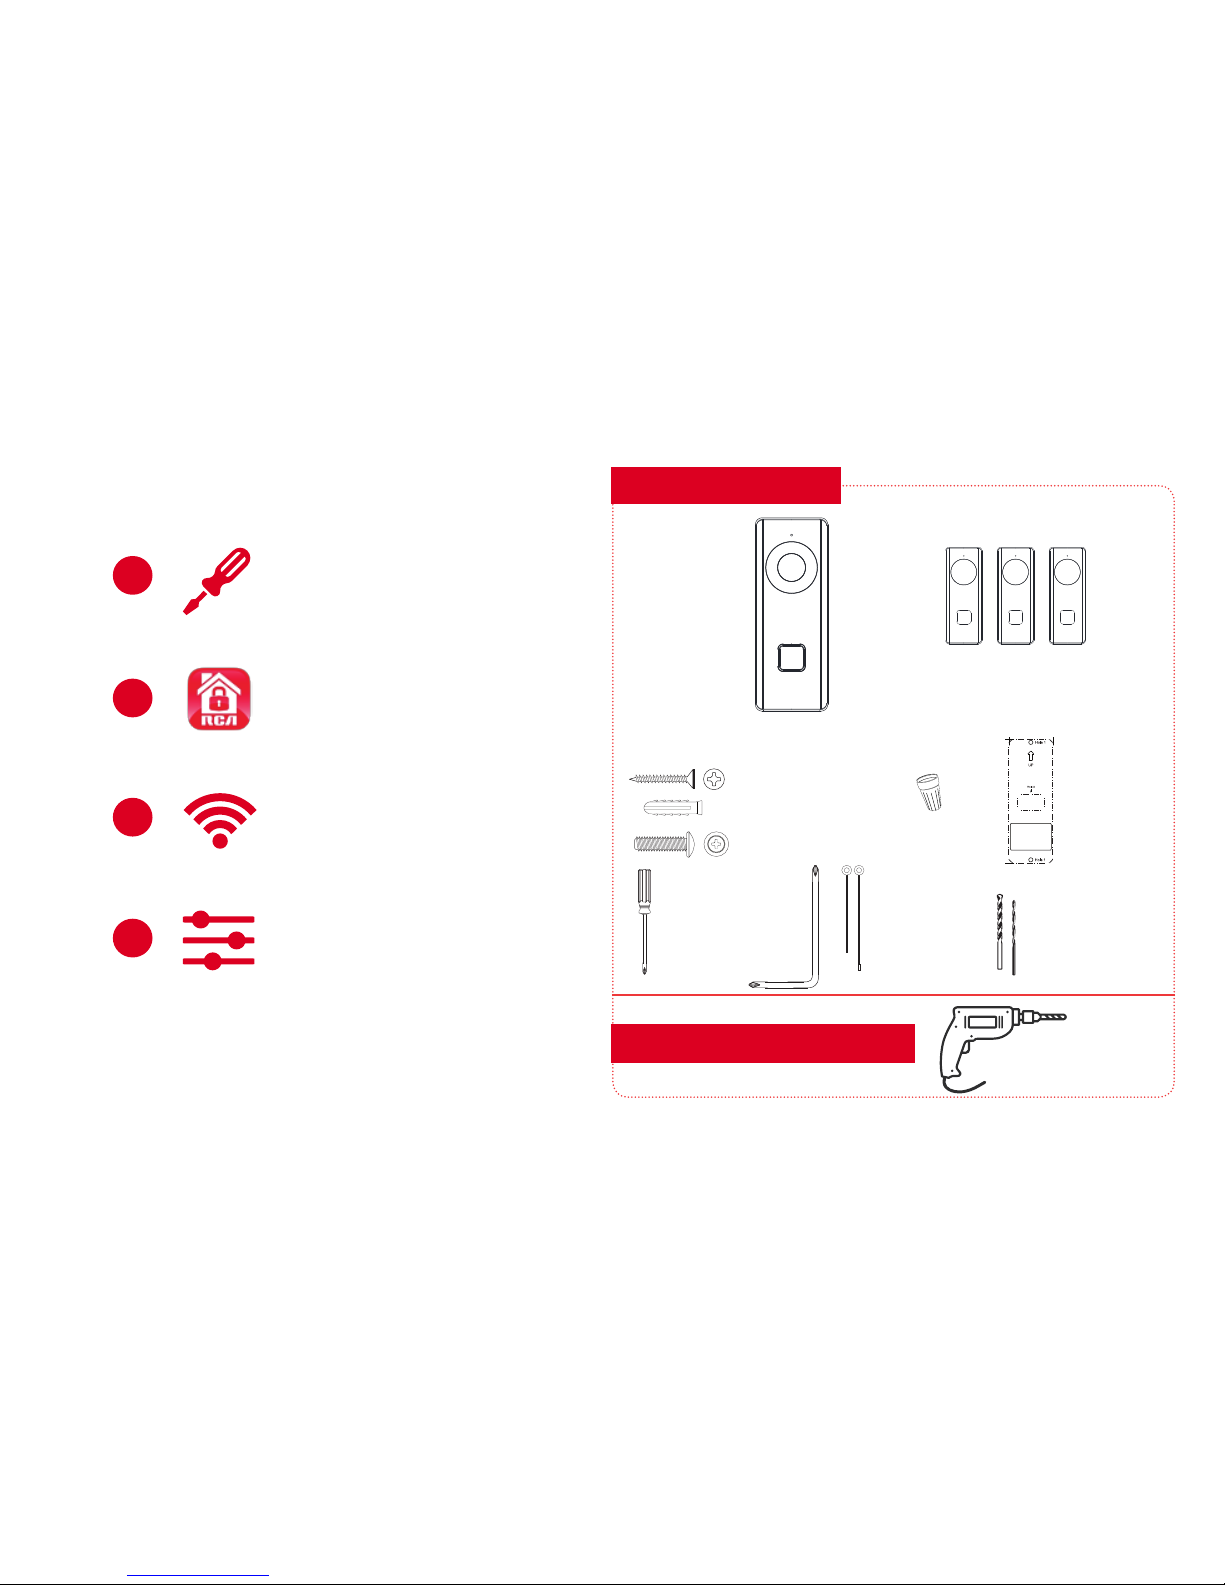
WHAT YOU GET
TOOLS YOU’LL NEED
3 extra faceplate options
Installation kit:
x2 Mounting anchors
x2 Mounting screws
Drill
#1 Phillips-Head
Screwdriver
~ 1.5 in
Mounting Template
Paste the template on the
required place.Drill screw
holes and cable holes
according to the template.
Hole A:Cable Hole.
Hole 1:Wall Mounting Screw
Hole.
.
.
Mounting
template
x2 Set screws
Security
screwdriver
x2 Wire nuts
7/32” Masonry
Drill Bit
1/16” Wood
Drill Bit
x2 Wire leads
EASY SETUP
1
Mount the doorbell camera
to an existing doorbell
2
Download the RCA
Security App
3
Connect to Wi-Fi
4
Customize your device
settings
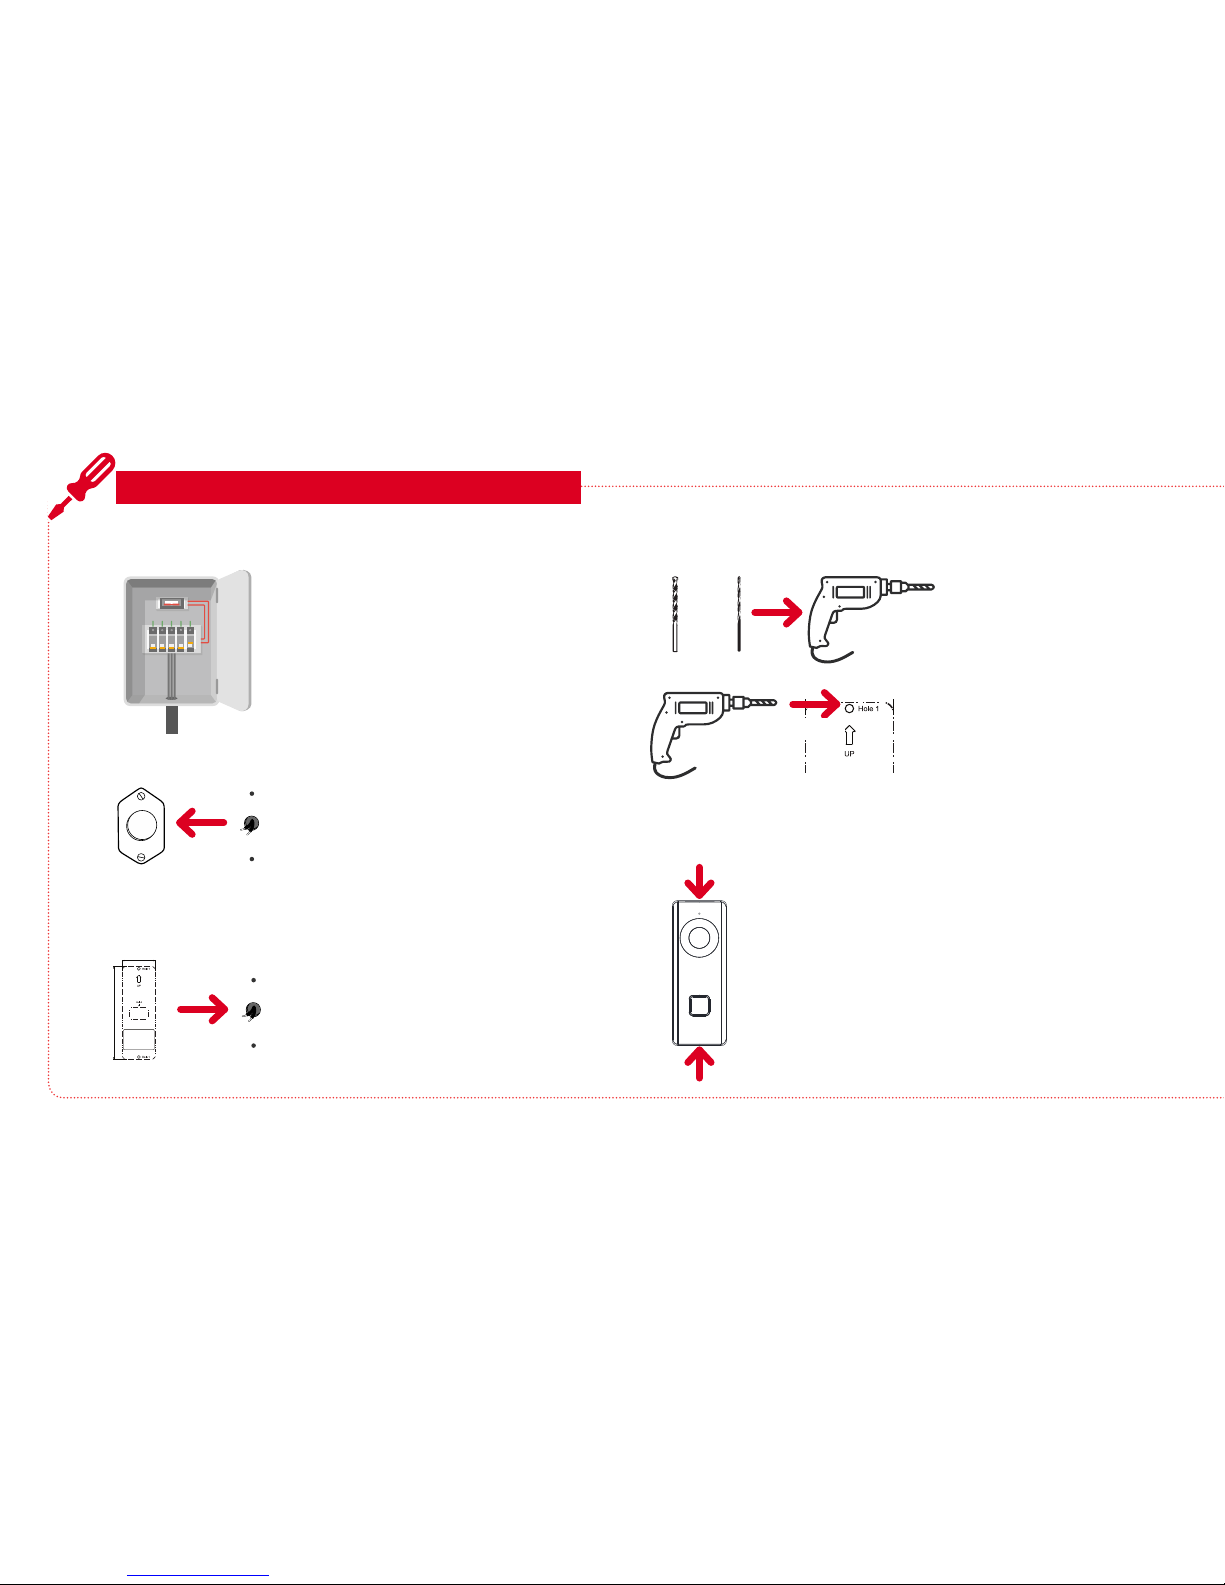
3
Find the breaker that controls the
circuit for your doorbell. Turn it o
before you continue installation.
Apply the mounting template sticker to the wall
Align the space marked “Hole A”
on the mounting template with the
access point for the cables that will
power the doorbell camera.
Stick the mounting template sticker to
the wall.
3
~ 4.5 in
~ 1.5 in
Mounting Template
Paste the template on the
required place.Drill screw
holes and cable holes
according to the template.
Hole A:Cable Hole.
Hole 1:Wall Mounting Screw
Hole.
.
.
MOUNT THE DOORBELL CAMERA
Turn o power to your doorbell’s circuit
1
Remove your existing doorbell
2
Carefully remove your existing
doorbell from the wall. Then unhook
your home’s wiring from the doorbell’s
terminals.
Remove &
unhook
Apply
4
Drill holes for the doorbell camera
Drill two holes where
indicated by the mounting
template.
~ 1.5 in
Insert one of the drill bits
in your drill—for masonry
or brick, use the larger drill
bit provided. For wood,
the smaller.
—OR—
Drill
Insert
5
Remove the faceplate from the doorbell camera
Before you mount it, take the faceplate o the
doorbell camera—you’ll need access to several
items behind the faceplate during setup.
To remove the faceplate: Push down on the top
and bottom of the doorbell camera and push the
button and just below the camera to remove the
doorbell camera from the faceplate. Be careful not
to touch the camera lens!
continues on the next page...
4
IMPORTANT! Handle the doorbell camera carefully! Make
sure not to scratch its lens.
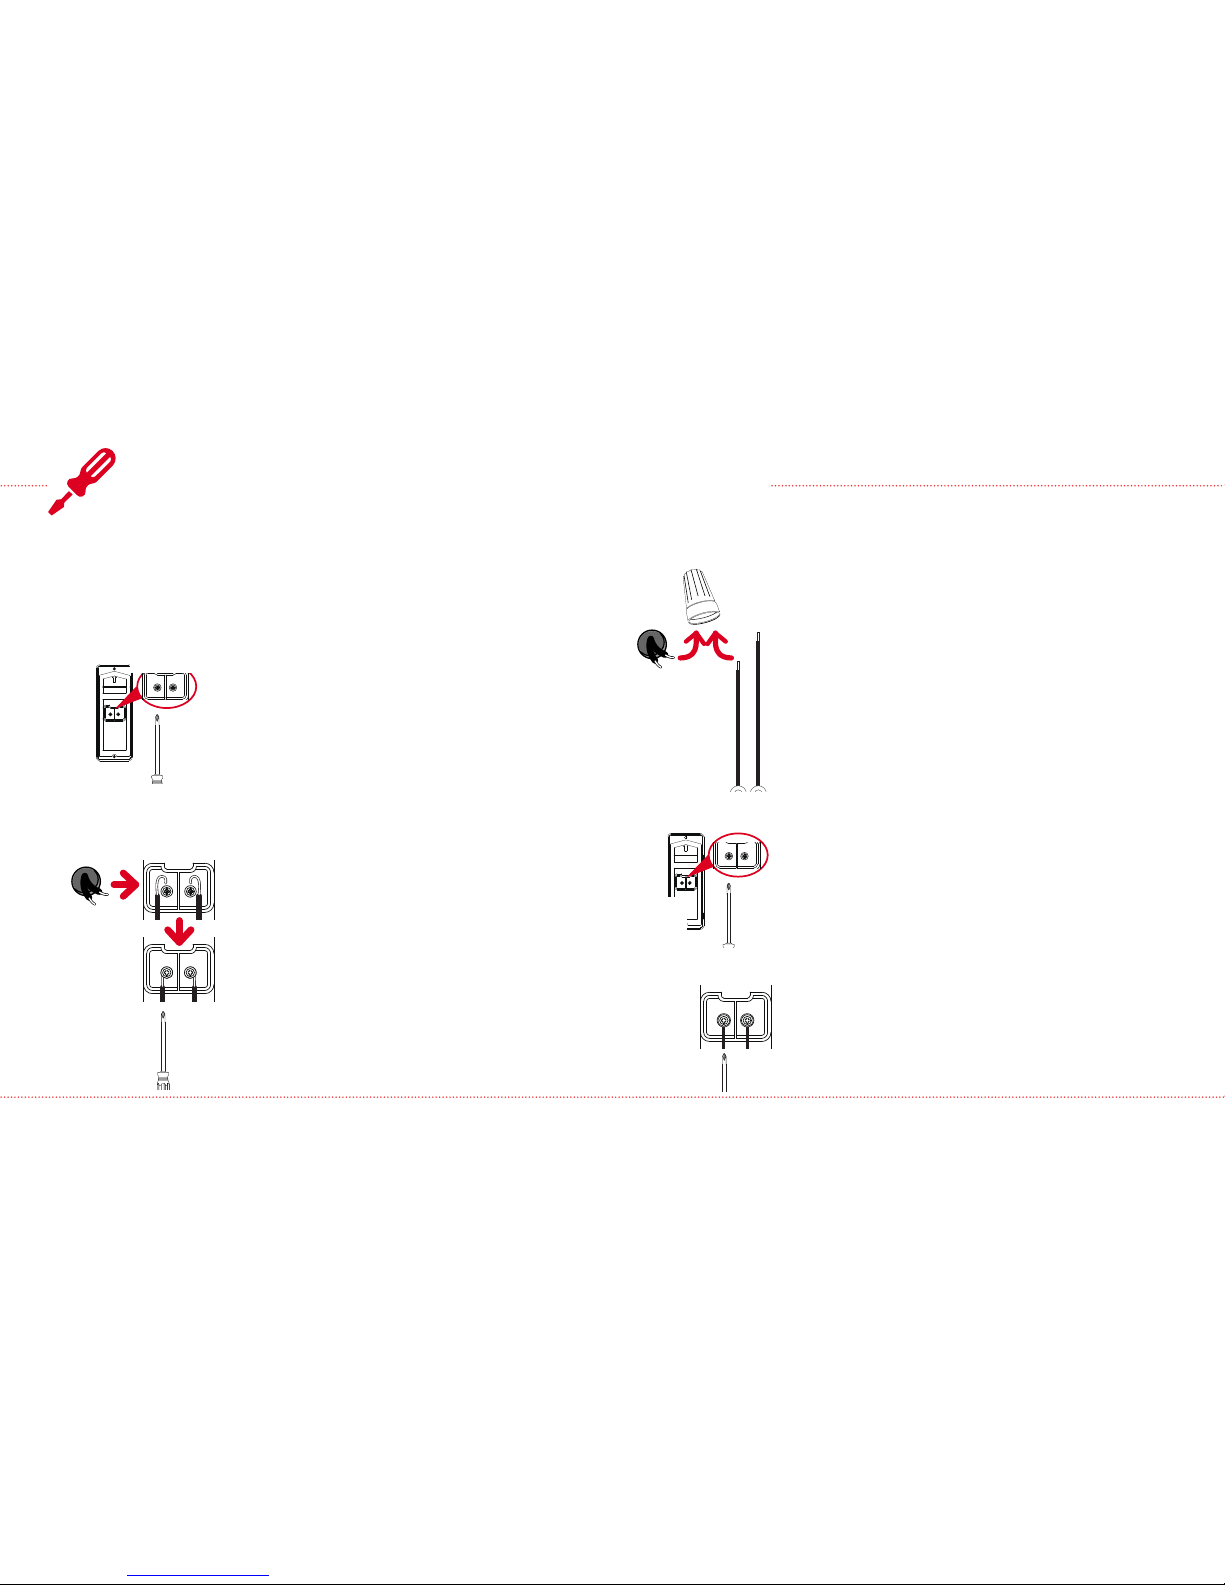
Connect the doorbell camera to home power
6
Check if your home’s doorbell power wires are long enough to
connect directly to the terminals on the back of the doorbell
camera.
Loosen
Doorbell
camera
back
Terminals
If your home’s doorbell power wires are long
enough:
Use the screwdriver provided in this package
to loosen the terminal screws on the back of
the doorbell camera.
Terminals
Home
doorbell
wires
Tighten
If your home’s doorbell power wires are NOT
long enough:
Use the wire leads and wire nuts included in
this package to connect them to the doorbell
camera.
First, put the ends of one wire lead and one
home doorbell wire together and insert them
into a wire nut. Then twist the wire nut until
you feel tension. Repeat with the other wire
lead, home doorbell wire, and wire nut.
Home
doorbell
wires
Wire nut
Twist
Wire
leads
Unscrew
& remove
Doorbell
camera
back
Terminals
Connect the doorbell power wires directly
to the terminals on the back of the doorbell
camera. Loop each wire end around each
terminal on the back of the doorbell camera.
Note: It doesn’t matter which wire you put on
which terminal.
Tighten the screws to hold the wires rmly in
place.
Next, unscrew the terminal screws on the back
of the doorbell camara and remove them.
Place each screw through the ring on the other
end of each wire lead, then screw the terminal
screws back onto the doorbell camera.
Tighten
MOUNT THE DOORBELL CAMERA (continued)
 Loading...