

Page 1
Television
User's G ude
Changing Entertainment. _=n.
Page 2
WARNING
To reduce the risk of fire or
electric shock, do not expose
this TV to rain or moisture.
To reduce the risk of electric shock, do not remove
cover (or back). No user serviceable parts inside.
Refer servicing to qualified service personnel.
_This symbol indicates
"dangerous voltage" inside
the product that presents a
risk of electric shock or
This symbol indicates
important instructions
accompanying the product.
personal injury.
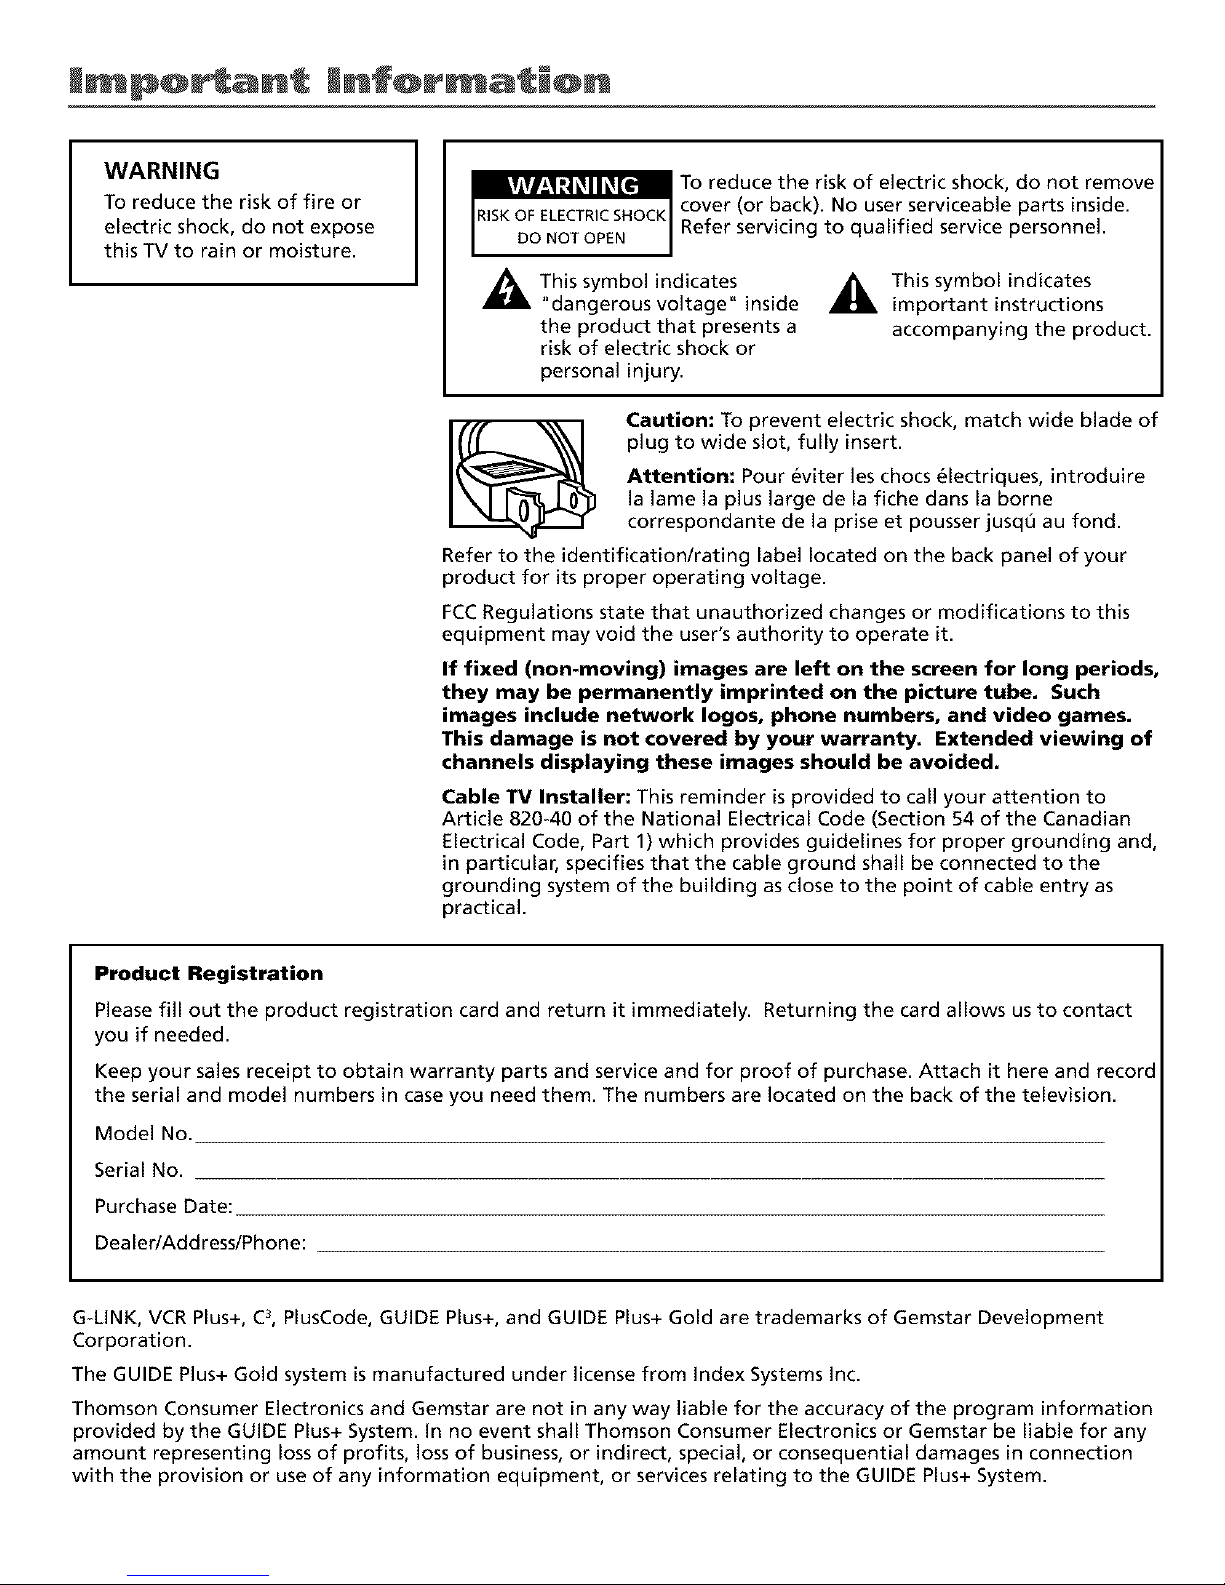
Caution: To prevent electric shock, match wide blade of
plug to wide slot, fully insert.
Attention: Pour eviter les chocs _lectriques, introduire
la lame la plus large de la fiche dans la borne
correspondante de la prise et pousser jusqO au fond.
Refer to the identificationlrating label located on the back panel of your
product for its proper operating voltage.
FCCRegulations state that unauthorized changes or modifications to this
equipment may void the user's authority to operate it.
If fixed (non-moving) images are left on the screen for long periods,
they may be permanently imprinted on the picture tube. Such
images include network Iogos, phone numbers, and video games.
This damage is not covered by your warranty. Extended viewing of
channels displaying these images should be avoided.
Cable TV Installer: This reminder is provided to call your attention to
Article 820-40 of the National Electrical Code (Section 54 of the Canadian
Electrical Code, Part I) which provides guidelines for proper grounding and,
in particular, specifies that the cable ground shall be connected to the
grounding system of the building as close to the point of cable entry as
practical.
Product Registration
Please fill out the product registration card and return it immediately. Returning the card allows us to contact
you if needed.
Keep your sales receipt to obtain warranty parts and service and for proof of purchase. Attach it here and record
the serial and model numbers in case you need them. The numbers are located on the back of the television.
Model No.
Serial No.
Purchase Date:
DealerlAddresslPhone:
G-LINK, VCR Plus+, C3,PlusCode, GUIDE Plus+, and GUIDE Plus+ Gold are trademarks of Gemstar Development
Corporation.
The GUIDE Plus+ Gold system is manufactured under license from Index Systems Inc.
Thomson Consumer Electronics and Gemstar are not in any way liable for the accuracy of the program information
provided by the GUIDE Plus+ System. In no event shall Thomson Consumer Electronics or Gemstar be liable for any
amount representing loss of profits, loss of business, or indirect, special, or consequential damages in connection
with the provision or use of any information equipment, or services relating to the GUIDE Plus+ System.
Page 3
Key Features Overview
Your TV is equipped with t>atures that will add to your TV viewing experience. The fi)llowing
infi)rmation sumnmrizes a t_w of these fi,atures. Chapter 3 provides more inl_)rmation about the
rest oflhe TV's fl.atures and how to use them.
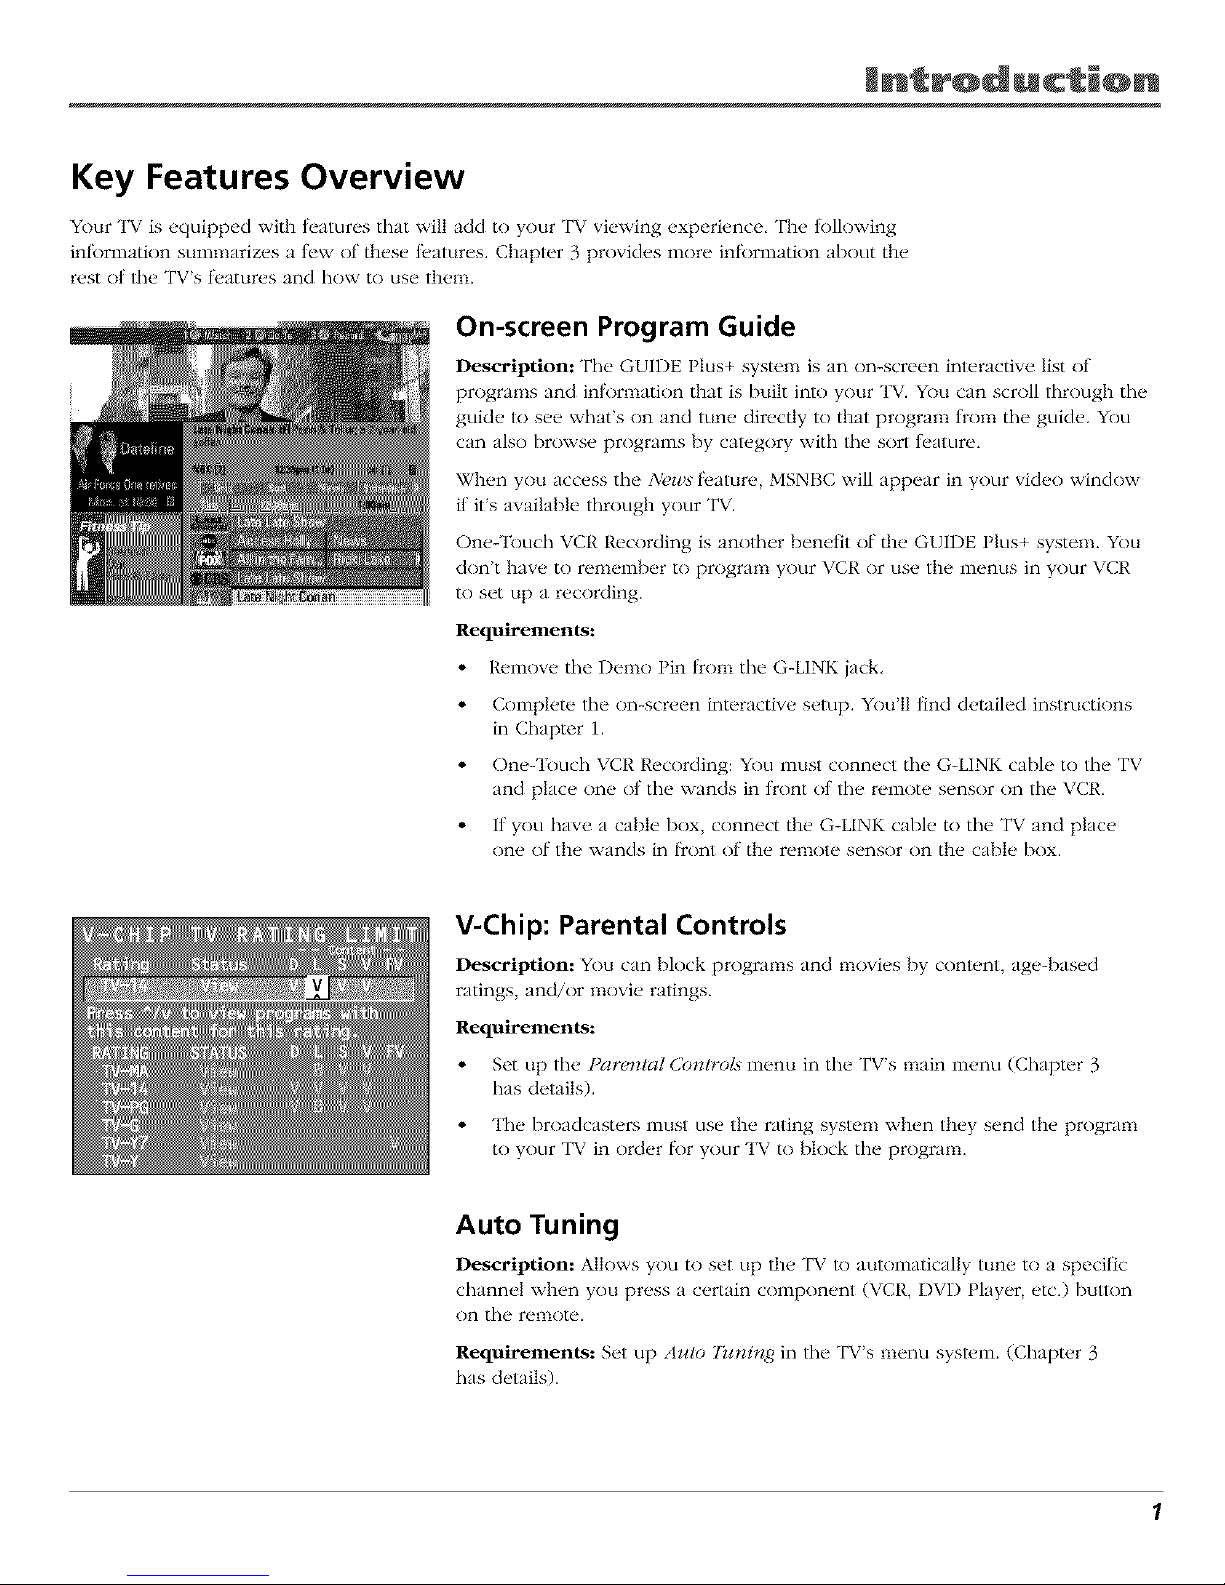
On-screen Program Guide
Description: The GUIDE Plus+ system is an on-screen interactive list of
programs and inl_)rmation that is built into your TV. You can scroll through the
guide to see what's on and tune directly to that program tkom tile guide. You
can also browse programs by category with tile sort t>azure.
When you access tile Neu,3 fl.ature, MSNBC will appear in your video window
if it's available through your TV.
One-']buch VCR Recording is another benefit of the GUIDE Phls+ system. You
don't have to remember to program your VCR or use the menus in your VCR
to set up a recording.
Requirements:
• R_.move tile Demn Pin tkom tile G-LINK jack.
• Complete tile nn-screen interactive setup. You'll find detailed instructions
in Chapter 1.
• One-'Ibuch VCR Recording: You must connect tile G-LINK cable to tile TV
and place one of tile wands in tkont of tile remote sensor on tile VCR.
• If you have a cable box, connect the G-LINK cable to tile TV and place
one of the wands in l}nnt of the remote sensor on the cable box.
V-Chip: Parental Controls
Description: You can block programs and movies by content, age-based
ratings, and/or movie ratings.
Requirements:
• Set up thv Parental ControA menu in tile TV's main menu (Chapter 3
has details).
• The broadcasters must use the rating system when they send the program
to your TV in order lk)r your TV to block tile program.
Auto Tuning
Description: Allows you to set tip thv TV to autnnmtically tune toa specific
channel when you press a certain component (VCR, DVD Player, etc.) button
on tile remnte.
Requirements: Set up Anlo Tz_ning in tile TV's menu syst(.m. (Chapter 3
has details).
1
Page 4

Jn_r@ducti@n
(This page intentionally left blank)
2
Page 5
ble @f C@nten s
Introduction
Key Features Overview .................................................................................................... 1
On-screen Program Guide ......................................................................................... 1
V-Chip: Parental Controls ........................................................................................... 1
Auto Tuning ................................................................................................................ 1
Chapter 1: Connections & Setup
Things to Consider Before You Connect ......................................................................... 6
Protect Against Power Surges ................................................................................... 6
Protect Components from Overheating ................................................................... 6
Position Cables Properly to Avoid Audio interference ............................................ 6
important Stand and Base Safety information ........................................................ 6
Use Indirect Light ....................................................................................................... 6
Connection Pictures ................................................................................................... 6
Demo Pin .................................................................................................................... 6
Choose Your Connection .................................................................................................. 7
Connection: TV + VCR....................................................................................................... 8
Connection: TV Only ......................................................................................................... 9
Connection: TV + VCR + Satellite Receiver ................................................................... 11
Jacks on the Back of Your TV ......................................................................................... 12
Why You Should Connect This G-LINK Cable ............................................................... 13
Placing the G-LINK Wands ....................................................................................... 13
How to Find the Remote Sensor ............................................................................. 13
Complete the Interactive Setup ..................................................................................... 15
Set the Menu Language .......................................................................................... 15
Complete Auto Channel Search .............................................................................. 15
The GUIDE Plus+ System Setup ................................................................................ 15
What to Expect ............................................................................................................... 20
Next Steps ....................................................................................................................... 20
Chapter 2: Using the Remote Control
The Buttons on the Remote Control ............................................................................. 22
Using the WHO,INPUT Button ................................................................................ 23
Programming the Remote to Operate Other Components ......................................... 24
Find Out If You Need to Program the Remote ....................................................... 24
How to Program the Remote .................................................................................. 24
How to Use the Remote After You've Programmed It ................................................ 25
Chapter 3: Using the TV's Features
About the GUIDE Plus+ System ..................................................................................... 28
Downloading Data ................................................................................................... 28
Getting In & Out of the GUIDE Plus+ System ......................................................... 29
The GUIDE Plus+ System Menus .............................................................................. 29
Grid Guide ................................................................................................................ 29
Sort ............................................................................................................................ 31
News .......................................................................................................................... 32
Schedule .................................................................................................................... 32
3
Page 6
ble @f C@nten s
Messages ................................................................................................................... 33
Channels ................................................................................................................... 34
Setup ......................................................................................................................... 34
How to Get More Information About an Advertisement or a Program ............... 35
GUIDE Plus+ Menu Items ............................................................................................... 35
Channel Banner .............................................................................................................. 36
Why You Should Use the Auto Tuning Feature ............................................................ 36
How to Set Up the Auto Tuning Feature ................................................................ 36
Parental Controls and V-Chip ......................................................................................... 38
How V-Chip Works ................................................................................................... 38
V-Chip TV Rating Limit ............................................................................................. 39
Blocking Specific Content Themes .......................................................................... 41
Viewing Specific Content Themes ........................................................................... 42
V-Chip Movie Rating Limit ....................................................................................... 43
V-Chip Unrated Program Block ............................................................................... 44
Channel Block ........................................................................................................... 44
Front Panel Block ..................................................................................................... 44
Lock/Unlock Parental Controls ................................................................................ 44
Chapter 4: Using the TV's Menu System
How to Use Your TV's Menu System ............................................................................. 46
Audio Menu .................................................................................................................... 46
Picture Quality Menu ..................................................................................................... 47
Screen Menu ................................................................................................................... 48
Using Closed Captioning ................................................................................................ 48
Channel Menu ................................................................................................................. 49
Time Menu ...................................................................................................................... 50
Chapter 5: Other Information
Troubleshooting .............................................................................................................. 52
Care and Cleaning .......................................................................................................... 54
Front Panel ...................................................................................................................... 55
RCA TV Limited Warranty .............................................................................................. 55
Index ................................................................................................................................ 59
4
Page 7

1
Connections & Setup
Chapter Overview:
• Things to Consider Before You Connect
• Choose Your Connection
• Connections
• Jacks on the Back of Your TV
• Why You Should Connect This G-LINK Cable
• Plug in theTV
• Put Batteries in the Remote
• How to Use the Remote Control to Complete the
Interactive Setup
• Turn on the TV
• Complete the Interactive Setup
Changing Entertainment. Again.
5
Page 8

C@nnecti@ns Setup
Things to Consider Before You Connect
Protect Against Power Surges
• Connect all components belore you plug any of their power cords into the wall out|et.
• Turn off the TV and/or component betk_re you connect or disconnect any cables.
• Make sure all antennas and cables are properly grounded. Reter to the Important
Saleguards sheet packed with your TV.
Protect Components from Overheating
• Don't block ventilation holes on any ot the components. Arrange the components so that
air can circulate t_ceely.
• Don't stack components.
• When you place components in a stand, make sure you allow adequate ventilation.
• If you connect an audio receiver or amplifier, place it on the top shelf so the heated air
IF(sill it won't flow around other components.
Position Cables Properly to Avoid Audio Interference
• Insurt each cable firlnly into the designated jack,
• If you place components above the T_, route all cables down the side of the back ot the
TV instead ot straight down the middle <51the back ot the TV.
• I1 your antenna uses 30(}-ohm twin lead cables, do not coil the cables. Also, keep the twin
lead cables away trom audio/video cables.
Important Stand and Base Safety Information
Choose the location tor your TV c'aret_llly. Place the TV on a stand or bas_,/hat is ot adequate
size and strength to prevent the TV flcom being accidentally tipped over, pushed <5t"1,or pulled
off. This could cause personal injury and/or damage the TV. Ret_,r to the hnportant Sai_,guards
sheet packecl with your TV.
Use Indirect Light
Don't place the TV where sunlight or room lighting will be directed toward the screen. Use soft
or indirect lighting.
Connection Pictures
Audio/video cables are usually bundled together. For better visibility, the connection pictures in
this book show each cable separately (audio left:, audio right, and video).
Demo Pin
You must remove the Demo Pin f_comthe G-LINK jack on the back of
?
your T_ in order |ksr your TV to operate properly and to connect the
G-LINK cable.
6 Chapter I
Page 9

C@nnecti@ns Setup
Choose Your Connection
There are several ways to connect your TV. Please use the lk)llowing chart to determine which
connection is best tor you. Proceed to the appropriate page and conned your TV.
Components Cables Connection Go to...
Needed Title
Coaxial
Audio/video
G-LINK cable
Coaxial
Coaxial
Audio/video
S-Video (optional)
G-LINK cable
TV + VCR
TV Only
TV + VCR +
Satellite Receiver
page 8
page 9
pages10-11
Cables Needed to Connect Components to Your TV
The pictures below show the cables needed tk)r the connections represented in this book.
Notes: Audio/Vich_o cable_ (A/V cabtesjbr _sbort) are usually soM as a bundled set, but
tbe connectio_ pictures i_ tbL_ book show each cable separatet_, /br better vL_ibilll_,.
Please locate the G-Lh\cK cable (provided) u;be_ you're gelli_zg reac(_, to sel J_l) )'ot_r 7"I_
Yuu _zeecl to connect this cable to your 71( and to your VCR a_M/or cable box i_ order./br
all q/'tbej_atures (f tbe prugram guide to u ork prol)e_q)'.
G_LINK cable Audio/Video cables Coaxiaicable
S-Videocable
Chapter I 7
Page 10
C@nnecti@ns Setup
TV(backpanel)
Vl_EO
R L
AIIOIO
R L
__CABLE/
OuIINFROM_ ANT CH3
From Cable
or ARteRga
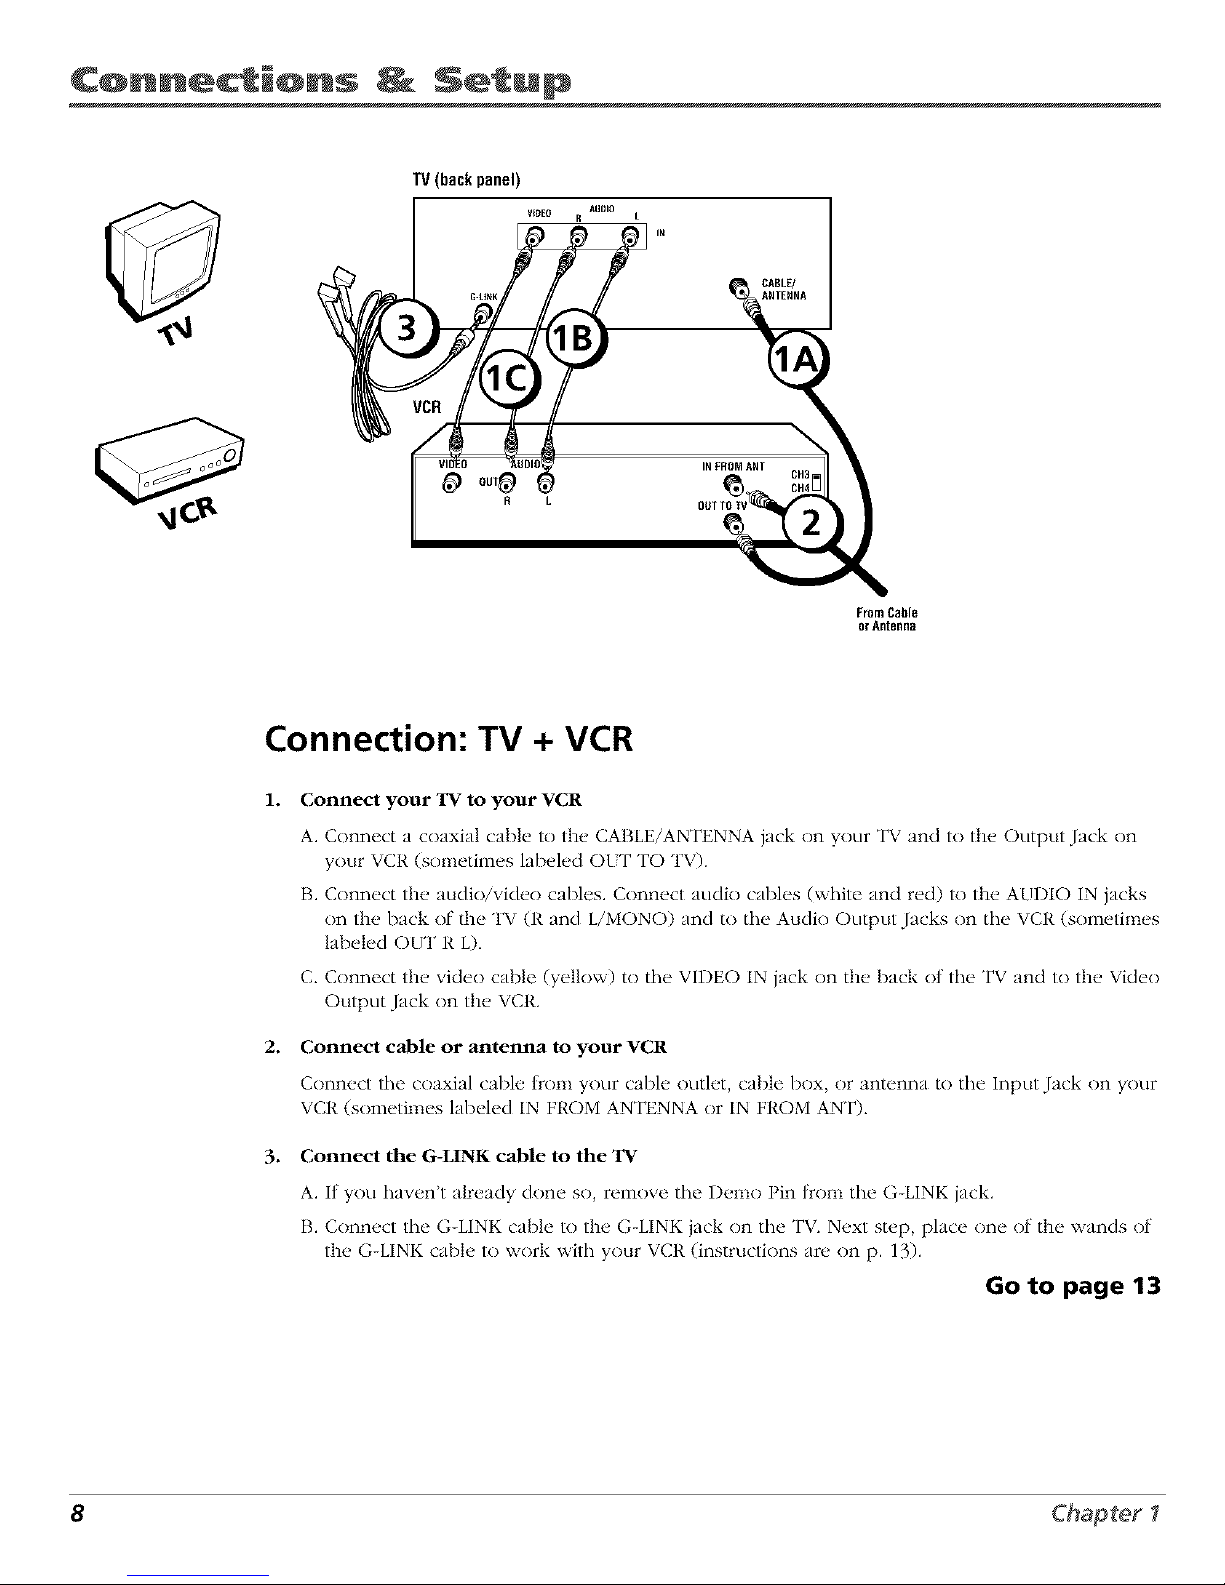
Connection: TV + VCR
1. Connect your TV to your VCR
2.
.
A. Connect a coaxial cable to the CABLE/ANTENNA jack on your TV and to the Output Jack on
your VCR (sometimes labeled OLT TO TV).
B. Connect the audio/video cables. Connect audio cables (white and red) to the AUDIO IN jacks
on the back of the TV (R and L/MONO) and to the Audio Output Jacks on the VCR (sometimes
labeled OUT R L).
C. Connect the video cable (yellow) to the VIDEO IN jack on the back ot the TV and to the Video
Output Jack on the VCR.
Connect cable or antenna to your VCR
Connect the coaxial cable from your cabl(, outl('t, cable box, or antenna to the Input Jack on your
VCR (sometimes labeled IN FROM ANTENNA or IN FROM ANT).
Connect the G-LINK cable to the TV
A. If you haven't already done so, remove tile Demo Pin tkom tile G-LINK jack.
B. Connect the G-LINK cable to the G-LINK jack on the TV. Next step, place one of the wands of
the G-LINK cable to work with your VCR (instructions are on p. 13).
Go to page 13
8 Chapter I
Page 11
C@nnecti@ns Setup
TV(backpanel)
FromCable,
CableBox,
orAntenna
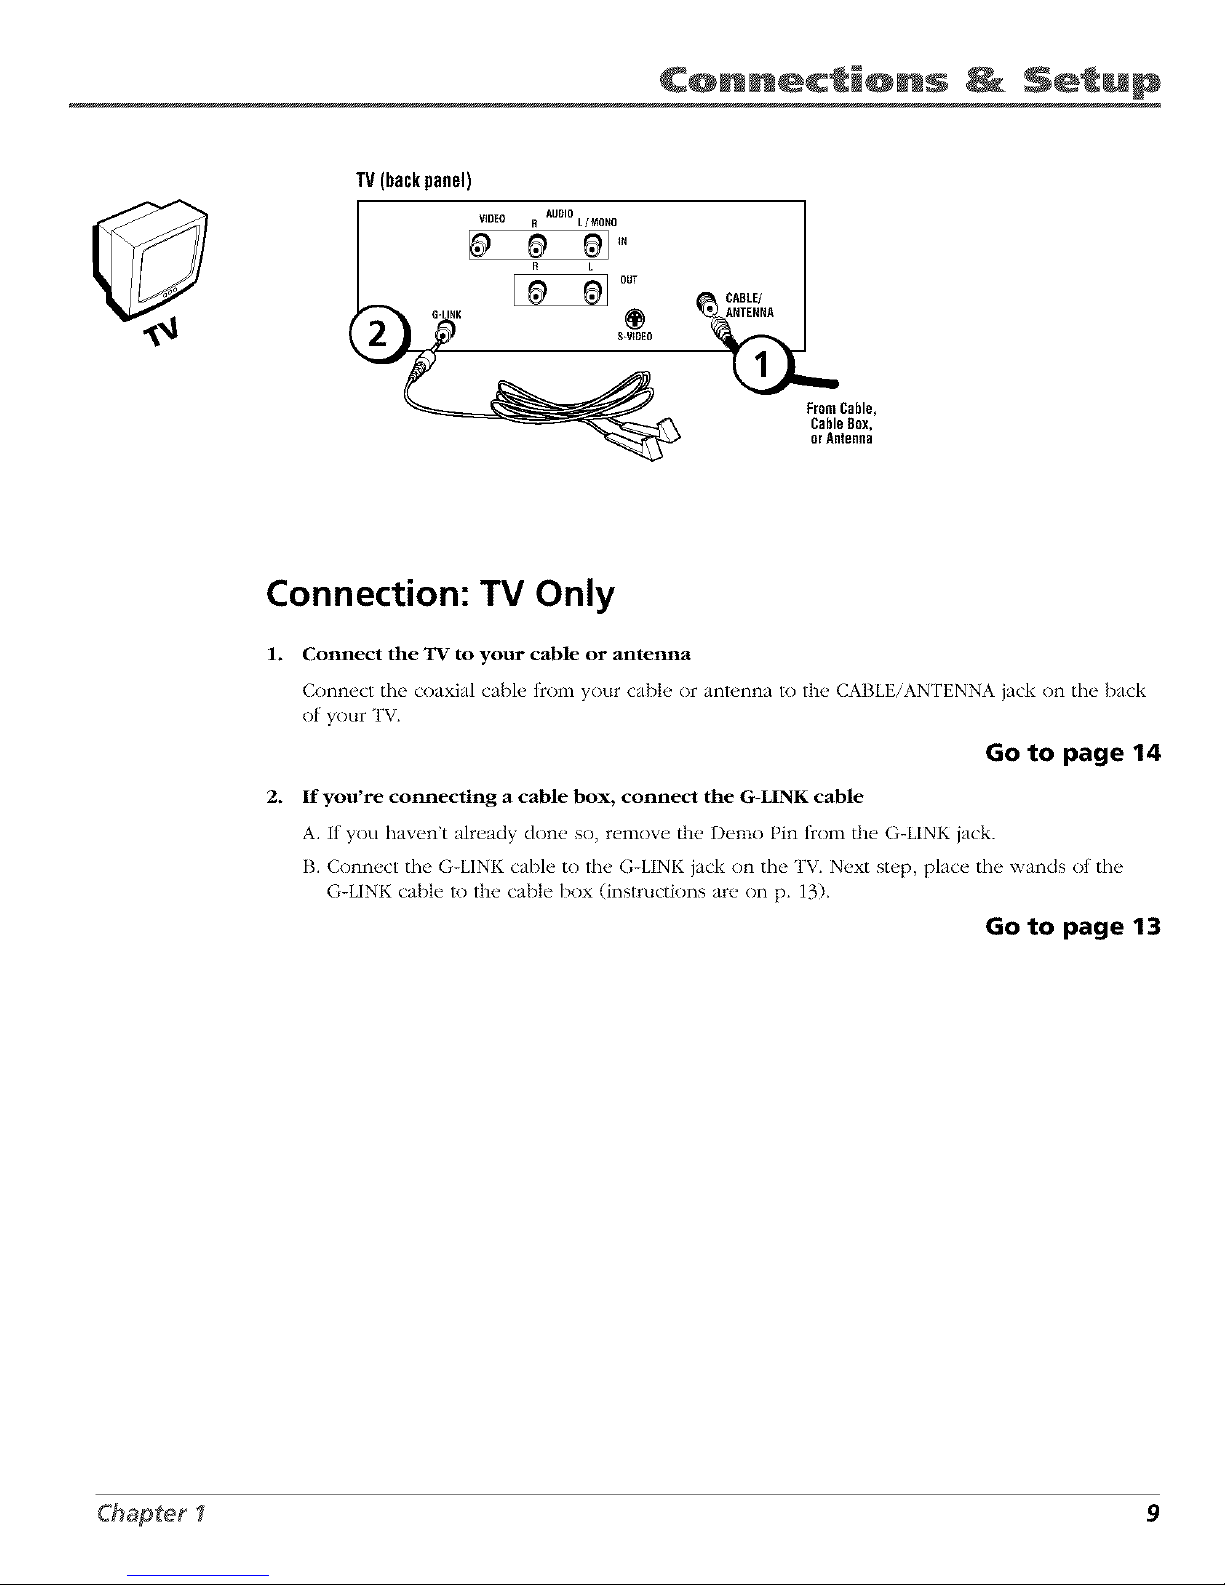
Connection: TV Only
1. Connect the "IV to your cable or antenna
Connect tile coaxial cable from your cable or anlunna to the CABLE/ANTENNA jack on the back
of your TV.
Go to page 14
2. If you're connecting a cable box, connect the G-LINK cable
A. If you haven't already don(. so, r_,move [11(.Demo Pin t_comthe G-LINK jack.
B. Connect the G-LINK cable to the G-LINK jack on the TV. Next step, place the wands of the
G-LINK cable to the cable box (instructions are on p. 13).
Go to page 13
Chapter I 9
Page 12

C@nnecti@ns _ Setup
SATELLITERECEIVER FromCableorAntenna
INFROMANT
OUT _'
VIDEO R L S-VIDEO
VCR
Satellite
Signal
TV (back panel)
_ICABLE/
ANTENNA
10 Chapter I
Page 13

C@nnecti@ns Setup
Connection: TV + VCR + Satellite Receiver
1. Connect your Satellite Receiver to your TV
A. Connect the audio/video cables. Connect the audio cables (white and red) to the AUDIO
IN jacks on the back of the TV (R and L/MONO) and to the Audio Output Jacks on the
Satellite P,eceiver.
B. Connect the vide() cable (yellow) to tile VIDEO IN jack on the back of the TV and to the
Video Output Jack on the satellite receiver.
C. Connect S-Video cable (optional). Connect an S-Video cable to the S-VIDEO jack on the
TV and to the S-VIDEO jack on the satellite receiver. (An S-Video cable provides better
picture quality than a regular video cable, but it is optional.)
2. Connect coaxial cables to the Satellite Receiver
A. Connect the coaxial cable t_comyour cable outlet, cable box, or antenna to the Input Jack
on your satellite receiver (sometimes labeled IN FI,'OM ANT).
B. Connect the coaxial cable t_com your satellite dish antenna to the Input Jack on your
satellite receiver (sometimes labeled SATELLITE IN).
3. Connect the Satellite Receiver to the VCR and to the TV
A. Connect a coaxial cabh, to the Output Jack (sometimes labeled OUT TO TV) on tile
satellite receiver and to the Input Jack on the VCR (sometimes labeled IN FROM ANT),
I3. Connect a coaxial cable to/lie Output Jack on the VCR (sometimes labeled OUT TO TV)
and to the CABLE/ANTENNA jack on the TV.
4. Connect G-LINK cable
A If you haven't done so, remove the Demo Pin from the G-LINK jack,
I3. Connect the G-LINK cable to the G-LINK jack on the TV. Next step, place one of the
wands of the G-LINK cable to work with your VCR (instructions are on p. 13).
Go to page 13
Chapter I 11
Page 14

C@nnecti@ns _ Setup
Jacks on the Back of Your TV
If you are connecting ninny components, please consult the manual that came with each
component R)r connection instructions. The picture of your TV's back panel describes the jacks
on the back of your TV and what types of components that you can connect to these jacks.
When connecting, make sure you connect Output jacks to Input jacks, Video to Video, Right
Audio to Right Audio, etc.
Audio and Video Input Jacks:
AUDIO R and L/MONO and VIDEO
Connect any ot tile tnllnwing components:
• DVD Player
• Satellite Receiver
• Laserdisc Player • VCP,
• IntemetAccess Device
To watch the content t_c()mthe component that's
connected to tile VIDEO Input Jack, press the
WHO ° INP[T button on the remote (the TV swilches
Iothe correct channel).
,v ""a
back panel)
AUDIO
VIDEO R L/MONO
R L
G-LINK
_) S-VIDEO
/
G-LINK Jack
Connect the end of the
G-LINK cable (provided)
to this jack. The G-LINK
cable enables the TV's
Guide Plus+ system to
interact with the cable box
and/or the VCR. A picture
of the G-LINK cable is on
page 7.
• /
S-VIDEO Jack
Connecting an
S-Video cable is
optional. S-Video
provides better picture
quality than a regular
video cable.
Audio Output Jacks:
R and L OUT
Connect audio cables to
these jacks and lo an
amplifier or audio receiver
['or improved sound qualily.
/
_CABLE/
ANTENNA
l
CABLE/ANTENNA Jack
Connect the coaxial cable
from tile VCR's Output jack to
this jack. If youre not
connecting a VCR, connect a
coaxial cable that carries tile
signal Dora the antenna,
cable, or cable box to the
CABLE/ANTENNA jack.
12 Chapter I
Page 15
C@nnecti@ns Setup
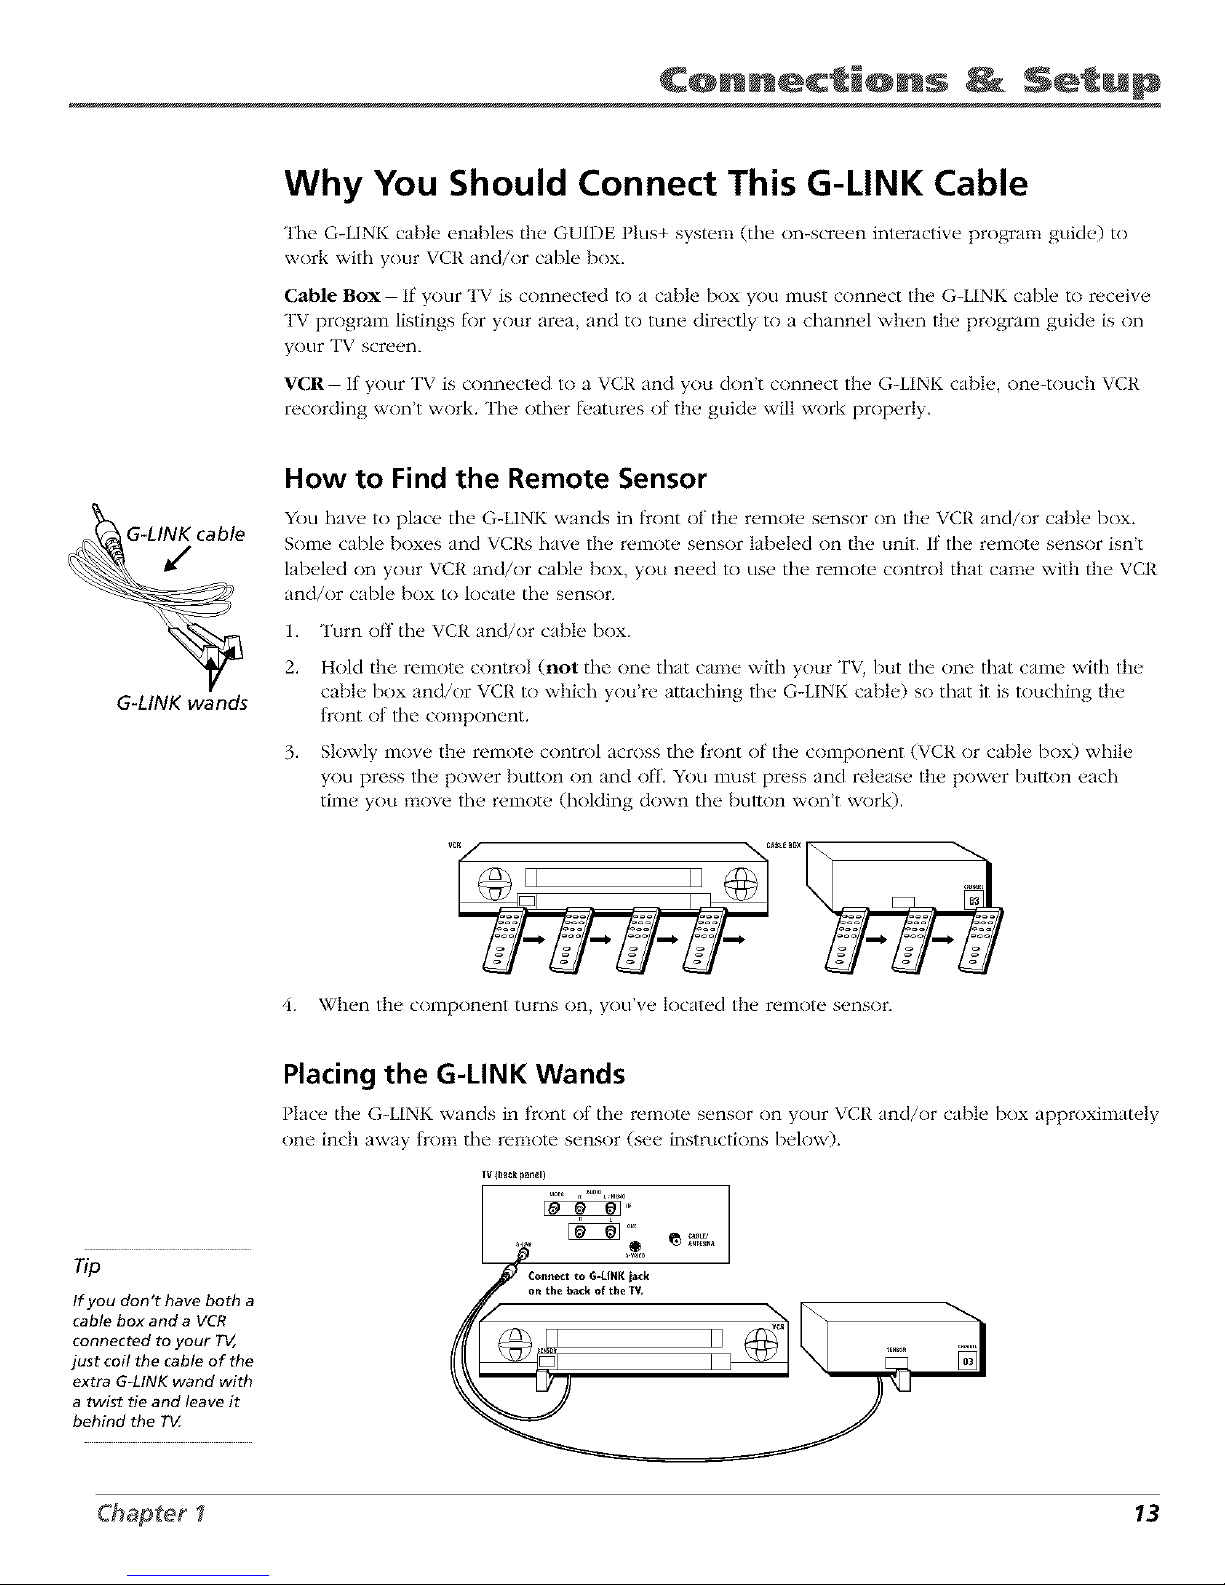
Why You Should Connect This G-LINK Cable
The G-LINK cable enables tile GUIDE Plus+ system (the on-screen interactive program guide) to
wnrl,: with your VCR and/or cable box.
Cable Box- If your TV is connected to a cable box you must connect the G-LINK cable to receive
TV program listings tbr your area, and to rune directly to a channel when the program guide is on
your TV screen.
"VCR-- It your TV is connected to a VCR and you don't connect tile G-LINK cable, one-touch VCR
recording won't work. The other l_,atures of the guide will work properly.
How to Find the Remote Sensor
2.
G-LINK wands
YOU have to place the G-LINK *_.ands in front of tile remow sensor on tile VCR and/or cable box.
Some cable boxes and VCRs have tile remote sensor labeled on tile unit. If the remote sensor isn't
labeled on your VCR and/or cable box, you need to use the remote control that came with tile VCR
and/or cable box to locate the sensor.
1. Turn off the VCR and/or cable box.
,
4,
Hold tile remote control (not the one that canle with your TV, but the one that came with tile
cable box and/or VCR to which you're attaching the G-LINK cable) so that it is touching the
tront nt the component.
Slowly move tile remote control across the front of tile component (VCR or cable box) while
you press the power bumm on and off, You must press and release the power button each
time you move the remote (holding down the button won't work).
II II ....
When tile component rams on, you've located tile remote sensor.
np
If you don't have both a
cable box and a VCR
connected to your T_,
just coil the cable of the
extra G-LINK wand with
a twist tie and leave it
behind the T_Z
Placing the G-LINK Wands
?
Place the G-LINK wands in lrnnt nt the remote sensor on your _ CP, and/or cable box apprnximawly
one inch away trom the remote sensor (see instructions below).
IV (bagk panel)
Chapter I 13
Page 16

C@nnecti@ns _ Setup
Plug in the TV
Plug the end of the power cord into the wall outlet. Match the wide blade nt the
plug with the wide slot in the outlet. Insert the plug completely into
the nutlet.
Put Batteries in the Remote
1. Remove the bal/ery compartment cover on the remote.
2. Insert new ba/teries. Match the polarities (+ and -) on the batteries with the
diagram on the remnte.
3. Put the battery cnmparm_ent cover back on the remnte.
<yd_C>
Use the arrow buttons and the OK
button to move through the menu
system.
How to Use the Remote Control to
Complete the Interactive Setup
The technical term is 'Navigation" - how you move through the on-screen
menus. The theory is the same throughout the menu screens: highlight your
choice and select it,
To highlight a menu item, press the arrow buttons on the remote to highlight
one (7t:the items listed on the screen. [se the tip or down arrow button to lllove
up or down. [se the right or left arrow button to move right or left.
To select the item that you've highlighted, press OK.
Note: Highli/4htecl means that the mem¢ item stands outjl'om
other menu items o_ the ti._t (appeat:_ clarke< b_htet; or a
d(ff_,rent coto_9.
Turn on the TV
Press the TV button on the remote control or the POWER button on the TV (the
first screen of the Interactive Setup appears). The menu screens "time out" alier
a period of time if you don't nmke a selection. The tips in this section tell you
how to access the Setup menu screens manually.
Note: Pressinq the TV bzttto_z not only tztrns on the 7'_ but puts the
y #_ • #
remote i!ito 7_7mode. '7_ mode ' m_a_Is that the b1_tlons on t,Se remote
control operate the 7'VXf!¢nctions.
14 Chapter I
Page 17
C@nnecti@ns Setup
Complete the Interactive Setup
The menu system in your TV allows the TV's tbatures to work properly. In this
Tip book, we call it tile 'interactive setup" because tile TV asks you questions, y()u
To access the setup menus manually, answer, and the TV makes tile appropriate adjustments. The first time you turn
press MENU and choose Setup on your TV, the setup screens appear automatically.
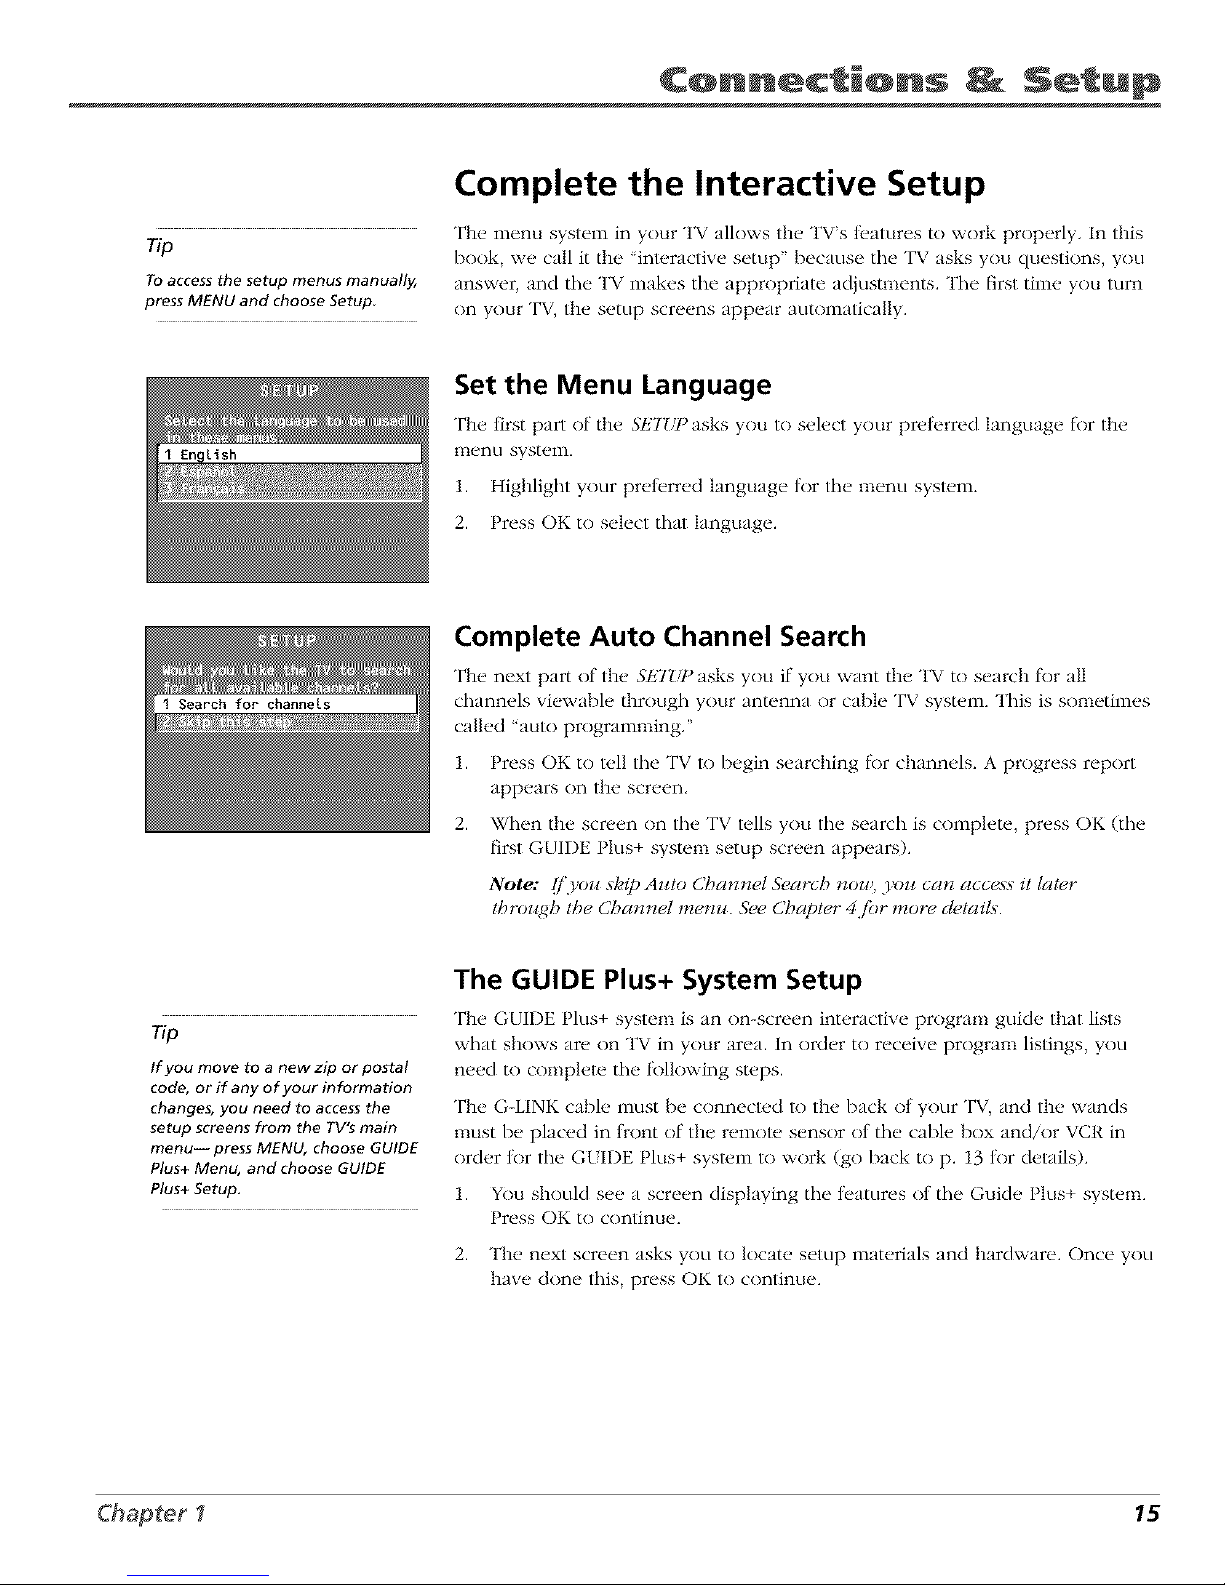
Set the Menu Language
"File first part of the SHTLq_asks you to select your preterred language tbr the
menu system.
1. Highlight your preterred language tnr the menu system.
2. Press OK to select that language.
Complete Auto Channel Search
The next part of the SHT'/_) asks you if you want the TV to search for all
channels viewable through your antenna or cable TV system. This is sometimes
called "auto programming,"
1. Press OK to tell the TV to begin searching tbr channels. A progress report
app_,ars on tile scr_'en.
2. When tile screen on the TV tells you the search is complete, press OK (the
+
first GUIDE I lus system setup screen appears).
Note: [/',Foz¢skip Azao Cban**el &,arch _zou,,yoz_can access it later
tbrozqdh t,5_ Cha_***etma_*z_.5}',, Cbap/ar 4jbr mora cl_,/aiA.
The GUIDE Plus+ System Setup
The GUIDE Plus+ system is an on-screen interactive program guide that lists
Tip what shows are on TV in your area. In order to receive program listings, you
If you move to a new zip or postal
code, or if any of your information
changes, you need to access the
setup screens from the TV's main
menu-- press MENU, choose GUIDE
Plus+ Menu, and choose GUIDE
Plus+ Setup.
need to complete the tbllnwing steps.
The G-LINK cable must be connected to the back nt your TV, and the wands
must be placed in tront of tile remote sensor nt the cable box and/or VCR in
order tnr the G[IDE Plus+ system to work (go back to p. 13 tnr details).
1. YOu should see a screen displaying the teatures nt the Guide I lus system.
t ress OK to continue.
2. The next screen asks you to locate setup materials and hardware. Once you
have done this, press OK to continue.
Chapter I 15
Page 18
C@nnecti@ns Setup
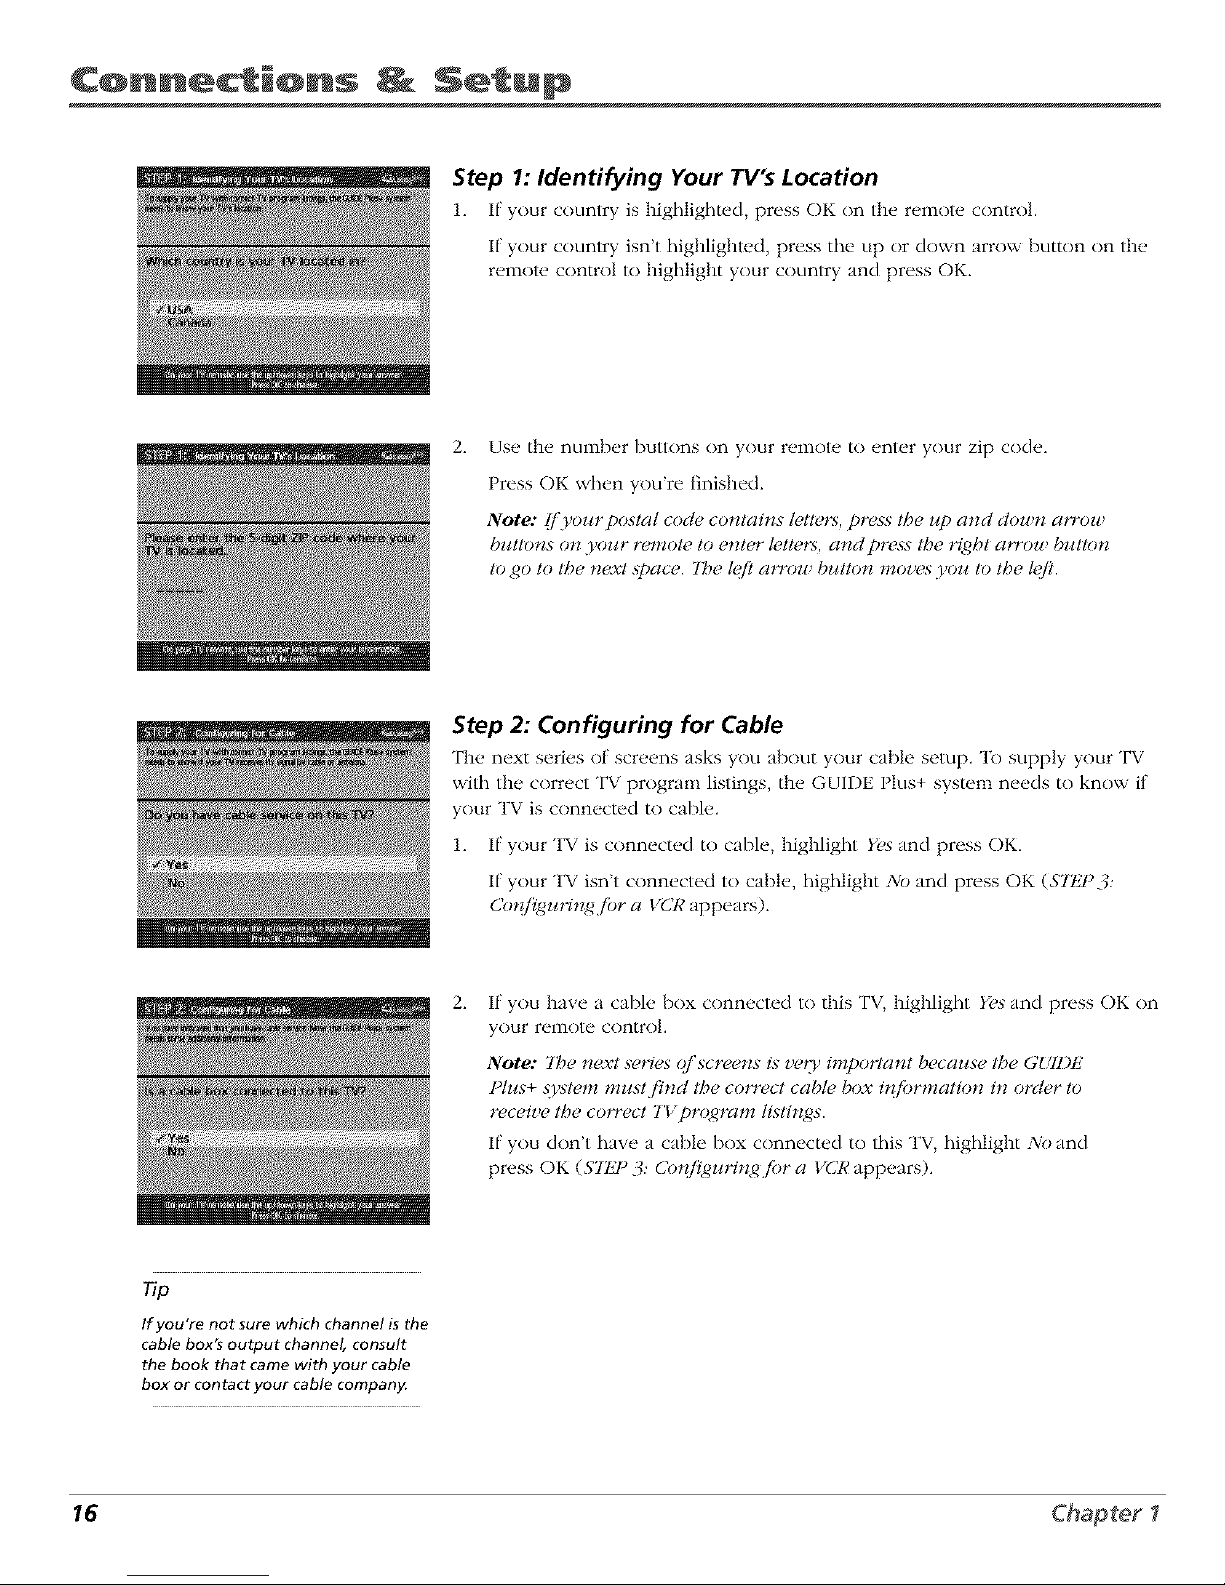
Step 1: Identifying Your TV's Location
1. If your country is highlighted, press OK on the remotecontrol.
If your country isn't highlighted, press tile Lip or down arrow button on the
remote control to highlight your country and press OK.
2_
Use tile nmnber buttons on your remote tn enter your zip cnde.
Press OK when you're finished.
Note: lj'yollrpostal code contains teltel% press thezip and down arrow
bzalons on 3'oz_r remoh, to enter k,tte_:_,and press tbe rt_gbt at_'ow butlon
to go to the next .space. 7be lgfl mrow bz¢tton moz,es you to the lgfl.
Step 2: Configuring for Cable
The next series of screens asks you about your cable setup. "Ib supply your TV
with the correct TV program listings, the GUIDE Plus+ system needs to know if
your TV is connected to cable.
1. If your TV is connected to cable, highlight Yes and press OK.
If your TV isn't connected to cable, highlight NO and press OK ($7t_P3:
Co_il_zcrin/4.ibr a VCR appears).
2_
If you have a cable box connected to this TV, highlight Y(,s and press OK on
your remote control.
Note: 7be next series of'screens is ve_Tyimportant b_,cause the GHI1)E
Ph¢s+ system mz¢stfind the correct cable box itd_)rmation in order to
receiz,*,the co_rect TVproNram tistDzgs.
If you don't have a cable box connected to this TV, highlight No and
press OK (STtJ ° 3: Conj_gmqn_,4jbr a VCR appears).
Tip
If you're not sure which channel is the
cable box's output channel, consult
the book that came with your cable
box or contact your cable company
16 Chapter I
Page 19

.
Highlight the channel to which you have to tune your TV in order to see
cable programming, and press OK (a screen appears reminding you lo
connect your G-LINK cable to your TV and cable box).
Notes: Channel Q$ i_ the most common.
Cboose VideoJ/AUX (/'your cable box is connected to your TV with
w_dio/_.'icleo cabh<_ instead o/'a coaxial cable. Go to page 7jbr pictures o/'
tbese cabh<_.
4. Highlight your brand of cable box, and press OK.
If your brand isn't listed, highlight Not Listed and press OK.
5_
Make sure your cable box is on.
Tune the cable box to channel 02 (use the remote control that came with
your cable box, or press the channel bunons on the cable box).
Press OK (the GUIDE Plus+ system starls testing codes).
Important Note: When code testing is in progress, don't to_cb yoJ_r TK
VCR, cable box or any o/'tbe remote controtsjbr tbese products.
6_
Look at your cable box. If it is still on and changed to channel 09, file test
was successl\d. Highlight Yes, and press OK (S'ltiP j_: Cot_/[_mqngjbr a VCR
appear._).
If your cable box didn't change to channel 09 or turned itself off, you have
two choices: No and 7_.,._ttbi._code again.
Te._t this code aidain: If you think the TV, the cable box, or any of the
remote controls might have been touched or bumped during tile test,
highlight Test this code ai4ain and press OK (tile GUIDE Plus+ syslem runs
the same set of codes).
No: If you don't think the test was interrupwd, highlight No and press OK
(GUIDE Plus+ syswm tests lhe next code).
Repeat the previous instructions until the TV finds tile correct cable box
code. Follow the instructions on the screen.
Note: [i'tbe TV can 'tfi'nd your cabtt, box code, a troublesboot#<,4
cbeckli._t appem:_. Care/id(}, revieu eacb cbeckli._t and.fidtow tbe
illsD'lgclions oll l,_)escreeH.
Chapter I 17
Page 20
C@nnecti@ns Setup
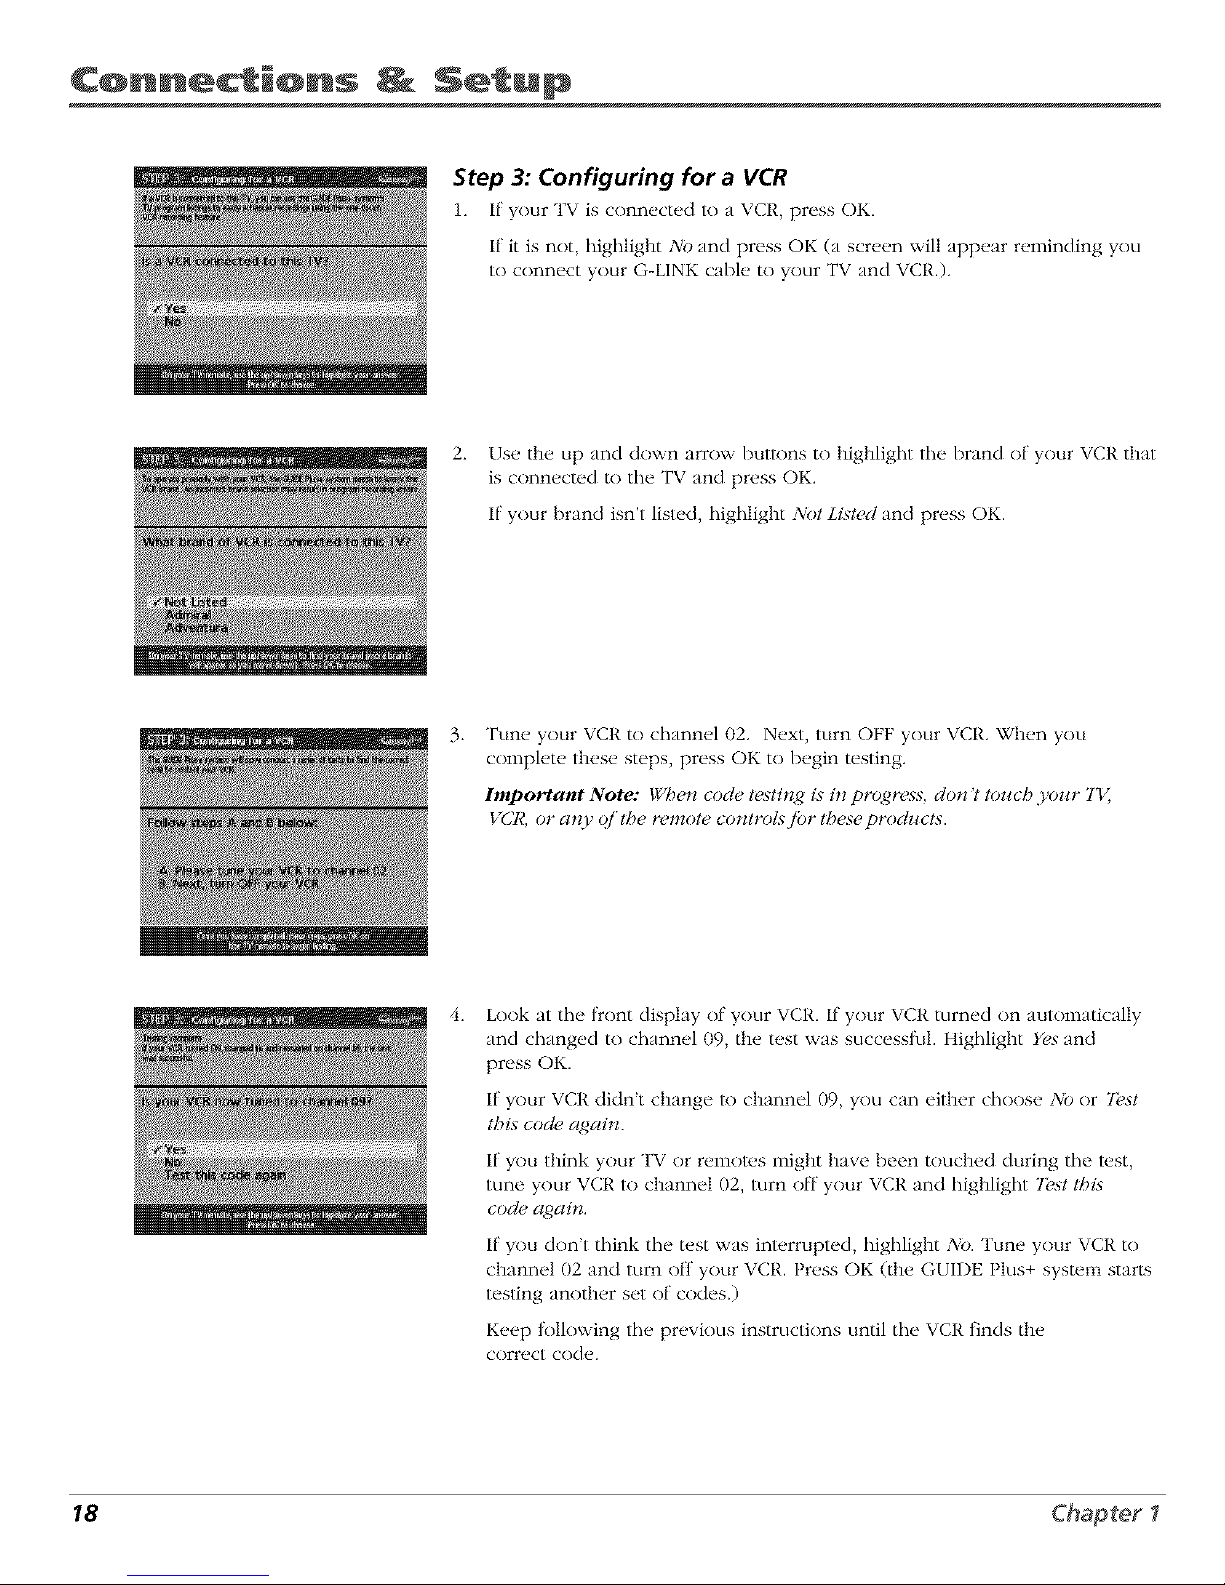
Step 3: Configuring for a VCR
1. If y()ur TV is connected to a VCt{, press OK.
If it is not, highlight NO and press OK (a screen will appear reminding you
t() c()nnect y()ur G-LINK cable to your TV and VCP,.).
2. Use the up and down arr()w buttons to highlight the brand ()f y()ur VCR that
is connected to the TV and press OK.
If:y()ur brand isn't listed, highlight Not Listed and press OK.
3_
Tune your VCR to channel (}2. Next, turn OFF y()ur VCP,. When you
complete these steps, press OK to begin testing.
Important Note: Whe*_ code testb_,g is in progrPss, do_ 't toz_ch .poz_r 7U,
VCR or m O' o/'tbe rPmote co_trot.v /br tbesPproducts.
Look at the lront display of your VCR. If your VCR turned ()n automatically
and changed to channel (}9,the test was successl\ll. Highlight Yesand
press OK.
If your VCR didn't change to channel 09, you can either ch()ose NO ()r 7},st
this coch, a_,dai_.
If you think your TV or remotes might have been touched during the test,
/
tune your _ CP, to channel 02, turn off your VCR and highlight 7>st t,_H._
code again.
If y()u don't think the test was interrupted, highlight NO. Tune your VCR to
/ } } + .channel 02 and turn off y()ur _ CP,. I ress OK (the GUIDE I lus system starts
testing another set of cndes.)
Keep t2)llowing the previous instructi()ns until the VCR finds the
correct code.
18 Chapter I
Page 21

np
Leaveyour cable box turned ON to
download program information,
Leaveyour VCRturned OFFto record
programs.
Note: [/'tbe GUI1)IZ Plus+ ,_mtem can't locate the cotrect codejbr the VCR,
a li._t qi'troublesbootirzg instrnctio_s appea_:_ to belpyou b_/breyou tO,
a_,qairz.
• 777pVCR cotg72uration again: repeat VCR setup.
• 7>st atternatP codes: tests selected brahms a_d (ftbi.t[_tit.% tbe test
contirlues with all codes in the system.
• 5_ip hSis step: tbe GUI1)E Plus+ ,_pstem worz 't bP able to automatically
scbedulP p_%_rams to record o_ your VCR.
Step 4: Confirming Your Settings
1. Check to make skirt, all sel/ings art, complete and correct. If all sel/ings art,
complete, highlight Fes, end setJ¢p and press OK. If your cable box and/or
VCR code testing 13iled, you should see INCOMPLtZT£ where the cable
box and VCR codes are listed. Once setup is complete, additional
screens appear.
If any settings are incomplete or incorrect, highlight Ago,repeat setup process
and press OK. Follow the instructions on the screen.
2. You can choose to view a demn of the GUIDE Plus+ ti.atures, which nmy
take a l_w minuh.s to load. If you don't want to see the demo right now,
press OK to watch TV.
Chapter I 19
Page 22

C@nnecti@ns Setup
What to Expect
The next time you turn on your TV, the GUIDE Plus+ system will appear on the screen. The
lkfllowing examples explain wlmt you might see:
• If all of tile program inl_>rmatinn has been sent to your TV, the GLIDE Plus+ system
appears with all of your TV program listings.
• If the program inlkmnation hasn't been sent to your TV yet, an outline of the GUIDE
(without TV program listings) will appear on the screen. Program inlimnation is usually
sent to your TV at night.
• If the TV detected that you have multiple cable companies in your area, ST/J ° 5: Cboo._irzg
gozcr Cbannd Linez@ appears.
Features of the GUIDE Plus+ system are explained in Chapter 3.
To clear the guide tkom your screen, press CLEAR or GUIDE on the remote control.
Next Steps
Now that you've finished the Interactive Setup, you're ready to watch TV. This might be a good
time to program your remote control. The remote cnntrnl that came with this TV can be
programmed to operalu other cnmponents. Go to the next chaplur lo lind out how to program
your remote.
20 Chapter I
Page 23

2
Using the Remote Control
Chapter Overview:
• The Buttons on the Remote Control
• Programming the Remote to Operate Other Components
• How To Use the Remote After You've Programmed It
• Code List
Changing Entertainment. Again.
21
Page 24

Using Re @ e C@n r@M
L.E.D.
VCRI TV
<l
DVD VCR2 AUX SAT.CABLE
&&&&
MUTE SKIP
SOUND GO SACK
GUIDE INFO
MENU CLEAR
,0 0'0
ANTENNA
O
REVERSE PLAY FORWARD
<;?C>c>
REC'VCR_ STOP PAUSE
The Buttons on the Remote Control
0-9 (Number buttons) Enter channel numbers and time settings directly
through tile remote control
To entur a two-digit channel, press tile two digits. To enter a three-digit channel,
press and hold the first digit fl)r hvn seconds until two dashes appear to the
right of the number, then add the second two. Example: to tune to channel 123,
press and hold 1 tbr two seconds, press 2, then press 3.
Arrow buttons (up, down, left, right) Press tile arrow buttons to move
through the on-screen menu system.
ANTENNA Functions as TV/VCR button in VCR mode and ]'V/receiver button
in SKF*CABLE mode.
AUK (auxiliary) Puts tile remote in auxiliary mode to operate tile component
you've programmed the remote to operate with this button. You can program
this button to control a cable box, most RCA, GE and PROSCAN audio
components, a laserdisc player, or a VCR. If you set tip the Auto Tuning feature
(Chapter 3), pressing the A[X buuon automatically tunes the TV to the
correct channel.
CH (up and down) buttons Scan up or down through the current channel list.
Press once to change the channel up or down; press and hold to continue
changing channels.
CLEAR 1,'cmnves any menu or display from tile screen and returns you to
TV viewing.
DVD Puts the remote in DVD mode. If you set tip/he Auto Tuning fl, ature
(Chapter 3), pressing tile DVD buuon automatically runes tile TV to tile
correct channel,
FORWARD If you're operating a VCR or DVD Player with tile remote control,
press FOI,'WARD to advance a disc or videotape.
GO BACK 1,'eturns you l© the previous channel.
GUIDE Press GUIDE to make tile GUIDE Plus+ system appear on the screen:
press GUIDE again to remove it Dora tile screen.
INFO Displays channel inlbrmation.
LE.D. (light-emitting diode) The lil/le light on tile remote that lights when you
are programming the remote. It also lights when you press a valid buunn on
tile remote.
MENU Displays the TV's Main menu, You can also press and hold for 2
seconds to display tile GLIDE Plus+ system.
MUTE Lowers the vnltlnle t() its inininluin level. Press again to restore vnltllne.
OK When a menu is on tile screen, press OK to select tile item that
is highlighted.
ON.OFF Turns tile TV on and off. When the remotu is in another mode (VCR,
DVD, Satellilu, etc.) and the remote is programmed to operate that component,
you can press ON*OFF to turn the component on and off.
22
Page 25

Using Re @ e
Tip
To turn off all the
RCA, GE, and
PROSCAN
components that are
connected to the T_,
press ON.OFF twice
within two seconds
This feature only
works with most RCA,
GE and PROSCAN
products.
PAUSE If you're operating a VCR or DVD Player with tile remote cnntrnl, press PA{SE when the disc
or videotape is playing to pause playback.
PLAY If you're operating a VCR or DVD Player, plays the disc or videotape.
REC.VCR+ When tile GUIDE Plus+ program guide is on the screen, press REC,.VCR+ to program
your VCR to record a program. If tile remote is in VCR mode, press REC*VCR+ to start recording.
REVEIkSE If you're nperating a VCR or DVD Player with tile remol_, control, press REVERSE to go
backwards on a disc or videotape.
SAT.CABLE Puts tile remote in SAT-CABLE mode. If you set tip tile Auto Tuning Ik,ature (Chapter
3), pressing tile SAT-CABLE button automatically tunes tile TV to tile correct channel.
SKIP If you press this butlon belk)re you change tile channel, tile TV waits 30 seconds and
automatically goes back lo tile original channel. Each time you press SKIP, you add 30 seconds (Le, if
you press SKIP two times beti)re you change tile channel, tile TV wails 60 seconds and automatically
turns back to tile original channel).
SOUND Displays tile AtJ)IO I)ROCtiSSOR menu.
STOP If you're operating a VCR or DVD Player, slops playing tile disc or videntape.
TV Turns on tile TV and puts/he remote in TV mode. Also displays channel inl_)rmatinn.
VCR1 Puts tile remote in VCR mode. If you set up tile Auto Tuning I_.ature (Chapter 3), pressing tile
VCR1 button automatically tunes tile TV to tile cnrrect channel.
VCR2 Puts tile remote in VCR mode. If you set tip tile Auto Tuning Dature (Chapl_.r 3), pressing tile
VCR2 buuon automatically tunes tile TV to tile correct channel.
VOL (up and down) buttons Decrease or increase tile TV's volume.
WHO,,INPUT In TV mode, press WHO*INPUT to toggle through tile awtilable Video Input channels
(VIDiSVID and tile current channel). In SAT mode, press to select available channel lists.
Using the WHO°INPUT Button
Use tile WHO,,INPUT button to toggle through tile available input sources (VID and tile current
channel) and view tile content t_cnm tile component you have connected to tile TV.
1. Press TV to place tile remol_, in TV mode. Make sure that tile content t_cnmtile component is
turned ON.
2. Press WHO*INPUT to tune to tile awtilable input source and view tile component.
3. Press WHO*INPUT again to tune back to tile channel you were previously watching.
23
Page 26

Using Re @ e C@n r@M
_VD VCR2 AU× SAT.C_SL[
& &oi,,A
¢_ +
You'll use these buttons when you program the
remote to operate another component.
The remote may not operate all models of
all brands.
Programming the Remote to Operate
Other Components
The universal remote control can be progranlmed to operate nlost brands
of remote controllable VCRs, satellite receivers and cable boxes. "File
remote is already programmed to operate most RCA, GE and PROSCAN
TVs, VCRs, DVD players, laserdisc players and satellile receivers.
Find Out If You Need to Program the Remote
To determine whether the universal remote needs to be programmed,
turn a component ON, such as a VCR, point the remote at the VCR, and
press the VCR1 button. Then press ON-OFF or channel kip or channel
down to see if the VCR responds to tile remote commands. If not, tile
r(,n:ot(,ne('ds to be progra:nmt, d_
How to Program the Remote
There an. two ways to progranl tile renlote control: automatic cod(.
search and direct entry. Instructions fk_r both ways follow.
rip
To stop the automatic code search without
programming any components, press and hold CLEAR
until the light on the remote turns of-[.
Using Automatic Code Search
1. Turn on the, component you want the, remote to operate (VCR, DVD
Player, etc.)
2,
Press and hold the conlponent button on tile renlote control that
corresponds to the component you want tile remote to operate
(VCR1, DVD, etc.). While you hold down the component button,
press and hold ON-OFF (when the red light on tile remote turns
on, release both buuons).
3. Press PLAY (the red light on the remote, located below tile ON-OFF
button, starts flashing).
7lie remote is searching tile first set of component codes (there are
20 sets of codes). If the component you want to operate doesn't
turn off automatically afl(.r 5 seconds, press PLAY again (the red
light starts flashing again as the remote searches through the next
set of codes).
Continue pressing PLAY until the component turns off.
4,
Note: If the componer_t doesn '! tz¢rn ojff'q/?er yo*¢'¢,epressed the
I)IMY bz_tto_ 20 time._; the component can't be programmed.
Press REVERSE, w.ait 2 seconds. Repeat this sl(.p until the
component turns back on.
5. 7b finish, press and hold the STOP button until the red light on the
remote turns off.
24
Page 27

Using Re @ e
Using Direct Entry
1. Turn on the' conlpnnent y()u _,ant th_ _ ren_ol_ _ to op_rate.
2. Look up the brand and code numb_.r(s) lk_rthe cnmpon_.nt on the cod_. list on page 26.
3. Press and hold tile component button that corresponds to tile component you want tile
remote to operate (VCR1, DVD, etc.)
4. Enl*.r tile code tkom tile code list.
5. Release tile component bul/on.
6. Press ON*OFF to see if tile component responds to tile remote commands. If it doesn't, try
pressing tile component buNnn and then ON*OFF again.
7. If you get no response, repeat these steps using tile next code listed t_)r your brand until tile
component responds to tile remote commands.
The buttons might
operate differently for
other components,
especially when you're
using another
component's menu
system.
How to Use the Remote After You've
Programmed It
Once the rem()te has been programmed successfully, you are ready tn use it to cnntrnl your
cnmponenls. To operate tile component:
1. Press tile component button (TV, VCR1, VCR2, DVD, AtX, or SAT*CABLE) lo set tile remnte
to operate tile component.
2. Press ON-OFF lo turn tile component ON or OFF.
3. Use tile remote bul/ons that apply to that component.
Note: i/'yoz_ keep pressin_,g billions and nothing happens_, the remote i._probab!), in the
u r()_lglnod_,. Yoz_mz_slpress the componenl button thai matches the componenl.gou
want to operate (_.e., (i'yoz_ want to operate hSe VCR, press VCR1 on the remote control to
put the remote in VCR mode<)
25
Page 28

Using Re @ e C@n r@M
VCR
Admiral .............................................................. 213 [
Adv_nmra .................................................... 2026
Aiko ..................................................................... 2027
Ai\\a ................................................... 2002. 2{)2(}
Akai ..... 2003. 2004¸ 2(1{)5, 200 v, 2008, 2111,2112, 2113
American tIigh ................................................. 202¸[
Asha ........................................................... 2013
Audio Dynamics ............................................ 2009, 2010
Audiovox .................................................. 2014
Be]l & It/)well ................................................ 201¸[
Beat/mark ......................................................... 2013
B_)ksonlc .......................................... 2012. 2{)25
Cali× .............................................................. 20¸[4
Candle ........... 2013_ 2014, 2(115, 2016, 20[7, 2018, 2{)19
Canon ................................................ 202I, 2022, 2114
Capehart ................................................ 2020, 211(I
Cal_ er ............................................................... 20(}2
CCE ........................................................ 2027, 20(}¸[
Citizen 2{)13. 2014, 2(115, 20I(}¸ 2017, 20182019,2027
Cok)rtyn_e ................................................... 2009
Co]I .................................................................... 20(}1
Craig ..................................... 2(113, 20[4, 2023, 20(}¸[
C_lrtis Mathes .......................... 2000. 2(1{)2,2009, 2013,
........................... 201(}. 2{318 2(121, 2022, 2024, 2115
Cybernex ........................................................ 2013
Daewoo 2015. 2{317, 2(119,2{325, 2(126, 2027, 2028, 211(I
Dayn on ........................................................... 211(}
Dbx ....................................................... 2009, 2010
Dimensia ....................................................... 2000
l)ynalech ....................................................... 2002. 202(}
Electrohome ........................................... 2014, 2029
Elect1ophonic ............................................... 2014
Eme__,on ............................................ 2002, 2012,2014,
............. 2{315, 2(121, 2024, 2025,202(},2029, 2030, 2032,
2033, 2034, 2035, 2{)3(}, 2037, 2(138, 20_}9, 2040, 2041.
2042, 2044, 2045, 20t7. 2065, 2I{35, 2113, 21[(}, 2117.
21341
Fishe_ 2{)1I. 2023, 2(}48, 2049, 2050, 205I, 20522118
Ftlji ........................................................... 202[. 2119
Ftmti .................................................. 2002. 202(}
Gmmrd ............................................................ 202(}
GE ...... 2000. 200[. 2013, 2(}21, 2022, 2053, 2115, 2124}
Goldstm ......................... 2009, 2(}I4, 2(}I8, 2054, 212[
Gradiente ................................................................. 202(}
timley I)avldson .......................................... 202(}
ttmman Ka]don .............................................. 2009
tiarxxood ............................................................... 20(}1
Headqt]arter .................................................. 201[
tilt tchl 2002. 2055, 205(}, 2(}57, 2107, 211I, 212(}, 2122
tIl Q ............................................................ 2023
Instanl Replay ..................................................... 202[
]CI................................................................... 202I
IC ]?enne) ............ 2009. 2010. 2(111, 2013, 20[4, 202[,
............ 2022,2055,2056,2058,2059,20(}0,2107,2118
Jensen ............................................... 2055, 205(}. 2ill
IVC ............. 2()(39, 2010, 2(}11, 20[8, 2058, 211[, 2123
Kern,rood 2009. 2010. 2(1I 1, 24116, 2018, 2058, 211 [,2123
KLH ....................................................... 20(}[
Kodak ................................................ 2014, 202[
Llo)d ........................................................ 2002, 202(}
Logik ............................................................. 20(}[
LXI .............................................................. 2014
Magn tvox 202[. 2022, 2(}62, 20(}3, 21(14, 21()8, 2124
Magnln ........................................................... 2013
M _]antz ........................................... 2009, 20[0, 201 [,
............................. 2(1I(}, 2018, 202I, 2058, 2{X_2,20(}4
Martt ........................................................... 2014
Mast shill ....................................................... 2021
MEI ...................................................................... 202[
Memorev .............................................. 2002, 201 [.
................... 2013, 2{)14. 2(}21. 2(}23, 2026, 21(}4, 213[
MGA .............................................. 2029, 20(}5, 2113
MGN IechnoIogy ................................................ 2013
Midland ............................................................... 2053
MinolH ............................................. 2055, 2056, 2107
MitstLbishi 21)29, 21)55. 2(}56, 2(}(}5,20(_(},20(}7, 20(}9,
............ 2070, 207[. 2072. 2{)73, 2(174, 2141(} 2113, 2123
Montgome_ y \Vmd ........................................ 2075, 213[
MoloJola .............................................. 2021,213I
MTC ............................................. 2(102, 20[3, 202(}
M_dlitech .................. 2002. 2013, 2(116, 2026, 2053, 20(}¸[
NEC .......................... 2009. 2010, 2011, 20[(}, 2018,
................ 2058, 20(}4. 2{)v(},20_8, 2(179, 211 I, 2123
Nikko ...................................................................... 2014
Noblex .................................................... 2013
Olympt s ............................................................... 202[
Opthm]s ............................................... 2014, 213[
Optonk_ ............................................................. 209(}
Orion .......................................................... 2035
Panasonic ................ 202[, 21322. 2[09, 2[25, 212(}, 2127
Pentax ....................... 2016, 2(155, 205(}, 21(}7 212(I
]?entex Research ................................................... 20[8
]?hilco ................................. 2(}21, 2022, 20(_2, 20(}3
]?hilips .................................. 2(}21, 2(1(}2,2096, 2124
]?ilot ................................................................... 2014
Pioneer ....................... 2010, 2(}55, 2080, 208I, 2123
]?ortland ................................. 2(}I(}. 2()I 7, 20[9, 2110
ProScan .................................................... 2000, 2001
Protec .................................................................. 20(}[
Pt]lsar .................................................................. 2104
Qumtei ...................................................... 201[
Qumtz .................................................................. 201[
QEasar ......................................... 2021, 2022, 2125
RCA ............................... 2000. 2001, 2003, 20[3, 2021,
............. 2055, 2056, 2(}82, 2083, 2084,2085, 208(},2087,
.......... 2088, 2089, 2090, 2091, 2[07, 2115, 2120, 2125
RtdioshackiReallstic .................. 2002, 2(111, 20[3, 2014
202I, 2022, 2023, 2132(},2029, 2(149, 2050, 209(}, 213[
Rtdlx ................................................................... 2014
Rmdex ............................................................ 2014
Ricoh ........................................................... 2128
Runco .......................................................... 2104
S trusting ................ 2005. 2013, 2015, 2(133, 2053, 2112
Smky .................................................. 2131, 2104
Smsul ...................................... 2010, 2(}92, 2111, 2123
Smyo ........................................... 2011, 20[3, 2023
Scotl 2012, 2015, 2025, 2032, 2(135, 2038, 20(}5, 2093,
211(}
Scars ........................... 21)11, 2(}14, 2021, 2023, 2048,
..................... 2049, 21)5(},21)51, 2(}55, 2056, 21(}7, 2118
Shtrp ........... 2002, 2017. 2029, 209i, 2095, 2096, 213[
Shlntom ....................................... 200_L 2(}5(},20(}I, 2098
Shogun ...................................................... 20[3
Sign m re .................................................. 2002, 2131
Singe_ ............................................. 2021, 20(}1, 2128
Sony ...................... 2002. 2004 2(}98, 2099, 21 [9, 2128
S]S ......................................................... 202I, 2107
Sylvania 2002, 202I, 2022. 2{32(},2(162, 2(1(}3,20(_5, 2124
Symphonic .............................................. 2002, 202(}
Tandy ........................................................ 2002, 201[
Tashiko ................................................... 2014
Tamng ......................................................... 2058, 211 [
"[EAC ........................... 2002, 2(}26, 2058, 2085, 211 [
"R'chnlcs ..................................................... 202I, 2109
"R'knik t ............... 21)02. 2014 2021, 202(}, 2100, 2129
"[MK ................................................. 20[3, 2024, 2047
"[_)shlba ....... 2015 2049, 2051, 2(155, 2(1(}5, 2093, 211(}
"[_)teVislon ............................................. 2013 2014
I nilech ............................................................. 2013
"vector Research ........................ 2009, 2010, 2015 201(}
\ictor ............................................................... 2010
\ideo Crmcepts ................ 2009, 2010, 2015, 2016, 2113
\ ideosonR ........................................................ 2013
\_rds ........ , 2002, 2013, 21314. 2(}15, 2(}21, 2023, 202(},
2(129, 2055, 205(} 20(}[. 20_}. 2101, 2[02, 21(13, 21(17,
21[(}, 213[
XR 1000 ......................................... 2021, 2026, 20(}[
52maaha .................. 2009. 2010. 2(111. 2(118, 2058, 211 [
Zenith ....................... 2004, 2(}98, 2101, 2119, 2128
Cable Boxes
ABC ............. 5002. 5003, 5004, 5005, 5006, 5007, 5053
Antronlx .................................................... 5008, 5009
Archer ................................... 5(108, 5009, 50[0, 501[
Cabletenna ............................................. 5008
Cab]eview •............................................................ 5008
Centt/iLv ......................................................... 501¸[
Cillzen ........................................................... 501¸[
Col{/ur _ice ............................................ 50[2, 5013
Comlronics ......................................... 5014, 5015
C/mtec ............................................................... 5016
Eastern ....................................................... 50iv
Garrard .......................................................... 5011
GC Elect_)nR s ...................................................... 5(1{39
Gemini ........................................ 5018, 5(119, 5(149
General ]nstrt/ment ............................................. 5(1{)3
]_amlin ............................. 5020, 502I. 5022. 5(135, 5045
Hitachi ....................................................... 5003
]_ytex .................................................................. 5(1{)2
lasco ............................................................ 5(111
ler_]d 5003, 5005, 500v,5018, 5{)23, 5(124, 5(146, 5053
Magnaw_x ..................................................... 5(125
Memorex ...................................................... 5026
Movie Time •...................................... 5002. 502v, 5(128
NSC ................................................. 5002. 5(127. 5(128
Oak ............................................. 5(1{32,5(116.5029
Panasonlc ..................................................... 5048, 5(152
Paragon .................................................. 5(126
PhiIips ................................. 501[_ 5012_ 5{)13, 5(119,
5025, 5030, 5031, 5032
Pioneer •............................................. 5(133, 5(134
]?_/lsa_¸•............................................................. 5(126
RCA ........................................... 50iv. 5(149, 5052
Realistic ..................................................... 5(1{39,5(149
Regal .................................................... 5(122, 5035
Regency .............................................................. 50IV
Rembrandt .................................................... 5(1{33
Runco .................................................................... 5(126
Samstmg ............................................. 5(114, 5(134
Sdentific Atlanta ...................... 500(}, 503(}, 503 v, 5(138
Signal ........................................................ 5(1I4, 5018
Signamre .................................................... 5(1{33
SI Mal_ ............................................................... 5(114
Sprucer ........................................................... 5052
Starcom ................................... 5007, 5(118, 5(153
StaJkqate .................................................... 5014. 5(118
Star{Nest ....................................................... 50¸[8
l_ndy ................................................................ 5040
3_leview •.................................................... 5014
l_com ........................................ 5004, 5(123, 5(141
l_shiba .............................................................. 5(126
Tusa .............................................................. 5(118
ITS(} ............................................................. 502v
Unlka ............................................ 5008. 5(1{39,50¸[1
UniIed Artists .................................................. 5(1{)2
UniIed Cable ....................................................... 5(153
Universal .......................... 5008, 5009, 5010, 5(111
_deoway .............................................................. 5044
_ex_star .......................... 5015, 5025, 502v. 5040
Zenith ..................................... 502(}, 5050, 5(151
Satellite Receivers
Chappa]a] ........................................... 5(}56, 5057
Drake ........................................................ 5(158, 5(159
G E ................................................................. 5000
General Instr_/ments ........................ 5060. 5(161, 5(162
Panasonlc ............................................................ 5(175
Plimes_r .................................................... 5(176
]?l_)Scan ............................................................. 5000
RCA ........................................................... 5000
Realistic .................................................................. 5(163
Sony ............................................................... 5(172
STSI .................................................................. 5(1(}4
STS2 .................................................................. 5065
STS3 ................................................................... 5066
STSi ............................................................ 5067
l_sh_ba ..................................................... 5(168
l_shiba .................................................................. 5(173
Unld_._ .................................................... 5(169
26
Page 29

3
Using the TV's Features
Chapter Overview:
• All About the GUIDE Plus+ System
• The Channel Banner
• Auto Tuning
• Parental Controls and V-Chip
Changing Entertainment. Again.
27
Page 30

Using %% Fea u s
Action Video Program Menu
buttons window information options
Promotional Channel
information listings
About the GUIDE Plus+ System
The GUIDE PIus+ system is an interactive on-screen program guide that lists TV
schedules t_r your area and allows your TV direct control of a cable box and/or
VCR. You nlust first set up the GUIDE PIus+ Menu system in order to view this
on-screen program guide (see Chapter 1 Ik>rdetails). Press GUIDE to bring up
the G{IDE Plus+ sysl_.m.
There are six sections of tile G{IDE Plus+ sysl_.m:
• A row of Action buttons at the top of the screen (1, 2 and 3)
• Vide() window
• Program inlbrnlation
• A row of menu options (Grid &)_v;Ne'w._;5Zb#dJde, Messa_,4es,
Cbanne& Setzcp)
• Channel listings
• Promotional inl_)rmation
Note: 7be G{,71)E l_tus+ system screens illustrated in t,Si._book are
representations q/'u@at you are lik@' to see. Not all cbannel._; proNrams;
and GUI1)E Plus+ #{f!)rmation depicted will be available in your area.
Newjg.atures and options can be downloaded to the GUI1)t_Phcs+
,';},stem,so tbese too are sul{/ect to cbarzge.
Tip
Since the program information provided by
the GUIDE Plus+ system is based on your
locale, you will need to run Setup again if
you move to a different zip or postal code.
Downloading Data
The GUIDE Plus+ system is not awtilable until it completes i_ fi_t download of
program listings. When the power is turned off, tile TV locates a 'host channel"
that carries GLJIDE Plus+ system data containing program schedule and channel
lineup inlk)rmation. A channel lineup is the list of stations and their respective
channels.
"R)ensure that your first download of data is complete, you should leave your
TV off overnight. Downloads occur several times a day. The TV must be turned
off fi)r GUIDE Plus+ system data lo download.
If the TV loses power or is unplugged, GLIDE Plus+ sysl_.m program listings
may be lost. When power is restored, make sure tile setup inlkmnation is still
correct. The GLIDE Plus+ system will receive updated program inlk)rmation
during tile next scheduled download.
Channel Lineup
If:more than one cable company services your area, you may be prompted with
S7t_P 5: Cboosin_,_ YoJ_rChannel Lineup after tile first GUIDE Plus+ system
download. You will need to identil_ your cable company by selecting tile
correct channel numbers lk_rthe stations in question.
• Use the up and down arrow buttons to change tile channel group and
press OK when the correct channel group is highlighted.
28
Page 31

Using
g
PressGUIDE on the remote control to see
the GUIDE Plus+ system. To remove the
program guide from the screen, press
OK, GUIDE, or CLEAR.
Getting In & Out of the GUIDE Plus+ System
To enter tile GUIDE Plus+ system:
• Press G[IDE on tile remote.
• Press and hold MENU tk/r 2 seconds on tile flcont panel.
To exit tile GUIDE Plus+ system:
• Highlight a program and press OK to exit tile GUIDE Plus+ system and tune
to tile channel
• Press GI_IDE to exit thv GUIDE Phls+ system and tune to tile dmnnel
displayed in tile video window.
• Press CLEARto exit tile GUIDE Phls+ system and return lo tile nriginal
channel.
The GUIDE Plus+ System Menus
"File GUIDE Phls+ system ot_rs seven dit_rent options on tile Menu bar: Grid,
Sort, News, J;chechd(4. Message.% Charmets and 5?,tJ_p.To access tile Menu bar:
1. Press GUIDE to access tile GUIDE Plus+ system.
2. Press MENU or use tile up and down arrow buunns to select tile Menu bar
(tim Grid Guide appears by defimlt).
3. Use tile left and right arrow buttons Ioaccess other menus.
4. Press OK, or MENU, or use tile down arrow but/on to see tile menu nptions.
Grid Guide
"File Grid Guide appears each time you enter tile GUIDE Phls+ system. It
displays tile current programming tk/r each channel. "File current program is
displayed in tile video window.
• Press tile up and down arrow buKnns on tile relnoh" tn browse channel
listings and tile channel up and down buuons to page through tile listings.
Use tile right and left: arrow buttons lo browse future program listings.
To tune lo a channel, highlight tile program you want to view in tile
dmnnel listing and press OK. Press CLEAR to exit tile GUIDE Plus+ system
and return to tile original channel. Press GUIDE to exit tile GLIDE Plus+
syswm and rune to tile channel in tile vide() window.
Then use tile Grid Guide Action Buttons as described next.
29
Page 32

Using %% Fea u s
Grid guide Grid guide
menu action buttons
selection
Grid Guide Action Buttons
Action but_ns will change according to where you are in the GUIDE Plus+
system. Be sure to look at tile action bar bet_re pressing the
command numbers.
When highlighting the program, the tk)llowing Action bul/ons appear:
Watch Press 1 on tile remow to place a timer in the Schedule l_)r the TV to
mrn on and rune to the program highlighted in the channel listing. When
the TV rams on, the GUIDE Plus+ system will automatically appear with the
scheduled program highlighwd and tuned in tile video window.
6'0 To Press 2 on the remow to bring up the direct dial box and enter the
number of the channel you want. Press OK to highlight the channel and
current program in the channel listing of the Grid guide. Press OK again to
rune to the highlighted channel. If the video window is unlocked, it will
automatically tune lo the channel.
• Record Press 3 on the remote to place a timer in tile Schedule tk_rtile VCR
to record tile program highlighted in tile channel listing.
If you have a cable box, changing channels on the TV will not cause the
cable box channel to change while recording.
Record will only appear if you have set up the GUIDE Plus+ system and
specified your VCR lype.
"ll_e program inlk>rmation window will display a confirmation when you have
successl\llly scheduled a program to watch or record.
Note: i/'you bazge seh, cled two programs to watch or record which begin
at the same time or ozgertap, you will receive a timer cot{/lict message.
You inl*sl choose belweetz the two programs.
When highlighting the Channel names (the left: colunm on the channel listing),
the fl)llowing Action buuons appear:
• Lock/Unlock Press 1 to lock or unlock the video window to either stay at
one channel as you browse the GUIDE Plus+ system (lock) or change as
you browse through dil'l>rent channels (unlock).
6"0 To Press 2 on the remow to bring up the direct dial box and enter the
number of the channel you want. Press OK to highlight tile channel and
current program in the channel listing of the Grid Guide. If the video
window is locked, press OK to rune to the highlighted channel. If tile video
window is unlocked, it will automatically tune to that channel.
30
Page 33

Osing
SOrt menu
selection
Categories
Sort
The' 5b_q menu lets you browse programs by c'at_,gnry. The channel to which
you are currently tuned is displayed in tile video window.
To Sort:
1. If the GLIDE Plus+ sysl*.m isn't on your screen, press GUIDE on your
remote cnntrnl.
2. Press MENU on the remote to select tile Menu bar.
3. Use the arrows to highlight Sort. When Sort is highlighted li_>rthe first time,
tile Movies category is displayed. "lllereafl_.r, tile last category used becomes
the det3ult. A listing of subcategnries is displayed below tile category name.
Use the left and right arrows to highlight other categories.
4. Use the up and down arrow buttons to highlight a subcategnry. For
example, highlight All and press OK (the GUIDE Plus+ system sorts
tile programs).
5. Press tile up and down arrow buunns to review the list one program at a
time. Press tile channel up and down to review tile list one page at a time.
6. Select MENU to return to tile menu bar, or press GI_ IDE or CLEAR to exit
tile GLIDE Plus+ sysl_.m.
Then use the Sort Menu Action Bu/tnns as described next..
Sort Menu Action Buttons
When vi_.wing the results of a Sort, the lbllowing Action buttons appear:
• Watch Press 1 on the remote to place a timer in tile Schedule, and then
li_>llnw/he on-line help fi>r l_lrther options. Placing a timer in tile Schedule
will cause tile TV to turn on and tune to the program highlighted in the
channel listing at the predetermined time.
• Record Press 3 on tile remote to set the VCR to record tile program
highlighted in tile channel listing. If you have a cable box, changing TV
channels will not cause the cable box channel to change while recording.
The program inlkmnation window will display a confirmation when you have
successfully scheduled a program to watch or record.
Note: i/'yoJ_ haz_'eselected Iwo programs to watch or record u,,bich b<_4in
at t,_e saint, time or overlap, ,FoJ_will receive a timer co_{tlict messclge.
You ml_sl choose between the two programs.
Note: Be sz_re that cht_qng the GUll)IS Ph_s+ system se/zq)you spec(f!_,d
that 3'oz¢ba12ea VCR. i/'you clicltFI; t,_e RECORI) option will not
be avctilable.
31
Page 34

Using %% Fea u s
News menu News menu
action buttons selection
News
The N_t_ menu lets you browse current news stories by headline,
1. If the (il2 I1)E Plus+ system isnt on your screen, press GUIDE on your
remote cnntrnl.
2. Press MENU on the remote control to select the menu bar.
3. Use the arrows to highlight News (if MSNBC is available on your TV, it will
appear in tile video window).
4. Use the up and down arrows to highlight a story.
• Use the up and down arrows to browse the list one story at a time.
• Use the channel up and down to browse through the list one page at
a time.
5. Press the right arrow button to see full text.
6. If there are multiple pages of text, press the right or let_ arrow bunnn to
page R>rward or back through tile pages of text. Press tile down arrow to
view the next stnry.
7. Select MENU to return to the Menu bar, or press GUIDE or CLEAR on the
remote to exit tile GI_IDE Plus+ system.
Schedule menu
selection
Schedule
The .Si.bedule menu allows you to aher timers tk)r either viewing or recording
programs, The GUIDE Plus+ system allows one-touch VCR recnrding if you
have cnnnected tile G-LINK cable to your VCR. See Chapwr 1 lk)r more details
on connecting file G-LINK cable.
To schedule a program lo watch or record:
1. If the GI2IDE Plus+ syswm isn't on your screen, press GUIDE on your
remote c()ntr()L
2. Press MENU on the remote lo select tile Menu bar.
3. Highlight a program wilhin tile channel listing.
4. Select Watch or Record t_om tile Action buttons bar. The timer is then
automatically logged into tile &bedzde menu.
5. If you select Record, make sure to place a blank tape in the VCR and turn
it off.
Note: I]'yoz¢ bazge a cable box co*_r_ected to,yoJ_r 717arid VCR, tz¢ne yoz¢r
VCR to the cable box oJ_tpz¢tchar_nel prior to tz¢rnin_,g()/f tbe VCR.
The program inlkmnation window will display a confirmation when you have
successfully scheduled a program to watch or record.
Note: {/'yoJ_ have selected two p*%_rams to watc,5 or record u,,Stch h<_in
at t,_e samP time or oz,erlap, ,yoJ_will receive a timer co_{tlict message.
You must choose between the two pr_4_rams.
32
Page 35

Using
"1_)remove or change the frequency (daily, once, or weekly) of a scheduled
event, access the 5"cht,dlilt, lllenH trom the Menu bar.
1. Press GUIDE to bring up the GUIDE Plus+ system.
2. Press MENU on the remote to select the Menu bar.
3. tse the arrows to highlight the Schedule menu selection.
4. [se the up and down arrows to highlight the program you want to edit.
Then use the Schedule Menu Action Buttons as described next.
Schedule Menu Action Buttons
When viewing the Schedu!e menu tile following Action buunns appear:
• Remove Highlight the Watch or Record timer you wish to remove from
the schedule and press 1 on the remnte.
• Change Highlight the Watch or Record timer you wish to change and
press 3 on the remote to toggle the t_equency between the tbllnwing
choices:
DAILY records the same program each day Monday through Friday.
OA%'h" records only on that day.
WkTJ_LY records the program each week at the same time.
Messages menu
selection
Messages
Occasionally you will receive messages regarding your G[IDE Plus+ system, as
well as special programming inlk)rmation. You can access these messages from
the Mr,ssa<,gesinenH on the Menu bar.
"lk)read inessages:
1. If the GLIDE Plus+ system isn't on your screen, press G[IDE on your
remote control.
2. Press MENU on the remote to select the Menu bar.
3. Use the arrows tohighlight the Messa<,desmenu selection.
4. Highlight the message you want to read by using the up and
down arrnvv buttnns.
5. Press INFO to display the full text of/lie message. If the text continues
beyond the screen, press INFO to view the next page of text. Once you
have reached the end of the message, press INFO to close the expanded
intk)rmatinn and return tothe M_,ssa<,g_,sscreen.
Then use the Messages Menu Action Buuon as described next.
Messages Menu Action Button
/ •
When viewing the M_,ssa/4_,._menu the lk_llo_ing Action button appears:
• Remove Highlight the message you want to delete and press 1 on
the remote.
33
Page 36

Using %% Fea u s
Channels menu Channels menu
action buttons selection
\
Channels
You can custonfize die channel listing by enabling or disabling the display of
certain cllannels. For instance, you may disable channels that you never watcil.
You can restore disabled channels at a later point in time.
1. If tile Guide Plus+ system isn't on your screen, press G{IDE on your
remote control.
2. Press MENU to select tile Menu bar.
3. llse tile right and lefl arrows to highlight tile Cha*mel._ menu selection.
4. llse tile up and down arrows to select a channel.
Then use tile Channels Menu Action Buunns as described next.
Channels Menu Action Buttons
Wilile browsing tlle Channels menu, tile _/llnwing Action buttons appear:
• Cancel Press 1 on tile remote to cancel any changes you made since
enid.ring tile ChanneL_ Menu.
• Change Press 2 on tile remnh, to change tile cllannel number t_/r tile
highligllted channel line.
• On/Off Press 3 on the remote to toggle tile state ol: tile channel between
On and Q/f
Setup
The 5_,tJq)menu allows you to access tile GUIDE Plus+ system setup inlkmnation. To access tile
Setup option:
1. If lhe Guide Plus+ system isn't on your screen, press GUIDE on your remote control.
2. Press MENU to select tile Menu Bar.
3. tse tile right arrow lo highlight tile Setup menu selectinn.
4. tse tile up and down arrows to select Change ._>_temsellimgs , Rel'ic*ll_options, or
Vieu demo.
* Change system setting* Confirms tile settings you completed in tile G{IDE Plus+
system setup are cnrrect.
* Review options Displays tlle GUIDE Plus+ auto display options.
On Automatically displays tile G{IDE Plus+ system when you press tile ON*OFF
but/on on tile remote control.
Off Disables tile GUIDE Plus+ system tkom being displayed when you press tile
ON* OFF button on tlle remote control.
* View demo Runs tile G{IDE Plus+ system demonstratin_
Note: I]'you have not comph, ted your GL,JI)t5Plus+ ._}_'temsetup, these options will not be
available. A screen u illprompt you to complete your setJq).
34
Page 37

Using
Promotional information
How to Get More Information About an
Advertisement or a Program
_ find out more in_mnation about a program, advertisemem or special, use
the le_ arrow but_n to highlight the channel listing or promotional
int_rmation box.
Requesting more int_mnation about a particular show displays the PklsCode
programming number and the Sboz_,s on 2@xt lk_rthat channel.
Press the INFO button to exit the expanded inlk)rmation screen.
GUIDE Plus+ Menu Items
The GUIJ)E PtJ¢s+ Menu gives you access lo ll, atures in the G{IDE Plus+ system.
"1_ access the GUIDE PtJ_s+ Menz_:
1. Press MENU on the remote.
2. Highlight GUI1)E Phgs+ Menz¢ and press OK.
Each menu and the sub-menus are listed below:
GUIDE Plus+ Setup Displays the GUIDE Plus+ system setup screen.
Change system settings Confirms the settings you completed in the
GUIDE Plus+ system setup are correct,
Review options Displays GLIDE Plus+ system auto display options.
View demo Runs the GUIDE Plus+ system demonstration.
GU1DEPIus+ Label Displays the GUIDE Plus+ label menu.
On Displays the station name when you change channels.
Off The station name isn't displayed when you change channels.
ContinuousDemo Runs the GLIDE Plus+ system demonstration until it is
turned off. "lb turn off the demonstration, you must turn off the TV.
Note: i/'yoz¢ /gaz,_, not compl_,t_,d 3'our Gt,ql)tS Phcs+ system setzcp, these
options will not _)_,avaitabh,. A screen u ill prompt 3,oz¢ to compl*,te
wn_r setJ_p.
35
Page 38

Using %% Fea u s
Sampie displays on a Channel Banner.
ChannelBanner
There are several indicators that might appear when you press the TV or INFO
buttons on the remote. This display is called tile Channel Banner. The fbllowing
list describes the items on tile Channel Banner screen (left to right and top to
bnttnnl).
12:01
i
Displays the current time.
The lock is displayed to indicate when tile Parental Controls
are lncl,:ed or unlocked.
r)isplayed when Closed Captioning is available on tile
current channel.
ESPN
6O
Displays the label assigned to tile current channel.
Displays the current channel or input channel.
Mute is displayed when you mtm. the audio.
Stereo is displayed when the current channel is broadcasting
in St_.ren.
SAP
r)isplayed when the current channel is broadcasting SAP
(Second Audio Program) infbrmation.
Displayed when the Sleep Timer has been set.
OO:OO
Displayed to count down time left on tile commercial skip
(SKIP) timer.
With the auto tuning feature, you can
set up the TV to tune to the channel
you need to watch by pressing that
component's button.
Why You Should Use the Auto
Tuning Feature
The auto-tuning lk.ature automatically tunes tile TV to tile correct channel tk_r
diflk_rent components you have connected to your TV (like a VCR, DVD Player,
etc.) When you set up auto tuning in the menu system you don't have to
remember to change your TV to channel 3, lk_rexample, when you want lo
watch tile tape in your VCR.
How to Set Up the Auto Tuning Feature
The way you set up tile auto tuning IUature in tile TVs mvnu correspnncls to
tile component buttons on the remote anti tile way you have each component
connected to your TV. When you set auto tuning, you're telling the TV what
channel to tune to when you press the VCR1, VCR2, DVD, or SAT,,CABLE
button on the remote control.
36
Page 39

Using
1. Press MEN[ (the TVMALVMhWUappears).
2. Highlight Cbanneland press OK on your remote control.
3. Highlight AJ_Io 7>¢ning and press OK.
4. Choose which channel you would like to set:
Set VCR 1 Channel Displays a list tllat lets you set up tile channel that tile
TV ttlnes lo when yotl press tile VCR1 bu/lnn on tile remnte.
Set VCR 2 Channel Displays a list tllat lets you set up tile channel that tile
TV ttlnes lo when yotl press tile VCR2 bu/lnn,
Set DVD Channel Displays a list tllat lets you select tile cllannel tllat tile
TV tunes to wllen you press tile DVD button.
Set SAT/CABLE Channel Displays a list tllat lets you set up tile channel
tllat tile TV tunes to wllen you press SAT*CABLE.
5. Highligllt tile choice that matclles the way you llave tile component
connected to this TV, and press OK.
]lie choices and a brief explanation ff)llow:
Not connected Choose this if you don't have _his particular component
connected to tile TV, or if you don't want tile TV to automatically rune to tile
correct channel when you're using tills component.
Channel 2 (SAT/CABLE only) Component (satellite or cable box) is
connected to tile CABLE/ANTENNA jack on tile back of tile TV, and you want
tile TV to rune to cllannel 2 when you press tile SKI'- CABLE bunnn on tile
remote. Reminder: make sure tile cnmponent's Cllannel 2/3/4 switch is set to
cllannel 2. Usually this switcll is on tile back of tile component.
Channel3 Component is connected to the CABLE/ANTENNA jack on tile back
of the TV, and you want tile TV to tune to channel 3 wllen you press tile
corresponding button on tile remote. Reminder: make sure tile c(/mpnnent's
Channel 3/4 switcll is set to cllannel 3.
Channel 4 Component is connected to tile CABLE/ANTENNA jack on tile
back of tile TV, and you want tile TV to tune to cllannel 4 when you press tile
corresponding button on tile remote. Reminder: make sure tile c(/mpnnent's
Channel 3/4 switcll is set to cllannel 4.
Video Input Component is connected to tile VIDE() jack on tile back of tile
TV and you want tile TV to tune to VID (SVID if you used an S-Video cable)
Input Channel when you press tile component button.
Note: YoJ_sboJdd choose Ibisjbr3'our VCR {/'.you connecled it to the TV
with audio/video cabte._.
37
Page 40

Using %% Fea u s
Parental Controls and V-Chip
"llle l)arentat ControL_ menu allows you to program your TV so that children
cannot see certain programs, channels, or use the lkont panel controls.
"llle first three choices in tile Parental ControL_ menu involve soflware inside
your TV (refl'rred to as V-Chip) which allows you to block TV programs and
movies based on violence, sex, or other conl*,nt you may believe children
should not view. In other words, it lets you program your TV so it won't display
certain programs.
Once you block programs, you or other adults can unblock programs by
enl_.ring a password.
By deftult, the software inside your TV is turned "off," so if you don't want to
use this t>ature, you can just ignore it.
How V-Chip Works
When turned "on," the V-Chip sol_vvare reads a code lhat most broadcaste_
send with programs. That code tells the software tile program's age-based rating
(TV-MA, TV-14, etc.) and content themes [(Violence (V), Adult Language (L),
etc.)]. If you have blocked tile rating and/or content themes that the program
contains, you ,,*,'illreceive tile message, "This channel is not approved tbr
viewing," when you tune to that particular channel.
Broadcasters are not required to provide content themes, so progranls received
with no content themes will only be blocked if you block their age-based
rating. You can also block out programs that have been given a rating of 'Not
1,'ated," and programs that are considered 'unrated" because no code has been
sent by the broadcasl_,r, The TV age-based ratings and content themes you can
block are listed in the tk)llowing table.
38
Page 41

Using
Age-Based Description and Content Themes for Age-Based Ratings
Rating
TV-MA Mature Audience Only. Sp_,cificaIly designed to Ix' _iewed by adults and may b_' unsuitable for clfildren
under 17. It contains one or more of the folk)wing content themes: crude indecent language (L), explicit
sexual activity (S), or graphic violence (V).
Pa_elltS Strongly Cautioned. C()i]tall]s some materi tl that many parents would find unsuitable f_)rchildren
TV-'I4 under 14. Parents are strongly urged to exercise greater care ha monitorhag this program md tre cautioned
against letting children under the age of 14 watch unattended. ['his program contains one or more of the
f'ollowhlg content themes: intensely suggestive dialogue (D), strong coarse langmlge (L) intense sexual
situations (S), or intense vk)lence (V).
Parental Guidance Suggested. Contains material that parents may find unsuitable for younger children. Many
TV-PG parents may want to watch it with their younger children. Che program contains one or more of the f'ollowing
content themes: some suggestive dialogue (D), infrequent coarse language (L) some sexual situations (S), or
moderate violence (V).
TV-G General Audience. Most parents would find this program suitable fi)r all ages. It contains
little or no sexual diak)gue (I)) or situations (S), no strong language (L), and little
or no vk)lence (V).
Directed to Children 7 years and older, l)esigned for chiMren ages 7 md above. It may be more
TV-Y7 tppropriate fi)r children who haxe acquired the devek)i)naent tI skills needed to distinguish I)etween make
believe and reality. Themes and elements in this program may include mild fantasy violence (FX_) or comedic
violence, or may frighten children under the age of 7.
"rl/-Y All Children. l'bemes and elements in tiffs program are designed fi)r a young audience, including children
from ages 2 6. It is not expected to flighten younger children.
V-Chip TV Rating Limit
7
The _(.'bip 7'VRati_zg Limit lets you decide which T\ programs can and cannot
be viewed.
set TV programming limits:
"11)
i, Choose Parental ControL_ t_com the Main menu. If Parental Conlrols have
previously been locked, you ntust enter your password. If they are not
locked, you will get a ntessage reminding you that your limits will not be
et'l_ctive until you lock Parental Controls.
2, Press MEN[ to continue,
3. Highlight and select V-Chip 7'VRat#zg Limit:
4. Once you get to the V-Chip TVRaHnN Limit screen, use the arrow bull(ms
and OK on your rentote to change the status of a TV program rating or
content theme from View to Block.
• /
The tk)llowing sections gi_ e you more details about how to change the status of
TV program limits.
39
Page 42

Using %% Fea u s
The V-Chip Rating Limit Screen
The f'ollowing is tin example of where ilems tire located within the Rating Limit screen.
Rating Status Field
Lets you sdect whether th_ _ status of the age-basted rating limit to
the le_ is View or Block
Rating Field
I_ts you se]ect fi_ml a
list of age-based ratings
Content Themes
LiStS th_ _ cont_i)t th_fnus }Okl
_an block or _ic_
Lets you select which
contellt themes to view for
the selected rating, and
whether the slams of the
content t}leme is curr_-ntly
View (V) or Block (B).
Rating Settings Area
Lets you see the curtc'nt block vi(_w state of agc_d_asc'd ratings and
associated _ontent The \'k_w (\') settings ate" _od_'d in gr_'en, and the
Block (B) settings are coded it] red.
Rating Rating Content
field status field status fields
Tip
When you change the status of a rating to
Block, the system will automatically block
higher ratings and all corresponding
content themes,
Blocking Age-Based Ratings
You can automatically block all program ratings above a specified age-based
rating level, For example, if you only want your child to watch programs that
have a TV-G rating and lower (in other words, you want the child to watch
TV-G, TV-Y7, and TV-Y), then you need to block out other programming with
higher ratings.
"lb block programs with higher ratings:
1. First, del_.rmine the lowest level rating you don't want the child to watch
(see charl of age-based ratings on next page).
2. Press the lefi and right arrow bul/ons to highlight the RatinJ4 field.
3, Press the up and down arrow buttons on the remote lo scroll through the
age-based rating limits, Keep scrolling until the rating corresponding wilh
the lowest rating you do not want the child to watch appears on the screen.
In the example discussed above, you would scroll through the Rating field
until TV-PG appears, since the highest rating you want the child to watch is
TV-G,
40
Page 43

Using
Hierarchy of Age-Based Ratings
TV-MA Mature Audience Only
TV-14 Parents Strongly Cautioned
TV-PG Parental Guidance Suggested
TV-G General Audience
TV-Y7 Directed to Children 7 years
and older
TV-Y All Children
4.
5.
.
7.
Press the right arrow buuon lo move tile yellow highlight to the
Statics field.
Press the up or down arrow button to to_le between View and Block. The
stares tier tile rating listed to the left and all higher ratings aulomatically
changes to Block (and B).
Press OK on tile remote lo return to tile nlenu or exit tile screen when you
are finished.
Select Lock Parental Controls t_om the Parental Control._ menu. Enter a
password, and if you have not already set your password, you will be
prompted to enter it again to confirm.
Tip
To reset the ratings to View and V,press the RESET
button on the remote.
Rating Rating Content
field status fieM status fields
Viewing Age-Based Ratings
After you block age-based ratings, you have tile option of changing some of tile
ratings back lo View.
1. Delermine which blocked rating you want to view.
2. l_se the up and down arrow buttons to select the rating with a status
of Block.
3. Press the right arrow bu/lon lo move tile yellow highlight to the rating
stams field.
4. Press the up buuon to select Vic*w.
Note: 7be conlent statusj?elds cotwesponding to the unblocked rating
become Vieu as well. 7bey, and the age-based rating status are the only
,fields that automatical(i, cbange back to Vieu when you complete
tbis p*_)cess.
Note: You must remember to lock Parental Controtsjbr rating limits to
take e/[/_,cl.
Content Themes
D Sexually explicit dialogue
L Adult language
S Sexual situations
V Violence
FV Fantasy Violence
TV- Y All Children
Blocking Specific Content Themes
You can block programs based on their content. (Content is represented by the
D, L, S, V, FV and TV-Y on your screen, See tile beginning of this section tk/r
details.) When you block a content theme ti_>ra particular rating, you
automatically block that content theme lk_rhigher rated programs as well.
For example, if you do not want your child to watch programs that have adult
language (L) rated TV-PG or higher, then you could block out all programming
TV-PG and above containing adult language.
(Steps continued on next page)
41
Page 44

Using %% Fea u s
Rating Rating Content
field status field themes
Content
status fields
"lb block program content:
1. Del_.rn_ine the lowest level of content yotl don't want the child to walch.
2. tse the kip and down arrow buttons on the remote to scroll through the
age-based ratings until the rating that corresponds with the lowest content
you do not want the child to walch appears. (In the example above, you
would scroll through the ratings until the TV-PG rating appeared.)
3. Press the right arrow btl/lon lo move the highlight to the field
corresponding with lhe conl_.nt theme you want to block out.
4. Press the kip or down arrow button to change content status l}onl Fro/_.
All higher ratings' content theme will automatically change to B.
5. Press OK to return to the menu or exit the screen.
Note: Broadcaster._ are not reqJ_ired to provide conlent tbemes or a_,de-
based rati_zgs. Pr(4,grams received witb no content themes will on{F be
bk_cked i/'you block their age-bas(,d ratin_,4.
Note: You must remember to lock Parental C'ontrol._jbr ratin_,4 limits to
take e[l_,ct.
Rating Rating Content
field status field themes
Content
status fields
Viewing Specific Content Themes
If you block specific content themes, you have the option of going back and
changing some of the content themes back to (_ Vieu_
1. Del_.rmine the conl_.nt themes yotl want to change to (V) Vic*u'.
2. 12se the up and down arrow bu/tons to scroll through the age-based ratings
until the rating whose content theme you want to change to Vic_wappears.
3. Press the right arrow bu/ton lo move the yellow highlight to a particular
content theme stares, such as the B under language (L) corresponding with
TV-14.
4. Press the tip or down arrovv buuon to change its status back to _ Your
child would then be able to watch programs with TV-14 adult language
content, but not programs with TV-PG or TV-MA language conl_.nt.
Note: Onty the corttent theme status co_Tesponding to TV-14
(L) tangua_,_e changes to (V) Vic_w. Hi_ber ratecl content tbeme._; such as
tbatjbr TV-MA tan_,4ua_,4e, do not c,San_,4e.
42
Page 45

Using
V-Chip Movie Rating Limit
You set movie rating limits by blocking movivs rated al)nvv a specified levvl.
How to block movie ratings and view movie ratings is explained in the next two
sections.
"Ibaccess the _uCIIIP MOVIE RATLN*GLIMIT menu:
1. Press MENU on the remote control (the 7WMAINMENUappears).
2. Select Parental Controls (press 6).
3. Select V-Chip Movie Rat#u4 Limit (press 2).
Ratingfie/d
Rating
status field
Blocking Movie Ratings
If you only want your child to watch movies that have a PG rating and lower
(in other words, movies rated PG and G), then you could automatically block
out all other movies with higher ratings.
_b
1.
2.
.
4.
block m()vies:
Highlight the Rating field and press tile up and down arrow buunns to find
the rating that is the lowest rating you don't want the child to watch. (In
the example above, you would highlight the rating status button
corresponding to PG-13, since the highest rating you want the child lo
watch is PG.)
Press the right arrnvv bu/lnn lo highlight the rating Status field, Press the up
and down arrow buttons to change the buuon t_om View to Bloc#. All
higher ratings automatically change to Block.
Press OK to return lo tile menu ()r exit the screen.
If Parental Cnntrnls are not locked, you nlust lock them so the movie rating
limits will take elll.ct.
Note: 5brae movies mc O, be giverz a Not Rated (A_) rat#u+ After b!ocki*u4
movie ratituqs , ,},oJ_midst set Aq¢ to Vieu separately to vieu Aq¢ movies.
Ratingfield Rating
status fiekl
Viewing Movie Ratings
After you block movie ratings, you have the option of changing some of tile
rating status bul/ons back to View:
1. Highlight the RatitU4 field and press the up and down arrow buttons to find
the rating you want to view.
2. Press the right arrow bu/tnn to highlight the rating Status field. Press the up
and down arrows to change the bu/lnn lroln Block to Vieu,.
For example, if movies with a rating of PG-13 and higher are blocked, you can
change the rating status corresponding with NC-17. Your child would then be
able to watch all movies with a G, PG, and NC-17 Rating.
3. Press OK to exit the screen, and be sure parental controls are locked.
43
Page 46

Using %% Fea u s
V-Chip Unrated Program Block
Selecting this option lets you decide if programs that the V-Chip recognizes as
'unrated" can be viewed. Note that 'unrated" TV programs nmy include news,
sports, political, religious, local and weather programs, emergency bulletins,
public announcements, and programs without ratings.
View All unrated programs are available.
Block All unrated programs are not awdlable.
Note: Yoz¢mz¢st remem&,r to toc/_Parental ControLL/br rating limits to
take, q/[/_,ct.
Channel Block
Selecting this option lets you decide what channels can be viewed.
View Makes the selected channel viewable.
B/ock The t_ont panel and remote control CH (channel) buttons will tune
only to channels that you have nmrked as l_Tew.The remote will still rune to
tile blocked channel if you use tile digits to access the channel, but the
channel will be blocked.
Don't tk)rget to lock parental controls afler yotl change the status of Cbamzet
Block. If you do not, the channel block will not take el/i.ct.
Note: []'yoJt have a di_,git_lcabh, box channels 126_999 can be blocked
bzct wilt _tot be removabh, jkom .},ozcrstall ti._t.
Front Panel Block
Selvcting this option lets you block (disable) or unblock (vnable) the TVs front
panel. The remote still tunes to any channel, t,?'ont Panel Bloc¢a can:
• Keep children from watching TV when tile parent is not present.
• Keep young children l'rom playing with tile buuons.
(When using this as a Parental Control method, you should remove access to
any remote that is capable of operating the television while you have tile f_ont
panel blocked.)
Don't forget to lock parental cnntrols al]l.r you change the status. If you do not,
tile front panel block will not take effect.
Lock/Unlock Parental Controls
Selecting this optinn lets you lock and unlock parental controls se/lings using a
password.
If yon do not lock parental controls, none of the settings for V-Chip,
Channel Block, or Front Panel Block w'dl take effect.
If you li>rget your password, sinmltaneously press and hold MENU on tile
television and volume down on the remote lk>r 3 seconds, Nothing appears on
tile screen, Parental Controls simply unlock and you can re-enter a password via
Lock Parental Control._.
44
Page 47

4
Using the TV's
Menu System
Chapter Overview:
• How to Use the Different Types of Menus
• Audio Menu
• Picture Quality Menu
• Screen Menu
• Channel Menu
• Time Menu
Changing Entertainment. Again
45
Page 48

Using
How to Use Your TV's Menu System
You use the buttons on tile remow or tile front of your TV to access tile menu system and
make changes to tile settings.
"File lk)llowing pages explain how to use tile difl>rent types of menus to adjust tile t>amres of
your TV.
Tip
Menus
The first menu is called tile Matin menu. Press MENU on the remote or on tile
tront panel to bring up tile Main menu. Note that holding MEN[ tor 2 seconds
displays tile GLIDE Plus+ system.
Menus take you to another nlenu or a control panel. There are two ways to
select a choice in a 111enu:
l_se your arrow buttons on your remote control to highlight your choice,
and press OK.
Feel free to explore the menu system. If you're
ever unsure where you are in the menu system,
or you're just plain tired of exploring, press
CLEAR to remove the menus from the screen
and start over again,
Press a nmnber button on tile renlote. For exanlple, in tile Matin lllenu press
3 to go straight to tile Scree** menu.
Exiting a menu
_lere are three ways to exit a menu:
Highlight iDc_and press OK.
• Press 0 on tile remote.
• Press CLEAR. "File on-screen displays are cleared from tile screen and you
return to TV viewing.
I Audio
Audio Menu
Mute Press OK to reduce tile TV's volume to ils minimunl level. Press OK
again to reslore tile volunle.
Tone Controls Displays tile slider controls tk/r adjusting tile TV's treble, bass
and balance.
Audio Processor Displays atchoice list of available atudio modes, which
control file way tile sound comes through your speakers. You can also access
tile A bl)IO t'ROCESSOR menu by pressing the SO LND button on tile remote.
Mono Plays tile sound in mono only. l_se this setting when receiving
broadcasts with weal,: stere<) signals.
Stereo Splits tile incoming stereo atudio signal into left and right channels.
Most TV programs and recorded materials have swreo audio. The word
STtJ_EO appears on tile TV when you rune to a program thai is broadcast
in stereo.
46
Page 49

Using
Expanded Stereo Electronically "widens" sound l_com stereo broadcasts,
stereo VCRs, digital satellite systems, DVD players, and LaserDisc players
l_r a fffller, more spacious sound.
Sound Logic" Stereo 1,'educes the annoying blasts in volume during
commercial breaks, and also amplifies sot)_*r sounds in program material.
Eliminates the need to constantly adjust volume control.
Second Audio Program (SAP) Plays the program's audio in a second
language, if one is awtilable. The word SAP appears on the TV when you
tune to a program that is broadcast with SAP inl_)rmation. SAP audio is
broadcast in mono. SAP is also used to broadcast a program's audio with
descriptions of the vide() tk)r the visually impaired.
Audio Output & Speakers Displays a choice list that lets you turn the TV's
internal speakers on or off, and set the audio outputs to fixed-level or variable
control level.
Variable Output, Speakers On This setting turns the TV's speakers on
and allows variable output from the TV's audio output jacks.
Variable Output, Speakers Off This selling turns the TV's speakers off
and allows variable output from the TV's audio output jacks.
Fixed Output, Speakers Off This selling turns the TV's speakers off and
allows t_xed output from the TV's audio output jacks to an external
component such as a surround sound amplifier. With Fixed Ozapza On, the
TV's volume control, tone controls, and mute are disabled.
Picture Quality Menu
Basic Picture Controls Displays the tlve slider controls tk)r adjusting the way
the picture looks.
Contrast Adjusts the dill_*rence between the light and dark areas of
the picture.
Color Adjusts the richness of the color.
Tint Adjusts the balance belween the red and green levels.
Black Level Adjusts the brightness of the picture.
Sharpness Adjusts the crispness of the edges in the picture.
When exiting this menu, the Save Pe_:sonal PictJ_re Prese! choice list will appear.
You can choose either Yes or No. If you save the settings as a Personal Picture
Preset, the TV will store the sel/ings so you can re-select them quickly if
someone changes the settings.
(Continued on next page)
47
Page 50

Using
Picture Presets Displays a choice list that lets you select one of three preset
picture settings: Brt_bt Li_,4btin_,4;Normal Ligbtin_,4;Soft Lighting or Pe_:s'onat
Pictz_re Preset: Choose tile setting that is best lk)r your viewing environment.
Auto Color Displays a choice list that lets you turn on the tl.ature that
automatically cnrrects the color of the picture. (This is especially useful lbr
tracking realistic flesh tone cnlnrs as you switch I_cnmchannel to channel.)
Choose On or Q/[/_depending on your pretl.rence.
Color Warmth Displays a choice list that lets you set one of three automatic
cnlnr adjustments: Cooll_>r a more blue pale/le of picture colors; Normal; and
Warm t_)r a more red palette of picture colors. "llle warm selling corresponds to
the NTSC standard of 6500 K.
Screen Menu
Closed-Caption Display Displays a choice list that lets you choose tile way
closed captioning inl_)rmation is shown on tile screen.
Off always No captioning intkmnation is displayed.
On always Captioning inlkmnation is shown always, when awdlable.
On when sound is muted Captioning infi)rmatinn is shown, when
available, whenever the TV's sound is muted. ('Ib mute the sound, press
the MI. TE buuon.) The captioning intbrmation is not displayed when the
sound is not nltll_.d.
Closed-Caption Mode Displays a choice list that lets you choose which
captioning mode is used tk)r displaying captioning inti_m_mtion.
Menu Language Displays a choice list that lets you select your prell.rred
language tbr the menus: Et_ti._h, Spanish or French.
Picture Tilt (Direct View TV 31" or above) Your TV has an extra large picture
tube that makes it vulnerable to the ef'll.cts of the Earth's magnetic field. You
may need to adjust the picture tilt.
Using Closed Captioning
Many programs are encoded with closed-captioning intk)rmation, which lets you
display tile audio portion of a program as text on the TV screen.
Closed captioning is not available on all channels at all times. Only specific
programs encoded with closed-captioning inlbrmation are applicable. When a
program is closed captioned, the CC icon is displayed in tile channel banner.
See Chapter 3 tbr more inlimnation about the channel banner.
48
Page 51

Using
Tip
If you don't know which Closed-Caption mode
to use, select CC1. CC1 is probably the mode
that is used in your area. CC2, CC3, and CC4
are reserved for foreign languages, but are
rarely used at this time.
Closed-Caption Modes
The TV nffurs eight closed-captioned modes, including t_mr text modes.
To set tile Closed-Caption Mode:
1. Select Scree_ from the Main menu.
2. Highlight ClosedCapdon Mode and press OK (the Closed-Capdo_ Mode
appears).
3. Highlight your choice and press OK (the Screen menu appears again).
Note: 7_)e Text modes cover _zeartv ba[/'q/'tbe picture on the scree_ Io
dis])laF the closed-captioned t_d. Most broadcaster_ use the CC rood<
wbicb displaFs aft, u, lines (ff'captio_zs at a lime.
Turning off Closed-Caption
L Select 5"cree_trom the Main menu.
2. Press OK to select CTosed-Ccq)tion I)i.s])lco,.
3. Highlight Qff'Atwa}_s and press OK. The closed captioning is turned off and
you go back to the Scree_l menu.
Channel Menu
Signal Type Displays a choice list that lets you select the current antenna
type. This option does not appear when the GUIDE Plus+ system is set up.
UHF/VHFAntenna Choose this ff you are currently using an off-air
antenna t_r TV signals.
Cable TV Choose this if you are currently using cable or a cable box [k)r
TV signals.
Auto Channel Search Tells the TV to search automatically lk_r all the channels
available through the antenna input. When tile TV finds an active channel, it
places it in the Normal channel list; inactive channels (weak stations or channels
with no signal at all) will be removed t?om tile channel list. If you are using a
cable box and have set up tile G{IDE Plus+ system, this option does not
appear.
List and Labels Displays a control panel that lets you edit your Normal
channel list and choose a six-character label fl)r each channel. Follow tile on-
screen directions to enter your channels and other inlnrmation.
(Continued on next page)
49
Page 52

Using
Tip
To enter a number greater than 99, press and
hold "! " to enter the hundreds digit, then
press the two remaining numbers.
Channel # Use the Lip and down arrows to scroll tip and down through
tile channels available via your anwnna. YOUcan enter the channel number
directly using tile number buuons.
NormalList Only the channels included in the Nornml list are awdlable
when you scan Lip and down using channel Lip and down. l_se tile LIpand
down arrow buttons to indicate whether tile channel number indicated is
included (Yes) or is not included (No) in tile Nornml channel list.
ChannelLabel l_se tile up and down arrow buttons to enter a six-
character label Ik)r each channel. Hold the button down to scroll quickly
through the characters. The TV can store tip to 27 labels in memory.
Auto Tuning Displays a choice list that lets you set kip the TV to automatically
rune to/he correct input channel when you press a component button (VCR1,
DVD, VCR2, or SAT,,CABLE) on tile remote. Go to Chapt*.r 3 tk/r details about
tile Auto Tuning fl,ature.
Video Input Source h, ts you select whether or not you have used tile S-Video
jack to connect a component. If you are using tile S-Video jack in this way,
select S-Video inpJ_t: If not, select Vid_.o inpz_t
Time Menu
Sleep Timer Displays a control panel that lets you select tile amount of time
you want to give the TV bet_/re it shuts itself off.
Schedule Displays a control panel that lets you set kip a schedule for turning
tile TV on and off automatically. Reminder: you must mrn the schedule On. The
on-screen directions guide you through the steps needed to set the schedule.
Set Time Displays a control panel that lets you enwr tile current time. The on-
screen directions guide you through the steps needed to set the time. If your
GUIDE Plus+ system is set tip, it will automatically update your time and this
option will not appear.
5O
Page 53

Other Information
Chapter Overview:
• Troubleshooting
• Care and Cleaning
• Front Panel Buttons
• Limited Warranty
• Accessory Order Form
• Index
Changing Entertainment. Again
Page 54

Jnf@r ati@n
Troubleshooting
Most problems you encounter with your TV you can correct by consulting the Troubleshooting list that [k)llows.
TV Problems
TV won't turn on
Press the ['V button.
Make sure tlm ['V is plugged in.
Check tlm wall receptacle (or extension cord) to make sure it is "live" by plugging in something else.
Something might be wrong with your remote control. Press the POWER button on the front of the TV. If the TV turns on,
check the remote control sotutk)ns on p. 54.
The front panel buttons may be locked (disabled). Use the remote control to unlock the front panel controls by selecting the
Front Panu/ Block in the Pm¢!*ltal C?antro/s menu and choosing Viuu'.
Buttons don't work
If youh-e using the remote, contro], press th_, ['V button first to make sure the remote, is in FV mode.
The front panel buttons may be locked (disabh'd). Use the' r_q_aote control to unlock the front panel controls by selecting the
Front t_nd Block in the t_l Cbntro_ menu and choosing Viuu_
Unplug the TV f_)r two minutes and then plug it back in. Tuna the TV on and tW again.
TV turns off while playing
Sclwduh'd off function may have be_.n activat_'d. Go to p. 50 f_r instructions.
Electronic protection circuit may have been activated because of a power surge. _Wait30 seconds and then turn the TV on
again. If this happens flequently, the voltage in your house may be abnormally high or low.
TV turns on unexpectedly
Scheduled On or _atch fl'om the GI/II)E Plus+ system may have b_en activated. Go to p. 50 for instructk_ns.
Blank screen
Make sure tb__compon_qlt conn_cted to the TV is tm-n_d on.
TW another channel.
Press RESE[' in cas__the picture controls are set too low.
When I turn on the TV an icon is moving on the screen
Make sure you have removed the I)emo Pin fI'OlTtthe G LINK iack on the back of your TV_
No sound, picture okay
Maybe sound is mut_'d. Press the votum_" up button to restore sound.
Maybe speakers an' turned off. Check the Al_ctio output and Spuake_._ control panel in the Audio m_qm. Go to p. 47 f_r
detailed instructk)ns.
If using S VIDEO cables to connect a component, remember to also connect the component's left and right Audio Output Jacks
to the TV's le_ and right INPl_" Jacks.
Can't select certain channel
Channel may be blocked or not approved in the Pare_ital ControL_ m_,nu.
If using a VCR, make sure th<' TViVCR button on th<' VCR is in the correct mode" (press th<' TViVCR button on your VCR).
Noisy stereo reception
The station might be weak. Press the SOUND button on your remote control to change from stereo to mono.
52 Chapter5
Page 55

Jnf@r ati@n
Troubleshooting
No picture, no sound but TV is on
Maybe the cabh'/Jir setting is set to the wrong position. Select (;UII)E Plus+ )/le_lu fl'om the MJin menu, select
the Setu/)option and provide the correct inf_)rmJtion on the fi_tlowing screens. Go to pJgcs 16 17 for dctJilcd instructions.
The cbnnc] might bc empty chm_ge chmmc]s.
If" you're watching your VCR and its connected with con×ia] cable to the CABLE/ANTENNA jnck, rune the ['V to channel 3 or 4
(whichever channel is selected on the 3/4 switch on the tx_cl< of your VC]_). AIso check to m_kc sure the TV/VCR button on the
VCR is in the correct mode (press the TV/VCR button on your VCR).
Sound okay, picture poor
Cb('ck antcm_n connections. Make sure 3II of the cJbh's arc firmly connected to the j3cks.
'1_T 3diusting sh_rpness function to impr(_ve weak sigm_ls. Go to page 47 fi)r more instructions.
Black box appears on the screen
Closed captioning might b(, on. Check the (JosectC_l/_tio_1 l)l-_l_l_O' control pJncl in the ,'_c_e,*_ m('nu. Go to page 48 fi_r more
instructions.
Every time I turn on the TV, the Guide is on the screen
The G [/II)E Plus+ system nutomatically 3ppcars on the screen when you use the ['V button on the remote to turn on the TV. You
cm_ turn off this fi,amre by pressing GI. II)E on your remote control and then select the Menu bJr. Press the right Jrrow button to
select Setu/) Choose lCet_u_ opt_ns and select O{¥_
GUIDE Plus+ System Problems
GUIDE Plus+ setup won't switch to channel 9 for VCR and/or channel 02 cable box
Make sure you bvc removed the I)cmo Pin from the G LINK j_cl<. Check to see if the G LINK wands are positioned correctly in
fl'ont of components' remote sensors.
G [JIDE Plus+ system comrol of cable box is slower than direct control of tim box itsetE Keep this in mind when changing channels.
You may have an incorrect GUIDE Plus+ Channel Lineup. ['be guide may get out of sync with the cable provider. Use the G_TI)E
t'hts+ Setup in the GblDE Plus+ Me_lu to change tim zip code to 99999. rurn tim TV off for 10 minutes. Use Setup again to change
the zip code back to the correct wdue. If asked, be sure to select the correct channel lineup from the on screen list.
Program information doesn't download
Review your setup information m_d make sure its correct. Press MENU on the remote and sch, ct (,'Ull)t,2l_hts+ 5et_t]z Go to pJgc 16
fi_r dct_fih, d instructions Jbout the G[ II)E Plus+ Setup menus.
The ['V must be off to downlo3d infi_rm_ltion. LeJvc your TV off overnight for at h'ast 10 hours to receive the initiJl download for
your area.
If you're using a cable box, leave it on so you can receive program infk)rmation.
Scheduled Watch or Record doesn't occur
Check Schedule fi_r thncr conflicts. Go to page 50 for instructions.
Make sure the wands of the G LINK cable are placed in front of the remote sensor(s) on the component(s).
Make sure your VCR is Wrned off during tim time you've scheduled to record a program because the system turns the VCR on when
it starts recording (if it's already on when recording starts, the system will turn it off).
Make sure there is a tape in the VCR and that the VCR is connected properly.
Be sure that you set up tim VCR in the G_7I)E Phts+ 5vtlt[) menus If you don't complete the C?n_/ii_ur/n_,fi)r a V()K steps
successfully, the Record option won't be awtilable. Go to p. 18 for detailed instructions.
If a cable box is attached to your TV. make sure you set it up correctly in the G_ql)t'Yl)hts+ 5etuf) menus. Go to page 16 17 for
detailed instructions.
Page 56

Jnf@r ati@n
The Remote Control Doesn't Work
Something might be between the remote md the remote sensor on the component. Make sure there is a clear path.
Maybe the remote isn't aimed dhecfly at the component (TV or VCR) that you're trying to operate.
Maybe rel_aote is not in TV Mode. ¸Press the TV bLltton so remote will control TV.
Maybe batteries ha remote are weak, c|ead or installed incorrectly. Put new batteries in the remote. (Note, if you remove the
batt(2ries_ yoL1 ITIay have to rei)iogram the I"(21TIot(2 to Op(2I"at(2 other COl2_ponents.)
YOu might need to draha the rel_aote's microprocessor: remove batteries and press the number 1 button for at least 60 seconds.
Release the i button, replace the batteries, and (if necessary) program the remote again.
Problems with V-Chip/Parental Controls
The rating limits don't work
YOu must lock the settings. Go to the TV MAL¥ MEAl (press MEN[/ on your remote) s('l('c't Pare_ltal (]o_ltrols (press 6 on your
remote) select Locla]_lrcllt_l] (]OtlDY)]s(press 0 on your remote).
I don't remember my password and I want to unlock the TV
If" you f_)rg_'t your p tssword smault ua_'ously pn'ss and hole| _lEND on the" television and _olume down on the' remote f_)r 3 seconds.
Nothing appears on the screen, ] arental Controls simply unlock and you can re enter a password _ia Loc'l_ Parental Co_ltrol.s.
The V=Chip won't let me watch a program even though it's not rated as violent.
Maybe" the nao_ie was given an NR (Not Rated) status. After you block movie ratings you must s_,t Ah'to View separately in orcl_q"to
_iew mo_ies with an NR rating
Care and Cleaning
CAUTION: Turn OFF your TV before cleaning.
You can clean the TV as required, using a snlk lint-t_ee cloth. Be sure to occasionally dust the ventilation slnls in the cabinet
to help assure adequate ventilation.
The TV's screen may be cleaned with a soft, lint-free cloth as well. Take care not to scratch or mar the screen. If
necessary, you may use a cloth dampened with warm water.
Never use strong cleaning agents, such as ammonia-based cleaners, or abrasive powder. These types of cleaners
will damage the TV.
While cleaning do not spray liquid directly on the screen, or allow liquid to run &)wn the screen and inside the TV. Also,
avoid placing drinks or vases with water on top nt the TV This could increase the risk of fire or shock hazard or damage to
the TV.
Caution: If fixed (nnn-mnving) images are left on the screen for long periods, they may be permanently imprinted on the
picture tube. Such ilnages include network logos, phone numbers, and video games. This damage is not covered by your
warranty. Extended viewing of channels displaying these images should be avoided.
54 Chapter5
Page 57

mnf@r ati@n
Front Panel
If y()u can't find your remote control y()u can use the buttons on your TV to operate ninny of the TV's teatLlres.
MENU Brings up the TV MAIN MENU. When in the menu system, it selects highlighted items. Also returns you 1<3the
previous menu. Press and hold MENt lk_rtwo seconds to access the G{IDE Plus+ system.
CH v Scans down through the current channel list. When you're using the TV's menu system, it acts like the arrow down
but/on on the remote control.
CH ^ Scans tip through the channel list. When you're using tile TV's menu system it acts like the arrow tip button on tile
remote control.
VOL-- Decreases the volume. When you're using the TV's menu system, it acts like the left: arrow button on the
remote control.
rOE + Increases the volume. When you're using the TV's menu system, it acts like the right arrow button on the
remote cnntrnl.
POWER Turns the TV on and ofl.
RCA TV Limited Warranty
What your warranty covers:
• Any detl.ct in materials or workmanship.
For how long after your purchase:
• 90 days ff_rlabor charges.
• One year lk_rparts.
• Two years t_r the picture tubes.
The warranty period tier rental units begins with the first rental or 45 days Dora date of shipment to the rental firm,
whichever comes first.
What we will do:
• Pay any Authorized RCA Television Service Center the labor charges to repair your television.
• Pay any Authorized RCA Television Service Center fl)r the new or, at our option, refurbished replacement parts and
picture tubes required 1<3repair your televisinn.
How you get service:
• For screen sizes of 26" and smaller: Take your RCA televisinn to any Authorized RCA Television Service Center and pick
up when repairs are complete.
• For screen sizes larger than 26": 1,'(quest home or pick tip, repair, and return service from any Authorized RCA
Television Service Center, provided that your television is located within the geographic territory covered by an
Authorized RCA Television Service Center. If not, you nmst take your television to the Service (;enter location at your
own expense, or pay fl)r the cost the Service (-;enter may charge to transport your television to and from your home.
• To identil_, your nearest Authorized RCA Television Service Center, ask your dealer, look in the Yellow Pages, or call 1-
800-336-1900.
(Continued on next page)
55
Page 58

Jnf@r ati@n
• Show the Authorized Service Center Representative your sales receipt or other evidence of purchase date or first rental.
What your warranty does not cover:
• Customer instruction. (Your Owner's Manual clearly describes how to install, adjust, and operat*, your t*devisinn. Any
additional inlkmnation should be obtained I_om your dealer).
• Installation and related adjustments.
• Signal reception problems not caused by your television.
• Damage tr()ill misuse or neglect.
• Batteries.
• Custonler replacement ILises.
• Images burned nntn tile screen.
• A television that has been modified or incorporated into other products or is used t_)r institutional or other commercial
purpnses.
• A television purchased or serviced outside the U.S.A.
• Acts of God, such as but not limited to lightning damage.
Product registration:
• Please complete and nmil the Product Registration Card packed with your TV. It will make it easier lo contact you
should it ever be necessary. The return of tile card is not required fi_r warran/y coverage.
How state law relates to this warranty:
• This warranty gives you specific legal rights, and you also may have other rights that wtry ffnm state to state.
If you purchased your television outside the United States:
• This warranty does not apply. Contact your dealer t_r warran/y inl_m_mtinn.
Service calls which do not involve defective materials or workmanship are not covered by this warranty. Costs of
such service calls are the sole responsibility of the purchaser.
56 Chapter5
Page 59

inf@r ati@n
VH81(340
VH82 (6-ft)
Screw-on Cable rlttacbes to
_)c YOldnd atll_Htla
conneclor._ (cailud Z_-obm
It-Opt,) on the back _ff_l'our
V(]R or TV 77_e e*lds scre_t
onto the co_mectomJbr a
SKeCL_IZ* CO*IlI{_CIiOII
VH89 (6-ft)
Push-on Cable atlacbes
1olbL, ro_lld antL,_na
connec/or._ (callud 75-
ohm l:-O_)c,) on lke brick
*fy(mr V(.T('or TV EmLv
push onjbr a quick
COntTecHot2
Gold-Tipped cable
VH83 (6-ft)
Monaural VCR Dubbing
Cable DoubD, cable that D,I,s
}'O_ co,Thee/ the L_[el) at_d
audio _cks _t_*) VHS
VCRs to dup/ica_ tapes¸
Can also _ _,_-ed to connect
a VCR to);o_r 7Y C_b/L_ is
cok>_coded and sb_lded
Has RCA-O_ pbono plugs
0_l each e_Td
Stereo VCR Dubbing Cable
7>ipD" cakk! that l_,t,_ 3'ou
col_l'l_,ct Ibe 17T)}:()and Al _)io
jacks oj's/_reo coYYz])o_l_Is
Gold-Tipped cable
VH84 (6-ft)
VH976 (6-ft)
VH913 (1240
S-Video Cable has multi-
pin COI_I_I_CtOFS 0_7 _acb
end for connectis_ S- VMeo
comt)onenL_ lo )_r 7_
Continued on next page .......
e
r_
Accessory Order Form
Description
Screw-on antenna cable (3-ft)
Screw-on antenna cable (6-ft) VH82
Push-on antenna cable (6-ft) VH89
Monaural VCR Dubbing Cable (6-ft) VH83
Stereo VCR Dubbing Cable (6-ft) VH84
S-Video Cable (6-ft) VH976
S-Video Cable (12-ft) VH913
2-way Signal Splitter VH47
Amplified Antenna ANT200
Antenna Mixer (not shown) 193984
Remote Control (CRK76TE1) 242524
Audio,Video Adapter (not shown) 228449
$5.95
$s.9s
$s.9s
$9.95
$7.95
$14.95
$3.95
$49.95
$11.15
$30.35
$4.45
Prices are subject to change without notice.
Total Merchandise ............................................
Sales Tax .............................................................
We are required by law to collect the
appropriate sales tax for each individual
state, country, and locality to which the
merchandise is being sent.
Shipping and Handling ....................................
Total Amount Enclosed ....................................
Use VISA, MasterCard, or Discover Card
preferably.
Money order or check must be in U.S.
currency only.
No COD or CASH.
All accessories are subject to availability.
Where applicable, we will ship a superseding model.
57
Page 60

Charge your order on your VISA,
Master( ard, or Discover Card by
filling in below
USE YOUR CREDIT CARD
IMPORTANT: Copy complete account number
fi-om your VISA card
VISA
M,cal'do×pire :i--1--1i--'i'--I
IMPORTANT: (opy complete accoullt number
f}-om your Master( ard
CopyNumber
above your
name on
MasterCard
My.card ['-"V-] ["-'V-]
expires:
IMPORTANT: (opy COlnplete account number
t?om your Discover Card
v-v-v-vqEIZE V-F-V V-r-V-Vq
My card expires: [--T"]
AUTHORIZED SIGNATURE
Credit card order will not be processed without signature)
Print o1"type your name and
address clearly.
i-
Name:.
A complete and correct
order will save you days
of waiting.
Street:
Apt:
City:
State: Zip:
Daytime phone number:
Please make sure that both sides of this form
have been filled om completely.
• Allow 4 weeks for delivery,
• All accessories are subject to availability,
• Prices are subject to change,
2-way Signal 5_litter
_qd/)s folt CO_lllt_ct a SL'Co?_d 7_:
or VCR
Splitter VH47
Amplified Amenna
Allou_.you 1o qttic_,@ su ltcb
./)'_;m the anten,a s_t_al to the
cable or salellit¢" s_tll zv_tbom
ANT200
Remote Control
7bL_ is the r_,mole cotm_d that
came pacl;,,,d u fth your TK
RUdacemenls or _spares can l_
Ot'c]L'rt4d gLs t_t_t_t[_d
CRK76TEI
to
t_
To Order
To place your order by phone, have your Visa,
MasterCard or Discover Card ready and call the toll-ficee
number listed below.
Use this number only to place an order for accessory
items listed on this order form.
1-800-338-0376
To place your order by mail, detach and mail the
completed order lk)rm with credit card intkmnation,
money order or check in ES currency (nmde payable to
Thomson Consumer Electronics, Inc.) to the t:olIowing
address:
Video Accessories
PO Box 8419
Ronk_, PA 17573
Page 61

A
Accessories 57
Advanced connections 11
Age Based Ratings 38
ANI'ENNA button 22
Arrow buttons 22
Acidic)
Output Volume & Speakers 47
Processor 46
Audio/Video cable 7
Auto
Channel Search 15, 49
Color 48
Tuning 50
DVD Cbannd 37
SKI'/CABLE Cbannd 37
VCR Channels 37
AUX (auxiliaw) button 22
B
Basic
connections 8, 9
Picture Controls 47
Batteries for tim remote 14
Black Level 47
Block
Age Based Ratings 40
Front Panel 44
Movie Ratings 43
Specific Content Themes 41
V Chip Unrated Program 44
Buttons, remote control 22
C
Cable Box
code list 26
Cables
Audio/Video 7
coaxial 7
G LINK 7
S Video 7
CC (Closed Captioning) 48
CH + bumm 22
CH button 22
Channel
2 37
3 37
Banner 35 36
Block 44
Labels 50
Lineup 28
Menu 49
Search 15
Channels menu 34
CLEAR button 22
Closed Caption
Display 48
Mode 48
Coaxial cable 7
Code list
Cable Box 26
Satellite Receiver 26
VCR 26
Color Warmth 48
CoI]I]ectk)ns
TV + VCR 8
TV + VCR + Satellite Receiver
11
TV Only 9
Content Themes 38
Contrast 47
D
I)emoPin 6 8, 9 11
DVD
button 22
Channel 37
F
Finding the sensor 13
Fixed
Images 54
Output, Speakers Off 47
FOR\_\RD button 22
Front Panel
Block 44
Front panel 55
Front panel block 44
G
G LINK
cable 7
connecting 13
GO BACK button 22
Grid Guide menu 29
GUIDE button 22
GUIDE Plus+ system
Channel Lineup 28
Channels 35
I)ownloading lnfbrmation 28
Setup 15
Guide Plus+ system 15, 20
I
INFO button 22
Interactive setup 15
J
Jacks on the TV 12
L
L.E.D. button 22
LiMONO jack 12
Labels 50
Language 48
Languages
Sdecting 15
Locating remote sensor 13
Lock, Parental Controls 44
M
Memory 50
Menu
Audio 46
Channel 49
Channels 34
Grid Guide 29
Language 48
Messages 33
News 32
Picture Quality 47
Schedule 32
Screen 48
Setup 34
Sort 31
Time 50
MENU button 22
Menus
GLIDE Plus+ System setup 15
Messages menu 33
Mono 46
Mute 46
MUTE button 22
N
News menu 32
Normal List 50
Number buttons 22
0
OK button 22
ONoOFF button 22
p
Parental Controls
Locking, [Ink)eking 44
menu 38
PAUSE button 23
Picture
Presets 48
Quality Menu 47
Tilt 48
PLAY button 23
Program guide
after setup 20
R
Rating Limits
movies 43
TV 39
RECoVCR+ button 23
Remote, batteries 14
Remote sensor 13
REVERSE button 23
S
S VIDEO
cable 7
SAP 47
SXI'oCABLE button 23
SAT/Cable Channel 37
Satellite Receiver
code list 26
connecting 11
Schedule
metal 32
time 50
Screen M_'nu 48
Second Acidic) Program (SAP)
47
Set
DVD Channd 37
SAT/CABLE Channel 37
Time 50
VCRI Cbannd 37
VCR2 Cbannd 37
Setup
GI}IDE Pkls+ system
menus 15
menu 34
Sharpness 47
Signal Type
Cable FV 49
UHFiVHF Antenna 49
SKIP button 23
Sleep Timer 36 50
Sort menu 31
SOl NI) button 23
Stereo 46
STOP button 23
1"
Time
Current 36
Menu 50
Tint 47
Tone Controls 46
Troubleshooting 52
TV button 23
tJ
[]HFiVHF Antenna 49
Unlock, Parental Controls 44
V
V Chip 38
Age Based Ratings 38
Blocking Movies 43
Content Themes 38
Variable Output, Speakers
On, Off 47
VCR
1 Channd 37
2 Cbannd 37
code list 26
connecting 8
VCR1 button 23
VCR2 button 23
Video 50
VIDEO IN jack 8, 11, 12
VOL+ button 23
VOL button 23
w
Warranty 55
WHO°INPI}T button 23
Page 62

Page 63

Page 64

Please do not send any products to the indianapolis address listed in this manual or on the carton. This will only
add delays in service for your product.
_ "n.IOMSONCONSUMER ELECTRONICS
10330 North Meridian Street
Indianapolis, IN 46290
02000 Thomson Consumer Electronics, Inc.
Trademark(s)® Registered
Marca(s) Registrada(s)
Printed in USA
TOCOM 15491880
The following materials were used in
printing this publication:
60%
RECYCLEDPAPER
MINIMUM20%POSTCONSUMER
 Loading...