

Page 1
Page 2
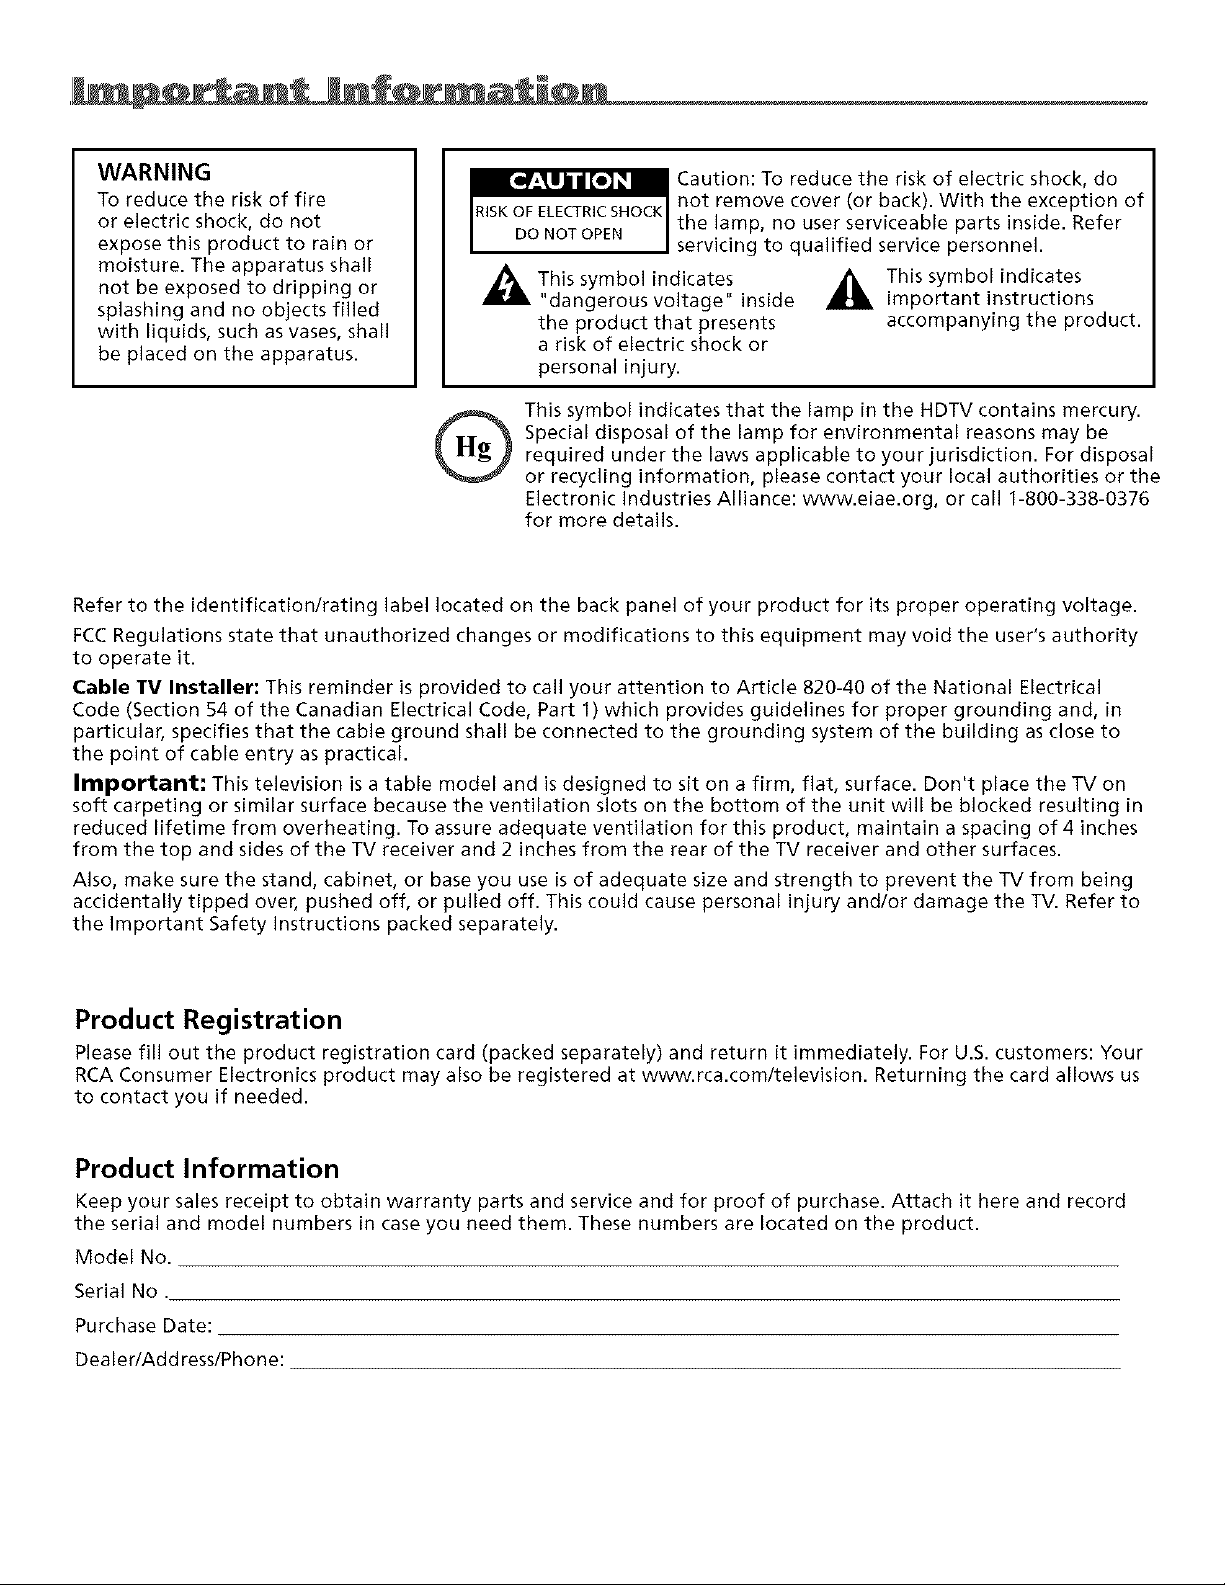
WARNING
To reduce the risk of fire
or electric shock, do not
expose this product to rain or
moisture. The apparatus shall
not be exposed to dripping or
splashing and no objects filled
with liquids, such as vases, shall
be placed on the apparatus.
Refer to the identification/rating label located on the back panel of your product for its proper operating voltage.
FCCRegulations state that unauthorized changes or modifications to this equipment may void the user's authority
to operate it.
Cable fV Installer: This reminder is provided to call your attention to Article 820-40 of the National Electrical
Code (Section 54 of the Canadian Electrical Code, Part 1) which provides guidelines for proper grounding and, in
particular, specifies that the cable ground shall be connected to the grounding system of the building as close to
the point of cable entry as practical.
Important; This television is a table model and is designed to sit on a firm, flat, surface. Don't place the TV on
soft carpeting or similar surface because the ventilation slots on the bottom of the unit will be blocked resulting in
reduced lifetime from overheating. To assure adequate ventilation for this product, maintain a spacing of 4 inches
from the top and sides of the TV receiver and 2 inches from the rear of the TV receiver and other surfaces.
Also, make sure the stand, cabinet, or base you use is of adequate size and strength to prevent the TV from being
accidentally tipped over, pushed off, or pulled off. This could cause personal injury and/or damage the TV. Refer to
the Important Safety instructions packed separately.
_This symbol indicates
"dangerous voltage" inside
the product that presents
a risk of electric shock or
personal injury.
This symbol indicates that the lamp in the HDTV contains mercury.
Special disposal of the lamp for environmental reasons may be
®
required under the laws applicable to your jurisdiction. For disposal
or recycling information, please contact your local authorities or the
Electronic Industries Alliance: www.eiae.org, or call 1-800-338-0376
for more details.
Caution: To reduce the risk of electric shock, do
not remove cover (or back). With the exception of
the lamp, no user serviceable parts inside. Refer
servicing to qualified service personnel.
_IL This symbol indicates
important instructions
accompanying the product.
Product Registration
Please fill out the product registration card (packed separately) and return it immediately. For U.S. customers: Your
RCA Consumer Electronics product may also be registered at www.rca.com/television. Returning the card allows us
to contact you if needed.
Product Information
Keep your sales receipt to obtain warranty parts and service and for proof of purchase. Attach it here and record
the serial and model numbers in case you need them. These numbers are located on the product.
Model No.
Serial No.
Purchase Date:
Dealer/Address/Phone:
Page 3
Thank You for Choosing RCA
Congratulations on purdlasing this RCA t{igh l)efiniti(m "Ik,levision (HD'I%') fi'aturing Texas
Instmn_ents Digital Light Processing® tedmology-a tree viewing experience. Your purchase
decision represents an investment in a new generation of technology-l)LP® and HD'I% 7, Even
though this is a technologically advanced tfD_lY, iF is the most usel_/riendly of its kincl-with
comprehensive on-screen instructions that guide you through all of the 3%'s tk_atures, There are
three mai*'t things about HDTV that bring yon a superior viewing experience: (1) resolntiom (2)
aspect ratio, and (3) digital signal and sound.
Resolution
The crisp, liti_qike picture that people rav_, about when experiencing tree HDTV is due to the
resolution this technology provides, ttDTV is capable of resolution that is up to almost 10 times
the resolution of the l)ictun ' on a regular, analog TV!
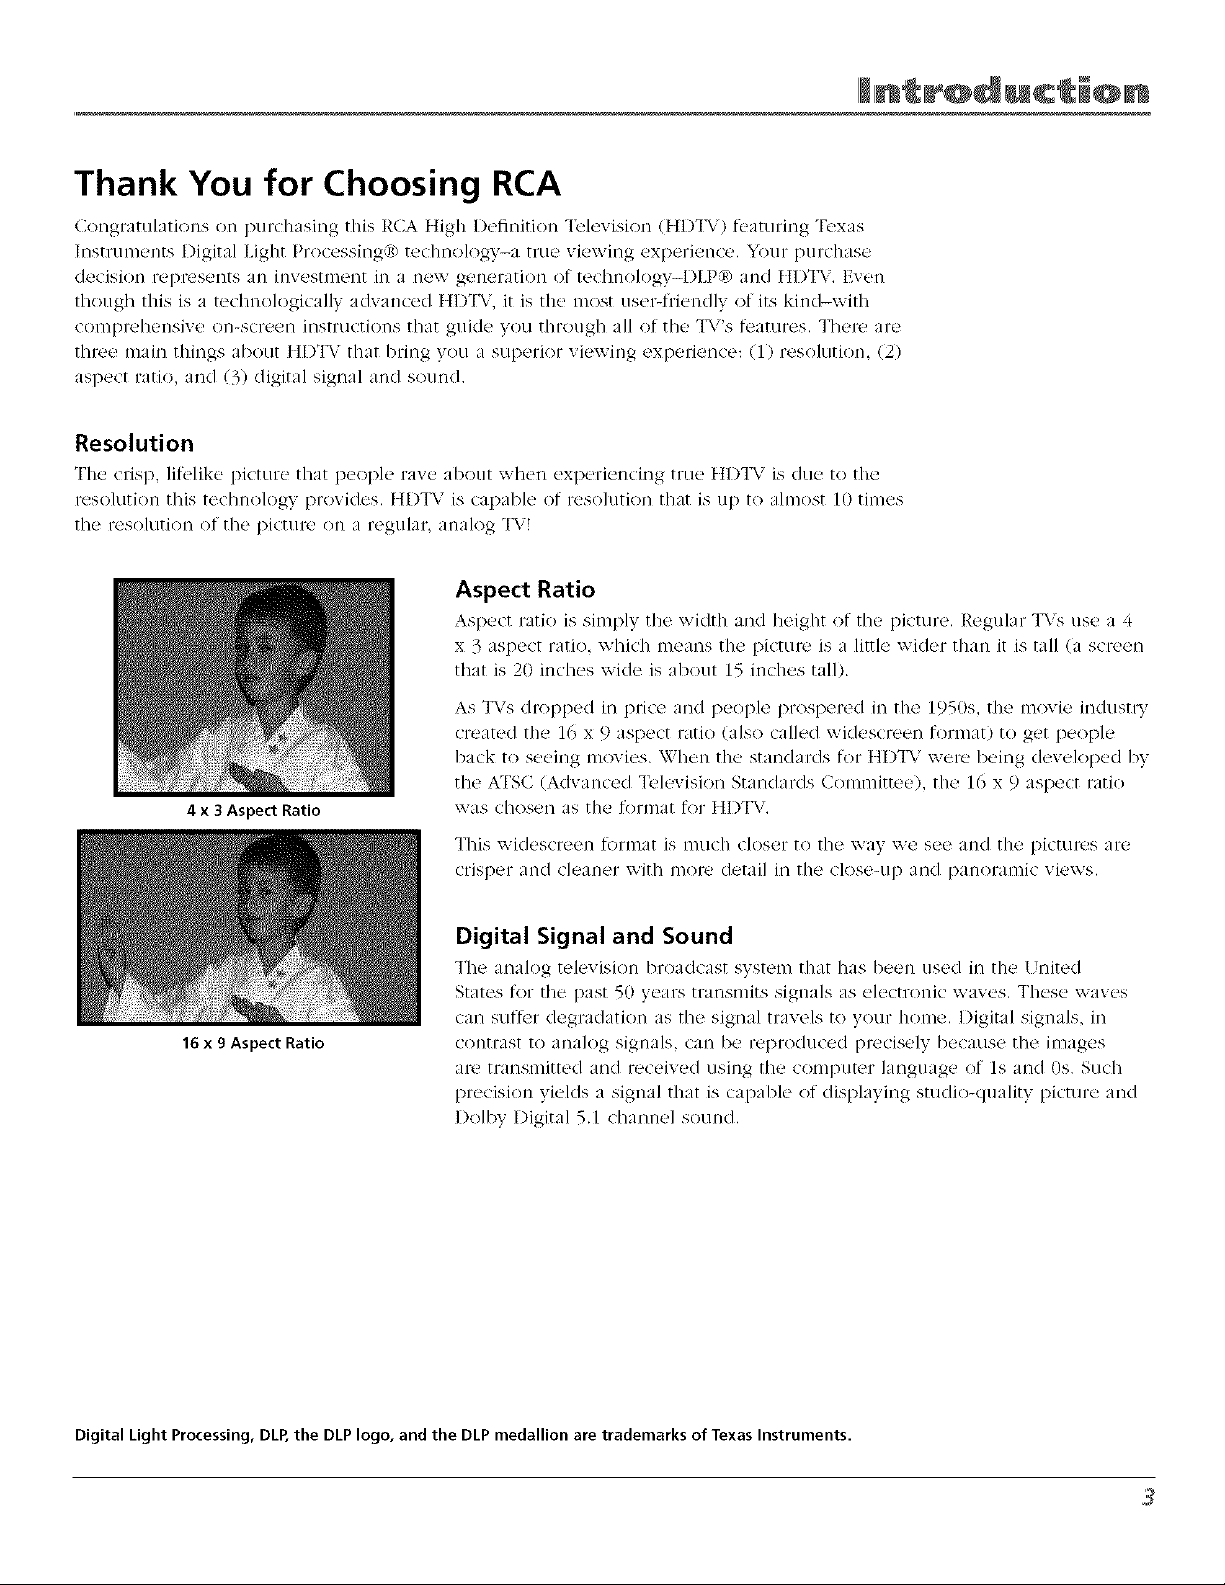
Aspect Ratio
Aspect ratio is simply the width and height of the picture, Regular +IAT_use a
x 3 aspect ratio, which means the picture is a little wider than it is tall (a scn'en
that is 20 inches wide is about 15 indies tall).
As TVs dlx)pped in price and people prospered in tile 1950s, the movie industry
created tile 16 x 9 aspect ratio (also called widescreen format) to get people
back to seeing movies, When the standards for HDTV were being developed by
the ATSC (Advanced Television Standards Committee), the 10 x 9 aspect ratio
4 x 3 Aspect Ratio
was chosen as the fiirmat f<ir HDT\,',
This widescreen tormat is nRich closer to the way we see and the plctuR!s are
crisper and cleaner with n/ore detail in the close-tip and p_tnoran/ic views,
Digital Signal and Sound
The analog television broadcast systenl that has been used in the ! nited
States ti>r the past 5(1 years transmits signals _s electronic waves. These waves
can sutt_r degradation as the signal travels to your home. Digital signals, in
16 x 9 Aspect Ratio
Digital Light Processing, DLP, the DLP logo, and the DLP medallion are trademarks of Texas Instruments.
contlTaSt to analog signals, can be reDiToduced precisely because the images
are transmitted and received using the computer language of ls and 0s. Such
precision yields a signal that is capable of displaying studio-quality picture and
Dolby Digital 5.1 channel sound.
Page 4
Other Key Features of Owning an RCA HDTV
RCA HD'IAr has been designed with _atures that will enhance your "IWviewing experience, and
tk,atures that provide flexihility to huild on the digital revolution that is raking place. A sumnmlw
of your "lSi's most unique k-amres h)llows. Go to Chapt_.r 3 t_yrmore details on these and
additional tk'atures.
Integrated HDTV Tuner with QAM
RCA was the ill:st to ofIk'r an integrat¢_d ttln{T with its HlYI'Vs, whkh means there
is no need for another hox to receive digital i)rogramming. D)ur _[Wis equipped
with a QAM (Quadrature Amplitude Modulation/ tuner that enables reception of
unscrambled digital cable content. If you have regular cable, your TV will receive
some digital channels that are availahle through a cable connection.
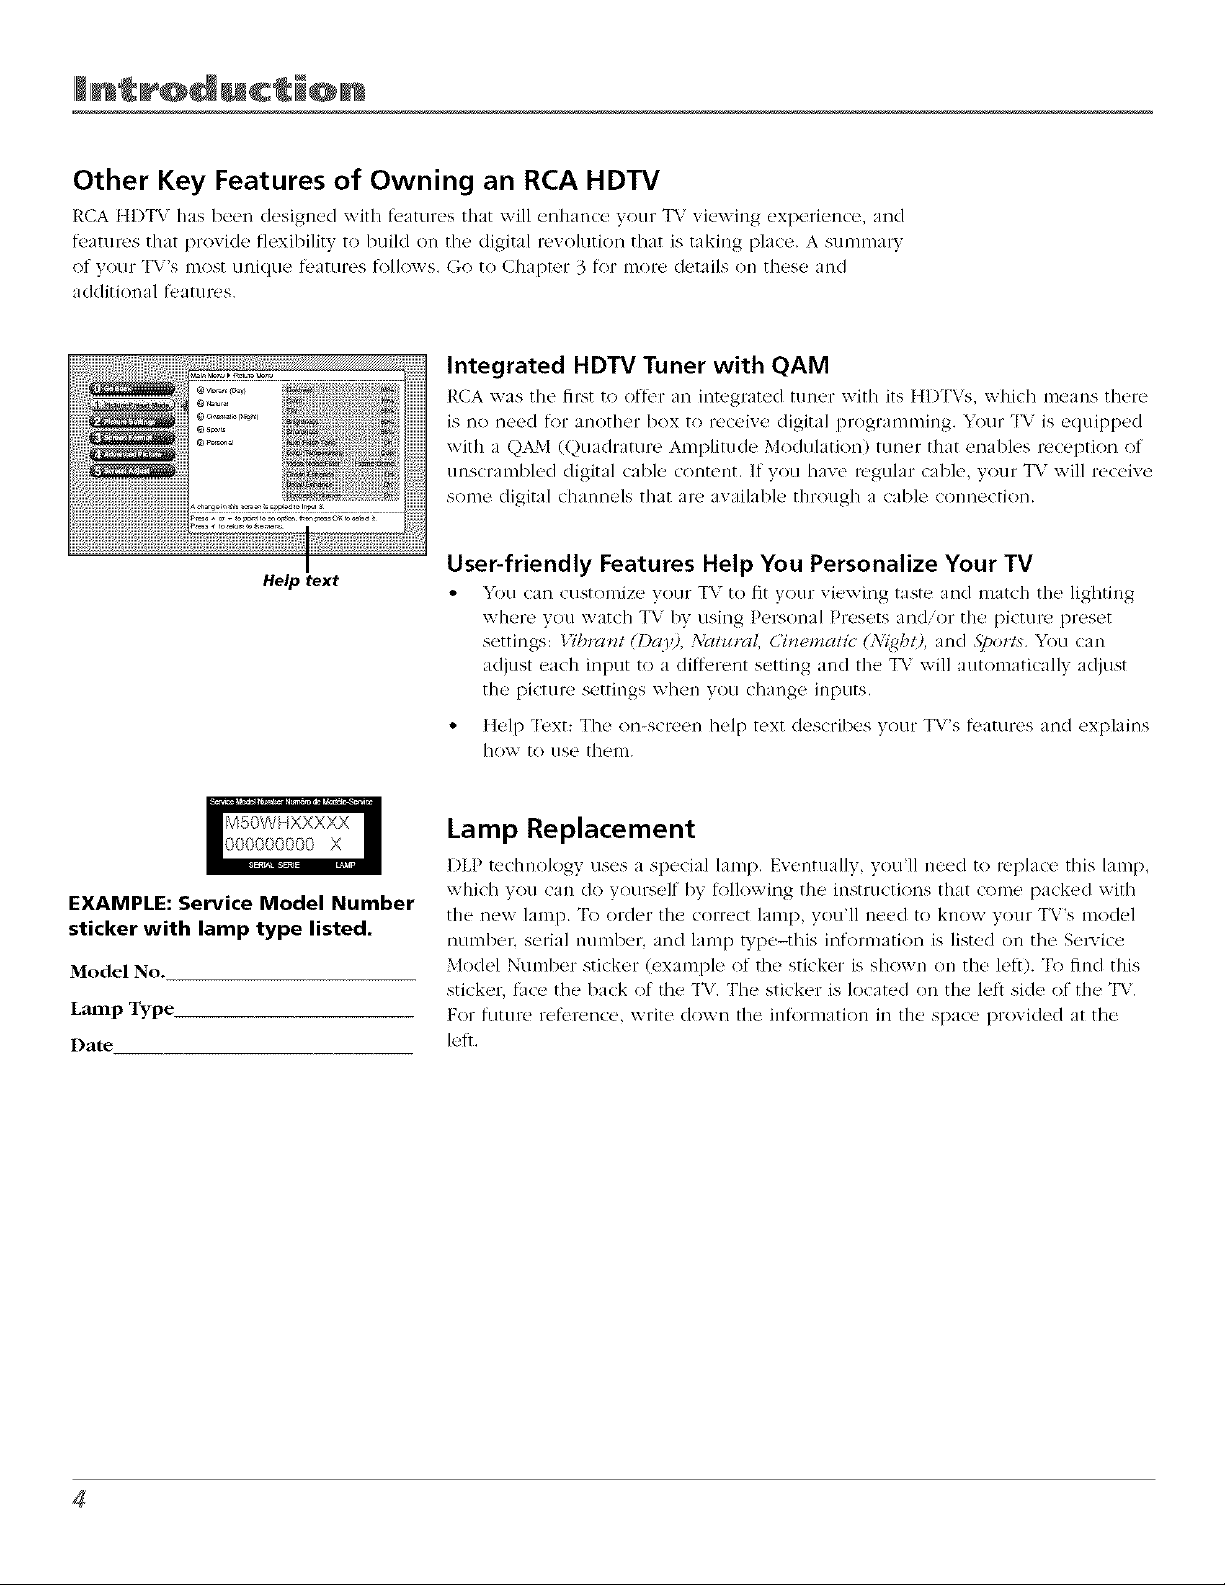
Help text
EXAMPLE: Service Model Number
sticker with lamp type listed.
Model No.
Laanp Type
Date
User-friendly Features Help You Personalize Your TV
• YOU<an customize Your TV to fit )-our viewing tastt- and match the lighting
where you watch qW hy using Person iI Presets and/or tile picture [)reset
settings: Vibrant (1)_09. :\Tatt_rat Cinematic' (N{_bO, and _\]>orts,You can
adjust each input to a different setting and the _I57will automatically adjust
the picture settings when yon change inputs,
• Help Text: The on-screen help text describes your TV's features and explains
how to use them.
Lamp Replacement
DLP tedmo/ogy uses a spedal lamp, Eventually, you'll n(.ed to repla<t' this lamp
which you call do yourself hy t<)llowing the instructions that come packed with
tile new lamp. _I_)order tile correct lamp, you'll need to know your TV's model
munber, serill number, and lamp type-this inforl,l-lmtion is listed on tile Se/wice
Model Number sticker (example of the sticker is shown on the lett). "I_>find this
sticker, lace the hack of fl_e T\,. The sticker is located on tile lelt side of tile _I%'.
For furore refl'rence, write down the inf_>rl-nation in the space provided at the
let}.
Page 5

lblle of Conten s
Introduction
Thank You For Owning an RCA HDTV ............................................................................. 4
Other Key Features of Owning an RCA HDTV .......................................................... 4
Lamp Replacement ..................................................................................................... 4
Chapter 1: Connections & Setup
Things to Consider Before You Connect ......................................................................... 7
Protect Against Power Surges .................................................................................... 7
Protect Components from Overheating .................................................................... 7
Position Cables Properly to Avoid Audio Interference ............................................. 7
Use Indirect Light ........................................................................................................ 7
FCCStatement ........................................................................................................... 7
Get the Picture .................................................................................................................. 8
Getting Cable Channels .............................................................................................. 8
Getting Off Air Channels ............................................................................................ 8
Choose Your Connection .................................................................................................. 9
Y Pb Pr (Component Video) Connection ................................................................. 10
Audio/Video Connection .......................................................................................... 11
HDMI Connection ..................................................................................................... 12
Advanced Audio Connection Information .............................................................. 14
Setting Up Your TV ......................................................................................................... 15
Remote Control Buttons Used for the Assisted Setup ................................................. 15
Complete the Assisted Setup ................................................................................... 15
Set the Menu Language ........................................................................................... 16
Complete the Channel Search ................................................................................. 16
Choose Setup Options .............................................................................................. 16
What To Expect ......................................................................................................... 17
Watching TV .............................................................................................................. 17
Next Steps ....................................................................................................................... 17
Explanation of Jacks....................................................................................................... 18
The Front/Side of Your TV .............................................................................................. 20
Side Input Jacks......................................................................................................... 20
Front Panel ................................................................................................................ 20
Chapter 2: Using the Remote Control
The Buttons on the Remote Control .............................................................................. 21
Programming the Remote to Operate Other Devices .................................................. 23
Find Out If You Need to Program the Remote ...................................................... 23
Programming the Remote ....................................................................................... 23
How to Use the Remote After You've Programmed It ................................................. 24
Modes of Operation ................................................................................................. 24
Volume Punchthrough Feature ...................................................................................... 25
Deleting ALL Volume Punchthrough Commands ................................................... 25
Using the INPUT Button .................................................................................................. 26
Remote Code List............................................................................................................ 26
Page 6
lblle of CQnten s
Chapter 3: Using the TV's Features
About the Channel Banner ............................................................................................. 31
Digital or Analog TV Channels ....................................................................................... 32
Direct Tuning to a Channel ...................................................................................... 32
Getting a Program Description ................................................................................ 32
Parental Controls ............................................................................................................ 33
Lock/Unlock TV ......................................................................................................... 33
How V-Chip Works for the USA and Canada .......................................................... 33
USA V-Chip TV Ratings ............................................................................................. 34
Channel Lists ................................................................................................................... 37
Auto Tuning Feature ...................................................................................................... 38
Future Downloadable Ratings ....................................................................................... 38
Chapter 4: Using the TV's Menu System
Menus, On-screen Help, and Control Panels ................................................................. 39
Navigating the Menu System ................................................................................... 39
On-Screen Help ......................................................................................................... 39
Controls ..................................................................................................................... 39
Picture Menu ................................................................................................................... 41
Pictu re Preset Mode ................................................................................................. 41
Picture Settings ......................................................................................................... 41
Screen Format ........................................................................................................... 42
Advanced Picture Menu ........................................................................................... 42
Screen Adjust Menu ................................................................................................. 43
Audio Menu ..................................................................................................................... 44
Sound Preset Mode .................................................................................................. 44
Sound Logic ............................................................................................................... 44
Balance ...................................................................................................................... 44
Advanced Audio ....................................................................................................... 44
Channel Setup Menu ...................................................................................................... 46
Channel Search ......................................................................................................... 46
Advanced Settings .................................................................................................... 47
Setup Options Menu ....................................................................................................... 47
Closed Captioning .................................................................................................... 47
Time Menu ................................................................................................................ 49
Quick Startup ............................................................................................................ 49
Assisted Setup ........................................................................................................... 49
Menu Preferences ..................................................................................................... 49
Advanced Options .................................................................................................... 50
Chapter 5: Other Information
Frequently Asked Questions (FAQs) .............................................................................. 51
Troubleshooting .............................................................................................................. 52
Lamp Replacement Information .................................................................................... 56
Replacing the Lamp Unit .......................................................................................... 56
HDTV Specifications ........................................................................................................ 57
Limited Warranty ............................................................................................................ 58
Care and Cleaning ........................................................................................................... 60
FCCInformation .............................................................................................................. 60
Page 7

Things to Consider Before You Connect
Protect Against Power Surges
Co[/n_,ct all (otill)oll(!nts b(,tOl_! you plug I11_,' of the'iF l'JOV, (q- (oF(Is into th(' will outlet or
power strip. NE\ER plug your T\ into an outlet that is controlled by a wall sv,itch.
• T[II'll off th(' T\, /( 'o_ ( ev e(s) be_or[, you conn[,ct or disconnect any (al)les.
• Mak(' sure all ante2ilnas ind ca[)l('s al'(! prop_rly gFo!lnd(,(I. RetZ, r to tho ]lllpol'tant _a[t'tV
h_structions sheet packed with your +I_,
Protect Components from Overheating
• |)on't 131o¢1_ vel3til _tioll Iio1(,s oll an_,' o[ the' _.Ol//[)o13_,nts. AITallge the' (orl/l)on('l_ts so that aft-
can _il-Ctllat_ _ [17_,elv,
])ol]'t stacl,_ (_O[Ill)On('llt&
If VOLI l_l t_.'(_ (olllp<)[lents fll a stand, [11 Ik_! SLIr_' V<)LI allow adequate ",entil itk)n.
• _ VOLI conn(,(t an atldio i'(_(eiv('F or ai1]pll['l(,F, plat(' it Oll it1(, top S]l('lf SO the ll('at(_d ail" [roll]
it Won't Hov, al-Otllld oth('r _.Ol]][)ol3_,l]ts.
Position Cables Properly to Avoid Audio Interference
Insc]t each cable firm]y into the designated jack.
Use Indirect Light
Don't pla(_ the T\ xxheru sunlight or room lighting will I)e (lir_-cted tox_ard thu scruun. [su sof_
or indirect lighting.
FCC Statement
This digital t_,levision is capable of receiving analog basic, digital basic and digital premium cable
television programming by direct connection t() a cable system providing such programming.
Certain advanced and interactive digital cable se/_,'ices such as video-on-demand, a cable
operator's enhanced program guide and data-enhanced television set_ ices may require the use of
a set-top box. For ll]OFe infolTnlation, call your local cable operator.
Page 8
C@lnlne¢ i@ns Setup
i
Get the Picture
The first part of conuecting your T\ is to get the picture, also knox\ r_ ts i signal. The back panel
of your TV allows you to receive analog and digital channels by using the ANTi NNA,CABLE
INI _J. , __¢graphic belov, for the location of tile jack.
ANTENNA/CABLE INPUT
Note: This back panel graphic is
for representation only. Your back
panel might be different.
What You Need To Know
Your TV is €!quipped with a QAM (Qu:Klrature Amplitude Modulation) tuner that enables ruception
of unscrambled digital cable content. If you have regular cable, your I_ _will receive some digital
channels that are available through a cable connection. Your 1_7can also receive analog and digital
off:air cable signals iron] all indoor or outdoor al'ff('[lna.
Coaxial cable
Outdoor antenna
Indoor antenna
Getting Cable Channels
Conm,(t a coaxial cabk, from the cable TV wall outlet to the ANTENNA, CAI3LE INP!T on the back of
the T_, to receive cable c['_al/l/els.
What You Need
Coaxial cable
What You Need To Know
• \Xhen you're ready to v,atch digital channels, make sure you are tuned to / digital cha[mel. Digital
statio_ls typically have a dash in tile channel number and a numl)er follox_iug the dish which is a
sul)channel. Go to page 17 for i]lore information.
• \VI]en you're ready to watch an all llog challllel, make s[ire you are ttlRed to ;11/ analog chHr/nel.
arlalog stations contain no t_l()lTe then three (ligits. Go to page 17 _)r t_l()lTe JrlfortilatJorl.
Getting Off Air Channels
Conne(t a <<>axialcable from m of_'-air autetml to th(- ANTENNA CABLE LNpI.T to ruceixu fl'uu local
off-air digital and analog channels.
What You Need
IDd()or or Olltd()or aDt_'I_lla
What you Need to Know
• \qsit v,ww,at/temla',vub.<)rg to get help deciding ",\hat typ(_ of ant(qltla to usu to re__eiv__thu local
digital channels available to you, By entering where you live, this mapping program tells you
what local analog and digital stations are available using a certain antenna. Once you determine
what type of antenna you need, go t<>rca.com.
Depending on VOLlrantenna capability, it may be necessat T to rotate your antenna and repeat the
chaHnel search to find all of*_air channels in your area. To speed this process, uncheck the box
Detect a*_te*_na or cable, sz_q*_alAlso to avoid erasing channels already found, uncheck the box
.S'<,a*vhcha*_{.ls _,:lread), in t_!.j;cha_z*vcl li._t
Chapter I
Page 9

Choose Your Connection
There 3re severed ways to colll/eCt your ]r][)T\7, de])el]c]i/]g Ol/ th(' COl-i/Don('l)[s yotl x,x,'_]l/t[O Colll/ect alld the qu dity ot the
signd you want to achieve. The HI)MI and component jacks ire considered excellent: S_\ ideo is rely good composite jacks
aie good, while coonectJ/]g coi_lDoneots [o the Antel/oa OF Cable iOD!lt is fahL
Please Llse the folloxx ing chirr to deterlllll/e x_q/ich com_ection is best lot yoLI, Proceed to the ai)DrODFlate page and com/ect
Jacks Used
/ INPUT 1
COMPONENT/COMPOSITE
y/VIDEO L
INPUT 2
COI_'IF'OSITE
VIDEO
_VIDEO
HDMItM
Y Pb Pr
Audio R and L
Video
Audio R and L
Cables Needed
_ Component video
Audio
Audio/Video
S-Video
HDMI
Go to...
page 10
page 11
pages 12-13
OR
HDMI
HDMI/DVItM
adapter
Audio
HDMI, the HDMI logo, and High-Definition Multimedia Interface are trademarks or registered trademarks of HDMI Licensing LLC.
Chapter 1
Page 10
C@lnlnec i@ns Netup
i
Y Pb Pr (Component Video) Connection
i
tNPUT _
Note: This back panel graphic is
for representation only, Your back
panel might be different.
• If you are done
connecting devices to
your TV_go to page 15
to complete the Assisted
Setup.
• To continue connecting
devices, go to the next
page.
Component Video
cables(Y Pb PO are
color coded- Green,
Blue and Red
Red
White
Audio cables are color
coded- Red= right audio;
white= left audio
Connecting the Device
This connection allows you to connect a device that has Y Pb Pr jacks, t_>r example, a DVD
player. If the device you are connecting also has S-Video or composite video, _e reconlnl_!nd
you use the component video input for better quality.
[sing the example of u I)\'D player:
1. If necessary, connect your cable and/or off-air mltenna as described on page 8.
2. Connect your Y Pb Pr coniponent video cables.
Connect three vMeo cables oF compon_,nt video cables to the INPI JT 1 Y VIDEO P_, P_
jacks on the back of the "I*z and to the Y P_ P_ outputs on the DVD player.
3. Connect your audio cables.
Connect the audio (white and red) cables to the INPlq 1 R and L Audio jacks on the back
of the T\: and to the Audio Output jacks on the DV1) player.
Viewing the Picture from the Connected Device
The device ill this cot'd'.,ction is cont'.,cted to thu TV's INPI _I 1 jacks. To view this device:
1. Turn on the _I__ and the device you want to view, for example a I)\'D player.
2. Press the TV I)ntton on the remote control to put the remote ii1 ]_,? nlode.
3. Press the INP{ T button on the remote control to scroll through the Video Input Channels
until you see h_pm l ((.bmpor_m_D displayed in the channel banner.
Note: }_z/car_ x_,t zip t/')c TYro atl/omatl'ca/{F t_tr_e to/b¢, coFtz.c/ d(.l'l'c_..)'o_l _l'gtrl/ 10
z'icT# 7/_is is cal/¢dAt¢/n T/_*vi*_g &.e Chap/*.r 3Jbr mot{? h{fi)rmatio*v o*_At¢to Tmvh_g_.
Chapter 1/
Page 11
Audio/Video Connection
\
Q
Note: This back panel
graphic is for representation
only. Your back panel might
be different.
• If you are done
connecting devices to
your TV, go to page 15
to complete the Assisted
Setup.
• To continue connecting
devices, go to the next
page.
Red
Yellow
White
Composite cables are color coded-
Yellow= video; Red= right audio; white=
left audio
Connecting the Device
This conm, ction allows you to __onn_ct a device such as a _,CR that has auclioiviclu(>
outputs
Using the example of a VCR:
1. Connect your cable and/or off-air antelma as described on page 8.
2. Cmmect your composite audio/video cables m the TV's input.
Connect composite audi(Wvideo cables to the TV's INPUT 2 jacks (R and L-
Audio, and Video) and co the VCR's audio/video outputs
Notes: Pr_)ss tb_ /NPUTbzcttotz o_ the rcmot_,cow,fro/to scro// thro_¢_h t/)_
Vidco ll_])z_/ (,_)an_eN z_nti! )'oz_ see Ir_])zd 2 disJ)!_(1,ed it1 the cbatl_d t)an_er
)'oz¢can set ¢@ the TV /u a_t/omatica!/) tz¢_ to/be corr_*ct d(_ icc )'oz_ zcdnt
to z'iezz, 7;_H,vis ca/!cd Aztto TTeni7N, See dTJ@/er .;,fi)r snore il_fi)rmatio_7 otz
Chapter1 11
Page 12
C@lnlnec_i@ns _ Setup
i
HDMI Connection
H
,-OR--*
Q
Note: This back panel graphic is
for representation only. Your back
panel might be different.
Chapter I
Page 13
HDMI cable
HDMI/DVI adapter
Audio cables are color
coded- Red= right audio;
white= left audio
Connecting the Device
High-Definition Multiuledkl Interface (HDMI) is an tm¢oulpicssed digital interface
that carries both video a/ld audio data bv x'_ay o[ all integrated mini-plug cable. Since
HDMI is based on Digital Visual Interfi_(e (I)VI), the jack on the back of your TV is also
compatible with devices that have a DVI jack.
Using the example of a set-top box:
If your set-top box has a DVI jack, connect an HDMI cable mid an HDMI!DVI
adapter.
QConnect t]I)MI cable to the HI)MI INP! "I the back of the "IX,.
ttilch m ttl)ML DVI adapter to the end of the ttDMI cable, then __onnect tlR!
ter to the D\'I Out jack on the back of the device.
_in_e you're rising an adapter, you to c(mne_ t
light cables t(/the R and L jacks on the back of the de'_ice mid t(> R and L Audio
jacks that aren't in use on the back of the T\,
_lI'l
Itl)MI, DVI n{'ed Atldio lef_ and
jack
o11
After }ou've coml)leted the /m-screen Assisted Setup (page 15), go to the DlTAzldio
[tlpztt option in the Advanced Amlio menu to select _ahich Audio Input jack you're
using, hi the example on the opposite page 3ou v, ouM choose INPIT 4.
Note: (/'tb_ d_ vic_ )olt'r_ co*_11*cthzg has a dl_itat audio ol_tpuljack, colz*wct a
d_gital altdio cable from the dez'ice to al_ alldio rec<41,er /br digital alldio,
) ) ) ) ) _ j (J
OR
HDMI cable
If your set-top box has an HDMI jack, connect an HDMI cable.
Connect an HI)MI cable to the HI)MI 1 INPI. T (or HI)MI 2 INI>UT if your TV has
this jack md it's more convenient) jack on the back of the T\ mid to tile HI)MI Out
jack on the back of the des ice.
Notes: Pt'_xs t_le L%7)(:T bllttotz !)1"l the t"eltzote coTltt'o[ to scroll tb?'(llt<({h t_le _9"deo
lrlpm Charl*lels urltil ),ol! see t:1Dltl 1 or kIDl:H 2 displco,ed i_l the chamlel
[)a111ge_*.
Yozl ('g!11 sot It7) l{)o "f'{' to 1111totH(Itl'cgl[{l' tzl!?( 10 t]?( co17"e(l (tel,lC( .},ol! IJ,Y!111 lo
view. 7his is called Azll(> T1_*zillg. See Chapter 3jbr more h{fornlatiolz or1 Az4t(>
77_lzh'lg.
• If you are done connecting
devices to your TV, go to
page 15 to complete the
Assisted Setup.
• Tofind out more about
connecting audio/video
receivers, go tothe next
page.
P
Chapter 1
Page 14
C@lnlnec i@ns Netup
i
Advanced Audio Connection Information
With the audio versatility of your HDTV, you can choose various comlection options depending
on the type and quality of sound that you want. From good to hest sound, choose one of the
options or l'et_'r to the lISer's lllau/lal of each device that yotl are connecting to get the hest
results.
• /se vour l*t's internal speakers (good sourtd).
• Comlect an audio receiver (speakel> connected to receiver) to your TV (better sotmd/.
• Connect an atlclio receiver/speakers connected to receiver) to your _1_,"using the ])IGITAh
AI.?I)I() O! FIP{IT/OPTICAL) jack (best sound)
IN,*UI_2
Red
White
Audio cables are color
coded- Red= right
audio; white= left
audio
Digital Optical
cable
Connecting Your TV to an Audio/Video Receiver
For I)_!tttq- SOUt-KI qoalitv [had fir _ T_'s it'_R'r[tal Sl)('aktq's, (ontl('ct [o an au(lio r_c_'iv_!r usit'_g audio
_ables to the T_,'s AI I)IO OI TPt T jacks.
• l. se the FIXED:VARIABLE AUI)IO O[ TPUT lot a more advanced connection. Connect the FIXEDi
VARIABLE AI.DIO OI_TPI. TS t1"omthe TV to an A,\: receiver using attdio cables.
Be sure to go to the Fixed/V(ariabl_. Oz_tscreen in the Adt,a_zc(.d Azcdio menu and select wbether
you want the FIXED/VARIABLE AUI)IO OU_IPI. T jacks to send fixed or variable vohlme audio.
• Variable Output provides variable-level audio output. Volume levels at-<_'controlled by the
T\'s volume.
• Fixed (-)Utl)Ot i)rovicles fixed-level audio output fruit/the TV, This au(lio outptlt is ideal for
c(_nuectil/g to art A'V receiver that has its o'wi/volume control.
Connecting Your TV to a Receiver with Dolby® Digital
If you o_n a wc_.ivel with _I)ol/)y i_I)igital cl_<:odiog or PCM (Pulse-Cocl__ Modulation) thlt uses an
optical cahle-type input, connect an optical cable t<)r excdleot audio quality.
• Connect one end of the optical cahle to the I)IGIiAL AIDIO Ol TPt T (OPTICAL) jack oft your
"I.7and to the Digital Optical Input jack on your receivel: amplifier receiver,
• If your receiver can decode Dolhy Digital and PC;M, go to the Aztdio menu, select A(h'a*zced
Azid/o menu. then L){git_tl Azidio Ozttpzit, Select Az¢toS_,lecl (recommended) or PCilL
• If your receiver can decode only PCM. select PCIL
*Dolby isa registeredtrademark of Dolby Laboratories.
,4
Chapter I
Page 15
Setting Up Your TV
• Plug in the 3_r.
Note: _lTbe*zO,<)_,fi_t plait Oour 7"["i_zlo u*z outl_#: /be Pou er iJTdicu/or ol7 /b_, fi_o17t patzu/
z#ill l_qbl used b/it_k,[i_t approximatelj, 30 secol_cls used tkes_ go (_f dulJlT<g{the i*ziliu/ixuHot_
<# tke 7"I7 7bi_, buppen:, only u'kel7 tke TV is ut_phtN<qecl usTcl plzt<_#ud back i_z The 7U cun
onlp be turned o17qfier the Pou er ilTdiculor goes q/.]i
• ]PUt batteries in the IWIIIOtL%
• Turn on the TX:.
Remote Control Buttons Used for the
Assisted Setup
To use the T\'s monus, first pr¢-ss the Tx: button <m th_= r¢ml<)tZ<ontrol to put
the i"el//ote 11/ T\ i-i/ode. When the Assisted S_2ttl D SCl"ecn _[)Dc'ars, rise the gzi-ovx'
butt<ms to highlight o_le of the items lifed in the menu. Use the lip (>r (ll)x_,t-_
arrow button to l_/O_E lip Ol- doxA'l/. I_SE the right or lett arrow button to tlloxe
right or left.
77oselect the item that you've highlighted, press OK.
Note: [t{gbh_qk/ed meurts tkut /be murat i/el*z ,_tu_zdso_t,/i*om o/ker
me_zu items or_tke list (appeuJ_- du*'ke_; br_gbteJ; or u cl([]_re_zt_olor)
Use these buttons during the Assisted Setup
Tip
Toaccessthe initial setup menus at a later time, press
MENU, choose Setup Options, then Assisted Setup.
Complete the Assisted Setup
YOtll- T\"s I//(qTtl s_,_st¢2n/ allows yOtl to (tlStOl//iz(. VOLII"T\'s foattlros. ()n-scr_ol_
l[_fOfl]] ItiO[_ holDS yokl _hoose sL_ttll_gS to [I_lt('[_ yOHl- S_2ttll). Wh(! _l"St t[111o yoH
tl.lf[] ()n VO[ll7 _1_\_ in( _ _s_;l'.';ie([ ,_et_lf_ _q(Ix_ell _[[)[)e_ll-S _l[itOl]/_ti(_l,[l_. ]Dloss (7)[_ to
begin tho setup.
Chapf:er _[
Page 16
C@lnlnec i@ns Netup
i
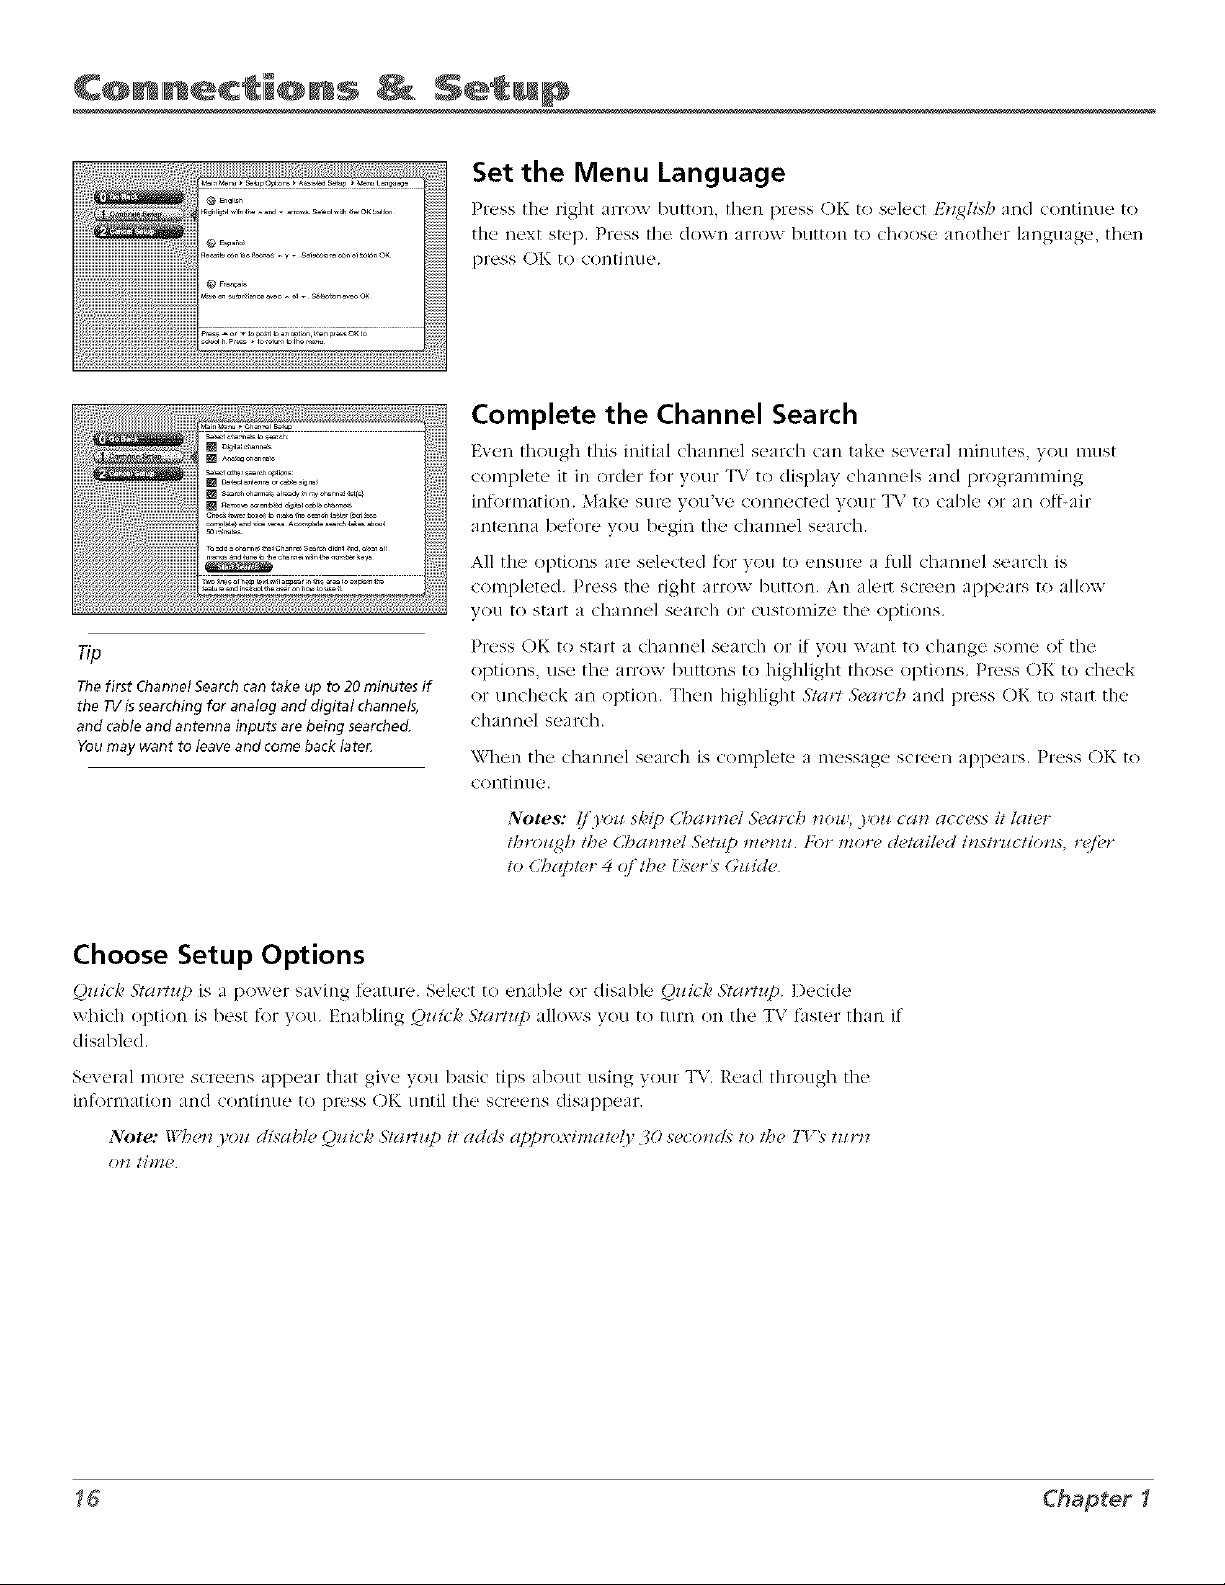
Set the Menu Language
Press thu right urov, button, then press OK to _el_,__tE_zghsb and continue to
tile next step. Pr('ss the down arrow I)klttol/ to Choose at/other larlgtlage, then
press ()l'_ to Co[][Inllo.
Complete the Channel Search
Even though this hfitial _hatmel search _ In take several mimltes, )ou must
complete it in order _or your T\, to display chalmels and programming
aiiR!nila I)efOl% _ yOtl begin the _hai/nel sear(h.
All the optiocts are selected for ,_ou to ensure a ftlll c[]a[]l/eI soarch IS
COtIll)leted, I)ross tho Ei_l/t arrow I)Lltt()ll, A[_ ale_ scroe[1 a[)Dears t() allow
you to start a chant/el searc]/ (¸¸)¸17CLISt()tIIizo tile options,
Press OK to start a cha/'Jnel sear(h or if you want to change s()l]/o of the
The first Channel Search can take up to 20 minutes if
the TV is searching for analog and digital channels,
and cable and antenna inputs are being searched.
You may want to leave and come back later.
options, use the arrow buttons to highlight those options. Press OK to check
or unche(k an option. Then highlight fta_¢ ft)arcb and press ()K to strut the
chai]nel search.
\Vhell the chal_nel N_!arch iN (otiip]ete a message screell al)pears. ]Press Q)K to
contii_(io,
• . • _ %
thro_tgb t/x_ Ct'_a*_2c/Sctz_p ;.r_u For more c!ct_i/cd i_stru(:tio*zs, rgfi,r
to Cbaptcr 4 ({/'the {_cr_ GzH(1c
Choose Setup Options
Q_Hc/_'S_art_p is a power saving teature. Select to e_'ttble or disable Q)_Hc/_,Start_p. I)e(ide
xxhich option is best tot you, Enabling _¢ick Star/_p illoxxs you to turn on the TV faster than if
disabled.
Sexeral more screens q)pear that give }ou basic tips about using your TV, Read througl7 rite
i[/[ortllatio[/ alld contill!le to press ()K Ilntil the screens disappear,
Note: Wbc _ ,o disablc Q ick s'l_rt Cpil _ dds app *o_,") _ 1_15,JO sec )*_rt._to/be Tt _ tz¢r[]
16 Chapter I
Page 17
What To Expect
Watching TV
If you have both In Ilog and digital <d>le dmnnels tlles_ will be put into the sanl__ch umel list. To
tell the_ditferenc¢ _between these <hannels, press the_ INFO button and look in the channel banner
tot these things: a subchannel, the format, all A of l) ( tnalog (ir digital) icon and resolution the "I%
is receiving.
Analog channels only display one claannel nun/her. I)igital channels received through (able or
in of_-iir antenna nlight ha_e i primal T ch umel and a subchannel. Ill the example belov,, 6
is tile pdn/arv channel 1 is the snbchannel.
Analog channels are sent ill a _ x 3 format. Digital channels can be sent in a fonnat of 4 x 3,
but usually 16 x 9.
AIlalog channels are sent ill a resolution lap to 480i. Digital c]/anneIs are sent ill a reso]l.ltiOtl of
iSOi, 480I), 720p, or [/)8/)i.
Changing Channels
Channel number
Channel format and resolution
Depending upon the type of signals you have connected to your HIlT\,, you might notice that
tile chanl'_els chmge slower than volt're used to. This is perf_ctl) normal. Digital cable (hannels
s()nletinles take longer to tune,
Some channels might be J'ound during the channel search that aren't available. Some channels are
enabled by the cable company that don't car U progran)ming, such as video-oft-demand. Whei't
channels are unavailable, your T\"s screen displays Weak or,\o 5'{g_a/. "_%uproba/lly want to
remove these so they no longer appear in your channel list. R_!nlove these ill the @amwl 5'e/_lp
nlenn. (]o to page 37 f_)rillore infolnlHtion.
Next Steps
Now that you've finished the Assislvd 5'etzlp, you're ready to watch I_ r. _Ihis might be a good time
to progl:lm your remote control. The remote coJltrol that calll_"with this _I%"tail be pl"ngramnled
to operate other devices. Go to tile next chapter to find out ho\v to progran/your remote.
Continue to the next tbw pages to leanl more about tile back panel and front of your TV.
• Chapter 2: Using the Remote Control
• Chapter 3: Using tile _l_i's Features
• Chapter 4: I. sing tile _lW's Menu System
• Chapter 5: Other Intk_rmation
Chapter1 _7
Page 18
C@lnlnec i@ns Setup
i
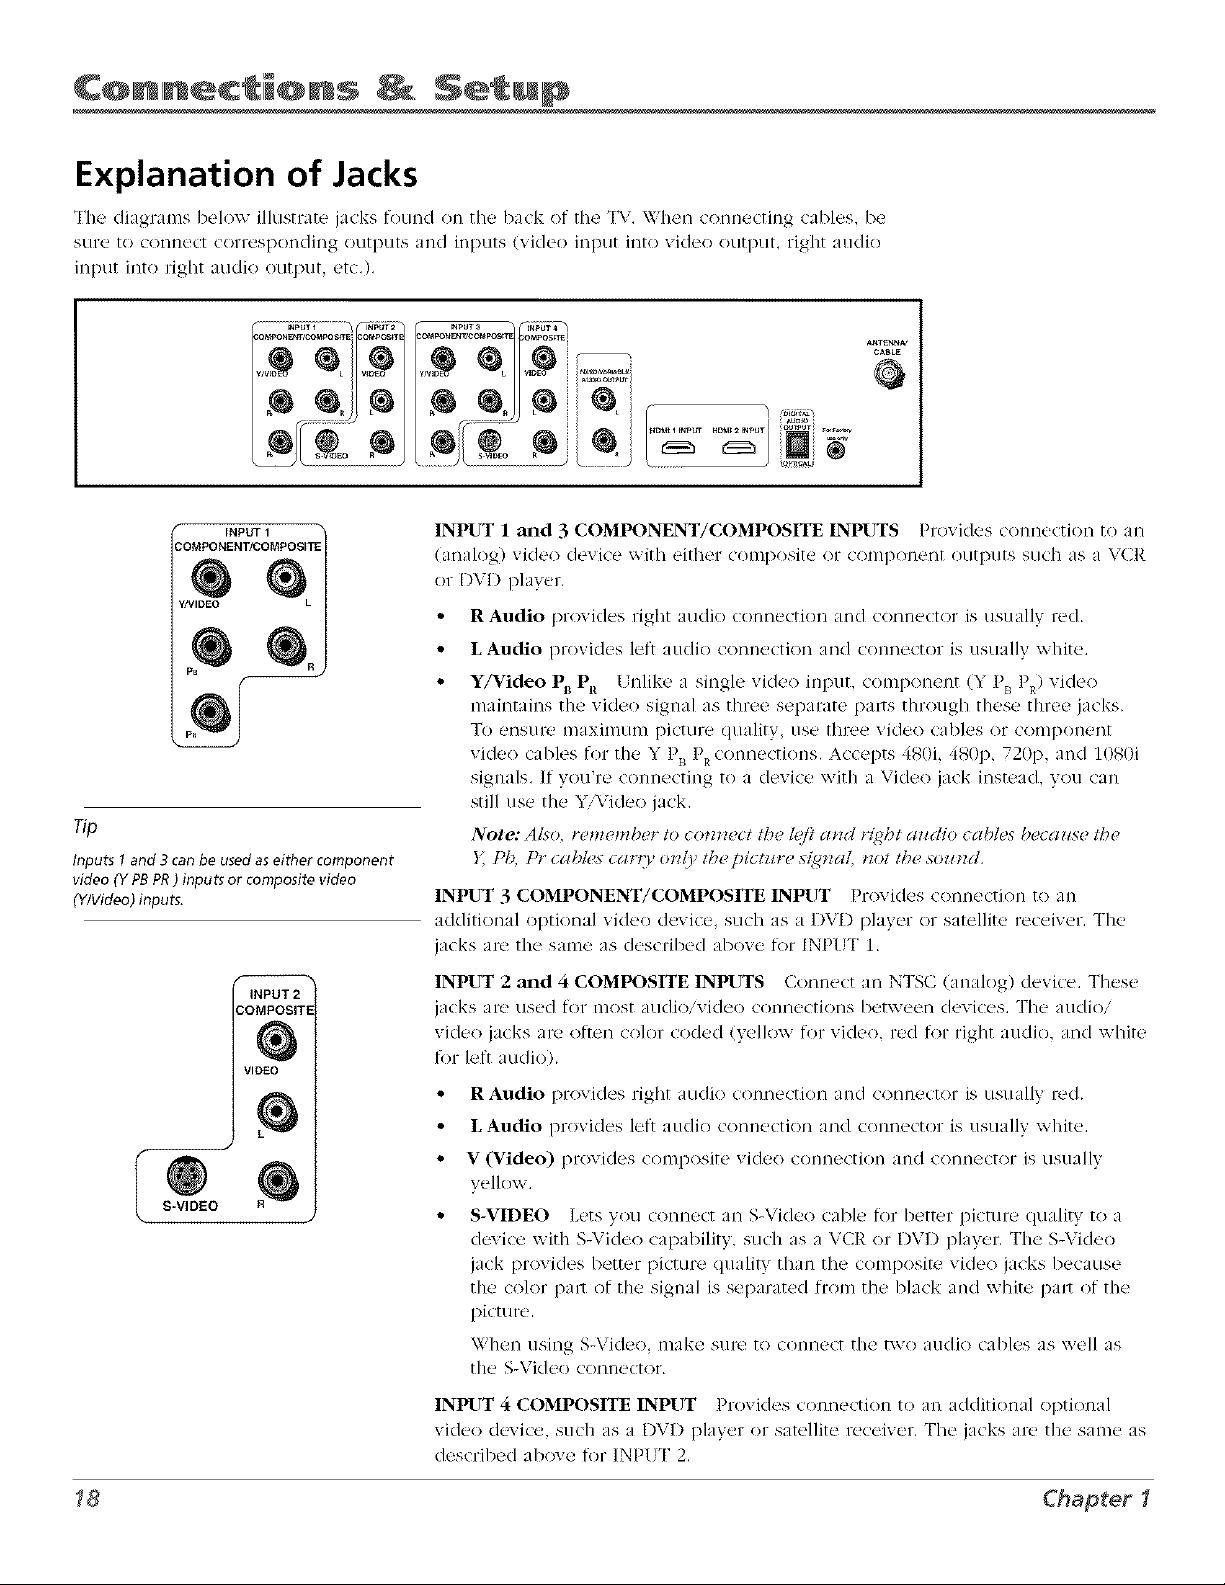
Explanation of Jacks
The dilgr uns below illusm_te jacks found on the back ()f the _1%.\\hem connecting cables, be
stir(' [() Conllec[ COIT(*SI)OI'IC/iMg OII[I)LI[S alld inD!l[S (_]deo inptl[ ]M[Ovide(> ()/l[p!lL righ[ a!ldio
input into right audio output, etc.).
ANT_N_
CABLE
r" INPUT 1 "
COMPONENT/COMPOSITE
WMIDEO
PB
Tip
Inputs 1 and 3 can be used aseither component
video (Y PB PR) inputs or composite video
(Y/Video) inputs.
INPUT 2
COMPOSITE
VIDEO
I S-VIDEO
HDM_21_PUT I_ _ _unm i
_ i f
_u_r i ,_
/ i_ _i _
INPUT 1 m_d 3 COMPONENT/COMPOSITE INPUTS Provides (omaection to an
(analog) video device with either composite or conlpollen[ Okltl)tltS such as a V(]R
or DVI) i)layer.
R Audio provides 1Tight audio connection and connec[or is (is(lalIv red.
L Audio provides lett audio connection and connector is usually white.
Y/Video P_ PR I nlike a single video input, component (Y P_ P_) video
maintains the video signal as three separate pa_ts through these three jacks.
To ellstlre II(axin/uR_ picture quality, Else three video cables or compo/leMt
vide(> cables tor the Y P_ PRconnections. Accepts 4g0i, 480p, 720p, and 10g0i
signals. If you're connecting to a device with a Video jack instead, you can
still use the YiYideo jack.
Note: Also, rememb(,r to cn_*_ect thu lufi a*_d r_ght a_(t/o cables beca_se the
} Pb, Pr cab!us car O, o*vly tb_,pictz_re s{gnaL tzot the,soz_zd.
INPUT 3 COMPONENT/COMPOSITE INPUT Provides connection to an
additional optional xd(l(,o devicm such as a I)VI) pla) er or satellite ru__eiver. The
jacks are the same as described aboxe for INPl]T 1,
INPUT 2 and 4 COMPOSITE INPUTS Connect an NTSC (analog) device. These
jacks at-<'used [or HIOStaudio/video conliections betT_veen devices. The audio/
vide() jacks are often color coded (yellow for video, red fi)r right audio, and white
for lett audink
r Audio provides right audio connection and connector is usually red,
E Audio provides let} audio connection and com(ector is usually white.
V (Video) provides composite video connection and connector is usually
yellow.
S-VIDEO Lets you connect an S-Video cable t_)r better picture quality to a
device with S-Video capability, such as a VCR or DVD player. The S-\ ide()
jack provides better picture (luality than the comp()site vide() jacks because
the color pa_l of the signal is separated from the black and white pa_* of the
picture.
When using S-Video, make S[ll-etO (()nnect the two audio cables as well as
the S-Video connector.
INPUT 4 COMPOSITE INPUT Provides connection to an idditional optional
video device, such as a I)Xl) player or satellite receiver. The jacks are the same as
described above for INPIT 2.
Chapter I
Page 19

FIXED/VARIABLE AUDIO OUTPUTS
Ig_F*xEg?_VA_ASLE
HDMI 1 INPUT HDMI 2 INPUT
• L and R Provides fixed _ariahle sound for use with an audio aml)lifier.
HDMI 1 and 2 INPUTS tIigh-Definition Multimedia Interlace/Digital Visual
Interti]ce Provides an unconll)russed digital interh_ce that carries/)oth video
and audio data by way of an integrated mini-plug cable. Since ttDMI is based
on Digital Visual Interfilce (I)VI), the jack on the back of your TV is also com-
patible with DVI devices.
Note: (/'you com_ect a ck,vic( ) with a Dt7 ]kt(:k to one o/'tbe HDMI il_pzets,
.)'(m 7l l_eed a_z ttDM1 to Df 7 adapt_)r Also. co*_z(,ct az_dio cabl(,s to a*z
i_pztt d)at Zs _()t in zts(_ A_z examplo ix sho_ *z on pa_e 12. 7_e_z go to the
Advanced Audio melTz_ cmd select DVI Audio Input tn chnox# the inpztt
)'ozl "PC Z_'siHg In Fec(4_ () (az!(]io.
DIGITAL AUDIO OUTPUT (OPTICAL) [s_' a digital optical cable (or SPDIF
(able) to connect your TV to a compati/)le Dolby Digital or PCM receiver nr
decoder. Dolhy Digital 32,dmol()gy ()ftkq\_,theatre-quality sound (six audio
channels). If you own a receiver that uses an optical cahle input, you can use
an optical cable t{} connect the J*: t{} that receiver h)r the best snund quality,
Go to the Dl2git>_lA_dio OzLt semen in the A¢¢dio menu to select A_to &deer (yr
I}(2YI as the output R)r this j_ck.
Note: 77)is 7"V_optical d{_ital az¢dio ot¢t[mt ]_¢cklTd(l' complies u ith
th(" i*_l(.r_alTom_lstamlard goz_,rsvi*_t4this O'p_,(ffl_ck (IF(]9qa), as_d
is des_grz#d./br cntz*zection to a Dolt O,D{qital (A(,-. ;'_or PCM) receiver
or decorl,zt Olrk.r ('qz_@me*zt.some (f which is tzot.]%/{I,compliam with
IEC95& mcO,t_ot be compatib[(, with the DoI_o, D_qiI(_Ibitstream. 5_ch
a cont_ectio*z zesit_<ga*o'thit_<gother than a Dolt{), D{gital LdC-.7 or t%;ID
*wceiz'er or <l_.cn(k.rcozdd create a b{gb *zois_.k.v<4,caz_sit_g dam_(g<, to
headpho_zes or spr)ak(n_.
Chapter I
ANTENN_CABLE
INPOT
ANTENNA!CABLE INPUT [sed to connect a coaxial cable to receive the
signll frolll cahle, a (al)le box or in of}_air antenna.
Page 20
C@lnlne¢ i@ns Setup
i
The Front/Side of Your TV
Side Input Jacks
The T\: has side il/I)!lt ja(ks for co/l_eniellc(, il/ (or/noctiDg a (all)_ordel-, digital ( tmOl-a, or xldeo
game system. F'lease note the illustration I)ek:,_, is just an example of hoxN these jacks might
a [)pea I-,
Notes: i_:_mzl'ozt[)Izl_i1:tIx_adpbo_cs,tb(,TI:_ilttcl3_al._cak_rsar_ mzl&_d._c the:_OL
zt]) OF do_:':'l /)I!/lo:'t go Col_lPo] /h( ) z'o]z_:/z_:.
_;]')CI_colz_ccti/'t,_a dczqcc that tls(:8a 1_lolzo _a:)](',slIc_l as 8()II_:(atH( o1"(l('F&ZlS_:t_l_:
L41IO_ O h':pzlt /_w/,>to get sozmdji'om/)oth ,_eakers
Power Indicator Lic_ht Status
vAUDIOIN q VIDEO S-VIDEO
UMONO R IN
@®®@
HEADPHONE
On TV is on
Off TV is off (standby mode)
Blinks
Light blinks 5 times, pauses, and blinks again 5 times:
Lamp is trying to turn on. If the TV doesn't turn on
after S minutes and then the light blinks steadily for
one minute, one of the following options is possible:
Lamp door may be open Face the back of the TV.
Power button
and indicator
MENU/OK CH _ CH _ VOLt VOL_"
!
Notes: 77)(:,/)'ontp(:m(4 /llustrat/o_z shows (:/O[:ica/Jko:ztpa_ze! ko'oz_t The
exact look m( O'bc dlT[fi,F(,_zt./)_omI'oz_r TI_
(/'3:o_z:s(:theFrom I3t/tto_13/oc/.,/_,:/tz:re.thefi'<nztpa_H t:olot:<_erproz:ides
access1othe mm_z_s.7b_:From !3utton13lock.fi,at:_red:_al:l,sall./)'ompanel
Imtto:zs lint not the /_c/e,_, For more i_/i)rmatio_, s_:(:Cbapt(:r ._
Locate the door at the bottom of the TV and close it,
Turn off the TV and turn back on. The lamp should
turn on.
Lamp may be dead. You can replace the lamp
yourself. Go to page 56 for lamp replacement
information.
Front Panel
If yot] ca//not lo¢'ato yOtll" t'ell/Oto, VOH _1/_ !lSO the Irol/t Danel o[ yOtll- TV to o[!olalto tl/any of the ]_'s I_atlll'es.
MENU/OK Brings up the Main menu, When the tllem_ system is displayed, pressing MEN( ,OK sele__ts highlighted items.
CH-r Scans down through the chamlel list. In the Illtqlll S_:'st('Ill, it moves the highlight down and adjust,_ metal controls.
CH-- Scans up through the chmmel list. In the rnenu system, it moves the highlight up and adjusts menu controls.
VOL _ Decreases the volume. In the menu system, it moves tile highlight left to items and adjusts menu controls.
VOL _ Increases the volume. In fl_e menu system, it moves tile highlight right to items and adjusts meuu coutrols.
(_ (Power button and indicator) Turns the 3W on and off. Tile indicator lights when _1_/is on. Your HI)_[_i's lanlp has a
cool-down period when the "1%:is turned oil and a waml up period when tile T\, is mined on, If you tW to turn tile TV on
during a cool-down, you will hear audio and then the picture will be displayed after a I_,w moments, This could take up to
one minuto, For diffurent light status of the indicator, see above,
Chapter I
Page 21

The Buttons on the Remote Control
Arrows (up, down, left, right) l_se to nan,(, through the on-scree[] men!ls.
(0-9) Number Buttons Enter channel numbers and time settings. Also used in the TV lalenu
to t]]akc, s_!lections.
To enter a digital channel with a sub-channeL enter the main channel, then to enter the suh-
channel, press the SUB C]d button and press OK.
CH + or CH- Scrolls up or down through the channel (>r input list. Press once to change
the channel up or down; press :rod hold to continue changing channels. In I)VI) mode, if
prognm]med, advances or rvver,ses the (halXer,s with some I)VD player,s,
CLEAR Renloves on-screeJl nlenus and (lispla3s. Cancels tile comnlercill skip timer if it is set.
DVD Places the ten]ore in I)VD n]ode. If Auto TuniFtg is enahled, pressing the DVI) hutton
turns on the TV and tunes to the com_ct \qdeo Input Channel h>r RCA devices. This button
lights when you press a valid button in L)\TDmode (see Mod_,s q/'op_,rct/io*_ on page 24 tot
more details).
FAV(Faw3rites) When the FA\' key is pressed, the TV will display the 'Chamael List" menu
v,ithin the Channel Setup menu. Ft'om there, the user can edit the "Faxorite Cham-tels List.
GO BACK RetLIrl/S VOLI tO the pl-evious channel Ol7 pre_io!ls SCl-eel] ill the nlen/i S,XStel]].
GUIDE I)ispla3s the CI-mlmel Guide List which alloxxs you to see programming intormation.
Remote model
R301G1
Toturn off most RCA devices
that are connected to the TV,
press ON, OFFtwice within two
seconds and hold remote steady
until the mode indicator turns
of_
INFO Displa3s the Channel Banner xxith chamlel and viexxing inh>rmation. Press again to
relnove the ])Hnl]er.
INPUT Toggles through the TV's available ictput sources (L_,q_t"T !. lAYer"T2. Lx,J-'LT.?,, LX79t"T
4. _)_o_1DZpzt/. t]DM[I. HDML _, and last-active channel.
MENU Makes lIaD.z M{_*_ appear and disappear.
MUTE Reduces the TV's volmne to it>minimum level. Press again to restore volume. The
Az_c/io Oz_tput n]enu must he set to _¢riabl_, Lcvel, .S_)eakcrs ()*_to control tile TV's volume.
To program this hutton to work with an audio system, tk)llow tile instructions tk)r D#ztme
Pu*_cbtbro_(gb t:(,at_lre oi] page 25.
OK \\hen a menu item is highlighted, press ()K to select the item.
ON-OFF Turns tile '1_,"on or off. Your _]D'IA" is equipped with a special lamp system. In
order to presetwe the lit_' ot tile lamp, the T\' must warn] up and (onl down properly when you
turn the TV on and o11.When you turn the _I%"ott, the screen turns hhle and lades to black.
While the screen is hlue, you (:an still turn the _IWback on. If the screen is black when you tW
to turn it on, the TV's lamp may be in its cool-down cycle. "Ihe _lW'saudio comes on, then the
picture is displayed aRer a tk,w nlomet]ts.
In other modes (SAT,,AUX, l)\,l)), and if prog_'atumed, turns the de\ice on a_KIoff.
PRESETS In TV mode, toggles through the Pi(ture Presets for tile input yotl're currently
tuned. In 1)\ I) mode. displays the dit]_rent angles, if axailable, for the DXq) 3ou're watching.
REVERSE, PLAY, FORWARD, RECORD, STOP, PAUSE If programmed, provides transport
control for some renaote-controllable \CRs, I)VD players, satellite receivers, etc. The RECORI)
b!ltton has a safety feature \vhich means VOLIi-inlst press the htlttOll two times to record.
Page 22

Using tlhe
SAToAEJX Places tile remote in SNI'/AI.,X box mode. If Auto Tuning is enabled, turns on the TV and tunes
it to the satellite or auxilials' mode to operate a device (such as a cable box, satellite receiver, VCR, I)VI), or
audio receiver) that you've programmed for RCA devices. This button lights when you press a valid button in
SAT-AI X mode (see Modes @Operatio_ on page 24 fur more details).
SLEEP When the SLEEP key is pressed, the _I*; will display the Time Menu with the Sleep Timer screen open
and the toggle box on the right side already highlighted. Press the right arrow button or OK button to advance
the Sleep Timer setting to the next 15m/inure increment.
SUB CH (Subchannel) When entering a digital chamlel that h_s a subchannel, press this button to access
tile subchanne] entry field. On(e the channel is entered, press the b[ltton 1o tune to the channel.
"IV Places tile remote in TV mode. Turns on tile "1%;and ttmes to the last-viewed T\7 channel or input. This
button lights when you press a valkl button in "I\" mode (see ,_[od{)sQ/'Opr)_*atl'otl on page 24 tk)r iI]ol-e details),
VOL- or VOL + Decreases or increases the [[W's volun_e. The TV Att(lin Oztt[mt menu must be set to
I2JHa/)l(, L(,z,(4, 5_)(,ak_,_.x O*z to cnntrol the T\'s volume. To program this button to work with an audio system
follow tile instru(ti(ms for fUh_m(, tJz_*whtl)roz_eh F(,atz_r_, on page 25,
ZOOM+/- \_q_en viewing a channel, press to change the screen ti)rmats: :YormaL S?r(_tch. _S'qw,ez(,,and
Znom Go to page 42 tor more in_orlllation on s(reen [ornlats.
Page 23

Using tlhe IRef @ e CQntroll
Programming the Remote to Operate Other
Devices
The universal ren/otL! cHn 1)_' l)rogrann3/(,d to Ol)('r/t_' nnlny brands of r(,13/ot(,-c()ntrollabl(, \/CRs,
audio dexices, l)Vl) pla3 ers, cable boxes, satellite recehers and other de'vices, In addition to being
progralllnl_?d to op_q-ate _oLIr television, it's ah-eady progr inlnled to op(,rat( _ sonl( _ RCA devices,
A second and third RCA T\ (an be programmed to any device button, except the TV I)utton,
Notes: Tlle Ti- bz_tton calv "t be prn_r(ammed n_z this remote/o cn_l/ro/ al_F d_)vhe: it
cn_ztrolx oriel' tbi_ TV
7be rcmolv may _7ot be compatible u,#l) all mod,4s (fall brands (f dvz'iccs, l/also mt O, _7o1
operate aHfittzc/intzs (f .l'our dez ice
Find Out If You Need to Program the Remote
To (l(,ttq-/niti_, vx'heth(,r the Hnivtq-sal r_,13/ot(, llt,(,ds to 1)1, l)rogrannn_,d to Ol)_q-ate one of the
de, ices connected to 3our T\, such as a _CR, do the _ollo_ing:
1, Turn on the device (in this example, a VCR),
2, Point the remote at the device,
Remote model
R301G1
The darkened buttons
are the device buttons
that can be programmed.
z_o., zr,_ i
.... UJ@ ....
%®@
%®@
3, Press the corresponding device button (in this example, SNF-A! X),
4, Press ON*OFF to see if the VCR responds. If the VCR does[Et respond, yon need to program
tile l'L_n/()tL _ [O operate it.
Programming the Remote
]'her(: ar(! thrt,e x_ a}/s to [)rogl_an_ the la'lllOt_' control to operate other devi((!s: Dfroc/t[1"l/13 ][a!'lll(2/
Undo? ._(?_//zJ_L and ALItnl_l(I/l'C (]Od(_ S_?tlFC/? [[ VOLI have, recL!ntlv [)nrchased the d(,vi(e you wa/'ff to
(ontrol or i[ the devi(e has n/any codes, yoLI might x_ a[it to fly the illannal code sear(h first,
Using Direct Entry
1, Turn on the dex k'e you want to control.
2, Look up tile brand and code number(s) for tile devi(e ill tile code list at the end of this
Section,
3, On vl.lur remote contrnl, simultaneously press and hold the ON*OFF and M!'IE buttons
(approximately 3 seconds) until a device button remains lit, Then release the buttons,
4, Press and release the device button (SAT*AUX, I)VD) yon want to program.
5, Enter a three digit code fi'ol-nthe code list,
6, To test the code you've programmed for that device button, point the remote at the device and
then press ON*OFF to see if the device responds to the remote control.
If the device turns off, you've entered the correct programming code tbr your device. Circle
the cnde yon entered tor fllture re'terence.
You'll use these
darkened buttons for brand or ny to mna manual code search.
Direct Entry.
If the dexice doesn't turn off, repeat these steps until you've tested all codes for your device's
Page 24

Using tlh@
Using Manual Code Search
Note: t3ff/i_r_ _ z_._i_,,q md_l_a/ codv s_arcb, )'o_ m_._t _sc_/)ir_ct t_I_ll3./'l_/, 7his l_qs tlg_ r_mot_ [tr_od_
wbicb O'pe_?fd_vicc to b_'_4i_searcbitL_ coders,7b_q7proc_cd z_itb tb_,/bl/owin_ st_,ps<
[. Tt]m on tile device you want to control.
2. On your remote control, simultaneously press and hold tile ON-OFF and MITE buttons (approximately
3 seconds) until a device button remains lit. Then release the buttons.
3. Press and release tile device button (SAT-AUX, DVD) you want to program.
4. Repeatedly press and release the ON•OFF button, watching for the device to respond. If it does turn
off, press and release tile OK button within 3 seconds to save tile code. If you accidentally passed the
code before saving it press the left arrow button to backtrack through the codes: then use the right
arrow button to go forward through the codes again.
When all codes have been searched, the device button flashes 3 tin'tes, then the relnote exits maiiual code
search and ret!lriis to nona_al operation,
Using Automatic Code Search
1. TLIrtl Oil th(' (k_vic( ' you \v:lnt to (oi_ttrol.
2, On your remote ¢(mtrol Mmultaneously press and hold ON"OFF and MI_TE (approxinmtely 3 seconds)
until a device button remains lit. Then release the buttons.
3, Press alld release the device' blltton you want to prograln,
4. Press and release tile ON,,OPF button once. "Ihere is a delay of approximately 6 seconds before tile
remote starts the code search.
The device buttons blinks each time the remote control sends a code to test with your device. Keep
pointing the remote at the device.
5. Once the device turns oft, quickly press the OK button to save the code. If you accidentally passed the
code before saving it, press the let} arrow button to backtrack through the codes_ then use the right
arrow button to go foP,yard through the codes again.
When all codes have been searched, tile device button flashes 3 times, then tile remote exits automatic code
search and returns to nortnal operation.
How to Use the Remote After You've Programmed It
()rice the tell/ore has been prograll)lned successl_.llly, you are ready to use it to operate your devices.
To Operate the Device:
• Press the appropriate device button (SAT•AUX, [)VI)) to set tile remote to control the device, fbr
example, press DVD to control your DVD player.
• Press ON*OFF to turn the device ON or OFF.
• /se tile remote buttons that apply to that device.
Note: 711(.rz,mote conttwl m( O, *sot b("compatibly withall brarTds arid mod<,l.sq/'d<.z i(es.
Modes of Operation
The buttOll correspondi/_g to the inod_, the' reTnote is in lights lip xvh_,rl you press ;ill}" btlttO/1 tllat works in
that mode. For example, if yo!l'r(' in ]_,7 mode and you press the VOL+ I)utton, the _IWbutton lights up. This
tells you that tile conmmnd to increase tile volume is being sent to tile _IV (and not tile satellite receiver, lbr
example).
Page 25

Using tlhe IRef @ e CQnt rol+
Volume Punchthrough Feature
You may find this feature helllfu/ if you've connected your devices to an audio system, and you
\v_ln[ to us(+ fiR; _[_/'S rel]/O[(' (ontrol [o op(qf_lt(' th(; volun/e for a d_+vic_ + that is conn_;ct(_d to th( _
alldio syst('nL An ('xanll)l(- fi_llows:
Let's say you've connectec[ vour I)V]) player to your audio systefn. You've also ])rogramn/ed your
+I%+remote conu+ol to operate your DVD player. Since the DVD player sends its volume through
tile atldio system, yotl would have to botlnce back and tbrth between two remote controls: the
audio system's remote to adjust the volume and the _[W'sremote control to operate the I)VD
player,
The fi)hln]e Pllnchthl+ollgh feature elinllnates the need for vo/i 1o use D,vo renlo[_' controls and
saves a I)ntton press \vhen vot.l'fe using the _ fenlote tn adjust the v(/]nnle. In eff(.'ct, you are
telling the 1Y r(2n_ote to retrieve and send volnn/e eomn/aFJds fron/the audio sys_n/whenever
the TV remote is in I)VD mode.
Therefore. after you've successfully set up the Volume P/mchthrough f_ature, whenever the _1_,:
l+<*tll()t_+is in I)VI) mode (press the DVD Ilntton) and you want to adjust file volume, you only
have to press the VOL +/- or MUTE buttons. Follow the instructions below to set up Volume
Punchthrough.
1.
On your remote control, simultaneously press and hold the ON-OFF and MI_TE huttons
(al)proximately 3 seconds) until a device button remains lit. Then release the buttons.
2.
Press and hold tile MI_TE hutton tmtil tile device hutton hlinks off, then release the M[ TE
hnHo[l+
Press and release the device button that you programmed to operate the audio system
(receiver or amplifier).
4.
Press and release the MI_TE button.
5,
Nov,+,test it/>}' ttlrning oll VOI/I"audio sysR,nl.
6,
Turn on the device that is connected to the audio system (satellite receiver, fl_r example).
7,
Put the +I%%remote in SA'I*AI. X mode hy pressing the SKI',,A! X hutton.
8,
Press VOL+ or VOL-. The volume _ronl the audio system should increase or decrease
aceordingly.
Deleting ALL Volume Punchthrough Commands
To delete all programmed Volume Punch.rough settings and return the J_mote control back to
the facto W dethu/t:
1. Sinnlltaneously press and hold the ON-OFF and MITE buttons (approximately 3 seconds)
until a device hutton remains lit. Then release the buttons.
2. Press and hold tile MUTE hutton until tile device hutton hlinks off, then release the M[TE
button.
3. Press and release the MUTE button.
4. Tile l'en/ote rL'tllrns tO norn/al Vohln/eimllte contro].
Page 26

Using tlhe
Using the INPUT Button
1. Repeatedl_ press the INP[T button to scroll through the a_ailable input sources until you find tile
input associated x_rith the device such as \,CR or D\q) player) you want to _iex_.
2. Once you find the butut source you want, st(>[) pressing INP[ T.
• If 3ou tune to INP{T 1 and 3( m \(,R is c(mnected to that input, you ,,,,ill be able to view 3our
\,CR. To play, stop, or rewind tile VCR tape using tile remote that </me xxith your _1%,you
must first press the SAT•A[ X button (the button i)rogramn/ed to the \7CR).
There are other ways of selecting a Video Input Cha[mel:
• Program the de_ ice buttons (SAT•A! X, l)'d)) on the remote control to automatic dly tune to the
correct Video Input Chamlel v, hen pressed. For more details (>nAuto Tuning, see Chapter 3,
• \Vhen viex3 ing all input, press INPI "I to g(>back to _ iewing channels or use the nkll]]bel + bllttons
to enter the channel number.
Note: 7_1e_odcs ar_ program_lab/c to ar O' (_i'tbc (/_l'i_ bllHot_s ( _t7"*/l_ X D_ !D) o1"ltl_¢ r_lotc,
Audio Codes Cable
4[\g_ ....................................................... 839 842 851 860
APEX ............................................................................ 436
BOSE ............................................................................ 672
CAI_ER ........................................................................ 825
CITIZEN ....................................................................... 826
CRITERION .................................................................. _8
DENON .......................................................... 803 817 8_2
DELPHI ........................................................................ 708
FISttER .................................................................. 8F+ 821
GOLDS'IAR .................................................................. 766
_RMAN KARDON .............................................. 8(_ 818
JVC ................................................................. 790 813 819
KEN\XOOD ............................... 683 808 816 828 832 869
KOSS ............................................................................ _15
MAGN@ OX ........................................... 7% 814 915 756
MA]_NTZ ............................................................. 688 824
MITSUBISttI ................................................................. 877
NAD ............................................................... 72I 739 743
NEO ............................................................................. 725
NORCENT •................................................................... 9(17
ONKYO ................................................... 8(¸)581l 812 892
OIYFIMUS .................... 667 747 748 749 751 752 754 793
PANASONIC ................ 79I 810 815 823 863 864 891 950
PItILIPS ............................................ 75_ 814 823 824 825
PIONEER .......................................... 837 8_ 867 878 893
RADIO SIbXCK 706 _,,i 793 8(}6 86 _, 8_ 867 868 875
RCA ........ 717 726 772 78[ 795 827 815 86G #X_v 870 871
.................................................... 8-2 8-q 8-8 8_9 449 895
R_ALI_'I 1C .................................................................... 822
SABA ............................................................................ 894
SAMS[ NG .................................................................... 454
SANYO ......................................................................... 7O5
SC( )TF ......................................................................... 768
SHARP ............................................................ 67[ 684 809
SIIE1_,_OOD ........................................... 70(, 806 858 859
SKYFI ........................................................................... 725
SONY ........................................ 323 _8 7_9 785 79_ 79{4
............................................. 79_) 833 834 835 836 843 909
"E-\O .............................................................................. 725
"lEA( ................................................ 710 8(}- 855 856 857
TECHNICS ................................. 791 810 815 823 863 864
"Ig3,ION ........................................................................ 4+8
VENT[ RER .................................................................. 745
XM RADIO ............................................................ 708 725
YAMAI{A .............. 801 802 838 8{0 8+1 8i6 8_7 848 849
Zt NIT]] 676 730 749 759 765 7(_6 =b>_8[4 787 85<) 405
) •
Remote Code List
ABC .................................................... 46[ "_@i465 466 _63
ADELI_I I_ .............................................................. 512 511
ALLEGRO ................................................................ 525 52_
AMERICASI" •.................................................................. 527
A_I RONIX ............................................................. 468 46_)
ARCHER .................................................... 468 469 470 _71
A'I_T .............................................................................. 511
BELL SOUT[_ ................................................................. 527
CABLETENNA ................................................................ _68
(_ABL_IEW ................................................................... 468
CABLF2, ISION ................................................................ 5(_
CENTURY •...................................................................... 471
C]_[ZEN ......................................................................... _71
COGECO ........................................................................ 511
COLOR VOICE ....................................................... 472 473
COMCA_ ...................................................................... 511
COMTRONICS ........................................................ 47_ _75
CONTEC ........................................................................ _76
I)IGI_AL MUSIC _PRESS ............................................ 5F+
EASTERN ........................................................................ 4_
EVERQUE_F .................................................................. 4_
GARRARD ...................................................................... 471
GC ELECFRON[CS ......................................................... _
GEMINI ................................................................... 536 479
GE .................................................................................. 549
878 8w9 ............................................................. 530 531 514 464 4{53
GENEIb_L INSIRUMEN1 ¸ (GI) 5(_ _6l 465 511 513 518
HAMLIN .................................................... 461 48O 48[ 482
ILL1CO ............................................................................ 5(_
JASCO ............................................................................ 4_1
JERROLD ....................... 509 46I 465 518 463 464 520 526
MAGN=WOX .................................................................. 485
MEMC)REX ..................................................................... ÷86
MOTOROLA ¸¸¸509 465 513 518 530 531 4@_ 5ll 526 463
MOVIE TIME ................................................................. 48_
NSC ................................................................................ 487
OAK ........................................................................ 476 489
PACE ............................................................................... 532
]_NASONIC ............................................................ 460 508
PA_L_,GON ............................................................... 486 488
PttIL1PS ....................................... 471 479 485 490 491 492
PIHLIPS MAGN_k_ C)X ............................................. 5{Iq _3_
P1ONEER ................................................... 478 506 493 4_
PULSAR .......................................................................... 486
RADIO SIbXCK ................................................ 505 534 _25
RCA .................................................................. 46() 471 51_
RI ALIS'HC ..................................................................... {69
REGAl............................................................................ 482
REGENCY ..................................................................... 477
REMBRANDT ................................................................ _63
ROGERS ........................................................................ 506
RI_NCO ......................................................................... _86
SAMSI iNG .............................................................. _7_ 494
SCIENTIt_IC ATLANTA ¸¸¸¸¸¸¸¸4<)8_97 5116 535 512 4_ 496
$I{AW ............................................................................ 5 t 1
SIGNAL ......................................................................... 474
SIGN_FI iRE .................................................................. 463
SL MA]_X ....................................................................... _74
SPRUCER ....................................................................... _60
_E.kNDARD ................................................................... _99
S'IARCOM .............................................................. 461 518
STAI,_G_l'E .................................................................... _74
S'IAI,_SIGHT .................................................................. 5(¸}7
S'I_R TI_-_K ................................................................... 516
"IAN]_Y .......................................................................... 50(}
TELEVIEW ..................................................................... 474
TEXSCAN ...................................................................... _99
"1IME _kRNER .............................................................. 5(16
TOCOM .................................................... 4@_ 513 520 501
"IOStt]BA ...................................................................... _86
"[_,86 .............................................................................. 487
UN1KA ............................................................. _68 469 471
UNITED CABLE ............................................................ _61
UNIVERSAL ................................ _68 469 470 47I 5(¸)2524
VII )EO_-kY •.................................................................. 504
VIDEOTRON ................................................................ 506
VIEWS'I'AR ............................................... 475 48_ 487 5(¸}(¸1
VIDEO TECH ................................................................ 550
ZENITH ............................... 5(¸13525 47I 486 521 522 523
ZENIF_ NE']_,_iORK ..................................................... 527
Page 27

CD
ADC ............................................................................... (,60
ADCOM .................................................................. 661 714
Al\%k ............................................................... 663 707 842
AKAI ................................................................ 715 737 83R
AUDIO TECtINICA ...................................................... 665
CALIFORNIA AVDR) LAB!q ......................................... 716
C_a3>KYRONR2 ............................................................... 669
CARVEF: .................................................... 666 667 668 825
CAR10 ........................................................................... 777
CITIZEN ........................................................................ 826
CUI,TIIS M_I HER .......................................................... 777
DENON ......................................................................... 670
EMERSON .............................................................. 661 673
FISHER .............................................. 667 675 676 677 718
GENEXXA ....................................................... 6_3 678 719
GOLDS'IAR ................................................................... 720
HAKMAN KARDON ............................................... 6811691
]H'lTk(;I Il ....................................................................... 678
INKEL ............................................................................ 68I
jc PENNEY ............................................................ 690 777
JVC ......................................................................... 682 813
KENWOOD ................................ 6_9 683 685 727 728 828
KREII ............................................................................. 666
KYOCEILk ..................................................................... 660
I_iXMAN .................................................. 686 68_ 729 738
EXI ................................................................................. 777
MAGNA_ OX ................................................... 666 731 8RO
MAIL4\T'Z ................................................ 666 688 689 732
MCS ........................................................................ 6911777
MGA .............................................................................. 69I
MISSK)N ....................................................................... 666
MITSVBISH l ........................................................... 691 692
NAD ....................................................................... 721 743
NAKAM1CHI ................................................... 693 694 83 l
NEC ............................................................................... 690
NIKKO ............................................................ 665 673 676
NSM ............................................................................... 666
ONKYO .................................................... 695 696 722 81 i
OP'IIMUS 667 668 678 (,_9 697 698 6_) 7110 -+4 7q _ 7q[
PANASONIC ...................................... 716 733 740 820 862
PttlLIPS ........................................................... 666 731 825
PIONt ER ............................. 678 VOl 702 719 75O 837 8-6
PROTON ....................................................................... 666
QUASAR ........................................................................ 716
I_ADIO SHA(K ............ RG8699 _06 750 786 868 874 876
RCA ................ 661 66 v _O3 723 750 795 8_4 873 874 876
REALlb'II( .................... 66[ 667 669 673 678 689 69 v 699
ROTEI ............................................................................ 666
SAE ................................................................................ 666
RAMS[NG ..................................................................... 74 [
SANS1 I ..................................................... 666 -04 723 734
SANYO .............................................. 66 _ 705 718 735 _42
SCO'IT ................................................................... 661 673
SEARS .............................................................. 6_9 689 777
SH-\RP .................................................................... 679 689
StIER\'_ OOD ..................................... 681 689 698 706 8q9
St11RE ........................................................................... 690
SONY ....................................................... 707 792 794 800
S'IS ................................................................................ 66O
SYL'VANIA ..................................................................... 666
SYMPHONI( ................................................................. 7R9
TEAC ................................... 676 689 159_)7{)9 710 711 856
TECI INICS ................................................ 716 _33 820 862
"IIiE]A I)R3I ]AL ........................................................... 73I
TOSHIBA ...................................................................... 721
VICTOR ......................................................................... 682
YAMMtA ........................................... 665 7[2 713 724 846
ZENFI}[ ............................................. 67(, _30 759 78t 8qO
DVD
ADVENT ....................................................................... 922
AFREEY ......................................................................... 917
,kI_:Tt ............................................................................. 41,i
ARM ....................................................................... 395 435
AMES ............................................................................. _3l
AMW ...................................................................... 917 918
ANAI3A .......................................................................... 961
M>EX 386 390 391 392 _24 4311436 439 _4_ 457 459 938
ASPIRE .......................................................................... 933
A TREND ...................................................................... 393
AIYDK)VOX .................................................................. 921
_9 913 40I
Using tlhe IRef @ e CQnt roll
AX[ON .......................................................................... 921
B&K ............................................................................ 978
}_LAU]?UNKT ................................................................. 430
]_ODYSONIC ................................................................ 417
BOSE ............................................................................. 672
BROKSONK; ................................................... 39_ 932 967
CENTRIOS ..................................................................... 951
CttANGtK)NG .............................................................. 401
CINEVISR)N ................................................................. 405
CLASSIC ................................................................. 4111431
COBY .................................. 926 946 _7 916 94q 928 89_
CONCEKF ..................................................................... 4311
CRH ERR)N ................................................................... _48
C[iRTIS INTERNATK)NA1 ..................................... 929 928
CYBERHOME ................................................. 393 985 939
C_RON ................................................................ 446 388
DAKWOO ......................................... 440 441 444 _l 965
DEN()N .................................................................. 400 421
DENZE1......................................................................... 428
DESAY •.......................................................................... 958
DIAMOND VISION ........................................ 948 892 896
DIGIX ............................................................................ 934
DIGITRFP4 ..................................................................... 445
DISNEY ......................................................................... 458
DUAl ................................................. 4"+7 98_ 956 _28 4_6
DI iIL4BIL4ND ........................................................ 449 405
DVI) 21100 ..................................................................... _02
EL'E_ ....................................................................... ,i34 435
EMERSON ......................................... 4115456 458 _(I 899
E_ ................................................................................ 956
I_RENttEYY ................................................................... 960
FISHER .......................................................................... 416
FUNAI .................................................................... _56 458
GE .......................................................................... 4119 430
GOLDS'IAR ................................................................... 405
GO _,IDEO ............ 41_ 426 455 431 937 971 45"_ _12 901
GPX ........................................................................ 936 94_
GILAI)IEN_YE ................................................................. _15
GREENH1LL .................................................................. 430
tIAAZ ..................................................................... 451 452
HALER ........................................................................... 935
HARMAN KARI)()N ...................................................... 427
HITACttl .................................................. 41_ 40 _ 419 428
HITEKER ....................................................................... _45
ttlJMAX ......................................................................... 912
ILO ................................................................................ 959
INFINITY ...................................................................... 41 _
INSIGNIA .......................................... 4115 456 905 921 4311
INITIAl .......................................................................... _311
INTEGRA ...................................................................... 422
JBI.................................................................................. "t27
jvc .................................................... 406 _18 923 %4 91111
JWIN ................................................................ 390 893 895
KAWa*SAKI ............................................................. _5 449
KENWOOI) ............................................................ 4110 429
K_S ............................................................................... _28
K_t ................................................................. 43O _6 386
KONKA ............................................. 41!¸1411 912 413 9115
KOSS ...................................................................... 41_ 388
KXD .............................................................................. 894
LASONIC ................................................................ 451 948
LENOXX ................................................................. 931 435
LG .................................................................... 405 972 907
LINN .............................................................................. _43
L1TEON ........................................................... 982 _12 898
MAGNAV(_X ......... 398 "+118979 981 980 456 915 914 969
MAI,L4_\TZ ......................................... 3!18 'ill5 4O8 423 !181
MAXENT •...................................................................... 923
MEDION .................................................. 911 "+46_13 896
MEMOF,EX .................................................................... 4"t6
MICROSOKI" •................................................................ 409
MINTEK ........................................................................ 430
MITS,1JBISI ti .................................................................. 402
MURTEK ........................................................................ "t31
MYRON & DA\ IS ......................................................... 962
NAIl ....................................................................... _l_q 433
NAKAM[Cttl ................................................................. 432
NESA ............................................................................. 43R
NEXXTECH .............................................. 952 954 955 956
NORCENT •........................................ 926 982 927 925 928
ONKYO .................................................................. _22 975
OPTIM[ iS ...................................................................... 404
ORR)N .......................................................................... 394
ORITRON ...................................................................... _ 15
RANASONIC ........................ 387 396 4011437 974 950 9711
t¼CIHC ......................................................................... 446
PII]LIPR .......... 398 4!¸18423 755 979 981 980 456 458 969
PHILIPS _\GNA'_ OX ....................... 398 _R8 423 979 980
PIONEER .................................... 4113404 976 977 968 9119
POLAROID ...................................................... 385 949 957
POLK A/il)I/3 ................................................. 398 408 981
PORTLAND ................................................................... 435
PROL[NE ....................................................................... _ 15
PROSCAN ............................................................... _l_ 890
PROSONIC .................................................................... 926
I_,M)K) SttACK ........................................ 449 _53 !119 920
R(_ ............................................ 9119 4311449 453 920 890
REGENT •....................................................................... 931
REO(; ............................................................................. _51
ROSEN .......................................................................... 930
ROTE1............................................................................ 406
SABA ............................................................................. 919
RAMSVNG .................................. 4117 454 4q5 942 963 891
RAMP() .......................................................................... _I7
SANSIiI .......................................................................... 394
RANYO ................................................................... 416 904
SEARS ..................................................................... 3_ 456
REG ............................................................................... 428
St]ARP .................................................................... 397 897
SttERWOOI) ................................................................. 425
SItINCO ........................................................................ 43!¸1
SttINSONIC ................................................................... 430
SONIC BLUE ................................................................. 937
SONY ......................................... 987 988 989 389 399 986
ROUNI)_)RM ...................................................... 910 911
SUNGAI E ...................................................................... 953
S1_PERSCAN .................................................................. 456
SV21_I0 .......................................................................... 456
S'*L_ANL_ .............................................................. _56 458
bYMPtR)NK; ................................................... 456 458 899
TEAC ...................................................................... 41_ 449
TEC] tN1CS ..................................................................... 400
TECIIWOOD ................................................................ 433
TE]LAI?IN ....................................................................... 9_3
FEVION ............................... 388 446 447 448 "+_l1451 452
THR'[_ DK;1TAI ............................................................ 404
T]VO ...................................................................... 912 909
TOSI IIBA .......................................... 394 398 973 924 983
TREDEX ........................................................................ 9_1
UNHED ........................................................................ 4_9
_!NTURER ................................................................... 449
WI IARI:EDALE ....................................................... _42 417
WI tlTE WEST1NGttOUSE ............................................ 458
X BOX ........................................................................... _09
XENIUS ......................................................................... 388
_AMA}¼ .................................................. 41_1 420 979 980
YAMAKA\V_ ........................................................... @8 428
ZENITH .................................................................. 4115 9117
DVD/VCR Combo Codes
Where the code is Hsted is I=_= ==-] the _st is f_* the
l)_I) a_d the second is _>1¸ the VCR ()therx_ise iust the
<me code operates both _he DVD _md the "VCR
APtX ............................................................................. 9"19
BROKSONIC .......................................................... 3_ 967
CINEVISR)N ........................................................ [4115 245]
I/AEWOO ..................................................................... !171
DIAMONI) MSION ...................................................... 896
DUIIABRANI) ...................................................... _05 245]
EMERSON ..................................................... 456 _58 227]
FIStlER ................................................................. [416 267]
FUNAI ........................................................... 456 _58 227]
GO VIDEO ............................................... _l_ "+26455 971
_tlTACH1 .............................................................. _19 227]
INSIGN]A ............................................................. _05 2_q]
JVC ................................................................................ _18
LG .................................................................................. 907
MAGNAV(_ .................................. _56 [919 286] [969 2_]
MEDION ....................................................................... 896
P_N ASEINK; .................................................................. 437
PHILIPS ......................................................... 456 [969 286]
PE)LAROK) .................................................................... 9_9
RCA ...................................................................... [_09 255]
SAMSI rNG .............................................................. 455 963
Page 28

Using tlhe
SANS[ I ........................................................................... 394
SANYO .................................................................. _416 2_]
SEARS ............................................................................. 394
SONY ............................................................................. 389
SYI3,ANIA ...................................... 456 _58 22_] 1_58 236]
SYMPHONIC .................................. 456 [958 227] _9 236]
TOSHIBA ....................................................................... 924
WI {ITE WESTINGIIOUSE .................................... _58 227]
ZENITH ................................................................. _405 245]
DVR/DVD Combos
HIMAX .......................................................................... 9[2
P&\ _St)NIC ................................................................... 387
PIONEER ................................................................. 909 97
TWO ....................................................................... 912 9()9
TOSttlBA ................................................................ 983 973
DVR Codes
WheR: codes arc' shox_n like {his {:a_] each one can be
used if _<_u have 2 or more o( the SAME d_wke
Xh%'[ ............................................................................. 373
HtiGHES ........................................................................ 580
HUMAX .......................................................................... 9[2
P&\ASE)NIC ................................................................... 373
PH]LIPS ...................................................... [37I] [344} 1345]
PIE)NEER ................................................................. 9(¸}9977
RCA ................................................................................ 409
ItEPLAYI%¸_...................................................................... 373
SONIC BLtiE .................................................................. 373
SONY ...................................................................... 372 657
T_, ............................... _1 372 3_4 3_5 657 983 912 9{¸)9
TOSttlBA ....................................................................... 983
DVR/Cable Combos
CABLt _,IS1ON ................................................................ 5(}6
H_ICO ............................................................................ 5{¸)6
PIONEEI/ ........................................................................ 5(}6
ROGEI/S ......................................................................... 5(¸)6
SCIENTIFKi <l L \N'IA ................................................... 5{¸16
TIME WARNER ............................................................... 5(}6
VIDE(Yl RON ................................................................. 506
DVR/SAT Combos
BILL ] XPRESq\ l ................................................... 647 655
DISH NETWORK .................................................... 655 647
I)REAMBE)X ................................................................... 62(¸}
ECHOSTAR ............................................................. 655 647
EXPRESSVU ............................................................ 6o7 6q5
I<)RTEC SZaR .................................................. 569 555 556
HUGttES NE]_VORK ............................................. 621 580
R(iA ................................................................................ 653
PH1LIPS .......................................................................... 62I
PROSCAN ....................................................................... 653
S_MSUNG ...................................................................... 583
SONY ...................................................................... 65 v 659
ULTIMATE D: ......................................................... 653 (;59
ZENITH .......................................................................... 656
Home Theatre in a Box
Where _he code is listed as [=== _=-] the first is lot the:
I)VD and the second is _1 ¸ the AUDIO Otherwise jus_
the one cod_' opera.s both the I)VD a_}d file A[ iDIO
AMW .............................................................................. 9[8
APEX .............................................................................. 436
BOSE .............................................................................. 672
CItlTEI/[ON .................................................................... 4_8
I)U[L,\BILAND ......................................................... 449 905
EMERSON ...................................................................... 940
J_2 ................................................................................. 964
KLH ................................................................................ 9()6
KOSS .............................................................................. M5
LENOXX ......................................................................... 93I
LG ................................................................................... 972
MAGNAVOX .................................. 915 [969 756] 141)8v56]
MYRON & DA\ IS .......................................................... 962
NORCEN'I ¸ •..................................................................... 928
ONKYO .......................................................................... 975
P,_\ ASON[C ................................................................... 974
PHILIPS ......................................................... 755 {969 7q61
P1ONEER ................................................................ 976 968
RADIO St¼CK ............................... 449 894 8951¸453 87_
RCA ........................................................ 4_9 92() 1_53 8791
REGENT •....................................................................... 931
SABA ............................................................................. 919
SAMSUNG .............................................................. 454 942
SE)NY ............................................................................ 986
TIglON ......................................................................... 448
ZENFH{ ................................................................ [_(1578_
Sateiiite/DTV Receivers
\'Sheir, codes _le show;/ fike this [###1 each ol/e cl;/
be _lsed if yoo bare 2 o* mole ol the SAME device or
AMPIICA ....................................................................... 575
BELL EXPRESS_] .................................... 654 647 655 628
CIIANNEL MASTER ........................................ 577 578 579
C}L4PPAIL\I ............................................................ 56(¸1561
CHEYENNE ................................................................... 561
I)IL4KE ............................................................ 562 574 qS-
DREAMBE)X .................................................................. 62(}
DIt/ECI_ 622 632 629 621 623 576 586 616 613 63(I 634
I)[Stt NE]%'VORK {655} [(>47] 628 612 65"_ 588 589 590
I)ISttPRO ................................................. 588 q89 590 654
DX AN_ITNNA ....................................................... 568 _82
ECtIOSPttERE ............................................................... 628
E(iIIOS'IAR ............... [6551 [647¸[628 612 654 _88 589 5_)
EXPRESS_, l i ............................................. 654 647 655 628
F()t_EC _AR ............................ 569 5% 556 557 558 559
FI[J]TS1 _ ................................................................. 591 592
GE ................................ 636 6A9 637 622 653 6_0 65I 652
GEMINI ......................................................................... 595
GENER-\L INSTRUMENT (GI) {627] [642] [6_3} 164"J 648
GE) VII)EO .................................................................... 6¸1(}
]HTACH] .................................... 638 629 630 632 641 6(_
HU(;HES NE'D,'; ORK 62[ 641 6{¸)7580 [632] _38] [6291
IVC ................................................................................ 628
Kt NWOOD ................................................................... 598
LUXOR .......................................................................... 599
MAGNAVOX ................................................... 576 612 639
MACOM ........................................................................ 6{_)
MITFMBISHI ............................... 641 632 638 629 630 6(U
MO'[ OROLA .......................................................... 648 618
NORS'IX[ ..................................................................... 601
PACt ................................................................ 61_ 615 646
PANSNI ........................................................................ 58}
PANASONIC .................................................... 626 586 5_X,
PRIMES'I'&R ............................................................ 627 640
PIIILIPS .......... 57(} 612 621 629 d30 632 638 641 607 639
P] tIL1PS MAGNA\ OX ..................................... 576 612 (53{)
PIONI ER ....................................................................... 6{b
PROS£I" ........................................................................ 563
PRE)S(AN ................................... 636 637 d50 653 65 t (}52
RCA ............ [636] 649 {637] 622 658 653 65O 651 652 098
REA]AB'I1C .............................................................. 567 6O3
SAMSUNG ......................................... 59_ 583 613 616 619
SHAI/P ........................................................................... 6(ki
SKY Nt "[XVORK .............................................. 614 6tq 6}6
SIt RlC4 1 II II1 ............................................................... 561
SONY ....................................................... 623 657 659 602
"KIARCtlOICI .................................................. 640 64:, 627
S'{AR SIGIIT ................................................................. 633
S]kR TIO\K ................................................................... 608
STS .................................................................. 568 570 571
SUPER GI YIDE .............................................................. 609
SYL\ 4NI4 ..................................................................... 581
TE)SHIBA 64 [ 632 638 629 630 607 572 624 625 631
tYIXIMA'IE "IY ........................................................ 653 659
tJNIDEN .......................................................... 633 573 611
t NFIED ........................................................................ 59 _
VIDE() CIPItER l[ ......................................................... 5vi
WEB TV ................................................................. 6[2 585
ZENITII ................. 617 63-_ 656 595 646 562 5v_ 587 635
636 638041 6_2 653 65v 659 6(¸17619 641
64(¸)6_5 564 565 566 593
blmd
[6301
VCR Codes
Wh_.le cvKk's ii_ sboxxn fike this [_=-_l cacb <me cm
be us_,d if you h_ve 2 or m{rc of the SAMI device or
A(( ELE ......................................................................... 35_
ADM1R41....................................................................... 226
AI)VENTURA ................................................................ 251
A1KO ............................................................................. 252
AI\_A ........................................................245 227269 251
A]<AI ............................. 227 229 228 231) 231 254 303 337
ALLEGRO ........................................................ 247 329 243
AMERI( AN t{IGIt ......................................................... 292
APtX ............................................................................. 949
ASIIA .............................................................................354
£r&'l ............................................................................ 373
AI D]O DYNAMICS ........................................ 376 377 234
AI DIO% OX .................................................................. 245
BILL & 110\'4 ELI........................................................... 268
BIAt MARK .................................................................. 354
BROKSONIC ................ 256 25O 257 3IO 39} 967 237 289
&A]2IX ............................................................................ 245
(ANI)LE ..................................... 240 2_5 359 234 242 244
CANNON ........................................................ 225 292 339
( APEIIAR'I .................................................................. 329
(;AR\] R ......................................................................... 287
((E ........................................................................ 252 356
(INF5 ISION ................................................................. 2_5
CIT1Zt N .............................. 24!) 245 252 354 234 242 244
(OIOR'[YME ................................................................ 234
( O]iI" ............................................................................ 356
( [LAIG ...................................................... 245 35_ 356 248
CI RTIS MA'[ttES 225 287 227 334 35"{ 358 234 249 292
CYBERNEX ................................................................... 354
DAEg/)O ............. 279 240 250 2q2 334 242 24i 251 971
DBX ................................................................. 376 3-7 234
DIAMOND \ ISION ...................................................... 896
DIMENSIA ..................................................................... 225
I)tY[L_I;10\NI ) ............................................................... 2i5
DYNA'I ECH ........................................................... 227 251
ELE(2TROHOME .................................................... 245 25_
ELI t "[ROPI{ON[( ........................................................ 245
EMt RSON 250 2_5 252 256 257 290 310 325 35_ 240 233
227 265 266 268 269 456 458 231 237 249 25[ 254 259
FISHER ......................... 304 268 267 287 234 248 273 274
FIII ........................................................................ 229 292
FENAI ...................................................... 227 456 458 251
GARILARI) ..................................................................... 2q1
GE ....................................... 225 311 335 342 354 278 292
GOII)S'IAR ................................ 227 245 338 329 3-_6 234
(3ILADIEN[ l ................................................................. 251
GO \ II)EO .......................... 354 375 407 426 455 971 368
H ARLEY D_,\ II )SON .................................................... 291
ttAI/MAN KARl)ON ............................................... 234 254
HARWE)OD ................................................................... 356
tIEAI)Qt AtE{'t R ........................................................... 268
l I]T_( Ill ........................................... 36 <)227 347 303 332
HI Q .............................................................................. 2i8
INt INITY ...................................................................... 288
INS]GNI4 ...................................................................... 245
INS'EA_\T REPIJA" ................................................. 227 292
INTI!Q ........................................................................... 245
j( PENNEY 22:, 245 268 354 369 376 37 292 3(13332
JCI.................................................................................. 292
Jt NSEN ................................................................... 369 3O3
JVC ...................................... 370 377 268 24" 4[8 234 303
KENWOOD ....................................... 268 76 377 234 3O3
KLH ............................................................................... 356
K( )DAK .................................................................. 245 292
LG ............................................................. 227 329 338 907
LLOYI ) ................................................................... 227 251
LOGIK ........................................................................... 356
LX[ .......................................................................... 227 245
MAGNAVOX 28_ 288 329 226 225 456 28(, 23q 227 914
MAGNIN ....................................................................... 354
MAILa.NTZ .................... 287 2fi8 376 377 289 292 339 234
MAI{'IA .......................................................................... 245
MATSI St IITA ................................................................ 292
Mt DION ....................................................................... 896
ME] ................................................................................ 292
MEMORI X 287 245 268 3(Pi 3[0 329 354 226 227 337
262 263 270 289 292 30i 33O 341
brand
343 234
9(,9 292
248 251 292
Page 29

Using tlhe IRef @ e CQnt roll
MGA ....................................................................... 2_) 25_
MGN TECHNOLOGY ................................................... 354
MIDLAND ..................................................................... 278
MINOL]_ ............................................................... 369 332
MITSUBISHI ........................ 2_) 298 369 376 377 254 295
MO_'GOMERY 'gARD ......................................... 226 3(1(I
MOTOROLA .......................................................... 226 292
MTC ................................................................. 227 354 251
MU]_FITECtt ...................................... 227 3_ 25I 278 356
NEC ....................... 268 37,5 37 289 311I 302 303 234 249
NIKKO) .......................................................................... 245
NOBLEX ........................................................................ 354
OLYMPUS ..................................................................... 292
OP'I'IMIiS ..................... 239 35_ 363 245 3,51 374 381 226
OP'_)NICA ............................................................ 354 301¸1
ORION ................................................................... 256 31(¸1
PANASONIC ........................ 3,53 381 374 373 225 437 292
PENTAX .......................................................... 369 234 332
PHII_O .................................................... 287 225 235 292
P]tlLIPS .......... 287 288 344 3_5 371 378 383 456 286 292
PttlLIPS MAGNA'_OX ..................................... 287 288 226
PILOT •........................................................................... 245
PIONEER ........................................... 305 3_ 376 3_ 343
PORTLAND ............................................................ 242 244
PROSCAN ............................................................... 225 308
PR<_I'EC ........................................................................ 356
PI_iL_,AR ......................................................................... 329
QI _ARTER ..................................................................... 268
Q_AR] Z ....................................................................... 268
(_)UASAR ............................................ 363 3_ 225 381 292
]tAI)]O SHACK ........................................ 225 226 227 239
....24q 268 342 354 361 363 248 251 251 27,+ 292 3(_1337
]L_DIX ........................................................................... 245
R_NDEX ....................................................................... 2i5
RCA [225} 245 1308] 3(19 311 3t2 313 3[4 315 316 335
..................................................... 354 369 228 278 292 332
RI ALIS][( 225 226 227 245 268 354 361 363 248 251
............................................................ 254 274 292 31_1337
Rt PL4"rqar ..................................................................... 373
R](OH ........................................................................... 353
RUNCO ......................................................................... 329
SAMSt NG ............. 354 358 240 369 455 942 963 230 337
SANKY ................................................................... 226 329
SANSt ] ....................................... 31(} 376 377 394 256 303
SANYO .............................................. 304 2/,_ 268 354 2_8
SCOT]" ................................ 240 25O 257 29t) 34t 237 263
SEAF,S 363 245 268 287 369 394 456 248 273 27_ 292
$t IARP .......................... 36{} 361 226 227 2@ 242 25_ 30{}
S]HNT()M ......................................... 229 343 369 356 357
SHOGI N ...................................................................... 354
SIGN _']l Rt .................................................................. 227
SINGER .................................................................. 292 3q6
SON1C BEt1 ................................................................. 373
SONY 379 324 229 323 353 389 372 3/_+ 365 3@ 38O
_,TS .................................................................. 369 292 332
S_YPHISCAN .................................................................. 456
SYL_cANIA ............. 227 287 2_51 225 236 456 458 251 292
S%MPHONI( ............................................ 227 23(5456 251
"IANDY ................................................................... 227 268
"IIa.SHIEO ...................................................................... 245
"IA'[UNG ........................................................................ 3113
TtA( ............................................................... 227 251 303
"IE(I _N](S ..................................................................... 292
"IEKNIKA .......................................... 227 245 325 251 292
Ti\o ........................................................................ 371 372
"IMK ................................................................ 354 2_9 301
TOSHIBA 240 261 260 287 290 358 3()9 924 27_ 341
"IO'1E\ ISION ......................................................... 245 35_
I]N1TECH ...................................................................... 354
VEC_IOF, RESEARCH ............................... 2_) 376 377 234
VIC FOR .................................................................. 3T(_377
VIDtO ( ONCEP'[%; ........................... 24(1 3_(_ 377 234 254
VIDEOSONIC ............................................................... 354
WARI)S 225 226 227 2411245 354 369 218 25[ 254 292
WIt1 rE WEB[]NGHOUSE ..................................... 227 279
XR 1000 ........................................................... 25t 292 356
YkM kt IA .................................................. 37¢, 377 23_ 303
ZENITH 329 247 252 266 288 226 227 338 347 353 358
2+q 229 310 232 232 376 37_ 279 368 243
300 326 332 341 356
342
332 3{3
Web TV
J'_C ................................................................................ 612
SONY ............................................................................ 585
Page 30

This page left intentionally blank.
Page 31

About the Channel Banner
The Channel Banner appeam when you press tile INFO button on tile remote. If 1/1 icon in the channel banner is grayed
out (dim), the fi'ature is not available. The tk)llowing list describes the items on the Channel I_anner screen (lett to right :rod
top to bottom). Other displays that are not described here are seltt-explanatory, When you change channels, the Channel
Bat]net appears as a smaller version than what's shown above.
The icons change appearan(e to show the itenfs status or availability,
Program Title/Acquiring Channel Title of program (if available) or Acqlliril<_ C2_am_*,l appears _xhen tuning a channel.
The time when the TV shuts off if tile Sleep Timer is activated in the Time menu.
l)isplays the time renmining before the _I\ tunes back to the ch innel where
Commercial Skip was activated.
12:39 PM Current time it the Time leature is set in Time menu.
D 6-1 DNLJ Currel-Ltsignll (D tot digital; A h)r malog , channel, suhchannel (for digital
clmnnels)
and the _D,,station call letters, if a_,ailable.
Antenna/Cable l)ispla}s the type of input you've currentl 3 tuned.
English For a digital channel, displa}s the currently pla._ing Audio Language Mode. For
an analog channel, displays when SAP is pla3ing. SAP or Audio Language Mode
changes xxith SOt NI) hurt<re.
16x9 Narmal 1080i HDTV
])isplays the aspect ratio; origina] resolution ofthe hroadcast not the resolution
of the TV; and HDTV (High Definitinn "Ik,levision), SD_I_ (Standard Definition
"]i,levision/or EITIX_ (Enhanced Definition Television). For more intormation about
aspect 17atio and hroadcast resolution, go to page 3.
l)ispla}s when Closed Captioniog is available on the current channel.
[]
The Audio language'mode icon appears whenl the current digital channel is
hroad(asting one or nn)re alternate audio i]]odes or lallguages,
Parental Control icon is displayed red and locked when the TV is locl,:ed, greeu
m
arid unlocked when the TV is unlocked, and yellow and unlocked when tile TV is
temporarily unlod, zed,
_IPAA -Arot Rated \<Chip progr un rating (not the _l_v'srlting set up in Parental Control nleF0a),
12:00PM-I:OOPM I)isplays the current TV i)rogram duration.
Page 32

Using the TV% IFea ures
Digital or Analog TV Channels
A single <;ft-air antenna cao pick Ul> I':ofl/ atlal<;g and digital daannels, l)igJtal daannels can be
IliadS! !1l) Of 1)17111/_11"yC[]aon_']s arid stll)chai/lqc,ls,
Note: ,5'ztbct_c_z_dx (somet#_zes called mhzor _bc_r_z*4,s9 c_re cbcmrzels associated u,/tt_ the
grima_ 3, cbamzel (sometimes ccdled the mc!jo_ cba_z_ze!). A prima O, cbam_el mcO, bave /usl
O]I( _ SZlbC_)(!IIJlO[ ()l* _ZlZt[t_ 91_" S_I[)C/)CI]IJIC/S.
A "D" is displayed for digita#
an "A" is displayed for analog
Primary
Channel (if necessary)
Tip:
Use the channel banner to determine whether
a channel is digital or analog. A digital (ATSC
or QAM) channel displays a "D" before the
channel and may have a dash and socond
number after it (e.g., 21-1); an analog channel
(NTSC)displays an "A" before the channel and
only has one channel number (e.g., Ch 21).
Direct Tuning to a Channel
1, _,'Iald.(_ sure [ll_' r(,l]]O[(, is J[l T\, tIlo(l_ _ bv pr(_'ssJt_t_ TV o[1 []le r(_[]]o[( _ (on[rol,
2, _I_t[('l" [h_! D[+II]]_]I+_ ' (h_]Ill_t( '] l_(lI]]b(21", Y]lis I_t[l[Ilb('[ " _l[)p('_ll+_q 111 [11_! D[+II]]_]I_, ' ([]_/IlI_t(!] ('ll[l+y box,
I)l'(_ss ()K or wait _1[f_w s_,(Ol/(Is, I[ you (]o/_'t ('liter [ Stlb(l-t_l/_13el, th(' T\, ttll/(,s to t['_ _ 131-st
avai]abk- analog clm[m_d or Iow_,s[ digital sul)chanm,l.
3. ff d_e primmy dmnnul m]mb_'r has tower d_an six digits tier cabk_), or two digits (for
aH[enml) a[_d you x%am to _nt_'r subchannel humblers, im_ss fl_e SI B CH or SI I_CItANNEL
I)!l[[(51q [o _I(]V_I[](_' [O [h_' s!lbcll_lllll('[ ('II[l_ box,
:I, I_n[_,r []/e /_LIn/b('l _ (5[ [h(' SLll)(]/11/1_], This []uI//bf_l _ aDD_li-S 11/ [I]_ _ stll)d'_arln_,l _'n[ly box,
_, PI('SS ()K to tLln_ _ to t]/_ d/a[]rl_,] (51- _xait a f_,w S(,_'Ol/(]s and t]-I( _ TV t(ll/_,s to tl-l__ _h_ln[]_d,
cba_ge cbam_e_ u,#b#_ the 7_ mode
Getting a Program Description
1, _'Iak_' sure [11_' r('lllO[(' is ill T\' tIlo(]( _ [)y DrC'ssJn_ TV o11 [lie r(_[]lo[( _ (on[rol,
2. Pr¢'ss tl_' INFO button on tl_ rt,mo[e twk¢,, ff tl_ intormafion is available, tram [1_
I'_loa<lcaster, a program descril_fion ',',ill _l[)l_X'm.
Chapter 3
Page 33

tlhe
Parental Controls
The Pare*_t>d(,bTvtrols menu allows you to wogram your TV so that
children cannot see certain programs, channels, ol- use the buttons on
the front of the "I_,'.The Pare*_ta/(,bntro/s tllentl controls the snttwarc,
inside your '1%7(retermd to as V-Chip) which lets you program ynur '1%7
so it \vo//'{ display certain DFogr0.1nsand lnovies based on violence, sex.
or other content yOU may believe children should not view. Ot'_ce you
block l)rograms, yotl or other adults can !lnblock proglTalns by entering
a password to !lr/lo( k video or enter the password to edit the [_'attlrc's ill
the Pare*_t_d (2)ntroZv menu. By default, the soft\rare inside your TV is
t!lr/led 'Oft," SOif you don't \van[ to use this [_-'ature, yotl can just ignore it.
The optkms in the Pare*ztal (,>*ztrols menu are {ZSAlsChip. Ca*_ada
V-UT.Jip,l'-67.Jip{ *zrttt_,d. and Fro_zt !4utto_z 14lock.
Before V-Chip is explained, fil>t you need to know how to lock and
ulllock your 3_7,
LocklUnlock TV
The LockiI nlnck TV option is tout-_d ill the Channel S¢!ttlp lnOtlLI.
Selecting this option lets you lock and unlock tile parental controls
and channel lists using a password. If the TV is locked when watching
TV, you only see the channels that are marked as 17eu:able. Locking
the I_ _ also bh_cks channels in @an*wl Setup (go to page 45 for more
intormation/.
Notes: When locki*zg the f_ ; .Fo_ 7l be asked to er_ter a password
a_zd th#_z tn re-el_ter th¢, f_ass_{,ord a seco_d tlll2e to re-col'{/h*l_z .yozlr
Tip
You must lock the TVfor the parental controls settings to be
enforced_
f)glSStL ,ord chol'c( _,
(l')'ou do *zotlock the 77. r_os_eof the setti*zgs /br l ;Chip, chctnr_el
block, as._dfi'ont pa_e/ block tc_ke qff{_(t.
(/')'ou jb_qd )ourpassword, simultc_*zeoz_slj,press and bold the MENC/
OK butto*z o*vtl)_',/l_u*vtpanel a*vd VOL- butto_z o*_the remot_,,/i)r three
second(Is. 7]'?isreset,s the password on(j' and _*zlocks the T_ all other
s(,tti_qs in !_ar_mtal Omtro/.s arc, not cha_vged.
How V-Chip Works for the USA and Canada
V-Chip reads the program's age-based rating (TV-MA, "1%:-14,etc.) and content themes [(Violence
(V), Adult Language (L), etc.)]. If you have blocked the rating and/or content themes that tile
program contains, you will receive the message telling you that tile program is blocked from
viewing.
I_r(>adc islets are not required to prnvide content themes, so Drogr i[ns received \_,ith 11o content
themes xxill only be blocked if yOtl block their age-based rating. You can also block out programs
that have been given all Exelnl)t rating, and progratlis that are considered !lnrated,
Page 34

Using the TV% IFea@ures
USA V-Chip TV Ratings
The' UqA V-Ct'n_)7URatin_ lets you deckh, which 1%' programs can and
cannot be vie'wed, 7-(1set "Bi programming limits:
1, Choose CT)ctn_zelb_,tztpfi'om the Main metal. If CT)an_zel5?,tztp has
previously bt,en IocIq{._(], you nlust {'llt('r y()!lF po,ss\vord,
2. Then select ]}(IFe)zt(l[ (,})nttTffs.
3. Highlight and select U£N V-Chip.
4. Highlight and select V-Chip 7_Rat/%q.
5. Once yon get to the l'-Chl}) 7WRating screen, use the arrow buttons
and OK on your remote to change the status of a TV program rating
or content theme from Vieu'able to Blocked.
Proceed to tile next sectiOllS for n/ore details about how to d/ange the
stares of TV program limits,
Hierarchy of Age-Based Ratings
TV-MA Mature Audience Only
TV-14 Parents Strongly Cautioned
TV-PG Parental Guidance Suggested
TV-G General Audience
TV-Y7 Directed to Children 7years
and older
TV- Y All Children
Blocking Age-Based Ratings
YOu can autonlaticallv block all program ratings above a specified age-
based rating level, For example, if you {rely want vour child to watch
proglTan/s that have a T\,-G rating and lower (ill ()tiler words, yotl \vant
the child to watch lET-G, 1_7-_7. and "I_:-Y), then you need to bk)ck out
higher ratings.
To block programs with higher ratings:
1, First, determine the lowest level rating you don't want the child t{}
waRh (see chair of age-based ratings {m previous page).
2, Highlight the lox_est rating you do not want the child to watch. In
the example discussed above, you would highlight TV-PG, since the
highest rating y{}n want the chiM t(>watch is 3%'-G,
3, PRESSthe OK button to toggle bet_veen I_eu'ablP and l£ocked.
The status fklr the rating listed to tile right and all higher ratings
antonlatically change to Hk>cked (and H),
4, Select Lock 7_from the Parental (_bntroLs menu, Enter a l)assword
alld re-enter password a se(ond tin/e to confirn] the password,
To view age-based ratings after you've [)locked then< fl}lh}w fl_e same
steps as above to make the rating ITeu,ahle (l).
Notes: 7he co_ztent statzts.fiekl.v co*v'e,sponding to the z_*zbh)cked
ralin_ become fTewable as well. Th<} and the (<ge-based rating
status are the o*z{}fiekls lhat az_/omatical{}, cha%ge back to
_Teuable wh<,n 3'o_t complPt_, this process.
_)u must rPmenzber lo lock the 7U as described abo_.'e fi)r ratin_
Hmits to l>lke <,ff?,ct
Chap er3
Page 35

tlhe
Content Themes
D Sexually explicit dialogue
L Adult language
S Sexual situations
V Violence
FV Fat_tasy Violet_ce
Blocking Specific Content Themes
You can block programs bas_'d on th_qr content. \\hen you block a
cO/3t('nt theln(' for a palti( tllar rating, yotl atltomati( ally block that
content theme for higl-_er rated progran/s as well.
For example, if you do not want yotlr child to watch progl7alns that h0.ve
adult language /L) rated TV-PG or higher, theH you could block out all
programming qY-PG and above containing adtdt language.
To block program coi-fft,nt:
1. Determine the lowest level of content vou don't want the child to
watch.
2.
{se tile up and down arrow buttons on the remote to hig/alight the
age-based ratings that correspond with die lowest content you do
not want die child to watch. (In the example above, you wotlld
highlight _I_'-PG.)
.
Press the OK button to change contel'tt status fronl (V) Viewabk, to
(ID IUocked. All higher ratings' content themes change to t3locked.
Notes: Broadcastm*s a*w *_otrc,q_Urcd to proz'id{, co*_tm_t th*,m{,s
or d<ge-bas_?drath_.s
)qizt mzt:,t *'{?m_,mb_,rto lock the TI"as Uesc*'ib_,dabot e./br ratit_<q
limits to take ¢_[_{_ct,
To view content the[n('s alter you've blocl<ed them, follow the same steps
as above to make thu content Weu,able (V). Note that if you unblock the
language corresponding to TV-PG, Rir example, the language for _:-MA
doesn't get unblocked. YOu have to unblock each content theme for each
rating separately.
V-Chip Movie Rating Limit
You set movie (MPAA) rating limits I)y blocking movies rated abort _ a
specified rating. How to block and view movie ratings is explained in the
next two sections.
To access the ILC/gl_ M(>zie Rati*_g me0u:
1. Press MEN! on tile remote control (the Maisv M{,*_ appear,s).
2. Select Cha*z*l{,l&_mp. Enter your passxvord if necessa W.
3. Select Pdr(,*Tt(ll(,b_Ttro/s.
4. Select U.gAV-Chip.
5. Select V-dY_ipMozie lqatilvf7.
Page 36

Usi ng the TV% IFea@ures
Blocking Movie Ratings
If you only want your cllild to watdl movies that haw, a PG rating and lower tin other wnrds.
movies rated PG and G), then you could automatically block out all other movies with higher
ratings.
_[k>block movies, follow the above steps used to describe blocking content themes,
Note: q?)me moz,ies m_(Fbe git'e*_ a .'cot Rated (NR) ra/it_g, d/}¢.r blocki*_g mol ie ratit_gs, you
razes/s¢.t XR to >)¢.u'able separat@, /n _'i#u, ,\7,7_r_)_li_'S.
elk)view ln(wie ratings af'_er you've blocked theln, follow the same steps as above to make the rat-
ing 17eu'clbk. (1:).
Canada V-Chip
t;anadian TV V-Chip supports t\\ro different Canadian rating systems:
English and French. The E_glisb or _)_<._ch(2t_zaUa 1'-(Tbip TVRati*_g lets
yon decide which TV programs can and camlot be viewed. To set "1.7
progranmling limits:
1.
Choose d'hamu4 _S?.t¢tpfrom tile Main menu.
2.
]f dT)amlel &.tup has previously been locked, you nmst enter your
password.
Choose Paternal 61)mro/s.
.
4.
Highlight Canada f'-dT;,ip and select either Canada's ETvglisb leati*_g,v
or [-)'_,_zch Ratirlgs.
Once you get to the E_Nlisb or I.)*<,_zchRat/*Ns screen, rise the arrow
buttons and OK Oll vour remote to change the status of a TV program
rating or content theme h()m Vieu'abD, to !3/ocked,
V-Chip Unrated Program Block
Selecting this option lets you decide if programs that the V-Chil_ recognizes
as <<Unrated"({SA) and <<Exen_pt"(Canada) can be viewed. Note that
"Linrated" and "Exempt" TV programs may include news. sports, political,
religious, local and weather progranls, emelgenc T bulletins, public
annotln(elnents, and programs withotit ratings, the movie rating
"NAY and the TV rating "None" and the Canadian rating of "ExemptY
Block Unrated and Exempt Programs All unrated and exempt
programs are available.
View Unrated and Exempt Programs All unrated and exempt
progranls are not available.
Note: Yozt mzlst remember to/eeL" the Tl _/br ratl'_l<g /l)tlit<s10 ta_'("
q/??_t
Chapter 3
Page 37

tlhe
Front Button Block
Sek!cting this option k,r.s you block (disable) or unblock (enable) the TV's
tront buttons, The remote still tunes to any channel, t.)>*vt Patu.l ]:_lock can:
• Keep children from watching _1_r when the parent is not present,
• Keep young children h-ore playing with the buttons on the _I%',
(When using this as a Pare*_tal (/o_t_*ol method, you should remove
access to any remote that is capable of operating the television,)
Don't lotget to lock the _1_;after vou select Bk>c,_ed, If VOtl do not, the
h'ont panel block will not take effect,
Note: {/'po_wr to the TV L_lost /br an exte*zcled peHod, lbe butlo*zs
become u_zblocL?ed,g/oc#i_ tbe fi'o_zt b_tttoJ_sdoes tzot disable, the
./)*o*zti_p_t /a(L>s
Channel Lists
The channel lists contain the tk)llowing intk>nnation: major channel
mlmber, with sub-channel number only if it's a digital channel; channel
call letters, if available when channel is tuned; indicated as an analog or
digital channel (if available), Signal Strength (if available), 3kzzo*'iteCh
List; and 6_'_il<tre*__ (,7_.List, "Ihe channels listed in Cha*_zel List are based
on the Channel Search results, If a channel is not found by Channel
Search, then it is not listed,
Editing Channels in the Channel Lists
Chann_'ls can be edit_d to appear in the Fal'or#_, Cb List and Cbi/dreJ_ _
Cb, List in the (,_a*_tzel LLsl menu, l. se the Fa_'oHte Ch, List to re,move a
channel if you no loJ_ger want it in yo!lr channel list because you don't
like a program, lk)r example, Remove or "hide" a channel by removing the
check mark in the box, In the example to the lett, channel 4 is removed
from the 67_amz_4 List, If you decide later you want to view channel 4,
ac(ess it using the nun/bet 4 bLittor/ on the remote,
(se the 62"_ildve*z}@ List to block a channel in your channel list if you
don't want children to view the channel, R_move or "hide" a channel by
removing the check mark in the box, In the example to the let}, channel
8-2 is removed h'om the C]_ild_w__ 67_. List, When the _i_"is locked,
access the channel directly by using the number buttons on the remote
control then enter your valid password to view the channel,
To save time. you can also add ALLor delete ALL channels in a list by
changing the box or choice field in the line that says All Video [_[)z¢t,_
or All Cha*_m,L_but be ve_w ca_xfful because you could erase all of your
selections,
Page 38

Using the TV% IFea@ures
Auto Tuning Feature
The way you set up file A_tto 7_*_i_zqt_,ature in file TV's menu
corf('sponds 1o [he d_,vi(x, b!l[[Oi'ts on [hL" renlo[(' and [hL " x,V;ly yOU hav('
each device connect_,d to your rj[%; \_'hen you s('t auto tuning_ you're
t_'lling [lie TV what channel or input to tune to v,:h_n you press tile
device huttons on the remote controh This is especially useflll tot going
directly to an input like HDMI.
1. Press MENI (the Mai_z,_le*vtt appear,s).
2. Highlight (,7"_at_*_e!,S_t_tpand press OK. Then highlight A_h'a*wed
Setti*_gs and press OK.
3, tJighlight Az_lo 7"t_Jvi*_gand press OK,
4. Highlight the device hut[on field and con[flintily press OK to scroll
through the selection of inputs.
The choices and a hrief explanation fi)llow:
Not Connected Choose this if you don't have this pa*ticular device connected to the q\, or if
you don't \van[ the ]%" to lutonlatically tune to the corre_ t channel when yotl press one of the
device buttons on tile r_'n/ote.
Channel 2, 3 or 4 Device is connected to the AA77fNNA/(/AI3LP_/3,7_UTjack on the hack of the
rF\T,and yon want the TV to tune to channel 2, 3, or 4 when you press the corresponding hut[on
on the remoR'. Reminder: make sure the device's Channel 2/3 or 3/4 switch is set 1o match the
channel you choose in A z_to Ttt*d_z/4.
Input 1, Input 3 Compatihle video source, such as a DVD player or satellite receiver, is
connected to the Input 1 or 3 (,OM!_O,\_PJN77/COAfI_OSITEL\7_U7 jacks (Y/Video, Pb, Pr) on the
back of the I_ _and yon want the "I%'to tune to the composite/component video input when you
press the corresponding bllttOll.
Input 2, Input 4 Device is cnnllected to die Input 2 Video (V) or S=VIDtfO jack on the
back of the _I__ and you want the "I%_to tune to the Video Input Channel when you prc, ss the
cor n'spol/ding hilt[on.
Front Input Device is connected to the IqDEO IN jack on the fiTontof the TV and you want the
_j_7 tO [ntle to tile front Video Inptlt Ch rune] when yOtl press the cofrc'sponding [)uttoi'l,
HDMI 1, HDMI 2 Device is connected to an HDMI jack on the hack of the TV and you want the
_I%;to tune to this input when you press the corresponding button.
Future Downloadable Ratings
h2)ur q_: is equipped to suppolt a downloadable rating system. It is similar to the current rating
system your "I_/has, called V-Chip. If a new rating system becomes available, the "l_r dnwnloads it
automatically from [lie signal and there is nothing you need 10 do 1o receive the information. Once
it's downloa(led, a new option appears in yotlr Parental Col'tirol nlentl. This Ol)rion and its nan]_'
are dependent on the content acquired frnm the broadcaster.
Note: These rati_z_s arw az'ailabk, o*_{_:(/'lbe broadcast_,r is sendi*_g them.
C_p_r 3
Page 39

Menus, On-screen Help, and Control Panels
This section highlights your TV's on-screen nlenu systen]. "]he nlenu svstell] has sevoral types of
screens, An overview folk)ws,
Note: 7be Paret#cd Cn*ztrol,_metzz_ ilk,ms i,_discuss_,d itz the fFatures cbapt_,*; u,bile
Assisl_M 5_,tup l_ discz_ssed i*z the Co_nections a_zd 5_,tup chapteJ_
a .... ::::_'*'*_'_° _'_ The first I'flenklVOL1see when \Oil press the MENU btltton on the remote is
a_..... _ called the Main Me*_< T(>use the Main Menn:
Press the MENU button (the Main Me*zu appears).
Navigating the Menu System
......................................... 2,
iiiiiiiiiiii
Tips
A shortcut method to accessa menu item is to press
the number button on the remote that matches the
number next to the on-screen menu. For example, in
the Main Menu, press 2 to go straight to the Audio
menu,
Feelfree to explore the menu system. If you're ever
unsure where you are in the menu system, look at
the menu path at the top (for example, Main Menu,
Picture Menu) or if you're just tired of exploring,
press CLEARto remove the menus from the screen
and start over again.
IIse the arrow buttons (left, right, up, down) to move ttlrough the menu and
highlight different options.
,
Press the OK buttcm to select a highlighted item.
Xole: [)FCSS tb{" *lZttlID{?F bzttto_z Otl t_?(" F(?tglOte that tHgItC]'){)S t_?(" tlll fH b(?*"
*g(4_'l t0 l_)(" ()*_-SCF_gtg lZlgtg*l 10 S('](_CI l]3( _ of_ltO!2,
_[>;exit the Mai*z :k/et_z/:
• Press CLEAR. The on-screen displays are cleared front the screen and you
return to TV viex_ing.
• Press MENI..
• Press 0 !Go Back) or GO BACK on the remote.
Menu path
Highlighted menu
selection
On-Screen Help
Ii_iorill;ltion appoal\'_ on nlost scr(,ons to _lSSJSt VOIl in ilnd(,rs, tai'tding yonr lIl_[/tl
selection. -1"othe right of the highlightod metal item is a display area that might
provide text for the item selected along with any submenu items. In additicm,
a zIlen[l path appears at the top of the scree[l to let VOtl know whea_ you are
in the menu system. At the bottom of the screen am two lines of help text that
explain the currently highlighted item.
Controls
Help text
Controls let you adjust the detault settings of your 3-\. You can choose a setting,
enter a numl)er, or adjust a level such as tint or/)righmess. There are ti)ur types
of controls:
• Sliders
• Chcfice lists (check boxes, radio buttcms)
• Alphaintlzileri( entries
• Menu (action, choice fields)
Page 40

Using the TV s I enu
Sliders
Slidvrs ar(! tlsed to select a Sl)e(ifi_ point of I co[]trol that his confin!lollS le_,els,
To rl/ak(' H(Jj[ist//'t_,nts:
1. Highlight the slider for thu feature 3ou v, am to adjust.
2, Press the lip or do_n irro_\ btlttOn to adBIst the il]dJca[or oll a veltkal
slider, Press the left or right arrow Imtton to adjust tile indicator on a
horizontal slider.
[] Q
[] Q
[] @
[]
Check boxes Radio buttons
Turn TV On at: Turn TV Off at:
Choice Lists
Check boxes and radio buttons are used to select options tronl a list. Check
boxes let you select one or n/ol-{? options. A radio btltton lets yotl sele(t only
()lie option.
1, [se the arrow billions to inove left, right, Lit2 dowT1,
2, Press OK to sele(t a radio I)utton; press ()K to select or de-select a check
box
Numeric Entries
NuJl/t, ri( {,ntrv fi{'](]s are !lSe(I to {'nt(,r numb{'rs, passw()rds, and tin](' vahles,
The IILInlbcr DLIttOIIS OI3 the renlotv Hnd th(' alTOW, (hallIl{'l ill!id(}\vn, v()hlnl{,
upid{}wn, and MENIIiOK buttons ()n the h-(mt panel can be used to enter the
inh)rmation,
1.
Use tile left/right arrow Ilutton to highlight tile field,
2.
To er'tter time values, such as the Wake-I p Timer, highlight the + or - field
and Dress ()K to change the tilne, or simply 11s(2 the n/lll3ber billions, W()
enter p issw(yrds, you lll(ist ilse tile n!lnlber I)!ltt(}ns,
On-screen Menu Items
The (}n-s__reen lnel'tll itenls ;ire used to ac__{'ss th{' illl(}rnlatioil an(I,,or change
the settings of the specifi_ item highlighted, Highlight the item with the uI)
and do\vn arrow b!lttOliS, Then prfPss (-)K or right arrow buttorl to access the
item's intormati(}n, T{) make a selection ill one sR_p, press tile nunlber button
c()rresponding to the item.
VCR
VCR2
DVD
Action Buttons
An on-screen button that pertbrms the acti{m lallelh'd on the I)tlttOI"_is an a(tiog_
button. Press the right arrow I)utton to highlight and press ()B7 to select.
Choice Fields
A choi(x, field Q;d('s through at least IV,{} or n'l(Jr( _ choices, Press 01<. to select
thv next (_[][IA7wlthii-_ tile ch{}ke field. Moving Eli{' highlight to a different ch(/ic{,
field, pressing CLEAR, {}rexiting tile n]enu saves the selection previously made,
Ch_p_er 4
Page 41

Usin9 tlhe I @nu Nystet
_iii_i_iiiT_7_iiii)iiii{iiiiiiiiiiiiiiii!Ti............................................................................................................................................................
HHHHHHHHHHHHHHHHHHHHHHHHHHHHHHHHHHHHi ,S,,_A®,_
iiiiiiiiiiiiiiiiiiiiiiiiiiiiiiiiiiiiiiiiiiiiiiiiiiiiiiiiiiiiiiiiiiiiiiiii_,_ _o_ _ _o_o_
iiiiiiiiiiiiiiiiiiiiiiiiiiiiiiiiiiiiiiiiiiiiiiiiiiiiiiiiiiiiiiiiiiiiiiiiiiiiii_
Picture Menu
TIR _ Piclzlre _1I_,1_// contains ln(fnus to con_gllr(' vid(,o settings: D[ctlll_e Pl_OSOl
,_)d_7, ])l'c/ltre 3"ctii_7_s, .%Fce_7 I_)J_l/< Adl'a_Tced Dic/llt'e, and Sct'ee_7 A_s/
nlentl, Each one is descri/)ed /)elow,
Note: 1,17bm,_cba_g#zg a_z item ir_the Pict_re Mmzu. the graphics become
tl*glIZSD_lt_eklt SO .l'Ott C_l_l s_e _OlL' .l'Ottr (tc]iIISttHeIIt<_ C!_]_ t t_Te D[Ctllt_e,
1,
Press MEN( on the remote control (the Ma#z Me*z_tappears).
2,
Highlight Picture and press ()K (the Picture options appea0,
Note: Wbesvmakis_g IJictm'e ehat_<ges,i*_p_ttsare all a@)_sted i*_depe_zde*zt
<#'each otbcs:
Picture Preset Mode
PI>CtZI_*_,P_%,_etx displays _l (boil(' list that I(_ts }'Oil s(,l(_(t o1/( >of th(,s(' l)r(>s_2t
pic'ture settings: D'b _ _t (De ,) _?_turat< ('i_s_,matic (,_gllt), 5]_orts.and Persorml,
Choose your setting I)ased on the degree of lighting in yotlr rooln, After yotl
select a preset, the settings listed to the right are adjusted automatically,
If you choose Personal, you can customize each picture quality setting to your
desired level, and a message appears asMng if you want to save those settings.
After you've saved your personal settings, yotl can go back into the l]flen/1 an(]
select a different picture preset. For example, if you normally use Personal but
want to watch a s[_(_x_rii_ lTbra*zt (Da)) lighting, choose _Tbratzt (Dgo), watch
the show, and then afterwards return to your (tlStOl'flized settings by choosing
Pe_xotmL The PRESETS burton allows you to scroll fl_rough your Picture Presets
qllickly. (io to the R_nlote chapter for nlore inl<)rnlation,
_p
To create a temporary personal setting, make your
changes and when the message appears asking if
you want to save the setting, select No. The preset is
saved until you change the channel or input.
Picture Settings
The Picture,Setti_<qsiF_'ntl displays slider controls for adiusting the way the
pic'ttir( >looks. _)tlr options tind(>r the Dfctz_r_,,ST,ttilT<_{sinwll!l ar(H
Colltrast l)iffbre[/ce I)_.>{X\r('t_IIthe! light Ind dark art_as of [l'i(-i)i(tur( >.
Color The richness of the color,
Tint The balance between the red and green levels,
Biqghtitess The brigl-ltness of the picture.
Sharpness The crispness of the edges in the picture.
To create picture settings fbr the xideo inputs:
1, Press the INPIT button v,hik_ in tile Pict#tre Settir_<qslnel-al until the correct
Video hlpclt C['_anl'_elappears in the upper right comer,
2, Press the right alld left arro\v billiOnS on the relnote control 1o sele(t the
slider.
3, Press the !ip and doxxn alT()__, I)llttons to operate tile slider.
Page 42

Using the TV% I enu
Screen Format
The Scree_z kbrmat [eature allows you to change how the image is displayed
on screen. The options are ,\(}l*l_la[, 5}Fete]'), .S}]*t(,(,ZC,or Zoolll. If you want to
adjust y(/ur image, choose an option bel{}w:
The aspect ratio is determined by the broadcaste_ ff
you don't like the way your picture is being format-
ted, press FORMAT until you see ascreen format
you like.
%117non Al/tolrlat/c FoPlrlat Su itcbilv_ so that as you change channels, the TV
will change *ormats fl)r v(/u,
Normal Tile image (if a 4 x 3 video signal is centered with bars on the
right and left sides of the screen. The 16 x 9 image is kept to its 16 x 9
[ormat.
Stretch The image of a 4 x 3 video signal is centered, expanding in tile
horizontal direction and cropping video at the sides. A 16 x 9 video signal
expands horizontally.
Squeeze A 4 x 3 image is compressed horizontally, adding bars to the
sides. A 16 x 9 image is also c(/mpressed horizontally.
Zoom The image of a 4 x 3 or 16 x 9 video signal expands horizontally
and vertically, cropping all sides of the image.
Notes: 7be./brmat o/'some video ca*_not be cba*zq(.(l
77_eZOOM +/- bztttons on tbe remote &t 0,ol_ c:baJvqetbeJl)rmat u itb a
o_ze-bltttoH _)K(>SS Fgtt])(_) **t_)CtH H(gl _(_lt[Hff tO t]')(" Screoil Forl3lat flT(>Hz_ ',
Advanced Picture Menu
The Ach'a*lced Picmr. options let you enhance picture peril)finance and adjust
picture position. When you select Advatzcecl I_hmre, a sullmenu al)pears with
options:
Auto Flesh Tone Minimizes the flesh tone variations of the TV picture,
Choose Ot_or (_i depending on your pret_-rence,
Color Temperature Automatically adjusts the color temperature of tile
pict/lre, The [_,at!lrt. lets you set one of three a!ltOlIlatic color adjustments:
• Cool More bhle,
• Normal Standard picture color,
• Warm More red,
Video Noise Filter Displays a list that lets you set (/ne of the three
settings that allows you to reduce picture "statiC' or any type of
interference, A differont Noise Rech_ctio*z setting can be stored R_r each
input, but only applies to devices c(/nnected to the composite inputs. You
can set tile Aoise Rtduct/(m to Frame Cbmb, A(ll'clHc¢.dP)*d*_l¢.Cbm& (it Q/s_]
The settings are explained in tile on-screen help toxt,
Green Enhance Makes g_en "greener" and increases tile saturation, For
example, nature shows and Sl)()ltillg events are especially enhanced by this
teature, The options are Otz and Qi.._
DetailEnhance Makes tile edges of the video steeper, sharper, and
crisper, There are two options tilt tile this lne[lu: ()17or ()./_iIf altilacts
appear in the vide(), change the setting to QZ')'I
Chapter 4
Page 43

Usin9 tlhe I @nu Systet
Contrast Enhance Makes tile picture appear brighter by deepening the black parts of
the picture. This also helps to maintain a nlore consistent black level front one scene to the
next. The options are O*_and Oz')_7
Film 3:2 PuUdown Automatically detect.s video sources that were originally recorded nn
fihn and converted to a different fornmt. Film .;..2 Pzdldozzw modifies the couvelted signal
so it looks as close as possible to tile original, a process called reverse 3:2 pulldown. Film
._:2 Pldldo_*l is applied to all inputx ()ptinns are:
• Advanced The defilult and reconmlended setting. Turns 1.)7m.3:2 Pzdldnz_w cm
when needed.
• On Used in circumstances when tile T\: is to lie used solely with fihn-hased sources.
• Off l_se this setting if you think the reveme 3:2 pulldown is causing distoitions in
your picture.
Reset Picture Menu button resets all Picture Menu controls to their original hlctory
set0ngs (except t_twnim! Pict_re t_P_'I, I/oriz(mt_d and _},r/ica! Pnsitiot_. and Smnntbi*_
A*{/_tst) tkn-the currently tuned input (see on-screen text). To reset the settings, you must:
1. Tune to the input you wouM like to reset.
2. Press MENI. to access the Mairl M(,*zz_.
3. Fronl tile Adl,atzc_,d &,ttitlgs nlenu, select Rcsct C?lmrols. and then select Rcs(,t to reset
the settings tot the curn.ntly tuned input.
Screen Adjust Menu
The .%r{,{,nAc{l'z¢stmetal allows you to positk)u and adjust the picture on-screen.
The options are:
HorizontalPosition Allows you tn adjust the picture let} and right. Press
the right arrow button to move the slider right and move the picture to
the right. Press the lelt arrow button to move the slider lett and move tile
picture to tile /eft.
VerticalPosition Allows you to adjust the picture tip and down. Press
the right arrow button to move the slider right and move tile picture up.
Press the left arrow button to move the slider left and move the picture
down.
Smoothil_g Adjust Allows you to adjust tile lines of tile picture so they
appear snlonth. Press the let,,right arrow buttons to adjust. I_se rile menu as
your "test pattern" when adjusting stlloothness.
AutoAdjust If a device is connected to tile HI)MI inputs, the Azzto Ac{/_tst
lilentl o/)tion optimizes the (in-screen position of the video. If your input
has Auto Adjust, just choose )?,a.
Page 44

Using the TV% I enu
Audio Menu
The Aztdio menu lets yotl adjust audio output. To _ccess tile Aztdio menu, pr<_ss
MENU on the remote, and then select Az_dio from the main menu. The following
audio items can be adjusmd: S'oz_t_dPreset Mode. So_t_zd[_4qi¢-,!3alat_c{<and
Adz'a_zc#d Azldio,
Sound Preset Mode
Yo[I can sele(t one of the sevend3at-_d Sotlnd Preset Modes or c_'eate yonr own
personal l)R_set. The seven-band graphic eqn _lizer lets you adjust the audio
frequency settings. The equalizer can only he changed if Fixedi_at:iabh, Oz_t
is set to V_Fiabh, Level ,S_,at_eFs O1_in the Arl_,'ancedA_rlio menu. If Fixcrg;
_}tpiab[_,Otlt is set to Fixcd Lezwl, you cannot make changes to the equalizer
and the bands are set to 0dB. Hoxkever, the graphic equalizer levels for _}tt:iaMe
Lez'eL ,S>_,atee*w0_l are stored in memo W in case you ,switch t_-omFLw,ciLcl¢l
hack to *@riabl_, t#zwl. ,s}>_,aketw()t_.
fi,ature S_'llZllgS_ll'e store_l glnbal{3, acrnss all t'_put._ cs_2cl_zolp_r il'tp_t.
Note: ,S'oztnd PFCS*'t_$fodcsar_, stnFed./i>*"each il'lpztt All <>the**a*tdio
_i ¸¸¸ ._p
iiiiiiiiiiiiiiiiiiiiiiiiiiiiiiiiiiiii_ .D_,_ o_
iiiiiiiiiiiiiiiiiiiiiiiiiiiiiiiiiiiiiiiiiiii_ _vl_l_
Sound Logic
Acting like a dynamic rang{, limitcr, it (ompresses the dvnami< range to limit
sIIdden vohnlle inere tses (for exan_ple, the sudden increase in _ohlnle yon
SOllletillles hear v, hen a (Olllnler('ial starts). Choose Or_or (._/.)'_depending on
your l)re[_'ren( e.
Balance
_e Ba_nce setting applies to the internal speakers and the headphone output.
Balance is how much audio (loudness) gets sent to the lef_ and fight speakers.
Note: i3ah_*_c_,app/ics i/'Fix_L'_Driab/_, O_t i._s_>tto I'_*dablc L_,ud.
.S)'_(,aL_+,rsO,l. &,e tbe.lbllou i*_gpa<qe.fi>rmore l'qfi_rmatio_
Advanced Audio
The Advanced Audio menu has options tl-lat allow you to adjust audio input and
OLItpll[, The options are:
Sound Expansion I)isphtxs _ choice list of available audio modes, xxhich
control the way the sonn(l (olnes thr()ugh y()tlr speakers when the TV is
set to using the _riablc O_tpzzt. The selected setting affects all inputs and
tllners.
To cleate the settings:
1. PRess the MEN[ button (the Ma_n .gIct_u appears).
2. Select Ad_'a*_c_,dA_dio, and then So_HvdF-vpa_vsinn. The following
options appear:
Chapter 4
Page 45

Msin9 tlhe I @nu Systet
Mono This should only be used when tile stereo signal is weaR,
Stereo Splits the inconling stereo audio signal into left and right
front chaT'reels.
The following options are availahle only if t;l_t/_gwiable Oz_t is set to I_a*'iable Lezel. 5)>(,ak_,r_0,_:
Off No SRS processing is applied to the audio.
$R$(O_
stage from stere() ntaterial, l_se the SRS FOCIIS adjttsmlent on the right to adjust the clarity.
Audi_a La*_g./Mode Lets you choose the deEmlt audio language/mode you want to hear fl.)r ATSC (digital 1_7)
programs. If the Audio hang.i Mode icon (_1) in the harmer lights, it ntems there is more thin one audio language/
mode available. The system automatically set.s the audio program to the default audio languageintode h-ore the mentt
when the channel you are viewing is a digital channel and the specified language is available f(>r that program.
Soi]]e programs can have audio mode available that can he heard hut that cannot be set as the deblult. To select and
hear those audk) modes, navigate to the "Change Audio" action button and select OK. or use the SO{ ND button on the
remote.
SRS Adds greater depth and stereo separation to stereo audio signals, l)elixers a panoramic 3-1) sound
Note: }bu can change the Az_dio Lang3 Mod_, temporari(i, lo pressing the SOF%D butto*_ 0*2the remote co*ztroL
(7)a_7<gi*7<gchan*Tels *w_.les_sll'_,Atldio Izt*7<q,'Mod<,back to the d(fazdt Audio La_Tg.iMode os*{gina/!l sek,cl+,d i*l the,
*77(',7,1
,gAP (Second Audio Program) \Xq_en turned o*t and available, Second Audio Program plays the analng program's
attdio in a second language. SAP is also used to broadcast a program's attdin with descriptions of the video for the visu-
ally intpaired. SAP might also contain audio which is totally unrelated to the vide().
Note: 57dPis broadca_st itz motzn atzd is on{F availabk,./hr ar_al¢4gprograms, tznt d{gital profirams
Startup Volume Select fl'_evolunte level that you want when the TV is
turned (m, then press the OK [)litton to activate the option. To deactivate
Startup Volume, access the menu and press OK.
Maximum Volume This feature is intended to stop the volume h:om being
turned up too loudly. Set the vohmte at the loudest level you would want
to hear. To hear Itow loud you're setting the volume, press and hold the OK
button.
Note: 5?artnp arzd Maximnm Volnrnes app,), (/'t.EvediVariable Ont is set
to {}lriable LeII('L .Sj)g,gg/eeFs ()n,
Fixed/Variable Out l)isplays a choi(e list that lets you turn rite T\,'s front
internal speaker_ on or off and set the Fixed'Variable audio output to a fixed
or variable vohl[lle outptlt level. The choices are:
SRS,SRSFocus, and ((0)) symbol are trademarks of SRSLabs, Inc.
SRSFocus Technology is incorporated under license from SRSLabs, Inc.
Page 46

Using the TV s I enu
DigitalAudio Out Allows you to output Dolby Digital sulTround sound, if
available, and ynu've connected a six-channel receiver to the _IW'sDIGFIAL
AUDIO ()UTPI. T jack with a digital optical cable. Choose Auto Select to
have the T\ choose between Dolby Digital and PCM Choose PCM if your
receiver is PCM only.
• Variable Level Speakers On Turns tile '15:'s froi'_t speakers 0_
and allows variable output iron] [h(' WV's FIXEI)iVARIABLE AUDIO
OI_TPIJT jacks. Use this setting if the rl%;is not connected to an audio
receiver or amplifier and the volume is controlled by the -IN.
• Variable Level, 37peakers Off Turns the TV's front speake> O_')'"
and allows variable output from the TV's FIXED/VARIABLE AI_DIO
()l TPUT jacks, lse this setting if the _IWis connected to an audio
receiver or amplifier and the voluine is controlled by the -[_,.
• Fixed Level, Speakers Off Turns the TV's fl-ont speake> QZ')'"
a[_d provides fixed output from the _l*:'s FIXE1)i\,ARIABLE A[DIO
()UTPUT jack to a receiver or amplifier. With the Fixed Output, the
_lW'svolmne control, graphic equalizer, arid mum are disabled. This
output is ideal when connecting to an audio receiver or amplifier that
has its own remote control tot controlling the vohllne.
DVIAudio Input Allows you to select the audio input you're using if
you've connected an HDMIiI)VI cable adapter to the ttDMI input. Select
from the inputs listed. Go to page 12 tor more intornlation.
Channel Setup Menu
The (Tbamzvl 5_.tup menu lets you find, add, alld delete channels, arid set
Par_'nta/ Controls, Iten'_s in the C])a*_z(.l g_.t_p n'_enu are: Lock Tt?g_zlock TI'.
C/:?a*_tzelSea_'ch, Cg_a*zm,lList, Udeo l_*pzct5'et_p A_k,a*zce(l .q_.tt/rtgs and
t_tremal Cn_ztrnL_.
Lock 7};/{ *zlnck TV, Chanm4 Ll_t. Vid¢.oh_[mt .Si_tztp,and I)arenml Comrol.s are
explained ill Chapter 3.
Channel Search
Engaging in a channel search tells the I%: to search tier all the TV channels
available through tile Antenna/Cable input. When tile TV finds ai'_active
channel, it places it in the channel list. hlactive channels (weak stations or
channels with i1o signal at all) aren't [)laced in the channel list.
Notes: Cbam_el &.arch l_',it_all optl'o*_ss¢./(.ct(.dtakc>s,Shineti_*zr,to
complete beea_se a// possibl, asmlog a_zd d{_ital cha*_zel._ are bei*_
seamhed.
You can still add a channel that was not found
by Channel Search. Clear any on-screen menus,
and tune to it by using the number buttons on
the remote. If the channel can be tuned, it will be
added to the channel list for that tuner.
Chapter 4
Page 47

Usin9 tlhe I @nu Nystet
Advanced Settings
T[3c _ ddl:'_lYlc_:d 5'_tti_l_s menu lets _o!1 set lip _hai_nel and Jt_pLIt k' fftlr('s, alld get
ii]or( _ IH_orI_l_ltloH _tbotlt _o!lr W\. It_'HIS ii3 the2 Adl_lH(ed St?tt_l'l_s I_l_'[]L] ar_': Allto
Tz_i_g, StaFtztp Cham_el, a_d Diag_osti( D_/b.
Auto Tuning Lets you specit_; the various devices you have connected to your
TV. It lets you progral-l/ a device, button on the tel-now control (SAT-A(JX or
DVI)) so that pmssi*'tg the button automatically turns on the TV and turns the ]%'
to the correct Video Input Channel (go to Chapter 3 ff)r detailed intommtion).
Startup Channel You can select the tuner ind cha[mel or input that your TV
tunes t(> each time the T\ is turned on b} plugging it back in.
l_'agnostic Dtfo l)ispla3s chann(A and cable inJ'ormati(m for T\, and cable
service p(,rsoi?H(!L
Setup Options Menu
The Setup option,s i1]ellLi lets you adjust items associated v,ith setting up your
T\. Items in the Set¢¢D ()ptior_s tlletltl are: C7osed cktptio_Hr_g, 77m( ]letzu. Quick
g?artz@, Assisted getup, lle_m Pr_¢[_re_ces, and Ach,cmced Optio_zs
Closed Captioning
YOu may set the t) p(' ot c/pti(mhag displayed. Chok('s _ itlfin the (7osed
(._!pt/(mi_g nwnu ar(': (Y_pti(m Dis_/cO'. A_alog (.?_pti(ms. [)_*jtal (.?_ptio_s and
(apti(m 5_1qe.
Caption Display
The (2tptio_z D_pl O' m_,nu displays a (hok:_, list that lets you (hoos_, wh_,n
closed captioning inR)rmatio*l is shown on the scax'n. IIDMI inputs awn't
SUl)ported by Closed Captioning (CC); try the' devk'Cs IIk'IlLI Svs[('lI/ for CC
options.
Oft Captionii_g il]fOlTiilatio/_ IS always sho\vI] v,h_'ll it's available on a
challilel or input.
Off No cal_ti(>ning intbrmltk)n is displayed.
On When _lguted Captioning inff)rmation is only shown when available
and the "l*:'s sound is muted. (To mute the sound, press the M(TE button
on the remote control and captioning infolTi'_lationwill appear on tile screen,
if available.)
Notes: Use the CC bzctto*v o_ the remow to toggh, (7C o*z a_vd off; Go to
tb(, remote s¢ctio_k/br mor_, i*{/brmation. C/)a_Ni_<q chan_els or D_puts
restores CC to the (hj2.m/t sr,ttin_
[/')'oz_ mr*u,d q(f the speakers in the Audio metro (Fixed Output,
Speake> Oil), CTosed C?tptio*ffng l_'o*_> appear when you press the MUTF
b_//'/'()tl ()?Z t]27(" re,_r}()/'_, el(,*l it,heir )'otl choose ()n whel/Muted
Page 48

Using the TV s I enu
Analog Captions
_%u can select a closed caption mode, which is the mode, or source, used for
displaying (aptioning in_ornmtion for analog channels or digital channels, if
available. Tile content of CC and _lk,xt are different: you can select which one
you xvailt to s('(- oi1 th(' ScR!eH,
CC l)isplays intormation at any position on the scl_en. It overlays the tuxt
on top of the picture as it is received.
Text Displays inf()rmation at one particular position (such as the/)ottoln
third) of the screen. You cannot see the picture underneath the text.
You can choose between eight closed caption modes:
• CC1 and Text 1 are file prima W caption and text services. The captioning or text is
displayed in the same language as the program's dialog.
• CC3 and Text 3 setwe as the pl_!t_?rred data channels. The captioning or text is often
a seconda U language translation, simplified English, or displayed at a slower rate.
• CC2 and CC4 and Text 2 and Text 4 alx_rarely available and broadcastelvs use them
only in special conditions, such as when (:(:1 and CC3 am not available, or "Ibxt 1
and 31,xt 3 are not awfilable.
Digital Captions
You can select a closed caption, service mode (1-6) fin- digital channels.
Service 1 and Se*wice 2 are tile primary and secondal T languages, respectively.
Serviee 3 and Sel_'iee 4, _, 6 are additional caption sources that may be available. Specific
label names may be displayed /e.g., SI)anish/instead of a generic label (e.g., Service 1), if
available.
Caption Style
Customize _los(,d captioning for tile digital captions by _hoosing the settings for tile R)llowing
options:
Note: (,'z_stom sett/r_gs oJ_/j,app O, 1od_qitcd cap/io*_s a*_d u'helv cap/io*_ co*_tm_/allozt,s it.
Caption Size is tile flint size (,5"ta*ldard, La*Se 5"mall) of the text char Icters.
Captioll Fol*l is a COlllplete assorttllellt of letters, [1Utlll)ers, pllliCtllatioll illal+kS etc. of a
given flint design. "_>tl can choose from a variety of flints (Ashley<*k Floridian>L etc.).
Note: A p*'c_]+,t_,graphic (7/tbe captio*v fi>m appears o*_the s+llgbtffitb_"sc*'een
Caption Color alloms you to choose tile font color: White, 131acb, Red, (;re_*%111_te,}t¢llo_#,
Maqem_. and Q)'gm.
Background Color allows you to choose the background color: White. l_lack. Red. Grt,et_.
l_hte, YH/ou'. .>Iage*_ld, and (,)'d*_.
"Monotype" isa trademark of Monotype Imaging, Inc. Registered in the U.S.Patent and Trademark Office and may be registered in certain other
jurisdictions.
"[Type" is a trademark of Monotype Imaging, Inc. and may be registered in certain jurisdictions.
"FIoridian", "Plate Gothic", and "Screen" are trademarks of The Monotype Corporation and may be registered in certain jurisdictions.
"Ashley" isa trademark of The Monotype Corporation registered in the U.S. Patent and Trademark Office and may be registered in certain other
jurisdictions.
Chapter 4
Page 49

Usin9 tlhe I @nu Systet
Background Opacity allows you to change tile see-through background options: Solid.
Tr_lt_,_i)dre!_L 7)'d_ISIlt( e_IL and Flasbi_g.
Caption Opacity allows you to change the see-through caption options: 5'olicL 7)w_zspare_t.
7)'a*_sluce*_t: and/'7ashis_g.
Time Menu
The 7)'tzle llR, nu k'ts you set up time-related _,'at!ll-L's, T/'tH( _ l'f'l(_nH consists of
_/eep 77tne_i Wake-_ _ Timer and 77me (f D(_(I,.
Sleep Tinter A one-time event that is used to set the _I_,: to turn off at a
spe( ific tin'_e,
Wake-Up Tinter [sed to turn the T\7 on and off at a specific time eve W
day of the week and tune to a specific channel or video input.
TimeofDay Enahles you to enter the correct tii_le nlanually. If you doll't
enter the time, it is acquired from the last tuned digital channe]. Make sure
you (he(k the time acquired is COITe(t,
Note: [/"I'oz¢enter the time mamtal{14 )'o_t mztst remember to set yo_tr
TV_ tlmv when lhe tim(, cha_es to Dao'l_ht 5_wit_t27)'my. Sleep _Iimer
at_d \Vake-I p Timer will t_otfi_t_ctiot_ as )'uzt expect if j,o_t,/i)_,t to
(:hart<gothe 7W_ time.
Quick Startup
The Q_i_k Startz_p menu is a power-sa_ing teature in your TV, If you choose
Enabk,, it will allow you to mrn on your TV taster than when disabk,d,
Assisted Setup
The Assisted Setup menus were covered in Chalxer 1, Go to page 15 for more
ii_orll]ation.
Menu Preferences
Menu Language Change to one of three languages: English, ,qpcmish or
Fre*zch. "Ihe menu language can also be selected when using the AssL_ted
.Setz_pmenu.
Color.Tlenu Select f[oin among four color,s (570 Blue, PUrest Gree*z. 14_sp-
bern% and lqz_ml to change the color of the menu system ai'_d banner.
Translucency You can change the translucency (see-flarough) level of the
menu screens. Adjust the slider hy using the lett and right arrow huttons.
Continues on next page...
Page 50

Using the TV s I enu
Advanced Options
Auto Oil ]J you Ios_ _ I)o_v_q to yOkll" T\'_ tkll_n this [(_attll-(_ on to have the' TV l)OX_(,i-(,(] oll
_or VOkl.
Multiple TVSetup This [_!atures allows you to control three different RCA TVs. 7his is
helpflfl if you have two or three RCA TVs near each other, and they also have this menu
option, but you want to control then1 independent of each other. Program a second RCA
"I_7to one of the device buttons (SAq -A{ X or I)VD) using the TV2 code 162. Select the
l_z2 option in that TV's l_¢mot_,5'_tz!p nlenu. If you have a third RCA T\, program a device
button using the JA,73code 163. Select the _I_/3 option in that TV's F,emote Setup menu. Go
to Chapter 2 for more information on programming your remote.
Chapter 4
Page 51

Frequently Asked Questions (FAQs)
Why does my TV take so k_ng to turn on?
Qzdcte g?artup is a power-saving f_'ature in your T\:. Select either enable or disable which ever option is best for von.
Enabling Qu/c,¢.%'artz_ allows yon to turn on the "IW faster than if disabled. Kee I) in mind, if you disable Qlticl_.qtarlzlp
it adds approxinlately 30 seconds to your _I_7's turn on time.
What's the quickest way to view High Definition (HD) video?
Connect an o[_-air lntenna to the ANTENNA CABLE INPIT to view tree local digital channels. 5%u might need to
purchase all antcmna. Go to page 8 for more intk}rn]ation.
How do I tell an analog channel from a digital channel?
There are several different ways to tell if your channel is digital or not. Press the INFO button to display the channel
banner. Look at the left corner for a channel infl)rmation. Channels displaying a D, prima W channel, and a subchannel
are digital channels (not all digital channels have subchannels). Channels displaying an A, are analog. Go to page 31 tor
nlore illtornlati(}n.
Wily does channel search find a lot of channels, but when I try to tune to them there's nothing there?
Sortie channels are enabled by the cable company that don't canT progralnnlii'tg, snch as vi(leo-on-denland, Whei't
channels are unavailable, your TV's screen displays IX@c_kot*,_n S{g_ml. ?2_u probably want to get rid of these so they
no longer appear in your channel list. Remove these in the C'ba*_lel Setltp metal Go to page 37 for more intkmnation.
Why does the first channel search take a long time?
If you've checked e:lcI/ box in the chamlel search menu the T\,' is looking for all available dmnnels in the _hannel list.
If you do have digital channels, the TV is also searching for each subchannel of that digital channel.
How do I control other devices I've connected to the TV?
Because yoln" TV came with a ilniversal renlote, yo!l can progranl vonr renlote to the blattOll correspollding with the
(I_'vi¢_.' y(/ll have ¢onnect_'d to y(/in- WV, (_o 1o page 23 lot infornlation (11) prognlnnqqing y(/in- re[note,
Wily do I have sound, but 11o picture when I turn on lny TV?
There is a lamp inside the TV whidl needs approximately one minute to reach filll brightness. You'll hear audio during
this time and the picture increasingly gets brighter as the lamp warms up.
Why are there bars on lily screen and can I get rid of them?
Analog channels are sent in a 4 x 3 flmnat, which cannot fill a t6 x 9 screen like your TV. Most digital channels are
sent in a 16 x 9 tonllat which do fill your screen, btlt sonletimes are sent in 4 x 3. It depends on how the station or
device connected to your TV is flmnatting the video. Press the ZOOM +/- button to see the different fl>rmats available
that n/av eliminate the bars. Go to page 42 for n/ore infk}nnation on screen format.
Page 52

O lhelr I nfolrl ation
Troubleshooting
Most prol)lems you encounter with your TV can be corrected by consulting the following troubleshooting list.
TVProl / m
TV won't turn on
Press the: TV button or ON OI'F button \_hilt l'cmotc is in T\ mode md there's k sotu'cc o[ power to the outlet or (/utlct strip.
Make: sure tl>-:TV is plugged in
_\>u might hkve tried to turn on the: TV during the lamp cool do\_ n Wait k f_-:wmoments md the pictur_-:_ill appear.
[{is thv: po\ver light on the front of the TV b_-:en blinking t_)r one minute? If so. the lamp *nay be ok-:td. l,'efi_qto the Poz_'_?ri_Ji(:ator
i:,blit_ki_J<qorJla._-hi.<<_ection belov, [_>lmor_-:inf_>rmation
Wl>-:n you first plug your TV into an outlet, tl>-:Po_ _-:rindicat< n on tl>-:fi_>nt pan_-:l will light and blink tor apploximately 30 seconds
and then go oft dming the initi dizatkm of the TV. This h tppens only when tl>-:TV is mlplugged and phlgged bkck in. The "IX can
onl 3 be turned on after the Po\_er indicator goes off
Check the v,all receptacle (or extension cord) to m kk_-:stue it is "live" by phlgging in something else. such as a lamp.
Something might be \_tong with your remote control Press tl>-: POWER button on the f_ont of fl_e TV. If the TV turns on, cl>-:ck the
lemote control solutio_-ls on page q4
.!lldtipk_ "FV,\(#_@ might be set to the wrong option. Press MENU/OK on the fl'ont pmel. Select ,\_.l_q_Optio_Ls, then Ad_'(ln(:c*l
O/dlo_/',. then IJz*i/ilak! 71/ V(#f@ Choose 71_(J(j}/_tit)
Power indicator is blinking or flashing
l[ the light blinks 5 times, pauses, and 1)links again 5 filncs, the lamp is hying _) ruin on If the TV do_:sn't mrn on <lhcr 5 minutes and
then the light blinks steadily for one minut% one of tl>-: f_>llowing options is possil)k-::
I_lmp door rely be open. Face the back of th_ TV. Locate the door at the bottom of the TV and close it. Turn off the TV and turn
back on The lamp shoukt mrn on
I.amp may be dead. Go to p_ge 56 R)I"lnnp replacemem inR)rmatkm.
Buttons don't work
If _<)u're using the remote: control, plcss the TV butt_>n fi_st t_) mal<c sure the _cmotc is in TV mode
The front panel _-onm>Is l_r I_"Io¢k_--'d(disabk'd) 1]SCthe _cl'notc c_mtrol to malock the fi:ont panel ¢ontrols by selecting the t7,'_>1_
Unphlg the TV tot tive minutes and then plug it back in Tmn the TV on and try again
TV turns off while playing
Sleep Til-n_ or Wake Up Til-nc_ rely haxc bccn a_tivatcd Go to page _9 fk_linstructions.
Electronic protection circui_ may have been activated because: of a power sul._e: Wait 30 seconds and then mrn on again If this
happens fiequently, the volt _ge in your house m_y I>e abnormally high or Io\_
Unplug Wait five minutes Phlg in again
TV turns on unexpectedly
\Vakc Up Timcl may have bccn _ctivatcd Go to pag,c q9 tot insnuctions
Video and audio are out of sync
If you'\c Connected a device, such as a I)VI) playcq, to your TV's Video jack, and to m audio rcccix cr using the audio jacks. _r<_ ]_"
experience a slight delay betx_een the audio heard and the video seen Connect the DVI) player to th_ TV's Audio jacks, then use tile
TV's FIXEI)iVARIABLE AUI)IO OUTPUT jacks to connect to an audio receiver
If your TV is connected to an audio/video (A/V) receiver or home theatre system via the I)IGIT-_L AUI)IO Ol ][' jack. iead the tk)llowing
information.
Continues on next page...
Page 53

O lhelr I lnfQirl at @ln
If you've connected a doric( to yore AV recciw:r, such as a DVD play_:r or satellite r_:c_:iwr, you may c_pcriencc i slight &:lay
I)_t\\r_%'n 113__ :ILl(I](>heard md the video sccn This occurs because the digital audio is sent directly to th_ _ spc_kl.TS \_hik' the video
nmst 1)c processed inskk the TV I>:f_)l'c it is displayed
If the ch:vke has Compon_:nt Vkteo CY, Pb, Pr) ja_-ks, connect these lacks to the _l*-'s Y, Pb, Pr jacks to minimize the: discrepancy This
works best if the device supports Progressive Scan techno]ogy
If necessary, 3ou can connect the &_:vice directl 3 to the TV using I.iR audio jacks and bypassing the AiV receivel or 3ou can program
an audio delky in the A/V receiver so the audio and video match up (not all audio equipment has the ability to pro)gram delays).
Check the AudioiVich_:o Receiver's manual.
Blank screen
Mike sur_ you have _onnc_tcd th_ clcvkc to th_ TV col'rc_tly.
Mike sur_ the ckvkc _onncct_d to the TV is turned on and tuned to the _oncspondin_. Video Input Channel
TIy another channel, or press the INPUT button.
When you first turn of I your TV, the screen iades ilom bkle to black Once the screen goes black, the TV's int_-:rnal lamp starts its
cool do\_n cycle If you try to turn on tl_e _1_"during the cool<k)x_ n cycle, the _1_"turns back on and you'll hear at_dio, but the picture
\rill take i {bxv moments to be displayed.
Unusual sound quality
Check if SAP is turned on
Check that the A_dio La_/Mod_' or ';AP is set to your language.
Humming or buzzing noise
The-"TV is in its lamp cool<k)_ n (_.'(Ic'. To prolong the liic <>1tl>-:TV's lamp syst_:m tl>-: TV must _r_ll'l__}I__Cl _OO1do\_ n pr_)p_:rly.
52Xl may notice additional noise during these cycles
Maybe the speakers are turned off Check the FIXFI)i_211_IAt;LE 0[7' control panel in the A_dio metal
No picture, sound okay
If the indk _tor on the front (>1the TV is blinking fin"one minute the lamp inside (>1your TV may need to 1)c d_angc<]. Refer to the
Poz_'_?rindha/or i_,bli_,le&_ <>r,/l_:,l_h{gsection <)n the previous page fl>rmore int_>rmation.
3_)tl might h_ve tried to turn on the TV during lamp cool<k>_ n. \Mfit a fL'w moments and the picture will be displayed.
No sound, picture okay
3day])c' the SOUl-l(_ is l-l'_klt_%t. TI'_ i>l'__'ssil'lg the' v(>IUl_C tlp ])[lttol2 t(> l'_'st(>l'_" _oklnct
Maybe the spcak_-'rs arcturn_:d off in the A_dio menu. Chc_-k the-"F/XI_I) U_IRIAt_I.EOt'Tcontrol pan_-d in the-"A</z'<m_,d Al_(/io menu.
If using an S-Video. component or composite video connection, remember to dso connect the device's L and R A[]I)IO OI]T jacks to
the TV's L and R INPI T jacks.
Check the .gk_xim_*m _q>h_meand S[_wt_g>l&k*me' _ettings in the Arh_mc_,d Az_dio menu.
Channel search finds few channels
The _ablc _-onnc_-tcd to the CAI_I.E ANTENNA INPUT jack might 1)c loose
Your oft air antenna might be getting a weak signal Move it highel or get a bigger antenna
Select all the options in the <>an_u/Se_lrcb menu. and ret W channel search
Can't select certain channel
May bc blocked or not approved in the t4_r_H_/(,o_flroL_ mcntl
If using a VCR, check to make sure the TV,VCR button on the VCR is in the correct mode (press the _I_'iVCR or INPUT button on
yotu VCR).
_)tl usually cm't chmge channels _ he:n a menu is on the screen (ple_s the: CLEAR butt(>n/
Chapter .5
Page 54

O lhelr I nfolrl ation
Noisy stereo reception
May bc a weak station. ! sc ,'l_dio menu to choose Mo_o sound.
No picture, no sound but TV is on
The dmnncl n-fight 1)c blank change dmnncls
If you're watching your VCR and it's connected with co _xial cablt: to the (ABLE/ANTENNA jkck, tune the TV to channel 3 or 4
(whichever channel is selected on the: .5/4 switdl on the buck of youl VCRL Also check to make sure: the TViVCR button on the VCR
is in the correct motto (press the T\ \CI,' button (In)our V(R)
If a channel doesn't exist and you tune to sc:laml)led QAM channel, _.t_'ak or :\_ ,\_¢(11 appe: u_.
Sound okay, picture poor
('hcc:k antenna and video connections. \lkke sulc all of the: <ablcs ale firmly _onnc_te:d to the jkcks and thcy'l"c not danmgcd.
Try adiusting sharpness f\mction to lmplove vveak sign fls Go to page 41 t_)r more instructions
Press the ZOOM+ buttons repeatedly to vie\v the pictule in diftcrent video t_)rmats. Andog channels may look better \_hen you use
the Nonnfl video fi_rmat (the video t_)rmat appears on the right side of the channel banner)
Black box appears on the screen
Closed _aptioning n-fight l)c on. Ch_:d_ the (,?lption Di_TJla), control panel in the: ,_('t_t/_O/>/io_> and (,?'os(,Hdap/ionitt_ menu Go to
p_ge 47 lor more instructions.
Problems with HDMI Connection
Make sure the: HI)MI or DVI device is turned on and the: cables are firmly connected If prol)lems still occur, turn off you1 device. Re
connect 3our device. Reset the power by unplugging the po',_er cord and plugging it back in.
If 3ou are tuned to an t tDMI input md you're receiving _i'bak or,\b S{gnal message on-screen, press the INFO button on the remote,
If A(q_id_ C_ann(_/appear_ in the channel banner¸ the t tDMI or DVI device isn't responding. Contact the manu_cturer of the
H[)MI o1 I)VI device _r further assistanc:e.
If you tune to the ttl)MI input and you see s]_()_ r. the video goes in and out. or the video takes a long time to appear, your ttl)MI or
I)_,q device is having trouble s_-:nding video inflmnation to _he _IY 1,_e connect your device¸ Reset the power by unplu_4ing the power
cord and plu_ing it back in Contact the n_anut_cturer of the ttDMI or I)VI device t_)r fflrther assistance.
The Remote Control Doesn't Work
Something n'fight l)c bctwce:n the rclnotc and the rcmot_ sc'nsor on the dcxic:c \lake sure thole is I c:Icm" path
\la)bc the Iclnotc isn't aimed dilc'ctly at the dcxic:_ that youhc trying to (>pcratc.
\la_l)c _cm(>tc is n(>t in TV M(>ct_ Press the TV button so the rcmot_ operates the TV
\la3be batteries in remote arc v_'t'ak, dt.H(L ol inst _llcd intorlcc:tly If batteries mc \_e tl¢. you \Gll not I>-: al)lc to ac:ti\ ate baddighting
on the remote; instead, bat\light will l)link once \vhen activated Put new batteries in the iemote Note. if you remove the batteries.
you may have to reproglam th( remote 1o operate other dcvic:es
Mi¢ltlph. 7'V¢etW_ might b_ set to the \_rong option. Press MENU/OK on the front panel Select ¢_,tz¢/_Option>. then A&'gl_ced
0/>1io*;_, then MTH/ip/( 7V Veh@. Choose 7Y ((hJ_7_dt).
Problems with V-Chip/Parental Controls
The rating limits don't work
5_)tl must lod_ the settings. Go to the Mahz ,II(_ (press MENU on _oul lcmotc), select (,;{_a_z_ / &t_q; then Prtl_'_t(t/_(nztr(,L. (plcss
3 (>n _(>ur remote), and sclcc't LocL, TV(prcss 1 on your remote).
I don't remember my password and I want to unlock the IV
If you tk>rgct your password, put the remote in TV lnodc. Simultaneously picss and hold MI:NU OK on the television and V()I. down
on the iemote fi)r 3 seconds. Nothing appears on tile screen, Parental Controls simply unlock and you can re enter a password via
Lock 7'K
Continues on next page...
Page 55

O lhelr I nfQirl at @n
The V-Chip won't let me watch a program even though it's not rated as violent.
Maybe the movie was given m NI,' (Not R ktcd) status. \fter you l)lod_ movk' ratings you must set VC_i/_ [*_r_t/_,r] to \ic\_ sop mtte:ly
in older to view moxics \_ith an NR rating.
What Else Can I Do?
If you've been through the Troubleshooting section and noticing has fixed your problem, tl3" rebooting your _l_r. Note that
at}er a reboot yotl may need to FLII'=yOtll- TV throtlgh the settlp pl'o(ess again, To do a reboot, nnpfilg the poxver cord [l'onl
the wall outlet, power strip, etc, Keep your "I*/unphlgged fi)r about 5 minutes, Then plug the I_,,' back in, turn on the _IW,
and see if the pl-oblem is fixed, If the D-oblem remains, then please visit www,rea,comitelevision t_>rupdated t{AQs or
contact RCA Customer Support at the suppolt number pl-ovided ill your Warranty under Itnz; 7b (k,t ,S'_,*'_,'ic_?
Chap_:er ,5
Page 56

@ lhelr I lnfolrl atioln
Lamp Replacement Information
Replacing the Lamp Unit
Your TV's source of light comes lrom a lamp - similar to lamps used in film or front projectors. Although this lamp is long-
lasting, it may need to be replaced eventually.
When to replace the lamp
YOUprobably need a new lamp if there's no picture, but you still can hear tlle audio and the [)<_re f light on tlle h-ont of tile
rlS; does the t_)llowing: blinks 5 times, pauses, blinks 5 times again. If the _1%:doesn't turn on at}er 5 minutes and then the
light blinks steadily t_)r one i-ninnte, the lamp may be dead. If you have any concerns. [)lease contact us at 1-866-723-6486
or call an authorized servicer in your area.
Note: The same symptoms occur if the lamp unit isn't seated correctly or lamp access door is ajar. If you
have recently accessed the lamp, make sure the lamp access door is completely closed and the lamp unit is
seated correctly.
What to do
Tile lamp has been designed to make installation as easy as possible, but if you don't lktllow tile directions, there is a risk of
injuu.
• You uan easily replace tile lamp yourself by lk)l/owing the instructions that uome packed with the new lamp. If your J_'
is still covered by the warranty, call 1-866-723-6486 to receive troublesh(_oting assistaHce and a lamp replacement.
• If your _l*_'swarranty has expired. <:all 1-800-338-03% to purchase a lamp replacement. If you are not comfoltable
replacing the lamp yourself, ca// 1-866-723-6486 and we will rel_.q-you to a selwice person who will replace the/al-np for
you. There will be a set. ice tee.
This symbol indicates that the lamp ill the HDT_ contains mercuQ'. Special disposal of the lamp tot
®
EXAMPLE: Service
Model Number
sticker with lamp
type listed.
environmental reasons may be required under tile laws applicable to your jurisdiction. For disposal or recycling
inl_>rmatinn, please contact your local authorities or tile Electronic Industries Alliance: www.eiae.org or call
1-800-338-0376 tor more details.
Service Model Number
Sticker location with
Lamp Type
"What you'll need to get started:
To order the colxect lanl[), yoll'll need to k[_ow yotlr "IA."StIlodel n//nlber, serial nLltIlbeE
and lamp type--this inff)rmation is listed on the Sel_'ice Model Numl)er sticker (example
of the sticker is shown at left). To locate the sticker, face the back of the T\,. The sticker
is located on the right side of tile _1%7/see picture below lor sticker location).
• Follow the replacement instructions that come packed xvith tile new lamp.
Page 57

O her ln rm @n
HDTV Specifications*
Tuning Capability Oh:rand _l\ming .......................................................................... NTSCiAT_,C/64 QAM 256 QAM
Digital CaNe {£OmlmtiNlity. ....................................................... QA\I, HD\IId)Sq, Component
Video 3:2 Pull Do\x n ............................................................................ 5\'s
16 _ 9 4 _ 3 D_rmat Conm_l (Screen) .................................... 5\_s
_<]:lt )tixe Vide< _ N<fi>e R_-'dtktion .............................................. _\'s
Adju>taNe Color T_-unpcratuw. .................................................. 5\'s
Adju _tal _le ]'icmrc C(,ntn >I......................................................... 5\-s
Aut_ CoMr Conux_l.................................................................... "_\'s
('(mib Hlter ................................................................................ Digital Frame ('onib (313 YC)
Optinlum Contrast, fligh Rt_,(>lutMn Screen ............................. _\'s
Green Enhance .......................................................................... Om Off
Hybrid h-'n> System .................................................................. _\>
l'ioure Pres_:ts ...................................... 5\-s
Light Engine Type ............................................. I)I,P Light Engine
\Eqlkvd Viex\ing Angh-* (Alpha \) ....................... 20
Ilon×(q-ltal Rc>olution @icturc xX'idth) ...................................... 1280
H_>fi/_ >ntal Viewing :\n_,k* (Alpha H). .................... _0
Sound Audio l'tw¢cr (\Vatt_,) 1"1_>nt Spcukcrs ........................................ 10 \'¢att>i(_halmCl
N,und Presets Mode .................................................................. } plus Personal
Full l,'ange I'lxw_t Speaker:- .................................... 2
(',raphic Equalizer ...................................................................... 7 band
S_-'c_wld Audio Pr(,granl (%-\P) ................................................... _\>
S_>und Logic Audio Levdcr ...................................................... 5\'s
Sl,'S ............................................................................... _\>
Convenience Aut. Channel S_-':lrd_ ................................. 5\'s
Muhilingual ()n_l'uL'n l)iN_lay ................................................. English, Fwn_h, Spani_,h
Auto Timing ............................................................................... 5\'s
Cl(mcd Captioning ...................................................................... _nzdog & Digital
Front Button Illod_ .................................................................... 5\'s
('ommcwial Skip ........................................................................ 5\'s (availaNe on ccl_ain models/.
]hlwntal Conm)l with USA & Canada VChip ........................... _\>
l'icml\* Memo W Pl\'_cts flu Video Inputs ................................. 5\'s (Individual \lcnioly)
('lod_ (I'imcl, Sleep and \\hk_-" 17p Timers ............................... 5\'s
Front Panel stc.,c<,Itcadphone Jack............................................................. £qlllltl Ntcl\'O _linija&
Side A/V lnpm ........................................................................... O mq-_,_itc and &Vide,)
Back Panel (.,m,p,,sit_: and S video A/V Inputs ..................... 2
(.Oll-l[)onzqlt vid_(_ _ i_l_)>,ciln v,'ilh ._Lltod_.'R'ct ....................... 2
Al_tcnnaiCaNc Inputs ................................................................ 1 RF
HI)MI DVI Input (\Qth .MIdio Input menu seh:,_tion)............. 2
Digital Audi_ ( )uq lut _()tlfica D ................................................. 1
Fixed or \hriaNc Ml(lio Output> .............................................. I _eL menu sxQtChal)le
_qx_cifications ar__ subjeCt I*_ d_au,_c
Chapter 5
Page 58

@ lhelr I nfolrl ation
Limited Warranty
What your warranty covers:
• Det_.-cts in materials or workn/anship to tile first consun/er [)nrchaser.
For how long after your purchase:
• One year from date of purchase for labor charges excluding labor charges for replacement of tile lmnp unit. At our
option we will either pay an Authorized RCA Selwice Center tile lab(>r t(> repair your television or replace your television
with a new or refurl)ished ullit.
• One year from date of purdmse for pints. At our option we will either supply new or reRIrbished pints to all Authorized
RCA Set'rice Center [or them to repair your television or replace your television with a new or refllrbished unit.
• One year from date of purchase for the original lan/p unit. At our option we will exchange a dell.clive lamp unit with
a new or refurbished lanlp unit at i1o chaqge to you. Labor chaEaes fur tile replacenleut of tile lanlp unit at-<'your
responsibility and are not covered under this warranty. The lamp unit is user-replaceable.
The warranty period t_yrrental begins with the fil>t rental or 45 days fronl tile date of shipment to tile rental firnl, whichever
conies first.
What your warranty does not cover:
• Customer instruction. (Your Owner's Manual describes how to install, adjust, and operate your unit.
• Installation and related adjustments.
• l)amage resulting fl'om non-approved installation methods.
• Signal reception problems not caused by your unit.
• Dan/age Iron/ n/isuse or neglect.
• Batteries.
• Labor to replace the light engine and lamp assembly alier one year from the date of purchase,
• A television that has been ln{}dified or incorporat_.d into ()tiler products or is used [))r institutional or (>tiler cotnmercial
purposes.
• A unit purchased or setsicecl outside the I..S.A.
• Acts of nature, such as but not limited to lightning dan/age.
• Special, incidental or consequential damages.
How you get service:
• (:all 1-877-RCA-HD'IV and have your unit's date of purchase and nlodeliserial number ready.
• A representafive will troubleshoot your prublem uver the phone.
• If the representa0ve determines that you should receive setwice, they will provide you with tile namels! of the
Authorized Service Center in your aret.
• Contact tile Seta'ice Center and arrange service. If your unit is located within the geographic territory covered by an
Authorized Service Center, the Authorized Service Center will either arrange [or set_'ice to be performed in your honle
or for pick-up and r*'turn service to enable the Authorized Service Center to pertk>rm setwice at the Authorized Sel_ice
Center. If your unit is not located within the geographic territoly covered by an Authorized Set¢qce Center, you tuust
take your iAni[tOtile Sel_'ice Center location at your (/_,¥nexpeuse, or pay for tile cost tile Service Center nlay chalge to
tratqspolt your unit 1o and [rotu }x)ur hont( _.
• Proof of purchase in tile I2)rm of a bill of sale or receipted invoice which is evidence that tile product is within tile
warranty period l'flust be presented to obtain ;varranty sel_'ice. Pot rental tim/s, proof of first rental is also r_'quire(].
Product Registration.*
• Please con/plete and n/all the Product Registration Card packed with your TV ur register on-line at
www.rca.cnnlitelevision. It will make it easier to contact you should it ever be necessmy. The rettlrn of tile card is not
re(luired IkyI"warranty coverage.
Page 59

O lhelr I lnfQirl at @ln
Limitation of Warranty:
• THE WARRANTY STATED ABOVE IS THE ONLY WARRANTY APPLICABLE TO THIS PRODUCT. NO VERBAL OR
WRITTEN INFORMATION GIVEN BY TTE TECHNOLOGY, INC., ITS AGENTS OR EMPLOYEES SHALL CREATE A
GUARANTY OR IN ANY WAY INCREASE OR MODIFY THE SCOPE OF THIS WARRANTY.
• REPAIR OR REPLACEMENT AS PROVIDED UNDER THIS WARRANTY IS THE EXCLUSIVE REMEDY OF THE
CONSUMER. TTE TECHNOLOGY, INC. SHALL NOT BE LIABLE FOR SPECIAL, INCIDENTAL OR CONSEQUENTIAL
DAMAGES RESULTING FROM THE USE OF THIS PRODUCT OR ARISING OUT OF ANY BREACH OF ANY EXPRESS
OR IMPLIED WARRANTY ON THIS PRODUCT. THIS DISCLALMER OF WARRANTIES AND LIMITED WARRANTY
ARE GOVERNED BY THE LAWS OF THE STATE OF INDIANA. EXCEPT TO THE EXTENT PROHIBITED BY
APPLICABLE LAW, ANY LMPLIED WARRANTY OF MERCHANTABILITY OR FITNESS FOR A PARTICATIAR PURPOSE
ON THIS PRODUCT IS LIMITED TO THE APPLICABLE WARRANTY AND WARRANTY PERIOD SET FORTH ABOVE.
How State Law relates to warranty..
• Some statos do not allow the exchlsion i'to[ limitation of incid_'ntal or COi_S_'([!lential dalllag_!s, Ol-limitations on how
long an implied \ValTaFIry lasts, So the abow' limitations o1-exclusions may ///)[ apply to you.
• This warranty gives you specific legal rights, and you also may have orhel7 rights that va W Dora stare to state.
If you purchased your unR outside the UnRed States or seek warranty coverage outside the UnRed States:
• This warranty does not apply. Contact your dealer fol- warranty illh)rmatioll.
Service calls which do not involve defective materials or workmanship are not covered by this warranty. Costs
of such service calls are the sole responsibility of the purchaser.
Chapter .5
Page 60

@ lhelr I nfolrl ation
Care and Cleaning
CAUTION: Turn OFF your TV before cleaning.
You can clean tile T\, as required, using a soft lint-free cloth. Be sore to occasionally dust tile ventilation slots in the cabinet
to hel I) asstlre adequate ventilation.
The _12r'sscreen may be cleaned with a so]t, lint-free cloth as well. Take care not to scratch or mar the screen. If necessa W,
you lnay use a cloth dampened with warm water.
Never use strong cleaning agents, such as ammonia-based cleaners, or abrasive powder. These types of cleaners will dain-
age the "IN_.
While cleaning do not spray liquid directly on the screen, or allow liquid to mn down the screen and inside the _IW.Also,
avoid placing drinks or vases with water on top of the _IA'.This could increase the risk of fire or shock hazard or damage to
tile 1%/.
FCC Information
This equipment has been tested and fk)tlnd to comply with tile limits fk>ra Class B digital device, pursuant to Pal] 15 of
the FCC Rules. These limits are designed to provide reasonable protection against Ilarmful interference in a residential
installation. This ecluipment generates, uses, and can radiate radio frequency enel_y and, if not installed and used in
a(cordance with tile instlTtlctions, inav cause hal'n_ful iliR'r[_'ren( e to radio (onlnRinications. }towever, there is no guarantee
that inter[erence will not occur in a particular installation. If this equil)ment does cause harmful interference to radio or
television receptkm, whi(h cai1 be determined by tllrning the eqoipine[lt ()['["and on, tile user is eJlcouraged to try to corr_<t
tile ]nterf('re//ce by ()lie or lnore of the following n/eastlres:
• Reorient or relocate tile receiving anR, nn 1.
• Increase the separation between the equipment and receiver.
• Connect the equipment into an outlet on a circuit different from that to which the receiver is connected.
• ( onsult the dealer or an experienced radioil_i mchnician ]or help.
This Class B digital apparatus complies with Canadian ICES-003
Page 61

This page left intentionally blank.
Page 62

Thispageleftintentionallyblank.
Page 63

Thispageleftintentionallyblank.
Page 64

Manufactured under license from Dolby Laboratories.
"Dolby" and the double-D symbol are registered trademarks of Dolby Laboratories.
Visit the RCA website at www.rca.com/television
Please do not send any products to the Indianapolis address listed in this manual or on the carton. This will only
add delays in service for your product.
TTE Technology, Inc.
101 West 103rd Street
Indianapolis, IN 46290
@2007 TTE Technology, inc.
RCA and associated marks are trademarks of THOMSON S.A. used
under license to TTE Corporation.
Printed in USA
Part Number 72-T199727-540
 Loading...