

Page 1
C O L O R T V
USER'S
GUIDE
50%
RECYCLED PAPER
MINIMUM 20% POST CONSUMER
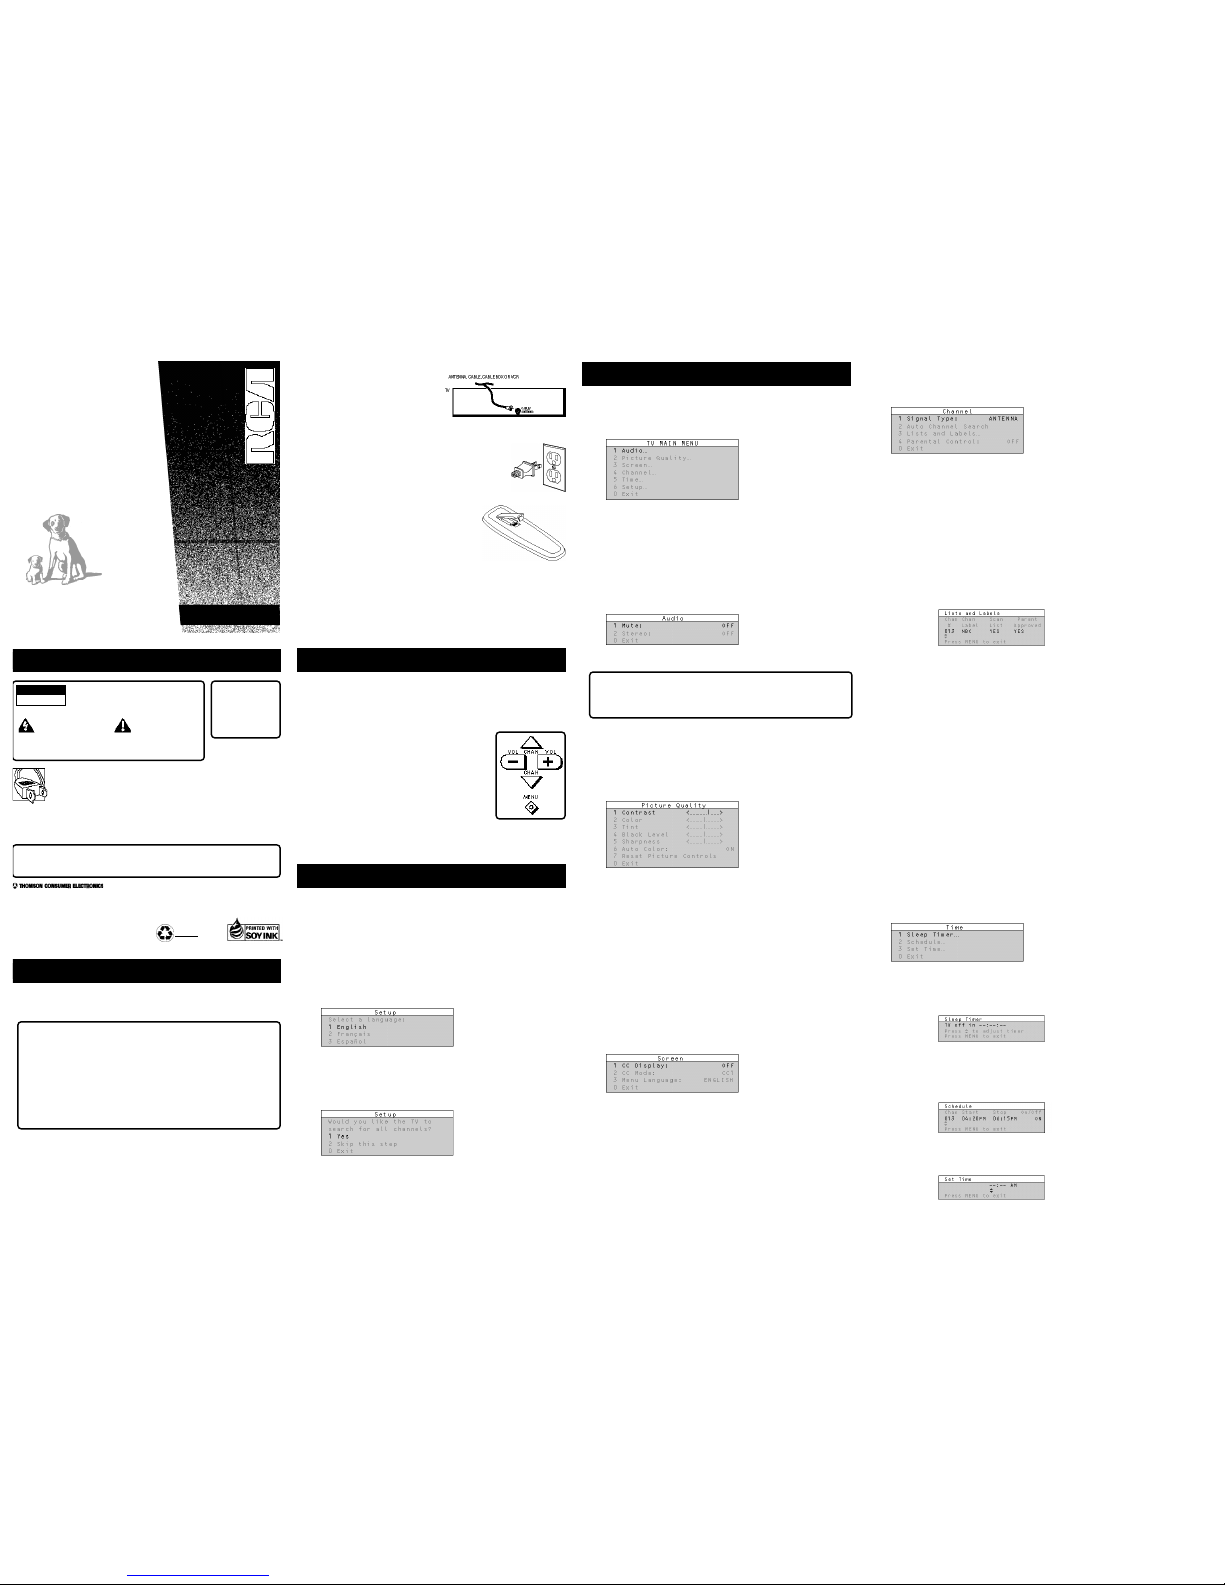
4. Tour of the Menu System
TV Main Menu
The Main menu is your gateway to controlling the TV. It lets you adjust the
TV's audio, picture quality, sc reen, time func tions and channe l settings.
To select any oth er menu item:
1. Press MENU to br ing up the TV's Main me nu.
2. Point to any menu item by pr essing the up and down arrows until the
item is high lighted in gre en.
3. Press MENU to select the it em and a new menu comes up.
To exit any menu s creen, point to Exit and press MENU, or press CL EAR.
The Audio menu
The Audio menu le ts you adjust the way the TV sounds.
Mute Turns off the TV's sound. Press MENU to tog gle the Mute featur e
between ON and OF F.
XS Stereo - An in novative method for providing stereo s ound effect
The sound deli vered by your te levision is XS Ste reo. This patente d process
suppresses noise, restores the dynamic ra nge and electron ically expands the
stereo signa l to create a mo re spacious so und effect.
Stereo Press MENU t o toggle the Ster eo feature betw een ON and OFF.
On Sou nd is reproduced in stereo or mon o, whichever is being broadcast.
Off Sound is reproduced in mono .
The Picture Quality Menu
The Picture Quality menu contai ns the controls that adjust the TV' s picture.
There are f ive slider cont rols for adjus ting the way the picture looks . Use the
left and rig ht arrow buttons to adjust the c ontrols.
Contrast Adjusts the difference between light a nd dark areas of the picture.
Color Adjusts the r ichness of the co lor.
Tint Adjusts th e balance betwe en the red and green levels.
Black Level Adjusts the brightness of the p icture.
Sharpness Ad justs the crisp ness of edges in the picture.
Auto Color Displays the cur rent setting (ON or OFF). This feature
automatically corrects the c olor of the pic ture. Select Off if you prefer to
adjust the p icture with the Picture Contro ls. Use the MEN U button to tog gle
between the cho ices.
Reset Pictu re Controls Resets the picture control s to their origi nal settings.
The Screen Menu
The Screen menu contains th e controls that let you adjust t he Closed-Capti on
mode, Closed -Caption display and menu langu age.
Closed-Captio n Display Displays a choice lis t that lets you c hoose the way
closed capti oning informatio n is shown on th e screen. Use th e MENU button
to toggle be tween the choices .
Off No captio ning information displayed.
On Cap tioning informa tion shown always , when availabl e.
On When Sound i s Muted Displays cap tioning informati on, when
available, whe never you press the MUTE button. The ca ptioning
information i s not displaye d when the sound is not muted.
Closed-Captio n Mode Displays a choic e list that lets y ou choose which
captioning mo de is used for displaying cap tioning informa tion. Use the
MENU button t o toggle between the choices: CC1 and CC2.
Menu Language Lets you select the langu age of your cho ice: English,
French or Sp anish. Use the MENU button to toggle between the choic es.
The Channel Menu
The Channel m enu contains al l the commands us ed to control y our channels,
including c ustom-building yo ur channel list a nd setting pare ntal controls.
Signal Type Displays a cho ice list that lets y ou select the curr ent antenna
type.
Antenna Choose this i f you are curr ently using an of f-air antenna f or
UHF/VHF TV signals.
Cable TV C hoose this if you are currently usin g cable or a cable box for
TV signals.
Auto Channel Se arch Displays a co ntrol panel that le ts you tell the TV t o
search automa tically for all the channels av ailable through the antenna input .
When the TV fin ds an active chan nel, it places it in the channel lis t; inactive
channels (wea k stations or channels with no si gnal at all) wil l be removed
from the chan nel list.
Lists and La bels Display s a control pa nel that lets y ou custom-build your
channel scan li st, choose a four-cha racter label for ea ch channel, and dec ide
whether each cha nnel is “parent-appr oved.” Use the up, down , left and right
arrows to en ter settings an d create labels . Press MENU to ex it.
Chan # Use the u p and down arro ws to scroll up and down throug h the
channel scan li st. You can enter the chann el number directly using the
number button s.
Chan Labels Use the up and down arrows to enter a four-character la bel
for each channel.
Scan List Only the channels includ ed in the Scan lis t are availabl e when
you scan up and down using t he CHAN buttons. Use the up and down
arrows to in dicate whether t he channel number indicated is inc luded
(YES) or is n ot included (NO ) in the chann el scan list.
Parent Approve d Use the up and down arrows to ch oose whether the
channel indic ated should be shown when the Pa rental Control fe ature is
turned on. Se lect YES to indica te that the channel can be shown at any
time, regar dless of whether Parental Control is turned on. S elect NO to
indicate tha t the front pan el cannot tune to that channel whe n Parental
Control is t urned on. Importan t: You must tur n the Parental Con trol
feature ON in the Parental C ontrol control panel.
Parental Cont rol Dis plays a choice list that lets you adjust the Pare ntal
Control feat ure.
On The front panel CHA N buttons will tune only to channels that you have
marked as “Pa rent Approved” in the Lists and La bels control pane l.
Important: Wh en Parental Control is on, the TV’s front pane l no longer
provides ac cess to the menus . Parents may p refer to hide the remote and
let childre n use the front pane l to change channel s.
Off The TV shows all cha nnels, whether they are marked as “Parent
Approved” o r not.
The Time menu
The Time menu con tains the contro ls that let you s et the time and sc hedule
the TV to turn off and on at specific times.
Sleep Timer Displays a control panel t hat lets you sel ect the amount of time
you want to g ive the TV before it shuts itself off . Use the up and d own arrows
to increas e or decrease the sleep timer by 15 minute incre ments. Press
MENU to exit.
Schedule Displays a control panel tha t lets you set u p a schedule for t urning
the TV on and off automatically. Mak e sure to turn the s chedule On in the
control panel . Us e the up and down arrows and number buttons to change
the settings . Use the left a nd right arrows to move across t he control pane l.
You must first set the clock to u se the scheduling feature.
Set Time Displa ys a control pa nel that lets you enter the curren t time. Use
the up and d own arrows and nu mber buttons to set the time. Pr ess MENU to
exit
Safety Information
10330 Nor th Meridia n Street
Indianapo lis, IN 4 6290
©1996 Thoms on Consumer Electronic s, Inc.
Trademark(s )® Registe red
Marca(s) Registrada (s)
Printed i n U.S.A.
TOCOM 1511223A
Step 2:
Connect your TV. This is a basic
connection fr om an antenna, c able
box, or VCR to your TV. Connec t the
cable from y our cable system or off-air
antenna to t he cable-in jack on the
back of the TV, as shown.
Step 3:
Plug in the T V. Plug the end of the po wer cord into the wall
outlet, matc hing the wide bl ade of the plug w ith the wide
slot in the outlet. Be sur e to insert the plug completely.
Step 4
Put batterie s in the remote.
• Remov e the battery compa rtment cover from
the back of th e remote.
• Inser t two AAA batteries as shown, matching
the + and – ends of each batte ry in the
compartment.
• Repla ce the cover.
Step 5
Turn on the TV.
• Press TV on the remote.
Read the ne xt section, Using the Menu System, w hich is a brief overview of
the basic ru les for getting a round in the menus using the remote o r TV's front
control pan el.
2. Using the Menu System
The Menu Rul e: Point and Sel ect
You only need to k now one rule to use the on-sc reen menus and c ontrol
panels: poi nt and select.
What is Point a nd Select?
The point an d select method has two steps.
1. Point to a men u item using the MOVE arrows on
the remote. ( The CHAN/VOL butto ns on the
remote.)
2. Select a menu item by pressing MENU.
Selecting an it em tells the TV’s menu sy stem to go
ahead and mak e the change or go to a place y ou
have indica ted. (You can also se lect an item by
pressing the corresponding number button on t he
remote.)
Once you kn ow how to point an d select y our way through the menus, you
can apply t his rule in the menu control pan els, which do th e real work in the
menu system.
3. Interactive Setup
The setup rou tine walks you thr ough the steps nee ded to configure th e TV.
These steps allow you to sel ect a menu langu age, complete the auto channel
search, which puts available cable TV or antenna signals into the TV’s
memory, label th e channels and se t the parental co ntrols. After you select a
menu languag e, you can skip any of the remai ning steps and return to them
later.
Begin Setup
1. Press MENU t o bring up the M ain menu.
2. Point to Se tup and press MENU. T he first Setup scre en comes up, asking
you to sele ct a language.
3. Point to yo ur preferred lan guage by pressin g the up and down arrows
until the la nguage is highl ighted in gree n.
4. Press MENU t o select the la nguage.
5. A screen ap pears asking if y ou would like the T V to search for all
channels.
6. Complete the Setup routine or skip any of the steps and r eturn to them
later.
WARNING
RISK OF ELECTRIC SHOCK
DO NOT OPEN
To reduce the risk of electric shock, do
not remove cover (or back). No user
serviceable parts inside. Refer servicing
to qualified service personnel.
This symbol indicates
"dangerous voltage"
inside the product that
presents a risk of electric
shock or personal injury.
This symbol indicates
important instructions
accompanying the product.
Caution: To reduce the risk of electric shock, match wide blade of plug
to wide slot, fully insert.
Attention: Pour éviter les chocs électriques, introduire la lame la plus
large de la fiche dans la borne correspondante de la prise et pousser
jusqú au fond.
• Operate TV only on 120 volts, 60 Hz AC power (normal house power).
• FCC Regulations state that unauthorized changes or modifications to this
equipment may void the user’s authority to operate it.
WARNING
To reduce the risk
of fire or shock
hazard, do not
expose this TV to
rain or moisture.
Cable TV Installer: This reminder is provided to call your attention to Arti cle 820-40 of the National
Electrical Code (Section 54 of the Canadian Electri cal Code, Part 1) which prov ides guidelines for
proper grounding and, i n particular, specifies that the cab le ground shall be connected to the
grounding system of the building as close to the po int of cable entry as practical .
The follo wing mate rials wer e used in p rinting
this publ ication:
1. First Things First
Step 1
Unpack the TV and remo te control.
Important Information : Optional Stand
Matching sta nds were designed to be used with 2 5 inch and larg er table
model TV(s) inc luded in this book. The recommended stands a re provided
with hardwar e to secure the TV to the stand so th at it cannot be ea sily
pushed off, pu lled of,f or tipp ed over. Your RCA dealer can help you choose
the appropria te stand for your TV.
Caution: If you choose not to use the stand rec ommended for your T V,
take precau tions that the st and or other furn iture the TV is pl aced on is
properly lo cated and of adequa te size and stren gth to prevent the T V from
accidentally being pushed off, pu lled off, or tippe d over. This could cause
damage to the TV an d/or personal inju ry.
Page 2
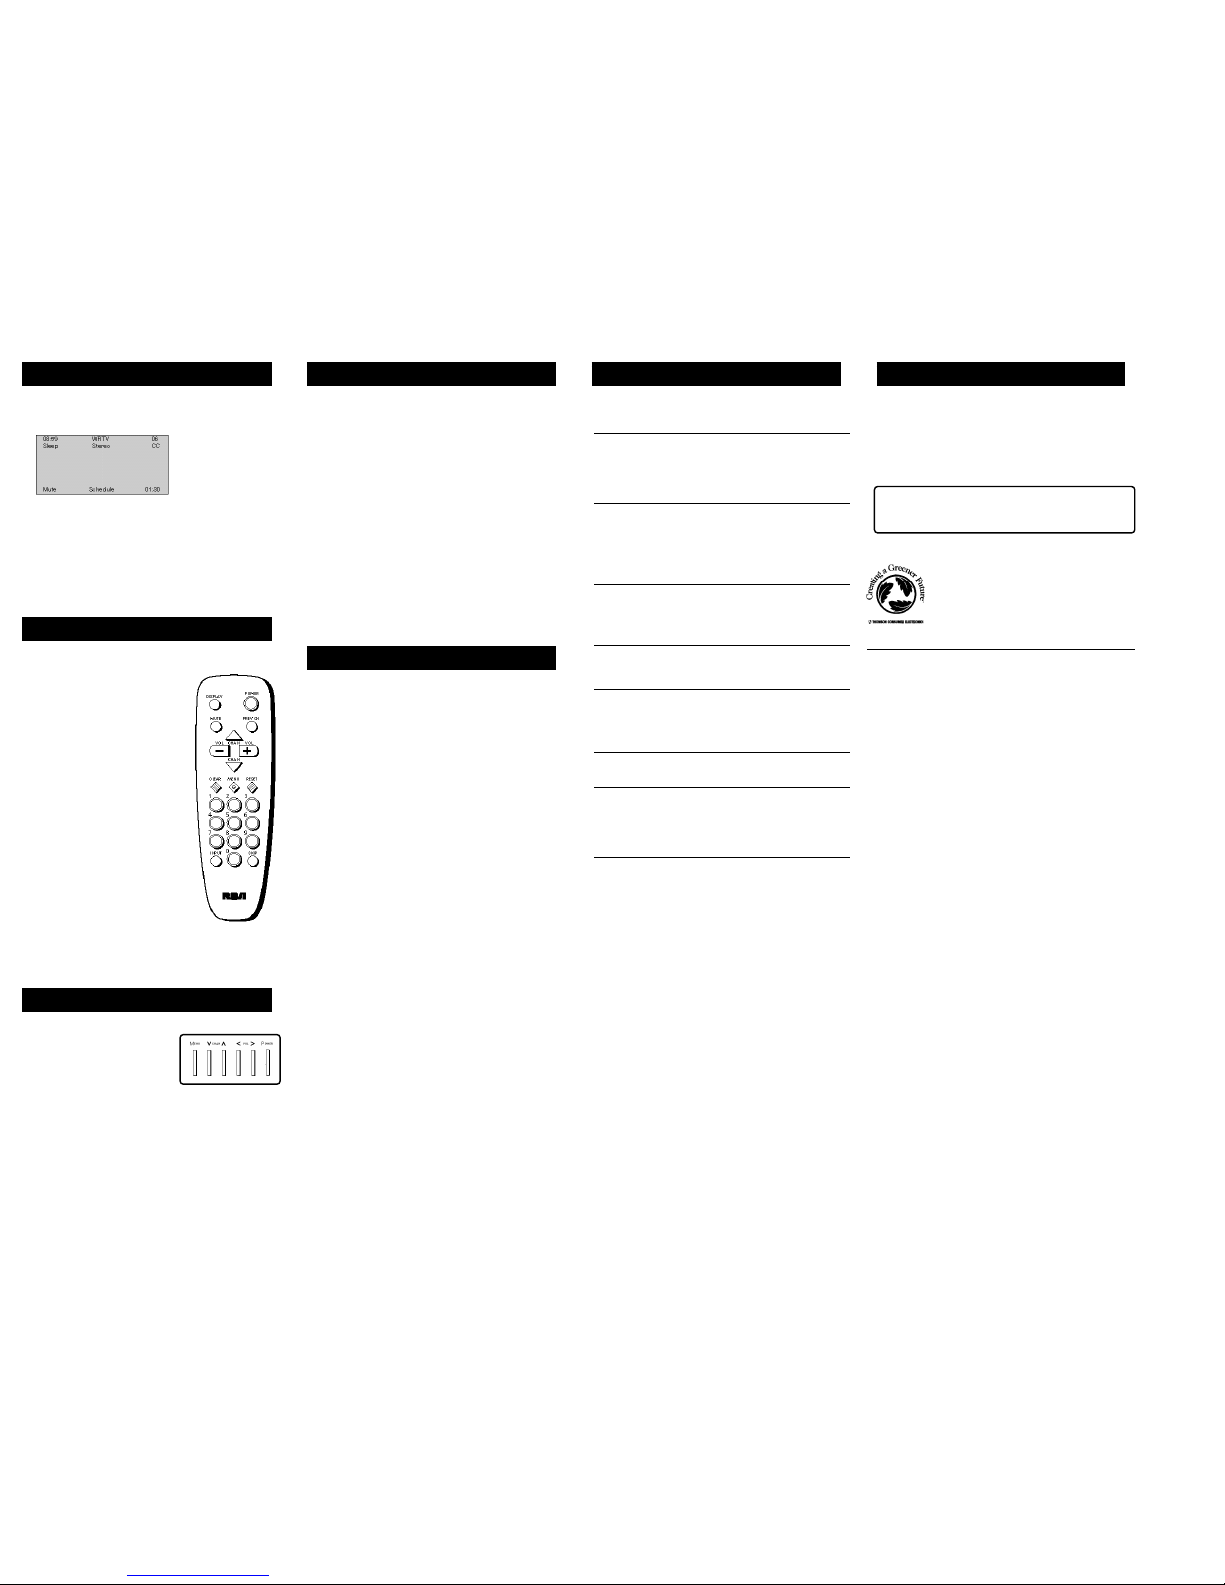
Channel Marker
There are se veral indicator s that come up wh en you change ch annels or press
the DISPLAY button. T his display is calle d the Channel Marker. The Cha nnel
Marker show n below is just an example of wh at your scree n may look like .
08:59 Dis plays the curre nt time.
WRTV Displays the label assig ned to the curren t channel.
06 Displays the current chann el.
Sleep Disp layed when the Sleep Timer has been se t.
Stereo Displaye d when the curre nt channel is bro adcasting in Ster eo.
CC Displayed when Closed Capti oning is availa ble on the curre nt channel.
Mute Disp layed when you mute the audio.
Schedule Displayed whe n the TV is schedule d to turn on.
01:30 Dis played to count down time left on the commercial skip (SKIP) time r.
Tour of the remote
Remote Buttons
POWER Turns the TV on and off.
DISPLAY Bri ngs up channel infor mation. Press
repeatedly t o see detailed program informat ion,
if availabl e.
MUTE Turns off the TV’s sound. Press again to
restore the sound.
PREV CH Re turns you to the previous channel .
VOL – or VOL + Decreases or incr eases the TV’s
volume. Also used as left and r ight arrows.
CHAN ^ or CHAN v Sc ans up or down th rough
the current c hannel list. Pres s once to change
the channel u p or down; pre ss and hold to
continue cha nging channels. Also used as up
and down arro ws.
CLEAR R emoves any menu o r display from th e
screen and retu rns you to TV viewing.
MENU Brings up th e Main menu. When in the
menu system, selects highlig hted items or
returns you to the previou s menu.
RESET Retu rns all pictur e quality contr ols to
their origi nal settings.
(0-9) Number Buttons Enters channel
numbers and time settings di rectly though the
remote control . To enter a two-digit channel,
press the two di gits. To enter a three-dig it
channel, pre ss and hold the first digit, th en add
the second tw o. Example: to tu ne to channel
123, press and hold 1, pre ss 2, then pres s 3.
INPUT (on some models) Press to toggle
through the available input sources (CH3, CH4, etc.).
SKIP Pr ess once before cha nging channels and th e TV will wait 30 seco nds
before retur ning you to the o riginal channe l. Press repeate dly to add more
time.
Tour of the TV
Front Panel
VOL < D ecreases the volum e. When in the
menu system, V OL < is used to poin t left to
items and ad just menu contr ols.
VOL > Incr eases the volume. Wh en in the
menu system, V OL > is used to po int right to
items and ad just menu contr ols.
CHAN ^ Scans up through the ch annel list.
In the menu system, it poin ts up to items and adjusts menu controls.
CHAN v Scans down through the cur rent channel list . In the menu sy stem, it
points down to items and adj usts menu contr ols.
MENU Brings up th e Main menu. When in the menu sys tem, it selects
highlighted items. Also retu rns you to the p revious menu.
If you turn Parental Contro l on, the front panel no longer provides access to
the menus. F or more informat ion, see Parenta l Control in the Channel menu
on the back s ide of these ins tructions.
POWER Turns the TV on and off.
The front pan el shown is a typic al button layout. The exact look of the buttons
may be differe nt from those on the front of your TV.
Advanced Features
On-screen P rogram Details
Program pro viders have the o ption of sendin g information thr ough the
airwaves alo ng their programs. If this informati on is available, the TV can
display it u p when you press DISP LAY on the remote. To display the on-screen
program deta ils:
1. Press DISP LAY once to bring up t he channel marker.
2. Press DISP LAY again to bring u p the program title , the program's length,
elapsed time and other progr am details such as the story lin e and
whether Clos ed-Captioning is available.
3. Press DISP LAY again to clear the screen.
Whether all ( or any) of the program details are displaye d depends on wheth er
the program provider has se nt the informati on along with th e program.
Closed Capti oning
Many progra ms are encoded with closed-captioni ng information, which lets
you display the audio portion of a pr ogram as text on the TV screen. You can
tell the TV to display close d captioning: a) ne ver, b) whenever it i s available,
or c) whene ver the MUTE butto n is pressed.
The TV offers two closed-caption ed modes. Select CC1 for full trans lation of
the primary language in your area. Select C C2 for seconda ry language
translation , simplified En glish, or whatev er is being br oadcast in your area.
Closed captio ning is not av ailable on all c hannels at all times. Only spec ific
programs enc oded with closed-c aptioning infor mation are applic able. When a
program is c losed captioned, the letters CC are displayed i n the channel
marker.
Limited Warranty
What your warranty covers:
• Any d efect in material or workmanship .
For how long a fter your purchase :
• 90 da ys for labor char ges.
• One y ear for parts.
• Two years for picture tu be.
The warranty period for ren tal units begins with the firs t rental.
What we will do :
• Pay any Authorized RCA Television Ser vicenter the labor ch arges to repair
your televis ion.
• Pay an y Authorized RCA Television Servicenter for the new or, at our
option, refu rbished replac ement parts and p icture tube re quired to repair
your televis ion.
How you get se rvice:
• Reque st home service from any Autho rized RCA Television Servicen ter. To
identify you r nearest Authorize d RCA Television Servicenter, ask your
Dealer, look in the Yellow Pages, or call 1-800 -336-1900.
• Show t he service techn ician your evide nce of purchase dat e.
What your warranty does not cover:
• Acts of God, such as but not limited to lightning dama ge.
• Custo mer instruction . (Your User's Guide clearly descri bes how to inst all,
adjust, and operate your te levision. Any a dditional informa tion should be
obtained fr om your Dealer.)
• Insta llation and re lated adjustments .
• Signa l reception pr oblems not caused by your televi sion.
• Damage from misuse or neglect.
• Remote control batterie s.
• A tele vision that has been modified or incorporate d into other pr oducts or
is used for institutional o r other commerc ial purposes.
• A tele vision purchase d or serviced out side the U.S.A.
Product Regi stration:
• Pleas e complete and mai l the Product Re gistration Car d packed with your
set. It will make it easier to contact you s hould it ever be necessary. The
return of the card is not r equired for warr anty coverage.
How state law relates to t his warranty:
• This warranty gives y ou specific lega l rights, and y ou also may have other
rights that vary from state to state.
What if you purch ased your televisio n outside the U. S.A.:
• This warranty does not apply. See your dealer for details .
Troubleshooting
Troubles sometime s are caused by simple “faults” th at you can corre ct
without the help of a servic e technician. If you experience any difficulty wi th
your TV, check a few basi c remedies before ca lling your service technician.
TV will not turn on or contr ols don’t work
• Check to make sure it is plugged in.
• Check th e wall receptac le (or extension cord) to make su re it is “live” by
plugging in something else.
• Try unplugg ing set for two mi nutes and then plug it back in and turn it on
again.
Problems wit h Remote
• Maybe s omething is betw een the remote and the remote s ensor.
• Maybe t he remote is not a imed directly at th e TV's remote se nsor.
• Maybe re mote batteries are weak, dead or insta lled incorrectly. Try
replacing batt eries correctly.
• Remove batteries and ho ld down one or more buttons for sev eral
seconds. Ins tall the batter ies and try remo te.
Turns ON or off while playing
• Schedul e function may ha ve been activate d.
• Electr onic protection c ircuit may ha ve been activat ed because of a power
surge. Wait 30 seconds and then turn on again. I f this happens
frequently, the voltage in yo ur house may be abnormally high.
Schedule does not turn off th e TV at the set t ime
• Check s chedule on/off fun ction (it must be set to On).
• Check to make sure cloc k is set to the co rrect time.
Blank screen or Black Box appea rs on the scre en
• Try another c hannel.
• Press RESET, in case the pic ture controls a re set too low.
• Caption ing may be turne d on. Check the C losed-Caption Di splay control
panel in the Channel menu.
No sound, pi cture okay
• Maybe so und is muted. Try pressi ng volume up button to restore sound.
No picture, no sound but pow er light is on
• Maybe c able/air functi on is in wrong position.
• Maybe a vacant channel is tuned.
• If watch ing VCR, make sure TV is tuned to channel 3 o r 4 – same as CH3/4
switch on VCR. Also che ck to make sure TV/VCR switch o n VCR is in
correct posi tion.
Sound okay, picture poor
• Check an tenna connections .
• Try adjustin g sharpness func tion to improve weak signals.
Creating a greener future
At Thoms on Consum er Electro nics w e are ded icated to the pres ervation
of our na tural her itage and to a heal thy and sa fe way of life for current a nd
future ge nerations. This is a glo bal effort which encomp asses ev ery
THOMSON fa cility th roughout the world.
We believe that cle an air, clean water, a pr otected e arth, and healthy p eople
are not on ly pract ical and de sirable goals, but achievabl e ones as well. Our
Corporat e Environme ntal, Hea lth and Saf ety Chart er acknowle dges our
commitment to prote ct these precious a ssets and provides a challeng ing
vision an d guidelin e for con ducting ou r busine ss. Below are a fe w
examples o f Thomson’s ac hievement s in our effo rts to pres erve our nat ural
resource s.
Thomson ha s also in creased it s usage o f recycle d materia ls for pa ckaging of our produc ts. For
example, in the U.S . and Mex ico our te levision p lants use recycled content i n our tel evision ca rtons
and instr uction book lets. The inks use d for the p rint on ca rtons and i nstructio n booklets is soy ba sed
and nontox ic. For a fr ee brochure regarding T homson’s Envi ronmenta l Health and Safety Prog rams,
write to T homson Cons umer Elec tronics 10 330 N. Merid ian, India napolis, I N 46290, a ttention
Environme ntal Progr ams: INH3 40.
The Earth
Thomson reclaim s millio ns of
pounds o f hazard ous was te
annually diverti ng it f rom lan dfills.
Thomson treats m illions of
pounds o f waste water sl udge
annually and ren ders it
nonhazar dous.
Thomson recycles over 5 0 millio n
pounds o f nonhaz ardous materia l
annually that ot herwise would
have bee n treate d as tr ash, an
overall r ecovery rate o f 50%.
Thomson globall y recycl es
millions of pou nds of broken
picture tube gla ss thro ugh bot h
internal and ext ernal p rocesses
annually.
The Water
Thomson recovers over 2 million
pounds o f fine g lass pa rticles f rom
process w ater eac h year and
recycles them ba ck into its glas s
furnaces .
Thomson ’s state-of -the-art waste
water tr eatment plants filter o ut
over 26 m illion pounds of soli ds
from pro cess wat er each year.
Thomson ’s US glass factor y
recycles 2,500 g allons o f water per
minute a nd clean s 2.6 m illion
gallons o f water per day.
Thomson is resea rching n ew
processes and is develo ping ne w
manufact uring e quipmen t and
technolo gies to further r educe
large vol ume wat er use.
The Air
Thomson has rep laced so lvent
based pa ints at many loc ations
resultin g in an 80% redu ction i n
toxic air emissi ons for equival ent
material used.
Thomson has elim inated the use
of ozone deplet ing subs tances a t
televisio n manuf acturin g facili ties
around t he world .
Thomson is coll ecting a nd
returnin g over 1. 5 million pounds
of air po llution contro l dust to the
glass mak ing pro cess an nually.
Thomson has laun ched wor ldwide
energy sa vings p rograms which
contribu te to gl obal eff orts to
reduce ai r emiss ions fr om
electric al gener ating f acilitie s.
Care and Cleaning
You can clean the TV a s required, using a soft cloth or the dusting attachmen t
for your v acuum cleaner. Be su re to occasiona lly vacuum the v entilation slo ts
in the cabin et to help ass ure adequate ve ntilation.
To clean the TV scr een, use a diluted soap and water mix ture and a soft clo th.
Do not use fur niture polish on t he TV cabinet or sc reen.
While cleanin g do not allow li quid to run down the screen and in side
the TV. Also, avoid plac ing drinks or vases wit h water on top of the
TV. This could incre ase the risk of fire or shock hazard or dama ge to
the TV.
Caution: If fixed (non-mo ving) images a re left on the sc reen for long
periods, the y may be permane ntly imprinted o n the screen. Su ch images
include netw ork logos, pho ne numbers, and v ideo games. Ex tended
viewing of ch annels display ing these images should be avoide d.
 Loading...