

Page 1

www.rba.com.au
MADE IN THE U.S.A.
Installation
Instructions
RBA8186-623
The Big John Econo
483mm wide from Side to Side
MADE IN THE U.S.A.
P 1300 788 778 • F 1300 788 878
E info@rba.com.au • W www.rba.com.au
Page 2
www.rba.com.au
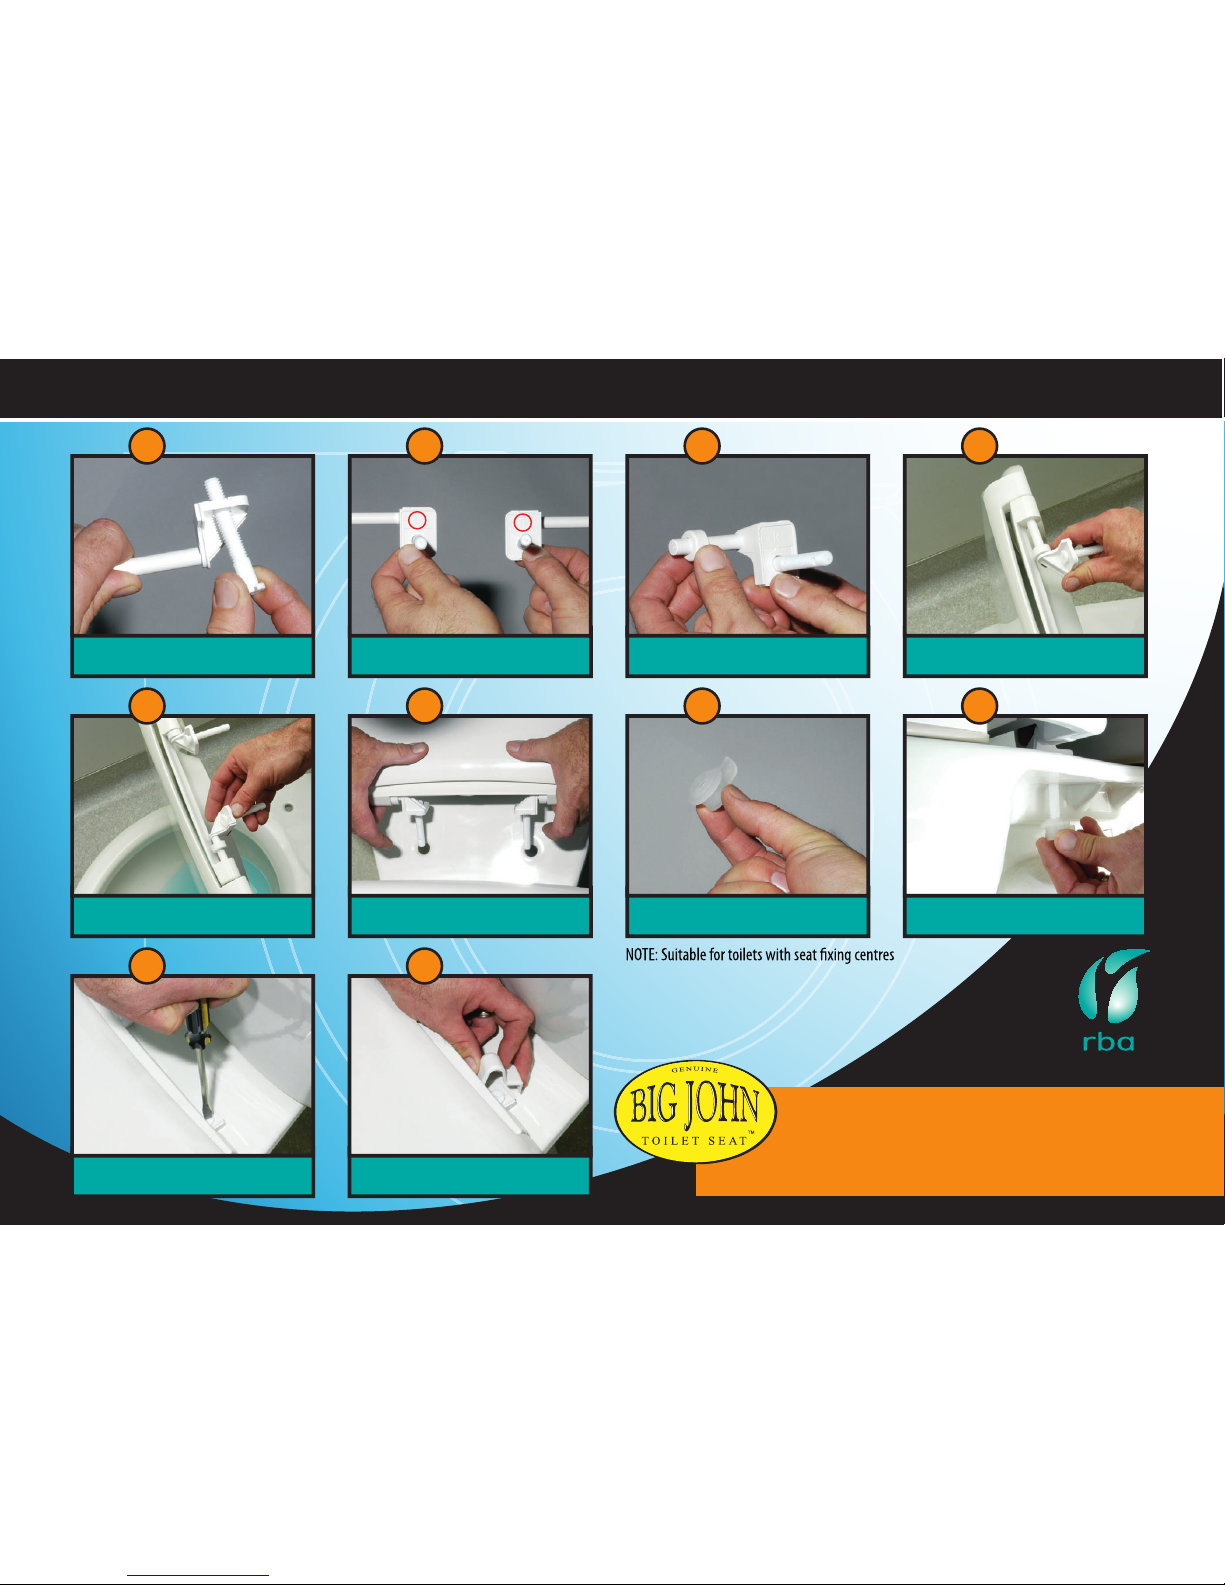
Insert screws into left & right hinge Hinges are marked right and left For installation in the U.S. insert
spacer on left & right hinge
Insert Left Hinge through the
seat and lid on the Left side*
Insert Right Hinge* Mount on toilet and adjust so
hinges are flat
Be sure to put on the nuts with the
beveled side up
Finger tighten the nuts...make sure
that the seat is mounted properly
Secure the seat using a screwdriver...
DO NOT OVER TIGHTEN
See warning below
1
Step
2
Step
3
Step
4
Step
5
Step
6
Step
7
Step
8
Step
9
Step
Snap cover onto hinge to
cover the screw head
10
Step
*Left / Right Hinges - Refers to the left and right
mounting holes on the toilet when facing it.
of 135 - 155mm.
10 Easy Step-by-Step Instructions for Installing the Big John Econo Toilet Seat
WARNING:
ADJUST FLANGES SO THE BUMPERS SIT
FLAT ON THE TOILET BEFORE TIGHTENING NUTS.
Cracking or breaking around the hinges is a result
of improper installation and IS NOT covered by
the warranty.
*Note: Because of the size of this injection moulded seat & lid,
from time to time there may be formlines evident.
 Loading...