

Razor Crazy Cart, W25141012106 Installation Instructions Manual
Need Help? Visit our website at www.razor.com or call toll-free at 866-467-2967 Monday - Friday 8:00 AM - 5:00 PM PST.
CRAZY CART
CHARGER PORT
INSTALLATION INSTRUCTIONS
W25141012106
Tools Required: (Not included)
A. 5 mm Allen wrench
B. 10 mm wrench
C. Flathead screwdriver
D. 19 mm wrench
WARNING
CAUTION: To avoid potential shock or other injury, turn power switch OFF and disconnect charger
before removing or installing the charger port. Failure to follow these steps in the correct order may
cause irreparable damage.
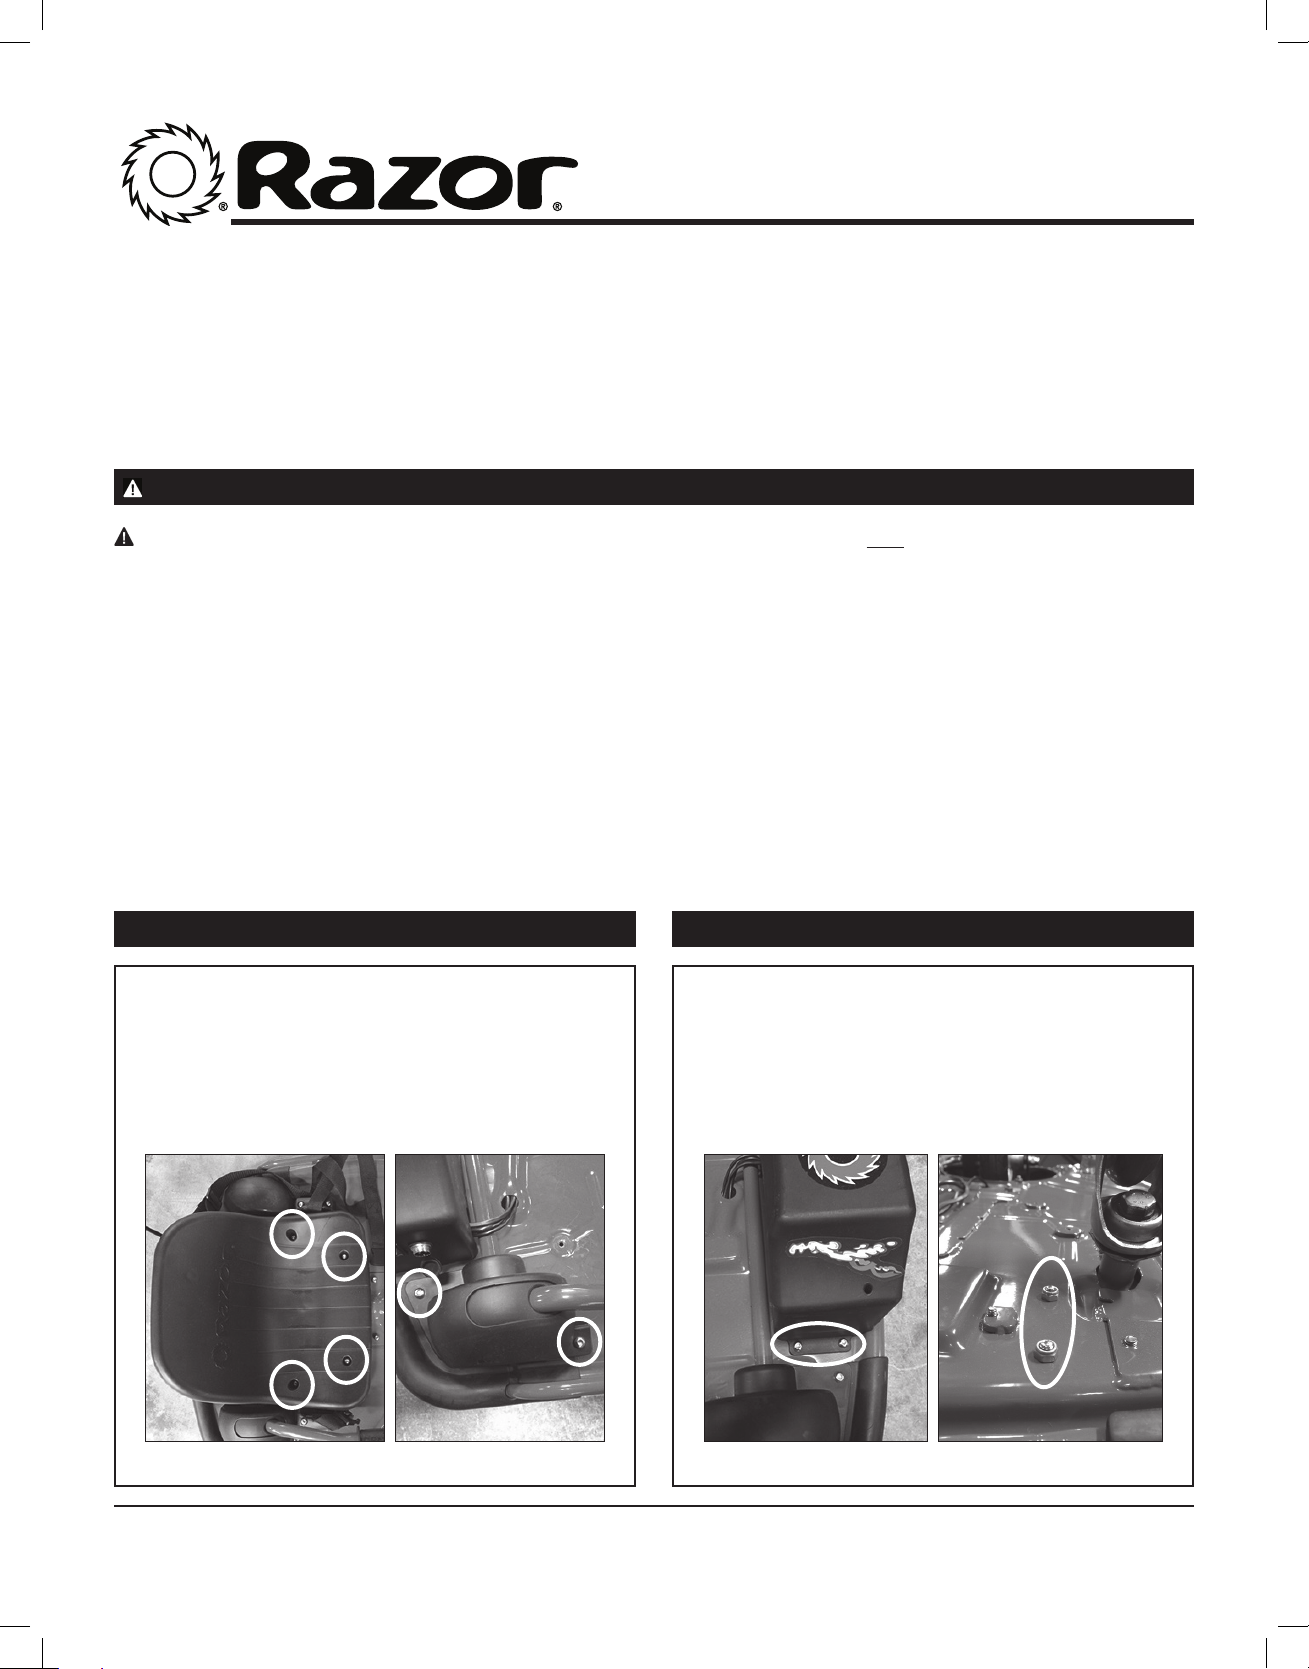
Step 1
Using a 5 mm Allen wrench, loosen the four (4) hex
bolts that attach the seat to the frame (Figure 1a)
and remove seat. Remove the two (2) hex bolts on
the Drift Bar cover (Figure 1b) and remove.
Figure 1a Figure 1b Figure 2a Figure 2b
Step 2
Using a 5 mm Allen wrench and a 10 mm wrench,
loosen the two (2) hex bolts on the side of the
battery cover (Figure 2a) and the two (2) locknuts,
located underneath the unit (Figure 2b).
1
Need Help? Visit our website at www.razor.com or call toll-free at 866-467-2967 Monday - Friday 8:00 AM - 5:00 PM PST.
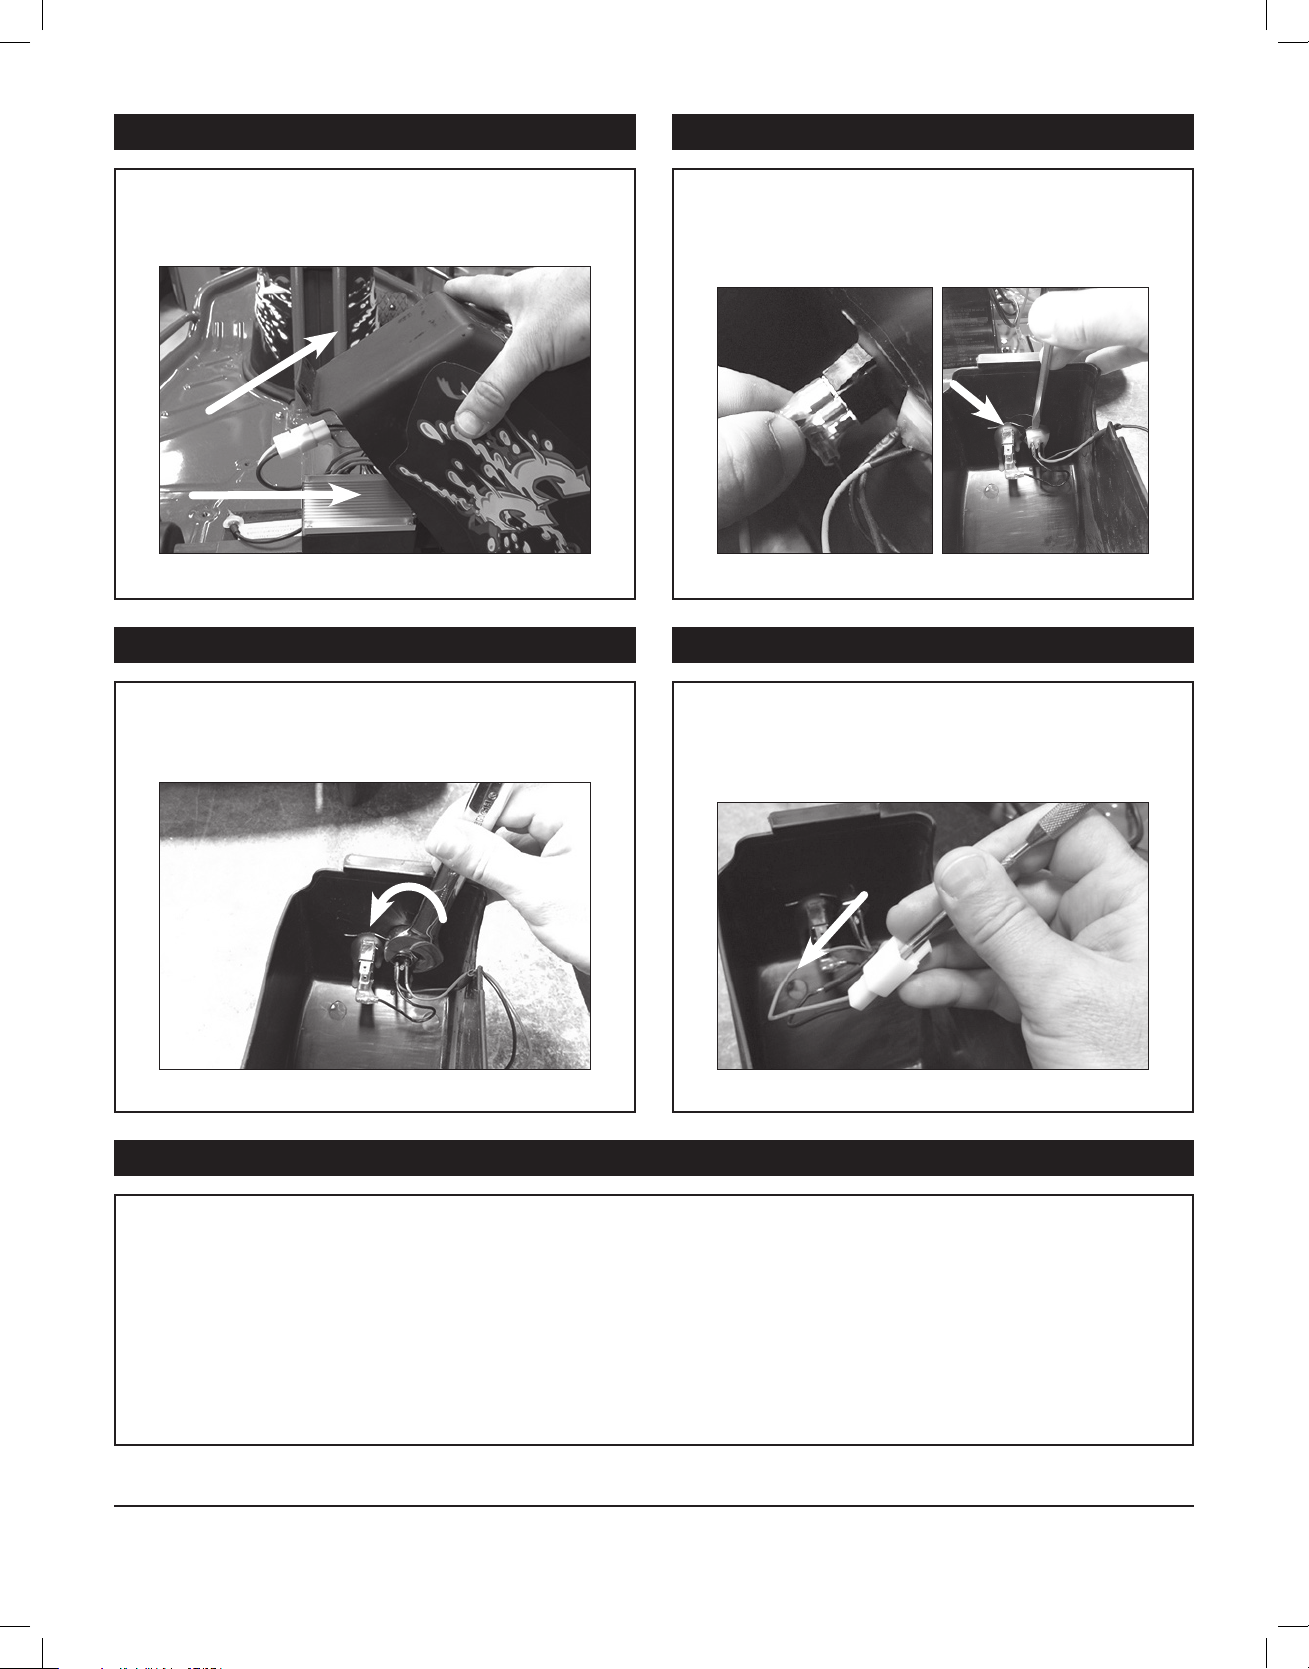
Step 3
Step 4
Remove the battery cover by lifting up the right side
first then slide off. Be careful not to pull any of the
wires that are attached to the cover.
Figure 3
Step 5
Using a 19 mm wrench, loosen the locknut.
Disconnect the black wire from the charger port that is
connected to the top prong of the on/off switch (Figure
4a). Using a flathead screwdriver, carefully remove the
silicone from the back of the charger port (Figure 4b).
Figure 4a Figure 4b
Step 6
Using a small pointed object, carefully depress the
two (2) locking pins inside the white plastic connector
attached to the charger port and gently pull them out of
the connector. Remove charger port from battery cover.
Figure 5
Figure 6
Step 7
Reverse steps 1 through 6 to install replacement charger port.
ATTENTION: Charge battery 12 hours before initial use.
2
140124
 Loading...