

Razor Trikke Owner's Manual
Owner’s Manual
Trikke

2
NOTE: This manual contains many “Warnings” and “Cautions”
concerning the consequences of failing to maintain or inspect your
Razor Trikke 5. Because any incident can result in serious injury or
even death, we do not repeat the warning of possible serious injury or
death each time such a warning is mentioned.
WARNING: Riding the Razor Trikke 5 can be hazardous. Proper
inspection and maintenance of the product is your responsibility and
can reduce the risk of injury.
WARNING: The Trikke 5 has been built to Razor’s design
specifications. All the original equipment supplied at the time of sale
Razor Trikke Owner’s Manual
+ Safety Handbook
Table of Contents
Parts of the Trikke . . . . . . . . . . . . . . . . . . . . . . . . . . . . . . . . . . . .3
Assembly . . . . . . . . . . . . . . . . . . . . . . . . . . . . . . . . . . . . . . . . . . .4
Maintenance . . . . . . . . . . . . . . . . . . . . . . . . . . . . . . . . . . . . . . . . .6
Trikke Riding Tips . . . . . . . . . . . . . . . . . . . . . . . . . . . . . . . . . . . . .7
General Warnings . . . . . . . . . . . . . . . . . . . . . . . . . . . . . . . . . . . .12
Razor Safety Tips . . . . . . . . . . . . . . . . . . . . . . . . . . . . . . . . . . . .13
Limited Warranty and Owner Registration . . . . . . . . . . . . . . . . .15
3
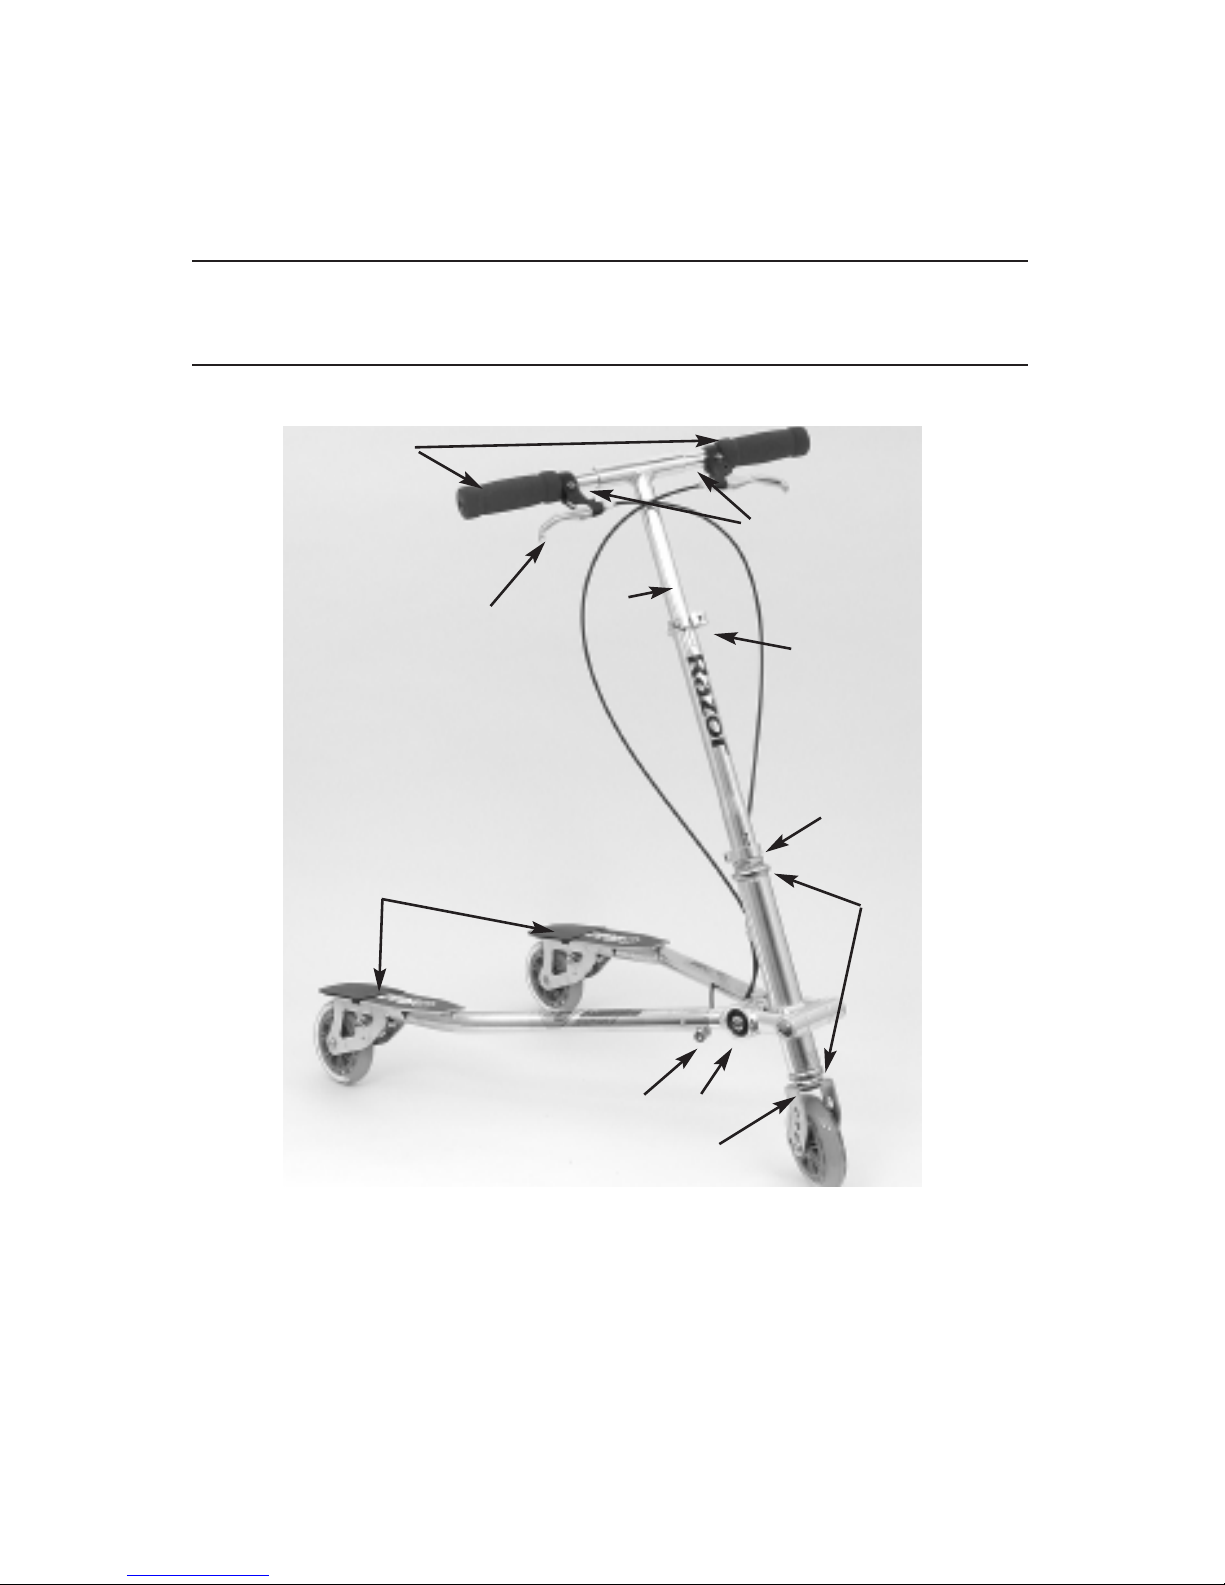
1. Parts of the Trikke
Two 5mm hex (Allen) keys (supplied)
A. Front wheel
B. Front fork
C. Cambering mechanism
D. Clamp
E. Foot platform
F. Headset (steering
bearings)
G. Collar clamp
H. Quick release clamp
I. T-tube
J. Handlebar
K. Brake levers
L. Grips
M. Brake cables
TOOLS REQUIRED FOR ASSEMBLY ONLY
were selected on the basis of their compatibility with the frame, fork and
all other parts. Certain after-market products may or may not be
compatible with your Razor Trikke 5. Consult your retailer or call Razor
prior to modifying or replacing any component with a non-factory
specified product.
A
B
C
D
E
F
G
H
I
J
K
M
M
L
4
Assembly
Your pre-assembled Trikke requires only handlebar and footrest
attachment and a quick maintenance checklist before riding.
F
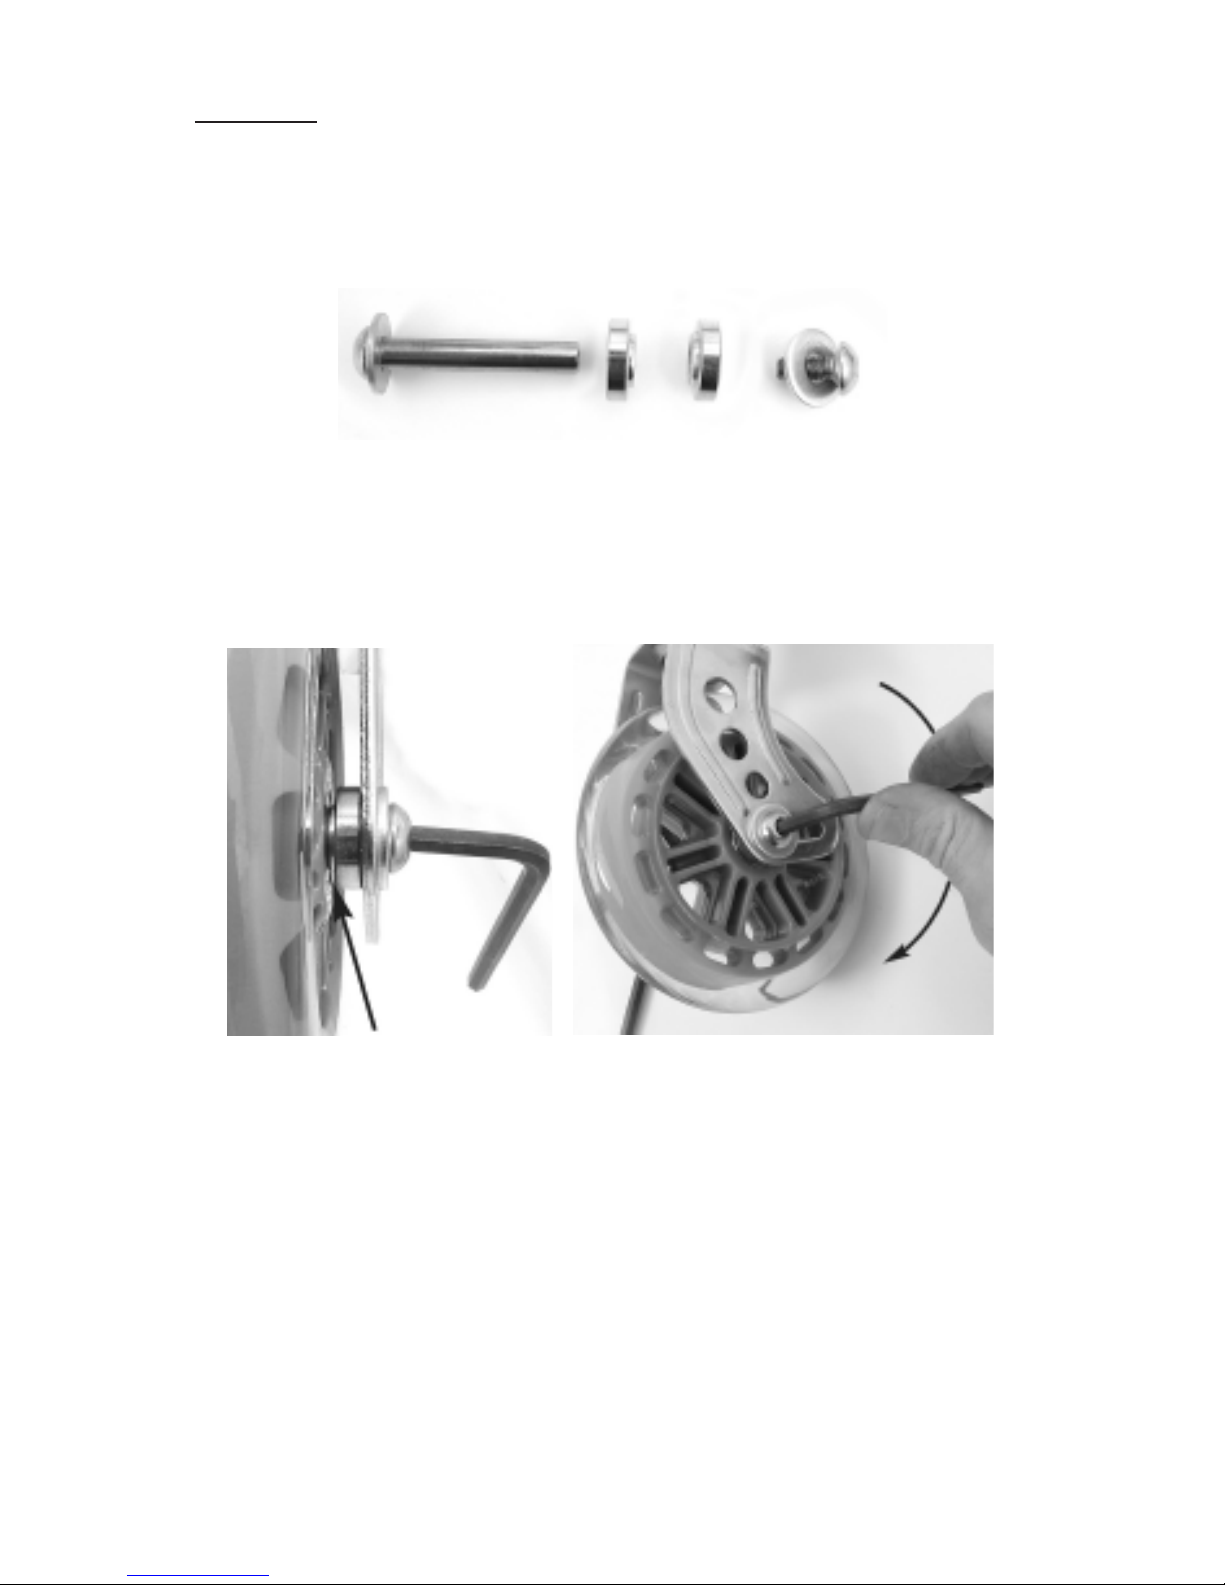
Install front wheel by removing the axle from the fork, Arrange the
hardware sequence as shown in figure 1.
Figure 1.
Position the wheel spacers so the rim is facing the wheel bearing as
shown in Figure 2. Using the two 5mm Allen key wrenches, tighten the
axle securely as shown in Figure 3.
Figure 2. Figure 3.
Note that the fork offers three axle positions. For the time being,
position the axle as shown. Later, when you become more experienced,
you can try the alternative axle positions for climbing, speed, and agility
variations.
Install the left and right footrests as shown in Figures 4 and 5. Tighten
the retaining clamp securely as shown in Figure 6.
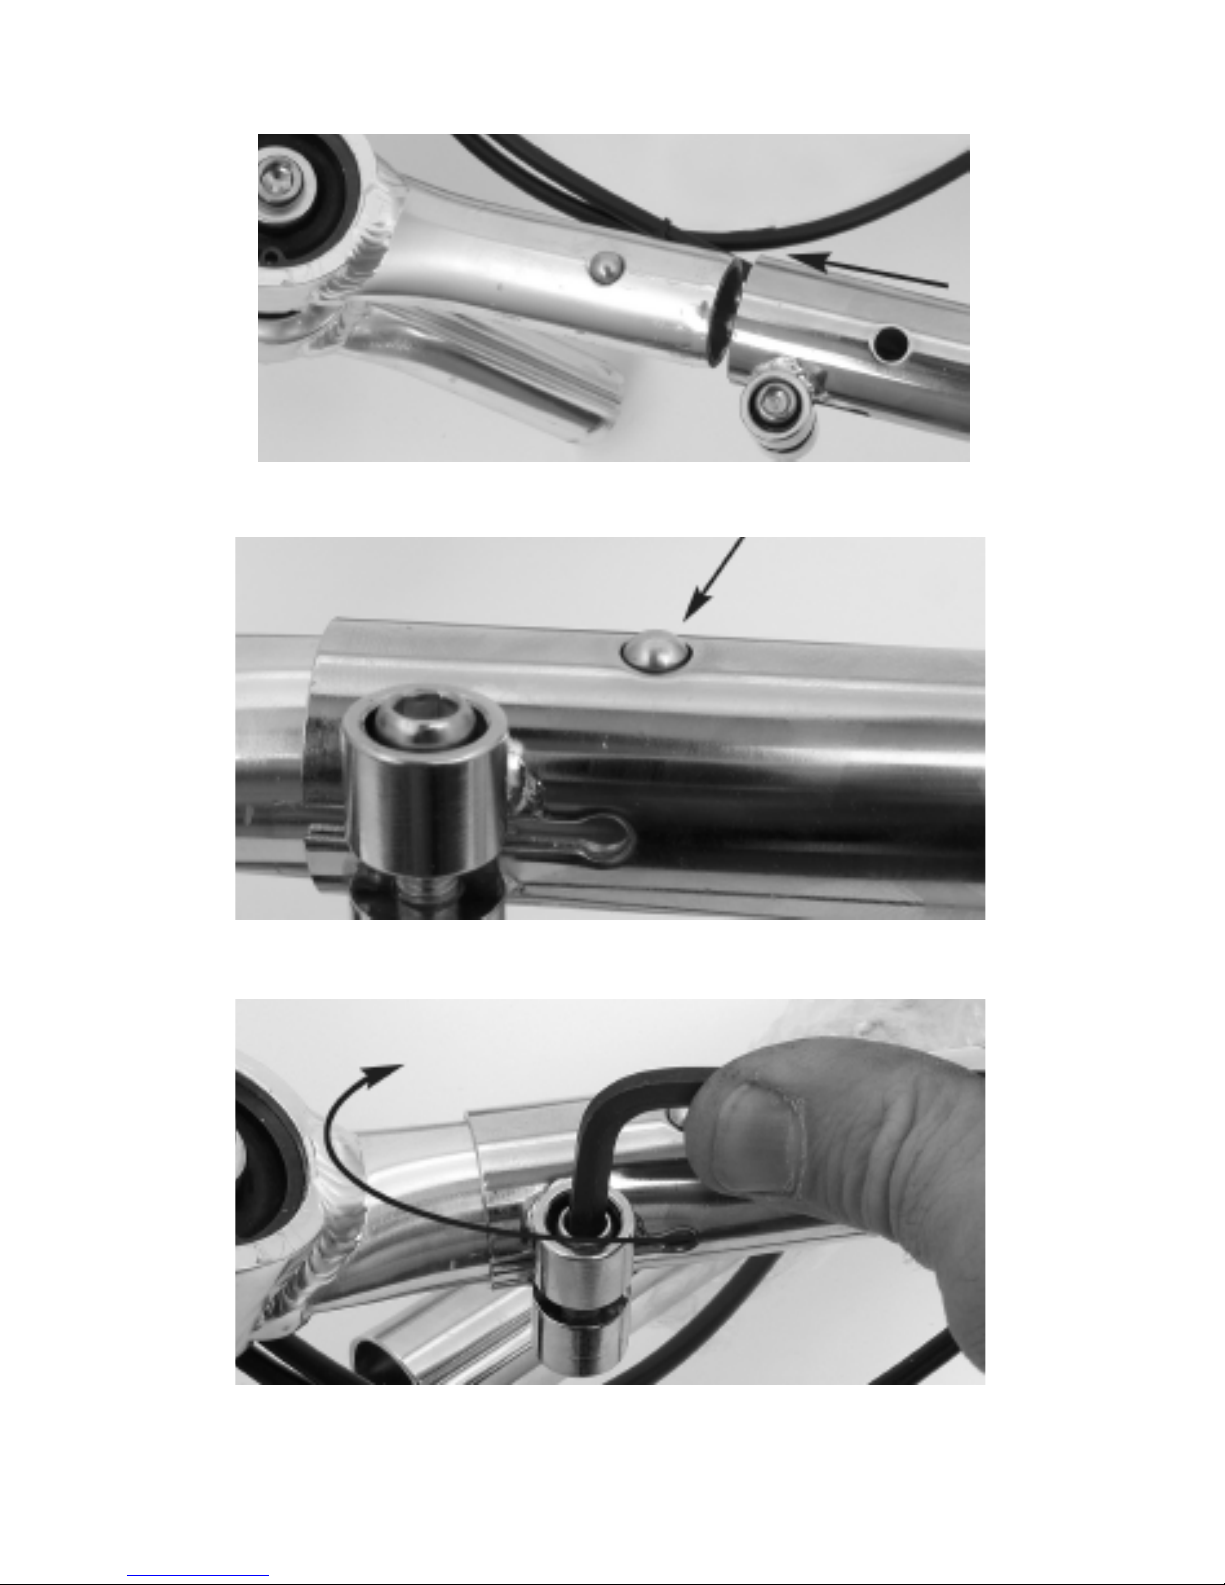
5
Figure 4.
Figure 5.
Figure 6.
 Loading...