

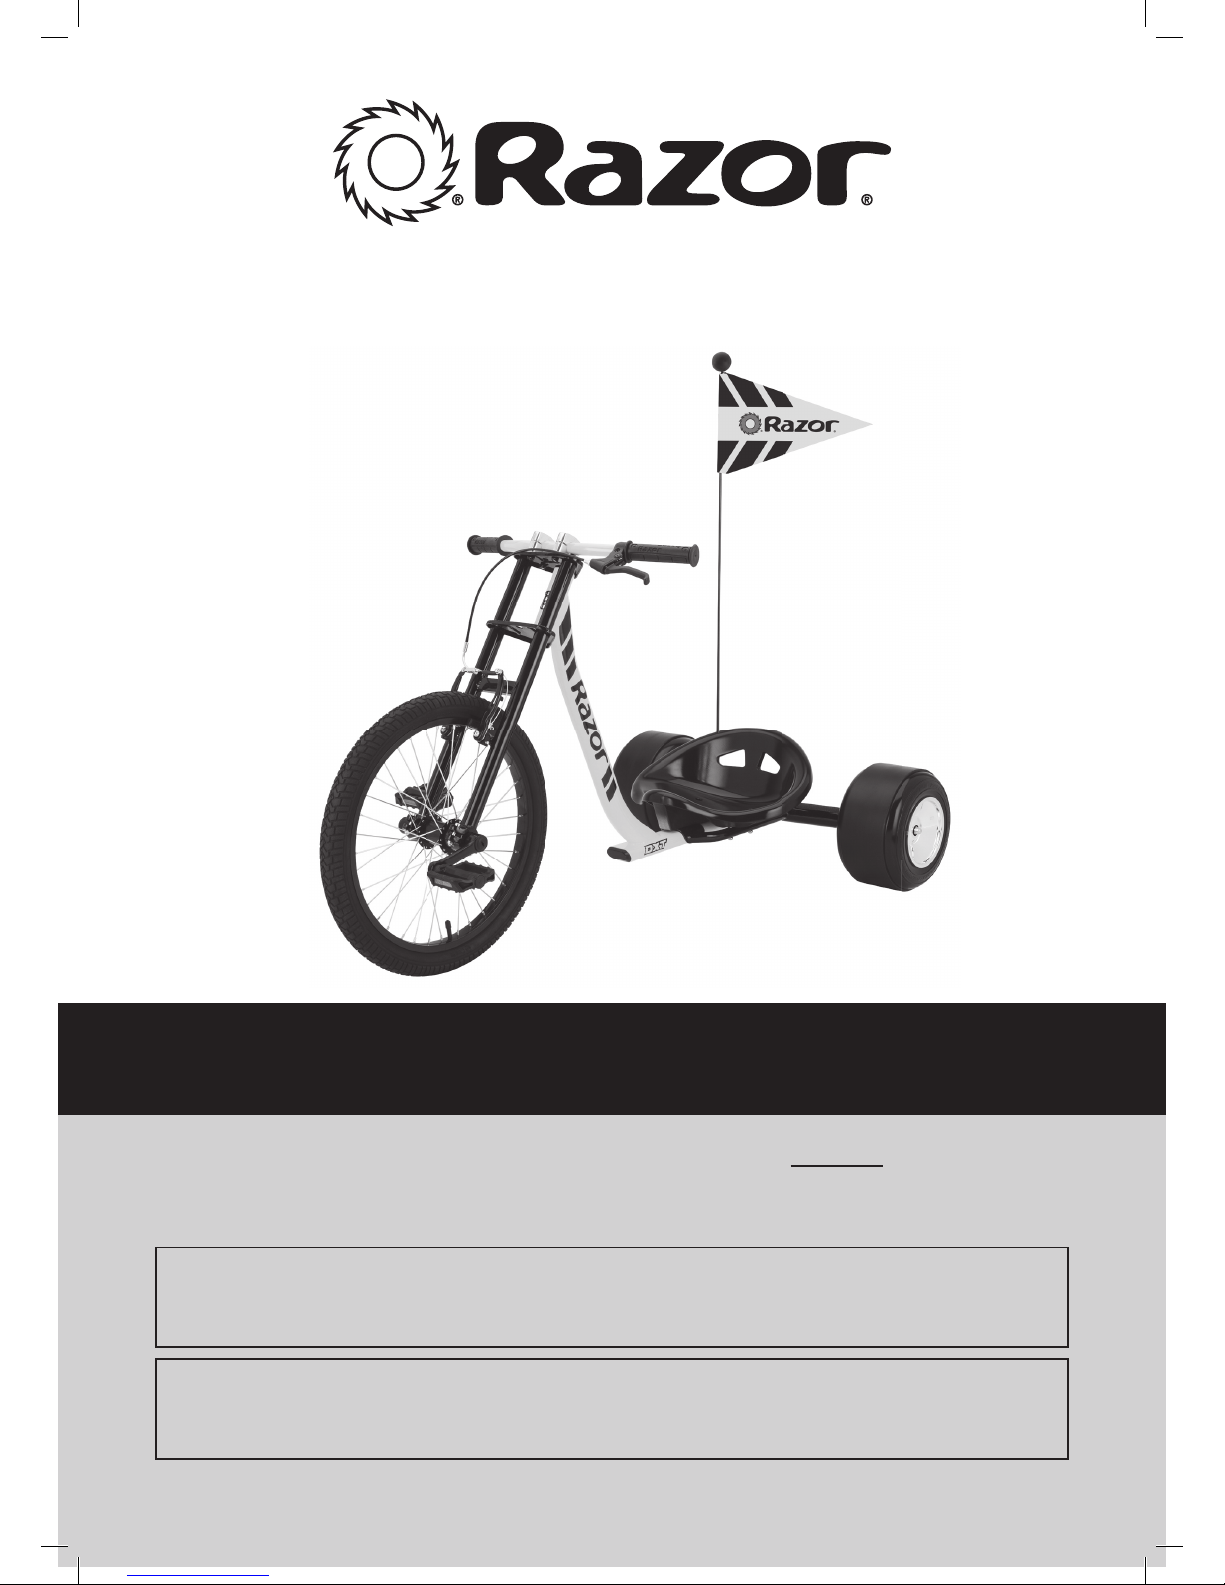
Razor DXT Owner's Manual
OWNER’S MANUAL
Read and understand this entire manual before allowing
child to use this product! For assistance contact Razor.
DO NOT RETURN TO STORE.
NOTE: Manual illustrations are for demonstration purposes only.
Illustrations may not refl ect exact appearance of actual product.
Specifi cations subject to change without notice.
Please have your product along with the 22 character product I.D. code with you
before contacting Razor for warranty assistance and/or replacement parts.
Product I.D. Code: _____________ - ____________ - ____________
DXT™ DRIFT TRIKE

1
WARNING: PARENTAL AND ADULT RESPONSIBILITY AND
SUPERVISION NECESSARY: Because products, like the DXT Drift Trike,
can and do present potential hazards plainly associated with their use,
it is well recognized THE NEED FOR EXERCISE OF PARENTAL RESPONSIBILITY
IN SELECTING RIDING PRODUCTS APPROPRIATE TO THE AGE OF A CHILD,
OR PARENTAL SUPERVISION IN SITUATIONS IN WHICH CHILDREN OF
VARIOUS AGES MAY HAVE ACCESS TO THE SAME RIDING PRODUCTS,
IS IMPORTANT. Not every product is appropriate for every age or size of
child, and different age recommendations are found within this category
of product which are intended to reflect the nature of the hazards and the
expected mental or physical ability, or both, of a child to cope with the
hazards. Razor recommends that the DXT Drift Trike be ridden only
by riders aged 14 and up.
• Always wear safety equipment, such as helmet, wrist guards, gloves, knee
pads and elbow pads. Recognize that wrist guards may impair your ability to
properly grip the handlebars. Always wear a helmet when riding your drift
trike and keep the chinstrap securely buckled.
• Always wear shoes.
• A parent’s decision to allow his or her child to ride this product should be
based on the child’s maturity, skill and ability to follow rules.
• This drift trike was manufactured for performance and durability, but it
is not impervious to damage. Trick riding can overstress or damage any
product, including this drift trike, and the rider assumes all risks associated
with high stress activity.
• Ride on smooth, paved surfaces away from motor vehicles and other
hazards; riding on open public roads is dangerous.
• Avoid streets and surfaces with water, sand, gravel, dirt, leaves and
other debris.
• Loose or wet surfaces may further enhance risks when using this product
including braking.
• Install safety flag to increase visibility to others when riding.
• Never hitch a ride with another vehicle
• Do not ride at night or in reduced visibility conditions.
• Do not lean backwards when standing/riding on rear wing.
• Sudden braking may result in being thrown forward.
• Use extra caution on steep or long hills as the rider can gain speed quickly.
Avoid excessive speeds as risks of loss of control, or of collisions or falls,
will be greater.
• Practice and develop drifting skills on large flat, smooth surfaces away from
motor vehicles and other hazards.
• Check and obey all local traffic laws and regulations.
• Watch out for pedestrians.
• Check and secure all fasteners before every ride.
• Replace worn or broken parts immediately.
• Do not exceed 198 lb (90 kg) total weight on the drift trike.
• Do not allow children under age fourteen (14) to use the drift trike.
• Rider weight does not necessarily mean rider’s size is appropriate to fit or
maintain control of the drift trike.
ACCEPTABLE RIDING PRACTICES AND CONDITIONS
Adult supervision is recommended. Drift trikes are meant to be used only in
controlled environments free of potential traffic hazards. Do not allow rider
to ride a drift trike in any areas where vehicle traffic is present. Rider must
maintain a hold of the handlebars at all times. Never allow more than one
rider at a time to ride a drift trike. Never use near steps, sloped driveways,
hills, roadways, alleys or swimming pool areas. Do not ride a drift trike in wet
weather. Drift trikes are intended for use on solid, clean and dry surfaces such
as pavement or level ground without loose debris such as rocks or gravel. Wet,
slick or uneven and rough surfaces may impair braking traction, and contribute
to possible accidents. Do not ride a drift trike in mud, ice, puddles or water.
Avoid excessive speeds that can be associated with downhill rides. Never risk
damaging surfaces such as carpet or flooring by use of a drift trike indoors. Do
not ride at night or when visibility is impaired.
Aggressive riding reduces your ability to maneuver and control. Take necessary
precautions and practice in a safe area.
You will see people on TV and videos doing tricks or stunts. These are people
who have been practicing a long time and accept the risks of trick riding
activity. Do not assume that you can attempt to do the same tricks without
great risk.
PROPER RIDING ATTIRE
Always ensure rider is wearing proper protective equipment, such as an
approved safety helmet. A helmet may be legally required by local law or
regulation in your area. Always wear shoes and keep shoelaces tied and out
of the way of the wheels. Never ride barefooted or in sandals. Long pants are
recommended and may reduce risk of abrasion if legs come in contact with
wheels when riding.
WARNING: ALWAYS INSPECT DRIFT TRIKE PRIOR TO RIDING.
Properly inspecting and maintaining your drift trike can reduce the risk of injury.
Always inspect your drift trike before riding and regularly maintain it.
WARNING: CHECK LOCAL LAWS REGARDING USE. Check local laws
and regulations to see where and how you may use your drift trike legally. In
many states and local areas riders are required BY LAW to wear a helmet.
Check local laws and regulations regarding laws governing helmet use and
drift trike operation in your area.
FAILURE TO USE COMMON SENSE AND HEED THE ABOVE WARNINGS
FURTHER INCREASES RISK OF SERIOUS INJURY. USE AT YOUR OWN
RISK AND WITH APPROPRIATE AND SERIOUS ATTENTION TO SAFE
OPERATION. USE CAUTION.
SAFETY WARNINGS
Usage ............................................................................................................ 7-8
Repair and Maintenance.............................................................................9-13
Product Parts .................................................................................................. 14
Warranty and Contact Information ................................................................ 15
Safety Warnings .............................................................................................. 1
Before You Begin..............................................................................................2
Assembly and Set-Up....................................................................................3-5
Pre-Ride Checklist ............................................................................................ 6
CONTENTS
WARNING: The DXT Drift Trike is not the same as an “ordinary” tricycle and therefore may require greater skill to ride than an ordinary tricycle.
It is not for young children. The DXT is designed to allow movement forward and extreme sideways drifting. Using this product requires open space, free of
other traffic or obstacles, and it is best ridden by a practiced rider aware of the product’s capabilities and willing to accept risks associated with drifts and
fast moving actions.
Riding any product can be a hazardous activity. Certain conditions may cause the equipment to fail without fault of the manufacturer. Like other products, the DXT
Drift Trike can and is intended to move, and it is therefore possible to lose control, fall off and/or get into dangerous situations that no amount of care, instruction
or expertise can eliminate. If such things occur you can be seriously injured or die, even when using safety equipment and other precautions. RIDE AT YOUR OWN
RISK AND USE COMMON SENSE.

2
Need Help? Visit our web site for replacement parts, product support, a list of authorized service centers in the US and customer service contact information
at www.razor.com. Please have the product I.D. code (located on the white label of your product) available for better assistance. Additional Customer Service
contact information is listed at the back of this manual.
BEFORE YOU BEGIN
Remove contents from box and check parts against parts diagram found on page 14. Remove the separators that
protect the components from damage during shipping. Inspect the contents of the box for scratches in the paint or
dents that may have occurred during shipping. Because the DXT was partially assembled and packed at the factory
there should not be any problems, even if the box has a few scars or dents.
Estimated Assembly and Set-Up Time
Allow up to 15–20 minutes for assembly. Two (2) person assembly recommended.
WARNING: DO NOT
USE NON-RAZOR PRODUCTS
WITH YOUR DXT. The DXT has
been built to certain Razor design
specifications. The original
equipment supplied at the time
of sale was selected on the basis
of its compatibility with the
frame, fork and all other parts.
Certain aftermarket products may
not be compatible and will void
your warranty.
WARNING: Safety flag
is intended to increase rider’s
visibility to others. Do not bend
excessively (flag can break if
over stressed) nor remove from
bracket when riding.
Required Tools
Two (2) 5 mm Allen Wrench
6 mm Allen Wrench
13 mm/15 mm Wrench
Box Contents:
• DXT Drift Trike
• Tools
• Owner’s Manual
Product ID Locations:
See locations to the left
1. Frame (underneath unit)
2. Box - Side of UPC (not shown)
Front Wheel Assembly
Rear Drifter Wheels
Brake Lever
Seat
Flag
1
L
R
3
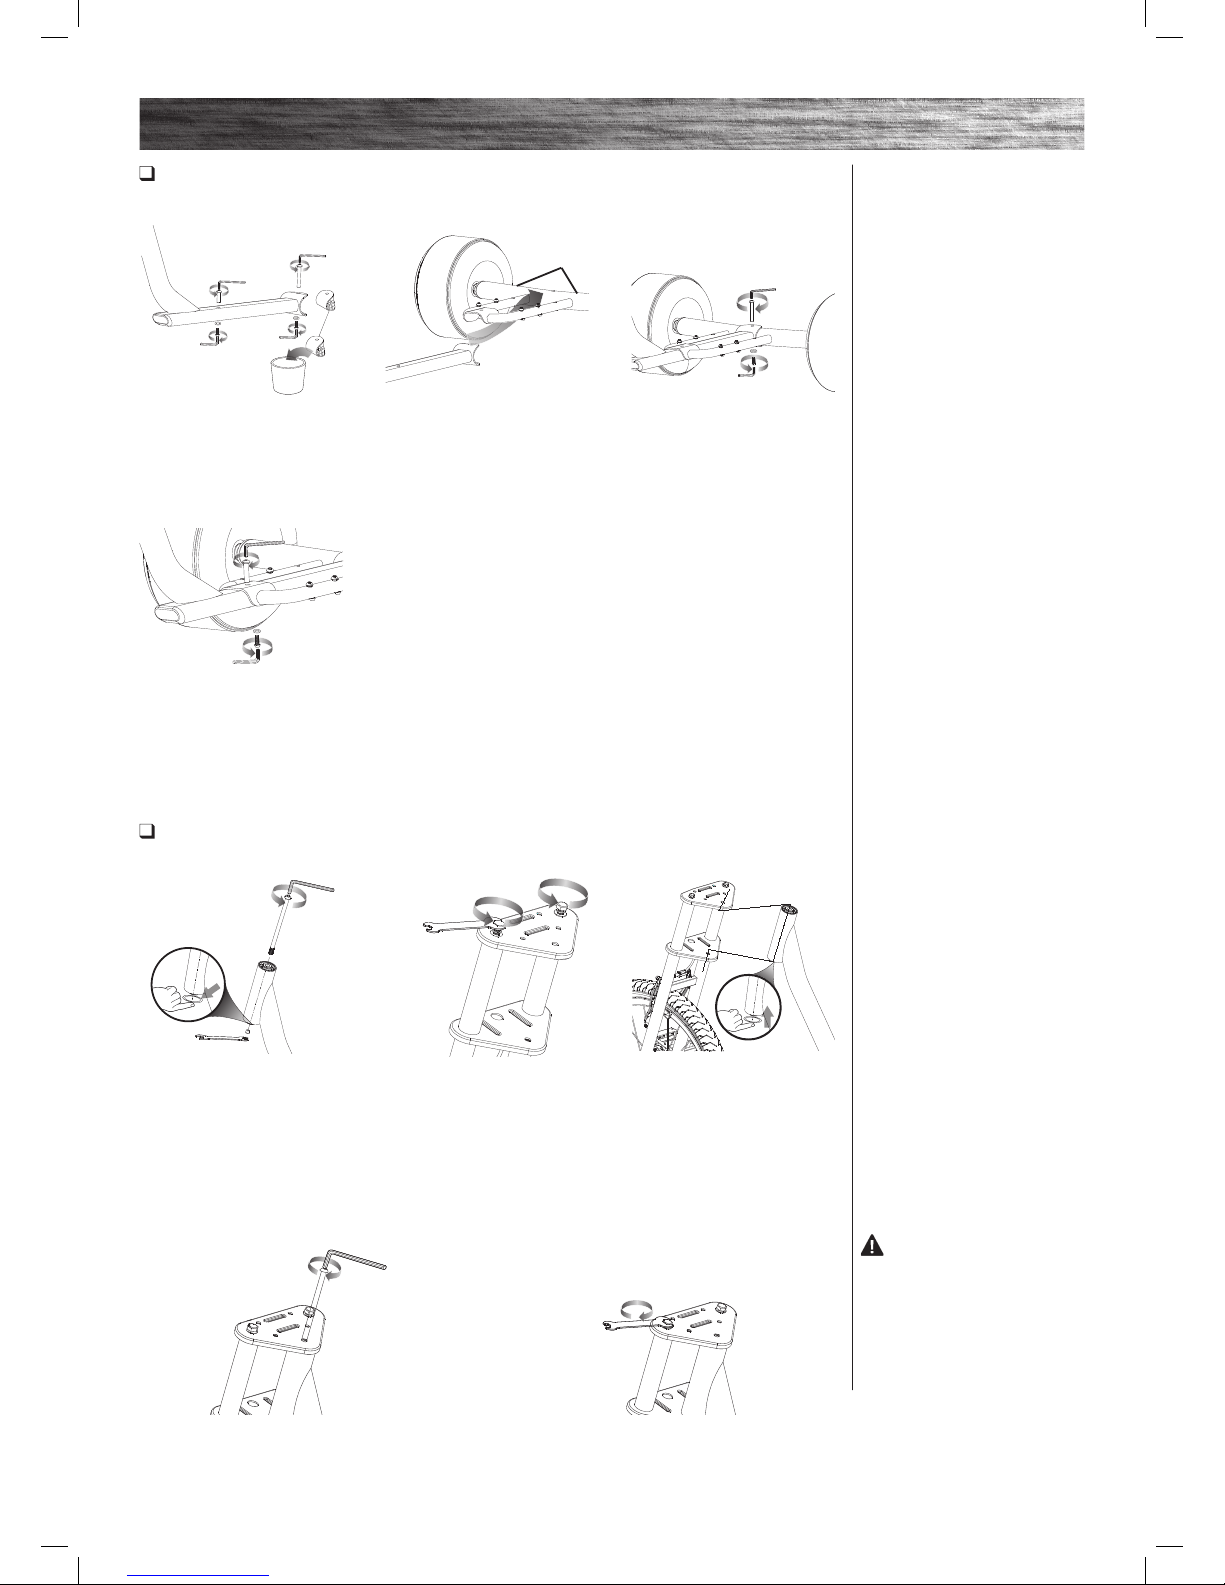
ASSEMBLY AND SET-UP
Assembling the Frame
Required Tools: Two (2) 5 mm Allen Wrenches
1 Using a 5 mm Allen wrench
and a 13 mm wrench, remove
the steering bolt and locknut
from the downtube.
Note: Place fi nger underneath
the downtube to prevent the
bottom bushing from falling
out and getting lost.
Attaching the Front Fork
Required Tools: 5 mm Allen Wrench and 13 mm Wrench
2 Using a 13 mm wrench,
loosen the two (2) bolts on
the upper crown.
3 Re-insert the bottom bushing
into the downtube then carefully
slide the downtube between the
upper and lower crowns.
4 Align the downtube with the hole in the upper and
lower crown and re-insert the steering bolt. Securely
tighten using a 5 mm Allen wrench and a 13 mm wrench.
5 Re-tighten the two (2) 13 mm bolts on the
upper crown.
WARNING: Failing to
properly tighten the steering bolt that
attaches the front fork assembly to
the frame assembly can cause you to
lose control and fall.
1 Using two (2) 5 mm
Allen wrenches, remove the
two (2) coupling bolts from the
downtube. Remove and discard
the plastic insert.
4 Re-insert the shorter coupling
bolt (A) through the center
frame and downtube and tighten
securely in place.
3 Re-insert the longer coupling
bolt (B) through downtube and
rear frame and tighten securely
in place.
2 Connect the downtube to the
rear frame and align the holes on
the downtube with the holes on
the rear frame.
A (Shorter)
B (Longer)
Grip Side Up
4
Need Help? Visit our web site for replacement parts, product support, a list of authorized service centers in the US and customer service contact information
at www.razor.com. Please have the product I.D. code (located on the white label of your product) available for better assistance. Additional Customer Service
contact information is listed at the back of this manual.
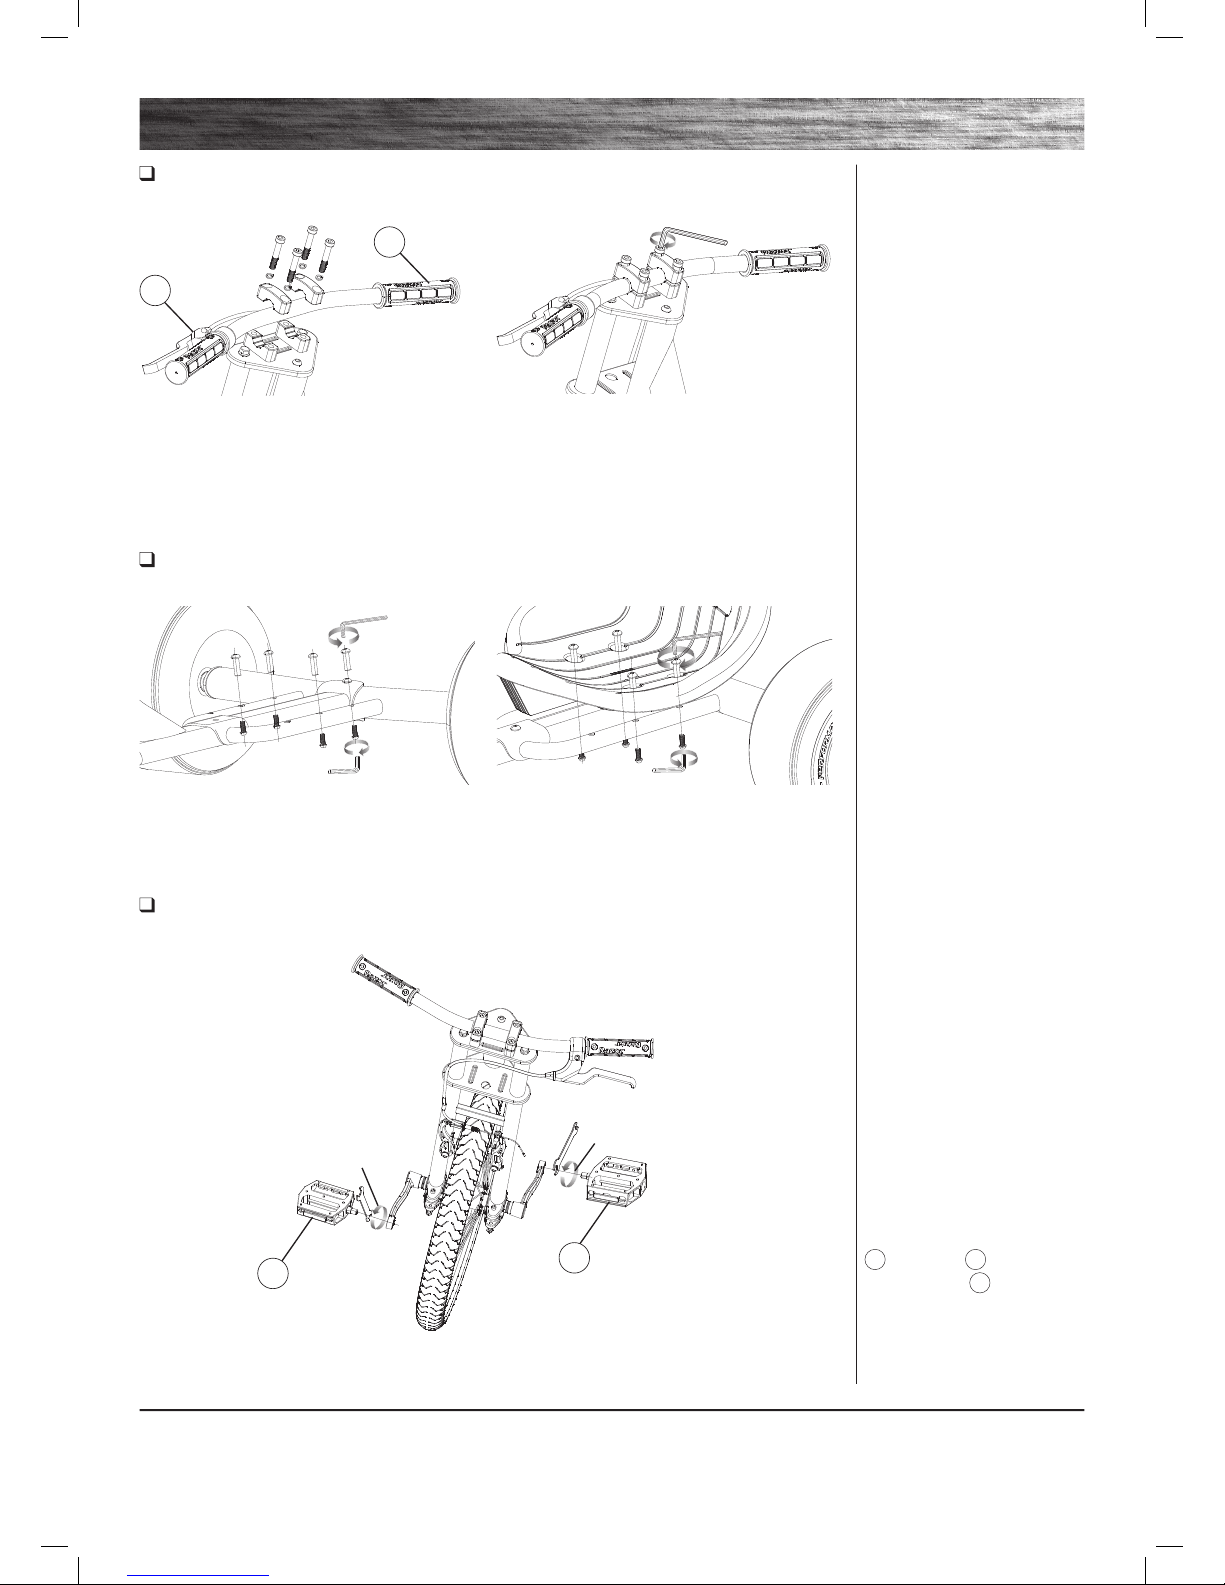
ASSEMBLY AND SET-UP
Note: Pedals are marked with an
L
(Left) and an
R
(Right). Install
the pedal marked
L
on the same
side as the brake lever.
Counter Clockwise
Clockwise
1 Place handlebars between the upper and lower
handlebar clamps.
Note: Make sure brake lever is on the left (from
sitting position).
2 Align the handlebars parallel to the front fork. Using a
6 mm Allen wrench, tighten all four (4) bolts securely to the
upper crown.
Note: When properly tightened, the handlebars should not
move forward or backward.
Attaching the Handlebars
Required Tool: 6 mm Allen Wrench
Attaching the Seat
Required Tools: Two (2) 5 mm Allen Wrenches
1 Using two (2) 5 mm Allen wrenches, remove the four
(4) coupling bolts from the frame.
2 Place the seat at desired position and align the
four (4) holes in the seat with the holes in the frame.
Re-insert the coupling bolts and tighten bolts until seat is
securely in place.
Attaching the Pedals
Required Tool: 15 mm Wrench
1 Attach the pedals to the cranks then tighten securely in place with a 15 mm wrench.
R
L
L
R
 Loading...