

DIRT QUAD BATTERY
INSTALLATION INSTRUCTION
Tools Needed: A. 3mm Allen Wrench
B. 4mm Allen Wrench
C. 5mm Allen Wrench
D. 6mm Allen Wrench
E. No. 10 Open Wrench
F. Phillips Head Screw Driver
WARNING: Turn off the main power switch before proceeding with the following instructions.
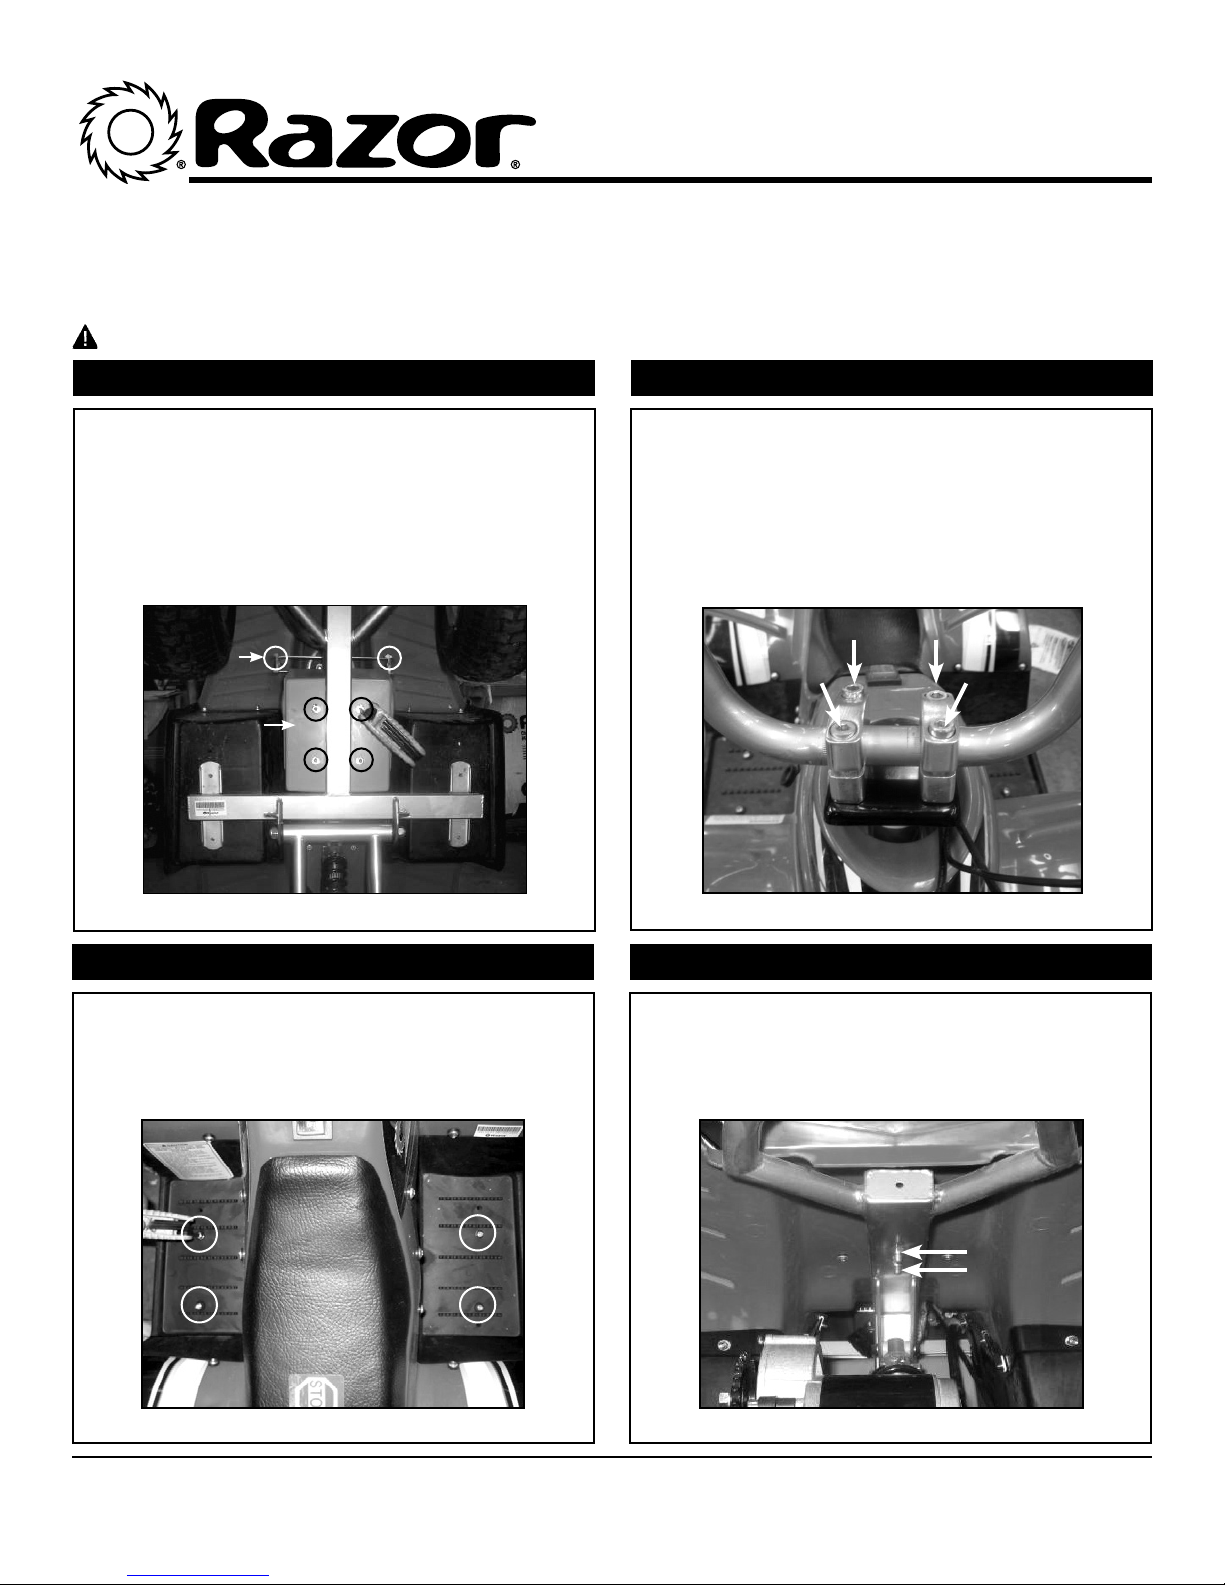
Step 1:
Use the rear carry handle to carefully lift Dirt Quad
up on front end. Using a 5mm allen wrench,
remove the 4 bolts on the bottom of the battery
cover. Using a 3mm allen wrench, remove the 2
bolts on the support bracket (Figure 1). Using the
rear carry handle, slowly lower the Dirt Quad back
down to the ground. Save bolts for reassembly.
3mm Allen
5mm Allen
Step 2:
Using a 6mm allen wrench, remove the 4 bolts
on the handlebar clamps and detach handlebars. (Figure 2)
Figure 1 Figure 2
Step 3:
Using a 5mm allen wrench, remove the 4 bolts
on both sides of the footrest platforms. (Figure 3)
Figure 3 Figure 4
Need Help? Visit our website for additional instructions at www.razor.com or call toll-free at 866-467-2967 Monday - Friday
8:00am - 5:00pm Pacific Time.
Step 4:
Using a # 10 open wrench, remove the 2 bolts
underneath the rear fender. (Figure 4)
1
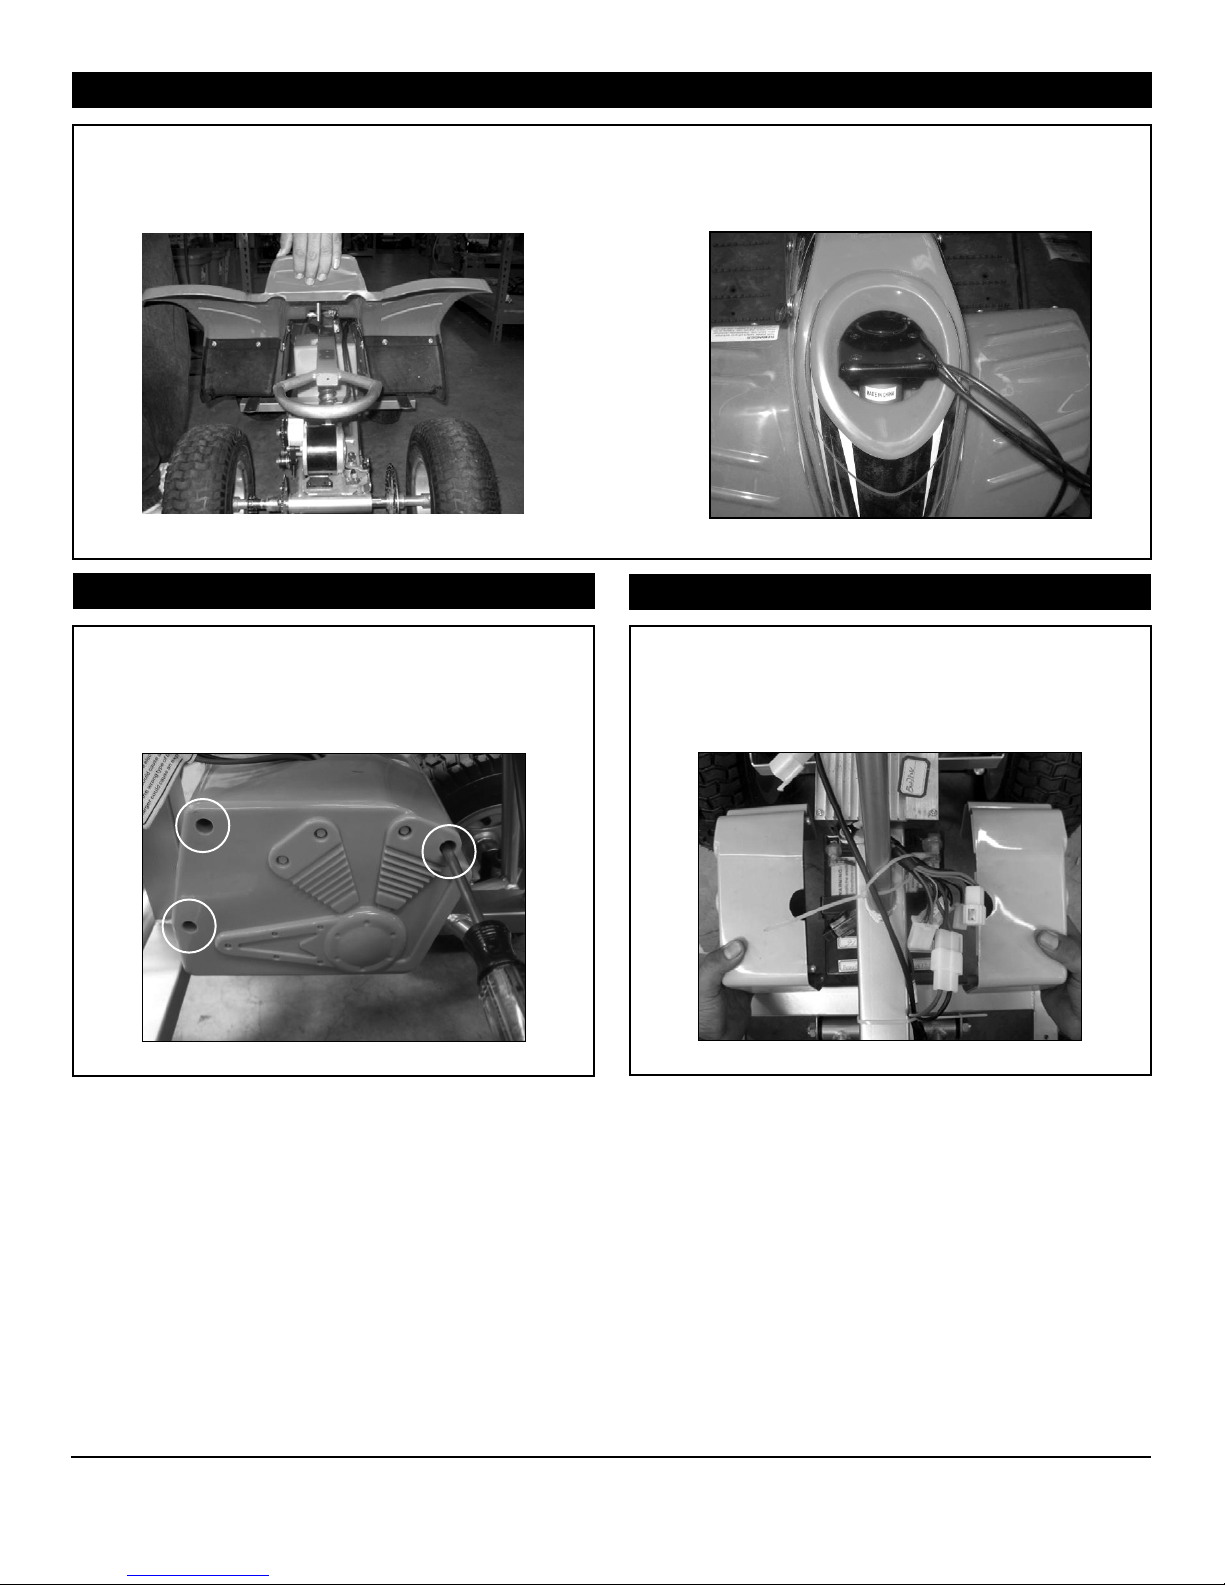
Step 5:
Lift up the plastic body (Figure 5a). Carefully maneuver it around the top of the steering tube (Figure 5b)
Figure 5a
Step 6:
Using a Phillips screw driver, remove the 3
screws on the right side (as if riding product) of
the battery cover. (Figure 6)
Figure 6
Figure 5b
Step 7:
Remove both sides of the battery covers. (Figure 7)
Figure 7
Need Help? Visit our website for additional instructions at www.razor.com or call toll-free at 866-467-2967 Monday - Friday
8:00am - 5:00pm Pacific Time.
2
 Loading...