

Razer PeathAdder, DeathAdder Owner's Manual

The Razer DeathAdder was released in 2006 and is still to date, the world’s best-selling
gaming mouse, used by countless pro-gamers in the circuit as their de facto gaming
mouse. For its combination of ergonomics and precision, the Razer DeathAdder has
become legend
How did we improve on perfection? Very carefully.
We didn’t want to fix anything that wasn’t broken, and so, we literally didn’t change
anything. We focused instead on enhancing and optimizing the Razer DeathAdder
utilizing next generation technologies and further ergonomics tweaks.
The Razer DeathAdder’s optical sensor was upgraded from 3.5G to the cutting edge 4G
infrared sensor featuring improved performance and precision. We also retained the
iconic right handed ergonomic shape, but enhanced it with built in rubber side grips for
better mouse control and grip. Like its predecessor, the Razer DeathAdder will feature
Synapse 2.0 support, for effortless synching of all your settings and profiles
automatically from the cloud.
The favorite weapon for pro-gamers all over the world just got better, and now, so will
your game.
0 | For gamers by gamers

CONTENTS
1. PACKAGE CONTENTS / SYSTEM REQUIREMENTS / REGISTRATION ..................... 2
2. TECHNICAL SPECIFICATIONS ............................................................................... 3
3. DEVICE LAYOUT .................................................................................................. 4
4. INSTALLING YOUR RAZER DEATHADDER............................................................. 5
5. CONFIGURING YOUR RAZER DEATHADDER ........................................................ 6
6. SAFETY AND MAINTENANCE ............................................................................ 26
7. LEGALESE ......................................................................................................... 28
1 | razer

1. PACKAGE CONTENTS / SYSTEM REQUIREMENTS / REGISTRATION
PACKAGE CONTENTS
Razer DeathAdder Gaming Mouse
Quick Start Guide
SYSTEM REQUIREMENTS
PC or Mac with a free USB 2.0 port
Windows® 7 / Windows Vista® / Windows® XP (32-bit) / Mac OS X (10.6-10.7)
Internet connection
100MB of free hard disk space
REGISTRATION
Please visit www.razerzone.com/registration for online product registration.
What you’ll get:
2 years limited manufacturer’s warranty.
Free online technical support at www.razersupport.com.
2 | For gamers by gamers

2. TECHNICAL SPECIFICATIONS
6400dpi Razer Precision 4G Optical Sensor
Ergonomic Right-Handed Design With Textured Rubber Side Grips
5 Independently Programmable Hyperesponse Buttons
Razer Synapse 2.0 Enabled
1000hz Ultrapolling / 1ms Response
On-The-Fly Sensitivity Adjustment
Always-On Mode
200 Inches Per Second And 50g Of Acceleration
Gold-Plated USB Connector
Seven-Foot, Lightweight, Braided Fiber Cable
Razer Synapse 2.0 Enabled
Approximate Size : 127 mm / 5.00” (Length) x 70 mm / 2.76” (Width) x 44 mm /
1.73” (Height)
Approximate Weight: 105 g / 0.23 lbs
3 | razer
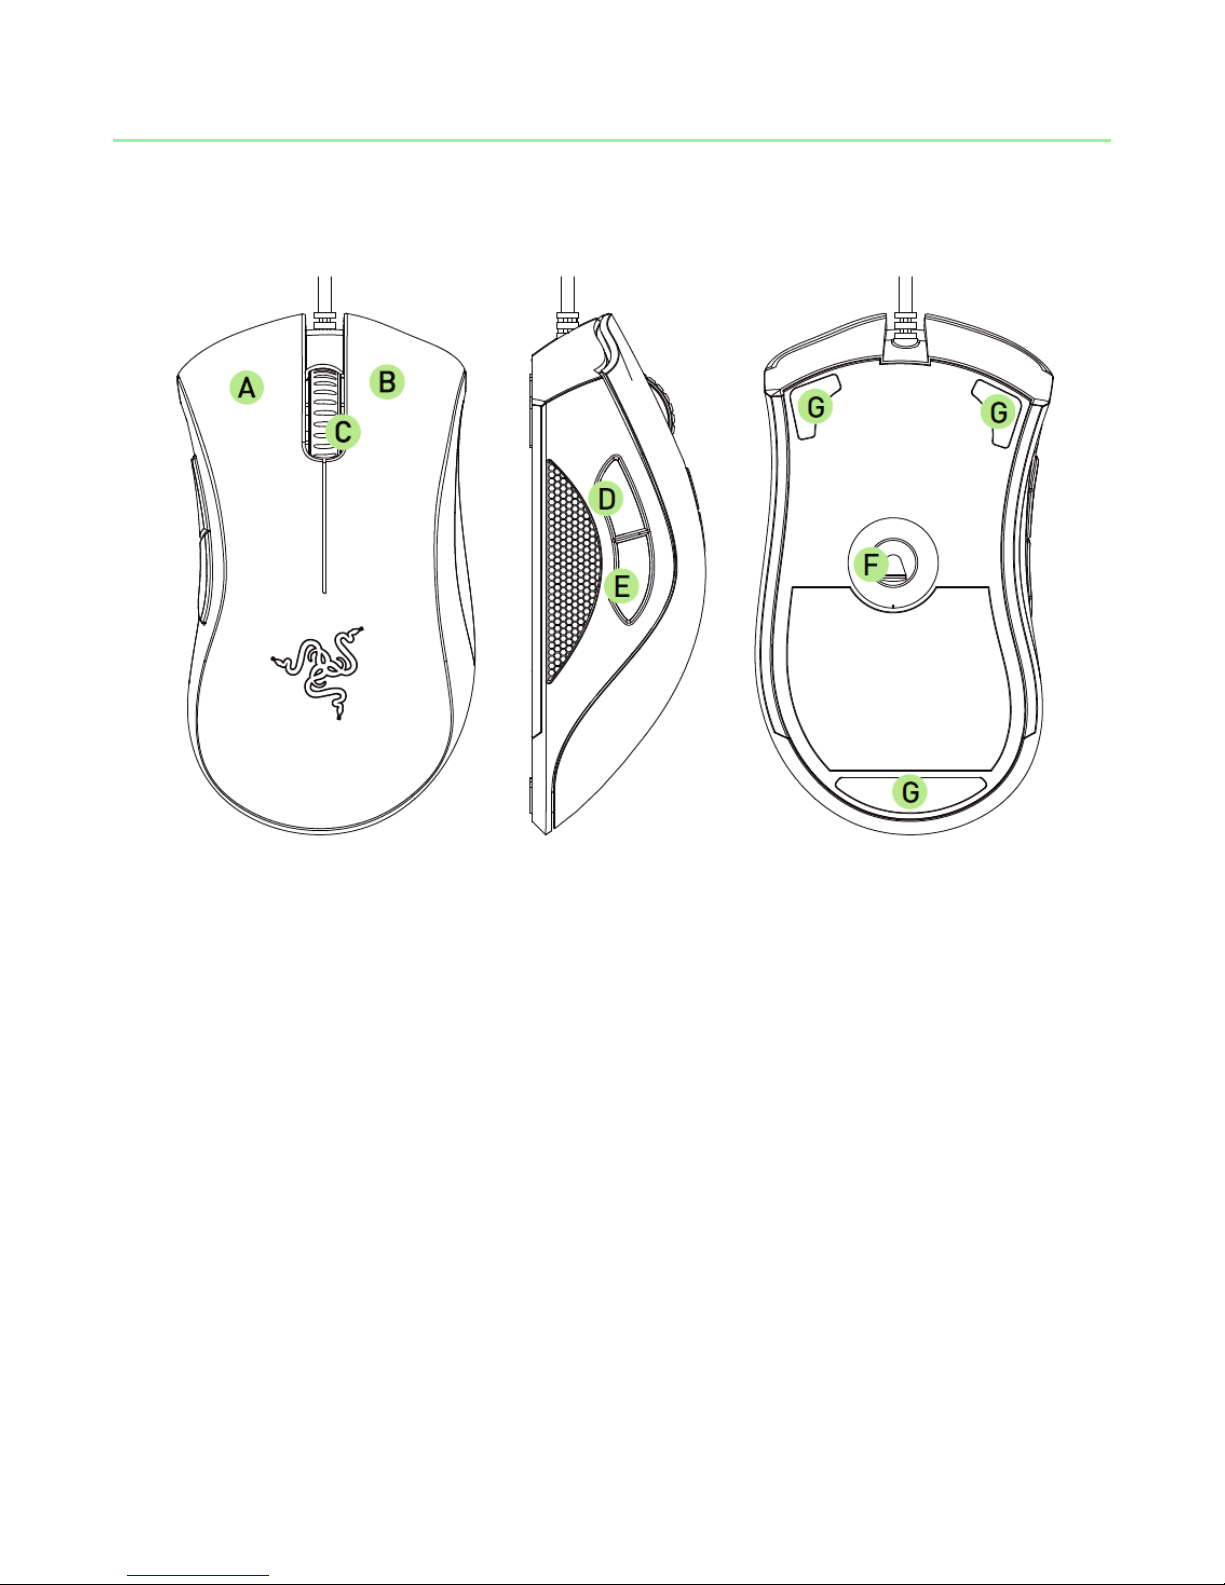
3. DEVICE LAYOUT
A. Left Mouse Button
B. Right Mouse Button
C. Scroll Wheel
D. Mouse Button 5
E. Mouse Button 4
F. Razer Precision 4G Optical Sensor
G. Ultraslick Mouse Feet
4 | For gamers by gamers
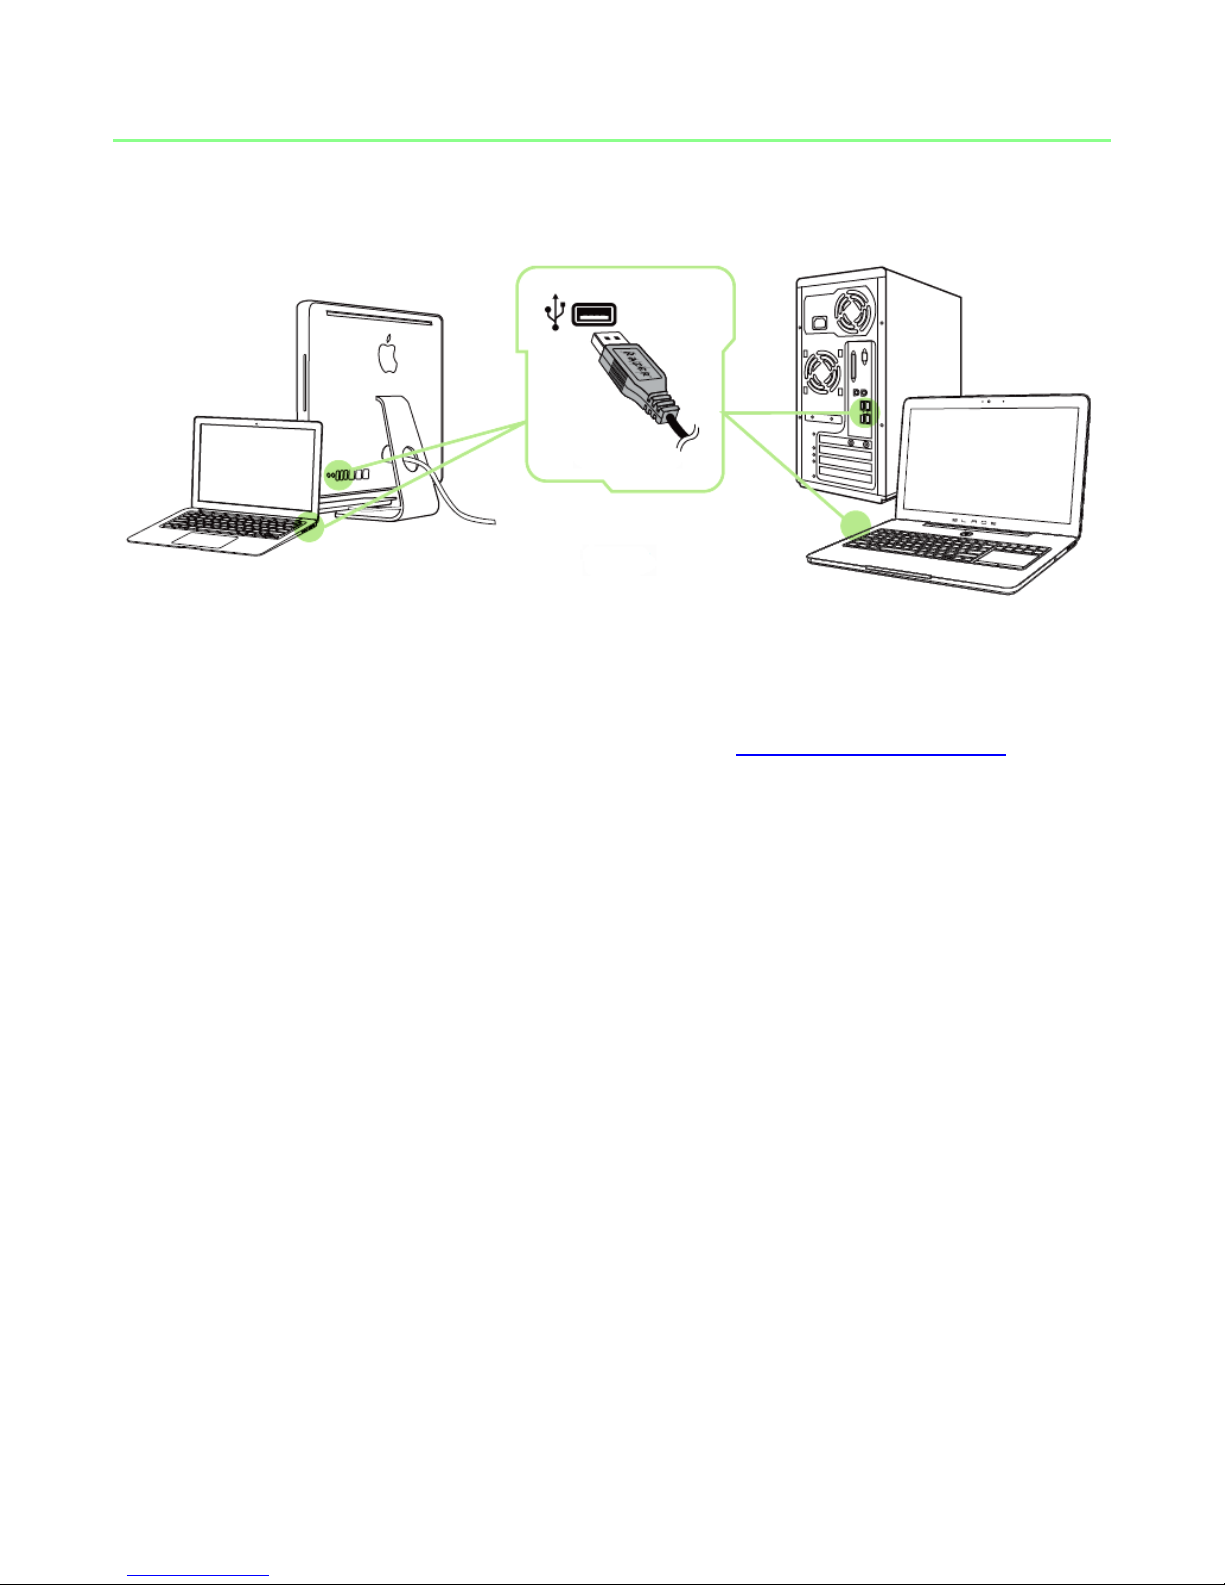
4. INSTALLING YOUR RAZER DEATHADDER
Note: You may skip Steps 2-4 if you already have a Razer Synapse 2.0 installed and an existing account.
Step 1: Plug the Razer DeathAdder into the USB port of your computer.
Step 2: Download the Razer Synapse 2.0 installer from www.razersupport.com.
Step 3: Run the installer and follow the onscreen instructions.
Step 4: Register for a Razer Synapse 2.0 account and confirm your new account.
Step 5: Launch Razer Synapse 2.0 and login to your account.
Step 6: Wait until the software automatically downloads and installs.
5 | razer
5. CONFIGURING YOUR RAZER DEATHADDER
Disclaimer: The features listed here require you to log in to Razer Synapse 2.0. These features are also subject
to change based on the current software version and your Operating System.
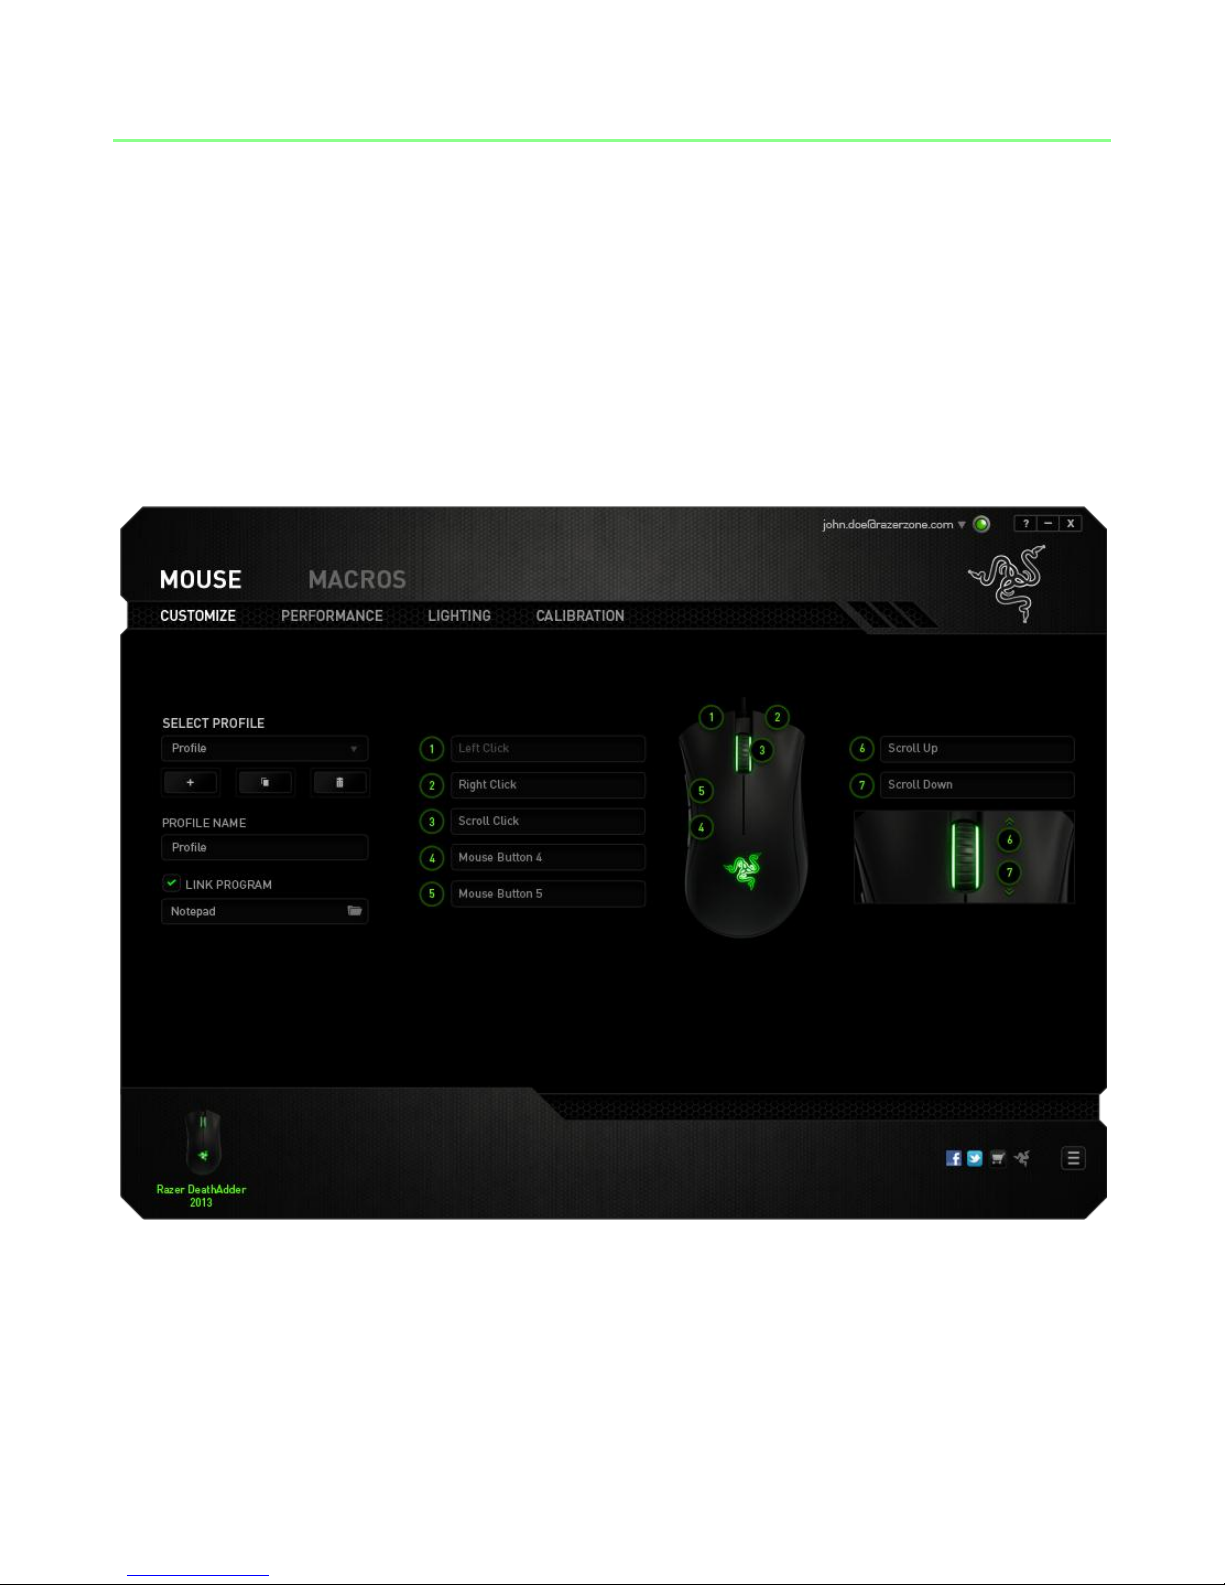
MOUSE TAB
The Mouse Tab is your default tab when you first install Razer Synapse 2.0. This tab
allows you to customize your device’s profiles, button assignments, performance,
lighting and calibration.
6 | For gamers by gamers

PROFILE
A Profile is a convenient way of saving all of the changes you have made on your
device. A single Profile can store numerous settings such as button assignments and
sensitivity adjustments.
Profile contains the default settings of your device. Any changes made within each tab
will automatically be saved into the current profile. If you want to rename this profile,
you may do so by typing on the field below PROFILE NAME.
There are other options available in the profile section such as creating a new profile by
clicking the button, deleting the current profile by clicking the button
and duplicating the current profile by clicking the button. You can even set a
profile to work with a specific program or application by using the LINK PROGRAM
option and clicking the button to search for it.
7 | razer
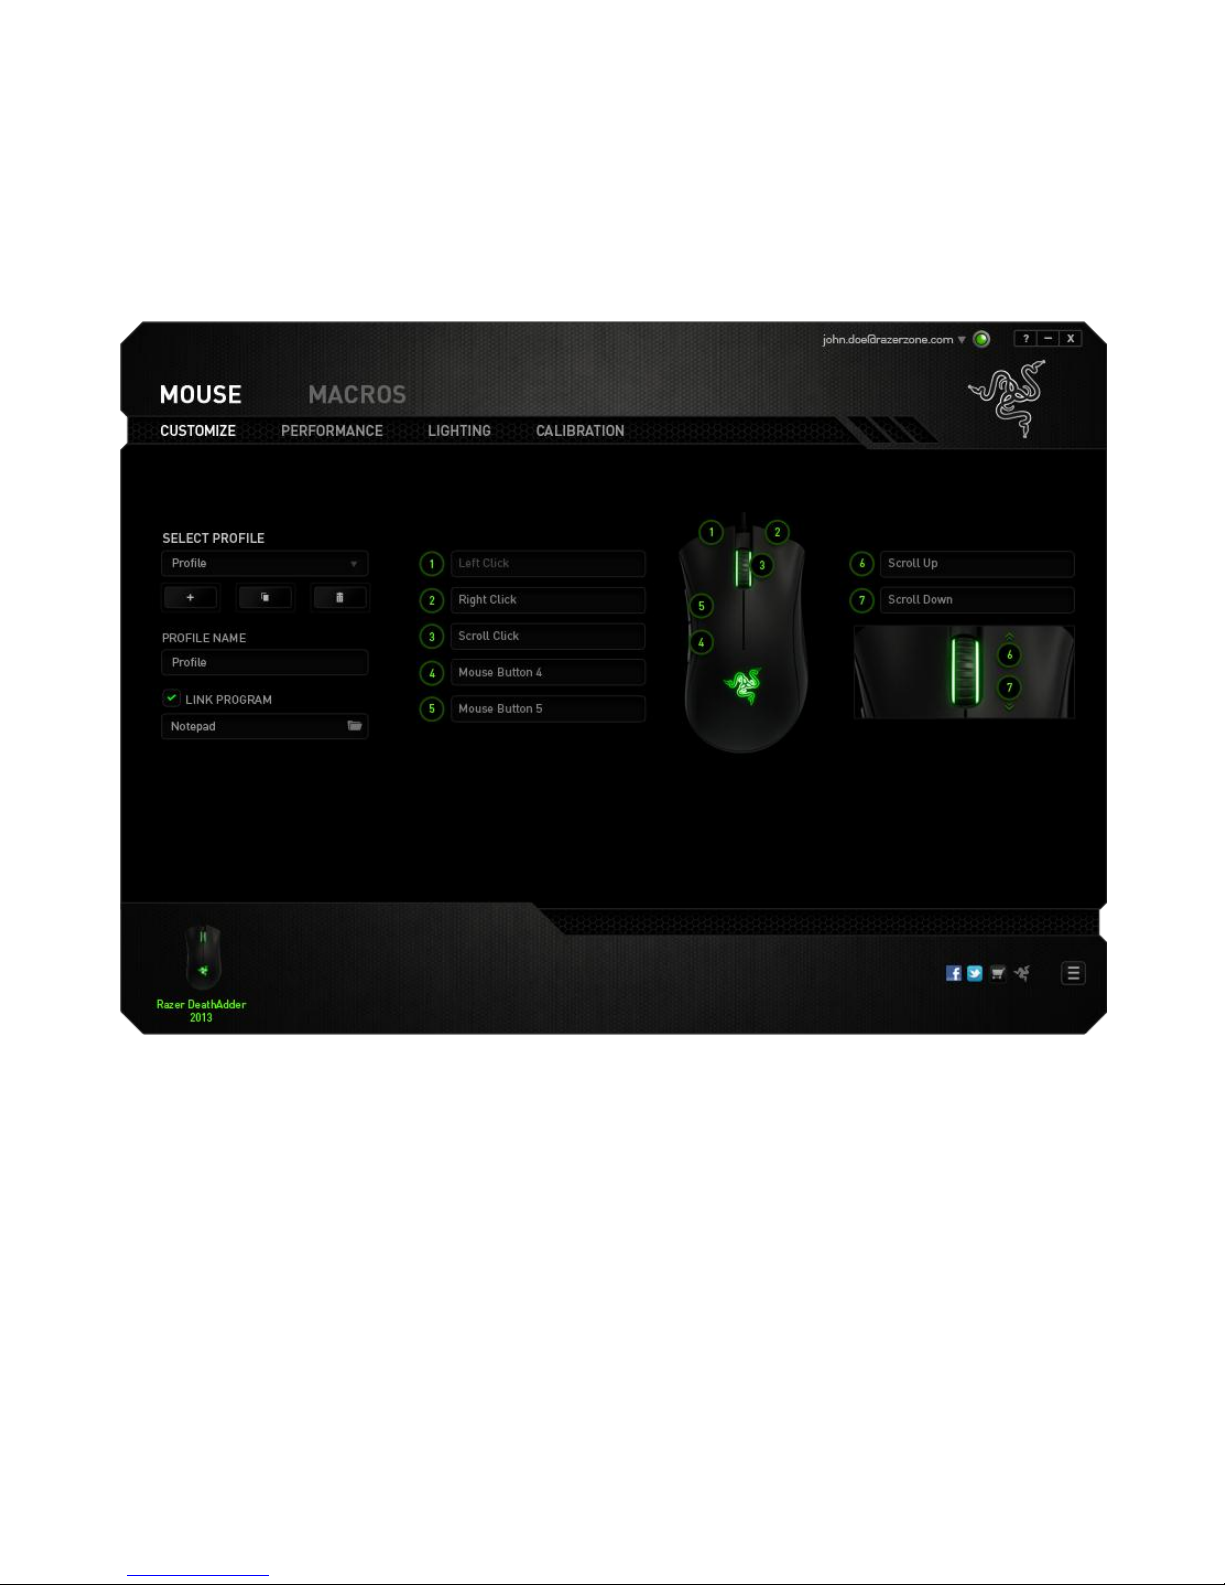
CUSTOMIZE TAB
The Customize Tab is where you can modify the basic functionalities of your device
such as button assignments to suit your gaming needs. The changes made in this tab
are automatically saved to your current profile.
8 | For gamers by gamers
 Loading...