

Page 1

RAZER RAZER ELECTRA V2 USB
MASTER GU IDE
Page 2

FOR GA ME R S. BY G AM ER S.™
1
Great audio is key to effective gaming. The Razer Electra V2 USB is your first
step to winning with the Razer advantage. Designed for all-around balanced
sound, the Razer Electra V2 USB is equipped with custom-tuned 40 mm
audio drivers that deliver well-controlled, punchy bass and clear crisp highs.
Take your gaming to the next level with virtual 7.1 surround sound for 360-
degree immersion.
Outfitted with a unibody aluminum frame and plush leatherette ear
cushions, the Razer Electra V2 USB is built to ensure comfort through the
most intense of battles.
Page 3

FOR GA ME R S. BY G AM ER S.™
2
CONTENTS
1. PACKAGE CONTENTS / SYSTEM REQUIREMENTS .................................................................................. 3
2. REGISTRATION / TECHNICAL SUPPORT .................................................................................................. 4
3. TECHNICAL SPECIFICATIONS .................................................................................................................. 5
4. DEVICE LAYOUT ...................................................................................................................................... 6
5. INSTALLING RAZER SYNAPSE FOR YOUR RAZER ELECTRA V2 USB ......................................................... 7
6. USING YOUR RAZER ELECTRA V2 USB .................................................................................................... 8
7. CONFIGURING YOUR RAZER ELECTRA V2 USB ..................................................................................... 13
8. SAFETY AND MAINTENANCE ................................................................................................................ 24
9. LEGALESE .............................................................................................................................................. 25
Page 4

FOR GA ME R S. BY G AM ER S.™
3
1. PACKAGE CONTENTS / SYSTEM REQUIREMENTS
PACKAGE CONTENTS
▪ Razer Electra V2 USB digital gaming and music headset
▪ Removable microphone
▪ Important Product Information Guide
SYSTEM REQUIREMENTS
PRODUCT REQUIREMENTS
▪ PC/Mac/PS4 with a free USB port
RAZER SYNAPSE REQUIREMENTS
▪ Windows®7/Mac OS X 10.9 (or higher)
▪ Internet connection
▪ 100 MB of free hard disk space
Page 5
FOR GA ME R S. BY G AM ER S.™
4
2. REGISTRATION / TECHNICAL SUPPORT
REGISTRATION
Register your product online at razer-id.razerzone.com/warranty to get real-time information on your
product’s warranty status.
If you haven’t registered for a Razer ID yet, register now at razer-id.razerzone.com to get a wide range
of Razer benefits.
TECHNICAL SUPPORT
What you’ll get:
▪ 1 years limited manufacturer’s warranty.
▪ Free online technical support at razersupport.com.
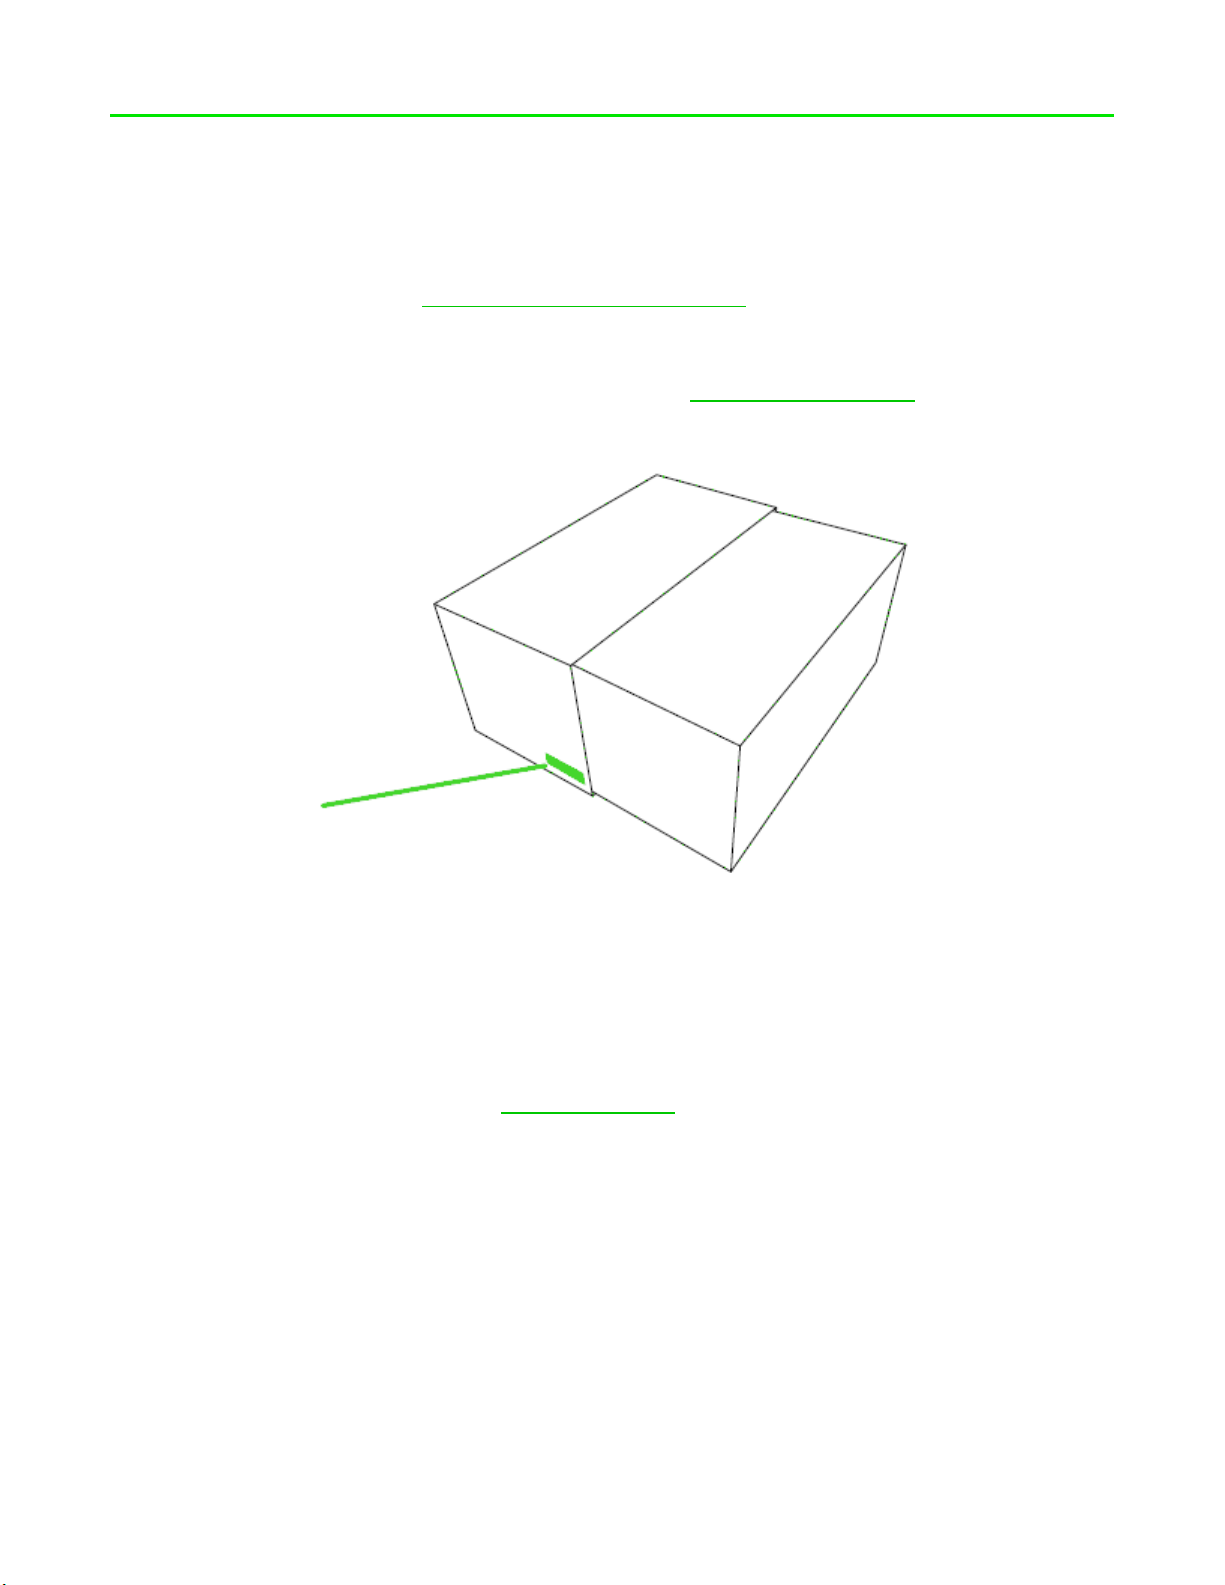
Your pr oduct’s serial number is located
on the bottom of it s packaging box.
Page 6

FOR GA ME R S. BY G AM ER S.™
5
3. TECHNICAL SPECIFICATIONS
HEADPHONES
▪ Frequency response: 20 Hz – 20 kHz
▪ Impedance: 32 ± 15% Ω
▪ Sensitivity: 115 ± 3 dB
▪ Max input power:50 mW
▪ Drivers: 40 mm with Neodymium magnets
▪ Cable length:1.3 m / 4.27 ft.
▪ Approximate weight: 294 g / 0.65 lbs
MICROPHONE (REMOVEABLE BOOM MIC)
▪ Frequency response: 100 Hz – 10 kHz
▪ Signal-to-noise ratio: >= 50 dB
▪ Sensitivity (@1 kHz): -41 ± 3 dB
▪ Pick-up pattern: Unidirectional
CONTROLS ON HEADSET
▪ Volume up / down, mic mute
Page 7
FOR GA ME R S. BY G AM ER S.™
6
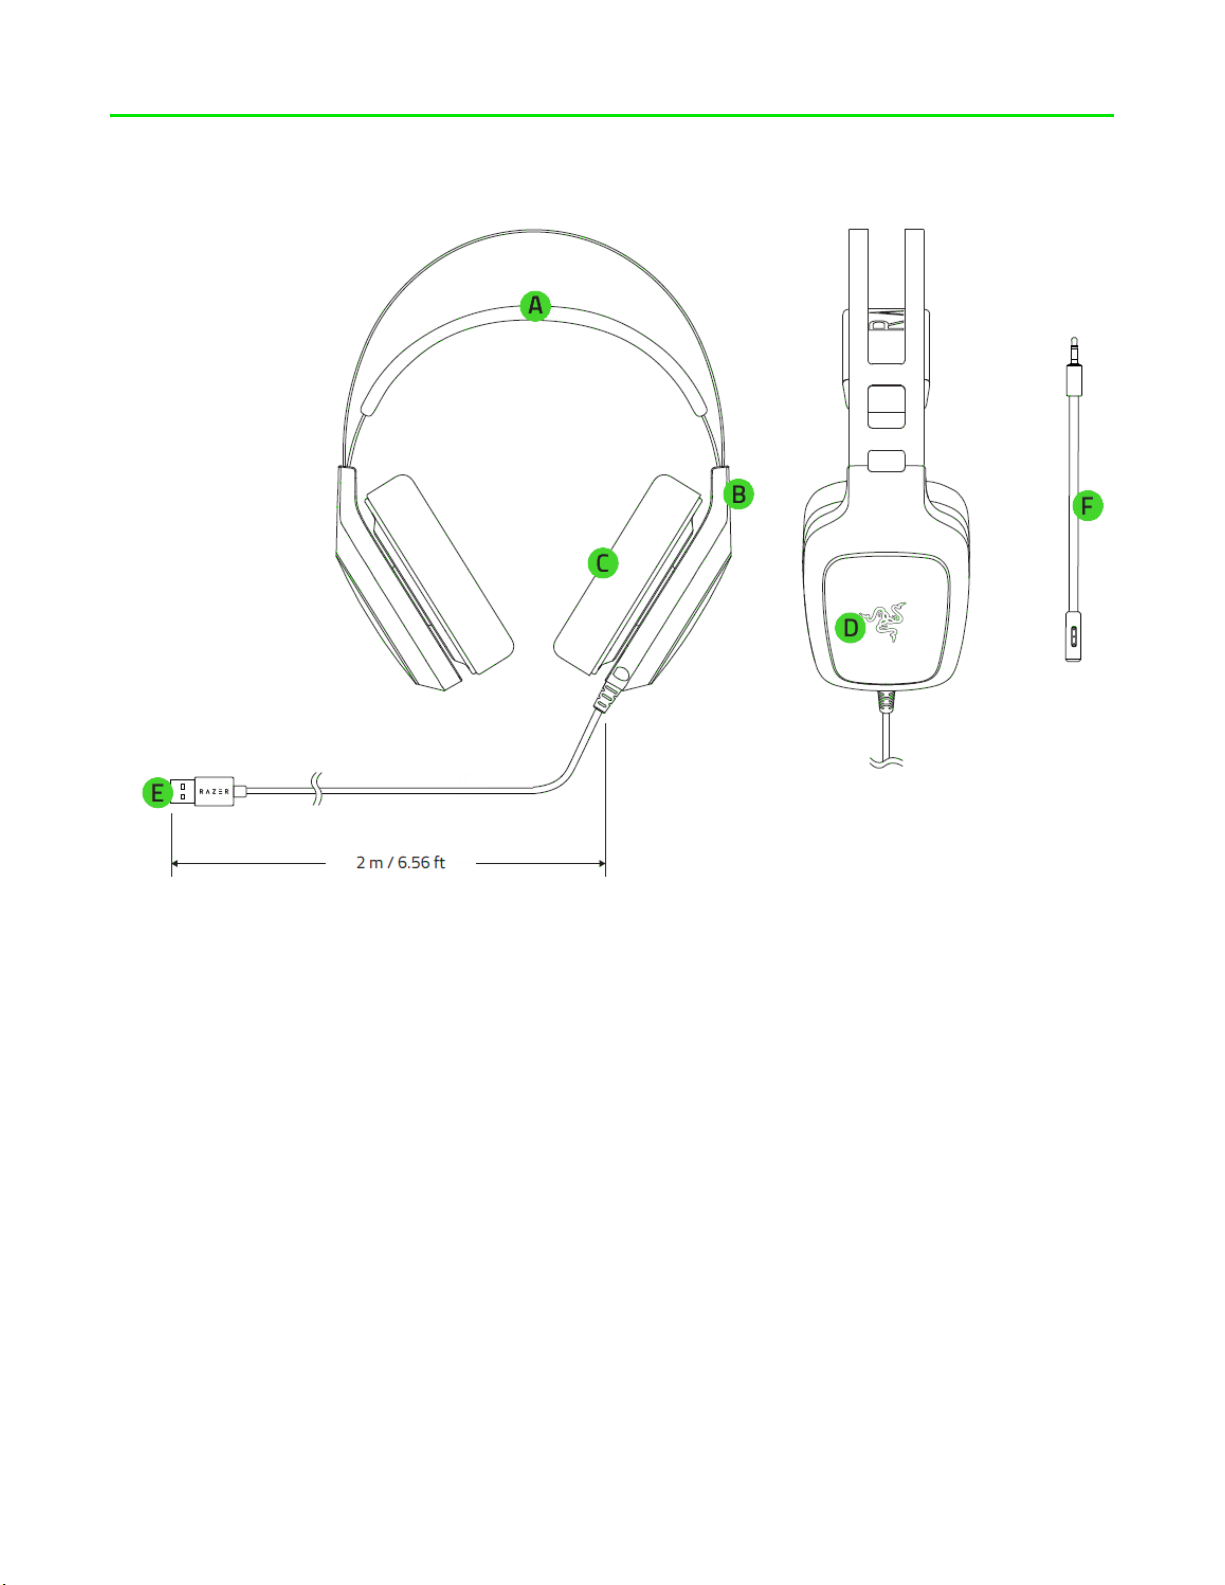
4. DEVICE LAYOUT
A. Adjustable padded headband
B. Circumaural ear cup design
C. Leatherette ear cushions
D. Backlit Razer logo
E. USB connector
F. Removable microphone
Page 8
FOR GA ME R S. BY G AM ER S.™
7
5. INSTALLING RAZER SYNAPSE FOR YOUR RAZER ELECTRA V2 USB
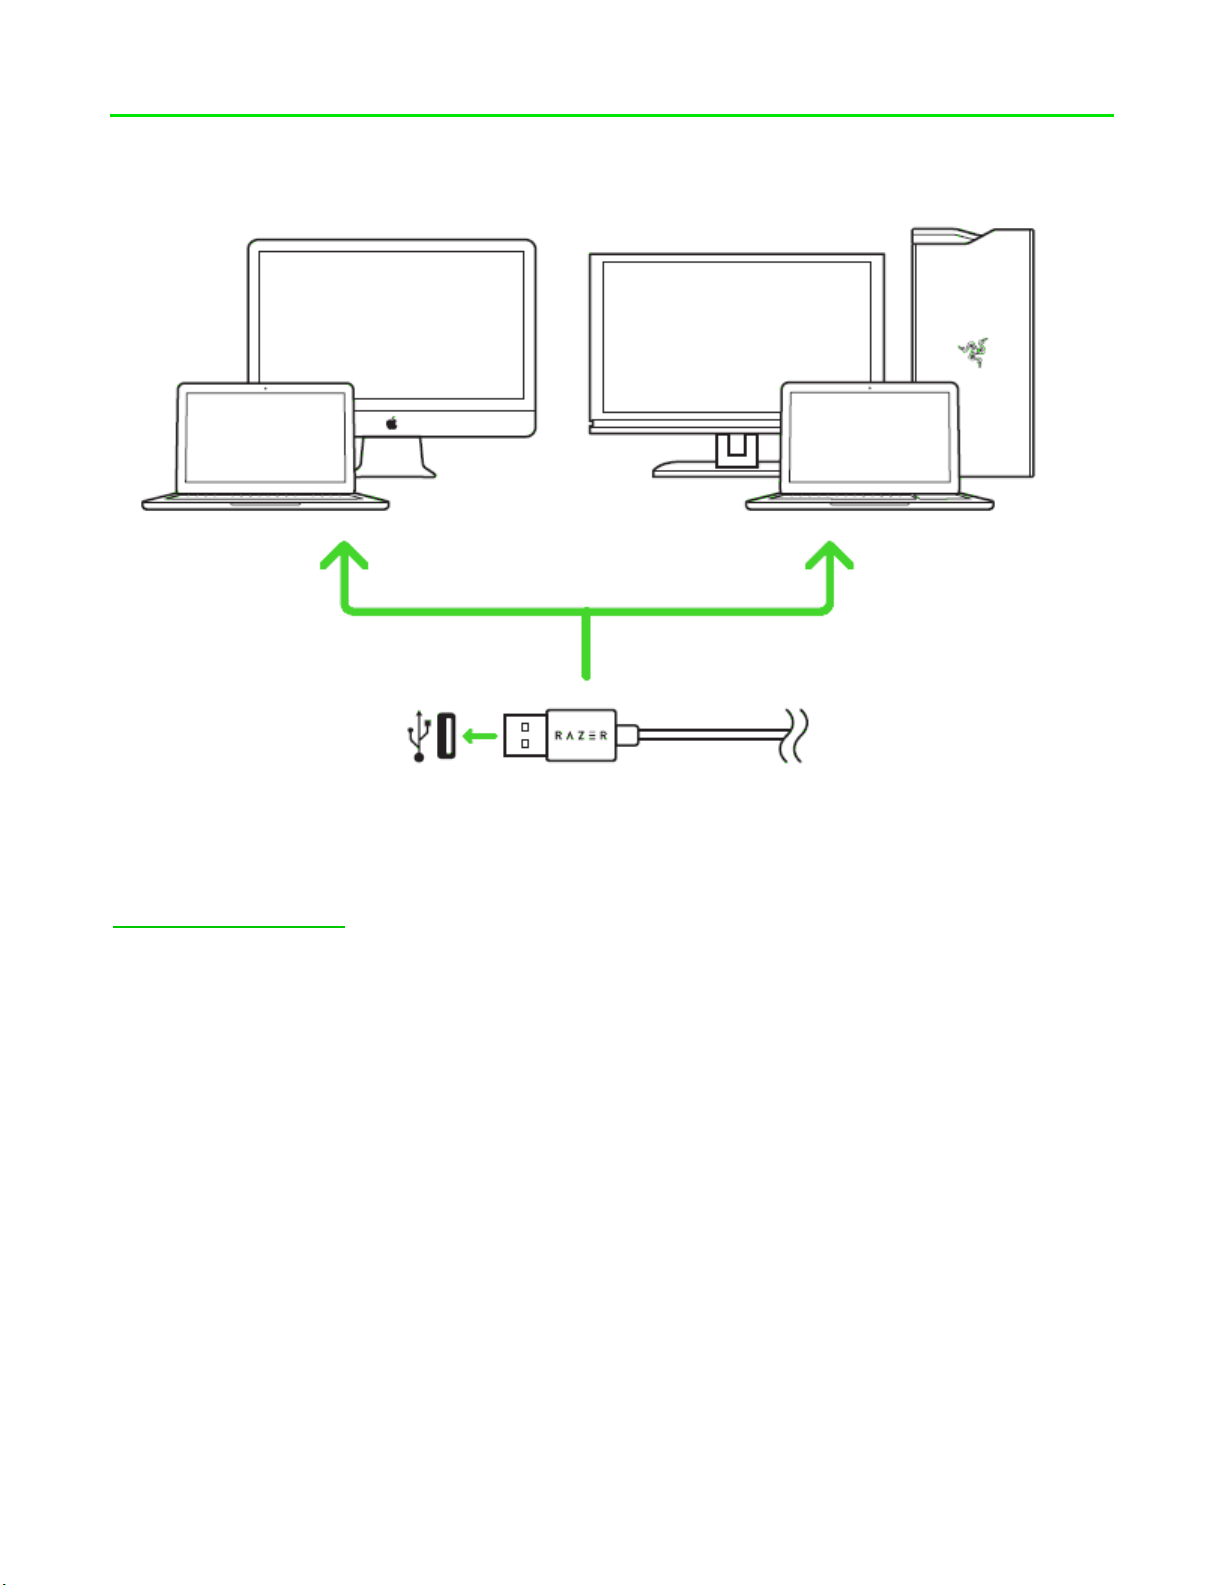
Step 1: Connect your Razer device to the USB port of your computer.
Step 2: Install Razer Synapse when prompted* or download the installer from
razerzone.com/synapse.
Step 3: Create your Razer ID or log into Razer Synapse with an existing account.
*Applicable for Windows 8 or later.
Note: The Razer Electra V2 USB headset works out of the box as a stereo headset, please install Razer
Synapse to set up virtual 7.1 surround sound.
Page 9
FOR GA ME R S. BY G AM ER S.™
8
6. USING YOUR RAZER ELECTRA V2 USB
SETTING THE DEFAULT PLAYBACK DEVICE
If you are using the Razer Kraken 7.1 Chroma headset for the first time, you may be required to set up
the device as your system’s default playback device.
FOR WINDOWS USERS
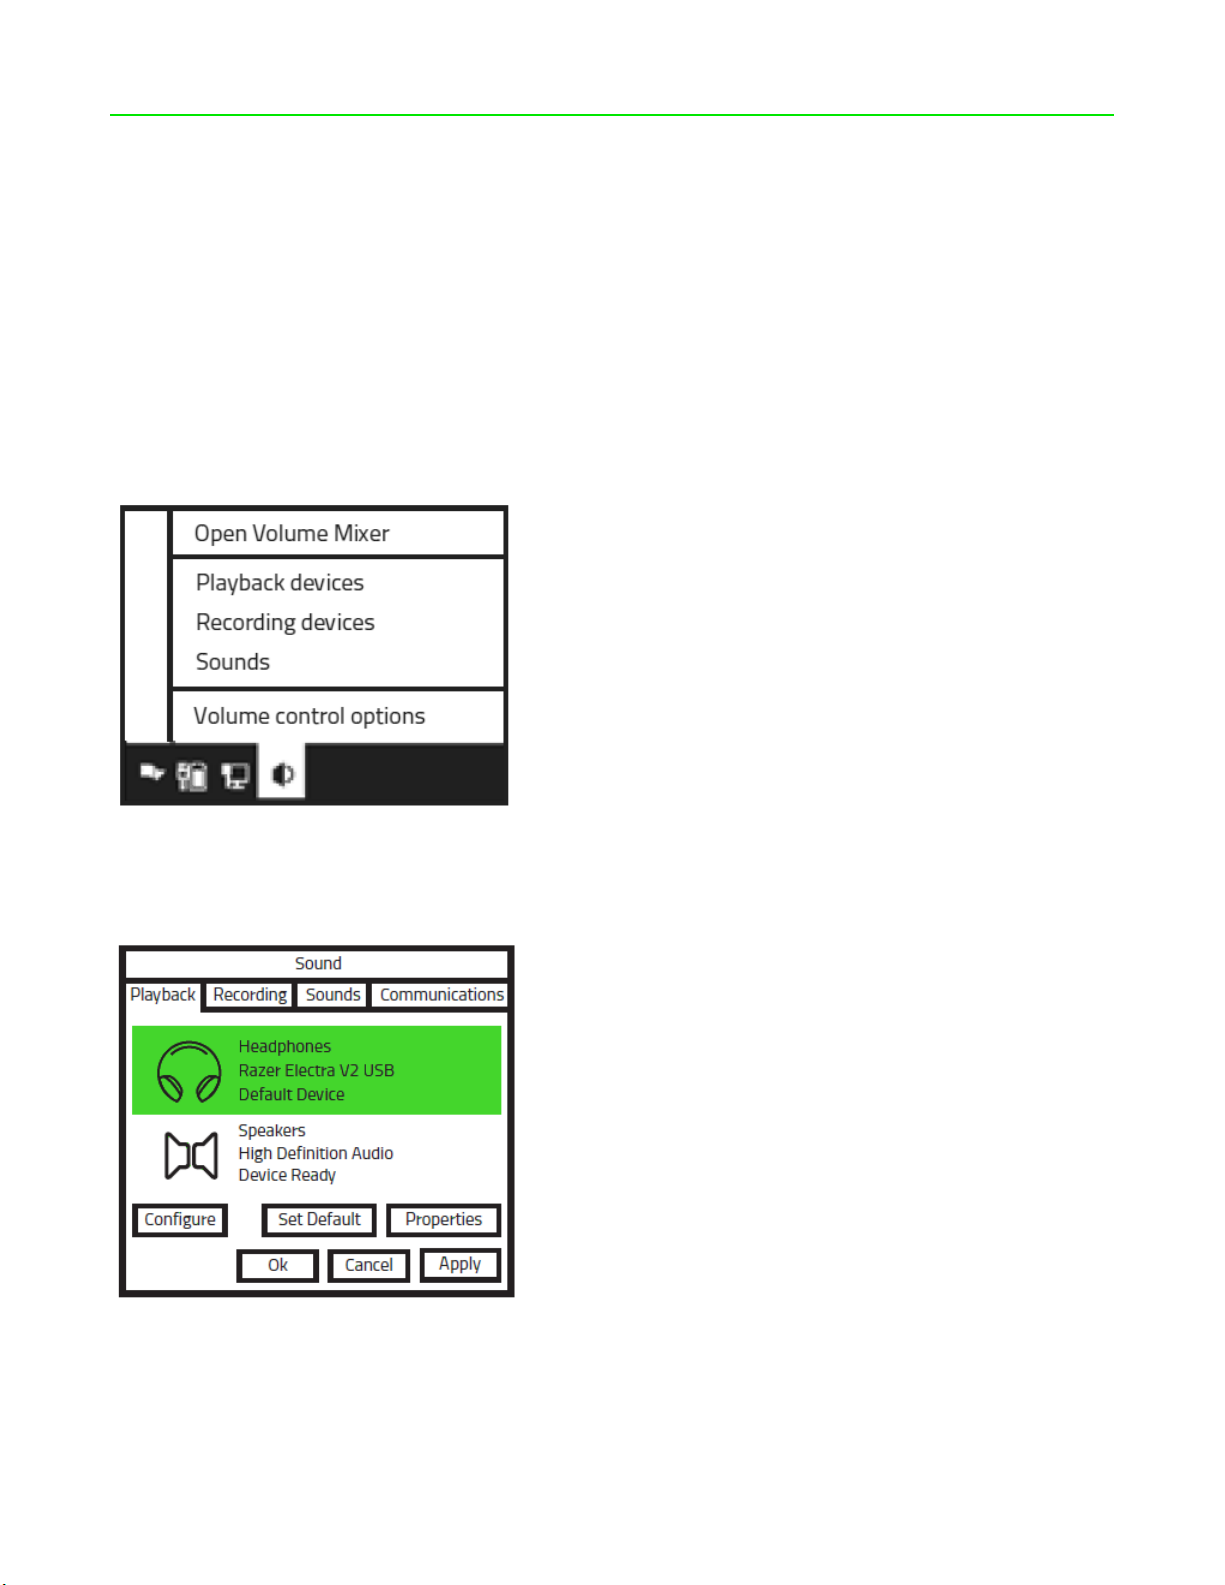
Step 1: Open your Sound settings from Control Panel > Hardware and Sound > Manage audio
devices. You can also right-click your sound icon on the system tray and select Playback devices.
Step 2: In the Playback tab, select Razer Kraken 7.1 Chroma from the list and click the Set Default
button.
Page 10

FOR GA ME R S. BY G AM ER S.™
9
Step 3: In the Recording tab, select Razer Kraken 7.1 Chroma from the list and click the Set Default
button.
FOR MAC USERS
Step 1: Open your Sound settings from System Preferences > Sound.
Step 2: In the Output tab, select Razer Kraken 7.1 Chroma from the list.
Step 3: In the Input tab, select Razer Kraken 7.1 Chroma from the list.
Page 11

FOR GA ME R S. BY G AM ER S.™
10
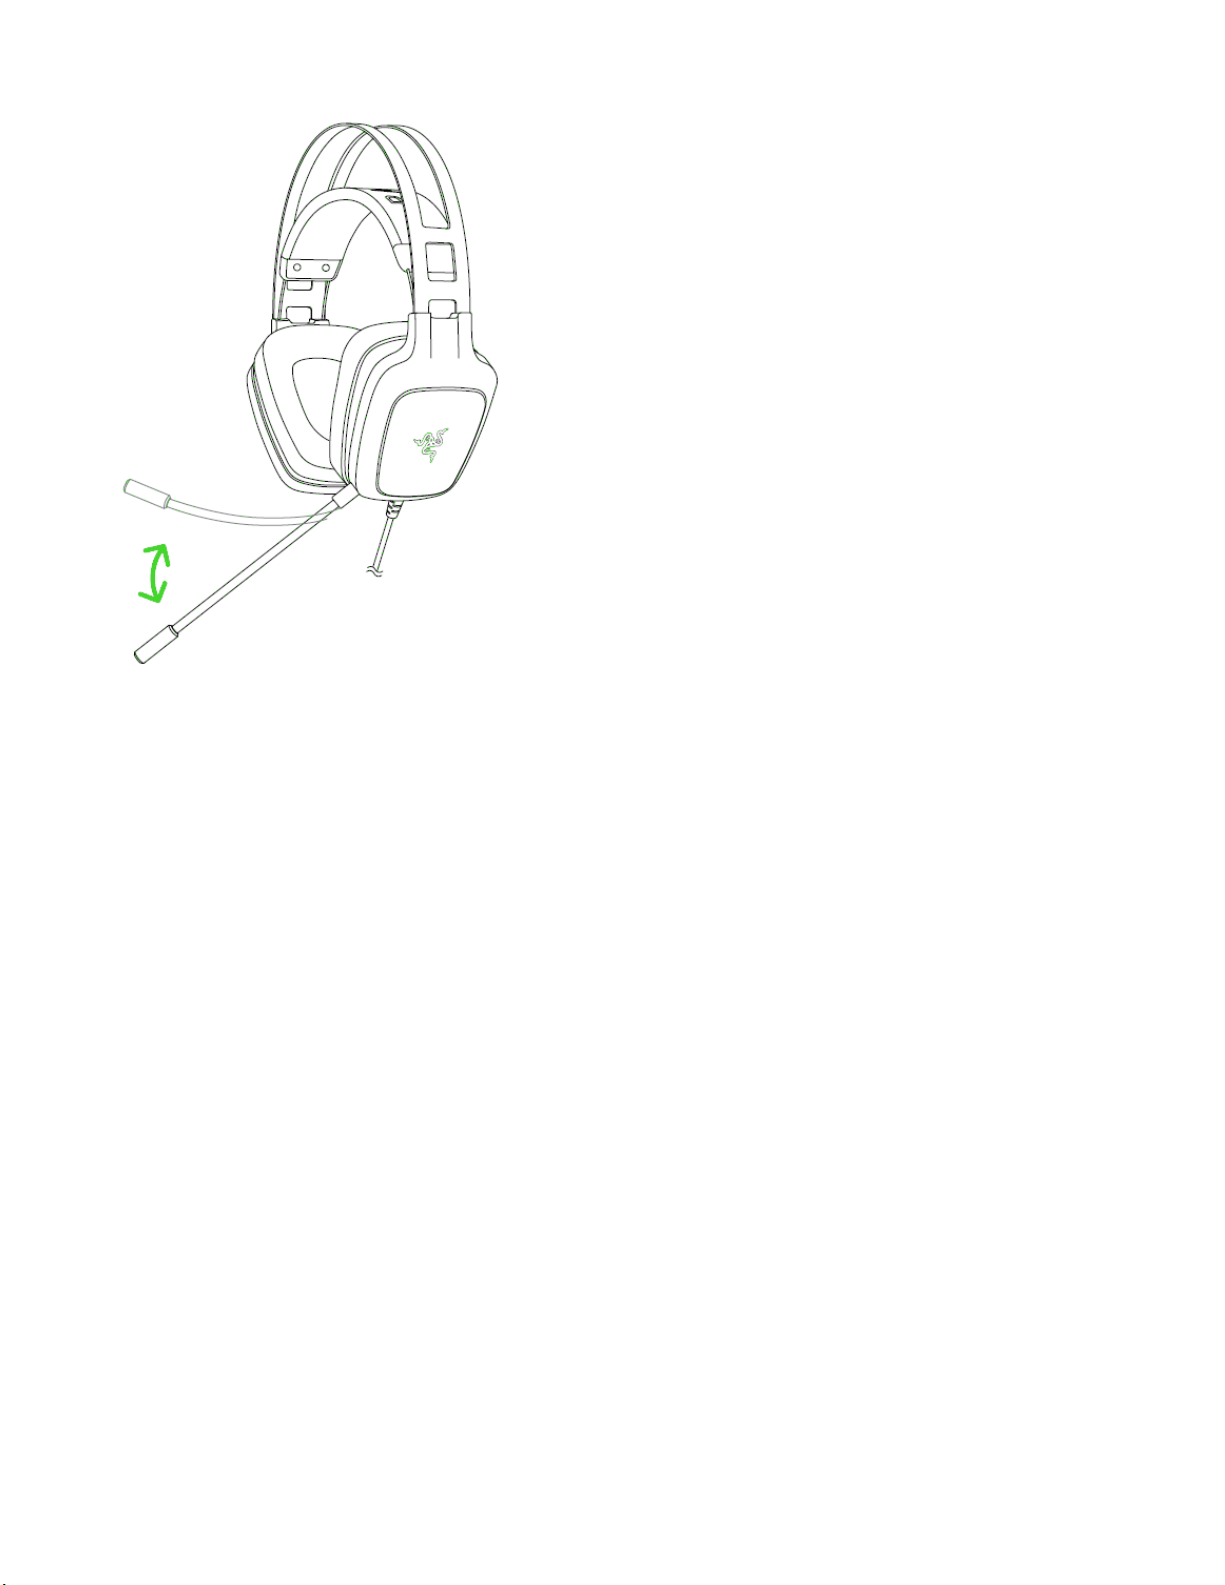
USING THE REMOVABLE MICROPHONE
Plug the removable microphone to the headphone.
Bend the microphone until it is in front of your mouth.
Page 12
FOR GA ME R S. BY G AM ER S.™
11
EXTENDING YOUR HEADPHONE’S LIFESPAN
We recommend stretching the headphones gently apart before placing them over your head to
minimize headband stress. However, please avoid overstretching the headphones beyond its
technical limits.
Page 13

FOR GA ME R S. BY G AM ER S.™
12
Page 14

FOR GA ME R S. BY G AM ER S.™
13
7. CONFIGURING YOUR RAZER ELECTRA V2 USB
Disclaimer: The features listed here require you to log in to Razer Synapse. These features are also
subject to change based on the current software version and your Operating System.
Your Razer Electra V2 USB headset is equipped with various software customizable features to
unleash its full power.
CALIBRATION TAB
A 3-step calibration wizard helps you set up your Razer Electra V2 USB for virtual 7.1 surround sound.
If you are setting up your audio device for the first time, we recommend using this wizard for a step
by step guide on the calibration process.
Click START to launch the wizard.
Page 15

FOR GA ME R S. BY G AM ER S.™
14
Step 1 of 3
This step introduces the calibration process. Read the instructions carefully and ensure that you are in
a quiet environment in order to hear the audio prompts properly.
In this figure, the mannequin represents your position. The green arrows on each segment represent
the target direction of the audio playback for that particular segment. Each orange line represents the
last saved calibration settings configured on Razer Surround.
Click Calibrate Now once you are ready to begin the calibration.
Page 16

FOR GA ME R S. BY G AM ER S.™
15
Step 2 of 3
Position yourself according to the point of reference indicated by the mannequin. The calibration
process is divided into a series of segments. An audio prompt will be played for each segment.
For the first segment, the sound should be perceived as coming from the direction marked by the
green target arrow, roughly North-East of your point of reference. Your aim is to move the sound you
hear such that you perceive it to be coming from this target direction. To achieve this,
1. Listen carefully to the audio prompt
2. The sound you hear will change direction as you move the mouse scroll wheel or the up/down
arrow keys.
3. Continue changing the direction of the sound until you perceive it to come from the North-
East position or as close to the green target arrow as possible.
Note: The orange line indicates the relative change to the previously saved alignment setting. It does
not affect your current calibration, as it serves merely as a change indicator.
Page 17

FOR GA ME R S. BY G AM ER S.™
16
Click Next to continue to the next segment. Repeat the above, using the green target arrow for each
segment as the target direction and continue until you complete the circle.
Once all segments are calibrated, click Next to go to the next step.
Page 18

FOR GA ME R S. BY G AM ER S.™
17
Step 3 of 3
Click Experience Surround Sound to test your personalized sound environment. To tweak a particular
section, simply click it to play its audio prompt and adjust the settings as desired. To reset the entire
configuration, click Reset All. Otherwise, click Finish to confirm the settings.
Page 19

FOR GA ME R S. BY G AM ER S.™
18
A confirmation screen will be displayed. Click OK to save and exit the wizard.
Page 20

FOR GA ME R S. BY G AM ER S.™
19
AUDIO TAB
The Audio Tab lets you control various options related to the audio you hear from your headset.
Using the various sliders, you can:
▪ Adjust the overall volume of your headset
▪ Improve the bass output of your headset
▪ Normalize the loudness of audio played to avoid sudden and unpleasant increase in volume
from effects such as explosions.
▪ Enable voice clarity adjustments to improve the quality of incoming voice conversations. Voice
Clarity adjustments includes both clarity (Presence Level) and volume (Volume Level) of
incoming voice conversations.
Page 21

FOR GA ME R S. BY G AM ER S.™
20
MIC TAB
The Mic Tab lets you control various options related to how your headset handles voice input via its
microphone.
Using the various sliders and options you can:
▪ Adjust the microphone input volume. You can also choose to mute your microphone.
▪ Hear the sounds that passes through your mic using the mic monitoring feature.
▪ Adjust volume normalization level for microphone input
▪ Adjust the microphone’s sensitivity so it cuts out background noises and only picks up your
voice.
▪ Enhance the clarity of microphone input by activating noise cancellation and reducing ambient
noise.
Page 22

FOR GA ME R S. BY G AM ER S.™
21
MIXER TAB
The Mixer Tab allow you to adjust the volume for programs currently running on your system
individually.
Note: The Mixer Tab is not available for Mac OS systems.
Customize the volume of audio for each program using the sliders.
Page 23

FOR GA ME R S. BY G AM ER S.™
22
EQ TAB
The EQ Tab lets you filter various audio frequencies, controlling the overall tone of your audio output.
A list of preset equalizer settings can be selected from the dropdown menu, giving you easy access to
various commonly used audio tones. You can also manually adjust each audio frequency using the
sliders.
Page 24

FOR GA ME R S. BY G AM ER S.™
23
LIGHTING TAB
The Lighting Tab allows you to configure the LEDs of your Razer Electra V2 USB. Simply toggle the ON
or OFF options to enable or disable Logo lighting.
Page 25

FOR GA ME R S. BY G AM ER S.™
24
8. SAFETY AND MAINTENANCE
SAFETY GUIDELINES
In order to achieve maximum safety while using your Razer Electra V2 USB, we suggest that you adopt
the following guidelines:
Should you have trouble operating the device properly and troubleshooting does not work, unplug
the device and contact the Razer hotline or go to razersupport.com for support. Do not attempt to
service or fix the device yourself at any time.
Do not take apart the device (doing so will void your warranty) and do not attempt to operate it
under abnormal current loads.
Keep the device away from liquid, humidity or moisture. Operate the device only within the specific
temperature range of 0°C (32°F) to 40°C (104°F). Should the temperature exceed this range, unplug
and/or switch off the device in order to let the temperature stabilize to an optimal level.
The device isolates external ambient sounds even at low volumes, resulting in lowered awareness of
your external surroundings. Please remove the device when engaging in any activities that requires
active awareness of your surroundings.
Listening to excessively loud volumes over extended periods of time can damage your hearing.
Furthermore, legislation of certain countries permits a maximum sound level of 86db to affect your
hearing for 8 hours a day. We therefore recommend that you reduce the volume to a comfortable
level when listening for prolonged periods of time. Please, take good care of your hearing.
MAINTENANCE AND USE
The Razer Electra V2 USB requires minimum maintenance to keep it in optimum condition. Once a
month we recommend you unplug the device from the computer and clean it using a soft cloth or
cotton swab with a bit of warm water to prevent dirt buildup. Do not use soap or harsh cleaning
agents.
Page 26

FOR GA ME R S. BY G AM ER S.™
25
9. LEGALESE
COPYRIGHT AND INTELLECTUAL PROPERTY INFORMATION
©2016 Razer Inc. All rights reserved. Razer, the triple-headed snake logo, Razer logo, “For Gamers. By
Gamers.”, and "Powered by Razer Chroma" logo are trademarks or registered trademarks of Razer
Inc. and/or affiliated companies in the United States or other countries. All other trademarks are the
property of their respective owners.
Windows and the Windows logo are trademarks of the Microsoft group of companies.
Mac OS, Mac and the Mac logo are trademarks or registered trademarks of Apple.
Razer Inc. (“Razer”) may have copyright, trademarks, trade secrets, patents, patent applications, or
other intellectual property rights (whether registered or unregistered) concerning the product in this
guide. Furnishing of this guide does not give you a license to any such copyright, trademark, patent or
other intellectual property right. The Razer Electra V2 USB (the “Product”) may differ from pictures
whether on packaging or otherwise. Razer assumes no responsibility for such differences or for any
errors that may appear. Information contained herein is subject to change without notice.
LIMITED PRODUCT WARRANTY
For the latest and current terms of the Limited Product Warranty, please visit:
razerzone.com/warranty.
LIMITATION OF LIABILITY
Razer shall in no event be liable for any lost profits, loss of information or data, special, incidental,
indirect, punitive or consequential or incidental damages, arising in any way out of distribution of,
sale of, resale of, use of, or inability to use the Product. In no event shall Razer’s liability exceed the
retail purchase price of the Product.
COSTS OF PROCUREMENT
For the avoidance of doubt, in no event will Razer be liable for any costs of procurement unless it has
been advised of the possibility of such damages, and in no case shall Razer be liable for any costs of
procurement liability exceeding the retail purchase price of the Product.
Page 27

FOR GA ME R S. BY G AM ER S.™
26
GENERAL
These terms shall be governed by and construed under the laws of the jurisdiction in which the
Product was purchased. If any term herein is held to be invalid or unenforceable, then such term (in
so far as it is invalid or unenforceable) shall be given no effect and deemed to be excluded without
invalidating any of the remaining terms. Razer reserves the right to amend any term at any time
without notice.
 Loading...