


WR14
Winding Resistance Meter 15A
WR50-12 / 13
Winding Resistance Meter 50A
Raytech USA, Inc., 118 South 2nd Street, Perkasie, PA 18944
INSTRUCTION MANUAL
ENGLISH

Instruction Manual Winding Resistance Meter
Type WR50, WR14, Version 2.01 Page 2 of 85
Contents
1 Safety Precautions .......................................................................................................... 4
2 Unpacking ....................................................................................................................... 6
2.1 WR50...................................................................................................................... 6
2.2 WR14...................................................................................................................... 7
3 Introduction...................................................................................................................... 8
3.1 General................................................................................................................... 8
3.2 Advantages & Features........................................................................................... 9
3.3 System Details.......................................................................................................10
4 Quick Start Guide...........................................................................................................11
4.1 Instrument operation..............................................................................................11
4.2 Selecting the proper current range.........................................................................12
4.3 Connection to Test Object......................................................................................12
5 Operation Elements........................................................................................................17
5.1 WR50.....................................................................................................................17
5.2 WR14.....................................................................................................................20
6 Operating Menu..............................................................................................................23
6.1 Menu Structure ......................................................................................................23
6.2 Main Menu.............................................................................................................24
6.2.1 Main Menu Screen ................................................................................................................ 24
6.2.2 Start....................................................................................................................................... 25
6.2.3 Store...................................................................................................................................... 25
6.2.4 Stop....................................................................................................................................... 25
6.2.5 Demag................................................................................................................................... 26
6.2.6 Setup..................................................................................................................................... 27
6.2.7 General.................................................................................................................................. 28
6.2.7.1 Mouse Cursor...................................................................................................... 28
6.2.7.2 Alternative Caption .............................................................................................. 28
6.2.7.3 MUX A / MUX B................................................................................................... 29
6.2.7.4 Length Correction................................................................................................ 30
6.2.7.5 License................................................................................................................ 31
6.2.7.6 Firmware update.................................................................................................. 32
6.2.7.7 Language............................................................................................................. 32
6.2.7.8 Clock Settings...................................................................................................... 33
6.2.7.9 About................................................................................................................... 34
6.2.7.10 USB Printer.......................................................................................................... 34
6.2.7.11 Service Mode....................................................................................................... 35
6.2.7.11.1 Calibrate Touchscreen....................................................................... 35
6.2.7.11.2 WR14 Ground Warning ..................................................................... 36
6.2.8 Mode ..................................................................................................................................... 37
6.2.8.1 Single .................................................................................................................. 37
6.2.8.2 Continuous .......................................................................................................... 37
6.2.8.3 Interval................................................................................................................. 38
6.2.9 Range.................................................................................................................................... 40
6.2.10 Temp. Corr. ........................................................................................................................... 41
6.2.11 Colors.................................................................................................................................... 44
6.3 Results...................................................................................................................45
6.3.1 Print....................................................................................................................................... 45
6.3.2 Delete.................................................................................................................................... 45
6.3.3 Open...................................................................................................................................... 46
6.3.4 Export.................................................................................................................................... 47
6.3.5 HRT....................................................................................................................................... 47
6.4 Battery Operation WR14........................................................................................48
6.4.1 Low Battery ........................................................................................................................... 49
7 Options...........................................................................................................................50
7.1 Temperature Measurement....................................................................................50

Instruction Manual Winding Resistance Meter
Type WR50, WR14, Version 2.01 Page 3 of 85
7.2 Heat run test Software ...........................................................................................51
7.2.1 Introduction............................................................................................................................ 51
7.2.2 Measurement with interval mode for HRT ............................................................................. 52
7.2.3 Analysing the HRT Results.................................................................................................... 54
7.2.3.1 Showing the graph in °C...................................................................................... 56
7.3 Cable extension.....................................................................................................58
7.3.1 2040N-05003......................................................................................................................... 58
7.3.2 2041N-05003......................................................................................................................... 59
7.3.3 2043N-05000......................................................................................................................... 60
8 Technical Specification...................................................................................................61
8.1 WR50.....................................................................................................................61
8.2 WR14.....................................................................................................................62
9 Interfaces........................................................................................................................63
9.1 Hardware...............................................................................................................63
9.1.1 RS 232 .................................................................................................................................. 63
9.1.2 USB....................................................................................................................................... 63
9.1.3 USB....................................................................................................................................... 63
9.1.4 Extern.................................................................................................................................... 64
9.1.4.1 Standard type ...................................................................................................... 64
9.1.4.2 Example for connecting an external warning device............................................ 65
9.1.4.3 Extended Safety Circuit type ............................................................................... 65
Appendix
A Raytech Toolbox.............................................................................................................69
B Software Development Kit SDK......................................................................................70
C Command Syntax...........................................................................................................71
C.A Serial Interface..................................................................................................................................... 71
C.B USB Interface....................................................................................................................................... 72
D USB Printer Info..............................................................................................................73
E Measuring high- and low-voltage-side in series ..............................................................74
F Demagnetizing................................................................................................................77
G Multiplexer......................................................................................................................79
H Warranty Conditions.......................................................................................................80
I Error Messages..............................................................................................................82
J Trouble Shooting............................................................................................................84
K Contacts.........................................................................................................................85

Instruction Manual Winding Resistance Meter
Type WR50, WR14, Version 2.01 Page 4 of 85
1 Safety Precautions
The following safety precautions must be observed during all phases of operation, service,
and repair of this instrument. By purchasing this equipment the purchaser assumes all
liability for the operation and use of this equipment. The intended use of the instrument, its
design and manufacture, is to be conducted within the precautions or other specific warnings
located within this manual. Failure to comply with these precautions and other specific
warnings violates safety standards of design, manufacture, and intended use. Raytech USA,
Inc. assumes no liability for the operation and use of this equipment.
SAFE OPERATION
Only qualified knowledgeable persons should be permitted or attempt to operate this test
equipment. All test personnel should fully familiarize themselves with the correct application
and operation of this and all test equipment prior to operation. Persons directly and indirectly
engaged in the operation of this test equipment should keep clear of all high voltage
apparatus while conducting tests and measurements.
WARNING!
Never connect the instrument to an energized transformer.
GROUND THE INSTRUMENT
The power cord supplied with the equipment must be connected an electrical receptacle with
an electrically grounded terminal (Earthed Ground). To minimize shock hazard, the Ground
Terminal on the instrument must be properly connected to an Earth grounded point. In many
cases, the quality of the safety ground terminal provided by the power cord does not fulfil the
safety requirements.
Non grounded instruments are dangerous and may cause Personnel and instrument
damage.
BEFORE APPLYING POWER
Read this manual carefully before operating the system. The WR14 is battery operated, the
WR50-12 and the WR50-13 are line operated. They operate from a wide range power input
from 90 to 264Vac and 47…63Hz with automatic ranging.

Instruction Manual Winding Resistance Meter
Type WR50, WR14, Version 2.01 Page 5 of 85
KEEP AWAY FROM LIVE CIRCUITS
Operating personnel must not remove instrument covers. Component replacement and
internal repairs must be made by qualified service personnel. Do not replace components or
service this instrument with the power cable connected. To avoid injuries, always discharge
circuits, disconnect power and remove external voltage sources before touching
components.
DO NOT OPERATE IN AN EXPLOSIVE ATMOSPHERE:
Do not operate the instrument in the presence of flammable gases or fumes.
DO NOT SUBSTITUTE PARTS OR MODIFY INSTRUMENT:
Because of the danger of introducing additional hazards, do not install substitute parts or
perform any unauthorized modification to the instrument. Return the instrument to a Raytech
service department for service to ensure proper operation and that safety features are
maintained.
Instruments, which appear damaged or defective, should be made inoperative and secured
against unintended operation until they can be repaired by qualified service personnel.

Instruction Manual Winding Resistance Meter
Type WR50, WR14, Version 2.01 Page 6 of 85
2 Unpacking
2.1 WR50
The Instrument consists of the following items:
The Instrument Power Cord Accessories:
(depending on country 2 Paper Rolls
of distribution) and 2 fuses
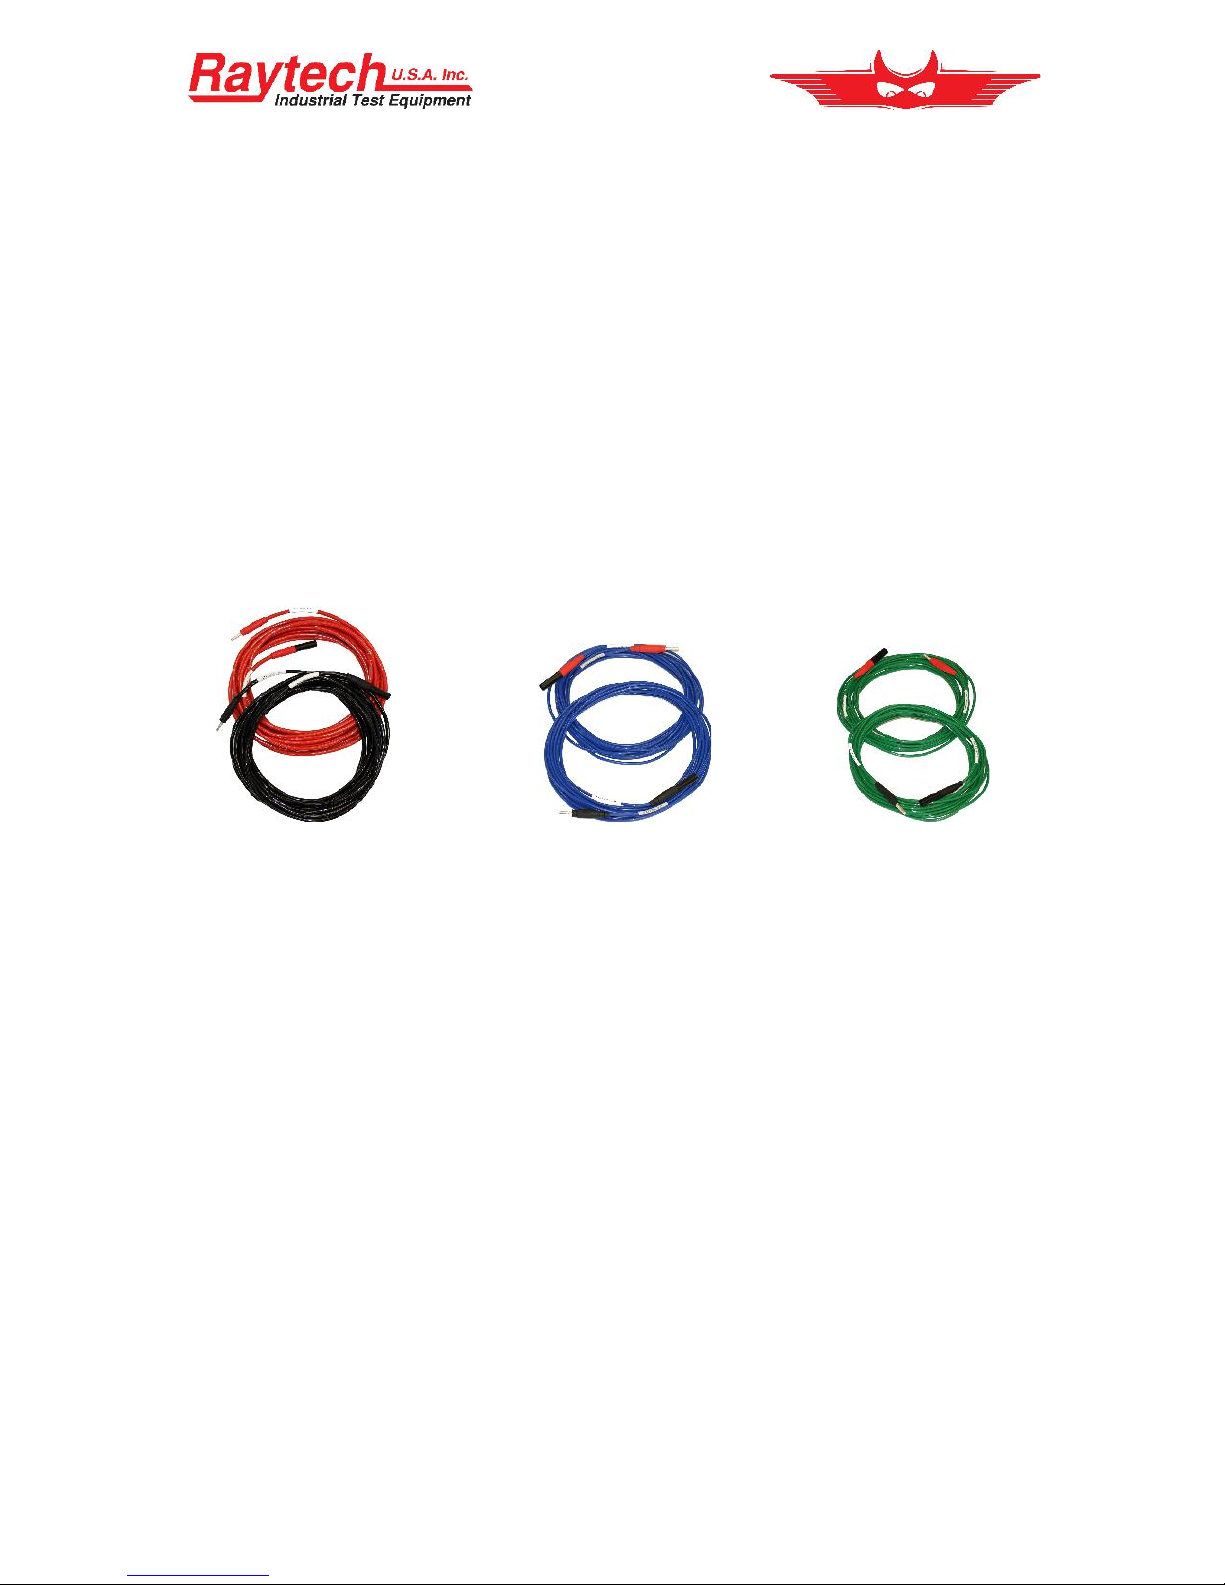
Current cables Jumper cable Cable Bag
(2 cables with WR50-13)
Potential cables: Channel 1 Potential cables: Channel 2 Potential cables: Channel 3
(only WR50-13)
USB Memory Stick Instruction Manual

Instruction Manual Winding Resistance Meter
Type WR50, WR14, Version 2.01 Page 7 of 85
2.2 WR14
The Instrument consists of the following items:
The Instrument Power Cord Accessories:
(depending on country 2 Paper Rolls
of distribution)
Current cables Jumper cable Cable Bag
Potential cables: Channel 1 Potential cables: Channel 2 USB Memory Stick
Instruction Manual
If any of the above items are missing or damaged contact your local representative or
Raytech USA, Inc. immediately. Optional test leads may be ordered (other than shown).

Instruction Manual Winding Resistance Meter
Type WR50, WR14, Version 2.01 Page 8 of 85
3 Introduction
3.1 General
Raytech Digital Winding Resistance meters are the enhanced version winding resistance
system with a most advanced demagnetizing circuit. They are designed for high degree of
accuracy for the measurement of very low resistance of inductive loads.
Ease of use: This intelligent system has an easy to use operation screen, which allows quick
selection of the current level to be measured. This system incorporates a touchscreen which
allows the user easy access to change or activate a feature.
Impressive Accuracy: The WR series of instruments have high precision, fully automatic,
multi-microprocessor based architecture. These systems are designed for highly accurate
readings on-site with laboratory precision.
Unique Measuring Technique: This newly designed technique of measurement
incorporates a high precision measurement circuit, a unique power source and the fastest
discharge unit on market. Extensive filtering and high precision standards are used within the
test system. The WR50 is capable of precision measurements up to 50A, The WR14 up to
15A.
Operation: The WR series of instruments apply a preset current level, selected by the user,
from 0.025A to 50A (WR50) or 0.025A to 15A (WR14). The 50V1power source quickly
charges the load and the results of the test are displayed within a few seconds automatically.
The results are reported on the easy-to-read color LCD display and can be stored or printed.
Compact Design: The WR50 and the WR14 are lightweight systems designed with their
own rugged waterproof field cases.
NOTE
The WR field case is a waterproof design. When the case is unlocked,
a small hole automatically opens, to compensate atmospheric
pressure changes.
Simple Maintenance: There is no maintenance required. There is no calibration procedure
(no potentiometers to turn). This is due to the utilization of high precision components in the
design.
Advanced Protection: Upon powering on the system initializes itself with a self-calibrating,
circuit checking sequence. If any problems are detected during this initialization period, or
during operation, the operator is immediately notified. The system constantly monitors the
condition when turned on. The WR series have extensive protection built in to the circuitry.
This is one of the many reasons we can extend our warranty to 5 years.
1
WR14: 30V

Instruction Manual Winding Resistance Meter
Type WR50, WR14, Version 2.01 Page 9 of 85
3.2 Advantages & Features
Highest Accuracy and Precision of any high current test system
Automatic measurements of Low Resistance from 0.00 ...100k
Demagnetizing Circuit (Advanced design)
Microprocessor based system with internal storage for over 10000 test results
Data exchange via USB-Key
Storage and Printing of test results while the test system is measuring
Complete automatic calibration system and system diagnostics
Temperature channels with automatic resistance correction
Standard USB 1.1 & RS232 (serial) Interface
Pure filtered DC Power source for the highest accuracy readings
Automatic, high efficiency cooling system to dissipate internal temperatures
Automatic shut off for over-temperature condition
Color LCD with backlighting and touch screen
Panel mounted Emergency Stop Switch
Mounted in rugged case for field testing
Fully automatic cooling curve analysis (option AHRT 01)
Fastest discharge time in the market
5 Year standard warranty

Instruction Manual Winding Resistance Meter
Type WR50, WR14, Version 2.01 Page 10 of 85
I
U
R
3.3 System Details
System Check:
The instruments are line operated1. The systems are designed to be used with AC Voltage
power sources between 90 to 264VAC 47…63Hz. The systems perform a self-check each
time that they are powered on. The User should always visually inspect all connectors,
cables and devices to be measured to avoid any safety issues.
Limitations of Winding Resistance Testing:
In general, there are no limitations on testing low or high inductive windings of transformers.
The test systems are specially designed to test all transformer windings.
Discharging the Transformer windings:
The WR systems are specialized systems designed to measure Transformer windings. These
systems are equipped with heavy-duty discharge circuits that are very unique in design.
The internal discharge circuit dissipates the stored energy in the transformer windings with a
“Constant Power Discharge Circuit” that is unique to all transformer winding test systems.
That is the reason why Raytech systems can discharge transformers more than 10 times faster than
any other system on the market.
If a cable happens to fall off during test, the system will STILL discharge the test object safely with
the automatic Constant Power Discharge Circuit.
The Potential Test Leads are part of the safety circuit and have the ability to discharge a transformer
should one of the current leads become detached.
DO NOT USE A SMALLER GAUGE POTENTIAL CABLES (Channel 1, 2, or 3) THEN THE
ORIGINAL RAYTECH CABLES SUPPLIED!
Low Resistance Testing:
The WR series of test instruments utilize a 4 wire measuring technique for each Channel.
The points where the potential leads are connected determine the resistance reading.
The test set employs a very simple principle of Ohm’s law:
R = Resistance
U = Voltage
I = Current
1
The WR14 is also battery operated additionally to the line operation

Instruction Manual Winding Resistance Meter
Type WR50, WR14, Version 2.01 Page 11 of 85
4 Quick Start Guide
4.1 Instrument operation
For examples of Transformer connections; See next page
1. Power on the instrument 2. Select the Test Current:
press Range or Setup / Range
3. Press start button 4. Get the results
5. Press stop button
WARNING!
Wait until the green light shows
“Safe” before disconnecting the
cables

Instruction Manual Winding Resistance Meter
Type WR50, WR14, Version 2.01 Page 12 of 85
4.2 Selecting the proper current range
Ensure that the test current does not exceed 10% of the rated winding current. This could
cause erroneous reading due to heating in the winding.
4.3 Connection to Test Object
Always check the winding schematic on the nameplate and trace the current path through
the windings.
You can save time if you measure the high voltage side in series to the low voltage side from
the same magnetic core. Because there are more turns on the high voltage side, you reach
much faster saturation flux in the core. This helps to stabilize the measurement and saves
much time.
The potential leads must be connected between the current leads. Do not clip the potential
leads to the current leads.

Instruction Manual Winding Resistance Meter
Type WR50, WR14, Version 2.01 Page 13 of 85
Single Phase Transformer, Vector Group 0
Measurement of HV and LV Winding

Instruction Manual Winding Resistance Meter
Type WR50, WR14, Version 2.01 Page 14 of 85
Three Phase Transformer, - Vector Group 0
Measurement of HV and LV Winding

Instruction Manual Winding Resistance Meter
Type WR50, WR14, Version 2.01 Page 15 of 85
Three Phase Trafo -
Measurement of one LV Winding

Instruction Manual Winding Resistance Meter
Type WR50, WR14, Version 2.01 Page 16 of 85
Three Phase Transformer, -
Measurement of two LV Winding

Instruction Manual Winding Resistance Meter
Type WR50, WR14, Version 2.01 Page 17 of 85
5 Operation Elements
5.1 WR50
1
1
The picture is from a WR50-12, the WR50-13 additionally has a 3rd channel

Instruction Manual Winding Resistance Meter
Type WR50, WR14, Version 2.01 Page 18 of 85
1: Main Input, Main Switch, Fuses
Connect the power cable to the Main Input.
Press the Main Switch to switch the WR50 on / off.
A 10A T (slow blow) fuse protects the device. Use only the correct fuse type to replace it.
2: Emergency Stop
Press to stop: The measurement will stop and immediately start to discharge the
Transformer.
Turn clockwise to release. The device will remain in a safe mode state.
3: Thermal Printer
Allows you to quickly get your results on paper by using the built-in thermal printer.
4: Safety Indicator
Green Light on: System is in safe mode. Ready for handling connections.
Red Light on: Unsafe mode! Don’t remove any cables, there is current flowing and
voltage on the test leads!
The Transformer is not discharged!
5: Display with Touch Panel
The instrument can be easily manipulated and fully controlled by the touch screen panel. If
preferred, an external mouse or keyboard can be connected to the USB Port to control the
system.
6: Sense receptacle
Connect + and – Sense Cable for each channel to test object.
(Channel 3: only WR50-13)
7: Current receptacle
Connect + and – Current Cable to test object.
8: Extern
This port can be used for en external warning device.
See chapter “9.1.4 Extern” on page 64 for details.

Instruction Manual Winding Resistance Meter
Type WR50, WR14, Version 2.01 Page 19 of 85
9: Earth
Use this terminal to connect an additional ground line.
10: Temperature receptacle
Each receptacle accommodates an external temperature probe. (maximum 3)
(Optional 10m Accessory 2021N-26001)
11: USB Interface
1 x USB Host
1 x USB Device
See chapter “9.1.2 USB” on page 63 for details.
12: RS Interface
RS232
See chapter “9.1.1 RS 232” on page 63 for details.

Instruction Manual Winding Resistance Meter
Type WR50, WR14, Version 2.01 Page 20 of 85
5.2 WR14
The soluti on com pany
88-264VAC/47-63H z
ON/OFF
CHARGE
Temp 2
Temp 1
Extern
Current ON Safe
RS232
88-264VAC/47-63H z
S
T
O
P
E
M
E
R
G
E
N
C
Y
14: Main Inp ut
2: Main
Switch
1: Charge
Indicator
3: RS Interface
1 x RS232
4: USB Interf ace
1 x Host
1 x Device
5: Thermal
Print er
6: Display with
Touch Panel
7: Earth
8: Extern
9: Temp erature
receptacle 1...2
10: Sense
receptacle
11: Current
receptacle
12: Safe
Indicator
13: Emerg ency
St o p
.

Instruction Manual Winding Resistance Meter
Type WR50, WR14, Version 2.01 Page 21 of 85
1: Charge Indicator
This LED is blinking if the battery is charging, although if the WR14 is switched off.
If the instrument is switched on and the battery is not charging, the LED is on.
2: Main Switch
Press to switch the WR14 on / off.
3: RS Interface
RS232
See chapter “9.1.1 RS 232” on page 63 for details.
4: USB Interface
1 x USB Host
1 x USB Device
See chapter “9.1.2 USB” on page 63 for details.
5: Thermal Printer
Allows you to quickly get your results on paper by using the built-in thermal printer.
6: Display with Touch Panel
The WR14 can be easily manipulated and fully controlled by the touch screen panel. If
preferred, an external mouse or keyboard can be connected to the USB Port to control the
system.
7: Earth
Use this terminal to connect the ground line.
WARNING!
Unit must be connected to Earth Ground for operator Safety

Instruction Manual Winding Resistance Meter
Type WR50, WR14, Version 2.01 Page 22 of 85
8: Extern
This port can be used for en external warning device.
See chapter “9.1.4 Extern” on page 64 for details.
9: Temperature receptacle
Each receptacle accommodates an external temperature probe. (maximum 2)
(Optional 10m Accessory 2021N-26001)
10: Sense receptacle
Connect + and – Sense Cable for each channel to test object.
11: Current receptacle
Connect + and – Current Cable to test object
12: Safety Indicator
Green Light on: System is in safe mode. Ready for handling connections.
Red Light on: Unsafe mode! Don’t remove any cables, there is Current flowing and
Voltage on the test leads!
The Transformer is not discharged!
13: Emergency Stop
Press to stop: The measurement will stop and immediately start to discharge the
Transformer.
Turn clockwise to release. The device will remain in a safe mode state.
14: Main Input
Connect the power cable to the Main Input.

Instruction Manual Winding Resistance Meter
Type WR50, WR14, Version 2.01 Page 23 of 85
6 Operating Menu
6.1 Menu Structure
Start up screen: Example WR50

Instruction Manual Winding Resistance Meter
Type WR50, WR14, Version 2.01 Page 24 of 85
6.2 Main Menu
6.2.1 Main Menu Screen
The Touch screen enables quick
navigation by pressing directly on the
screen.
E.g. if you would like to change the current
range, just press with your finger on the
text “Range” and the Menu Range will
open directly, it’s not necessary to go the
way over the Setup.
R1
Enable or Disable measuring channel 1 by touching the small box (next to caption R1)
or rename the caption (R1) in the Setup General screen. Press the caption (R1) to change.
R2
Enable or Disable measuring channel 2 by touching the small box (next to caption R2)
or rename the caption (R2) in the Setup General screen. Press the caption (R2) to change.
Status
Shows the measurement parameters
Temp. Correction
Shows the temperature parameters, Temperature variables can be modified by pressing the
Setup Button or directly in the text (--.-°C). See chapter 6.2.10.
Start
Starts the measurement and the selected current is applied.
Store
Stores the results while measuring current is on.
Stop (This button is only active when current is on)
Stops the measurement; DO NOT disconnect the measuring cables BEFORE the Green light
is on and the indication Safe appears.
Demag
Demagnetizes the core of a test object. See chapter 6.2.5
Setup
Goes directly to the Setup Menu. See chapter 6.2.6
Results
Goes directly in the Results Menu. See chapter 6.3

Instruction Manual Winding Resistance Meter
Type WR50, WR14, Version 2.01 Page 25 of 85
6.2.2 Start
Press Start
Instrument starts to charge test object with
the selected current.
Maximum current is shown on the Range
Status.
6.2.3 Store
Press Store
Instrument stores the value shown in the
Display (R1, R2).
The Measurement doesn’t stop.
6.2.4 Stop
Press Stop
Instrument stops the measurement and
begins the discharge process.
DO NOT disconnect the measuring cables
until the green light is on and the indication
Safe appears.

Instruction Manual Winding Resistance Meter
Type WR50, WR14, Version 2.01 Page 26 of 85
6.2.5 Demag
Demagnetisation procedure to demagnetize the test object (e.g. transformer core)
Demag button appears after measurement is finished.
Press Demag.
Connect the Current and the Sense (only
Channel 1) cables to the high voltage side
to the Transformer.
Select the demagnetizing current which is
usually the same current as the test
current and then press start.
Demagnetizing procedure runs
automatically.
For a technical description of the demagnetizing feature: See Appendix: F Demagnetizing on
Page 77.

Instruction Manual Winding Resistance Meter
Type WR50, WR14, Version 2.01 Page 27 of 85
6.2.6 Setup
By pressing the Setup button, the Setup screen will appear.
Press the appropriate text box (Caption) in the main menu screen and the Setup-Screen will
automatically appear with the selected screen for Range, Temp. Correction or similar.
General
This screen allows the selection, modification and setting of the General Instrument
parameters.
Mode
This screen allows the selection and setting of the measurement mode (single, continuous or
interval).
Range
This screen allows the selection, modification and setting of the range for the Test Current.
Temp. Corr.
This screen activates the temperature correction feature.
Colors
This screen allows the modification and changes of the screen colors.

Instruction Manual Winding Resistance Meter
Type WR50, WR14, Version 2.01 Page 28 of 85
6.2.7 General
From the Main screen, press Setup.
Then enter the General Setup Menu.
6.2.7.1 Mouse Cursor
Show or hide the Mouse Cursor. Useful if you operate with a USB Interface mouse.
The mouse cursor appears automatically after the USB mouse is connected.
You can control the instrument with a USB-mouse, track ball and/or keyboard.
6.2.7.2 Alternative Caption
R1...R2...R31Measuring Channel, Name
Caption
Change the name of the measurement
channel displayed in the main screen.
Touch the text box (i.e. R1).
Press To store the settings
Press @ For special characters
Press “Close” To finish input
1
The third channel is only available in the WR50-13

Instruction Manual Winding Resistance Meter
Type WR50, WR14, Version 2.01 Page 29 of 85
6.2.7.3 MUX A / MUX B
Use the buttons MUX A and MUX B if you have a Multiplexer connect to your instrument.
For a description see in the Appendix chapter G Multiplexer on page 79.
If you don’t have a Multiplexer, you can
use the buttons MUX A and MUX B to
automatic label the caption.
See chapter 6.2.7.2 Alternative Caption.
With “Set Labels” you can change the
standard or you can set your own names
by touching the text box.

Instruction Manual Winding Resistance Meter
Type WR50, WR14, Version 2.01 Page 30 of 85
6.2.7.4 Length Correction
Length Correction
Change the measuring unit from Ohm to
Ohm/Length. The test results are then
corrected to the selected display method.
The length of the test object is pre-defined
by the customer. Enter the length of the
test specimen.

Instruction Manual Winding Resistance Meter
Type WR50, WR14, Version 2.01 Page 31 of 85
6.2.7.5 License
License Manager
The License Manager shows the validity of
the license for the use of the instrument
and the Heat Run Test Software.
If there is no valid status for a license
displayed, contact your local
representative or Raytech GmbH.
Extend the license
To modify or extend the license, enter a
new license code.
The license code is generated by
Raytech GmbH.

Instruction Manual Winding Resistance Meter
Type WR50, WR14, Version 2.01 Page 32 of 85
6.2.7.6 Firmware update
New Firmware versions are available free
of charge at www.raytech.ch
Download the new Firmware (.zip file) onto
your USB key on the root directory (Not in
a subdirectory, do not Unzip it).
Connect the USB-key to the instrument
and press install. The system will detect
and automatically install the new firmware
and restart the system.
6.2.7.7 Language
The selection of languages for the
operating menu can be made.
To activate the desired language, restart
the instrument after the selection is made.

Instruction Manual Winding Resistance Meter
Type WR50, WR14, Version 2.01 Page 33 of 85
6.2.7.8 Clock Settings
Adjustment of the internal clock can be
made.
Date:
By pressing the arrow the calendar will be
displayed. Select the date by pressing on
the actual day.
The date format is: Month/Day/Year
Time:
Select hour/minute/second by highlighting
the numbers in the clock.
By pressing the arrows the time will
increase or decrease.

Instruction Manual Winding Resistance Meter
Type WR50, WR14, Version 2.01 Page 34 of 85
6.2.7.9 About
Shows actual Firmware Version and
the Serial Nr. of the instrument.
6.2.7.10 USB Printer
Certain external USB Printers can be
connected. Select the desired printer to
print results. Printers not listed are not
supported.
For more Information see chapter D USB Printer Info on page 73.

Instruction Manual Winding Resistance Meter
Type WR50, WR14, Version 2.01 Page 35 of 85
6.2.7.11 Service Mode
The Service Mode has limited access.
However, the touch screen parameters can
be calibrated by the enduser.
To calibrate the touch screen parameters:
Press 0000# and follow the on screen
instructions as depicted below.
or exit directly by pressing
6.2.7.11.1 Calibrate Touchscreen
After entering the code “0000”# in the Service Mode, you will see the following screen:
Press and hold stylus on the center of the
target until the cross moves.
Repeat as the target moves around the
screen.
Upon completion, press Enter to accept
the new parameters or Esc to escape and
not save the parameters if you have
connected a keyboard to the instrument. If
you don’t have, press anywhere on the
display to accept the new parameters.

Instruction Manual Winding Resistance Meter
Type WR50, WR14, Version 2.01 Page 36 of 85
6.2.7.11.2 WR14 Ground Warning
Every time you switch the WR14 on, you
get a Warning, that the Unit must be
connected to Earth Ground for operator
Safety.
It’s possible to disable the Warning: After entering the code “0200”# in the Service Mode, you
will see the following screen:
Now you can select weather you want the
Warning enable (Yes) or disable (No).
WARNING!
We highly recommend to enable the warning!
Unit must be connected to Earth Ground for operator Safety

Instruction Manual Winding Resistance Meter
Type WR50, WR14, Version 2.01 Page 37 of 85
6.2.8 Mode
6.2.8.1 Single
Performs 1 single measurement
Stopcondition:
Stops the measurement as soon as the
result is within the selected conditions.
(Example: within ±0.10% during 10
Seconds of time)
6.2.8.2 Continuous
Performs continuous measurement until
the measurement is stopped by the user.
Quality Assistant:
If the result is within the selected
parameters, a green light in the main
screen will illuminate and indicate this
condition.
If the result is out of the selected
parameters, a red light in the main screen
will illuminate and indicate this condition.
If the selected conditions are almost met, a
yellow light in the main screen will
illuminate.

Instruction Manual Winding Resistance Meter
Type WR50, WR14, Version 2.01 Page 38 of 85
6.2.8.3 Interval
Performs a selected number of
measurements (selected with “Count”)
Interval Time:
The time (in Seconds) selected between 2 measurements. It will automatically store the
result.
Count:
The number of measurements to be taken.
When all measurements are taken, the System discharges the Transformer.
Fix Interval Time:
Selects the interval time from Start Time instead of from the 1st measurement point.
e.g. If the Interval Time is set to 10 seconds and the first measurement is taken at 27
seconds, the system stores results at 27, 37, 47...seconds if the checkbox is not checked. If
the checkbox is checked, the results will be taken and stored at 27, 30, 40, 50...seconds.
Note:
The current remains ON for the duration of the test and automatically stops after “Count”
number of measurements are taken.
Quality Assistant:
If the result is within the selected para-meters, a green light in the main screen will indicate
this condition and automatically store the result.
The Interval measurement starts taking the results.
If the result is out of the selected para-meters, a red light in the main screen will indicate this
condition. No results stored.
If the selected conditions are almost met, a yellow light in the main screen will illuminate and
indicate this condition. No results stored.

Instruction Manual Winding Resistance Meter
Type WR50, WR14, Version 2.01 Page 39 of 85
Auto Print Results
1
If this feature is selected, the instrument additionally prints the results to a connected printer
when a measurement will be stored.
AutoSave USB:
The results will be additionally stored on a USB-Key during a measurement.
1
Not available in WR14

Instruction Manual Winding Resistance Meter
Type WR50, WR14, Version 2.01 Page 40 of 85
6.2.9 Range
Selects the current range for the
measurement.
1
Auto Close Setup:
Closes the Setup Window after the Current
Range selection is made without pressing
OK.
The 3 frames on the right side are reserved for the User specified settings.
For adjusting the User Settings:
Press “Set”
Adjust all 3 settings by moving the cursor
left or right to the desired Current level.
Press OK when finished.
1
The maximum current of the WR50 is 50A
The maximum current of the WR14 is 15A

Instruction Manual Winding Resistance Meter
Type WR50, WR14, Version 2.01 Page 41 of 85
6.2.10 Temp. Corr.
Activated:
Temperature correction is activated when
the box is marked. The displayed test
value then is a calculated result depending
upon parameters selected.
Coefficient:
Choose the temperature coefficient of the material to be measured; Either CU (copper), AL
(aluminium) or User defined. Temperature correction parameters are then displayed on the
touch screen panel.
Reference value:
The base temperature the temperature correction factor is referred to.
Channels:
This allows the user to select which measurement channel (temperature probe or external
temperature meter) that the temperature correction is applied to. If the required selection is
more than one channel, then the average value of the selected measurement channels is
calculated.
Ext.:
Manual input of an external measured temperature. For example, an external temperature
meter.
Example for calculation:
In the example below, the measurement object is Copper and will be corrected to 25 degrees
Celsius based on the temperature input of temperature channel 1.
If you do not have a Raytech temperature probe, activate the “Ext” box and fill in the
temperature of the test object you measure with an external temperature meter.

Instruction Manual Winding Resistance Meter
Type WR50, WR14, Version 2.01 Page 42 of 85
The correction follows the formula:
TkTm
TkTs
RmRs
Rs Resistance at desired temperature, Ts
Rm Measured resistance
Ts Desired reference temperature
Tm The temperature at which resistance was/is measured
Tk 234.5 for copper
225.0 for aluminium
(aluminium may be as high as 240)
If you are used to a correction with “alpha25” you can calculate the Tk by the formula:
25
25
1
alpha
Tk
The Main Test screen appears as below if the Temperature correction is activated:
The “T” in the measuring channel box
shows that the displayed resistance value
is corrected. In this example it is corrected
to 25 °C using Tk of Copper and referring
to Temperature probe 1.

Instruction Manual Winding Resistance Meter
Type WR50, WR14, Version 2.01 Page 43 of 85
To view the actual result without the temperature correction, Press the “T” during the
measurement:
The “crossed” “T” shows that the displayed
resistance value is NOT corrected.
The corrected AND the uncorrected values
are stored in memory whether or not the
correction is activated in the display.
If the display shows a crossed Red T, the
result is not corrected because a
temperature probe is missing or not
recognized by the system.

Instruction Manual Winding Resistance Meter
Type WR50, WR14, Version 2.01 Page 44 of 85
6.2.11 Colors
Shows the selected colors displayed on
the screen.
The User may change the colors on the
touch screen display by selecting
appropriate colors for each.
Default A: Black and white screen
Default B: Colored screen
Black and white may be selected on
certain outdoor conditions. For example
bright sun light.
Choose a color by selecting a predefined
color available.
Choose a color by manually adjusting the
color select bar.

Instruction Manual Winding Resistance Meter
Type WR50, WR14, Version 2.01 Page 45 of 85
6.3 Results
Shows the overview of the measurements
which are sorted by Date/Time.
6.3.1 Print
Print Selected:
Prints the details of the selected
measurement.
Print All:
Prints the details of all stored
measurements.
The default printer is the built-in printer. If
an external USB Printer is selected, this
will be recognized as the default printer.
6.3.2 Delete
Delete Selected:
Deletes the selected measurement.
Delete All:
Deletes all stored measurements.
After selecting delete, a warning window
will appear to confirm this choice. Deleting
selected files is permanent.

Instruction Manual Winding Resistance Meter
Type WR50, WR14, Version 2.01 Page 46 of 85
6.3.3 Open
Header:
Opens the header for the selected
measurement. The header cannot be
modified.
Details:
Shows all of the details of each
measurement stored under this data file.
You can although double tip on the
measurement to open the details of the
measurement.
Details:
Shows the details of the measurements.
A single measurement can be deleted by
highlighting and selecting Data/Delete in
the menu.
If you exit the Details after selecting delete,
a warning window will appear to confirm
this choice.
Deletion is permanent.

Instruction Manual Winding Resistance Meter
Type WR50, WR14, Version 2.01 Page 47 of 85
6.3.4 Export
Export Selected to USB Drive [XML]:
Exports the selected measurement to the
RaytechWRxx directory of a connected
USB Key in XML-Format.
Export All to USB Drive [XML]:
Exports all measurements to the
RaytechWRxx directory of a connected
USB Key in XML-Format.
Export Selected to USB Drive [CSV]:
Exports the selected measurement to the
RaytechWRxx directory of a connected
USB Key in CSV-Format.
Export All to USB Drive [CSV]:
Exports all measurements to the
RaytechWRxx directory of a connected
USB Key in CSV-Format.
6.3.5 HRT
Heat Run Test Analysis
Only activated with the option HRT
1
(Heat Run Test)
For an explanation see chapter 7.2
1
The AHRT01 can also be ordered later from Raytech USA (Part Number 2042N-11001)

Instruction Manual Winding Resistance Meter
Type WR50, WR14, Version 2.01 Page 48 of 85
6.4 Battery Operation WR14
The WR14 is a Battery and Mains operated System.
The measurement doesn’t stop if you have a mains power break down. It is very helpful if
you are doing e.g. heat run tests.
There is a Battery Symbol on the top of the
main screen of the WR14. It indicates the
Battery status and the charging conditions.
With a full Battery you are able to measure
200 single measurements at 15 Amps.
Mains supply present
A connector-symbol is inside the Battery.
Battery charging
The filling inside the Battery moves from the left to the right.
The LED on the main switch is blinking if the battery is charging, although if the WR14 is
switched off.
Charging condition
With the help of the filling inside the Battery you can see the charging condition:
If the Battery is filled totally green, the Battery is 100% charged.
The LED on the main switch is on (not blinking), If the instrument is switched on and the
battery is fully charged.

Instruction Manual Winding Resistance Meter
Type WR50, WR14, Version 2.01 Page 49 of 85
6.4.1 Low Battery
Low Battery
If the charging of the Battery is low, you
see a Battery Warning.
The running measurement doesn’t stop,
but you are not able to start a new
measurement before the mains supply is
connected.
Very low Battery
If the charging of the Battery is very low,
the WR14 displays a second Warning and
shoots down the instruments if no mains
supply will connect.

Instruction Manual Winding Resistance Meter
Type WR50, WR14, Version 2.01 Page 50 of 85
7 Options
7.1 Temperature Measurement
The Raytech WR-Instruments are very accurate and precise test systems. To take full
advantage of this high accuracy, recording the temperature of the device under test is highly
recommended. This is due to the characteristics of the increase in resistance of a metallic
object as its temperature increases. Incorporated into the system are temperature
compensation tables for Copper and Aluminium. These tables are used to automatically
calculate the conversion factor to a known reference temperature.
Temperature Coefficient Settings: see chapter 6.2.10 on page 41.
The system allows up to three1(3) temperature probes to be used for the purpose of
recording temperatures. Optional Part Number: TP01, can be purchased for this purpose.
TP01 temperature probe is mounted to a flexible cable that plugs into the front panel of the
WR-instruments. This option enables the user to record the ambient temperature and/or the
actual temperature of the device under test. A set of three (3) temperature probes (TP03)
can be ordered to allow complete temperature measurements at three different reading
points.
The Instrument will automatically detect when a TP 01 probe is connected. The temperature
will be displayed on the instrument screen during a test and will appear on the printed report.
The temperature, as well as the test results, can be saved into memory.
1
The WR14 up to two (2) temperature probes

Instruction Manual Winding Resistance Meter
Type WR50, WR14, Version 2.01 Page 51 of 85
7.2 Heat run test Software
The Heat Run Test Software, option AHRT 01, is used to analyze the measurement results
of the copper loss test of the windings of a transformer and to calculate the resistance values
of the winding at the working temperature (time zero).
7.2.1 Introduction
The Heat Run Test performs a measurement during the cooling curve of a transformer after
the transformer has been heated.
The measurement is made in the interval mode without temperature correction.
In the Setup Menu the following settings must be made:
Activate “Interval Mode“ and select the
interval time. Select the time in seconds
between measuring points and the number
of data points.
Temperature correction must be
deactivated for Heat run testing.
Disable although the Quality Assistant.

Instruction Manual Winding Resistance Meter
Type WR50, WR14, Version 2.01 Page 52 of 85
7.2.2 Measurement with interval mode for HRT
At the moment of switching off the heat
source of the test object, the heat run timer
must be started.
Press the “Timer” Button on the main
screen to start the timer.
The timer starts running.
The timer can be halted at any time by
pressing the button a second time.
Note: The current is NOT switched on at
this time.
Disconnect the power cables or heat
source of the test object and connect the
measurement cables of the instrument.
Measurement results should be obtained
as quickly as possible.
To start the measurement press “START”.
The current is applied and the system
charges the transformer Winding(s) to be
measured.

Instruction Manual Winding Resistance Meter
Type WR50, WR14, Version 2.01 Page 53 of 85
After charging the transformer, the
instrument system monitors the
measurements until the results are stable.
The results are then stored automatically.
Press the “Stop” Button at any time to halt
the measurement.
After storing the last measurement the
instrument turns off the output Current,
stops the measurement, starts
automatically to discharge the transformer
till the test object is save.

Instruction Manual Winding Resistance Meter
Type WR50, WR14, Version 2.01 Page 54 of 85
Although the measurement is finished, the
timer continues to operate. This allows
further measurements on other windings of
the same transformer.
The timer can be halted at any time by
pressing the Timer button.
7.2.3 Analysing the HRT Results
Select the Data-set in the Result Screen.
Select in the menu “HRT” “Analyse” to
display the analysis curve.
Double tip the selected measurement. The
detailed results are available for viewing
without applied analysis.
The graph of the measured values is
shown.
With “Save” you can store the graph as a
gif-file to the internal memory.

Instruction Manual Winding Resistance Meter
Type WR50, WR14, Version 2.01 Page 55 of 85
Press “Analyse”
You’ll be asked for “Approximation Model”
to calculate the Value of the Winding at
time = zero
Select the Approximation Model:
(Exp)onential or Linear
After selecting the Model press “Analyse”
The value of the approximation R(t=0) is
shown.
Linear Approximation:
R0: Winding Resistance at time t = zero
m: Slew rate dr/dt in %/ min
Cor: Correlation of the approximation
Exponential Approximation:
R0: Winding resistance at time t = zero
tau: Time constant
R∞:Winding resistance at time t =
∞
Cor: Correlation of the approximation

Instruction Manual Winding Resistance Meter
Type WR50, WR14, Version 2.01 Page 56 of 85
The approximation and the measured
values.
7.2.3.1 Showing the graph in °C
When the resistance of the winding at any
specific temperature and the material is
known, all the values can be displayed as
°C.
Enter the resistance value of the winding at
a reference temperature and the
temperature coefficient of the conductor.
Linear Approximation:
T0: Temperature at time t = zero
m: Slew rate dt/dt in °/ min
Cor: Correlation of the approximation

Instruction Manual Winding Resistance Meter
Type WR50, WR14, Version 2.01 Page 57 of 85
Exponential Approximation:
T0: Temperature at time t = zero
tau: Time constant
R∞:Temperature at time t =
∞
Cor: Correlation of the approximation
The approximation and the values are
shown as Temperature.
Instruction Manual Winding Resistance Meter
Type WR50, WR14, Version 2.01 Page 58 of 85
7.3 Cable extension
7.3.1 2040N-05003
The WR50-12 is available with the optional 10m cable extension sets for the Plug type cable
sets (Note: Cable sets with the ring lug connectors do not have this option available). The
Plug type connector locking system operates on the “push-pull” principle. It self locks when
connected. To disconnection the Plug type connector, push in first then pull out.
Connectors that become dirty should be cleaned with industrial alcohol before connecting.
The 2040N-05003 consists of the following cables:
2x 10m Extensions for 2x 10m Extensions for 2x 10m Extensions for
the Current cables the Potential channel 1 the Potential channel 2

Instruction Manual Winding Resistance Meter
Type WR50, WR14, Version 2.01 Page 59 of 85
7.3.2 2041N-05003
The WR50-13 is available with the optional 10m cable extension sets for the Plug type cable
sets (Note: Cable sets with the ring lug connectors do not have this option available). The
Plug type connector locking system operates on the “push-pull” principle. It self locks when
connected. To disconnection the Plug type connector, push in first then pull out.
Connectors that become dirty should be cleaned with industrial alcohol before connecting.
The 2041N-05003 consists of the following cables:
2x 10m Extensions for
the Current cables
2x 10m Extensions for 2x 10m Extensions for 2x 10m Extensions for
the Potential channel 1 the Potential channel 2 the Potential channel 3

Instruction Manual Winding Resistance Meter
Type WR50, WR14, Version 2.01 Page 60 of 85
7.3.3 2043N-05000
The WR14 is available with an optional 10m cable set instead of the 5m cable set. System
part number 2043N-05000 is the WR14, including 2043N-05001.
The 2043N-05001 consists of the following cables:
2x 10m Current cables 2x 10m Potential 2x 10m Potential
cables channel 1 cables channel 2
If you choose this option, the normal 5m cable set will not delivered.
Extension cables for existing 5m cables are not available due to the screw type plugs.

Instruction Manual Winding Resistance Meter
Type WR50, WR14, Version 2.01 Page 61 of 85
8 Technical Specification
8.1 WR50
Type WR50-12 / WR50-13
Size L: 521 mm (20.5”) W: 432 mm (17”) H: 216 mm (8.5”).
Weight: 16.6 kg (36.6 lbs.).
Input Power 90-264 VAC (1.5 kW max.) 47-63 Hz, automatic ranging
Output Voltage 0 to 50V DC
Test Current: User Selectable: 0.025 ….. 50 Ampere.
Panel Display Color LCD with back lighting and touch screen.
Front Panel Sealed anodized.
Interface 2 x USB 1.1 (1 host / 1 device) and 9 Pin RS232 serial
Memory Storage Stores up to 10000 complete test results.
Resistance Range: 0.00 to 100 k
Operating Temperature -10 C to 60 C
Storage Temperature -20 C to 70 C
Current Range Measuring Range Accuracy Resolution
30 - 50 A 0.00 ...1.3 0.1% Rdg 0.05 5 Digits or 0.05
15 - 30 A 0.0 ...3.3 0.1% Rdg 0.1 5 Digits or 0.1
8 - 15 A 0.0000 m ...6.3 0.1% Rdg 0.2 5 Digits or 0.2
3 - 8 A 0.0000 m ...16.7 0.1% Rdg 0.5 5 Digits or 0.5
1 - 3 A 0.000 m ...47.2 0.1% Rdg 1 5 Digits or 1
0.7 - 1 A 0.000 m ...71.4 0.1% Rdg 2 5 Digits or 2
0.3 - 0.7 A 0.000 m ...167 0.1% Rdg 5 5 Digits or 5
0.1 - 0.3 A 0.00 m …500 0.1% Rdg 10 5 Digits or 10
25 - 100 mA 0.00 m …2 k 0.1% Rdg 20 5 Digits or 20
- 25 mA 2 k …10 k 0.2% Rdg 200 m 5 Digits or 200 m
- 25 mA 10 k …100 k 0.8% Rdg 20 4 Digits or 20
Features
- Charges inductive loads up to 1500 Henry
- Heavy-duty protection circuitry
- Simple touch screen operation
- Data exchange with an USB-Key
- 3 Temperature channels
- High power DC Supply (50A/50V)
- DC Current adjustable for resistance values from 0.00 to 100 k
- Fastest Discharge unit on market (more than 10 times faster)
- Discharge Indicator – visible and audible indicator for discharge status
- Demagnetizing Circuit (world unique)
- Warning device output to show “transformer under test”
- Emergency stop push button immediately turns off power and starts discharging
- Data transfer to internal or external Printer
- Data Storage of up to 10000 measurements
- Fastest discharge time in the market
- 5 Year standard warranty
Specifications are subject to change without notice.

Instruction Manual Winding Resistance Meter
Type WR50, WR14, Version 2.01 Page 62 of 85
8.2 WR14
Type WR14
Size L: 470 mm (18.5”) W: 357 mm (14.1”) H: 176 mm (6.9”).
Weight: 9.4 kg (20.6 lbs.).
Input Power 90-264 VAC 47-63 Hz, or 12V DC (charging only)
Output Voltage 0 to 30V DC
Test Current: User Selectable: 0.025 ….. 15 Ampere
Panel Display Color LCD with back lighting and touch screen.
Front Panel Sealed anodized.
Interface 2 x USB 1.1 (1 host / 1 device) and 9 Pin RS232 serial
Memory Storage Stores up to 10000 complete test results.
Resistance Range: 0.00 to 100 k
Operating Temperature -10 C to 60 C
Storage Temperature -20 C to 70 C
Current Range Measuring Range Accuracy Resolution
10 - 15 A 0.00 ...1 0.1% Rdg 0.1 5 Digits or 0.05
5 - 10 A 0.0 ...3 0.1% Rdg 0.2 5 Digits or 0.1
1 - 5 A 0.0 ...15 0.1% Rdg 0.5 5 Digits or 0.5
0.5 - 1 A 0.0 ...30 0.1% Rdg 2 5 Digits or 1
0.1 - 0.5 A 0.0 ...300 0.1% Rdg 5 5 Digits or 2
25 - 100 mA 0.0 ...1200 0.1% Rdg 20 5 Digits or 10
- 25 mA 1.2 k …10 k 0.1% Rdg 200 m 5 Digits or 200 m
- 25 mA 10 k …100 k 0.5% Rdg 10 4 Digits or 10
Features
- Charges inductive loads up to 1500 Henry
- Heavy-duty protection circuitry
- Simple touch screen operation
- Data exchange with an USB-Key
- 2 Temperature channels
- High power DC Supply (15A/30V)
- DC Current adjustable for resistance values from 0.00 to 100 k
- Fastest Discharge unit on market (more than 10 times faster)
- Discharge Indicator – visible and audible indicator for discharge status
- Demagnetizing Circuit (world unique)
- Warning device output to show “transformer under test”
- Emergency stop push button immediately turns off power and starts discharging
- Data transfer to internal or external Printer
- Data Storage of up to 10000 measurements
- Fastest discharge time in the market
- 5 Year standard warranty
- Battery operated
Specifications are subject to change without notice.

Instruction Manual Winding Resistance Meter
Type WR50, WR14, Version 2.01 Page 63 of 85
9 Interfaces
9.1 Hardware
9.1.1 RS 232
9.1.2 USB
9.1.3 USB
USB-Master USB Slave
Standard 1.1 Standard 1.1
1 x RS 232, 9 Pin
Pin 2 TxD (WR-> Host)
Pin 3 RxD (Host-> WR)
Pin 5 GND
Interface Parameters:
(fixed, not changeable)
Port RS232
Baudrate 38400 Baud
Databit 8 Bit
Stopbits 1 Bit
Parity No

Instruction Manual Winding Resistance Meter
Type WR50, WR14, Version 2.01 Page 64 of 85
9.1.4 Extern
9.1.4.1 Standard type
The standard type has 4 pins. You can use pin 3 and 4 to connect an external Warning Light
or Beeper to indicate a Dangerous condition.
There is an internal Relay whose contact is connected to the plug “Extern”.
An external power source and a Warning Light or Beeper may be connected to pins 3 & 4 to
indicate a Dangerous condition. See: Example for connecting an external warning device
below.
Use the working contact between Pin 3 and Pin 4, maximum Load 240VAC 2A.
The contact is open when the system is Safe.
The contact is closed when the system is Unsafe.
Pins 1 and 2 on the Extern connector: These pins are for Raytech Service use.
Do not connect anything to these pins!
Standard type with 4 pins:
Connector in the instrument Extern
Lemo: ERA.1E.304.CLL Lemo: FFA.1E.304.CLAC60

Instruction Manual Winding Resistance Meter
Type WR50, WR14, Version 2.01 Page 65 of 85
9.1.4.2 Example for connecting an external warning device
9.1.4.3 Extended Safety Circuit type
The Extended Safety Circuit type has 6 pins.
You can use pin 3 and 4 to connect an external Warning Light or Beeper to indicate a
Dangerous condition. The function for this pins are the same as with the standard type, see
chapter “9.1.4.1 Standard type” on page 64.
Pins 1 and 2 on the Extern connector: These pins are for Raytech Service use.
Do not connect anything to these pins!

Instruction Manual Winding Resistance Meter
Type WR50, WR14, Version 2.01 Page 66 of 85
If the contact between Pin 5 and Pin 6 is open, the instrument acts as emergency stop is
pressed.
without external safety circuit with external safety circuit
If you would like to use the instrument without the extended safety circuit, you have to
connect the plug below.
It has a bridge between Pin 5 and Pin 6
Extended Safety Circuit type with 6 pins:
Connector in the instrument Extern
Lemo: ERA.1E.306.CLL Lemo: FFA.1E.306.CLAC60
RAN: 40802 RAN: 40803
V+
Internal
Emergency
Signal
V+
Internal
Emergency
Signal
External
Safety Interlock

WR14
Winding Resistance Meter 15A
WR50-12 / 13
Winding Resistance Meter 50A
Raytech USA, Inc., 118 South 2nd Street, Perkasie, PA 18944
APPENDIX

Instruction Manual Winding Resistance Meter
Type WR50, WR14, Version 2.01 Page 68 of 85
Contents
A Raytech Toolbox.............................................................................................................69
B Software Development Kit SDK......................................................................................70
C Command Syntax...........................................................................................................71
C.A..........................................................................................................Serial Interface
71
C.B............................................................................................................USB Interface
72
D USB Printer Info..............................................................................................................73
E Measuring high- and low-voltage-side in series ..............................................................74
F Demagnetizing ...............................................................................................................77
G Multiplexer......................................................................................................................79
H Warranty Conditions.......................................................................................................80
I Error Messages..............................................................................................................82
J Troubleshooting..............................................................................................................84
K Contacts.........................................................................................................................85

Instruction Manual Winding Resistance Meter
Type WR50, WR14, Version 2.01 Page 69 of 85
A Raytech Toolbox
The Raytech Toolbox is another option for Data Exchange between the measuring
instrument and an external computer.
The Raytech Toolbox can be downloaded free of charge. Contact Raytech USA.

Instruction Manual Winding Resistance Meter
Type WR50, WR14, Version 2.01 Page 70 of 85
B Software Development Kit SDK
The SDK is a device management software with various possible applications. It is
essentially a software layer (or driver) that resides between the Operating System (OS) IO
system, custom Windows Application and Raytech instruments. The SDK with native
Raytech USB Driver for Windows provides the OS with full device functionality, appearing to
OS as Raytech USB device. This software can also be used without native Raytech USB
drivers to control the device over the standard RS 232 Serial port.
It is a powerful tool to write easy customised Software to control the Raytech Instruments.
For more information about the Software Development Kit, contact Raytech USA.

Instruction Manual Winding Resistance Meter
Type WR50, WR14, Version 2.01 Page 71 of 85
C Command Syntax
It is possible to control the instrument over the RS 232 or the USB port with an external
computer. You can write your own test program for a full customized test procedure.
C.A Serial Interface
Related Firmware 2.6.0.0 and later.
Interface Parameters
Parameter Value
Port RS232
Baudrate 38400 Baud
Databit 8 Bit
Stopbits 1 Bit
Parity No
TxD (WR-> Host) Pin 2
RxD (Host-> WR) Pin 3
Gnd Pin 5
Command Syntax
Cmd [Para[,Para2..]] LF”
Separator for Cmd and Parameters ‘ ‘ (space 0x20)
Separator for Parameters: ‘,’
Numeric Format of Numbers: float ( C - Language), “.” as decimal point
Format of Strings: all ASCII Characters from 0x20 to 0xff]
Standard Responds / Error Messages
“*1 Ok” Command successful
“*2 Syntax error” Command unknown
“*3 Out of range” Parameter is out of allowed range
“*4 Fail” Command is not allowed (at this time)
“*5 Missing parameter” Too less Parameters
“*6 Too many parameter” Too many Parameters
“*7 Out of Range Meas” Range change not allowed while Measure
“*8 Internal” Internal Error occurred
Compatibility all commands are valid for the WR series
examples must be adapted to each system type:
WR14, WR50, WR100
A description of all commands (90014 Command Set WRxx) is stored on the delivered USBKey. The newest version is available from Raytech USA.

Instruction Manual Winding Resistance Meter
Type WR50, WR14, Version 2.01 Page 72 of 85
C.B USB Interface
Related Firmware 2.7.0.0 and later.
A description of all commands is available from Raytech USA.
There you find although the USB-driver and an installation guide. The USB-driver installation
is not necessary in order to use the RS 232 serial port for communication with the device.

Instruction Manual Winding Resistance Meter
Type WR50, WR14, Version 2.01 Page 73 of 85
D USB Printer Info
Printer Requirements
Languages:
- HP PCL
- Epson ESC/P 2
- Epson Stylus COLOR
- Canon BJ (300 dpi)
- Canon BJ (360 dpi)
- Epson LX (9-pin)
Driver
The Printer has to act as Standard USB class 7.1 device. About every Printer acts as such
device (except multifunction devices like All in One Printers).
Interface
USB 1.1 or 2.0
Suggested Printers
- Ink-Jet:
Canon iP90
Epson Stylus S20
HP-Deskjet 6940
HP-Deskjet H470B
HP-Deskjet H470WBT
Epson Stylus Office B40W
- Laser
Brother HL-5240 (Tested)
Brother HL-2140
Brother HL-5240L
HP-Laserjet P1505N
HP-Laserjet P2055DN
HP Color Laserjet CP2025N
PocketJet 200
PocketJet II
The information in this document is subject to change without notice.

Instruction Manual Winding Resistance Meter
Type WR50, WR14, Version 2.01 Page 74 of 85
E Measuring high- and low-voltage-side in series
It makes sense to measure the high voltage side in series to the low voltage side to
magnetize the transformer faster. Take always the 2 windings on the same coil in the same
current direction. In the following table you find examples on transformer connection
schemes for injecting test current and measuring 2 windings simultaneously:
Transformer type
Current Connection
Sense Connection
Current +
Jumper
Current -
Channel 1
Channel 2
PSV
+-+
-
D
d
0
H1
H3:X1X3H1H3X1
X3
H2
H1:X2X1H2H1X2
X1
H3
H2:X3X2H3H2X3
X2
2
H1
H3:X1X2H1H3X1
X2
H2
H1:X2X3H2H1X2
X3
H3
H2:X3X1H3H2X3
X1
4
H1
H3:X3X2H1H3X3
X2
H2
H1:X1X3H2H1X1
X3
H3
H2:X2X1H3H2X2
X1
6
H1
H3:X3X1H1H3X3
X1
H2
H1:X1X2H2H1X1
X2
H3
H2:X2X3H3H2X2
X3
8
H1
H3:X2X1H1H3X2
X1
H2
H1:X3X2H2H1X3
X2
H3
H2:X1X3H3H2X1
X3
10
H1
H3:X2X3H1H3X2
X3
H2
H1:X3X1H2H1X3
X1
H3
H2:X1X2H3H2X1
X2
yn
1
H1
H3:X1X0H1H3X1
X0
H2
H1:X2X0H2H1X2
X0
H3
H2:X3X0H3H2X3
X0
5
H1
H3:X3X0H1H3X3
X0
H2
H1:X1X0H2H1X1
X0
H3
H2:X2X0H3H2X2
X0
7
H1
H3:X0X1H1H3X0
X1
H2
H1:X0X2H2H1X0
X2
H3
H2:X0X3H3H2X0
X3
11
H1
H3:X0X3H1H3X0
X3
H2
H1:X0X1H2H1X0
X1
H3
H2:X0X2H3H2X0
X2

Instruction Manual Winding Resistance Meter
Type WR50, WR14, Version 2.01 Page 75 of 85
Transformer type
Current Connection
Sense Connection
Current +
Jumper
Current -
Channel 1
Channel 2
PSV
+-+
-
D
y
1
H1
H3:X1X3H1H3X1
X3
H2
H1:X2X1H2H1X2
X1
H3
H2:X3X2H3H2X3
X2
5
H1
H3:X3X1H1H3X3
X1
H2
H1:X1X2H2H1X1
X2
H3
H2:X2X3H3H2X2
X3
7
H1
H3:X3X1H1H3X3
X1
H2
H1:X1X2H2H1X1X2H3
H2:X2X3H3H2X2
X3
11
H1
H3:X1X3H1H3X1
X3
H2
H1:X2X1H2H1X2
X1
H3
H2:X3X2H3H2X3
X2
Yn
d
1
H1
H0:X1X2H1H0X1
X2
H2
H0:X2X3H2H0X2X3H3
H0:X3X1H3H0X3
X1
5
H1
H0:X3X1H1H0X3
X1
H2
H0:X1X2H2H0X1
X2
H3
H0:X2X3H3H0X2
X3
7
H1
H0:X2X1H1H0X2
X1
H2
H0:X3X2H2H0X3
X2
H3
H0:X1X3H3H0X1
X3
11
H1
H0:X1X3H1H0X1
X3
H2
H0:X2X1H2H0X2
X1
H3
H0:X3X2H3H0X3
X2
yn
0
H1
H0:X1X0H1H0X1
X0
H2
H0:X2X0H2H0X2
X0
H3
H0:X3X0H3H0X3
X0
6
H1
H0:X0X1H1H0X0
X1
H2
H0:X0X2H2H0X0
X2
H3
H0:X0X3H3H0X0
X3
y
0
H1
H3:X1X3H1H3X1
X3
H2
H1:X2X1H2H1X2
X1
H3
H2:X3X2H3H2X3
X2
6
H1
H3:X3X1H1H3X3
X1
H2
H1:X1X2H2H1X1
X2
H3
H2:X2X3H3H2X2
X3

Instruction Manual Winding Resistance Meter
Type WR50, WR14, Version 2.01 Page 76 of 85
Transformer type
Current Connection
Sense Connection
Current +
Jumper
Current -
Channel 1
Channel 2
PSV
+-+
-
Y
d
1
H1
H3:X1X3H1H3X1
X3
H2
H1:X2X1H2H1X2
X1
H3
H2:X3X2H3H2X3
X2
5
H1
H3:X3X2H1H3X3
X2
H2
H1:X1X3H2H1X1
X3
H3
H2:X2X1H3H2X2
X1
7
H1
H3:X2X1H1H3X2
X1
H2
H1:X3X2H2H1X3X2H3
H2:X1X3H3H2X1
X3
11
H1
H3:X1X3H1H3X1
X3
H2
H1:X2X1H2H1X2
X1
H3
H2:X3X2H3H2X3
X2
yn
0
H1
H3:X1X0H1H3X1
X0
H2
H1:X2X0H2H1X2X0H3
H2:X3X0H3H2X3
X0
6
H1
H3:X0X1H1H3X0
X1
H2
H1:X0X2H2H1X0
X2
H3
H2:X0X3H3H2X0
X3
y
0
H1
H3:X1X3H1H3X1
X3
H2
H1:X2X1H2H1X2
X1
H3
H2:X3X2H3H2X3
X2
6
H1
H3:X3X1H1H3X3
X1
H2
H1:X1X2H2H1X1
X2
H3
H2:X2X3H3H2X2
X3
S
s
0
H1
H0:X1X0H1H0X1
X0
6
H1
H0:X0X1H1H0X0
X1
The table is in ANSI standard. You can change it e.g. to the ICE standard by substitute
H1 to 1U
H2 to 1V
H3 to 1W…

Instruction Manual Winding Resistance Meter
Type WR50, WR14, Version 2.01 Page 77 of 85
F Demagnetizing
Energizing magnetized transformers
Problems can be created when the core of a transformer becomes magnetized prior to being
energized for use. Damage to the insulation and deformation of the windings are two of the
most common side effects.
Generally, Transformer cores, during operation are magnetized, demagnetized and then
magnetized and demagnetized in the opposite direction for each sine wave cycle.
It is not easy to determine the magnitude the core is magnetized at the moment the
Alternating Current source is switched off. The larger the hysteresis of the iron in the core
material, the greater the magnetization level. The magnitude of magnetization depends upon
the moment the transformer is switched off and the applied voltage level during the power on
state.
The highest magnetization in this scenario occurs when a transformer is switched off right at
the moment the voltage source sine wave crosses the zero-line.
Transformer cores are also magnetized after having a Direct Current source flow in a
winding. For example, the application of Direct Current when performing a winding resistance
test. After measuring the Winding Resistance the core is magnetized to its’ maximum
Hysteresis.
Both of these scenarios can leave the core in an unpredictable state which can cause
damage when energized. These problems can be eliminated if the transformer is
demagnetized prior to being energized for use.
Conclusion
• A transformer is magnetized when power is switched off. Even if a transformer is
completely de-energized, it can still be in a magnetized state!
• After performing DC tests on a transformer winding, the core is magnetized.
Consequences of energizing a magnetized transformer
When a magnetized transformer is switched back on line, it is quite possible, depending
upon the position of the sine wave and other variables, that inrush current can exceed 8
times the nominal current flow. This hazardous situation may cause tripping of over-current
relays, damage to the insulation medium and deformation of the transformer windings.

Instruction Manual Winding Resistance Meter
Type WR50, WR14, Version 2.01 Page 78 of 85
Procedure for eliminating the magnetized state of a transformer
One option that can be taken to safely switch a transformer back on line and avoid a
dangerous and damaging situation is to apply a reduced AC voltage source and increase the
voltage level to the operating voltage level. Under controlled conditions this may be possible.
However, this undertaking may not be theoretically possible when energizing a transformer
on site. Equipment required to fully demagnetize a transformer in this manner is large and
expensive.
or
A better solution is the new Raytech Winding Resistance Meter, WR-Series.
These easy to use systems are recognized throughout the World for Precision Winding
Resistance measurements. A unique and new feature built into the WR-series is the ability to
Automatically Demagnetize a Transformer core on site.
Avoid unnecessary damage and unsafe conditions when energizing a transformer; use one
of the Raytech WR-series instruments and be sure.
Parameters for demagnetizing
The Current of the WR series test system should be applied on the high inductive or High
Voltage side of the transformer. Although the potential cables from Channel 1 must be
connected.
The optimal demagnetizing current to be used is the same as the measuring current used
during Winding Resistance Measurement or the maximum allowed for the nominal current
level of the high voltage side.

Instruction Manual Winding Resistance Meter
Type WR50, WR14, Version 2.01 Page 79 of 85
G Multiplexer
Description
Raytech Multiplexer is designed to drastically reduce cabling time and increase test
performance. It is made to be used with Raytech Winding Resistance and Turns Ratio
Meters. Any Multiplexer configuration can be easily controlled by a Winding Resistance
Meters touch panel or by remote.
Example
Advantages & Features
Minimizes cabling time.
Does all measurements with one
cabling per transformer, including
Winding Resistance and Turns Ratio.
Uses up to three Multiplexers and
measure transformers with three
winding systems with one cabling
sequence.
Get your own configuration containing
from one to three Multiplexers, from
one to three Winding Resistance
Meters and one Turns Ratio Meter.
Control your Tap Changer with a
powerful tap changer interface.
Operate all instruments on a touch
screen or by remote control.
Get a customized complete solution
containing WR, TR and Multiplexers.
Ask Raytech for a ATOS (Automatic
Transformer Observing System)
Specifications:
Power supply: 100..240VAC
Case: 19’’ Rack 4U
Interface: Raytech Serial
Intercom
Included in Delivery
10m standard cables set to test object
Standard cables to WR and TR.
Firmware Update for WR14/50/100
Options
Cable set for 2 or 3 Multiplexer
systems
Integrated Safety Unit providing fused
electrical power, central interlock
system and central warning lamp
interface

Instruction Manual Winding Resistance Meter
Type WR50, WR14, Version 2.01 Page 80 of 85
H Warranty Conditions
RAYTECH USA, Inc. warrants to the original purchaser that it’s products shall be free from
defects in material and workmanship under normal use and service for a period of 60 months
from the original date of shipment. An additional extended warranty period is provided, at
cost to the end user, for the products covered under this warranty if the products are returned
on each calendar year from the original date of shipment, prepaid, to Raytech USA, for
system evaluation.
The obligation of RAYTECH USA, Inc. under this warranty is limited, in its exclusive option,
to repair, replace, or issue credit for parts or materials which prove to be defective, and is
subject to purchaser's compliance with the RAYTECH USA, Inc. warranty claim procedure as
set forth within this manual. RAYTECH USA, Inc. shall at their option and expense, repair,
replace any part or parts that prove to be defective within the warranty limitation periodirrespective of the operating time of the test equipment provided that the cause of the defect
occurred prior to the time at which the risk was passed. The purchaser is obligated to
immediately notify RAYTECH USA, Inc. in writing of any defects of the supplied test
equipment. RAYTECH USA, Inc. must always be given the opportunity to rectify a defect
within a reasonable amount of time. The purchaser shall grant adequate amount of time that
the test equipment shall be repaired
This warranty covers only those parts and/or material deemed to be defective resulting from
manufacturer’s workmanship. The liability of RAYTECH USA, Inc. shall be limited to the
repair, replacement, or issuance of credit for parts deemed defective within the meaning of
this warranty. Costs for all transportation, labor or other expenses that may have occurred
incidental to the inspection, repair, replacement, or issuance of credit for such parts and/or
materials shall be the sole responsibility of purchaser. This warranty shall not apply to any
accessories, parts, or materials not manufactured or supplied by RAYTECH USA, Inc.
Equipment must be returned prepaid with a Return Material Authorization (RMA) to:
RAYTECH USA, Inc.
118 S. 2ndStreet
Perkasie, PA 18944 USA
Tel. + 267 404 2676 Fax. + 267 404 2685
www.RaytechUSA.com
LIMITATION OF WARRANTY
The foregoing warranty shall not apply to defects resulting from improper and unauthorized
modifications or misuse and abuse of the product, negligence, alteration, modification, faulty
installation by the customer, customer’s agents or employees. Attempted or actual
dismantling, disassembling, service or repair by any person, firm, or corporation not
specifically authorized in writing by RAYTECH USA, Inc.
Defects caused by or due to handling by carrier, or incurred during shipment, trans-shipment,
or other move. Inadequate maintenance by the customer, second source supplied software

Instruction Manual Winding Resistance Meter
Type WR50, WR14, Version 2.01 Page 81 of 85
or interfacing, operation outside the environmental limits, or improper site preparation.
Exclusive remedies provided herein are the customer’s sole and exclusive remedies.
RAYTECH USA, Inc. shall not be liable for any damages resulting from the use of this
equipment whether direct, indirect, special, incidental, or consequential damages, or whether
based on contract, tort, or any other legal theory.
NO OTHER WARRANTY OR REMEDY IS EXPRESSED OR IMPLIED.
Arbitration
All disputes arising out of or in connection with the warranty agreement between the
purchaser and Raytech USA, Inc. and including those regarding the legal validity of the
warranty and this arbitration clause shall be settled out of court and may be referred to
arbitration for final decision.
Any disputes between the purchaser and Raytech USA, Inc. shall be settled according to the
rules of settlement and arbitration of the chamber of commerce in Pennsylvania by one or
more arbitrators appointed also according to the rules of arbitration of the chamber of
commerce in Pennsylvania.

Instruction Manual Winding Resistance Meter
Type WR50, WR14, Version 2.01 Page 82 of 85
I Error Messages
The Raytech instruments are designed to be trouble free, so you may not see many error
messages.
The emergency switch is activated.
1
In this condition it is not possible to start a
measurement.
Exit this message screen by touching “OK”
without releasing the emergency switch.
The system will revert to a pretest or main
screen similar to the following screen:
Because the emergency switch is still
depressed, you are not able to start a new
measurement.
All other features of the system such as
storing, printing are still active.
Turn the Emergency Stop button clockwise to release.
1
In case of Interlock-Modification for extend safety circuit the same message appears. For more
information see chapter “9.1.4.3 Extended Safety Circuit type” on page 65.

Instruction Manual Winding Resistance Meter
Type WR50, WR14, Version 2.01 Page 83 of 85
Attempt to store results to the USB key
without any device key plugged to the WRinstrument USB port.
Plug the USB key in and try again. The
following will appear. The data can then be
exported.

Instruction Manual Winding Resistance Meter
Type WR50, WR14, Version 2.01 Page 84 of 85
J Troubleshooting
When the WR-instruments are powered on an internal calibration and check sequence is
performed.
Upon completion of the check sequence the test set will proceed to the “Main Screen”.
Should there be any problem with the test set an error message will appear.
Touch Panel does not work:
Please connect any USB mouse to the USB port and control the instrument with it.
The instrument will automatically display a cursor and everything can be done by mouse.
See chapter 6.2.7.1 Mouse Cursor.
You can recalibrate the touch Panel: see chapter “Calibrate Touchscreen” on page 35.
USB Memory Stick does not work:
There are a few unsupported memory sticks available on the market. Please use another
model and try again.
Test Current cannot be turned on:
Is the Emergency stop switch pushed in? Turn it counter clockwise to release.
Erratic or erroneous readings
Possible causes
1. Test lead damaged or not connected.
2. Poor test lead connection.
3. Poor supply power source. Check extension cords, plugs and cables carefully.
4. Test set attached to a “Live” load or high interference load.

Instruction Manual Winding Resistance Meter
Type WR50, WR14, Version 2.01 Page 85 of 85
Can’t switch off the WR14
Disconnect the power cable and press the main switch for 5 seconds.
NOTE
The WR-instruments are designed to be trouble free.
If problems or questions do arise please contact your nearest
representative or our service support group in Pennsylvania.
K Contacts
Raytech USA, Inc.
Raytech USA, Inc
118 South 2nd Street
Perkasie, PA 18944, USA
Phone: +267 404 2676
Fax: +267 404 2685
Mail: welcome@raytechusa.com
Web: www.raytechusa.com
Your local Representative
 Loading...