

Page 1

Raytec Milestone Plug-in
User Guide
© Raytec Ltd 2013
Raytec Global (excluding Americas) - Tel: +44 (0) 1670520055 sales@rayteccctv.com
Raytec Americas - Tel: +1 613 270 9990 Toll Free: +1 888 505 8335 ussales@rayteccctv.com
www.rayteccctv.com
Page 2

1
1 Contents
2 Introduction
3 System Requirements
4 Raytec Milestone Plug-in Installation Instructions
5 Using the Raytec Discovery Tool
6 Configuring Illuminators in the XProtect Management Application
7 Lighting Operation in the Smart Client
8 Example Configurations
9 Troubleshooting Guide
Raytec Global (excluding Americas) - Tel: +44 (0) 1670520055 sales@rayteccctv.com
Raytec Americas - Tel: +1 613 270 9990 Toll Free: +1 888 505 8335 ussales@rayteccctv.com
www.rayteccctv.com
Page 3

2
2 Introduction
This guide will help you install, configure and operate your VARIO IP illuminators within
your Milestone Video Management System. Once configured you will be able to control and
activate your illuminators in response to pre-configured system events, and in accordance
with specific illumination settings. These events can be triggered via milestone alarms (e.g.
camera, detector, illuminator photocell etc), which in turn can activate/deactivate your
illuminator. System events, and alarms from the illuminator (e.g. photocell), are also able to
control other network devices available in the Milestone system.
The Raytec Milestone Plug-in provides many features that can provide you with multiple
possibilities for controlling your illuminators, these range from simple illuminator on/off
commands to timed commands that allow you to increase the power of the illuminator for a
period of time before reverting to the previous power level.
2.1 On/Off Triggers
You can set a trigger to simply switch an illuminator off or on at a certain power level when
an event occurs in the Milestone system. When this is done the illuminator will remain in
that state until another event changes the state of your illuminator.
2.2 Deterrent Triggers
The VARIO IP lamp comes with built in deterrent patterns that can be triggered when an
event occurs in your Milestone system. You can choose from three patterns
Wave – Cycles from minimum power increasing to maximum power and back again
Hi-Lo – Switches from minimum power to maximum power and back again
SOS – The illuminator flashes to the SOS pattern
2.3 Timed Triggers
With a timed trigger you can switch your illuminator on, alter the power level or activate the
deterrent mode for a fixed period of time, when this time elapses you can also choose
whether to switch the illuminator off or to revert to the power level the illuminator was at
before the trigger occurred. This is especially useful for a short term higher power level or
for a burst of deterrent mode to notify people that a camera is monitoring them.
2.4 Boost Trigger
The Boost function provides the ability to overdrive the illuminator and boost to 120% power
for a short period of time. The boost trigger can be used to provide additional illumination on
scene e.g. to help focus a camera or to view a subject/detail on scene more clearly. This a
default period of ten seconds that is not configurable and has a two minute cool down
period before it can be activated again.
2.5 Alarms
Alarms (e.g. camera, detector, illuminator photocell etc), can trigger pre-configured system
events, which in turn can activate/deactivate your illuminator in accordance with your
specific illuminator settings.
Raytec Global (excluding Americas) - Tel: +44 (0) 1670520055 sales@rayteccctv.com
Raytec Americas - Tel: +1 613 270 9990 Toll Free: +1 888 505 8335 ussales@rayteccctv.com
www.rayteccctv.com
Page 4

3
Alarms from the illuminator (e.g. photocell), are also able to control other network devices
available in the Milestone system. Each VARIO IP illuminator can report the status of its
photocell and external input to the Milestone system. These can be accessed in the alarm
section of the management application where you can trigger events that can be used with
other devices on your system.
2.6 Manual Control
When running the XProtect Smart Client application the users have access to individual
illuminators and groups of illuminators that you have configured in the management
application. This allows them to override the illuminators’ status on the system temporarily.
For instance they can choose to put a group of illuminators to full power in a selected area
or activate deterrent mode on an individual illuminator. These actions are timed by the
system and will revert back to the illuminators previous state once this time elapses.
Raytec Global (excluding Americas) - Tel: +44 (0) 1670520055 sales@rayteccctv.com
Raytec Americas - Tel: +1 613 270 9990 Toll Free: +1 888 505 8335 ussales@rayteccctv.com
www.rayteccctv.com
Page 5

4
3 System Requirements
3.1 Pre- Requisites
Milestone XProtect Client or Server installed
.net framework 4 and 4.5
Version 1.1.0 Vario IP firmware or above
The Raytec Milestone plug-in has been tested with and is compatible with the latest
supported versions of the Milestone XProtect VMS product range which support the
Milestone Integration Platform (MIP) architecture. At the time of testing this was:
XProtect Corporate 5.0
XProtect Enterprise 8.1
XProtect Professional 8.1
XProtect Express 1.1
Raytec can test our Raytec Milestone Plug-in against prior versions of products in the
XProtect range on request, providing that they are in the Milestone general availability
phase and that the particular product/version supports the MIP architecture. If it is in the
Milestone limited availability phase, Raytec may still be able to test against this version,
providing it supports the MIP architecture. After discontinuation you may need to upgrade to
the latest version supported by Milestone to be able to use the Raytec Milestone Plug-in.
3.2 Hardware Requirements
Windows 7 or Windows Server 2008/R2
10 Mb free HDD space
512Mb RAM
Note: The requirements for the Milestone XProtect software should have also been met
before this installation is performed.
Raytec Global (excluding Americas) - Tel: +44 (0) 1670520055 sales@rayteccctv.com
Raytec Americas - Tel: +1 613 270 9990 Toll Free: +1 888 505 8335 ussales@rayteccctv.com
www.rayteccctv.com
Page 6
5
4 Raytec Milestone Plug-in Installation Instructions
Note: You must be logged on as an administrator to install this program.
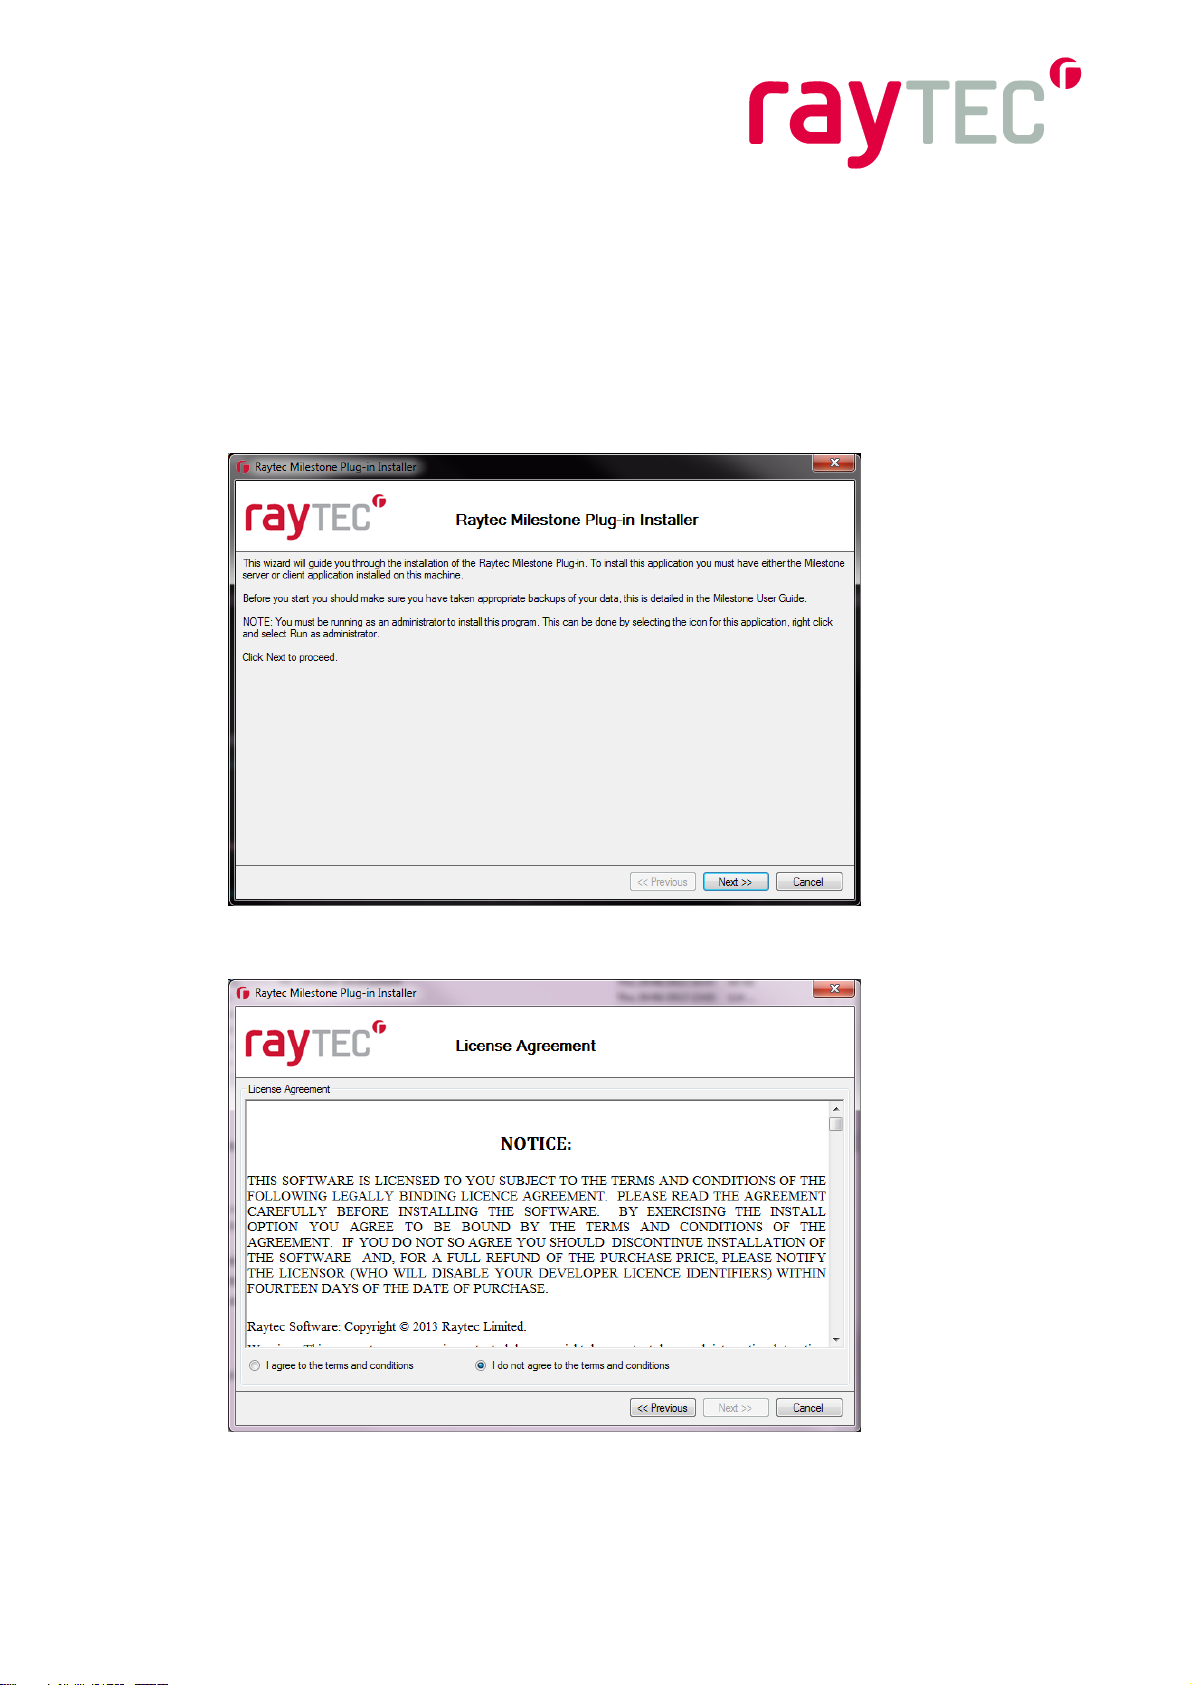
Close any open Milestone applications such as the XProtect Management Application or
the Smart Client and run the Raytec Milestone Plug-in Installer by double clicking on it.
Click the next button.
Click “I agree to the terms and conditions” and click next.
Raytec Global (excluding Americas) - Tel: +44 (0) 1670520055 sales@rayteccctv.com
Raytec Americas - Tel: +1 613 270 9990 Toll Free: +1 888 505 8335 ussales@rayteccctv.com
www.rayteccctv.com
Page 7
6
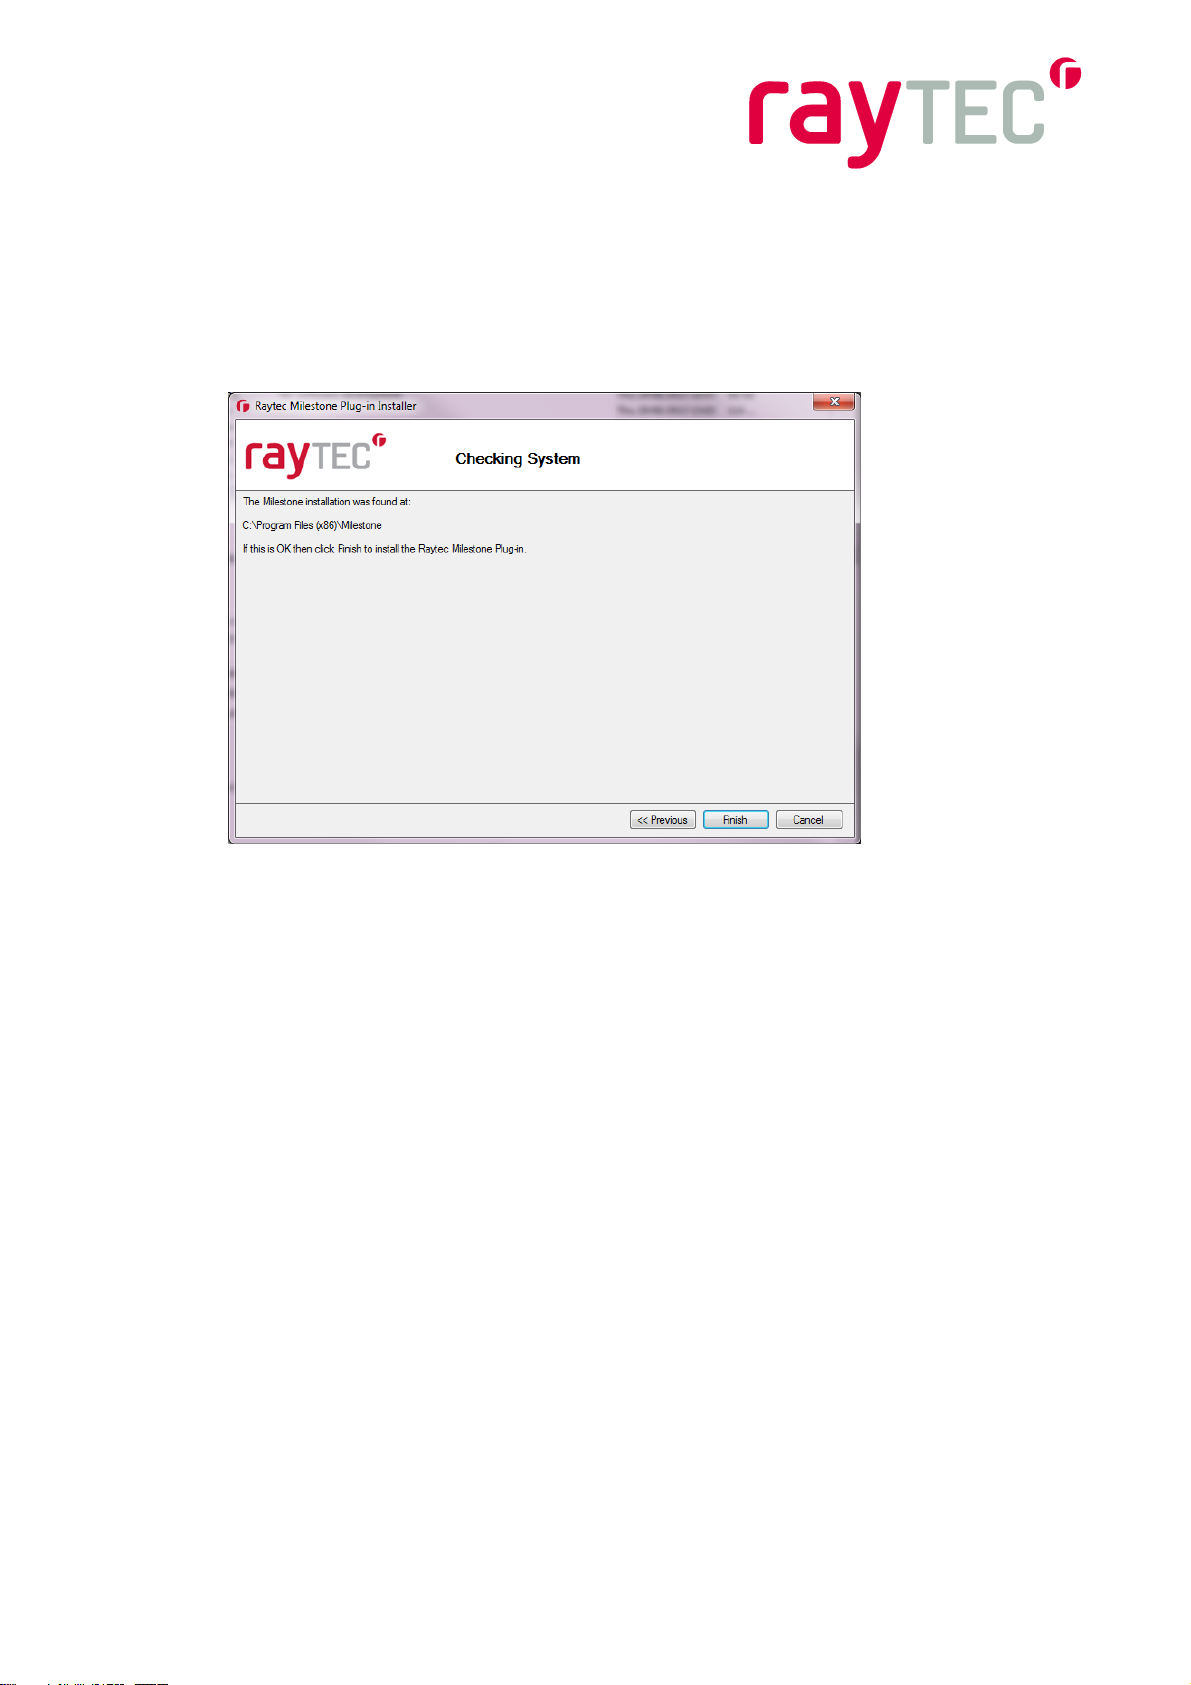
The installation should detect your Milestone installation folder, if it does not ensure that
Milestone XProtect is installed on the machine.
Click finish and the installation of the Raytec Milestone Plug-in will proceed, once the
installation is complete you will be ready to configure your Milestone XProtect system.
Please note that it will be necessary to restart the XProtect
server once installation is complete, the event server must
be restarted in order for it to recognise that the Raytec
Milestone Plug-in is available.
Raytec Global (excluding Americas) - Tel: +44 (0) 1670520055 sales@rayteccctv.com
Raytec Americas - Tel: +1 613 270 9990 Toll Free: +1 888 505 8335 ussales@rayteccctv.com
www.rayteccctv.com
Page 8
7
5 Using the Raytec Discovery Tool
When purchasing the VARIO IP illuminators you will have been supplied with a software
package called the Discovery Tool. This application allows you to configure and check the
illuminators on your network. A full instruction manual comes with the Discovery Tool and
you should refer to this for detailed information on configuring illuminators with it. This
section will detail the steps that allow you to add lamps to the Milestone XProtect system.
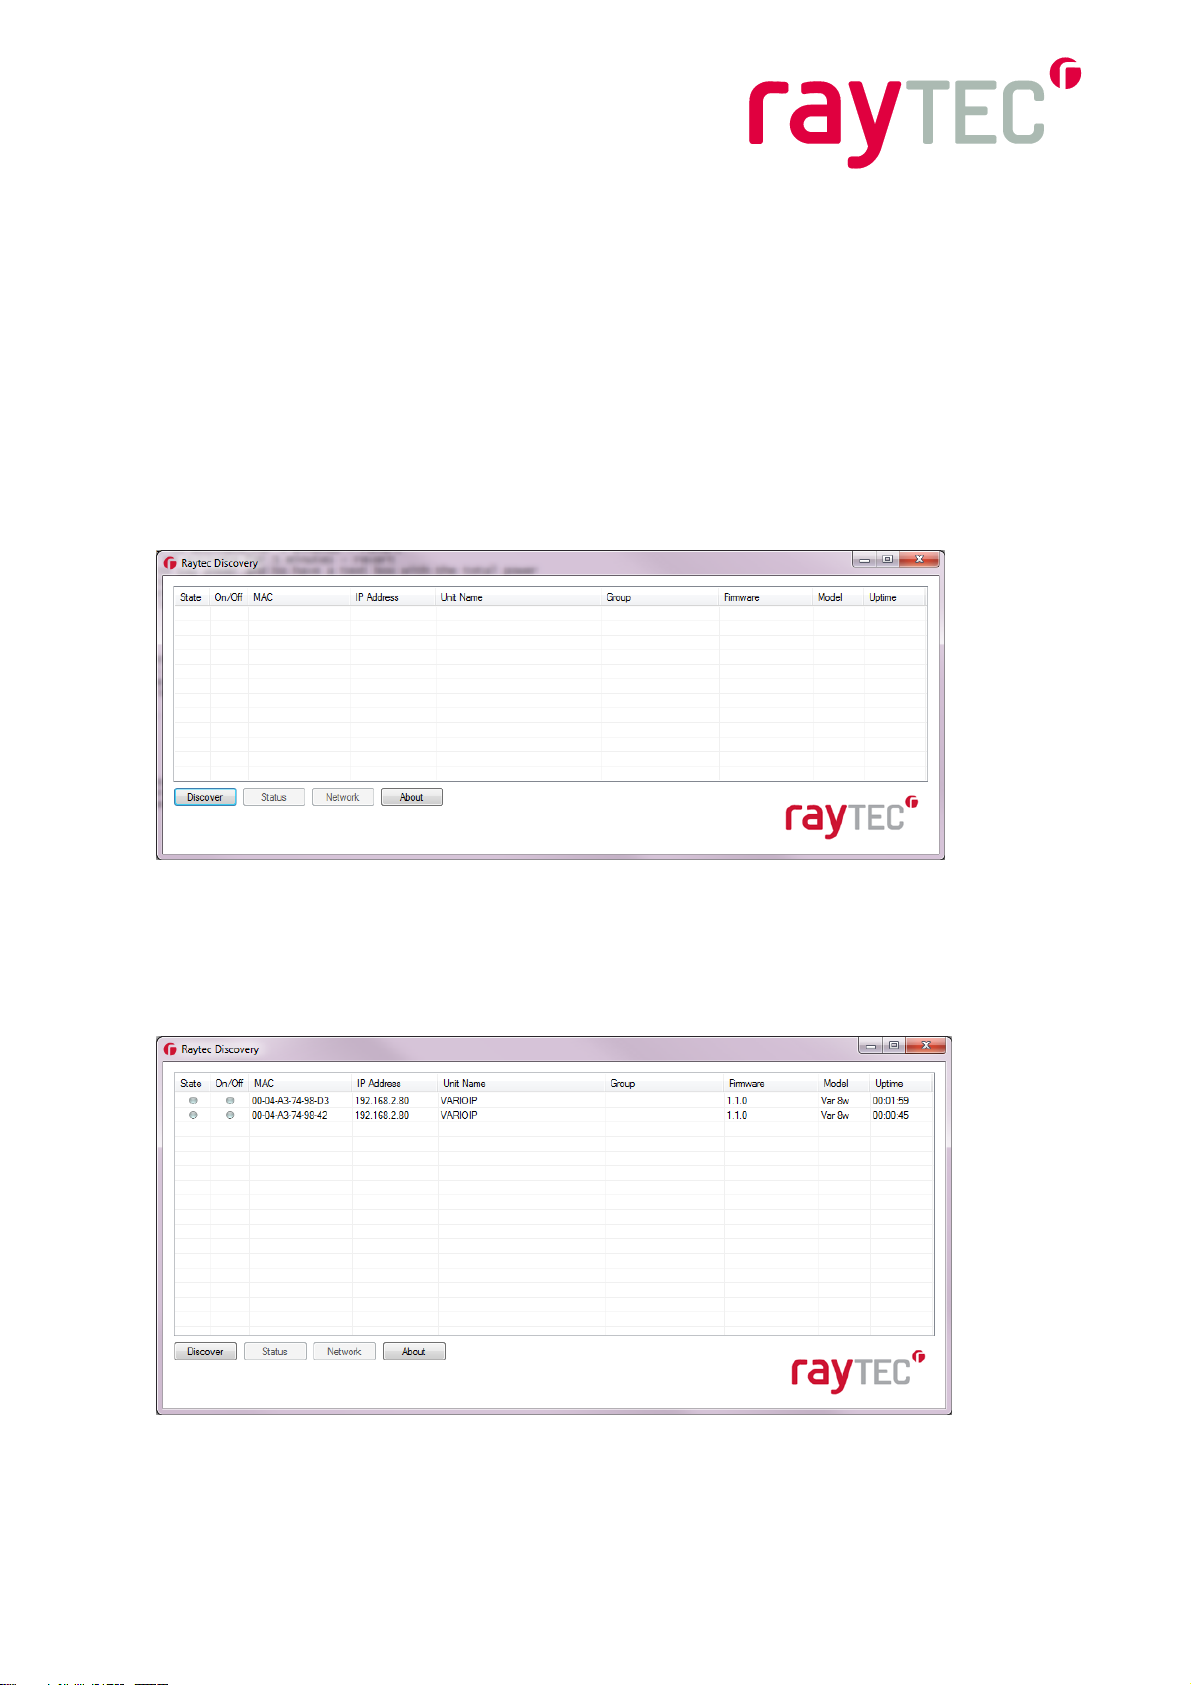
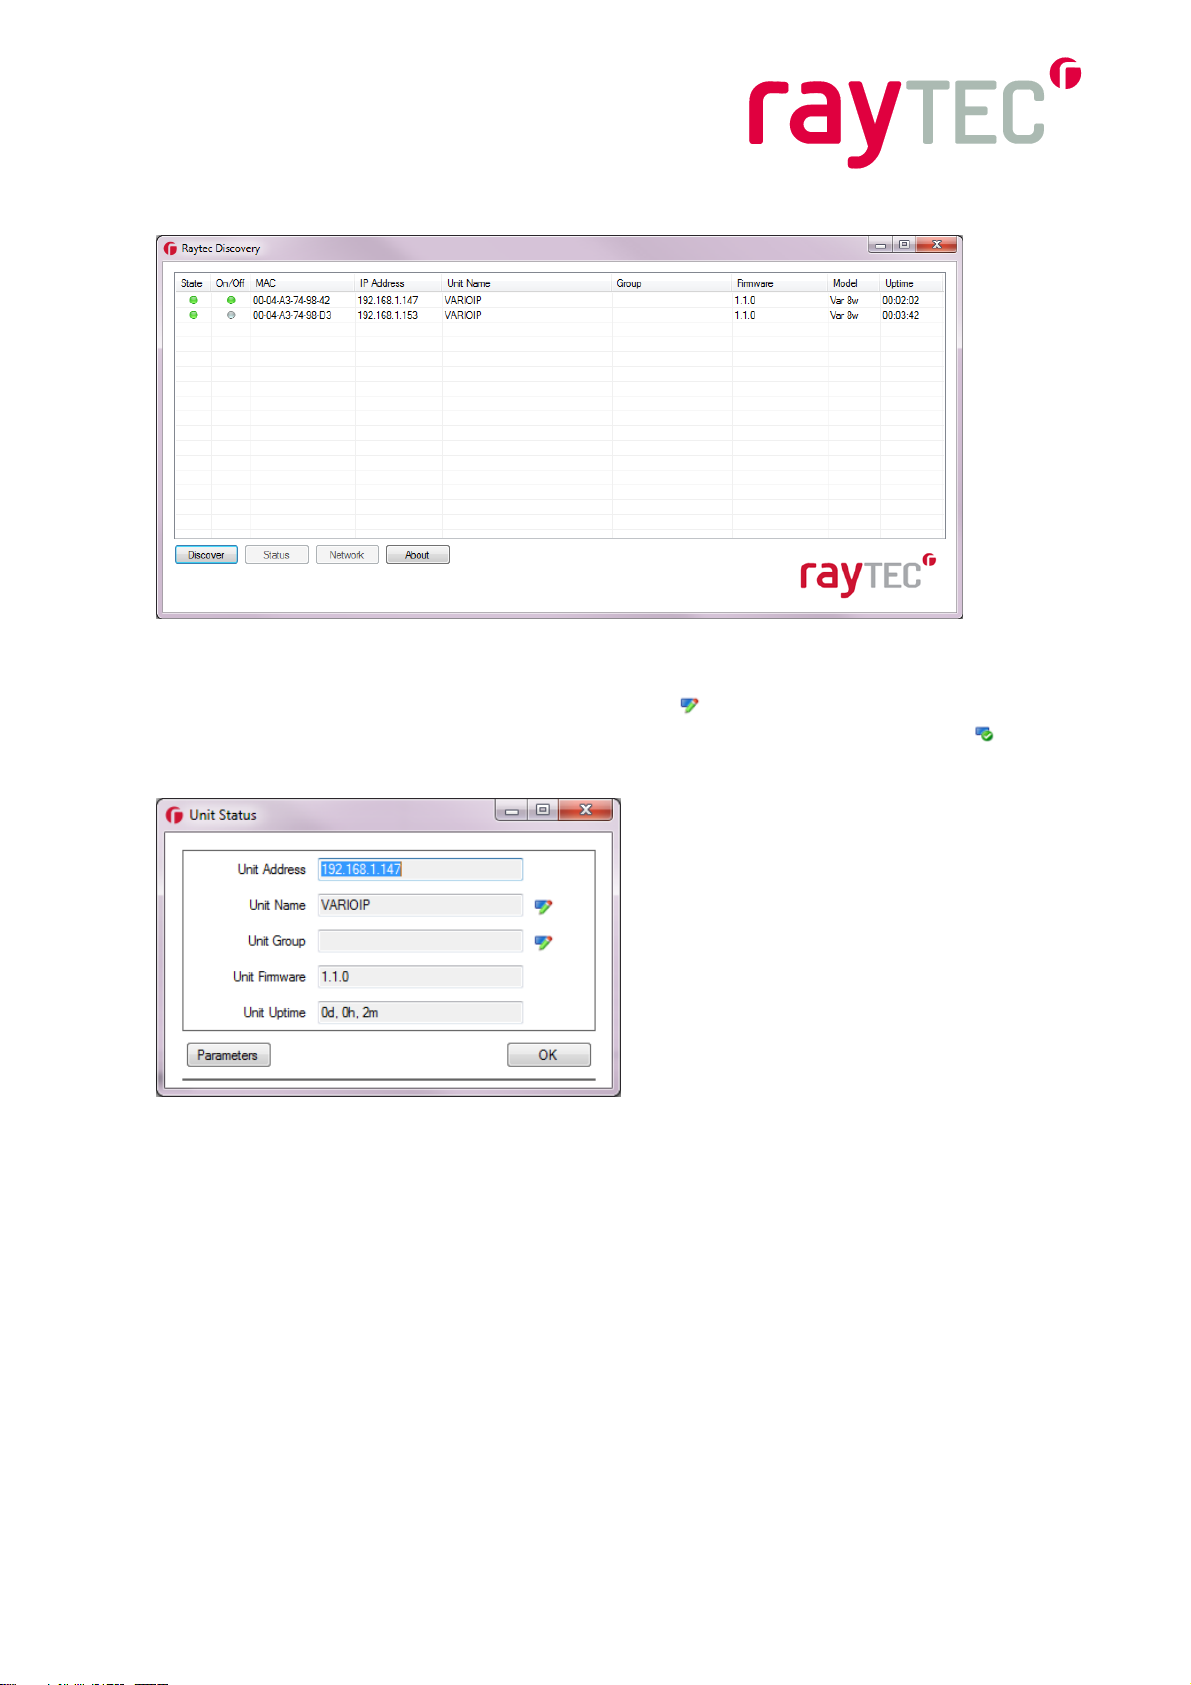
Open the Raytec Discovery Tool and you will be presented with the following window.
Click the discover button and any VARIO IP illuminators that are on the network should
appear in the list.
By default new illuminators always have a name of VARIOIP, an IP Address of
192.168.2.80 and no group name. Before being able to use them in your Milestone system
they should be updated to have a valid IP address and meaningful names.
Raytec Global (excluding Americas) - Tel: +44 (0) 1670520055 sales@rayteccctv.com
Raytec Americas - Tel: +1 613 270 9990 Toll Free: +1 888 505 8335 ussales@rayteccctv.com
www.rayteccctv.com
Page 9
8
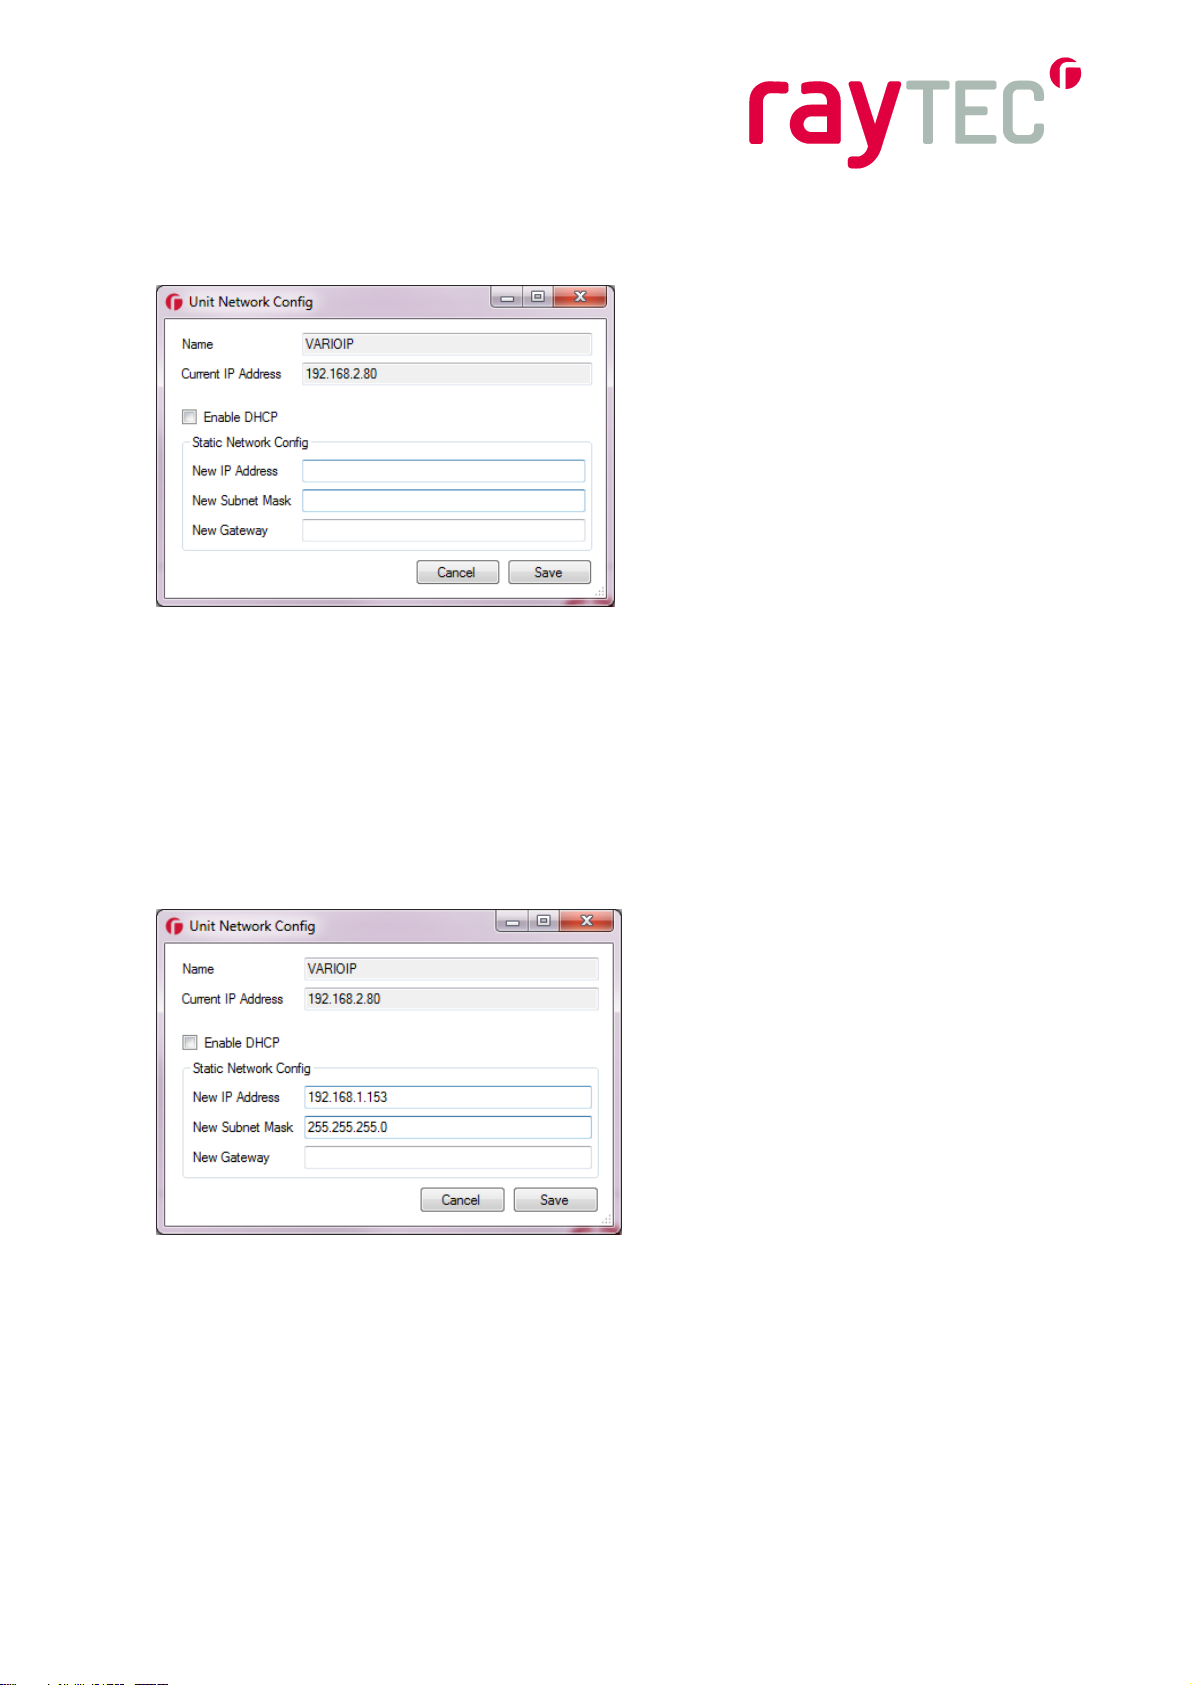
Select an illuminator you wish to configure from the list; this will highlight it. Click the
Network button and the following windows will be displayed.
You can choose to enable DCHP here should you wish. This will make the illuminator
request an IP address from the DHCP server on your network, however this method does
not guarantee that the IP address of the device will remain the same throughout its lifetime
on the network.
The recommended approach is to enter your IP address and subnet mask manually. This
information will vary from network to network so you will need to consult the network
administrator for the range of IP addresses that are available to you and the subnet mask
that is appropriate for them. The example below shows such settings; these are indicative
only and may not be appropriate for your network.
After inputting your changes click save and you will be notified that this action will cause the
illuminator to temporarily loose communications while it reconfigures itself. You will then be
back at the main window of the Discovery Tool. After around 30 seconds you should be
able to click the discover button again and the illuminator will reappear in the list with the
settings that you changed.
Once you have configured the IP address of the illuminators you can also change the
names of them. Select the illuminator from the list and click the status button.
Raytec Global (excluding Americas) - Tel: +44 (0) 1670520055 sales@rayteccctv.com
Raytec Americas - Tel: +1 613 270 9990 Toll Free: +1 888 505 8335 ussales@rayteccctv.com
www.rayteccctv.com
Page 10
9
The following window will appear. Click the edit icon ( ) and you will now be able to
change the name of your illuminator. Once you have changed it click the save icon ( ) to
save your changes and click OK to return to the Discovery Tool window.
Raytec Global (excluding Americas) - Tel: +44 (0) 1670520055 sales@rayteccctv.com
Raytec Americas - Tel: +1 613 270 9990 Toll Free: +1 888 505 8335 ussales@rayteccctv.com
www.rayteccctv.com
Page 11
10
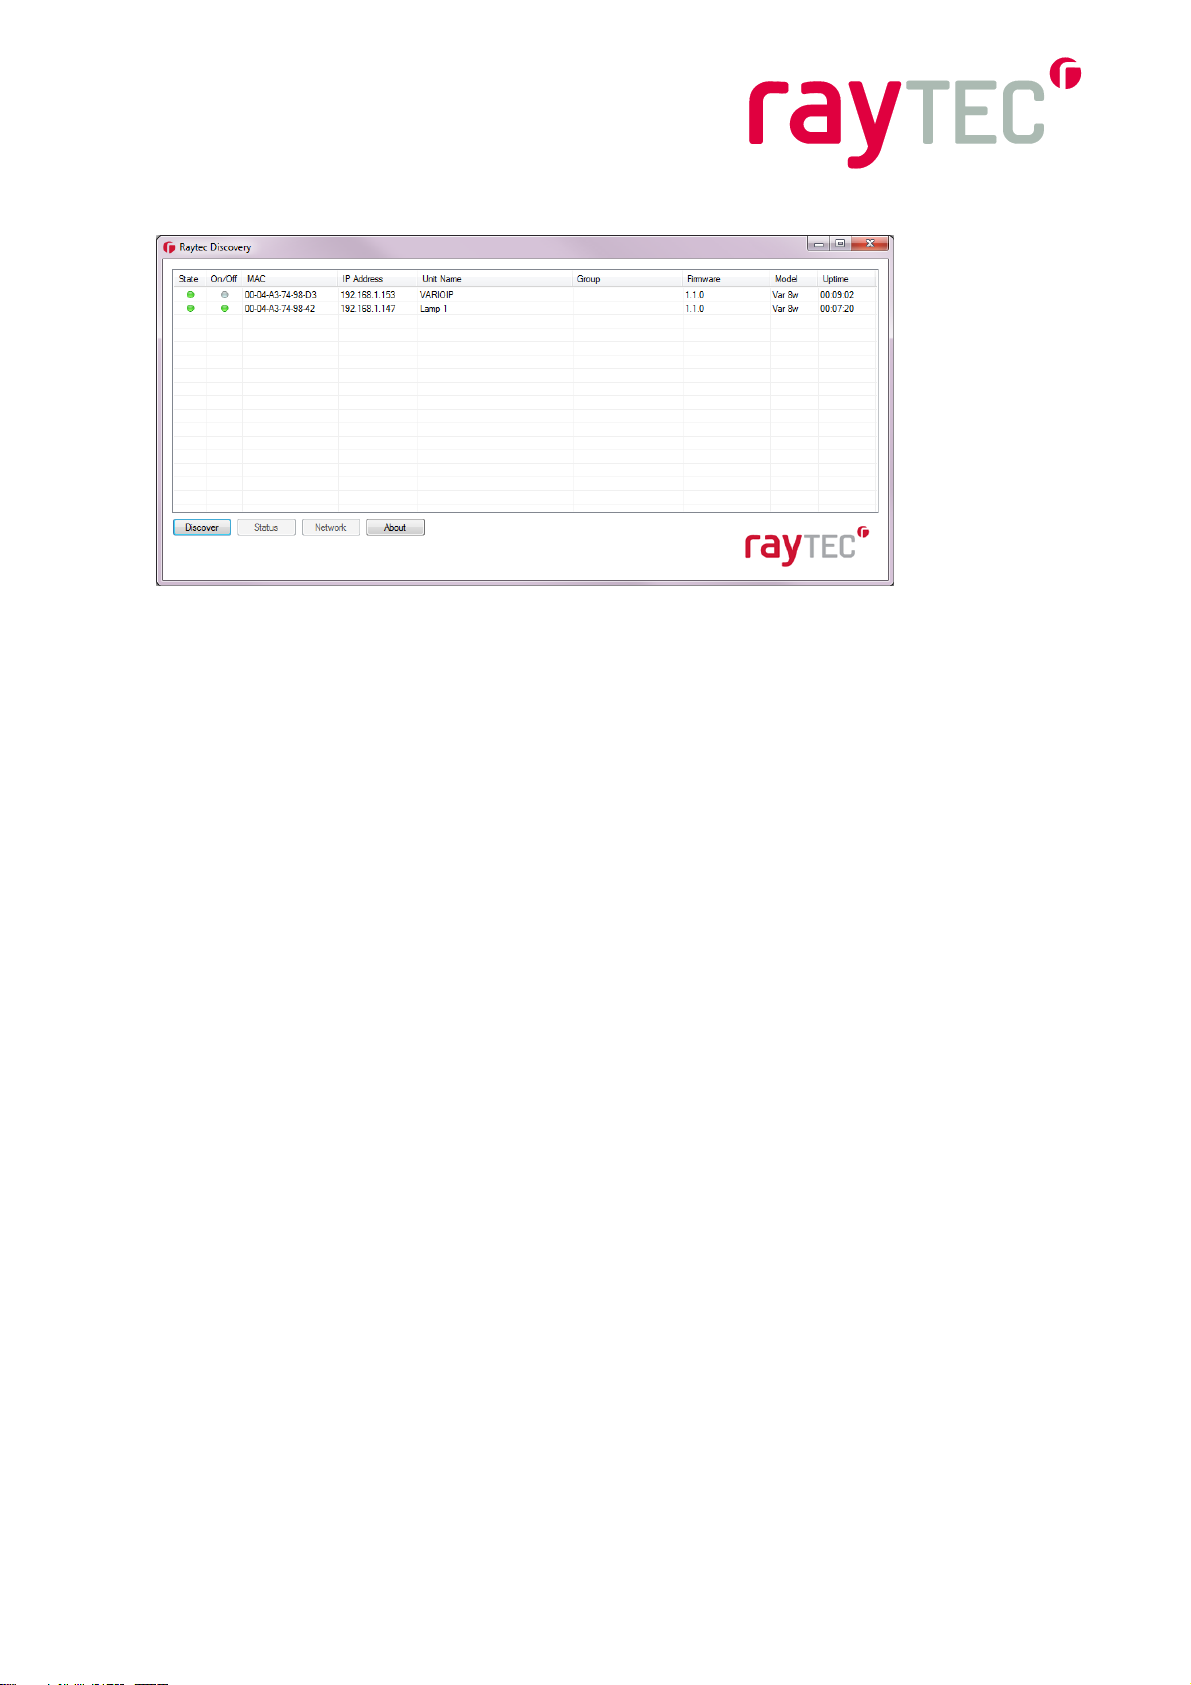
Click the discover button and the changes to the illuminator name should appear.
Note that any illuminators you wish to control through your VMS system should be
configured for VMS control. This can be done through the VARIO IP web interface in the
settings/groups page by deselecting the “Local (No VMS server)” option. Double click on
the individual illuminators within the discovery application to access the VARIO IP web
interface.
Once you have configured your illuminators you are ready to add them to the Milestone
system and configure them.
Note: You cannot run both the discovery tool and the
milestone integration at the same time as the
communications will conflict with each other.
Raytec Global (excluding Americas) - Tel: +44 (0) 1670520055 sales@rayteccctv.com
Raytec Americas - Tel: +1 613 270 9990 Toll Free: +1 888 505 8335 ussales@rayteccctv.com
www.rayteccctv.com
Page 12

11
6 Configuring Illuminators in the XProtect Management
Application
This section will give you a quick introduction to configuring your VARIO IP illuminators in
the XProtect Management Application. You should refer to the documentation provided with
your Milestone XProtect system for further information about configuring events, alarms etc.
After first discovering your illuminators on the network using the Raytec Discovery
application, you must then discover them in the Milestone system. However, before
discovering your illuminators in the Milestone system you should configure any groups
ready to associate the illuminators with.
6.1 Creating a Group
VARIO IP illuminators can be grouped together allowing you to control multiple illuminators
at the same time from an event raised from the XProtect server or the XProtect Smart
Client.
Open the XProtect Management Application
Please note: Even if you wish to configure/operate individual illuminators, they still
need to be held in a group. To configure specific illuminator settings, you simply
click on your chosen illuminator within its group.
Raytec Global (excluding Americas) - Tel: +44 (0) 1670520055 sales@rayteccctv.com
Raytec Americas - Tel: +1 613 270 9990 Toll Free: +1 888 505 8335 ussales@rayteccctv.com
www.rayteccctv.com
Page 13

12
Expand Advanced Configuration->MIP Plug-ins->Raytec Vario IP->Groups and right click
on the Groups node and select “Create New”, the following screen will be displayed.
This is the new group configuration screen. It will allow you to create a group and configure
how it responds to events from the XProtect system.
Group Name - Required
The name of the group, which will be seen in the management application and in the smart
client. It should be named in a way that will allow the user to identify quickly the location
and/or function of the group.
Group Description – Optional
Provides a description of this group. This is not shown anywhere else in the application and
serves only for notes and information about this group.
Lamp Control Option – Covered in section 6.4
This section allows you to configure the actions for the illuminators. Detailed instructions
are covered in section 6.4
Once you have set-up your groups you are ready to start adding your VARIO IP illuminators
to them.
Raytec Global (excluding Americas) - Tel: +44 (0) 1670520055 sales@rayteccctv.com
Raytec Americas - Tel: +1 613 270 9990 Toll Free: +1 888 505 8335 ussales@rayteccctv.com
www.rayteccctv.com
Page 14

13
6.2 Adding Illuminators to a Group
6.2.1 Using the Discovery Page within Milestone VMS
Open the XProtect Management Application
Expand and click the Advanced Configuration->MIP Plug-ins->Raytec Vario IP node.
The VARIO IP illuminator Discovery pane will be in the main window.
Click the Discover button.
You will be presented with a list of IP illuminators that are on the network as follows.
You can select an illuminator by checking the box next to its name. If you wish to add
multiple illuminators to a group then check the box of all the illuminators you wish to add.
Under the add selected lamps section on the bottom left of the screen select the group you
wish to add the selected illuminators to and click the add lamps button.
You may only have an illuminator in one group. Should you attempt to add an illuminator
that is already in a group into another group the management application will warn you
about this and will not add the selected illuminator.
Raytec Global (excluding Americas) - Tel: +44 (0) 1670520055 sales@rayteccctv.com
Raytec Americas - Tel: +1 613 270 9990 Toll Free: +1 888 505 8335 ussales@rayteccctv.com
www.rayteccctv.com
Page 15

14
This screen provides information about the VARIO IP illuminators available on your
network, key details such as the IP address, firmware and model information is displayed
here to facilitate the configuration of your groups. The Raytec Milestone Plug-In utilises
functionality available in newer versions of the IP illuminator firmware version 1.1.0 and up.
If there is an illuminator that has an older incompatible version then you will be notified of
this. The latest version of the IP illuminator firmware is freely available from Raytec on
request and updating you illuminators is a simple process.
Note:
You can manually add VARIO IP illuminators to your groups using the “Add Lamp
Manually” option in the discovery pane, and entering the individual lamp name and IP
address. However it is easier to use the discovery option and add your Raytec IP
illuminators by selecting them from the discovery list.
6.3 Removing Illuminators from a Group
If you wish to remove an illuminator from a group this can be done by selecting the
illuminator you wish to remove and clicking the right mouse button. You will be presented
with an option that says ‘delete’, click this, and you will be prompted to confirm that you
wish to delete the selected lamp. Selecting ‘yes’ will remove the illuminator from the group
and you are free to add it to another group if you wish to. note that while the illuminator is
not in a group you cannot associate and triggers with it and it will not be under the control of
the Milestone XProtect system.
6.4 Configuring Events
You can configure both groups of illuminators and individual illuminators to respond to
‘events’ raised by the XProtect system (e.g. triggered by a camera, detector or other
network device) or activated by the XProtect Smart Client operator. Configuring groups or
individual illuminators is done in the same way, just select either the group or individual
illuminator you wish to configure.
Creating Events
To create a new named event, go to the ‘Events’ node on the left hand side of your
XProtect management system, and create an event with a meaningful title
e.g. Group 1 ON.
Events can be connected to triggers as detailed below.
By default a group or illuminator will have all triggers disabled. When an event is associated
with a trigger the following defaults will apply unless you choose to change them.
Raytec Global (excluding Americas) - Tel: +44 (0) 1670520055 sales@rayteccctv.com
Raytec Americas - Tel: +1 613 270 9990 Toll Free: +1 888 505 8335 ussales@rayteccctv.com
www.rayteccctv.com
Page 16

15
Group or Lamp on Trigger 1 or 2
Lamp power will be 20%
The lamp will remain on until another trigger changes its state
Group or Lamp Deter Trigger
The deterrent will remain on until another trigger changes its state
The pattern it uses will be wave
The speed it uses will be slow
The following screen shows the defaults described above.
There are five triggers that can be configured
1) Group or Lamp Trigger 1
2) Group or Lamp Trigger 2
3) Group or Lamp Deter Trigger
4) Group or Lamp Off Trigger
5) Group or Lamp Boost Trigger
Raytec Global (excluding Americas) - Tel: +44 (0) 1670520055 sales@rayteccctv.com
Raytec Americas - Tel: +1 613 270 9990 Toll Free: +1 888 505 8335 ussales@rayteccctv.com
www.rayteccctv.com
Page 17

16
6.4.1 Group or Lamp Trigger 1 and 2
Group or Lamp Trigger 1 and Trigger 2 are configured in the same way. You can select an
event that will cause the trigger to activate by selecting the ‘select event’ button, this can be
cleared by clicking the respective x button.
Power
This is the power that you wish the illuminator to activate at. This is set by using the sliding
bar.
Lamp stays on
The selected the illuminator will stay on at the selected power until another event turns the
illuminator off or to another power level. When this option is selected the time and revert
options are disabled as they have no meaning for a permanent action.
Lamp switches off
When selecting this option, you can configure the specified period of minutes that you want
the illuminator to be on for. Once this period elapses you can choose to either turn the
illuminator off or to have it go back to the previous state it was in. This allows for greater
control of the illuminators connected to you Milestone system.
6.4.2 Group/Lamp Deter Trigger
Your VARIO IP illuminator comes with a built in deterrent feature. It provides a selection of
preset actions that can be activated that cause the illuminator to change its power output in
a known fashion. This is useful when used as a deterrent.
Deterrent stays on
The selected the illuminator will stay on in the selected deterrent mode until another event
turns the illuminator off or to another power level. When this option is selected, the time and
revert options are disabled as they have no meaning for a permanent action.
Deterrent ends after
When selecting this option the illuminator can be configured to remain in deterrent mode for
a specified period of seconds. Once this period elapses you can choose to either turn the
illuminator off or to have it go back to the previous state it was in. This allows for greater
control of the illuminators connected to your Milestone system.
Mode
The mode option allows you specify the visible light pattern of the illuminator.
Wave: The intensity of the illuminator will increase to maximum power then
decrease to minimum power and repeats.
Hi-Lo: The illuminator switches from maximum power to minimum power and
repeats.
SOS: The illuminator performs the SOS morse code pattern at full power.
Raytec Global (excluding Americas) - Tel: +44 (0) 1670520055 sales@rayteccctv.com
Raytec Americas - Tel: +1 613 270 9990 Toll Free: +1 888 505 8335 ussales@rayteccctv.com
www.rayteccctv.com
Page 18

17
Speed
This determines the speed at which the deterrent mode will run at, selectable speeds are
slow, medium or fast.
6.4.3 Group/Lamp Off Trigger
When associated with an event this switches the illuminators off.
6.4.4 Group/Lamp Boost Trigger
When associated with an event this puts the illuminators into boost mode. Boost mode is a
special mode where the power is increased to 120% for 10 seconds. Note that once boost
mode has been activated on an illuminator there is a 2 minute cool down period before it
can be activated again.
6.5 Using and Configuring Alarms
6.5.1 Using alarms to trigger events and thus illuminators
Pre-configured alarms in the Milestone system, e.g. on motion detection from 3rd party
devices like a PIR, can be set to trigger system events, which in turn can
activate/deactivate your VARIO IP illuminators.
Open the XProtect Smart Management application
On the left hand side select the Alarms section, and select the specific alarm that you want
to use e.g. PIR motion detect. This is just an example of a pre-configured alarm that you
may have already named and set within your Milestone system.
In the alarm window, you can relate your chosen alarm to a specific illuminator related
event in ‘Other’ section, by using the ‘Events triggered by alarm’ drop down list. This in turn
can activate/deactivate your VARIO IP illuminator/group of illuminators in accordance with
specific illuminator settings.
Raytec Global (excluding Americas) - Tel: +44 (0) 1670520055 sales@rayteccctv.com
Raytec Americas - Tel: +1 613 270 9990 Toll Free: +1 888 505 8335 ussales@rayteccctv.com
www.rayteccctv.com
Page 19

18
6.5.2 Configuring alarms from your illuminator
It is possible to configure your Milestone system to respond to events created by your
illuminators, these alarms are standard Milestone alarms and are covered in the Milestone
configuration guide.
Open the XProtect Management application
On the left hand side select the Alarms section
Right click on alarm definitions and select create new
To raise an alarm from your illuminator, select VARIO IP Lamp from the ‘Triggering Event’
drop down menu.
You can now select the specific action to create the alarm from the list just below the Vario
IP Lamp option shown above. There are currently two different actions from two devices on
the illuminator available to you – 1) External Input Active or Inactive and 2) Photocell Day or
Night
The select button will become active at this point and you may select which individual
illuminators will raise this alarm. For further information about configuring alarms please
consult your Milestone documentation.
Raytec Global (excluding Americas) - Tel: +44 (0) 1670520055 sales@rayteccctv.com
Raytec Americas - Tel: +1 613 270 9990 Toll Free: +1 888 505 8335 ussales@rayteccctv.com
www.rayteccctv.com
Page 20

19
6.5.2.1 External Input Active or Inactive
Each illuminator has an external input that can be connected to any compatible device such
as a PIR or switch. When the device connected to the lamp changes the state of its output
the illuminator will detect this and will send the alarm to the XProtect system, an example of
this would be a PIR detecting movement. This alarm raised from the illuminator can raise
any event in the Milestone system, and in turn trigger other network devices connected to
the system, or perform a multitude of user defined actions - e.g. send email
6.5.2.2 Photocell Day or Night
Each illuminator has an integrated photocell that detects the ambient light around it. At a lux
threshold specified by the illuminator it will determine whether it is day or night. When this
changes the illuminator will send the alarm to the XProtect system. Again, this alarm can
raise any system event.
See section 8.1 for various configuration examples.
Raytec Global (excluding Americas) - Tel: +44 (0) 1670520055 sales@rayteccctv.com
Raytec Americas - Tel: +1 613 270 9990 Toll Free: +1 888 505 8335 ussales@rayteccctv.com
www.rayteccctv.com
Page 21

20
7 Lighting Operation in the Smart Client
Your operators will be using the XProtect Smart Client for their day to day operation of the
system. The VARIO IP illuminator integration will allow them to control the configured
illuminators from this application. Note that at this stage, no user intervention is required in
terms of set up, when the system is correctly configured to use events (see section 5.3);
though they can still control the lights by group or individually should they need to.
7.1 Operating Groups Manually
Groups of Illuminators can be operated manually from the XProtect Client.
This temporarily overrides any event configuration, until timed out.
Open the XProtect Smart Client application
On the left hand side there will be a section called MIP Plug-ins
Locate the Vario IP Side Panel in this list
Select a group from the list
Raytec Global (excluding Americas) - Tel: +44 (0) 1670520055 sales@rayteccctv.com
Raytec Americas - Tel: +1 613 270 9990 Toll Free: +1 888 505 8335 ussales@rayteccctv.com
www.rayteccctv.com
Page 22

21
You may now control the illuminators in this group using the buttons provided. The buttons
on the left will activate each illuminator at the brightness indicated. This action is timed for 5
minutes. On completion it will revert back to the illuminators’ previous state. The deterrent
button will activate deterrent mode as Hi-Lo at fast speed for 30 seconds and once
complete it will revert back to the illuminators’ previous state.
7.2 Operating Individual Illuminators Manually
Individual illuminators can be operated manually from the XProtect Client.
This temporarily overrides any event configuration, until timed out.
Open the XProtect Smart Client application
On the left hand side there will be a section called MIP Plug-ins
Locate the VARIO IP Side Panel in this list
Select a group from the list
Select an illuminator from the list
Raytec Global (excluding Americas) - Tel: +44 (0) 1670520055 sales@rayteccctv.com
Raytec Americas - Tel: +1 613 270 9990 Toll Free: +1 888 505 8335 ussales@rayteccctv.com
www.rayteccctv.com
Page 23

22
The On and Off indicators show the current status of the illuminator. You may select either
On or Off to change this status. When the illuminator is on you may move the power bar to
change the power intensity of the selected illuminator. Any change to the illuminator on
status or power level will remain valid for 5 minutes.
The deterrent button will activate deterrent mode as Hi-Lo at fast speed for 30 seconds and
once complete it will revert back to the illuminator’s previous state.
The boost button will activate the boost functionality on the selected illuminator, this will
increase the power to 120% for 10 seconds. Note that there is a 2 minute cool down period
before the boost action can be activated again.
The three remaining sections give you feedback about the current status of the selected
illuminator.
Communications
Shows the current communications status of the selected illuminator, this should always be
‘Good’. If the status changes you should contact your administrator to investigate the
problem.
Photocell
Provides the status that the photocell is reporting, either Day or Night.
External
Provides the status of the external input, either active or inactive.
7.3 Operating Illuminators with Manual Events
If you have configured groups of illuminators or individual illuminators to respond to events
such as those detailed in section 6.4, it is possible to manually activate these events from
the Smart Client Application. This allows an operator to activate illuminators in a
preconfigured way.
Open the XProtect Smart Client application
On the left hand side there will be a section called Events
Expand this section
There will be multiple events here that can be activated manually
Select an event that is used either by a group or individual illuminator
Click the Activate button
The group/individual illuminator configured to respond to that event should perform
the configured action
Raytec Global (excluding Americas) - Tel: +44 (0) 1670520055 sales@rayteccctv.com
Raytec Americas - Tel: +1 613 270 9990 Toll Free: +1 888 505 8335 ussales@rayteccctv.com
www.rayteccctv.com
Page 24

23
8 Example Configurations
To provide an indication of the capability of the Raytec Milestone Plug-in and to assist in
configuration of the system there are some example configurations discussed here. These
propose some options you have when configuring your Milestone system and may provide
solutions to help you to achieve your goals.
These examples assume you have already configured the other parts of your Milestone
system such as events raised from camera motion detects, PIR, audio alarms etc.
Configuring this part of your system is covered in the guides provided by Milestone.
In all examples we are using an illuminator group called Group 1, which is newly created
with associated illuminators and is configured with its default settings. This group has 2
lamps, called Lamp 1 and Lamp 2 they are configured with their default settings.
Raytec Global (excluding Americas) - Tel: +44 (0) 1670520055 sales@rayteccctv.com
Raytec Americas - Tel: +1 613 270 9990 Toll Free: +1 888 505 8335 ussales@rayteccctv.com
www.rayteccctv.com
Page 25

24
8.1 Configuration 1
Daytime the lamps in a group are always off
At dusk the photocells on the lamps detect it is dark, the lamps should come on at
20%
At dawn the photocells on the lamp detect it is light, the lamps should switch off
If a motion detect is detected on camera 1 the lamps should go into deterrent mode
for 60 seconds, SOS fast
Camera 1 raises a hardware event when motion is detected, this event is called
Cam1MotionDetect.
Create the following events:
Group1OnTrigger1
Group1DeterTrigger
Group1OffTrigger
Create an alarm called Group1PhotocellDay, select the triggering event as Vario IP Lamp
and Photocell Day. Click the select button and associate Lamp 1 and Lamp 2 with this
alarm. Click the select button at the bottom of the screen next to Events triggered by alarm
and select the Group1OffTrigger.
Create a second alarm called Group1PhotocellNight, select the triggering event as Vario IP
Lamp and Photocell Night. Click the select button and associate Lamp 1 and Lamp 2 with
this alarm. Click the select button at the bottom of the screen next to Events triggered by
alarm and select the Group1OnTrigger1.
Create a third alarm called Group1CameraMotDet, select the triggering event as System
Events and External Event. Click the select button and associate Camera1MotionDetect
hardware event with this alarm. Change the activation period to Event based and select the
start event as Group1OnTrigger1 and the off event as Group1OffTrigger. Click the select
button at the bottom of the screen next to Events triggered by alarm and select the
Group1DeterTrigger.
Select Group 1 in the Raytec Vario IP node and set the following information on the page.
Group On Trigger 1
Event: Group1OnTrigger1
Power: 20%
Lamp stays on
Group Deter Trigger
Event: Group1DeterTrigger
Deterrent ends after: 60 seconds
And reverts back to previous power level
Mode: SOS
Speed: Fast
Group Off Trigger
Raytec Global (excluding Americas) - Tel: +44 (0) 1670520055 sales@rayteccctv.com
Raytec Americas - Tel: +1 613 270 9990 Toll Free: +1 888 505 8335 ussales@rayteccctv.com
www.rayteccctv.com
Page 26

25
Event: Group1OffTrigger
We achieve the desired results for our requirement by switching the lamps in our group on
when the photocells say it is dark, and off when they say it is light.
We ensure the lamp only goes into deterrent mode during the night by only allowing the
deterrent trigger event to be raised during the period after the photocell has indicated it is
dark but before the photocell has indicated it is light.
By setting the deterrent trigger to be revert back to previous level it means the lamps
remain on after the deterrent mode times out.
Raytec Global (excluding Americas) - Tel: +44 (0) 1670520055 sales@rayteccctv.com
Raytec Americas - Tel: +1 613 270 9990 Toll Free: +1 888 505 8335 ussales@rayteccctv.com
www.rayteccctv.com
Page 27

26
8.2 Configuration 2
Daytime the lamps are always off
When it gets dark the lamps come on at 50% for 4 hours then switch off
If a motion detect is detected on camera 1 the lamps should go into deterrent mode
for 60 seconds, SOS fast
Camera 1 raises a hardware event when motion is detected, this event is called
Cam1MotionDetect.
Create the following events:
Group1OnTrigger1
Group1DeterTrigger
Group1LightTrigger
Create an alarm called Group1PhotocellDay, select the triggering event as Vario IP Lamp
and Photocell Day. Click the select button and associate Lamp 1 and Lamp 2 with this
alarm. Click the select button at the bottom of the screen next to Events triggered by alarm
and select the Group1LightTrigger.
Create a second alarm called Group1PhotocellNight, select the triggering event as Vario IP
Lamp and Photocell Night. Click the select button and associate Lamp 1 and Lamp 2 with
this alarm. Click the select button at the bottom of the screen next to Events triggered by
alarm and select the Group1OnTrigger1.
Create a third alarm called Group1CameraMotDet, select the triggering event as System
Events and External Event. Click the select button and associate Camera1MotionDetect
hardware event with this alarm. Change the activation period to Event based and select the
start event as Group1OnTrigger1 and the off event as Group1LightTrigger. Click the select
button at the bottom of the screen next to Events triggered by alarm and select the
Group1DeterTrigger.
Select Group 1 in the Raytec Vario IP node set the following information on the page.
Group On Trigger 1
Event: Group1OnTrigger1
Power: 50%
Lamp switches off after 240 minutes
Group Deter Trigger
Event: Group1DeterTrigger
Deterrent ends after: 60 seconds
And reverts back to previous power level
Mode: SOS
Speed: Fast
We achieve the desired results for our requirement by switching the lamps in our group on
when the photocells say it is dark after 6 hours they will switch off.
Raytec Global (excluding Americas) - Tel: +44 (0) 1670520055 sales@rayteccctv.com
Raytec Americas - Tel: +1 613 270 9990 Toll Free: +1 888 505 8335 ussales@rayteccctv.com
www.rayteccctv.com
Page 28

27
We ensure the lamp only goes into deterrent mode during the night by only allowing the
deterrent trigger event to be raised during the period after the photocell has indicated it is
dark but before the photocell has indicated it is light.
By setting the deterrent trigger to be revert back to previous level it means the lamps go
back to their previous state, so within the first 4 hours they will go back to 50% after that 4
hour period and before it is light again they will switch off.
Raytec Global (excluding Americas) - Tel: +44 (0) 1670520055 sales@rayteccctv.com
Raytec Americas - Tel: +1 613 270 9990 Toll Free: +1 888 505 8335 ussales@rayteccctv.com
www.rayteccctv.com
Page 29

28
8.3 Configuration 3
Daytime the lamps in a group are always off
If a motion detect is detected on camera 1 the lamps should go into deterrent mode
for 60 seconds, SOS fast
Camera 1 raises a hardware event when motion is detected, this event is called
Cam1MotionDetect.
Create the following manual events:
Group1DarkTrigger
Group1DeterTrigger
Group1LightTrigger
Create an alarm called Group1PhotocellDay, select the triggering event as Vario IP Lamp
and Photocell Day. Click the select button and associate Lamp 1 and Lamp 2 with this
alarm. Click the select button at the bottom of the screen next to Events triggered by alarm
and select the Group1LightTrigger.
Create a second alarm called Group1PhotocellNight, select the triggering event as Vario IP
Lamp and Photocell Night. Click the select button and associate Lamp 1 and Lamp 2 with
this alarm. Click the select button at the bottom of the screen next to Events triggered by
alarm and select the Group1DarkTrigger.
Create a third alarm called Group1CameraMotDet, select the triggering event as System
Events and External Event. Click the select button and associate Camera1MotionDetect
hardware event with this alarm. Change the activation period to Event based and select the
start event as Group1DarkTrigger and the off event as Group1LightTrigger. Click the select
button at the bottom of the screen next to Events triggered by alarm and select the
Group1DeterTrigger.
Select Group 1 in the Raytec Vario IP node set the following information on the page.
Group Deter Trigger
Event: Group1DeterTrigger
Deterrent ends after: 60 seconds
And reverts back to previous power level
Mode: SOS
Speed: Fast
We ensure the lamp only goes into deterrent mode during the night by only allowing the
deterrent trigger event to be raised during the period after the photocell has indicated it is
dark but before the photocell has indicated it is light.
Raytec Global (excluding Americas) - Tel: +44 (0) 1670520055 sales@rayteccctv.com
Raytec Americas - Tel: +1 613 270 9990 Toll Free: +1 888 505 8335 ussales@rayteccctv.com
www.rayteccctv.com
Page 30

29
9 Troubleshooting Guide
Before trouble shooting for more complex issues encountered during installation or use of
the Raytec Milestone plugin, the following check list should be used to ensure the target
system is in a supported state.
Important, please read the troubleshooting guide for the Raytec IP Illuminator to ensure the
illuminator is working and set up correctly.
9.1 Vario IP
Firmware version 1.1.0 or above
“Local (No VMS server)” option is deselected
9.2 Operating System
The Raytec Milestone Plug-in is fully supported by the following operating systems.
Windows Server 2008R2
Windows 7 SP1
Other operating systems can be tested for compatibility on request: Contact Raytec.
Windows Server 2008
Windows Server 2012
Windows Vista
Windows 8
NOTE: The Raytec Milestone Plug-in does not support Windows XP at all
9.3 System Configuration
The following components must be installed on the target machine
Microsoft .net 4.0 or search for .net 4 download in your browser
Microsoft .net 4.5 or search for .net 4.5 download in your browser
Supported version of Milestone XProtect (client or server)
Other versions of the Milestone applications can be tested for compatibility on request:
Contact Raytec.
Raytec Global (excluding Americas) - Tel: +44 (0) 1670520055 sales@rayteccctv.com
Raytec Americas - Tel: +1 613 270 9990 Toll Free: +1 888 505 8335 ussales@rayteccctv.com
www.rayteccctv.com
Page 31

30
9.4 Installation Issues
9.4.1 Installation Fails with ‘access is denied’ message
Symptoms
The installation stops and indicates that the installation failed with an error message that
access was denied to folder “C:\Program Files\Milestone”. Note: the name of the program
files folder may also contain the phrase “(x86)”.
Cause
Any application wanting to make changes in the “program files” or “program files (x86)”
folder must have administrator privileges. This is something that is enforced by the
Windows operating system to stop malicious code being placed in an area where
applications are run from.
Remedial Action
To resolve this issue you must either log into the machine as an administrator or right click
on the Raytec Milestone Plug-in installer application and select “Run as Administrator”.
Doing this will allow the application have write access to the necessary folders in “program
files” or “program files (x86)”.
Note that if the user has UAC (User Account Control) enabled they may be prompted to
enter their administrator password again. If they are logged on as a standard Windows user
and have UAC enabled they will be prompted to enter an administrator username and
password. Further to this should they be logged on as a standard Windows user and UAC
is disabled they may not be able to install the software at all, in this case they must consult
their network administrator to get the application installed on their machine.
Raytec Global (excluding Americas) - Tel: +44 (0) 1670520055 sales@rayteccctv.com
Raytec Americas - Tel: +1 613 270 9990 Toll Free: +1 888 505 8335 ussales@rayteccctv.com
www.rayteccctv.com
Page 32

31
9.4.2 Installation Upgrade fails with ‘access is denied’ message
Symptoms
During an upgrade the installation stops and indicates that the installation failed with an
error message that access was denied to “filename”.dll where file name could be:
“Log4Net.dll”
“ObjectListView.dll”
“RaytecAPI.dll”
“RaytecCommon.dll”
“RaytecPlugin.dll”
“VideoOS.Platform.dll”
Cause
When the plug-in is first installed the Milestone application is unaware of this and does not
use it at all, this is why it is necessary to close both the client and server applications before
installing. Once the plug-in is installed and configured within the milestone application, the
files we install are in use by the Milestone system. When this happens these files can be
locked by the operating system so they cannot be changed during the operation of a
running application.
Remedial Action
The only way to allow the upgrade to proceed is to stop the applications and Windows
services that use our plug-in files. There are three of these, as follows:
XProtect Management Application
This is the application used to configure the Milestone VMS system, it is a standard
windows application and can be closed in the normal way by using the “X” at the top right of
the application window. This would only normally be running when a user is changing the
configuration of their site.
XProtect Smart Client
This is the application used to aggregate the information gathered from the milestone
system, such as video feeds, events and alarms. This would normally be open on a
machine as it is the entry point for users to the milestone system it can be closed in the
normal way by using the “X” at the top right of the application window.
XProtect Event Server
This is the server application that processes events that have been configured on the
Milestone system, this is not a standard Windows application however. The Event server is
a Windows Service, and to be able stop or start this service you should open the services
application. This can be done by pressing the Windows key and typing “services.msc”.
When the services application opens, locate the correct service in the name column it will
be called “Milestone XProtect Event Server”, right click on this entry and select stop. When
the installation and upgrade is complete you must right click on this service and select start.
Raytec Global (excluding Americas) - Tel: +44 (0) 1670520055 sales@rayteccctv.com
Raytec Americas - Tel: +1 613 270 9990 Toll Free: +1 888 505 8335 ussales@rayteccctv.com
www.rayteccctv.com
Page 33

32
IMPORTANT NOTE
When stopping the above service you will essentially disable the Milestone system, it will
not be able to respond to events raised, and other parts of the system will not respond as
normal until the service is restarted.
Before performing this action you should make sure the user is aware of what this action
will do, even though this is a temporary action.
When the service is restarted the system should return to normal operation. However it may
be prudent to restart the machine that the service was stopped on, so that Windows can
restart the services for you in the normal manner.
9.5 Compatibility Issues
9.5.1 Discovery application conflicts with Milestone integration
The mechanism we use to perform device discovery with the VARIO IP devices requires we
use a specific port on the network card. When application is started it will create a
connection to this port meaning no other process will be able to use this port. Since both
the discovery application and the Milestone integration use the Raytec API to perform
actions with the VARIO IP devices there is a conflict should you wish to run both at the
same time.
To run the discovery application on the same machine as the milestone system it will be
necessary to perform the same actions detailed in section 9.4.2.
9.5.2 Milestone integration/Discovery Tool doesn’t work when Oracle Virtual Box is
installed
The Raytec API uses a technology called multi cast to perform its device discovery and
some communications. There is a known issue with Oracle Virtual Box on Windows 7
where a user is using an application that uses multi cast.
The information to resolve this issue from the support forums is as follows.
Open up Network and Sharing Center
Click 'Change Adapter Settings'
Right click 'VirtualBox Host-Only Network', go to Properties
Double click "Internet Protocol Version 4 (TCP/IPv4)' under 'This connection uses
the following items'.
In the Properties page, click "Advanced..."
In the "Advanced TCP/IP Settings", tab "IP Settings", uncheck the box marked
"Automatic Metic" and type in 800 or higher.
OK all dialogs and run whatever software could not receive multicast.
Please see this link for further information on this issue,
https://www.virtualbox.org/ticket/8698
Raytec Global (excluding Americas) - Tel: +44 (0) 1670520055 sales@rayteccctv.com
Raytec Americas - Tel: +1 613 270 9990 Toll Free: +1 888 505 8335 ussales@rayteccctv.com
www.rayteccctv.com
Page 34

33
9.5.3 Illuminators not responding to the Milestone system
After an installation of the Raytec Milestone Plug-in, you may find that some or all of the
illuminators fail to operate when attempting to switch them on/off via the management
application or the smart client.
Should this be the case, you need to restart the management application, the smart client
and the event server. This is because the Raytec Milestone Plug-in is placed in a location
where the management application, smart client and event server can locate it. After
installation it is important that these are restarted in order for them to find the new plugin.
The restarting of these is detailed in section 9.4.2.
Should the illuminators still fail to respond, a restart of the Milestone server machine is
recommended; this will ensure all Milestone applications are restarted. Please note that a
restart of this machine may have other consequences, so consult the network administrator
should you wish to do this.
Raytec Global (excluding Americas) - Tel: +44 (0) 1670520055 sales@rayteccctv.com
Raytec Americas - Tel: +1 613 270 9990 Toll Free: +1 888 505 8335 ussales@rayteccctv.com
www.rayteccctv.com
 Loading...