

Rayming TN-200 User Manual
TN-200 User’s Guide v1.3
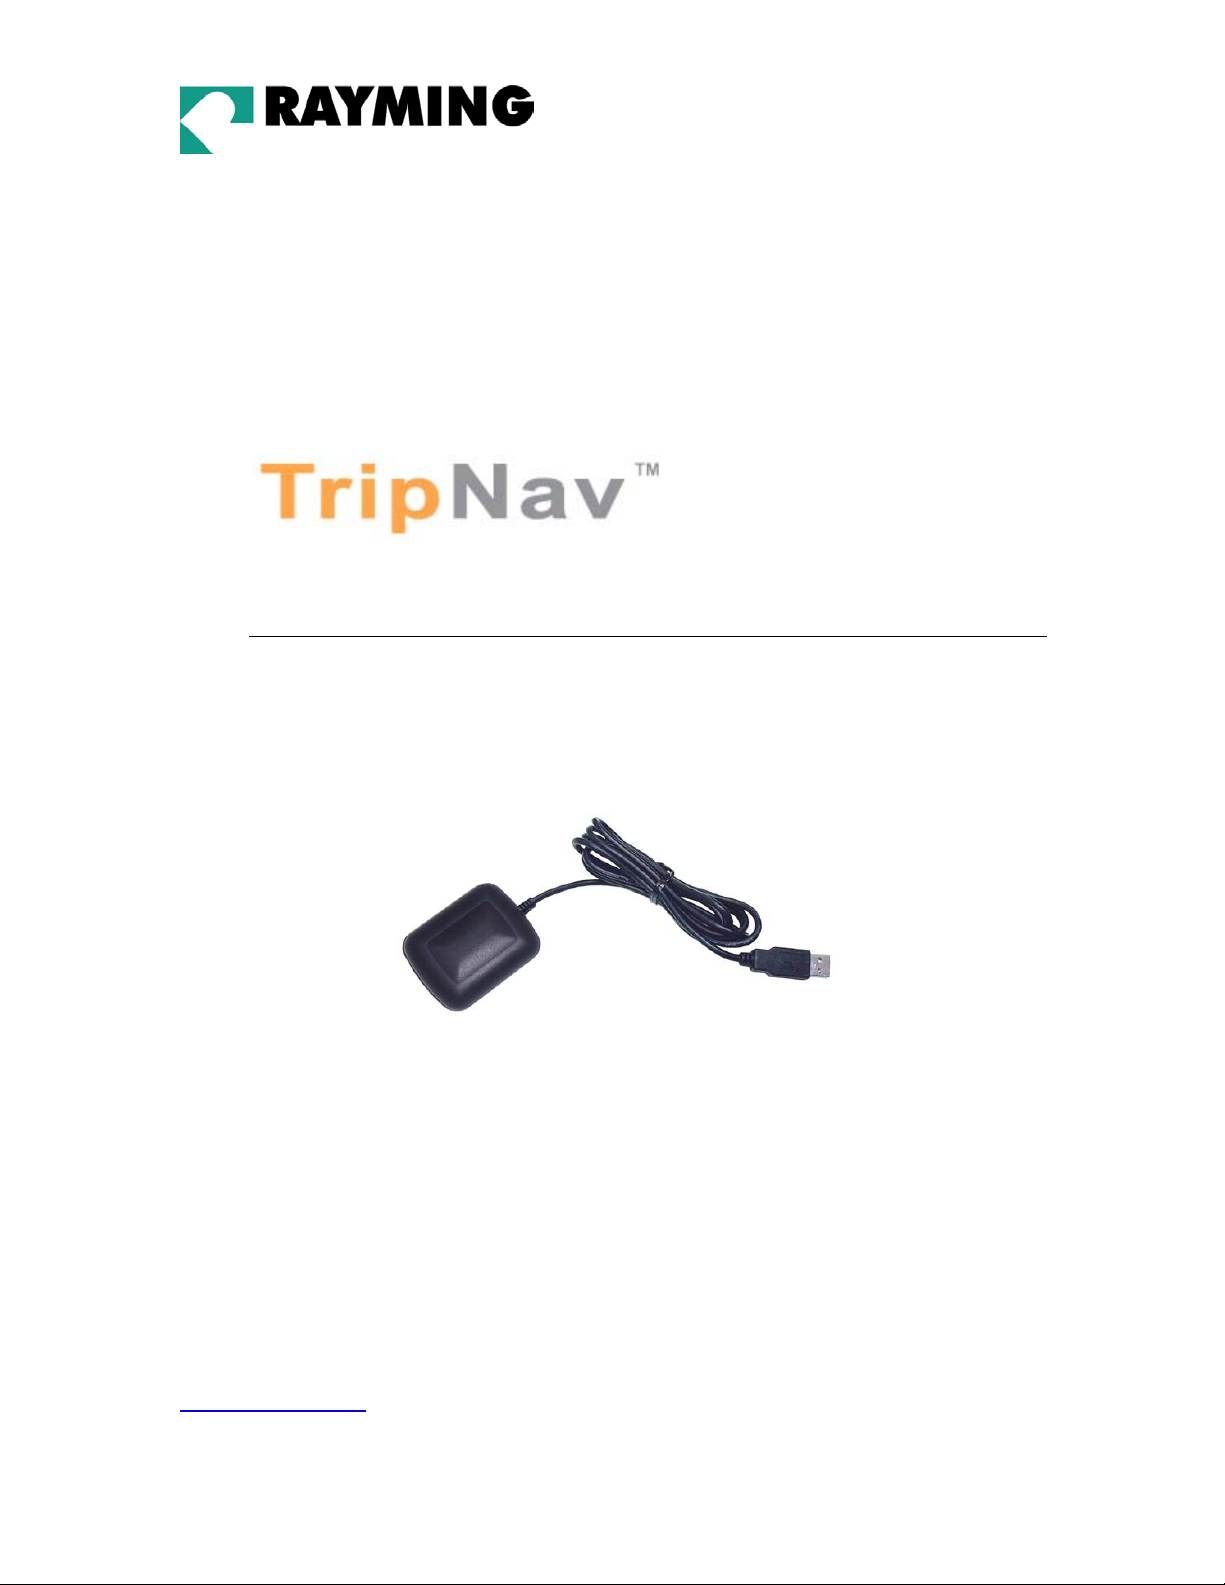
USB GPS Receiver
©
2003-2004 Rayming Corporation. All rights reserved. The Rayming logo and TripNav are trademarks of
Rayming Corporation. All other trademarks or registered trademarks are acknowledged as the exclusive
property of their respective owners.
All rights reserved. No part of this manual may be reproduced, transmitted, copied, or stored in any storage
medium, for any purpose, without prior written consent from Rayming Corporation. Rayming Corporation hereby
grants the right to download ONE copy of this manual onto a hard drive for personal use. This manual is
copyrighted and contains proprietary information that is subject to change without notice. For more information visit
http://www.rayming.com.
TN-200 USB GPS RECEIVER

Table of Contents
PACKAGE CONTENTS ....................................................................................................3
SYSTEM REQUIREMENTS .............................................................................................3
WELCOME.........................................................................................................................3
SAFETY AND LEGAL NOTICES......................................................................................3
1. GETTING STARTED WITH TRIPNAV.........................................................................4
2. INSTALLING THE USB DRIVER INTO YOUR LAPTOP...........................................4
2.1. Installing the FT8U232 USB Driver under Windows 98 ..................................5
2.2. Installing FT8U232 USB Driver under Windows 2000................................ 11
TN-200
2.3. Installing FT8U232 USB Driver under Windows XP .................................... 16
3. USING TRIPNAV........................................................................................................21
4. UN-INSTALL THE USB DRIVER................................................................................22
4.1. Uninstalling FT8U232 USB Driver from Windows 98................................... 22
4.1. Uninstalling FT8U232 USB Driver from Windows 2000............................... 23
4.2. Uninstalling FT8U232 USB Driver from Windows XP.................................. 28
5. FAQ’s...........................................................................................................................29
6. CONTACT INFORMATION.........................................................................................31
7. LIMITED WARRANTY................................................................................................31
8. TECHNICAL SPECIFICATIONS FOR TN-200 GPS RECEIVER ............................33
PAGE 2 OF 33
UG-TN200 V1.3

PACKAGE CONTENTS
TripNav TN-200 GPS Receiver w/USB cable
Driver CD-ROM with Quick Start User’s Guide & User’s Manual*
SYSTEM REQUIREMENTS
TN-200
The TripNav GPS requires a Windows or Macintosh laptop computer, with a CD-ROM*, USB port, and
NMEA compatible navigation software. The 3
rd
party mapping/navigation software may have its own
system requirements, please check with software vendor for details.
*CD-ROM is required for USB driver installation and access to the User’s Guide. If no CD-ROM drive is available,
files can be downloaded from the Internet at http://www.rayming.com/downloads.htm
WELCOME
Thank you for purchasing TripNav! TripNav is a USB compatible GPS receiver for your laptop PC!
TripNav allows real-time street navigation by using your laptop PC for graphical plotting and positioning
of your route. Simply load the GPS driver, plug the GPS receiver into your PC’s USB port and install
your own personal street mapping software to begin to view your position in real-time in relation to the
surrounding streets in your travel area.
You’ll find that almost any NMEA compliant street mapping software is compatible with the TripNav
USB GPS receiver. Visit our web-site for recommended mapping programs that you can use.
http://www.rayming.com/products/mapchart.htm
SAFETY AND LEGAL NOTICES
Please read this section carefully before using TripNav
Rayming Corporation will not accept any responsibility whatsoever for accidents resulting from
failure to observe common sense precautions. Your personal judgement, traffic regulations,
and common sense must always take precedence over any directions produced by TripNav or
the mapping software
WARNING: Make sure that the GPS receiver is secure and does not interfere with driving
visibility and safety.
It is your responsibility as the vehicle operator to securely place the GPS unit and antenna so that they
will not interfere with driving and prevent operations of any safety device (such as the Airbag) in your
vehicle. Do not mount the devices in a place where the driver or passengers may receive injury during
vehicle operation or collision. For your safety, take care to route all cables away from shifters, pedals,
accessory controls and mechanisms.
PAGE 3 OF 33
UG-TN200 V1.3

TN-200
WARNING: Drive safely and use common sense.
It is your responsibility as the vehicle operator to drive safely, observe all traffic rules and above all use
your own personal judgment while driving. If you feel that a route suggested by the navigation software
instructs you to perform an unsafe or illegal maneuver, places you in an unsafe situation, or routes you
into an area which you consider unsafe, do not follow the instructions.
WARNING: Keep your eyes on the road.
It is your responsibility as the vehicle operator to keep your eyes on the road and be an alert driver at all
times, especially when the vehicle is moving. The vehicle’s operator should not be distracted by the
navigation equipment or software. Should there be a distraction with the ability to drive responsibly,
please turn off the device. Should you want to look at the display for a prolonged time, park the car
safely, while following all traffic regulations before looking at the display.
WARNING: To reduce the risk of fire or shock hazard, do not expose this product to rain or
moisture. Do not remove covers or open housings, there are no user serviceable parts inside.
Refer servicing to qualified personnel only.
1. GETTING STARTED WITH TRIPNAV
These are only a few simple steps that you need to follow before using your TripNav receiver:
• Install the USB driver and onto your laptop PC from the included CD-ROM or download the files
from our web-site http://www.rayming.com/downloads.htm
.
• Install your own personal street mapping software and configure the software’s COM port setting to
accept the GPS.
• Plug-in the GPS receiver into your laptop.
2. INSTALLING THE USB DRIVER INTO YOUR LAPTOP
Click on the TN200.EXE file to have the driver files and User’s Guide automatically unzipped and
copied from the CD-ROM to a local directory on your PC (C:\TRIPNAV2).
I addition to the driver and user manual, a GPS test program called NMEAgent will be copied to
C:\TRIPNAV2\GPS_TEST, so that you can verify GPS signals if you don’t already have your map or
navigation software loaded.
TripNav uses the FTDI FT232BM serial-to-USB controller and assumes that you are installing the
drivers on to a clean system for the first time, i. e. one on which FTDI drivers has not yet been installed
previously. If this is not the case then refer to Section 4 for guidance on uninstalling FTDI drivers before
proceeding with installation.
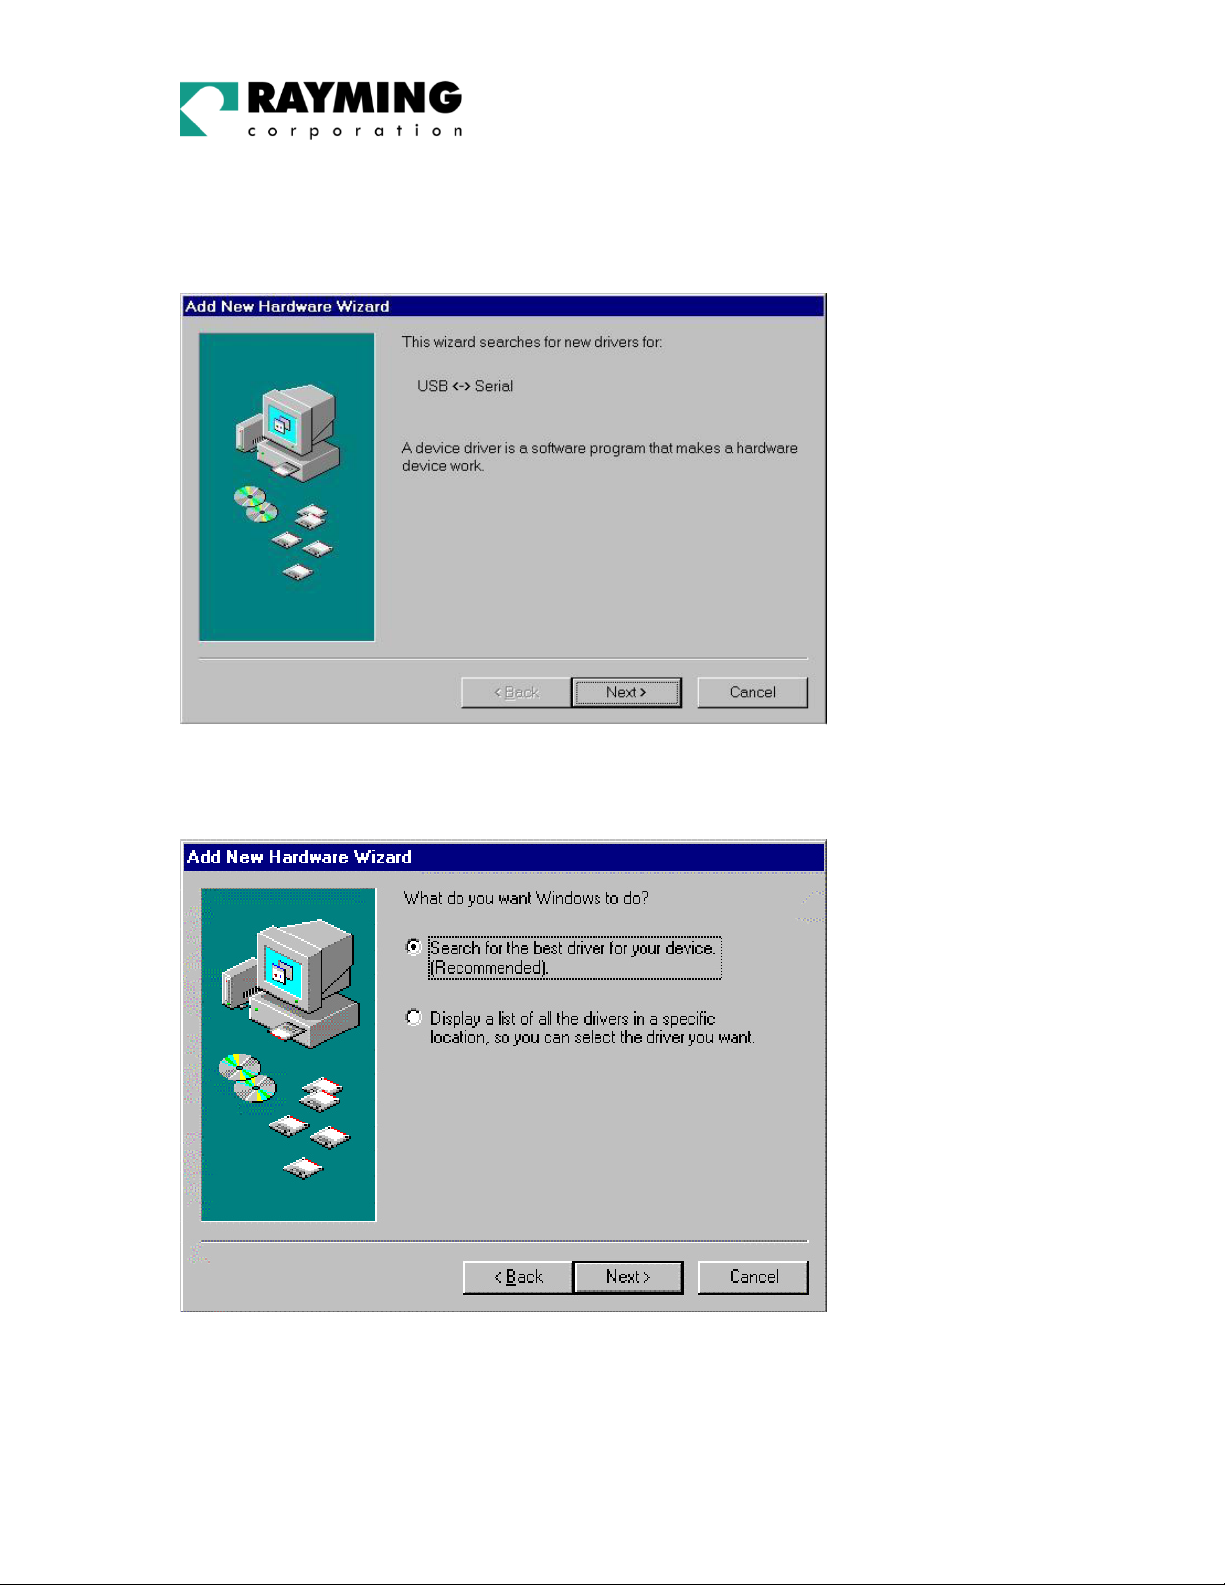
Plug in your TN-2000 GPS receiver. This should bring up a "Building Driver Information Database"
window followed by the “Add New Hardware Wizard.”
Continue reading the appropriate section of this User Guide which pertains to your particular operating
system.
PAGE 4 OF 33
UG-TN200 V1.3
Screen 1
TN-200
2.1. Installing the FT8U232 USB Driver under Windows 98
Click Next.
Screen 2
Click Next.
PAGE 5 OF 33
UG-TN200 V1.3
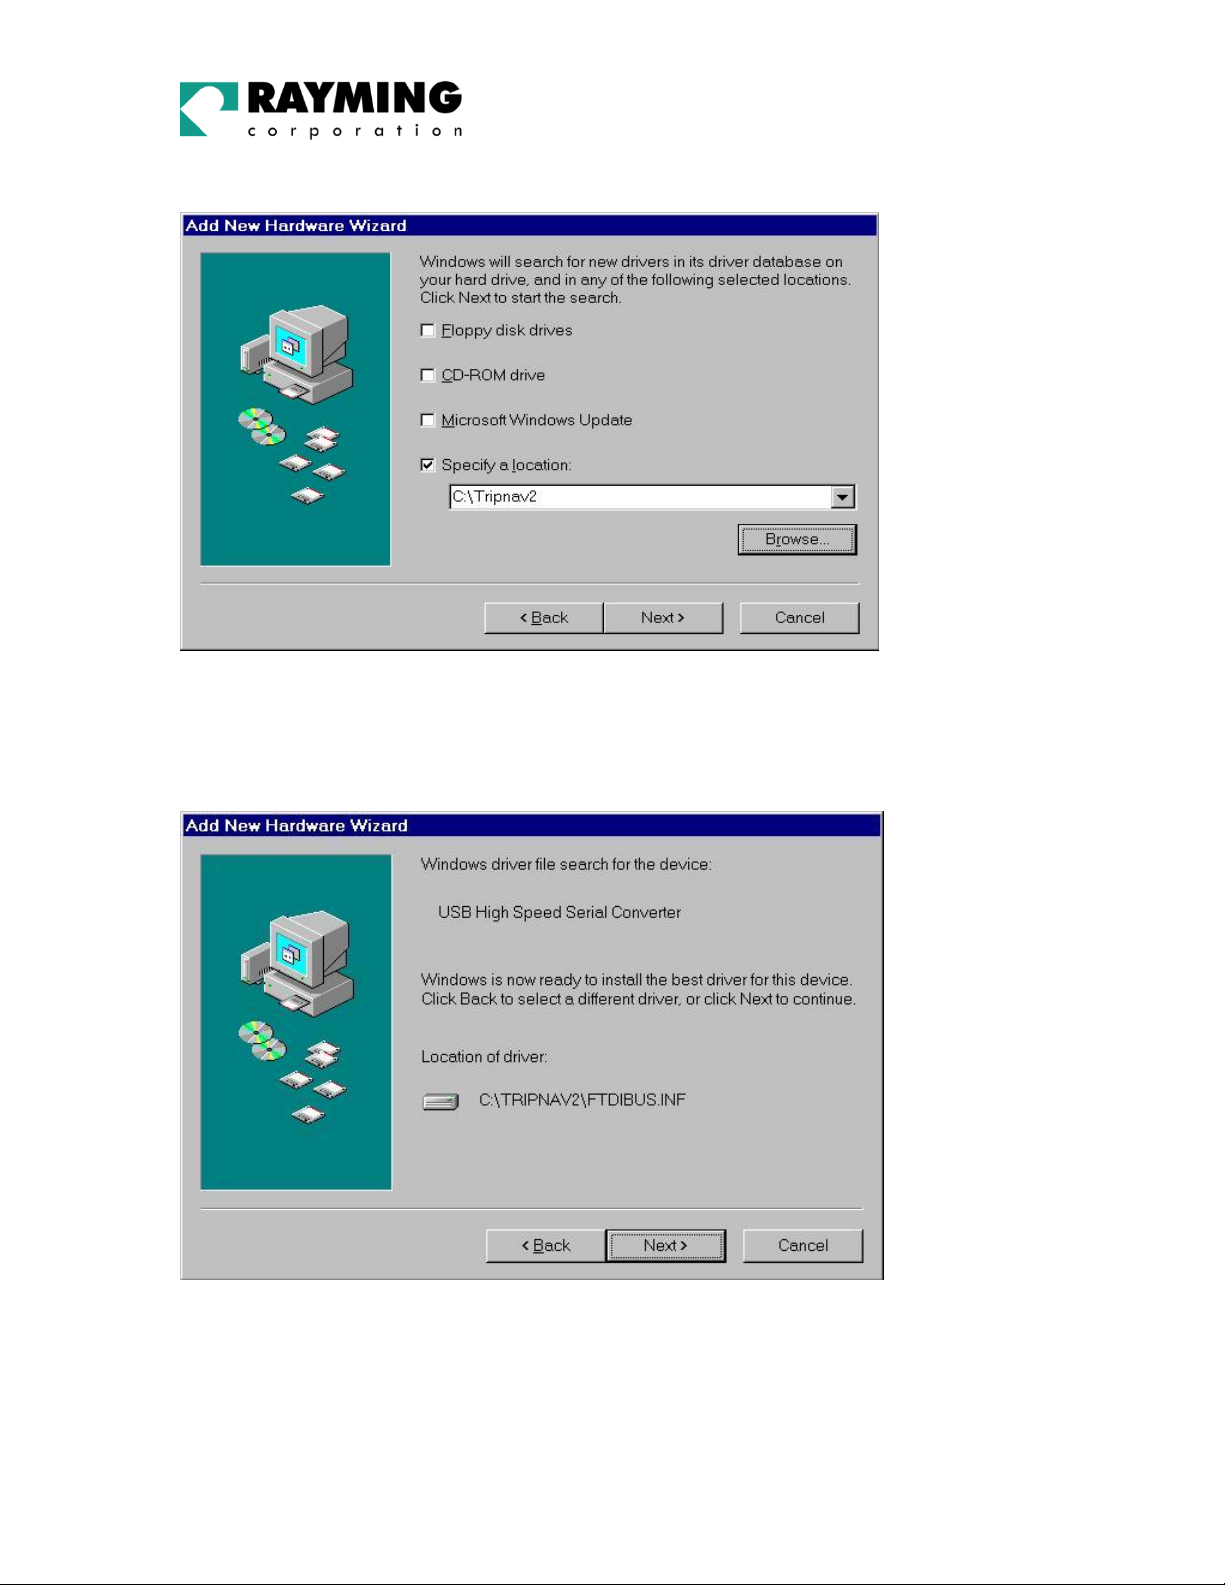
Screen 3
TN-200
Select specify a location. Click “Browse” and select or type a path to: “C:\TRIPNAV2”, then click Next.
The installation process will automatically select and load the correct USB driver that matches with your
O/S version.
Screen 4
Click Next.
PAGE 6 OF 33
UG-TN200 V1.3
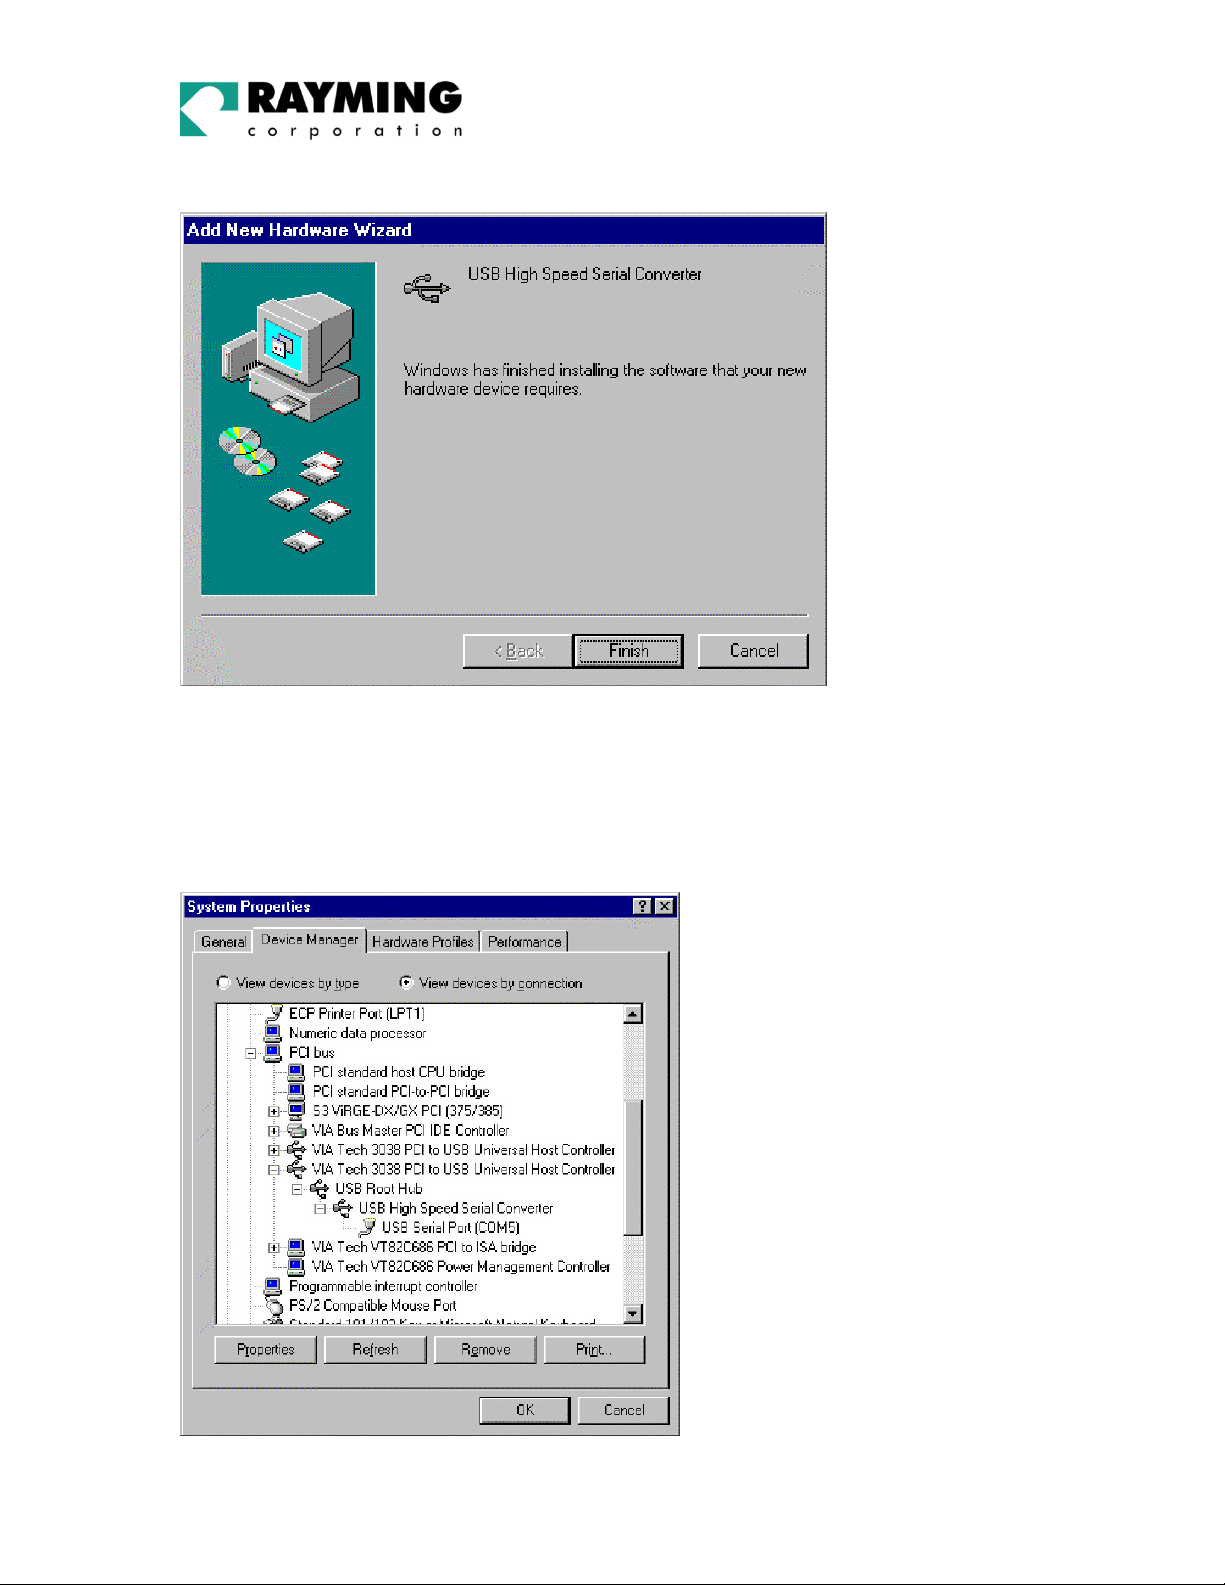
Screen 5
TN-200
Click Finish.
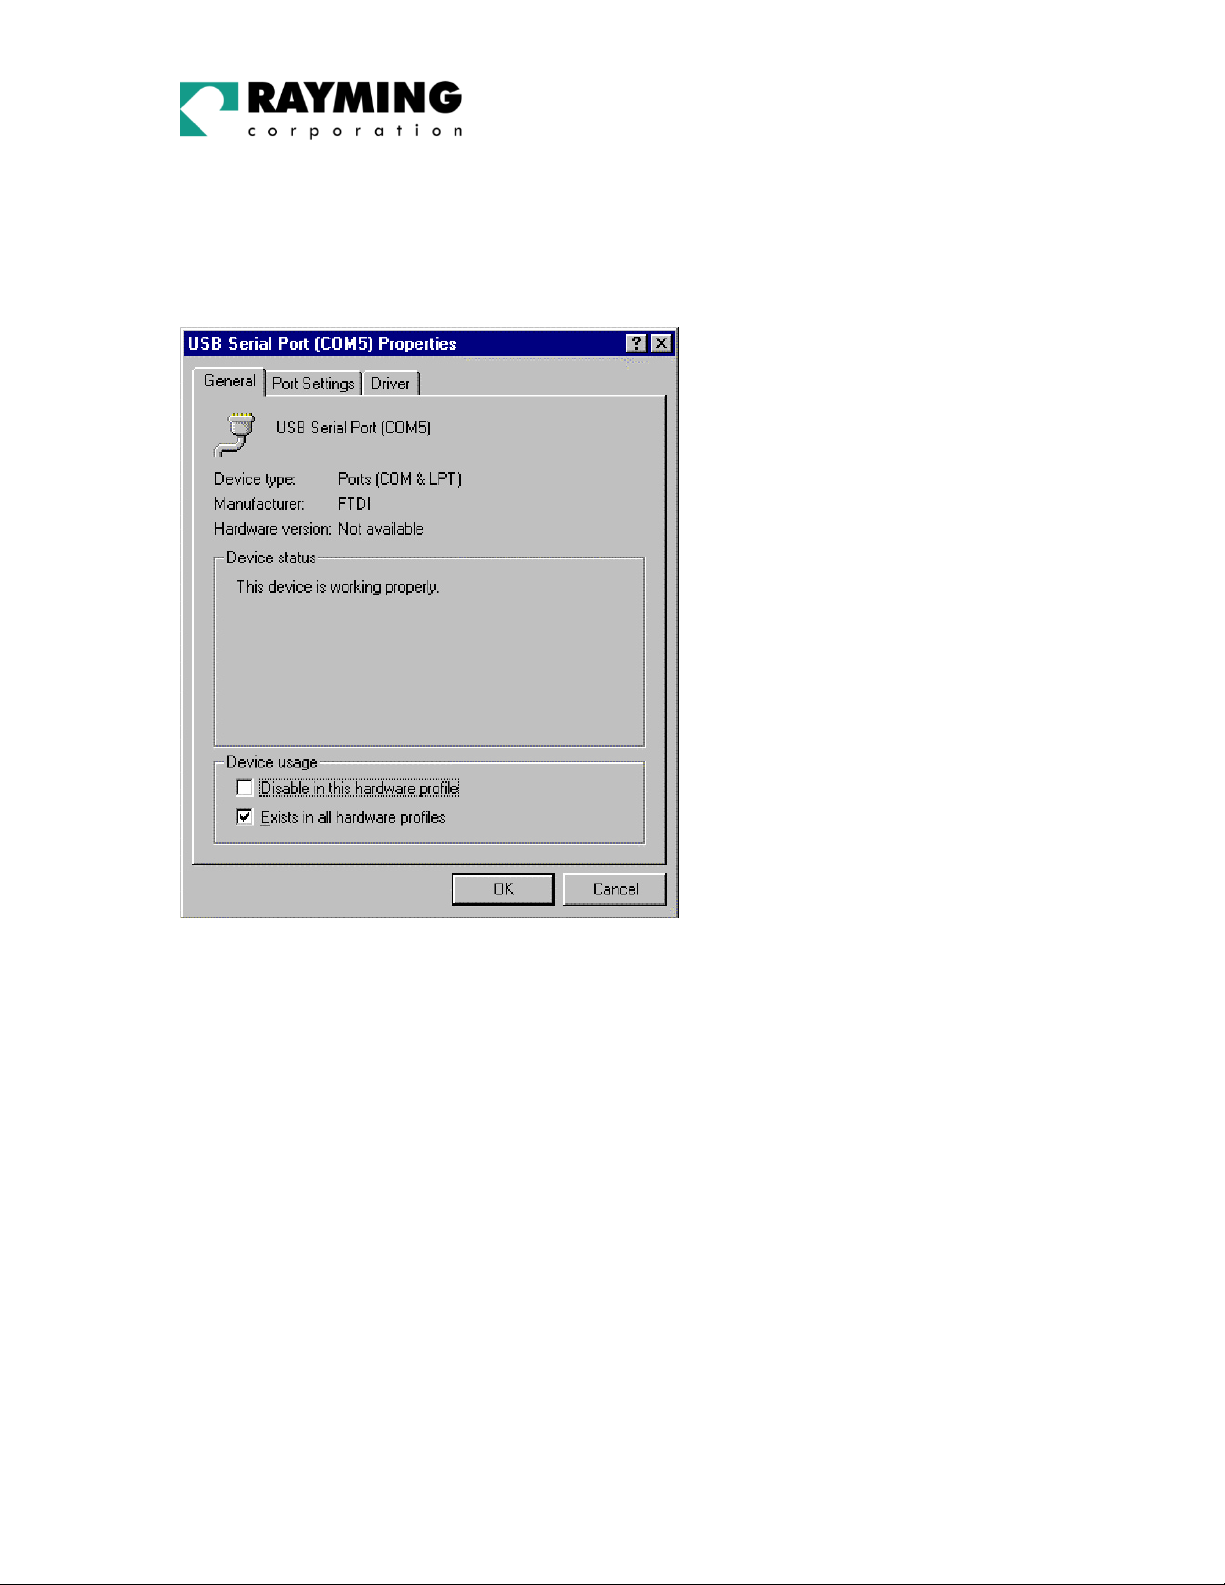
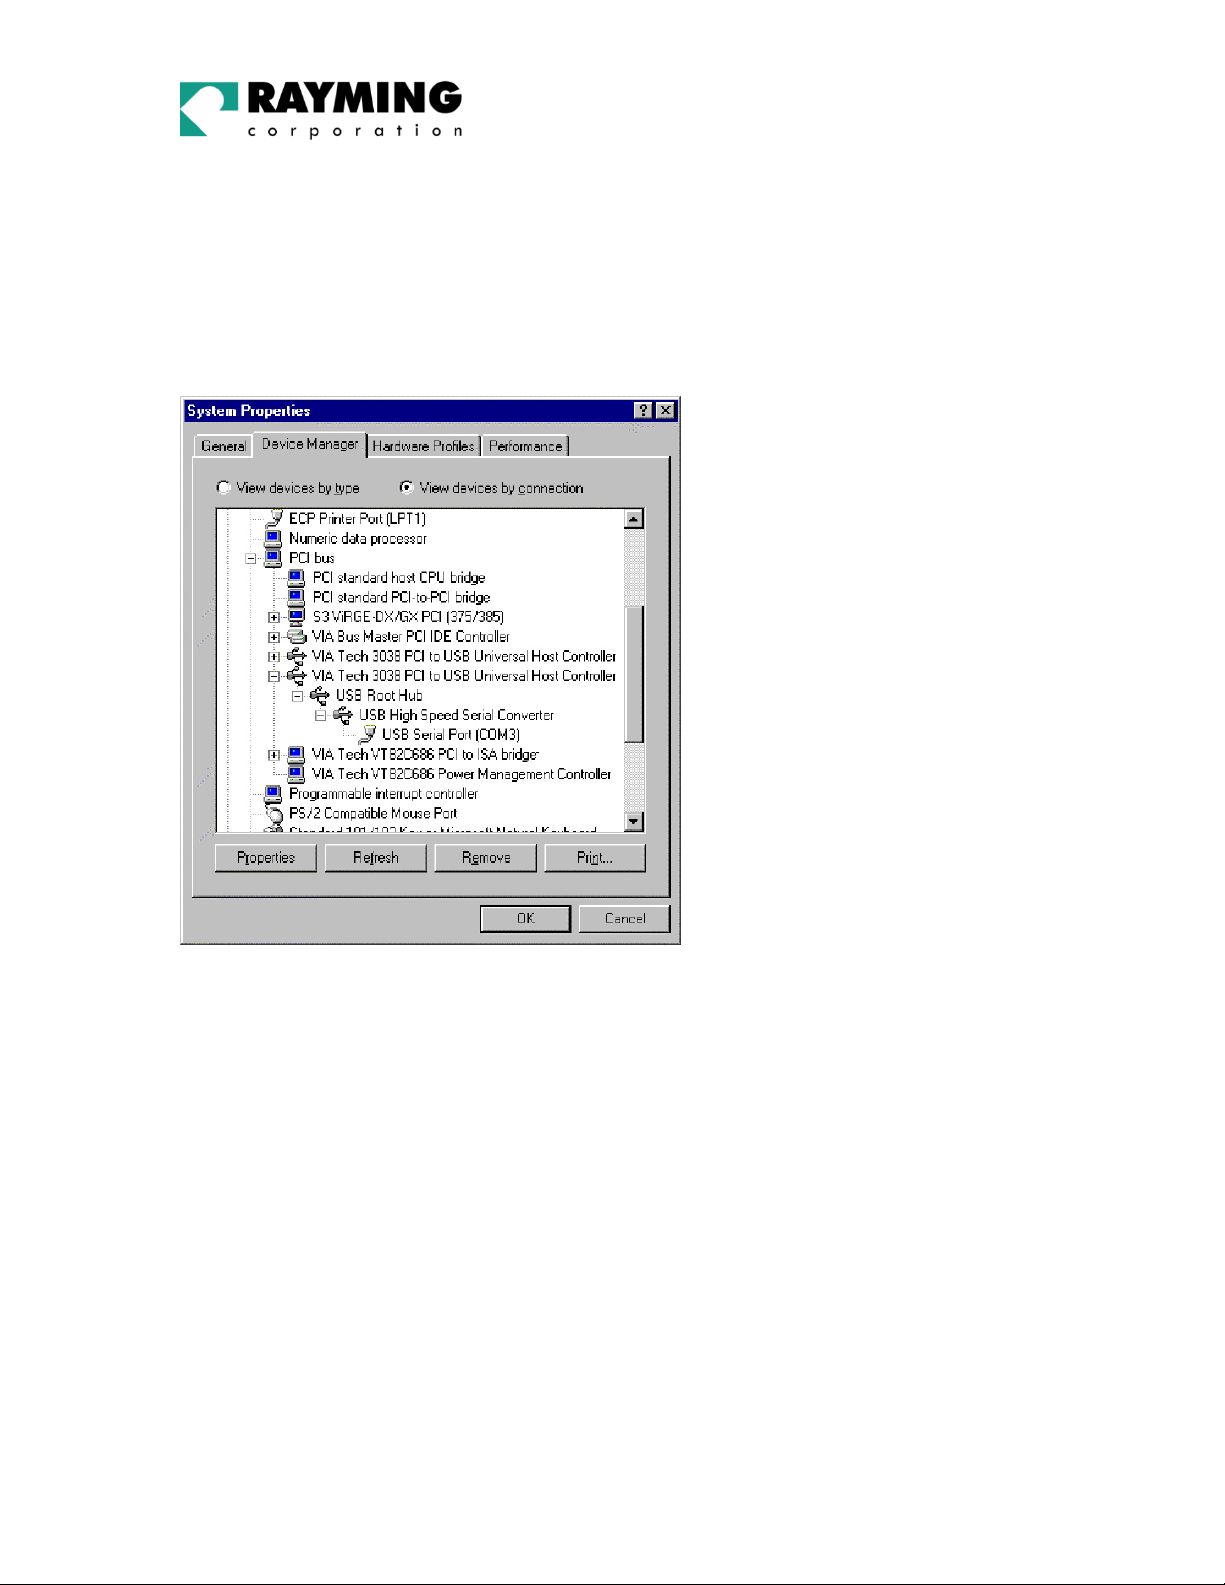
To confirm that the installation has completed successfully, look under Device Manager of the System
Properties screen. The device should have installed as a USB Serial Port (COMx) attached to USB
High Speed Serial Converter.
Screen 6
PAGE 7 OF 33
UG-TN200 V1.3
TN-200
To change the virtual COM port properties, select the USB Serial Port and then click Properties. This
allows you to change serial port properties such as baud rate, data bits etc. Of particular use is the
ability to change the COM port that is assigned to your device.
Screen 7
Click Port Settings.
PAGE 8 OF 33
UG-TN200 V1.3

Screen 8
TN-200
Set COM port to :
Click Advanced.
Screen 9
Baud rate: 4800
Data bit: 8
Parity: None
Stop bit: 1
Flow control: None
PAGE 9 OF 33
UG-TN200 V1.3
TN-200
Then click the drop down arrow on COM Port Number and scroll to the desired COM port. Click OK.
Please ensure that you do not select a COM port that is in use. Note: This is particularly important
when running programs like HyperTerminal, which only works with COM1 through to COM4.
When you return to the Device Manager Screen you will have to see that the USB Serial Port
installation has been changed to COM3.
Screen 10
This is the end of installation instruction.
PAGE 10 OF 33
UG-TN200 V1.3
 Loading...