

Ravpower RP-SH007 User Manual
RP-SH007
www.ravpower.com
NORTH AMERICA
E-mail : support@ravpower.com(US)
support.ca@ravpower.com(CA)
Tel : 1-888-456-8468 (Monday-Friday: 9:00-17:00 PST)
Address : 46724 Lakeview Blvd, Fremont, CA 94538
EUROPE
E-mail:
support.uk@ravpower.com(UK)
support.de@ravpower.com(DE)
support.fr@ravpower.com(FR)
support.es@ravpower.com(ES)
support.it@ravpower.com(IT)
EU Importer : ZBT International Trading GmbH,Halstenbeker Weg
98C, 25462 Rellingen, Deutschland
ASIA PACIFIC
E-mail : support.jp@ravpower.com(JP)
JP Importer: 株式会社ニアバイダイレクトジャパン
Manufacturer
Shenzhen NearbyExpress Technology Development Co., Ltd.
Address
333 Bulong Road, Shenzhen, China, 5181299
www.ravpower.com
OPEN
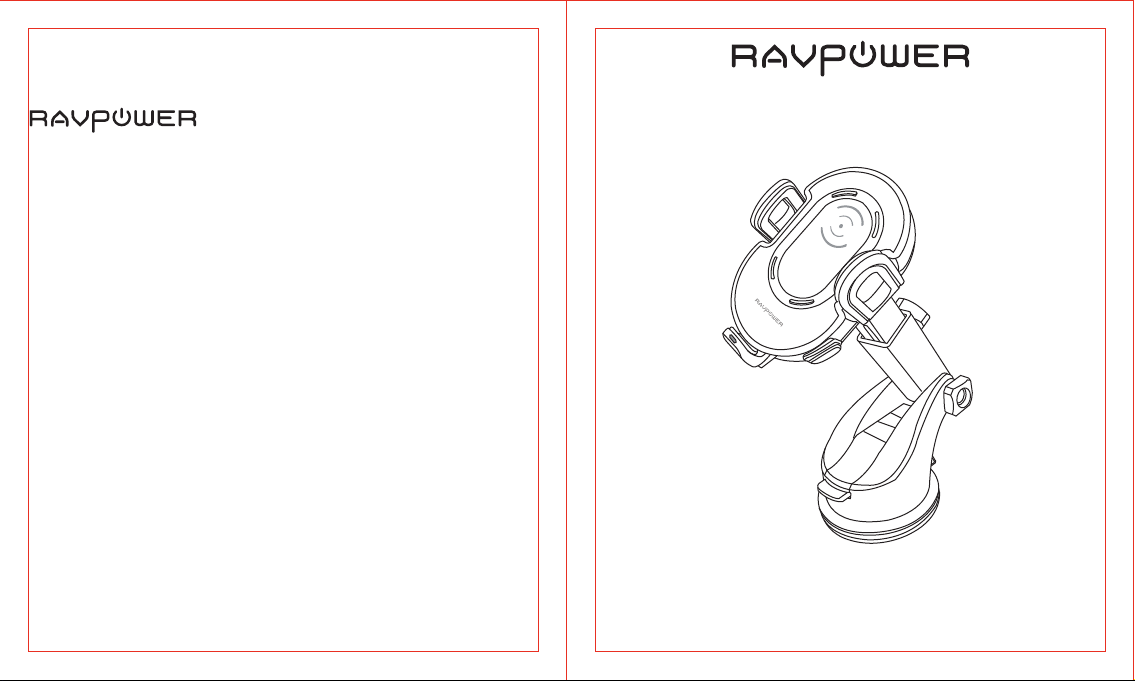
Wireless Charging Car Holder
User Guide

CONTENTS
English
Deutsch
Français
Español
Italiano
日本語
01/05
06/09
10/13
14/17
18/21
22/25

DE
1
2
OPEN
7
4 5
3
6
12
8
9
10
11
Produktabbildung
1. Handygreifer
2. Kabelloses Ladegerät
3. Fußhalterungsfreigabeknopf
4. LED-Anzeige
5. Fußhalterung
6. Micro-USB-Ladeanschluss
7. Greiferfreigabeknopf
8. Kugelgelenk & Feststellmutter
9. Armverlängerungsknopf
10. Winkelfeststellschraube
11. Saugglocken-Abziehlasche
12. Saugglockenverschluss
13. Autoladegerät
14. Micro-USB-Kabel
FR
Description du Produit
1. Berceau
2. Chargeur Sans Fil
3. Bouton de Déverrouillage du Tiroir
4. Voyant à LED
5. Tiroir Inférieur
6. Port de Charge Micro USB
7. Bouton de Déverrouillage du Berceau
8. Rotule & Écrou Stabilisateur
9. Bouton d’Extension du Bras
10. Réglage d’Angle
11. Languette de Libération de la Ventouse
12. Verrou de Ventouse
13. Chargeur de Voiture
14. Câble Micro USB
EN
Product Diagram
1. Cradle
2. Wireless Charger
3. Tray Release Button
4. LED Indicator
5. Bottom Tray
6. Micro USB Charging Port
7. Cradle Release Button
13
8. Ball Joint & Stabalizing Nut
9. Arm Extension Button
10. Angle Adjuster
11. Suction Cup Release Tab
12. Suction Cup Lock
13. Car Charger
14. Micro USB Cable
ES
14
Diagrama del Producto
1. Plataforma
2. Cargador Inalámbrico
3. Botón de liberación de la Bandeja
4. Indicador LED
5. Bandeja Inferior
6. Puerto de Carga Micro USB
7. Botón de Liberación de la Plataforma
8. Rótula y Tuerca Estabilizadora
9. Botón de Extensión del Brazo
10. Ajustador de Ángulo
11. Palanca de Liberación de la Ventosa
12. Candado de la Ventosa
13. Cargador de Automóvil
14. Cable Micro USB
IT
Schema del Prodotto
1. Sostegno
2. Caricabatteria Wireless
3. Pulsante di Rilascio del Carrello
4. Indicatore LED
5. Carrello Posteriore
6. Porta di Ricarica Micro USB
7. Pulsante di Rilascio del Sostegno
8. Giunto Sferico e Dado di Stabilizzazione
9. Pulsante di Estensione del Braccio
10. Regolatore Angolo
11. Linguetta di Rilascio Ventosa
12. Blocco Ventosa
13. Caricabatterie per Auto
14. Cavo Micro USB
JP
製品図
1. クラドル
2. ワイヤレス充電器
3. トレー解除ボタン
4. LED 表示
5. ボトムトレ ー
6. マイクロ USB 充電ポート
7. クラドル解除ボタン
OPEN
8. ボール接続部& 留めネジ
9. アーム伸縮ボタン
10. 角度調整ダイヤル
11. 吸引カップ解除タブ
12. 吸引カップロック
13. シガーソケット
14. マイクロ USBケーブル
EN
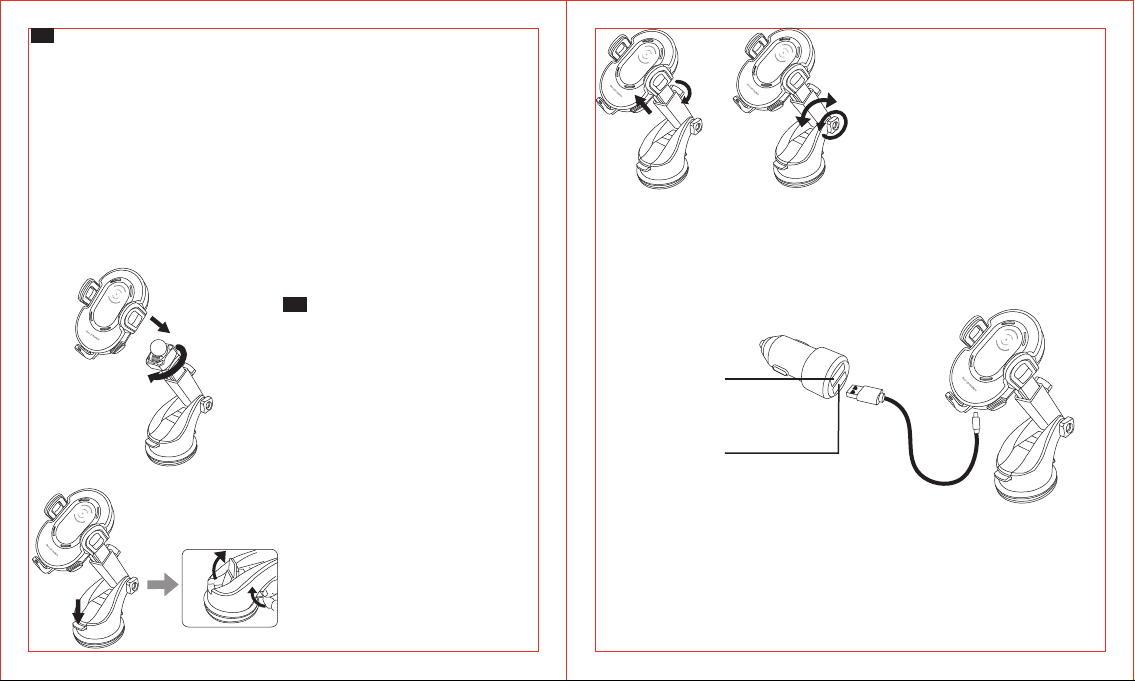
Assembling the Wireless Charging
Car Holder
Click the ball into the connecting joint,
screw the stabilizing nut to lock in place.
OPEN
OPEN
Use the arm extension button and angle
adjuster to adjust the height and angle
of the mount.
Using the Wireless Charging Car Holder
Green Chip: 9V
(Quick Charge,
Recommended)
White Chip: 5V
OPEN
Wipe clean the dashboard, press down
OPEN
the suction cup onto the surface and
push the suction cup lock to x it in
place. Pull the suction cup lock rst, then
1. Connect the micro USB cable into the charging port.
2. Insert the USB connector into the car charger. The LED indicator will turn on red
for 10 seconds indicating a successful connection.
lift the tab to remove when needed.
01/02
OPEN
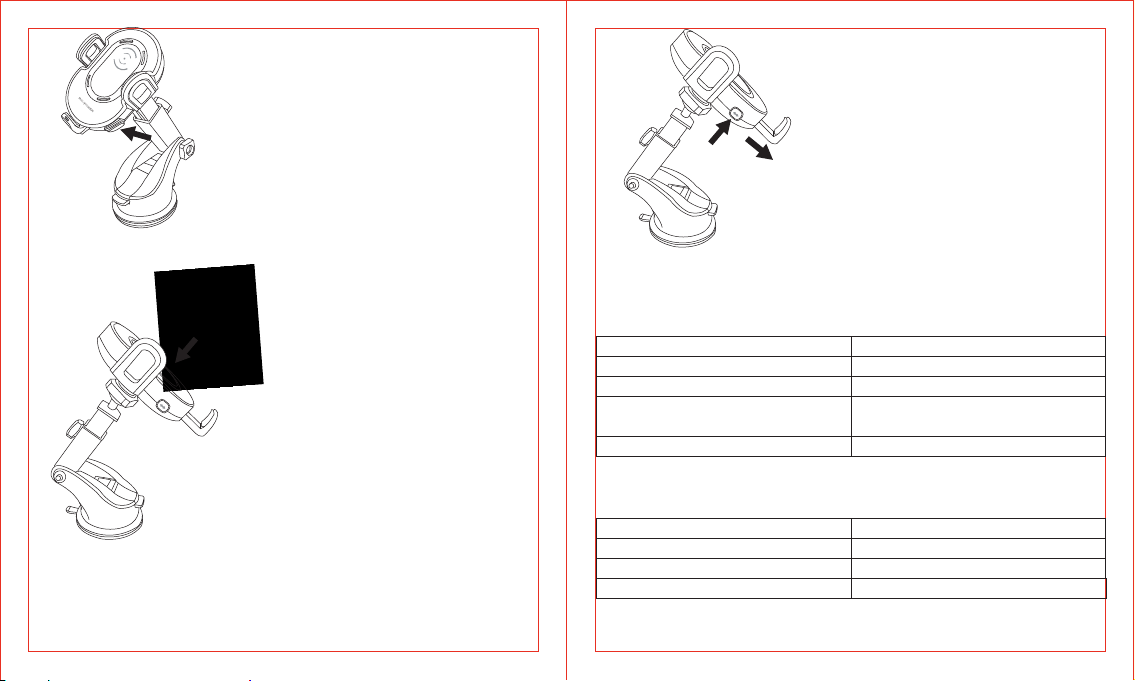
Press the cradle release button to open
up the cradle.
Place the smartphones with wireless
charging functionality onto the phone
holder. Squeeze the cradle to t your
device.
Note:
· Phone cases with thickness over 0.2 inch / 0.5cm will not be detected.
· Align the center of your phone on the wireless charging zone for stable
connection.
LED Indicator
Indicator
Turns red for 10 seconds, then turns o
Blinks green
Turns solid green, then turns o in
15 - 20 seconds
Flashes red
Specications
Model
Input (Wireless Charger)
Output (Wireless Charger)
Micro USB Cable Length
Adjust the tray to achieve an ideal
placement of your phone. The indicator
will blink green indicating charging is
started.
Working Status
Connected to power
Charging a compatible device
Device fully charged
Error
RP-SH007
5V / 9V
10W Max
3.9 ft / 1.2 m
03/04
Caution
· Do not drop, knock, or squeeze the product.
· Do not dismantle or throw the product in re or water, to avoid causing short
circuit leakage.
· Do not use the wireless charger in severely hot, humid, or corrosive
environments to avoid circuit damage and leakage.
· Do not place close to magnetic stripe or chip card (ID card, bank cards, etc.) to
avoid magnetic failure.
· Make sure the back of your phone or phone case is even without foreign metal
objects.
· Keep at least 20 cm / 7.9 in away from implantable medical devices
(pacemakers, implantable cochlear, etc.) to avoid potential magnetic
interference.
· Keep away from children.
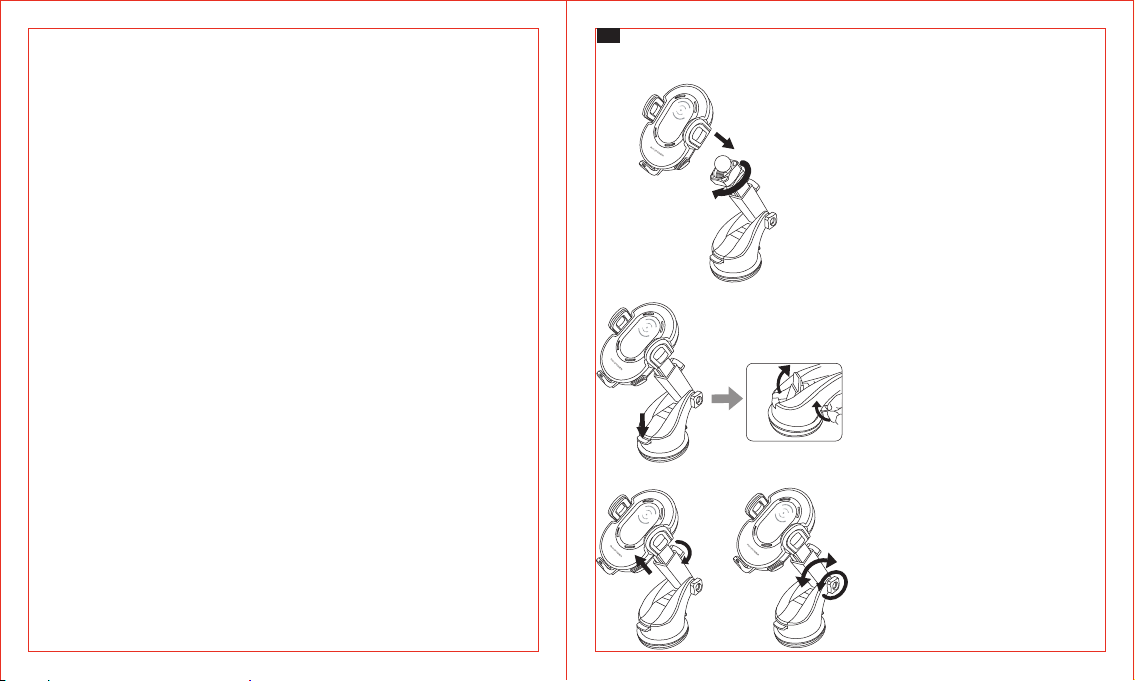
DE
Zusammenbau der Auto Handyhalterung mit kabellosem Ladegerät
OPEN
OPEN
Lassen Sie das Kugelgelenk in die
Gelenkverbindung einrasten und
schrauben Sie die Feststellmutter zum
Fixieren fest.
Wischen Sie das Armaturenbrett sauber,
drücken Sie die Saugglocke auf die
Oberäche und schließlich den
Saugglockenverschluss nach unten, um
sie zu befestigen. Ziehen Sie zuerst am
Saugglockenverschluss und heben Sie
dann die Lasche an, wenn benötigt, um
die Halterung abzunehmen.
OPEN
OPEN
Armverlängerungsknopf und die
Winkelfeststellschraube, um Höhe und
Winkel der Halterung einzustellen.
05/06
Benutzen Sie den
 Loading...