

Page 1
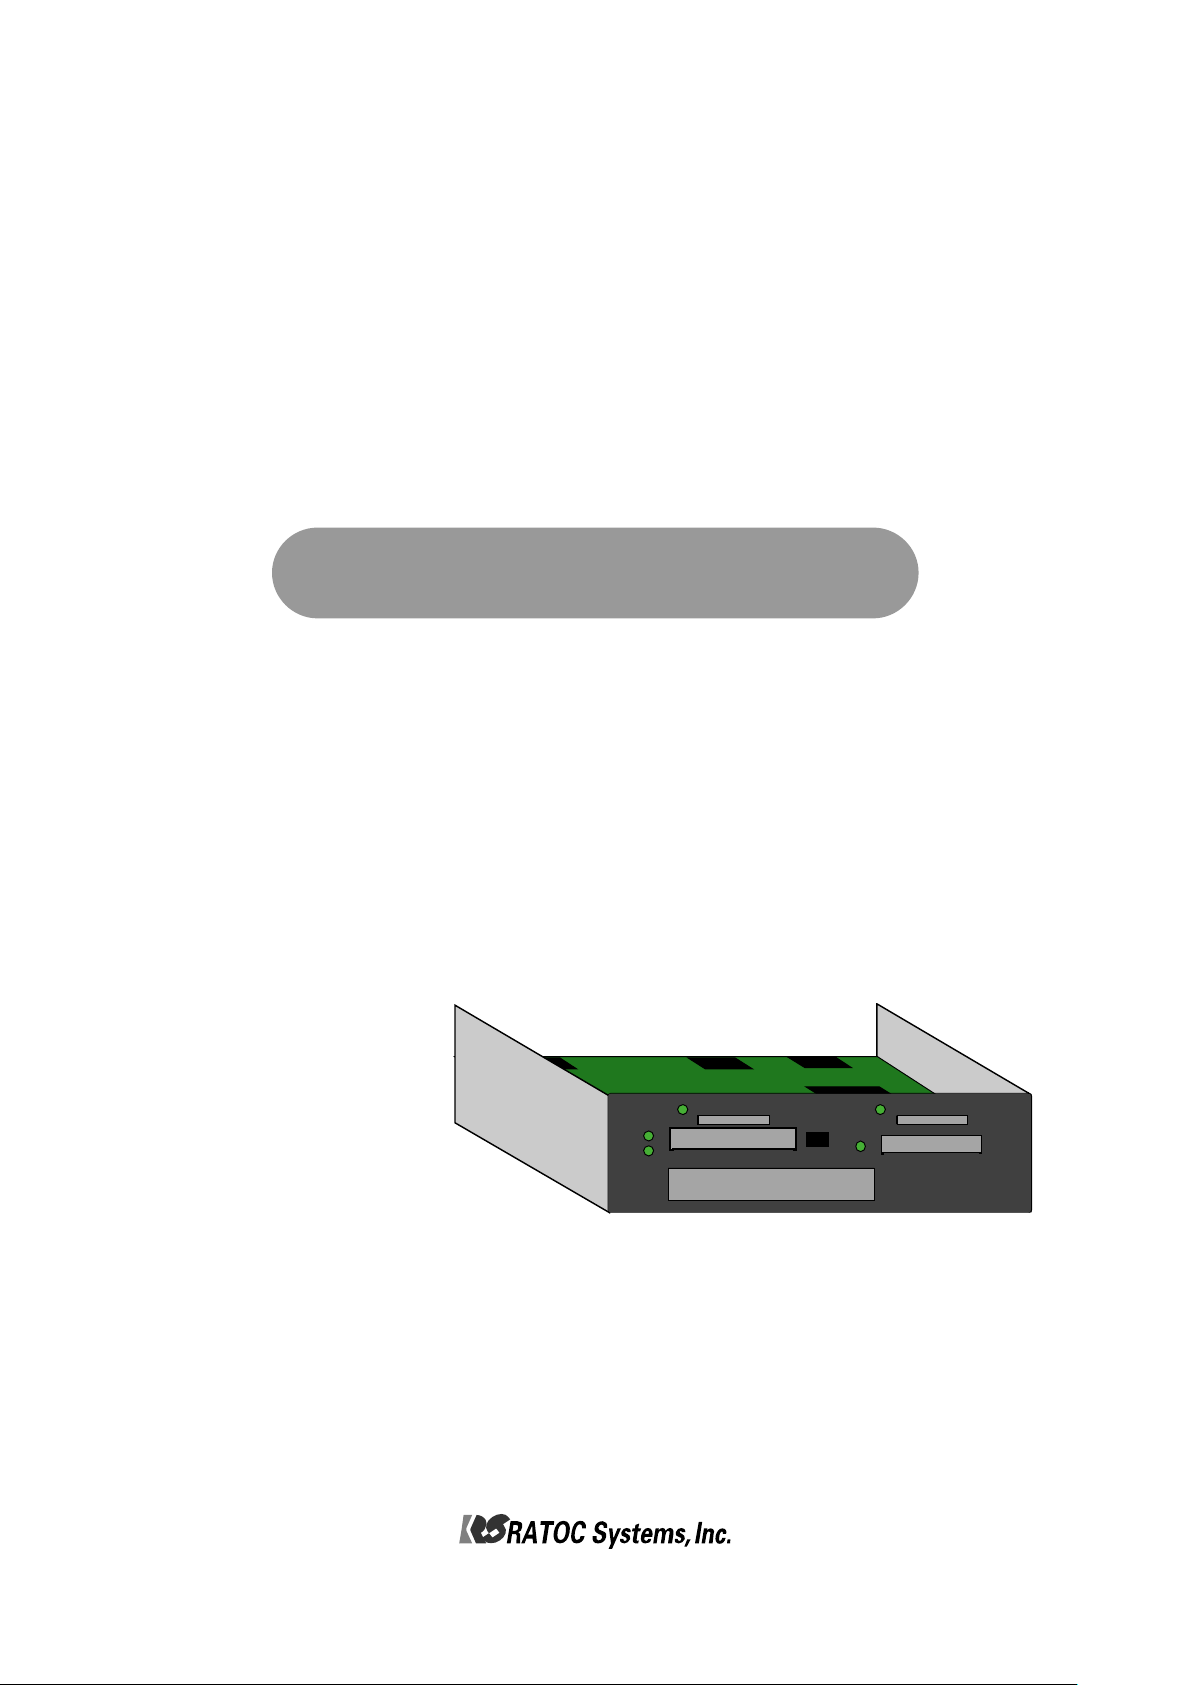
Professional Media Card Reader/Writer Unit with USB3.0
MR18
MR18EX
User’s Manual
Dec. 2016 Rev1.1
MR18EX
SATA
SSD
SD Card
Compact Flash
SD UHS-II
SxS
MR18
Page 2

<Cautions >
1. ©2016 RATOC Systems, Inc. All rights reserved.
2. This user’s manual was created with thorough attention to its content.
If, however, you have a question, spot an error, or find a description lacking, please contact us.
3. RATOC Systems, Inc. doesn’t take responsibility for any damage arising from the use of this product.
4. This publication may not be reproduced or used in whole or in part without permission of RATOC Systems,Inc.
5. Design and specifications are subject to change without notice.
● “REX” is a trademark owned by R ICOH COMPANY, LTD. RICOH allows RATOC Systems,Inc. to use this trademark
under license agreement.
●SxS、 SxS-1、SxS PRO、 SxS PRO+ are trademark of Sony Corporation.
●Apple、Mac、Mac OS are registered tradem arks of Apple Inc. in the United States of America and other countries.
●Windows is a registered trademarks of Microsoft Corporation in the U nited State of America and other countries.
●All other product and company names are trademarks or registered trademarks of their respective companies.
Page 3

Contents
1 Introduction 4
1-1.Package Contents ------------ 4
1-2.System Requirement ------------ 5
1-3.Supported media ------------ 5
1-4.Description of each part ------------ 6
2
3
4
Setup 9
2-1.Procedure to install this product -------- 8
2-2.Connection of a USB ------------ 8
2-3.Installation of HotPlug tool and how to use it --- 9
2-4.Direction of each media insertion--------- 12
Drive letters 13
3-1.Windows10 ------------ 13
3-2.Windows8.1 ------------ 13
3-3.Windows7 ------------ 14
Installation and confirmation inMac OS X
16
Page.3
Page 4

1
Introduction
Thank you for purchasing our product.
Be sure to read this user’s manual before using our product.
<Features>
●This product is a media card reader/writer with USB3.0 interface.
●HotPlug tool is included. By this tool, you can centrally manage removal/insertion of all media
which this product supports.
-1.Package Contents
1
Confirm all of the items are included in the package.
1-1-1.MR18
1-1-2.MR18EX
SD Card 2
SATA
Compact Flas h
SSD
MR18 body
MR18EX body
SD Card 1
SxS
CD-ROM
USB cable
Standard-A - Micro-B
2.95ft(90cm)
Warranty Card
USB 3.0 cable
Standard-A - Standard-B
2.95ft(90cm)
Power cable
CD-ROM
Warranty Card
Page.4
Page 5
-2.System Requirement
1
●Supported OS :Windows10 / 8.1 / 7 ※Compatible with both 64bit and 32bit OS
Mac OS X 10.10 or later
●Supported PC :WindowsPC with USB3.0/2.0 ports(It is recommended to connect USB3.0 ports)
Mac with USB3.0/2.0
-3.Supported media
1
●SD SD memory card, SD memory card
SD High Speed(ver1.1), SD Pro High Speed
SDHC memory card, SDXC memory card
SDXC memory card UHS-I、SDXC memory card UHS-II
●SxS SxS-1、SxS PRO
●CF Compact flash Type I / II、UDMA0~7
●SSD SATA2.0(3Gbps) / SATA1.0(1.5Gbps)
Page.5
Page 6

-4.Description of each part
1
1-4-1.MR18
●Front panel
SD card slot, a ccess LED
CF card slot, a cce ss LED
SSD slot, acce ss LED SxS slo t, acce ss LED
※If you use a UHS-II compatible SD card, be sure to use the SD
card slot at the right side. If you use the SD card slot at the left side,
access speed will be down.
UHS -II compatible SD card slot,
access LED
●Back side of PCBA
Pow er connector
(For attaching a SATA power conne ctor of a P C)
Pow er supply port for SSD
(Cable is attac hed from the beginning)
※Be sure to use the SATA cable, and power cable which are
attached to this product from the beginning without removing,
replacing them.
Micro-USB port
SAT A port(no use)
SAT A port
(for use to connec t a cable for S SD port)
Page.6
Page 7

1-4-2.MR18EX
●Front panel
Each part of memory card is the same as MR18, as described in the previous page.
PowerLED
Power switch
※If you use a UHS-II compatible SD card, be sure to use the SD
card slot at the right side. If you use the SD card slot at the left side,
access speed will be down.
●Back panel
AC connector
USB3.0 port
Page.7
Page 8

2
Set up
-1.Procedure to install this product
2
Connect a USB cable
Set up HotPlug tool
Preparation is complete
-2.Connection of a USB cable
2
2-2-1.Connection of MR18
●MR18 -----------Page 8
●MR18EX-----------Page 9
※The bundled HotPlug tool is
for the use of Windows only.
For Mac, this tool is not required,
because standard removal tool
in Mac is used instead.
●It is required to install MR18 into a 5 inch bay of a PC. For further information, please refer to the User’s
Manual which accompanies a PC, PC case.
●Attach the bundled USB cable into the Micro-B connector of MR18.
USB 3.0 port
●Don’t insert the wrong side of the cable forcefully.
●Secure the cable with the fixation band after inserting the cable.
●Insert a USB cable into a USB port of a PC.
Fixation band for cable
Next page
Page.8
Page 9

●Connect SATA-HDD 15pin power cable to the power connector of MR18.
To MR18 PCBA
Available from power supply unit
of a PC
2-2-2.Connection of MR18EX
USB 3.0 port
For Windows users, proceed to Chapter 2-3.Installation of HotPlug tool
and how to use it.
For Mac users, you have finished installation already.
Proceed to Chapter 2-4.Direction of each media insertion and get started
with this product.
2
-3.Installation of HotPlug tool and how to use it
This section explains installation of HotPlug tool for Windows and how to use it.
Mac users don’t need to install HotPlug tool. Refer to Chapter 2-3-3 for hot-plug instruction.
2-3-1.Installation of HotPlug tool
[Caution]
If you use MR08 or MR08EX with the PC currently, be sure to uninstall its
HotPlug tool before installing the HotPlug tool for MR18/MR18EX.
●Before installation of Hot-Plug tool, confirm MR18/MR18EX is connected to the PC.
And then, start [ REX-MRHotPlugTool-Setup.exe] at the bundled CD-ROM and follow the on-screen
instructions to finish installation. If the below screen will appear in the last screen, you are successful
in installation.
●Restart the PC connecting MR18/MR18EX. And then, the icon will appear at the task tray
at the bottom right corner.
Page.9
Page 10

2-3-2.Confirmation of the installatioon of the HotPlug tool
●If the below screen appears, MR18/MR18EX isn’t recognized correctly.
In this case, finish the installation first. And then, connect MR18/MR18EX.
After confirming MR18/MR18EX is recognized correctly, start [ REX-MRHotPlugTool-Setup.exe]
at the bundled CD-ROM and follow the on-screen instructions one more time.
Page.10
Page 11

2-3-3.How to use HotPlug tool
●Click the icon at bottom right.
●Black letters mean media which are inserted
into the slot now.
Gray letters mean media which aren’t inserted
into the slot now.
●If you click a media you want to remove,
it will be ready for removal.
●[SD UHS-II USB Device] is the right SD slot.
[SD Card USB Device] is the left SD slot.
2-3-4.HotPlug with Mac
●Mac users can hotplug each media by
standard function in OS.
To remove media, select [Eject] for
each media.
Blac k: Media slo t with m edia
Gray:Med ia slot without me dia
Page.11
Page 12

-4. Direction of each media insertion
2
Caution
●Be careful of direction of media insertion when each media is inserted.
●If media is inserted in the wrong direction, media or MR18/MR18EX may have damaged.
●SD Card (For both SD UHS-II slot and SD Card slot)
+Insert SD card with the SD label facing up.
+Insert it until it clicks into place.
+When removing, please push the media again to eject it.
●CF Card
+Insert CF card with CF label facing up.
+Insert it firmly.
+When removing, push the eject switch.
●SxS Card
+Insert SxS card with SxS label facing up.
+Insert it until some part of SxS card goes
approx 0.6 inch beyond the front panel.
+When removing, pinch the SxS protruding from the panel
and slide it out slowly.
●SSD
+Set the direction of SSD insertion, as shown in the bottom right.
+Insert it until some part of SSD goes approx 0.6 inch
beyond the front panel.
+When removing, pinch the SSD protruding from
the panel and slide it out slowly.
SSD
SATA
7pin
SSD Drive
0.6 inch
SATA Power 15pin
Put both
connectors at the
right side and
insert SSD into
the slot slowly.
Page.12
Page 13

3
Drive letters
●A drive letter in each media slot will be assigned automatically by Windows after installation of
MR18/MR18EX. If drive letters aren’t used, a user can assign any drive letter by following the next
steps.
●Once the setting is made, Windows will keep the setting, and when Windows starts next time,
the assigned drive letter can be used.
But, the assigned drive letter may change at the following time:
-At the time when a USB port of a PC connected to MR18/MR18EX change.
-At the time when a PCIExpress bus slot change if a PCIExpress board for additional USB ports are used.
-1.Windows10
3
●Right-click at Windows mark at the bottom left corner and select [Disk Management].
Next steps are the same as Windows 7. Proceed to 3-3.Windows 7.
-2.Windows8.1
3
●After selecting [Disk Management], procedure is the same as Windows 7. Proceed to 3-3.Windows 7.
Page.13
Page 14

-3.Windows7
3
●Right-click at [Computer] and click [Manage].
●Click [Disk Management] at the [Computer Management] window.
●Right-click at a drive you want to change, and click the [Change Drive Letter and Paths...].
●Select the drive letter and click [Change].
●Allocable drive letter will be shown. Select a drive letter and click [OK].
Page.14
Page 15

●The warning window will appear. Click [Yes].
●Drive letter changed to the one you selected.
Page.15
Page 16

Installation and confirmation in MacOS X
4
MacOS X(10.10 or later) will load driver software automatically once MR18EX is connected to Mac.
Select [System information] – [USB]. The screen shown below will appear.
This screen shows MR18EX.
[MR18(SATA-HDD)] appears only when SSD is recognized.
Page.16
Page 17

 Loading...