

Page 1

FireWire CardBus PC Card
for Macintosh PowerBookG3
CBFW2
User’s Guide
Rev. 4.0
October 2001
Page 2

CBFW2 User's Guide
1. Introduction 1
1-1.Before Using the CBFW2 1
1-2.Package 1
2. Setup 2
2-1.Setup procedures 2
2-2.Installing the driver for the CBFW2. 3
2-3. V erifying the installation. 5
2-4. Installing QuickTime 4.0. 6
2-5.Inserting the CBFW2 10
2-6. Connecting the DVCAMs 1 1
3. Compatibility with Video Editing Software 12
3-1.Adobe Premire 12
3-2.Final Cut Pro 14
3-3.Digital Origin EditDV Unplugged, 1.6.1, 2.0 15
3-4.Digital Origin MotoDV 1.4 17
3-5.Digital Origin PhotoDV 1.4 19
3-6.STRATA VideoShop Ver.5.0 21
4. Registration and Tech-Support 22
4-1. How to Register 22
4-2. Software Update and Support 22
4-3. System Requirements 23
5. Specifications 24
Features 24
Page 3

1. Introduction
This User’s Guide describes how to install,use,and troubleshoot the RA T OC CBFW2
FireWire CardBus PC Card.(called CBFW2 in this User Guide)
The information in the README file on the CD-ROM may include the latest information.
Be sure to read the README file as well.
1-1.Before Using the CBFW2
l Never attempt to disassemble the PC Card and the dongle.
1. Introduction
l Do not bend, drop or strike the PC Card and the cable, or subject it to heavy pressure.
l Information in this document is subject to change without notice.
l If you have any questions or find errors in this guide, do not hesitate to let us know .
1-2.Package
l CBFW2 FireWire CardBus PC Card
l 4PDV(i-Link) to 6P FireWire cable (6feet)
l Dongle with two FireWire 6P port and Cable Power input jack
l Support software CD-ROM(The version below are subject to change without notice)
•REX-CBFW Installer
•REX-CBFW Driver 2.0
•REX-CBFW Enabler 2.0
•FireWire Support 2.2.2
•QuickTime 4.0
•EditDV unplugged 1.6.1 45 days trial version
l User Guide document(This document)
NOTE:
If any of these items are missing from the CBFW2 Retail package, contact your supplier
immediately.
1
Page 4

2. Setup
2. Setup
2-1.Setup procedures
1.Install the driver for the CBFW2. (Refer to 2-2)
2.Verify the installation.(Refer to 2-3)
3.Check whether there are two drivers below at the Extensions folder at the System Folder.
-QuickTime FireWire DV Enabler
-QuickTime FireWire DV Support
4.If you was not able to find QuickTime FireW ire DV Enabler , QuickTime Fir eWire DV
Support, you have to install QuickTime4.0.(Refer to 2-4)
5.Insert the CBFW2. (Refer to 2-5)
6.Connect a DVCAM. (Refer to 2-6)
2
Page 5

2-2.Installing the driver for the CBFW2.
1. Insert the Support software CD-ROM into CD-ROM drive.
2. After you see the icon of the CD-ROM mounted on the desktop,
open the CD-ROM icon.Y ou will see a screen below .Click “CBFW2 Driver Installer”
2. Setup
3
Page 6

2. Setup
3. License Agreement window will appear. Click [Accept]. You will see the screen below .
Click [Install].
4. Y ou will see the screen below .Click [Continue].
5. Y ou will see the screen below . Click [Restart].
4
Page 7

2-3. Verifying the installation.
1)T o make sure you have succeeded to install the driver for the CBFW2,
following the steps below:
1-1)Open Extensions folder at the System Folder.
1-2)If you can find the files below at the Extensions folder,
you have succeeded to install the driver for the CBFW2.
-REX-CBFW Driver (Version 2.0)
-REX-CBFW Enabler(V ersion 2.0)
-FireWire Support 2.2.2
2. Setup
NOTE:The version number is subject to change without notice for software updates.
2)Check whether there are two drivers below at the Extensions folder at the System
Folder.
-QuickTime FireWire DV Enabler
-QuickTime FireWire DV Support
If you was not able to find the two drivers above, proceed to the next step 2-4.Install
QuickTime4.0.
If you can find the two drivers above, ignore the step 2-4.Install QuickTime4.0
and proceed to the step 2-5.Insert the CBFW2.
5
Page 8

2. Setup
2-4. Installing QuickTime 4.0.
If there aren’t QucikTime FireWire DV Enabler and QucikTime FireWire DV Support
at the Extensions folder at the System Folder, you have to install QucikTime 4.0.
Follow the steps below:
1. Insert the CD-ROM into CD-ROM drive.
2. After you see the icon of the CD-ROM mounted on the desktop,
Open the CD-ROM icon.Y ou will see a screen below .
6
Page 9
2. Setup
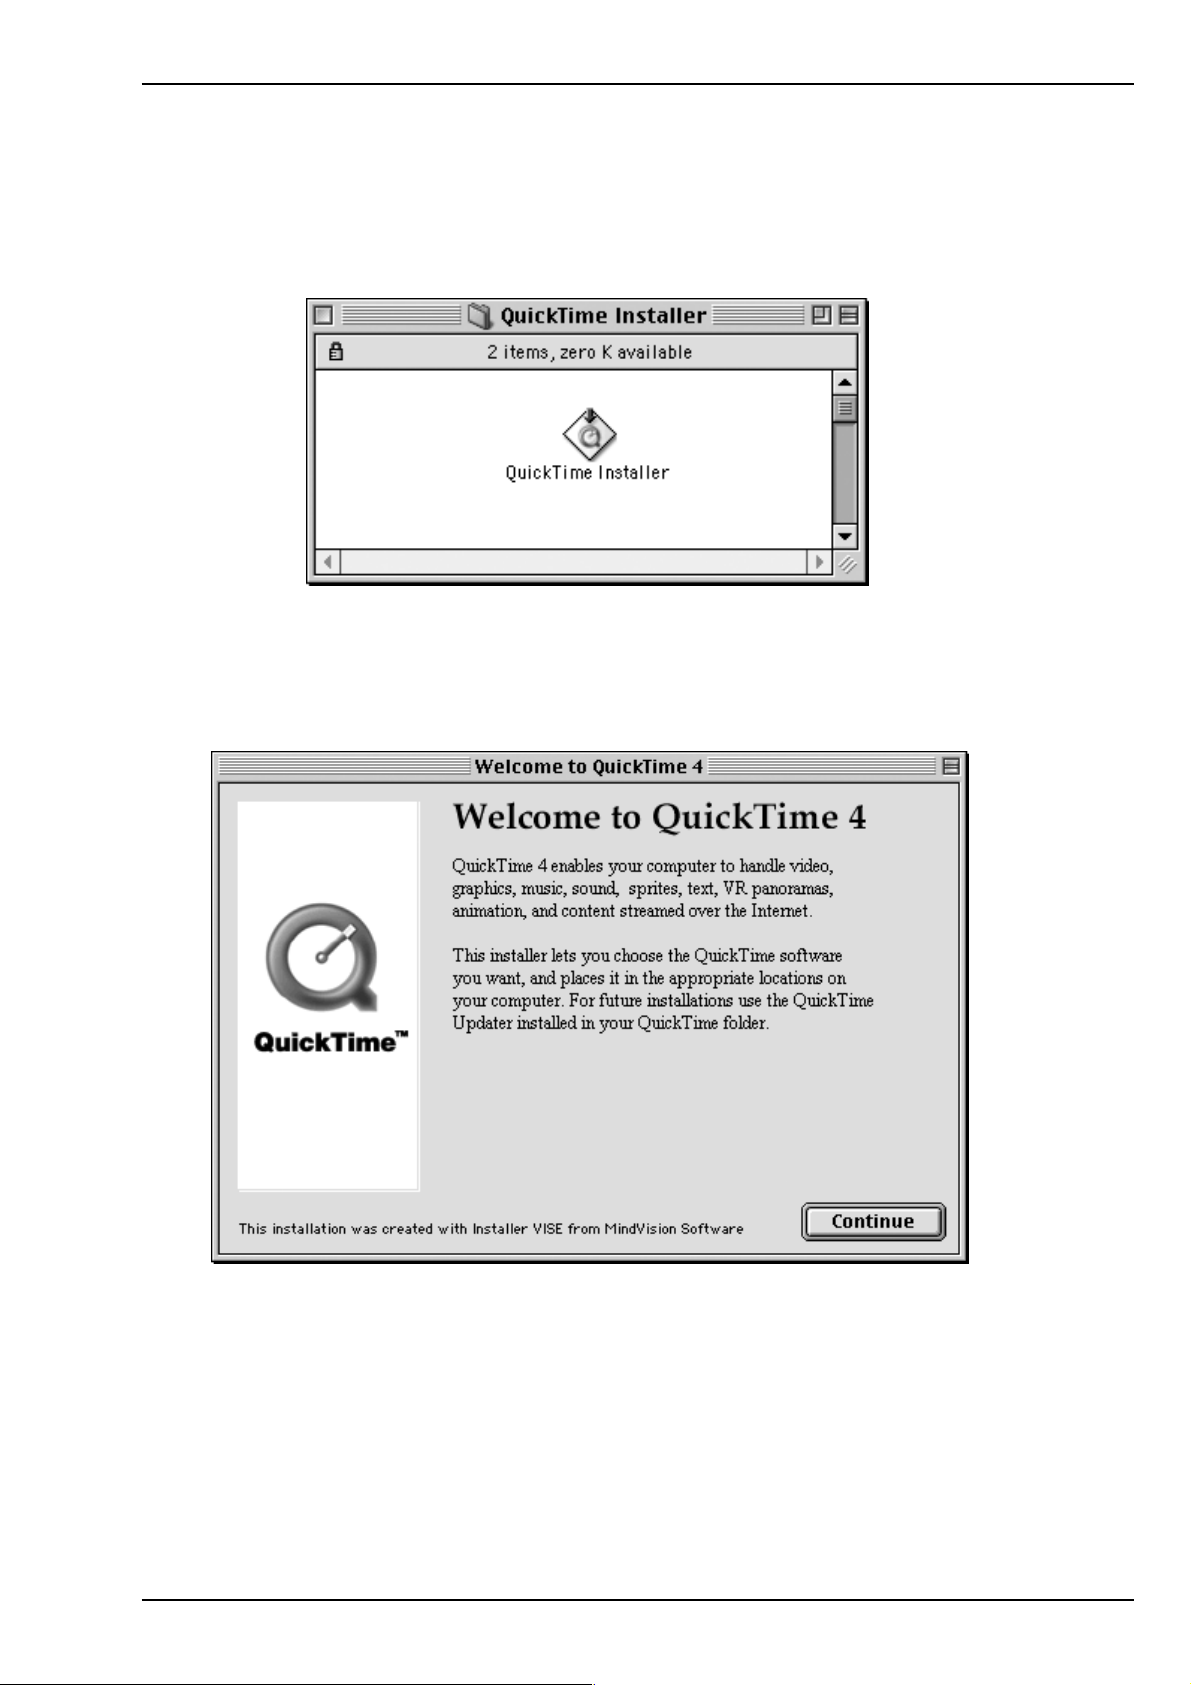
3.Double-click the QuickTime Installer folder .Y ou will see the screen below . Double-click the
QuickTime Installer icon.
4.Y ou will see the screen below .Click [Continue].
7
Page 10

2. Setup
5.Y ou will see the screen below .Click [Agree] .
6.Y ou will see the screen below .Select the Full option and click [Continue].
8
Page 11

7.Y ou will see the screen below .Click [Continue].
2. Setup
8.Y ou will see the screen below .Click [Restart].
9.T o verify the installation,open the Extention folder in the Control Panel and find the five
drivers below .If you can find the five drivers,you can proceed to the step 2-5.Insert the
CBFW2.
-REX-CBFW Driver (Version 2.0)
-REX-CBFW Enabler(V ersion 2.0)
-FireWire Support 2.2.2
-QuickTime FireWire DV Enabler
-QuickTime FireWire DV Support
9
Page 12

2. Setup
2-5.Inserting the CBFW2
1.Turn of f your PowerBookG3.
2.Grasp the CBFW2 by the edges with the label facing upward.
Insert the CBFW2 into the slot and push it in until it is firmly seated.
3.Make sure the CBFW2 icon is mounted on the desktop.
10
Page 13

2. Setup
2-6. Connecting a DVCAM
1)Connect a DVCAM to the CBFW2 with the FireWire cable.
Y ou can connect the DVCAM without turning off the DVCAM or the PowerBookG3.
You can hot plug the DVCAM.
Refer to the manual that accompanied your DVCAM for the location of the FireWire connector .
4p DV to 6p FireWire cable
2)Check if the DVCAM is recognized.
Follow the steps below:
2-1)Set the DVCAM in Camera Mode and turn on the DVCAM.
2-2)Start Apple Video Player in your system.
2-3)If you can preview with Apple Video Player, the DVCAM is recognized.
But note the Apple Video Player can not capture sound and
recording function does not work.
Y ou can now do a video editing.
T o install EditDV trial version,open EditDV folder and follow the installer and
readme instructions.
11
Page 14

3. Compatibility and Video Editing Software
3.
Compatibility with Video Editing Software
3-1. Adobe Premire.
CBFW2 is fully compatible with Premire5.1c. If you have not it, you have to update your
Premire to 5.1c. Adobe original package contains Premire5.1 CD-ROM. You have to
download Premire5.1c updater from www.adobe.com and install it. If you are using MacOS9,
you have to download FireWire DV Device control 1.2 (This version may be subject to
change.) from www.adobe.com and install it.
Premire5.1 full version bundled model(CBFW2PF) is available from us.
T o install Premire5.1 and update to 5.1c, follow these steps.
(1) Check your CBFW2 installation.
Y ou need following CBFW2 drivers in your Extensions folder .
-REX-CBFW Driver 1.6 or 1.7 or later
-REX-CBFW Enabler 1.0 or later
-FireWire Support 2.2.2
-QuickTime FireWire DV Enabler
-QuickTime FireWire DV Support
These drivers are included in CBFW2 CD and MacOS9.0.
REX-CBFW Driver , Enabler and FireWire Support 2.2.2 are installed by REX-CBFW
installer.
If you are using MacOS9.0 or later, you don’ t need to install QuickTime FireW ire DV
Enabler and Support because QuickTime 4.x is already included in the OS. If you are
using MacOS8.6, you have to install QuickTime4.x. QuickTime FireW ire DV Enabler
and Support are installed by QuickTime4.x installer .
(2) CBFW2 is working ?
Check “REX-CBFW” FireWire PC Card i-con on your desktop.
(3) Connect DVCAM and turn it on with setting camera mode.
12
Page 15

3. Compatibility and Video Editing Software
(4) Run Apple Video Player. You will see the footage from DVCAM.
(5) If you can not see any picture from DVCAM, check your CBFW2 installation, DVCAM
connection and cable again.
(6) Install Premire5.1 and update to 5.1c.
(a)Put Adobe Premire application CD-ROM into the CD-ROM drive.
(b)Double click Adode Premire CD-ROM I-con and open the folder .
(c)Double click Installer Adobe Premire 5.1. The installation will be started and done
automatically .
Y ou should not install QuickT ime 3.0.2. FireWire requires QuickTime4.0.
(d)Download 5.1c updater.
- Start Internet browser and access to Adobe web site www.adobe.com.
- Go to Support page and select Downloads.
- Select Premire machintosh.
- Select V ersion 5.1c and download Adobe Pr emire 5.1C updater for MacOS.
(e)If you are using MacOS9, you have to download FireWire DV Device control 1.2
beta plug-in for MacOS9 continuously .
(f)Expand Premire5.1c updater for Mac.sit and refer to GettingStarted.pdf.
(g)Run Premire5.1c Update.
(h)If you are using MacOS9, expand FireWire DV Device 1.2 Beta.sit.
(i)Refer Readme and drag FireWire DV Device contr ol 1.2 to the Extensions folder .
Also you need to remove FireWir e DV Device control 1.0 from Extensions folder .
(j)Start Premire5.1C and select File menu. Select Preferences > Scratch
Disks/Device Control.
And then choose FireWire DV Device 1.2 in the pop-up menu.
(k)Y ou will be able to control your DVCAM and capture movie from the DVCAM.
13
Page 16

3. Compatibility and Video Editing Software
3-2. Final Cut Pro
CBFW2 is fully compatible with this software and qualified officially by Apple, refer to
http://www.apple.com/finalcutpro/techspecs/ ‘qualified video capture card’ page.
If you are using MacOS9.0 or later, you need Final Cut Pro 1.2 and QuickT ime 4.0.3.
Please note, Final Cut Pro 1.2 does not work with MacOS8.6 and QuickTime 4.0 or 4.0.1.
T o use it, follow these steps.
(1)Check your CBFW2 installation.
Y ou need following CBFW2 drivers in your Extensions folder .
-REX-CBFW Driver 1.6 or 1.7 or later
-REX-CBFW Enabler 1.0 or later
-FireWire Support 2.2.2
-QuickTime FireWire DV Enabler
-QuickTime FireWire DV Support
These drivers are included in CBFW2 CD and MacOS9.0.
REX-CBFW Driver , Enabler and FireWire Support 2.2.2 are installed by REX-CBFW
installer.
If you are using MacOS9.0 or later, you don’ t need to install QuickTime FireW ire DV
Enabler and Support because QuickTime 4.x is already included in the OS. If you are
using MacOS8.6, you have to install QuickTime4.x. QuickTime FireW ire DV Enabler
and Support are installed by QuickTime4.x installer .
(2) CBFW2 is working ?
Check “REX-CBFW” FireWire PC Card i-con on your desktop.
(3) Connect DVCAM and turn it on with setting camera mode.
(4) Run Apple Video Player. You will see the footage from DVCAM.
(5) If you can not see any picture from DVCAM, check your CBFW2 installation, DVCAM
connection and cable again.
(6) Install Final Cut Pro. Notice to select “DV mode”.
(7) Restart MacOS
(8) Make sure “REX-CBFW” FireWire PC Card i-con. Connect DVCAM to CBFW2 and
turn it on.
(9) Start Final Cut Pro.
14
Page 17

3. Compatibility and Video Editing Software
3-3. Digital Origin EditDV Unplugged, 1.6.1, 2.0.
CBFW2 is fully compatible with Digital Origin EditDV. Also CBFW2 CD-ROM includes
EditDV unplugged 1.6.1 45days trial version. If you have older version than 1.6.1, you have to
update to this version.
T o use it with CBBFW2, follow these stepps.
(1)Check your CBFW2 installation.
Y ou need following CBFW2 drivers in your Extensions folder .
-REX-CBFW Driver 1.6 or 1.7 or later
-REX-CBFW Enabler 1.0 or later
-FireWire Support 2.2.2
These drivers are included in CBFW2 CD-ROM. REX-CBFW Driver , Enabler and
FireWire Support 2.2.2 are installed by REX-CBFW installer . If you are using
MacOS8.6 and you can’t find QuickTime 4.0 in your Extensions folder , you have to
install QuickTime4.0. But you have to set QuickT ime FireW ire DV Enabler and
Support disable state to prevent software confliction with DigitalOrigin original
drivers.
If you have already installed following QuickTime4.0 FireW ire DV drivers, you have
to remove from Extensions folder or set disable state with Extensions Manager
because these drivers will conflict with Digital Origin original drivers and cause
system crush.
-QuickTime FireW ire DV Enabler
-QuickTime FireW ire DV Support
(2)Install EditDV unplugged, 1.6.1 or 2.0.
15
Page 18

3. Compatibility and Video Editing Software
(3)Check Digital Origin DV drivers.
Y ou need following drivers in your Extensions folder .
-RadDVCodec
-RadDVDecorder
-RadDVDriverA
-RadDVDriverB
-RadDVFireWireExpert
-RadDVFireWireFamily
-RadDVOutLib
-RadDVPlayerComp
-RadSonyPC7Driver
-RadSonyVXDriver
If the version of these drivers are older than 1.6, you have to update these Digital
Origin DV drivers. In this case, you need to download the latest Digital Origin DV
drivers( Drivers for G3 built-in-FireWire) from http://www.digitalorigin.com and install
them into your Extensions folder.
(4)Restart MacOS and make sure that the “REX-CBFW” FireWire PC Card i-con
appears on your desktop.
(5)Connect DVCAM to CBFW2 and turn it on.
(6)Start EditDV .
16
Page 19

3. Compatibility and Video Editing Software
3-4. Digital Origin MotoDV 1.4
CBFW2 is fully compatible with Digital Origin MotoDV 1.4. T o use it with CBFW2, follow
these steps.
(1) Check your CBFW2 installation.
Y ou need following CBFW2 drivers in your Extensions folder.
-REX-CBFW Driver 1.6 or 1.7 or later
-REX-CBFW Enabler 1.0 or later
-FireWire Support 2.2.2
These drivers are included in CBFW2 CD-ROM. REX-CBFW Driver , Enabler and
FireWire Support 2.2.2 are installed by REX-CBFW installer . If you are using
MacOS8.6 and you can’t find QuickTime 4.0 in your Extensions folder , you have to
install QuickTime4.0. But you have to set QuickT ime FireW ire DV Enabler and
Support disable state to prevent software confliction with DigitalOrigin original drivers.
If you have already installed following QuickTime4.0 FireW ire DV drivers, you have
to remove from Extensions folder or set disable state with Extensions Manager
because these drivers will conflict with Digital Origin original drivers and cause
system crush.
-QuickTime FireW ire DV Enabler
-QuickTime FireW ire DV Support
(2) Install MotoDV 1.4.
17
Page 20

3. Compatibility and Video Editing Software
(3) Check Digital Origin DV drivers.
Y ou need following drivers in your Extensions folder .
-RadDVCodec
-RadDVDecorder
-RadDVDriverA
-RadDVDriverB
-RadDVFireWireExpert
-RadDVFireWireFamily
-RadDVOutLib
-RadDVPlayerComp
-RadSonyPC7Driver
-RadSonyVXDriver
If the version of these drivers are older than 1.6, you have to update these Digital
Origin DV drivers. In this case, you need to download the latest Digital Origin DV
drivers( Drivers for Apple built-in-FireWire) from http://www.digitalorigin.com and
install them into your Extensions folder.
(4) Restart MacOS and make sure that the “REX-CBFW” FireWire PC Card i-con
appears on your desktop.
(5) Connect DVCAM to CBFW2 and turn it on.
(6) Start MotoDV .
18
Page 21

3. Compatibility and Video Editing Software
3-5. Digital Origin PhotoDV 1.4
CBFW2 is fully compatible with this software. T o use it, follow these steps.
(1) Check your CBFW2 installation.
Y ou need following CBFW2 drivers in your Extensions folder.
-REX-CBFW Driver 1.6 or 1.7 or later
-REX-CBFW Enabler 1.0 or later
-FireWire Support 2.2.2
These drivers are included in CBFW2 CD-ROM. REX-CBFW Driver , Enabler and
FireWire Support 2.2.2 are installed by REX-CBFW installer . If you are using
MacOS8.6 and you can’t find QuickTime 4.0 in your Extensions folder , you have to
install QuickTime4.0. But you have to set QuickT ime FireW ire DV Enabler and
Support disable state to prevent software confliction with DigitalOrigin original
drivers.
If you have already installed following QuickTime4.0 FireW ire DV drivers, you have
to remove from Extensions folder or set disable state with Extensions Manager
because these drivers will conflict with Digital Origin original drivers and cause
system crush.
-QuickTime FireW ire DV Enabler
-QuickTime FireW ire DV Support
(2) Install PhotoDV 1.4.
19
Page 22

3. Compatibility and Video Editing Software
(3) Check Digital Origin DV drivers.
Y ou need following drivers in your Extensions folder .
-RadDVCodec
-RadDVDecorder
-RadDVDriverA
-RadDVDriverB
-RadDVFireWireExpert
-RadDVFireWireFamily
-RadDVOutLib
-RadDVPlayerComp
-RadSonyPC7Driver
-RadSonyVXDriver
If the version of these drivers are older than 1.6, you have to update these Digital
Origin DV drivers. In this case, you need to download the latest Digital Origin DV
drivers( Drivers for Apple built-in-FireWire) from http://www.digitalorigin.com and
install them into your Extensions folder .
(4) Restart MacOS and make sure that the “REX-CBFW” FireWire PC Card i-con
appears on your desktop.
(5) Connect DVCAM to CBFW2 and turn it on.
(6) Start PhotoShop and select import from Digital Origin .
20
Page 23

3. Compatibility and Video Editing Software
3-6. STRA T A V ideoShop V er .5.0
Y ou need Version 5.0 to use with CBFW2 and DVCAM. If you have old version, you have to
update it to 5.0 or later.
T o use this software with CBFW2, follow these steps.
(1) Check your CBFW2 installation.
Y ou need following CBFW2 drivers in your Extensions folder .
-REX-CBFW Driver 1.6 or 1.7 or later
-REX-CBFW Enabler 1.0 or later
-FireWire Support 2.2.2
-QuickTime FireWire DV Enabler
-QuickTime FireWire DV Support
These drivers are included in CBFW2 CD and MacOS9.0.
REX-CBFW Driver , Enabler and FireWire Support 2.2.2 are installed by REX-CBFW
installer.
If you are using MacOS9.0 or later, you don’t need to install QuickT ime FireW ire DV
Enabler and Support because QuickTime 4.x is already included in the OS. If you are
using MacOS8.6, you have to install QuickTime4.x. QuickT ime FireW ire DV Enabler
and Support are installed by QuickTime4.x installer .
(2)CBFW2 is working ?
Check “REX-CBFW” FireWire PC Card i-con on your desktop.
(3)Connect DVCAM and turn it on with setting camera mode.
(4)Run Apple Video Player. You will see the footage from DVCAM.
(5)If you can not see any picture from DVCAM, check your CBFW2 installation, DVCAM
connection and cable again.
(6)Install STRATA VideoShop 5.0.
(7)Restart MacOS
(8)Make sure “REX-CBFW” FireWire PC Card i-con. Connect DVCAM to CBFW2 and
turn it on.
(9)Start VideoShop. You can capture DV data from DVCAM, but you can’t control it.
21
Page 24

4.Registration and Tech-Support
4. Registration and Tech-Support
4-1. How to Register
W e highly recommend to register yourself as our customer through our on-line registration.
1.On the Internet, access our site (http://www.ratocsystems.com/english/)
2.Follow window menu guide to register.
3.Fill out and submit the registration form.
4-2. Software Update and Support
-Software UpdateThe latest driver is subject to change for improvement or bug fix.
Y ou can download the latest version from our web site.
(http://www .ratocsystems.com/english/)
-T echnical SupportY ou can get a T ech support from RA T OC at the following
(Open Monday - Friday ,10:00A.M. to 5:00P .M(PST))
RA T OC Systems International,Inc. Tech support
Address: 1933 O’T oole A venue Suite A109
SanJose, CA 95131, U.S.A.
Phone : (408)955-9400
Fax : (408)955-9402
E-mail : int-support@rexpccard.co.jp
W eb : http://www .ratocsystems.com/english/
22
NOTE:
Please include the following information to help us to assist you in the event of a problem:
-Our product name, serial number , and product description
-Host Computer Name, MacOS version
-Application software/driver version
Page 25

4.Registration and Tech-Support
4-3. System Requirements
l PowerBookG3/233,G3/250,G3/266,G3/292,G3/300(1998 W allStreet),
G3/333,G3/400(1999 Lomberd)
l MacOS8.6, 9.0, 9.0.4, 9.1, 9.2, 9.2.1
l QuickTime 4.0
1.)QuickTime FireWire DV support
2.)QuickTime FireWire DV Enabler
If you can not find these software component above,CBFW2 does not work.
l CD-ROM drive
l DV capturing frame rate depends on CPU speed,Memory size,software and
Hard Disk sustained data write rate.Y ou need more than 7MB/sec. sustained data write
rate Hard Disk.
l T o capture full frame rate and non dropped frame movie file to FireWire HD directly ,
G3/400 or G3/333(Lomberd) is required.
If you have W allStreet model PowerBook,you may not capture non-dropped frame movie
file to FireWire HD directly .For W allStreet model,we strongly recommend to use internal H D
or external Ultra SCSI as a scratch drive, and then save the movie to FireWire HD.
23
Page 26

5. Specifications
5. Specifications
Bus interface
CardBus (PC Card Standard)
Data transfer rate
100, 200 and 400 Mbps
Power requirements
Voltage +3.3V (Supplied from PC Card slot)
237mA (Suspend)
325mA (MAX)
Operating environment
Temperature from 32F °to 131F°(0 to 55
Relative humidity 95% maximum (Non-condensing)
o
C)
Dongle
Two FireWire 6p port
DC Cable Power input jack (DC8 to 30V, 3A max.)
GND +DC (5.5φ − 2.1φ)
(Note)
FireWire cable power is available through these ports.Output voltage and current depend on the Power Adapter
which is connected to the Cable Power input jack. W e recommend Power Adapter which has Class_1
capability.This adapter is sold separately as optional component from us. Product name is CBFW-CPA.
Features
l Designed for CardBus PC Card slot
l 32-bit Data Bus and 33MHz operation
l Supports Bus-mastering data transfer
l IEEE 1394-1995,IEEE1394.a compliant
l OHCI based architecture link layer chip included
l Data transfer rates up to 400 Mbps
l Provides Two FireWire 6p port(2 x 6p)
l 1394 Cable power is available through add-on DC Power adapter
24
Page 27

FCC Statement
FCC Statement
Trademarks
l Apple,PowerBook,QuickTime,FireWire,FireWire Logo,MacOS and Macintosh are registered trademarks of Apple
Computer Corp.
l EditDV unplugged is a trademark of Digital Origin Co.
l Other tradenames and products names appearing in this guide are the property of their respective owners.
This equipment has been tested and found to comply with the limits for a Class B digital device, pursuant to Part 15 of
the FCC Rules. These limits are designed to provide reasonable protection against harmful interference in a residential
installation. This equipment generates, uses and can radiate radio frequency energy and, if not installed and used in
accordance with the instructions, may cause harmful interference to radio communications. However, there is no guarantee
that interference will not occur in a particular installation. If this equipment does cause harmful interference to radio or
television reception, which can be determined by turning the equipment off and on, the user is encouraged to try to
correct the interference by one or more of the following measures:
(1) Reorient or relocate the receiving antenna.
(2) Increase the separation between the equipment and receiver.
(3) Connect the equipment into an outlet on a circuit different from that to which the receiver is connected.
(4) Consult the dealer or an experienced radio/TV technician for help.
Changes or modifications not expressly approved by the party responsible for compliance may result in this unit not
complying with FCC Rules Part 15.
25
 Loading...