

Page 1

Page 2

Getting Started with Raspberry Pi Build HAT
Colophon
© 2020 Raspberry Pi (Trading) Ltd.
This documentation is licensed under a Creative Commons Attribution-NoDerivatives 4.0 International (CC BY-ND).
build-date: 2021-10-15
build-version: githash: 61115e7-dirty
Legal Disclaimer Notice
TECHNICAL AND RELIABILITY DATA FOR RASPBERRY PI PRODUCTS (INCLUDING DATASHEETS) AS MODIFIED FROM
TIME TO TIME (“RESOURCES”) ARE PROVIDED BY RASPBERRY PI (TRADING) LTD (“RPTL) "AS IS" AND ANY EXPRESS OR
IMPLIED WARRANTIES, INCLUDING, BUT NOT LIMITED TO, THE IMPLIED WARRANTIES OF MERCHANTABILITY AND
FITNESS FOR A PARTICULAR PURPOSE ARE DISCLAIMED. TO THE MAXIMUM EXTENT PERMITTED BY APPLICABLE
LAW IN NO EVENT SHALL RPTL BE LIABLE FOR ANY DIRECT, INDIRECT, INCIDENTAL, SPECIAL, EXEMPLARY, OR
CONSEQUENTIAL DAMAGES (INCLUDING, BUT NOT LIMITED TO, PROCUREMENT OF SUBSTITUTE GOODS OR
SERVICES; LOSS OF USE, DATA, OR PROFITS; OR BUSINESS INTERRUPTION) HOWEVER CAUSED AND ON ANY THEORY
OF LIABILITY, WHETHER IN CONTRACT, STRICT LIABILITY, OR TORT (INCLUDING NEGLIGENCE OR OTHERWISE)
ARISING IN ANY WAY OUT OF THE USE OF THE RESOURCES, EVEN IF ADVISED OF THE POSSIBILITY OF SUCH
DAMAGE.
RPTL reserves the right to make any enhancements, improvements, corrections or any other modifications to the
RESOURCES or any products described in them at any time and without further notice.
The RESOURCES are intended for skilled users with suitable levels of design knowledge. Users are solely responsible for
their selection and use of the RESOURCES and any application of the products described in them. User agrees to
indemnify and hold RPTL harmless against all liabilities, costs, damages or other losses arising out of their use of the
RESOURCES.
RPTL grants users permission to use the RESOURCES solely in conjunction with the Raspberry Pi products. All other use
of the RESOURCES is prohibited. No licence is granted to any other RPTL or other third party intellectual property right.
HIGH RISK ACTIVITIES. Raspberry Pi products are not designed, manufactured or intended for use in hazardous
environments requiring fail safe performance, such as in the operation of nuclear facilities, aircraft navigation or
communication systems, air traffic control, weapons systems or safety-critical applications (including life support
systems and other medical devices), in which the failure of the products could lead directly to death, personal injury or
severe physical or environmental damage (“High Risk Activities”). RPTL specifically disclaims any express or implied
warranty of fitness for High Risk Activities and accepts no liability for use or inclusions of Raspberry Pi products in High
Risk Activities.
Raspberry Pi products are provided subject to RPTL’s Standard Terms. RPTL’s provision of the RESOURCES does not
expand or otherwise modify RPTL’s Standard Terms including but not limited to the disclaimers and warranties expressed
in them.
Legal Disclaimer Notice 1
Page 3

Getting Started with Raspberry Pi Build HAT
Introduction
The Raspberry Pi Build HAT is an add-on board that connects to the 40-pin GPIO header of your Raspberry Pi, which was
designed in collaboration with LEGO® Education to make it easy to control LEGO® Technic™ motors and sensors with
Raspberry Pi computers.
It provides four connectors for LEGO® Technic™ motors and sensors from the SPIKE™ Portfolio. The available sensors
include a distance sensor, a colour sensor, and a versatile force sensor. The angular motors come in a range of sizes and
include integrated encoders that can be queried to find their position.
The Build HAT fits all Raspberry Pi computers with a 40-pin GPIO header, including — with the addition of a ribbon cable or
other extension device — Raspberry Pi 400. Connected LEGO® Technic™ devices can easily be controlled in Python,
alongside standard Raspberry Pi accessories such as a camera module.
The Raspberry Pi Build HAT power supply, available separately, is designed to power both the Build HAT and Raspberry Pi
computer along with all connected LEGO® Technic™ devices.
The LEGO® Education SPIKE™ Prime Set 45678 and SPIKE™ Prime Expansion Set 45681, available separately from
LEGO® Education resellers, include a collection of useful elements supported by the Build HAT.
NOTE
The HAT works with all 40-pin GPIO Raspberry Pi boards, including Raspberry Pi 4 and Raspberry Pi Zero. With the
addition of a ribbon cable or other extension device, it can also be used with Raspberry Pi 400.
Controls up to 4 LEGO® Technic™ motors and sensors included in the SPIKE™ Portfolio
•
Easy-to-use Python library to control your LEGO® Technic™ devices
•
Fits onto any Raspberry Pi computer with a 40-pin GPIO header
•
Onboard RP2040 microcontroller manages low-level control of LEGO® Technic™ devices
•
External 8V PSU available separately to power both Build HAT and Raspberry Pi
•
Introduction 2
Page 4

Getting Started with Raspberry Pi Build HAT
Preparing your Raspberry Pi
Raspberry Pi recommend the use of Raspberry Pi Imager to install an operating system on your SD card. You will need
another computer with an SD card reader to install the image.
Using Raspberry Pi Imager
Raspberry Pi have developed a graphical SD card writing tool that works on Mac OS, Ubuntu 18.04, and Windows called
Raspberry Pi Imager; this is the easiest option for most users since it will download the image automatically and install it
to the SD card.
Download the latest version of Raspberry Pi Imager and install it. If you want to use Raspberry Pi Imager from a second
Raspberry Pi, you can install it from a terminal using sudo apt install rpi-imager. Then:
Connect an SD card reader with the SD card inside.
•
Open Raspberry Pi Imager and choose the required OS from the list presented.
•
Choose the SD card you wish to write your image to.
•
Review your selections and click on the Write button to begin writing data to the SD Card.
•
NOTE
If using Raspberry Pi Imager on Windows 10 with controlled folder access enabled, you will need to explicitly allow
Raspberry Pi Imager permission to write the SD card. If this is not done, the imaging process will fail with a "failed to
write" error.
You can now insert the SD card into the Raspberry Pi and power it up. For Raspberry Pi OS, if you need to manually log in,
the default user name is pi, with password raspberry, and the default keyboard layout is set to United Kingdom (UK).
You should change the default password straight away to ensure your Raspberry Pi is secure.
Configuring the Serial Port
Once the Raspberry Pi has booted, open the Raspberry Pi Configuration tool by clicking on the Raspberry Menu button
and then selecting “Preferences” and then “Raspberry Pi Configuration”.
Click on the “interfaces” tab and adjust the Serial settings as shown below:
Using Raspberry Pi Imager 3
Page 5

Getting Started with Raspberry Pi Build HAT
Figure 1. Configuring
the serial connection
to the Raspberry Pi
Build HAT.
Figure 2. Configuring
the serial connection
to the Raspberry Pi
Build HAT using
raspi-config.
Using a Headless Raspberry Pi
If you are running your Raspberry Pi headless and using raspi-config, select “interface options from the first menu”.
Then “P6 Serial Port”.
Configuring the Serial Port 4
Page 6

Getting Started with Raspberry Pi Build HAT
Figure 3. Configuring
the serial connection
to the Raspberry Pi
Build HAT using
raspi-config.
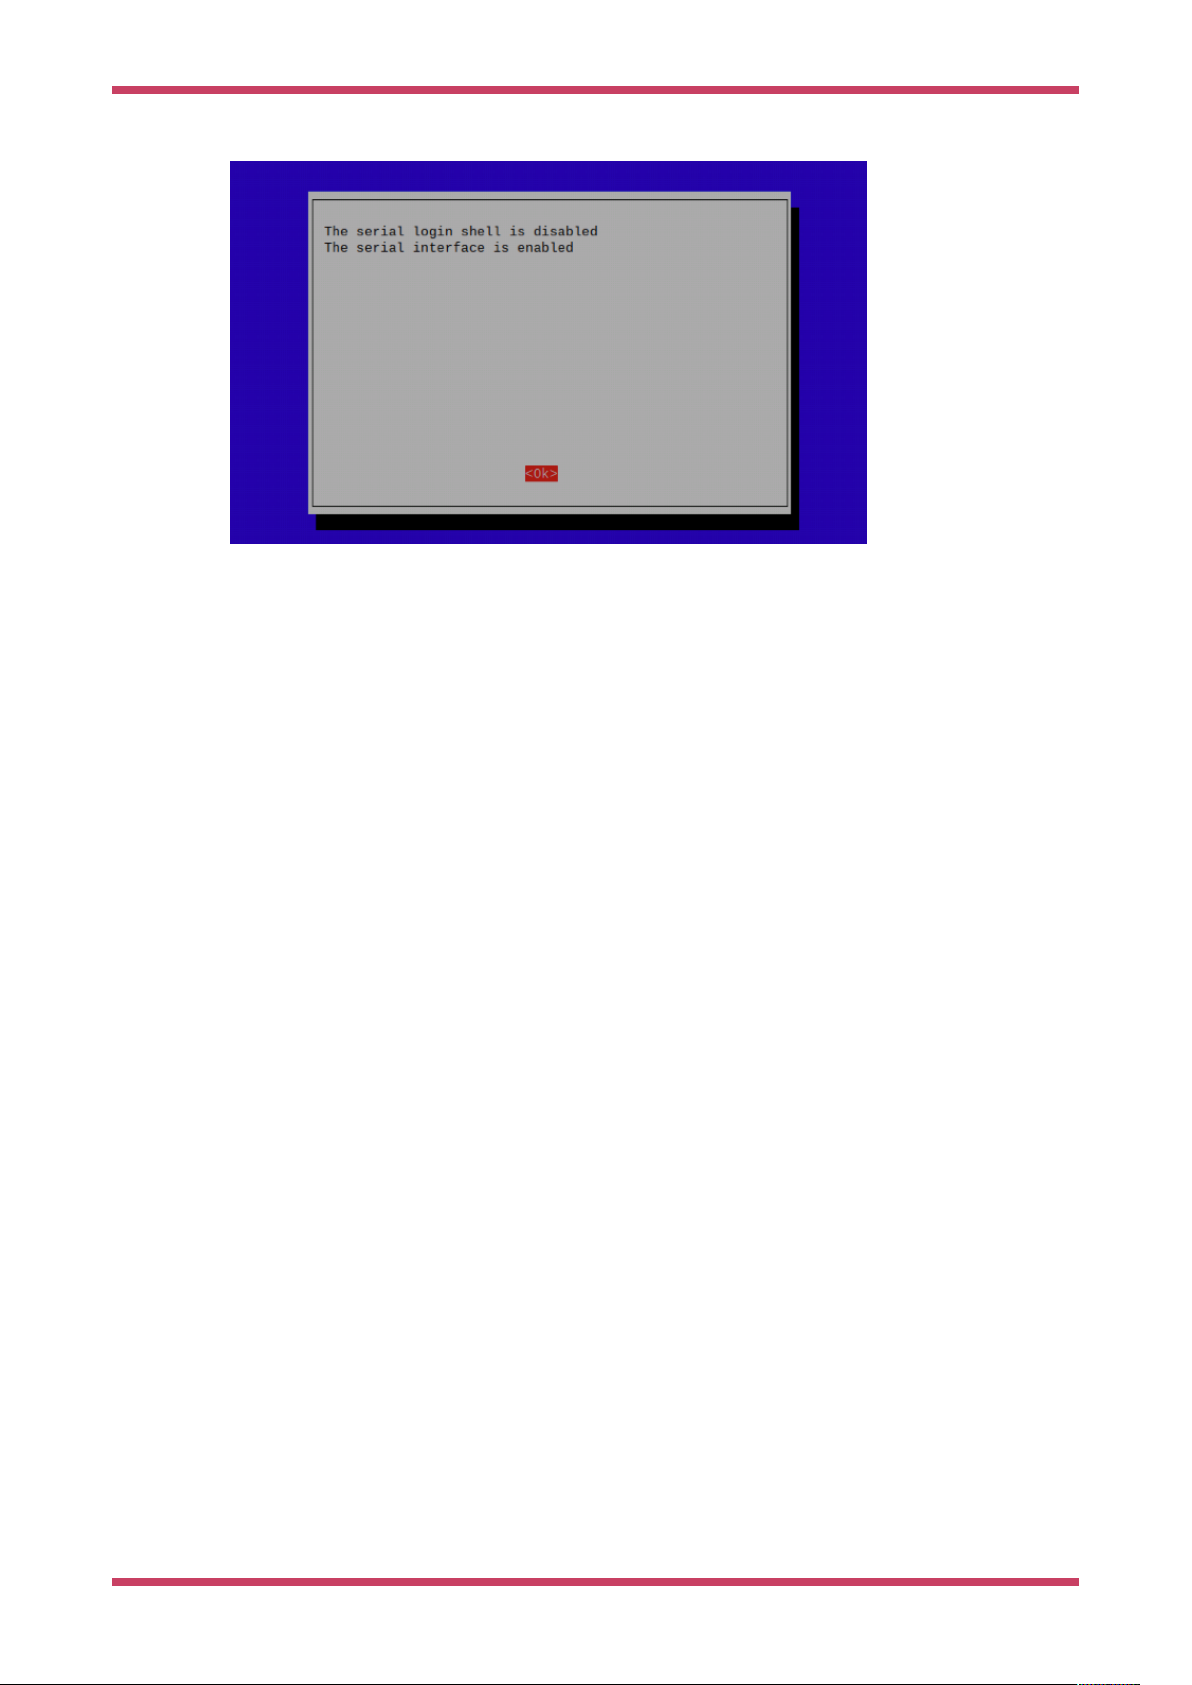
Disable the serial console:
Figure 4. Configuring
the serial connection
to the Raspberry Pi
Build HAT using
raspi-config.
Figure 5. Configuring
the serial connection
to the Raspberry Pi
Build HAT using
raspi-config.
And enable the serial port hardware.
The final settings should look like this.
Configuring the Serial Port 5
Page 7
Getting Started with Raspberry Pi Build HAT
Figure 6. Configuring
the serial connection
to the Raspberry Pi
Build HAT using
raspi-config.
You will need to reboot at this point if you have made any changes.
Configuring the Serial Port 6
Page 8

Getting Started with Raspberry Pi Build HAT
Preparing the Build HAT
Attach 9mm spacers to the bottom of the board. Seat the Raspberry Pi Build HAT onto your Raspberry Pi. Make sure you
put it on the right way up. Unlike other HATs, all the components are on the bottom, leaving room for a breadboard or
LEGO elements on top.
Figure 7. Fitting the
Build HAT to your
Raspberry Pi
Figure 8. The
Raspberry Pi Build
HAT connected using
the optional tall
header and 15mm
spacers.
Access the GPIO Pins
If you want to access the GPIO pins of the Raspberry Pi, you can add an optional tall header and use 15 mm spacers, see
Figure 8.
The following pins are used by the Build HAT itself and you should not connect anything to them.
GPIO Use Status
GPIO0/1 ID prom
GPIO4 Reset
Access the GPIO Pins 7
Page 9

Getting Started with Raspberry Pi Build HAT
GPIO Use Status
GPIO14 Tx
GPIO15 Rx
GPIO16 RTS unused
GPIO17 CTS unused
Powering the Build HAT
Connect an external power supply - the official Raspberry Pi Build HAT power supply is recommended. You don’t need to
connect a USB power supply to the Raspberry Pi as well, see Figure 9
NOTE
The Build HAT can not power the Rapsberry Pi 400 as it does not support being powered via the GPIO headers.
Figure 9. Powering the
Build HAT using the
Raspberry Pi Build
HAT power supply.
NOTE
The LEGO® Technic™ motors are very powerful; so to drive them you’ll need an external 8V power supply.
Connecting a Motor
Connect a motor to port A on the Build HAT. The LPF2 connectors need to be inserted the correct way up. If the connector
doesn’t slide in easily, rotate by 180 degrees and try again.
Powering the Build HAT 8
Page 10

Getting Started with Raspberry Pi Build HAT
Figure 10. Connecting
a motor to Port A of
the Build HAT
Connecting a Motor 9
Page 11

Getting Started with Raspberry Pi Build HAT
Installing the Software
Install the Build HAT Python library. Open a Terminal window and type,
$ pip3 install buildhat
For more information about the Build HAT Python Library see https://buildhat.readthedocs.io/.
Installing the Software 10
Page 12

Getting Started with Raspberry Pi Build HAT
Working with Motors
Start the Thonny IDE. Add the program code below:
1 from buildhat import Motor
2
3 motor_a = Motor('A')
4
5 motor_a.run_for_seconds(5)
Run the program by clicking the play/run button. If this is the first time you’re running a Build HAT program since the
Raspberry Pi has booted, there will be a few seconds pause while the firmware is copied across to the board. You should
see the red LED extinguish and the green LED illuminate. Subsequent executions of a Python program will not require this
pause.
Your motor should turn clockwise for 5 seconds.
Change the final line of your program and re-run.
5 motor_a.run_for_seconds(5, speed=50)
The motor should now turn faster. Make another change:
5 motor_a.run_for_seconds(5, speed=-50)
The motor should turn in the opposite (anti-clockwise) direction
Create a new program by clicking on the plus button in Thonny. Add the code below:
from buildhat import Motor
motor_a = Motor('A')
While True:
Ê print("Position: ", motor_a.get_aposition())
Run the program. Grab the motor and turn the shaft. You should see the numbers printed in the Thonny REPL changing.
Working with Motors 11
Page 13

Getting Started with Raspberry Pi Build HAT
Working with Sensors
Connect a Colour sensor sensor to port B on the Build HAT, and a Force sensor to port C.
If you’re not intending to drive a motor, then you don’t need an external power supply and you can use a standard USB
power supply for your Raspberry Pi.
Create another new program:
Ê1 from signal import pause
Ê2 from buildhat import ForceSensor, ColorSensor
Ê3
Ê4 button = ForceSensor('C')
Ê5 cs = ColorSensor('B')
Ê6
Ê7 def handle_pressed():
Ê8 cs.on()
Ê9 print(c.get_color())
10
11 def handle_released():
12 cs.off()
Run it and hold a coloured object (LEGO elements are ideal) in front of the colour sensor and press the Force sensor
plunger. The sensor’s LED should switch on and the name of the closest colour should be displayed in the thonny REPL.
Working with Sensors 12
Page 14

Getting Started with Raspberry Pi Build HAT
Appendix A: Compatibility
The Build HAT library supports all the LEGO® Technic™ devices included in the SPIKE™ Portfolio, along with those from
the LEGO® Mindstorms Robot Inventor kit and other devices that use an LPF2 connector. See Table 1 on the following
page.
Appendix A: Compatibility 13
Page 15

Table 1. LEGO®
devices supported by
the Raspberry Pi Build
HAT
Description Colour LEGO Item
Number
Supported
in FW
Supported
in Python
Alt Number BrickOwl Available In Set
Large Angular Motor White/Cyan 6254344 Yes Yes 45602 Link SPIKE Prime Set, SPIKE Prime
Expansion Set
Numbers
45678,
45680
Class Type Device ID
Motor Active 30
Medium Angular
White/Cyan 6254347 Yes Yes 45603 Link SPIKE Prime Set 45678 Motor Active 31
Motor
Medium Motor White/Grey 6299646,
Partial Yes 436655 Link Mindstorms Robot Inventor 51515 Motor Active 4B
6359216
Small Motor White/Cyan Yes Yes New SPIKE Prime Set Motor Active 41
Light/Colour sensor White/Black 6217705 Yes Yes SPIKE Prime Set, SPIKE Prime
Expansion Set, Mindstorms Robot
Inventor
UDS White/Black 6302968 Yes Yes SPIKE Prime Set, Mindstorms
Robot Inventor
45678,
45680,
51515
45678,
51515
ColorSensorActive 3D
DistanceS
Active 3E
ensor
Narrow Motor White/Grey No App controlled Batmobile 76112 Passive 1
Force Sensor White/Black 6254354 Yes Yes 45606 Link SPIKE Prime Set 45678 ForceSen
Active 3F
sor
3×3 LED White/Cyan Yes Yes New SPIKE Prime Set Active 40
System train motor Black 6261456 Yes ? 28740,
Link Passive 2
88011-1
Sys/Tech simple
Black 6240315 Yes ? Passive 8
lights
Medium linear motor
(LPF2 TACHO Light
White/Grey 6261452 Yes Yes 26913,
88008-1
Link Motor Active 26
MOTOR 4X6X3, NO. 1)
Technic large motor Grey/Grey 6318494 Yes Yes 22169,
Getting Started with Raspberry Pi Build HAT
Link Active 2E
88013
Appendix A: Compatibility 1414
Page 16

Description Colour LEGO Item
Number
Supported
in FW
Supported
in Python
Alt Number BrickOwl Available In Set
Numbers
Class Type Device ID
Technic XL motor Grey/Grey 6318509 Yes Yes 22172,
Link Active 2F
88014
Colour + distance
sensor
System medium
White/Grey 6261451 Partial ? 26912,
Link Active 25
88007
White/Grey 6138854 Yes ? Passive 1
motor
Button ? Partial Passive 5
Tilt sensor White/Grey 45305 Link
Getting Started with Raspberry Pi Build HAT
Appendix A: Compatibility 1515
Page 17

 Loading...