

Raritan Dominion KSX II Quick Installation And Setup Manual
KVM targ et servers are th e computers that wi ll be accessed and controlled via the KSX II. Before installing
KSX II, configure all KVM target servers to ensure optimum perf ormance. This co nfiguration ap plies only to
KVM target servers, not to the client workstations
(remote PCs) used to access KSX II remotely. Refer to
Chapter 1: Introduction, Terminology for additional
information.
I. Configure the KVM Target Servers:
• Check the video resolution.
• Check the desktop background.
• Adjust the mouse set tings.
• Perform OS-specific mouse and video configura-
tion.
Supported Video Resolutions
640x350 @70 Hz 720x400 @85 Hz 1024x768 @90 Hz
640x350 @85 Hz 800x600 @56 Hz 1024x768 @100 Hz
640x400 @56 Hz 800x600 @60 Hz 1152x864 @60 Hz
640x400 @84 Hz 800x600 @70 Hz 1152x864 @70 Hz
640x400 @85 Hz 800x600 @72 Hz 1152x864 @75 Hz
640x480 @60 Hz 800x600 @75 Hz 1152x864 @85 Hz
640x480 @66.6
Hz
800x600 @85 Hz 1152x870 @75.1 Hz
640x480 @72 Hz 800x600 @90 Hz 1152x900 @66 Hz
640x480 @75 Hz 800x600 @100 Hz 1152x900 @76 Hz
640x480 @85 Hz
832x624 @75.1
Hz
1280x960 @60 Hz
640x480 @90 Hz 1024x768 @60 Hz 1280x960 @85 Hz
640x480 @100
Hz
1024x768 @70 Hz 1280x1024 @60 Hz
640x480 @120
Hz
1024x768 @72 Hz 1280x1024 @75 Hz
720x400 @70 Hz 1024x768 @75 Hz 1280x1024 @85 Hz
720x400 @84 Hz 1024x768 @85 Hz 1600x1200 @60 Hz
Mouse Modes
The KSX II operates in several mouse modes: Absolute Mouse Synchronization, Intelligent Mouse
Mode, and Standard Mouse Mode. For both the
Standard and Intelligent mouse modes, mouse parameters must be set to specific values, which are
described in this quick guide.
Mouse parameters do not have to be altered for
Absolute Mouse Synchronization; D2CIM-VUSB is
required for this mode. Mouse confi gurations will
vary on different target operating systems; consult
your OS documentation for additional detail.
Windows XP®/Windows 2003 Settings
1. Select Start > Control Panel > Mouse.
2. Open the Pointer Options tab. In the Motion
group:
• Set the mous e motion s peed setting ex-
actly to the middle speed.
• Disable the Enhanced pointer precision
option.
• Click OK.
3. Disable transition effects:
a. Select the Display option from Control Panel.
b. Open the Appearance tab.
c. Cl ick the Effects button.
d. Clear th e Use the followi ng transition ef fect
for menus and tooltips option.
e. Click OK.
f. Close the Control Panel.
Windows Vista Settings
1. Confi gure the mouse:
a. Select Start > Settings > Control Panel >
Mouse.
b. Open the Pointer Options tab. In the Motion
group:
• Set the mous e motion s peed setting ex-
actly to the middle speed.
• Disable the Enhanced pointer precision
option.
• Click OK.
2. Disable animation and fade effects:
a. Select the System option from Control Panel.
b. Select Advanced system settings. The Sys-
tem Properties dialog box opens.
c. O pen the Advanced t ab.
d. Click the Settings button in the Perform-
ance group. The Performance Options
dialog box opens.
e. Under Custom options, clear the following
checkboxes:
• Animate controls and elements inside
windows
• Animate windows when minimizing and
maximizing
• Fade or slide menus into view
• Fade or slide ToolTips into view
• Fade out menu items after clicking
f. Click OK.
g. Close the Control Panel.
Windows 2000 Settings
1. Confi gure the mouse:
a. Select Start > Control Panel > Mouse.
b. Open the Motion tab.
• Set the acceleration to None.
• Set the mouse motion speed setting
exactly to the middle speed.
• Click OK.
2. Disable transition effects:
a. Select the Display option from Control
Panel.
b. Open the Effects tab.
c. Cl ear the Use the fol lowing transi tion ef-
fect for menus and tooltips option.
d. Click OK.
e. Clos e the Control Pan el.
Linux® Settings
(Standard Mouse Mode only) Set the mouse acceleration to exactly 1 and set the threshold to
exactly 1. Enter this command: xset mouse 1
1. This should be set for execution upon login.
Sun Solaris™ Settings
1. Set the mouse acceleration value to exactly
1 and the threshold to exactly 1.
2. Ensure that your video card is set to a supported resolution and that its output is VGA
(not composite sync).
Apple® Macintosh Settings
Use the D2CIM-VUSB and Absolute Mouse Synchronization.
IBM® AIX Settings
Go to the Style Manager, click on Mouse Settings
and set Mouse Acceleration to 1.0 and Threshold
to 3.0.
II. Network F irewall Se ttings
To enable remote access to Dominion KSX II,
your network and firewall must allow communication on TCP Port 5000. You can also configure
Domini on KSX II to use a diff erent TCP port; then
allow communication on that port.
To access Dominion KSX II via web browser,
your firewall must also allow access to TCP Port
443 (Standard HTTPS).
Access to TCP Port 80 (Standard HTTP) enables
automatic redirection of “HTTP” requests to
“HTTPS”.
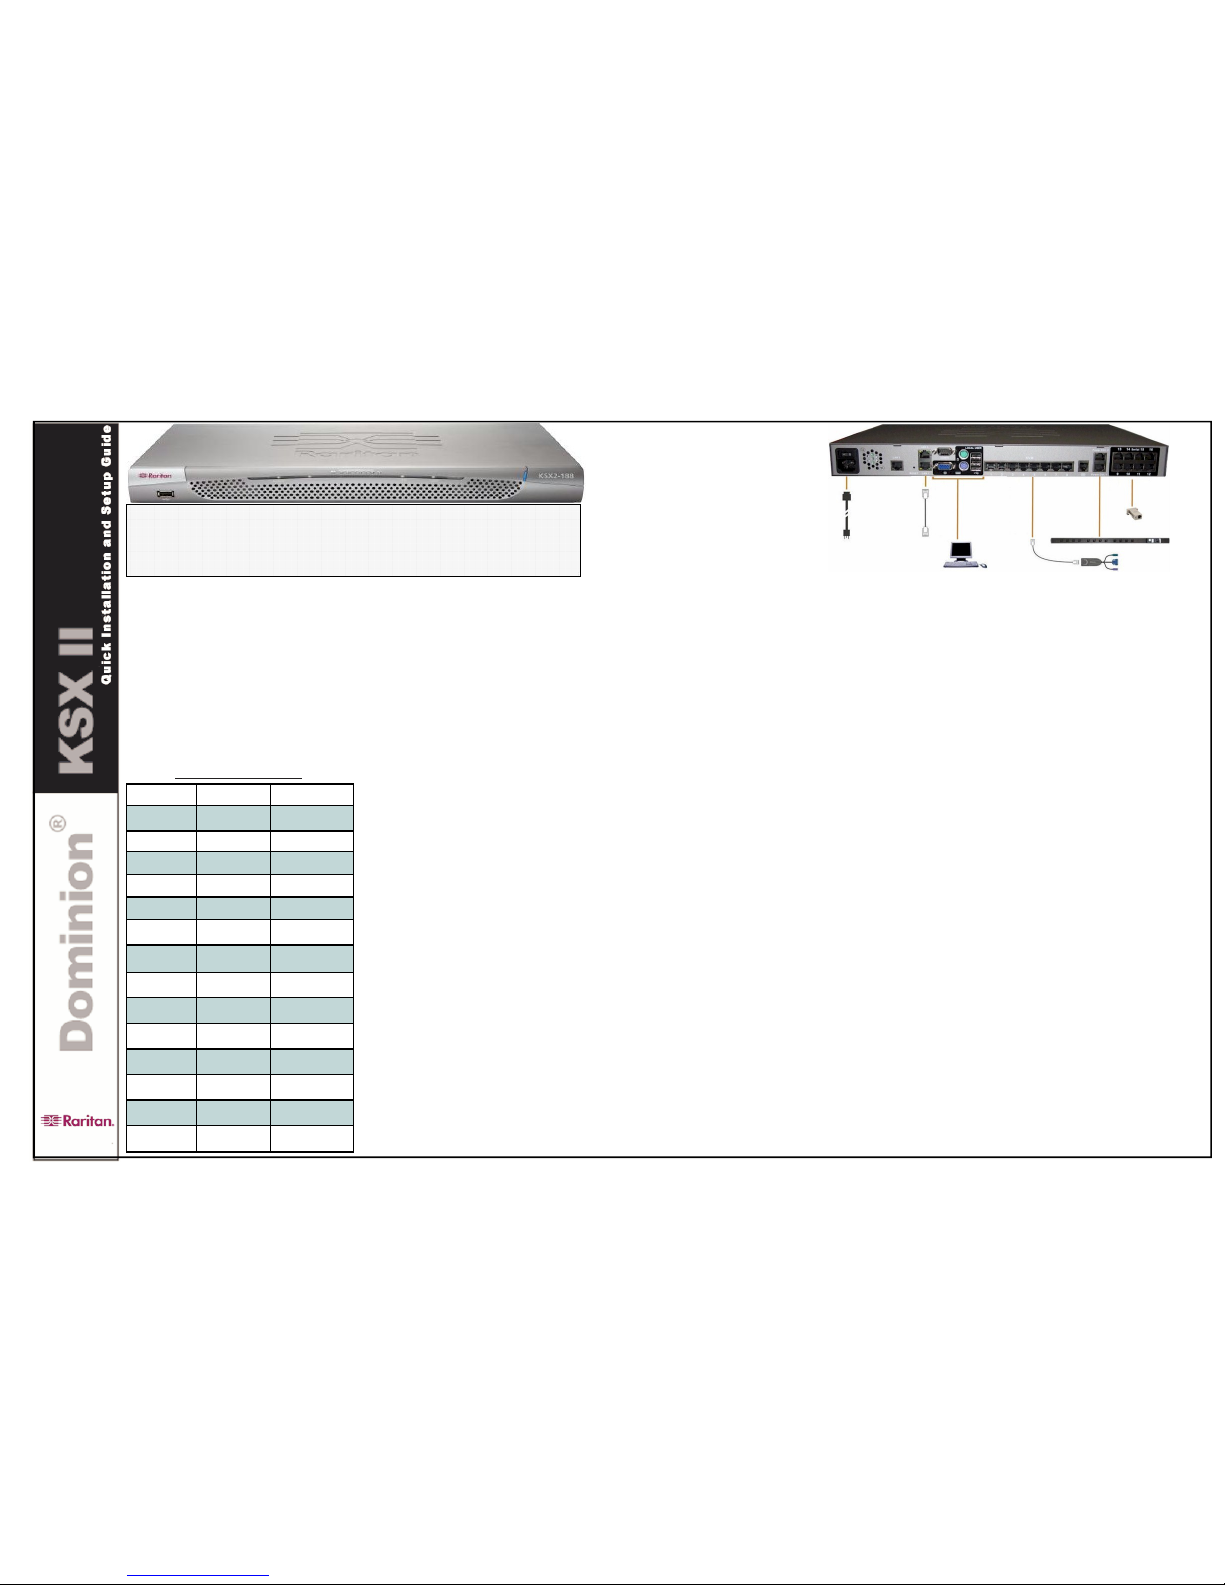
III. Connect Devices
A. AC Po wer
1. Attach the included AC power cord to the Dominion KSX II and plug into an AC power outlet.
2. For du al power failov er protection, a ttach the
second included AC power cord and plug it
into a di fferent power so urce than the fir st
power cord.
Note: If you only attach one power cord, the power
LED on the KSX II front panel will display red, because the system is set to automatically detect
both power sources. Please refer to Step V for
more information about turning off the automatic
power detection for the power source not in use.
B. Network Ports
Domini on KSX II provides two Ethernet por ts for
failover purposes (not for load-balancing). By default, only LAN1 is active and automatic failover is
disabled. When enabled, if the Dominion KSX II
internal network interface or the network switch to
which it is connected becomes unavailable, LAN2
will be enabled using the same IP address.
1. Connect a standard Ethernet cable (included)
from the network port labeled LAN1 to an
Ethernet switch, hub, or router.
2. To make use of the optional Dominion KSX II
Ethernet failover capability:
• Connect a standard Ethernet cable from
the network port labeled LAN2 to an
Ethernet switch, hub, or router.
• Enable Automatic Failover on the Network
Settings page.
C. Local Access Port (local PC)
For convenient access to target servers while at the
rack, us e the Dominion KS X II Local Access p ort.
While the local port is required for installation and
setup, it is optional for subsequent use. The local
port also provides a graphical user interface (the
KSX II Local Console) for administration and target
server access.
Attach a multi-sync VGA monitor, mouse, and keyboard to the respective Local User ports,
using either a PS/2 or USB keyboard and mouse.
D. Target Server Ports
Dominion KSX II uses standard UTP cabling
(Cat5/5e/6) to connect to each KVM and serial target server.
KVM Targets:
1. Use the appropriate Computer Interface Module
(CIM).
2. Attach the HD15 video connector of your CIM
to the video port of your target server. Ensure
that your target server’s video has already been
configured to a supported resolution and refresh rate.
3. (Cat5/5e/6) cable, connect the CIM to an available server port on the back of your Dominion
KSX II unit.
Serial Targets:
1. Use the appropriate serial adapter and connect
it to a ser ial console of a t arget server.
2. Connect one end of the UTP cable to the serial
Adapter and other end to the Dominion KSX II
unit.
IV. KSX II Ini tial Config uration
A. Change the Default Password
The Dominion KSX II unit ships with a default password. The first time you start th e Dominion KSX II
you are required to change that password.
1. Power ON the Dominion KSX II using the
power switch(es) at the back of the unit. Please
wait for the Dominion KSX II unit to boot. (A
beep signals completion of the boot.)
2. Once the unit has booted, the KSX II Local
Consol e is visible on the m onitor attach ed to
the Dominion KSX II local port. Type the default
username (admin) and password (raritan) and
click Login. The Change Password screen is
displayed.
3. Type your old password (raritan) in the Old
Passwo rd field.
4. Type a new password in the New Password
field; retype the new password in the Confirm
New Password field. Passwords can be up to
64 characters long and can consist of English
alphanumeric and printable special characters.
5. Click Apply.
6. You will receive confirmation that the password
was successfully changed. Click OK. The Port
Access page opens.
Congratulations on your purchase of Dominion® KSX II, the industry’s most full-featured, enterprise class, secure digital KVM (Keyboard, Video, Mouse) and serial console switch. This Quick Setup Guide explains how to
install and configure the Dominion KSX II. Follow the instructions carefully to ensure a quick and easy installation. For more detailed information on any aspect of the Dominion KSX II, consult the accompanying User Guide
accessible from the Raritan User Manuals & Quick Setup Guides CD or from the Raritan web site Product Documentation Support page.

B. Assign an IP Address
1. Select Device Settings > Network Settings. The Network Basic Settings page opens.
2. Specify a meaningful Device Name for your Dominion KSX II unit; up to 16 alphanumeric
and special characters, no spaces.
3. Selec t the IP configur ation from the I P auto configur ation drop-dow n list:
• None (Static IP). This is the recommended option because the Dominion KSX II is an
infrastructure device and its IP Address should not change. This option requires that
you manually specify the network parameters.
• DHCP. With this option, network param eters are assigned by the DHCP server.
4. If you select an IP configuration of None (static IP), type the TCP/IP parameters for your
Dominion KSX II unit: IP address, Subnet mask, Gateway IP address, Primary DNS
server IP address, and (optional) Secondary DNS server IP address.
C. Name Target Servers
1. Connect all target servers (if you have not
already done so).
2. Select Device Settings > Port Configuration.
The Port Configuration page opens.
3. Clic k on the Port Name fo r the desired tar get
server. The Port Page opens.
4. Type a name (up to 32 alphanumeric and
special characters).
5. Click OK.
6. Repeat for all target servers.
Switching between Target Servers
Domini on KSX II provides the abil ity to switch from one target server to
another. This feature is available in the Dominion KSX II Remote Console and MPC.
1. While already using a target server, access the Dominion KSX II
Port Access page.
2. Clic k the Port Name of t he target you want to acces s now. The Port
Action menu is displayed.
3. Select the Switch From option from the Port Action Menu. The Virtual KVM Client window opens to the new target server selected.
Disconnecting a Target Server
1. From the Port Access page, click the Port Name of the target you
are accessing. The Port Action menu is displayed.
2. Click Disconnect from the Port Action menu.
VIII. For Additional Information
Contact Raritan Technical Support by telephone (732) 764-8886, fax
(732) 764-8887, or email tech@raritan.com, Monday through Friday 8:00
AM to 8:00 PM Eastern Time. For more information about the Dominion
KSX II and the entire Raritan product line, refer to the Raritan User
Manuals & Quick Setup Guides CD ROM or Raritan’s Website http://
www.raritan.com/support/productdocumentation.
V. Create Users and Groups
User Groups are used with local and remote authentication (via RADIUS or LDAP). It is a good idea to define User Groups before creating individual users, because when you add a user, you must assign
that user to an existing user group.
VI. Launching the KSX II Remote Console
1. Log on to any workstation with network connectivity to your Dominion KSX II unit and Java Runtime Environment v1.4.2_2 or
higher installed (JRE is available at http://java.sun.com/). JRE
version 1.5 is recommended for optimum performance; version
1.6 is also supported but has not been fully tested.
2. Launch a supported web browser such as Internet Explorer (IE) or
Firefox.
3. Type the IP address that you assigned to your Dominion KSX II
unit. The default IP address is https://192.168.0.192. The login
page opens.
4. Type your username and password. The default username is
admin and the default password is raritan.
5. Click Login.
Connecting to a Target
1. From the Port Access page, click the Port Name of the KVM target
you want to access. The Port Action Menu is displayed.
2. Select Connect from the Port Action menu. A Virtual KVM Client
window opens to the target server connected to that port.
VII. Access a nd Control T argets Remot ely
The Dominion KSX II Port Access page provides a list of all Dominion
KSX II ports, the connected target servers, their status,
and availability.
January 2008
 Loading...