

Raritan ASMI G4 User Manual

Raritan ASMI G4 Module User Manual

Raritan ASMI G4 Module User Manual

Table of Contents
Preface ....................................................................................................................................................viii
Copyright
........................................................................................................................................ viii
Document Version
.......................................................................................................................... viii
Trademarks
..................................................................................................................................... viii
About the ASMI G4 Module
......................................................................................................... viii
Limited Warranty
..............................................................................................................................ix
Limitations of Liability
.....................................................................................................................ix
TechnicalSupport
..............................................................................................................................ix
1. The Quick Start Guide
..........................................................................................................................1
About the Raritan ASMI G4 Remote Management Card
..................................................................1
Connecting the ASMI G4 Module to the Host System
......................................................................1
Initial Network Configuration
............................................................................................................1
Web Interface
.....................................................................................................................................2
The Remote Console
..........................................................................................................................2
2. Introduction
............................................................................................................................................4
General Information
...........................................................................................................................4
Features
..............................................................................................................................................4
ASMI add-on Card System Components
...........................................................................................5
When the Server is up and running
....................................................................................................5
When the Server is dead
.....................................................................................................................5
3. ASMI Installation Guide
.......................................................................................................................7
About the ASMI Add-On Card
..........................................................................................................7
Connectors
.........................................................................................................................................7
Connecting the ASMI Add-On Card to the Host System
.........................................................7
Connecting the Ethernet
...........................................................................................................7
10 Mbps Connection
.................................................................................................................8
100 Mbps Connection
...............................................................................................................8
4. ASMI G4 Module Configuration
..........................................................................................................9
Initial Configuration
...........................................................................................................................9
Using the Psetup Tool
........................................................................................................................9
Using the Psetup Tool via Graphical User Interface
................................................................9
Running the Linux Psetup Tool via Command Line
..............................................................11
MAC Address Detection
........................................................................................................12
Authentication
........................................................................................................................12
Initial Configuration via DHCP Server
............................................................................................13
Web Interface
...................................................................................................................................13
Mouse and Keyboard Configuration
................................................................................................13
Three Blind Mice, See How They Run...
...............................................................................14
Remote Mouse Settings
..........................................................................................................14
Auto Mouse Speed and Mouse Synchronization
....................................................................14
Host System Mouse Settings
..................................................................................................15
Single and Double Mouse Mode
............................................................................................16
Recommended Mouse Settings
..............................................................................................16
VideoModes
...........................................................................................................................17
iii

Resetting the ASMI module to its Factory Settings.........................................................................17
Using the KiraTool
.................................................................................................................17
5. ASMI Module Usage
............................................................................................................................18
Prerequisites
.....................................................................................................................................18
Login and Logout to the ASMI Module
..........................................................................................19
Login into the ASMI module
.................................................................................................19
Navigation
........................................................................................................................................20
Logging out of the ASMI module
....................................................................................................21
The Remote Console
........................................................................................................................22
General Description
................................................................................................................22
Main Window
.........................................................................................................................23
Remote Console Control Bar
........................................................................................23
Remote Console Options
..............................................................................................25
Monitor Only
.......................................................................................................26
Exclusive Access
.................................................................................................26
Screenshot to Clipboard
......................................................................................26
Readability Filter
.................................................................................................26
Scaling
.................................................................................................................26
Mouse Handling
..................................................................................................27
Local Cursor
........................................................................................................28
Chat Window
.......................................................................................................28
Soft Keyboard
......................................................................................................28
Local Keyboard
...................................................................................................30
Hotkeys
................................................................................................................30
Encoding
..............................................................................................................31
Remote Console Status Line
..................................................................................................33
Optimizing the Video Picture
...........................................................................................................35
Using the ASMI module with low bandwidth
........................................................................35
6. Menu Options
.......................................................................................................................................36
Remote Control
................................................................................................................................36
KVM Console
.........................................................................................................................36
Remote Power
.........................................................................................................................36
VirtualMedia
...................................................................................................................................37
Floppy Disk
............................................................................................................................38
Dual Floppies
................................................................................................................38
Upload a Floppy Image
.................................................................................................39
Drive Redirection
...................................................................................................................39
Drive Redirection Options
............................................................................................40
Software Requirements
.................................................................................................41
Drive Redirection Tool
..................................................................................................41
Configuration
.......................................................................................................41
Drive Selection
....................................................................................................42
Write Support
......................................................................................................43
Device Authentication
.........................................................................................43
Navigation Buttons
..............................................................................................44
Creating an Image
.........................................................................................................45
Floppy Images
.....................................................................................................45
iv

UNIX and UNIX-like OS..........................................................................45
MS Windows
.............................................................................................45
CD ROM/ISO 9660 Images
................................................................................46
UNIX and UNIX-like OS
..........................................................................46
MS Windows
.............................................................................................46
System Health
..................................................................................................................................47
Chassis Control
.......................................................................................................................47
Monitor Sensors
......................................................................................................................48
System Event Log
...................................................................................................................50
User Management
............................................................................................................................52
Change Password
....................................................................................................................53
Users And Groups
..................................................................................................................53
Permissions
.............................................................................................................................55
KVM Settings
..................................................................................................................................57
User Console
..........................................................................................................................57
Remote Console Settings for Users
..............................................................................57
Transmission Encoding
.................................................................................................58
Remote Console Type
...................................................................................................59
Miscellaneous Remote Console Settings
......................................................................60
Mouse Hotkey
...............................................................................................................60
Remote Console Button Keys
.......................................................................................60
Keyboard/Mouse
....................................................................................................................61
Key Release Timeout
....................................................................................................61
USB Mouse Type
..........................................................................................................62
Mouse Speed
.................................................................................................................62
Device Settings
.................................................................................................................................62
Network
..................................................................................................................................62
Basic Network Settings
.................................................................................................63
Miscellaneous Network Settings
...................................................................................64
LAN Interface Settings
.................................................................................................65
Dynamic DNS
........................................................................................................................65
Security
...................................................................................................................................68
Certificate
...............................................................................................................................70
Date And Time
.......................................................................................................................73
Authentication Settings
..........................................................................................................74
LDAP Access
................................................................................................................75
Using the RADIUS Server
............................................................................................76
Event Log
...............................................................................................................................77
Event Log Targets
.........................................................................................................79
Event Log Assignments
................................................................................................80
SNMP
.....................................................................................................................................80
Maintenance
.....................................................................................................................................82
Device Information
.................................................................................................................83
Event Log
...............................................................................................................................84
Update Firmware
....................................................................................................................85
Unit Reset
...............................................................................................................................87
v

A. Frequently Asked Questions..............................................................................................................89
B. Glossary
................................................................................................................................................91
C. Configuring the RADIUS server
.......................................................................................................93
Prerequisites
.....................................................................................................................................93
Add and configure a RADIUS client
...............................................................................................93
Setup a custom remote access policy
...............................................................................................94
D. Key Codes
............................................................................................................................................95
E. Specifications
.......................................................................................................................................98
Sizes and Weight
..............................................................................................................................98
Environment
.....................................................................................................................................98
Temperature
............................................................................................................................98
Humidity Range
......................................................................................................................98
F. Raritan Corp. Warranty Information
...............................................................................................99
Limited Warranty
.............................................................................................................................99
Customer Remedies
.........................................................................................................................99
No Other Warranties
........................................................................................................................99
No Liability For Consequential Damages
........................................................................................99
G. GNU General Public License (GPL)
...............................................................................................101
H. The OpenLDAP Public License
.......................................................................................................106
vi

List of Tables
1-1. Initial Network Configuration ..............................................................................................................1
1-2. Login Settings
.......................................................................................................................................2
2-1. Hardware failures
.................................................................................................................................5
2-2. Host system failures and how they are detected
...................................................................................6
4-1. Initial network configuration
................................................................................................................9
4-2. Default User Settings
..........................................................................................................................13
5-1. Default User Settings
..........................................................................................................................20
5-2. Front End Buttons
..............................................................................................................................21
5-3. Buttons displaying the access state
....................................................................................................34
5-4. Buttons displaying the Monitor Only state
.........................................................................................34
D-1. Key Names
........................................................................................................................................95
E-1. ASMI G4 Specification
......................................................................................................................98
E-2. Temperature
.......................................................................................................................................98
E-3. Humidity Range
.................................................................................................................................98
vii

Preface
Copyright
Copyright 2004-2007 Raritan Corp.
All rights reserved.
Document Version
Version: 1.8
Date: Tuesday, February 27, 2007
Trademarks
This publication contains proprietary information which is protected by copyright. No part of this
publication may be reproduced, transcribed, stored in a retrieval system, translated into any language or
computer language, or transmitted in any form whatsoever without the prior written consent of the
publisher, Raritan.
Raritan Corp. acknowledges the following trademarks:
• Raritan is a registered trademark of Raritan Corporation.
• Windows 98, Microsoft Windows, Windows NT, Windows 2000 and Windows XP are trademarks of
Microsoft Corporation.
• IBM, AT, VGA, PS/2, and OS/2 are registered trademarks and XT and CGA are trademarks of
International Business Machines Corporation.
Other trademarks and trade names may be used in this document to refer to either the entities claiming
the marks and names or their products. Raritan disclaims any proprietary interest in trademarks and trade
names other than its own.
The firmware of this product uses in part software under GPL license. See
Appendix G for the license
text.
This product includes software developed by the University of California, Berkeley and its contributors.
This software is based in part on the work of the Independent JPEG Group.
This product includes software developed by the OpenSSL Project for use in the OpenSSL Toolkit
(http://www.openssl.org/).
Authors: Raritan Team
viii

Preface
About the ASMI G4 Module
The ASMI module (ASMI G4) provides remote server management capabilities: you can use the ASMI
add-on card to manage and monitor components in your servers. The ASMI G4 offers a comprehensive
hardware solution for server management.
Limited Warranty
The buyer agrees that if this product proves to be defective, Raritan is only obligated to repair or replace
this product at Raritan’s discretion according to the terms and conditions of Raritan’sgeneral trading
conditions.
Raritan shall not be held liable for any loss, expenses or damage, directly, incidentally or consequentially
resulting from the use of this product. Please see the Warranty Information shipped with this product for
full warranty details.
Limitations of Liability
Raritan shall in no event be held liable for any loss, expenses or damages of any kind whatsoever,
whether direct, indirect, incidental, or consequential (whether arising from the design or use of this
product or the support materials provided with the product). No action or proceeding against Raritan may
be commenced more than two years after the delivery of the product to the buyer.
The licensee agrees to defend and indemnify Raritan from any and all claims, suits, and liabilities
(including attorney’s fees) arising out of or resulting from any actual or alleged act or omission on the
part of Licensee, its authorized third parties, employees, or agents, in connection with the distribution of
Licensed Software to end-users, including, without limitation, claims, suits, and liability for bodily or
other injuries to end-users resulting from use of Licensee’s product not caused solely by faults in
Licensed Software as provided by Raritan to Licensee.
Technical Support
If you need help installing, configuring or running the ASMI G4 Module, please call your Raritan
Technical Support representative.
We invite you to access Raritan’s Web site (www.raritan.com) where you shall find all modifications
made after the editorial deadline.
ix
Chapter 1. The Quick Start Guide
About the Raritan ASMI G4 Remote Management Card
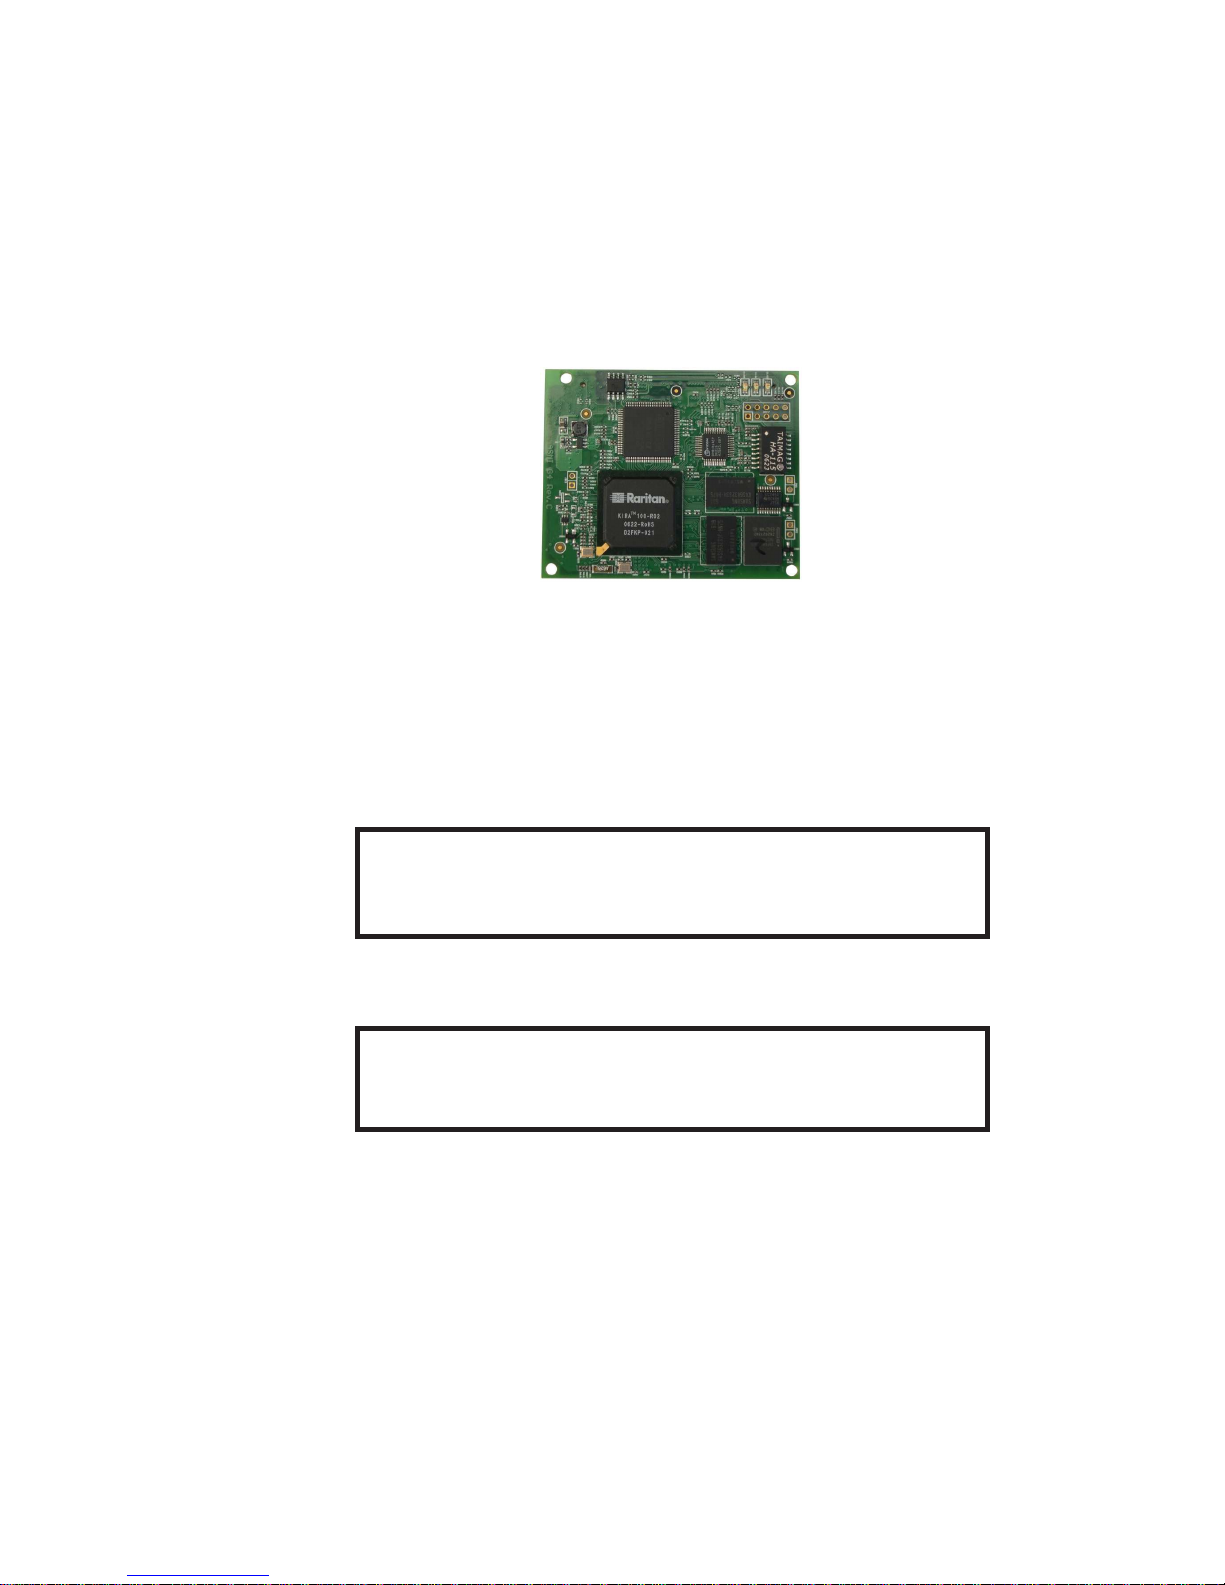
Figure 1-1. Front View of the ASMI G4 Module
The ASMI G4 add-on card provides remote server management capabilities. You can use the ASMI G4
add-on card to manage and monitor components in your servers through the WAN/LAN. The ASMI G4
add-on card offers a comprehensive hardware solution for server management.
Connecting the ASMI G4 Module to the Host System
Warning
Please note: the firmware of the ASMI G4 board deliveredto you is customized for
use with the specified motherboard model. Do not use with other motherboards.
Connecting the ASMI G4 module to the Host System is easy: turn off the host, find the correct slot and
carefully insert the ASMI G4 module into the slot.
Warning
You should disconnect the host from the power supply completely,including
disconnecting the power supply cable.
Initial Network Configuration
Initially, the ASMI network interface is configured with the parameters shown in
Table 1-1.
1
Chapter 1. The Quick Start Guide
Table 1-1. Initial Network Configuration
Parameter Value
IP auto configuration DHCP
IP address Netmask Gateway -
Warning
If the DHCP connection fails on boot up, the ASMI module will not havean IP
address and will not function on the network.
If this initial configuration does not meet your local requirements, adjust the values to your needs. To
retrieve the IP address of the ASMI add-on card, you could look into the records on the DHCP server.
There are special tools provided by us to ease the configuration and setup of the ASMI board. One of
these tools is called psetup. This tool will automatically seek out ASMI devices on your local subnet and
allow you to set them up.
Web Interface
The ASMI add-on card may be accessed using a standard Java enabled web browser. You may use the
HTTP protocol or a secure encrypted connection via HTTPS. Just enter the configured IP address of the
ASMI add-on card into your web browser.
The initial login settings for the web interface are as follows:
Table 1-2. Login Settings
User Password
super pass
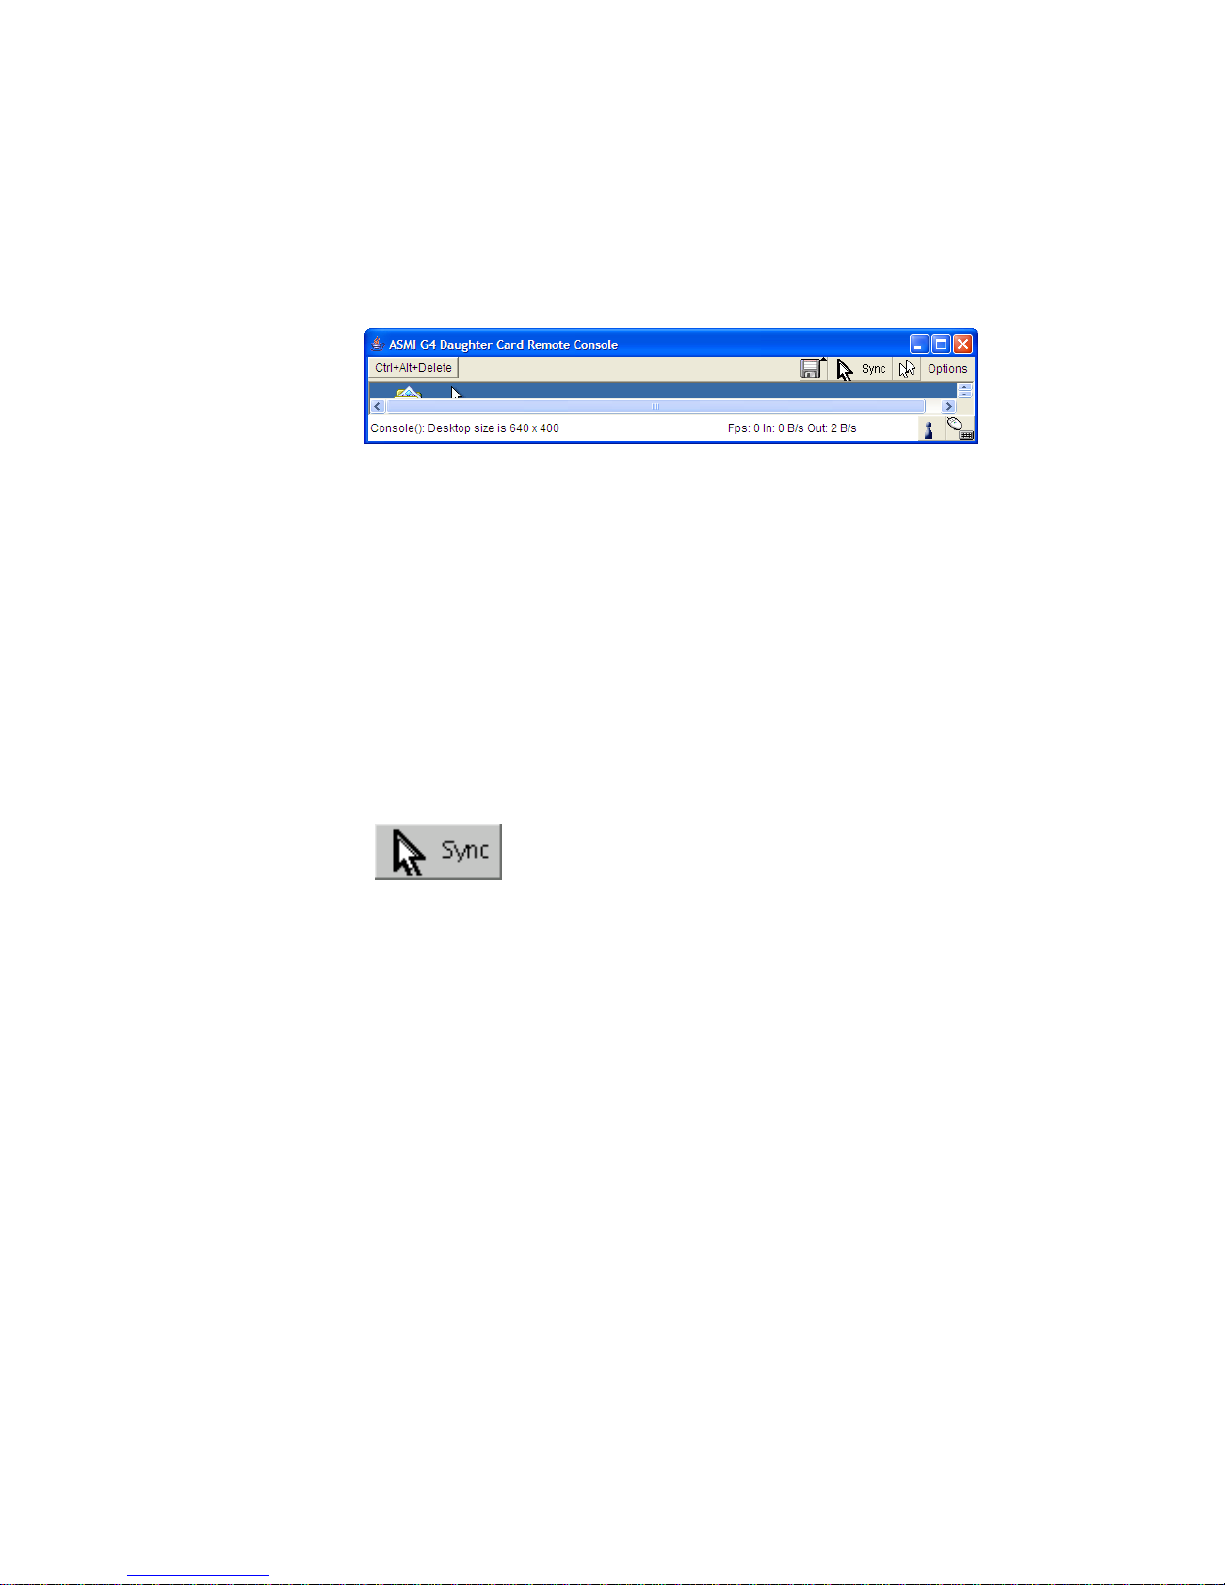
The Remote Console
The Remote Console is the redirected screen, keyboard and mouse of the remote host system in which
the ASMI is installed. The web browser which is used for accessing the ASMI module has to supply a
Java Runtime Environment version 1.4 or higher.
Note: You can get things working with lower numbered versionsof the JAVA Environment, but we
cannot guarantee that all features will be available.
2
Chapter 1. The Quick Start Guide
The Remote Console will behave exactly the same way as if you were sitting directly in front of the
screen of your remote system. That means that both the keyboard and mouse can be used in the usual
way.Open the console by choosing the appropriate link in the navigation frame of the HTML frontend.
Figure 1-2 shows the top of the Remote Console.
Figure 1-2. Top part of the Remote Console
Generally with modern operating system’s mouse devices (usually connected to the USB port) you do
not need to worry about the mouse synchronization and similar parameters. This generally applies to all
"modern" Windows Operating Systems like Windows200 and 2003, XP etc. Macintosh OS/X is the
same. They use "Absolute Mouse Mode".
Alternatively, there is a so called "RelativeMouse Mode" supported by most Linux and Unix operating
systems ("Other Operating Systems"). Withthis mode, local and remote mouse pointers might get out of
sync (i.e. might not point to the same position) when the local mouse or another KVM session has been
used at the same time.
The following options are ONLY visible and availableif you choose the option "Other Operating
Systems" for the mouse.
In this case there are some options to choose from the menu, the most important one being the following:
Sync Mouse
Choose this option in order to synchronize the local with the remote mouse cursor.
3
Chapter 2. Introduction
General Information
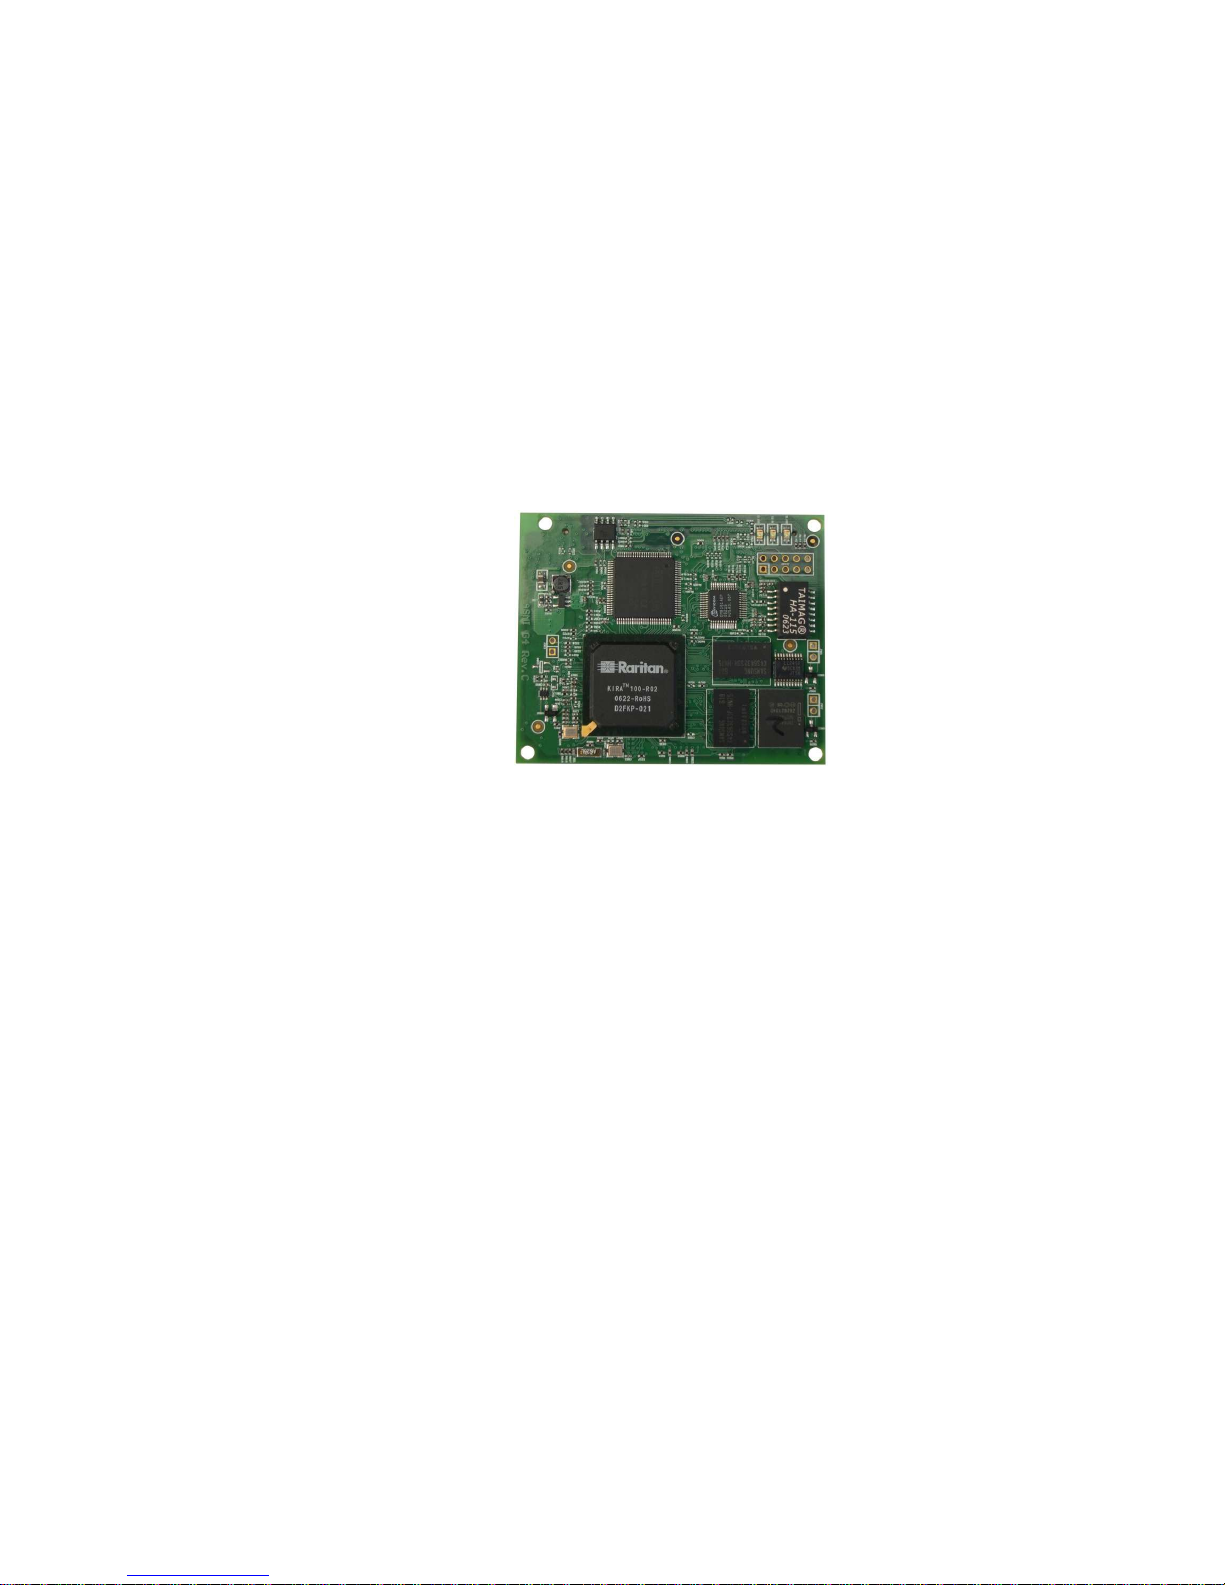
The ASMI module is an integrated solution for your server system.
Based on an embedded operating system, the ASMI G4 add-on card provides both exceptional stability
and permanent availability even when your server is down or powered off.
As a system administrator, you can use the ASMI Module to gain location-independent remote access to
respond to critical incidents and to undertake necessary maintenance.
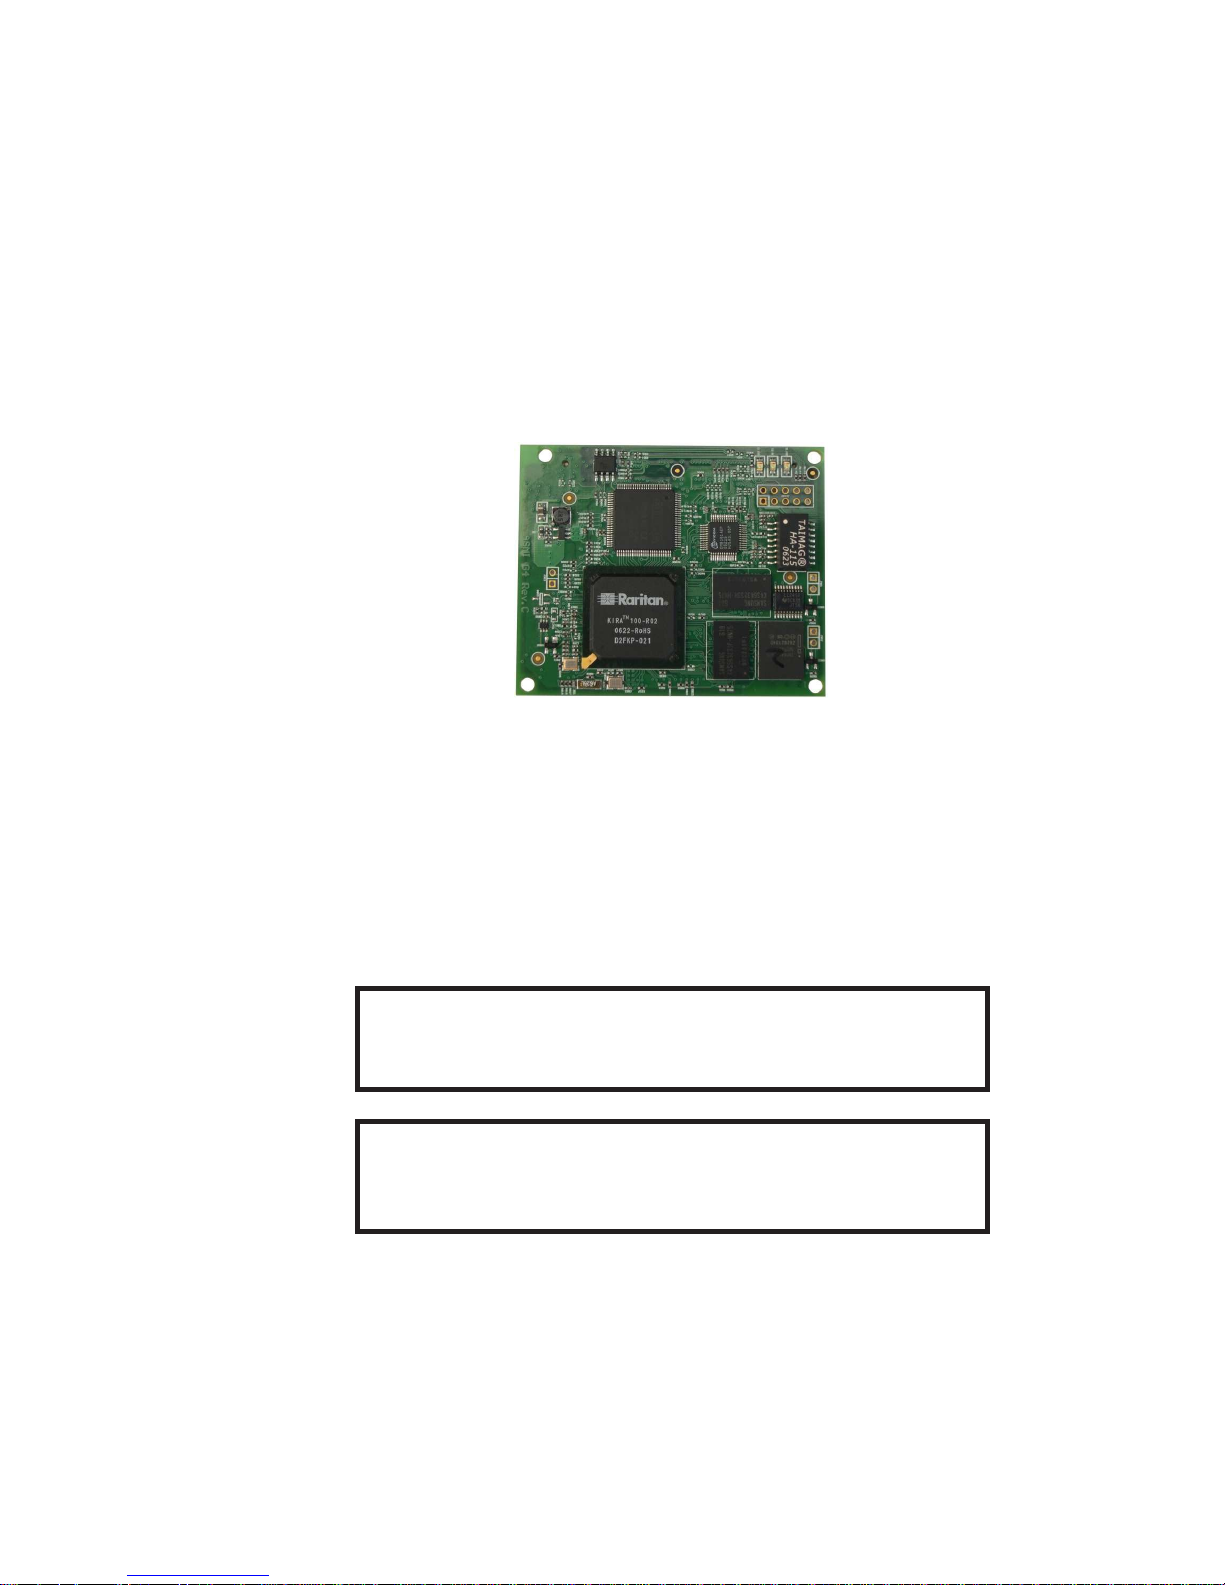
Figure 2-1. ASMI G4 Module
Features
The ASMI add-on card defines a new class of remote access devices. It offers convenient, remote KVM
access and control via LAN or Internet. It captures, digitizes, and compresses video output and transmits
it with keyboard and mouse data to and from a remote computer. Remote access and control software
runs only on its embedded processors but not on the mission critical servers, so that there is no
interference with server operation or impact on network performance. Furthermore, the ASMI add-on
card offers integrated remote power management using IPMI. Other key features of the ASMI add-on
card are:
• ASMI Specification Compliance
• IPMI V2.0 Compliance
• KVM (keyboard, video, mouse) access over TCP/IP networks
• No impact on server or network performance
• Automatically senses video resolution for best possible screen capture
4

Chapter 2. Introduction
• Sophisticated mouse tracking and synchronization
• Local Mouse suppression (only when using SUNs Java Virtual Machine)
• Works independently from the remote host OS. You can access the remote host even in its pre-boot
phases like POST and BIOS setup
ASMI add-on Card System Components
The ASMI add-on card is an add-on card with the following dimensions: 70mm (L) x 67.5mm (W) The
ASMI add-on card is shipped with:
• The ASMI G4 module
• CD-ROM with documentation: Installation Guide and User Manual
• The Quick Start Guide
When the Server is up and running
The ASMI module gives you full control over the remote server. The Management Console allows you to
access the remote server’s graphics, keyboard and mouse and to send special commands to the server.
You can also perform periodic maintenance of the server. Using the Console Redirection Service you can
do the following:
• Reboot the remote system (a graceful shutdown)
• Monitor the boot process
• Boot the system from a separate (local) partition to load a diagnostic environment
• Run special diagnostic programs
When the Server is dead
Obviously,fixing hardware defects is not possible using a remote management device. Nevertheless, the
ASMI module gives the administrator valuable information about the type of a hardware failure.
Serious hardware failures can be categorized into five different categories with different probabilities.1:
Table 2-1. Hardware failures
Category Probability
Hard disk failure 50%
Power cable detached, power supply failure 28%
CPU, Controller, motherboard failure 10%
5

Chapter 2. Introduction
Category Probability
CPU fan failure 8%
RAM failure 4%
Using the ASMI module, administrators can determine which kind of serious hardware failure has
occurred (see
Table 2-2).
Table 2-2. Host system failures and how they are detected
Type of failure Detected by
Hard disk failure Console screen, CMOS set-up information
Power cable detached, power supply failure Server remains in power off state after power on
command has been given.
CPU, Controller, main board failure Power supply is on, but there is no video output.
CPU fan failure By IPMI or server specific management software
RAM failure Boot-Sequence on boot console
Notes
1. According to a survey made by Intel Corp.
6
Chapter 3. ASMI Installation Guide
About the ASMI Add-On Card
The ASMI add-on card redirects local keyboard, mouse and video data to a remote administration
console. All data is transmitted using the TCP/IP protocol family. The ASMI add-on card is especially
useful in a multi-administrator environment.
Figure 3-1. ASMI G4 Add-On Module
Connectors
Connecting the ASMI Add-On Card to the Host System
Connecting the ASMI add-on card to the host system is easy: turn off the host, locate the ASMI slot and
carefully insert the ASMI add-on card into the slot.
Warning
Please note: the firmware of the ASMI board delivered to you is customized for use
with the specified motherboard. Do not use with other motherboards.
Warning
You should turn off the power of the host completely, that includes detaching the
power supply cable.
7

Chapter 3. ASMI Installation Guide
Connecting the Ethernet
The ASMI add-on card has a dedicated RJ45 Ethernet connector - this has to be provided by the native
system. The connector may be used either as a 100 Mbps 100Base-TX connection or as a 10 Mbps
10BASE-T connection. The adapter can sense the connection speed and will automatically adjust to it.
10 Mbps Connection
For 10BASE-T Ethernet networks the Fast Ethernet adapter uses category 3, 4, or 5 UTP cable. To
establish a 10 Mbps connection, the cable has to be connected to a 10BASE-T hub.
1. Make sure that the cable is wired appropriately for a standard 10BASE-T adapter.
2. Align the RJ45 plug with the notch on the adapter’sconnector and insert it into the adapter’s
connector. You should hear an audible click, as the Ethernet plug latches.
100 Mbps Connection
For 100BASE-TX Ethernet networks the ASMI module supports category 5 UTP cabling. To establish a
100 Mbps connection, the cable has to be connected to a 100BASE-TX hub.
1. Make sure that the cable is wired appropriately for a standard 100BASE-TX adapter.
2. Align the RJ45 plug with the notch on the adapter’sconnector and insert it into the adapter’s
connector. You should hear an audible click, as the Ethernet plug latches.
Warning
The UTP wire pairs and configuration for 100BASE-TX cable are identical to those
for 10BASE-T cable when using category 5 UTP cable.
8

Chapter 4. ASMI G4 Module Configuration
Initial Configuration
The ASMI module’scommunication interfaces are all based on TCP/IP. It comes pre-configured with the
IP configuration listed in
Table 4-1. Additionally you can do some simple configuration using the serial
interface.
Table 4-1. Initial network configuration
Parameter Value
IP auto configuration DHCP
IP address Netmask Gateway -
Warning
If the DHCP connection fails on boot up, the ASMI module will not haveobtained
an IP address. This means it will not be accessible over the network.
If this initial configuration does not meet your requirements, this chapter describes the initial IP
configuration that is necessary to access the ASMI module for the first time.
Using the Psetup Tool
The psetup tool is used to determine the IP address assigned to the ASMI by the DHCP server or to
change the device’s initial network configuration. It allows you to access the ASMI module even when it
has no configured IP address.
Psetup can access the ASMI module in two ways:
Locally
Psetup can be invoked directly on the host containing the ASMI module. The psetup tool uses USB
to connect to the module.
Remotely
Psetup can be invoked on any host connected to the same subnet (broadcast domain) as the ASMI
module. Psetup uses UDP broadcasts to find the module.
9
Chapter 4. ASMI G4 Module Configuration
Using the Psetup Tool via Graphical User Interface
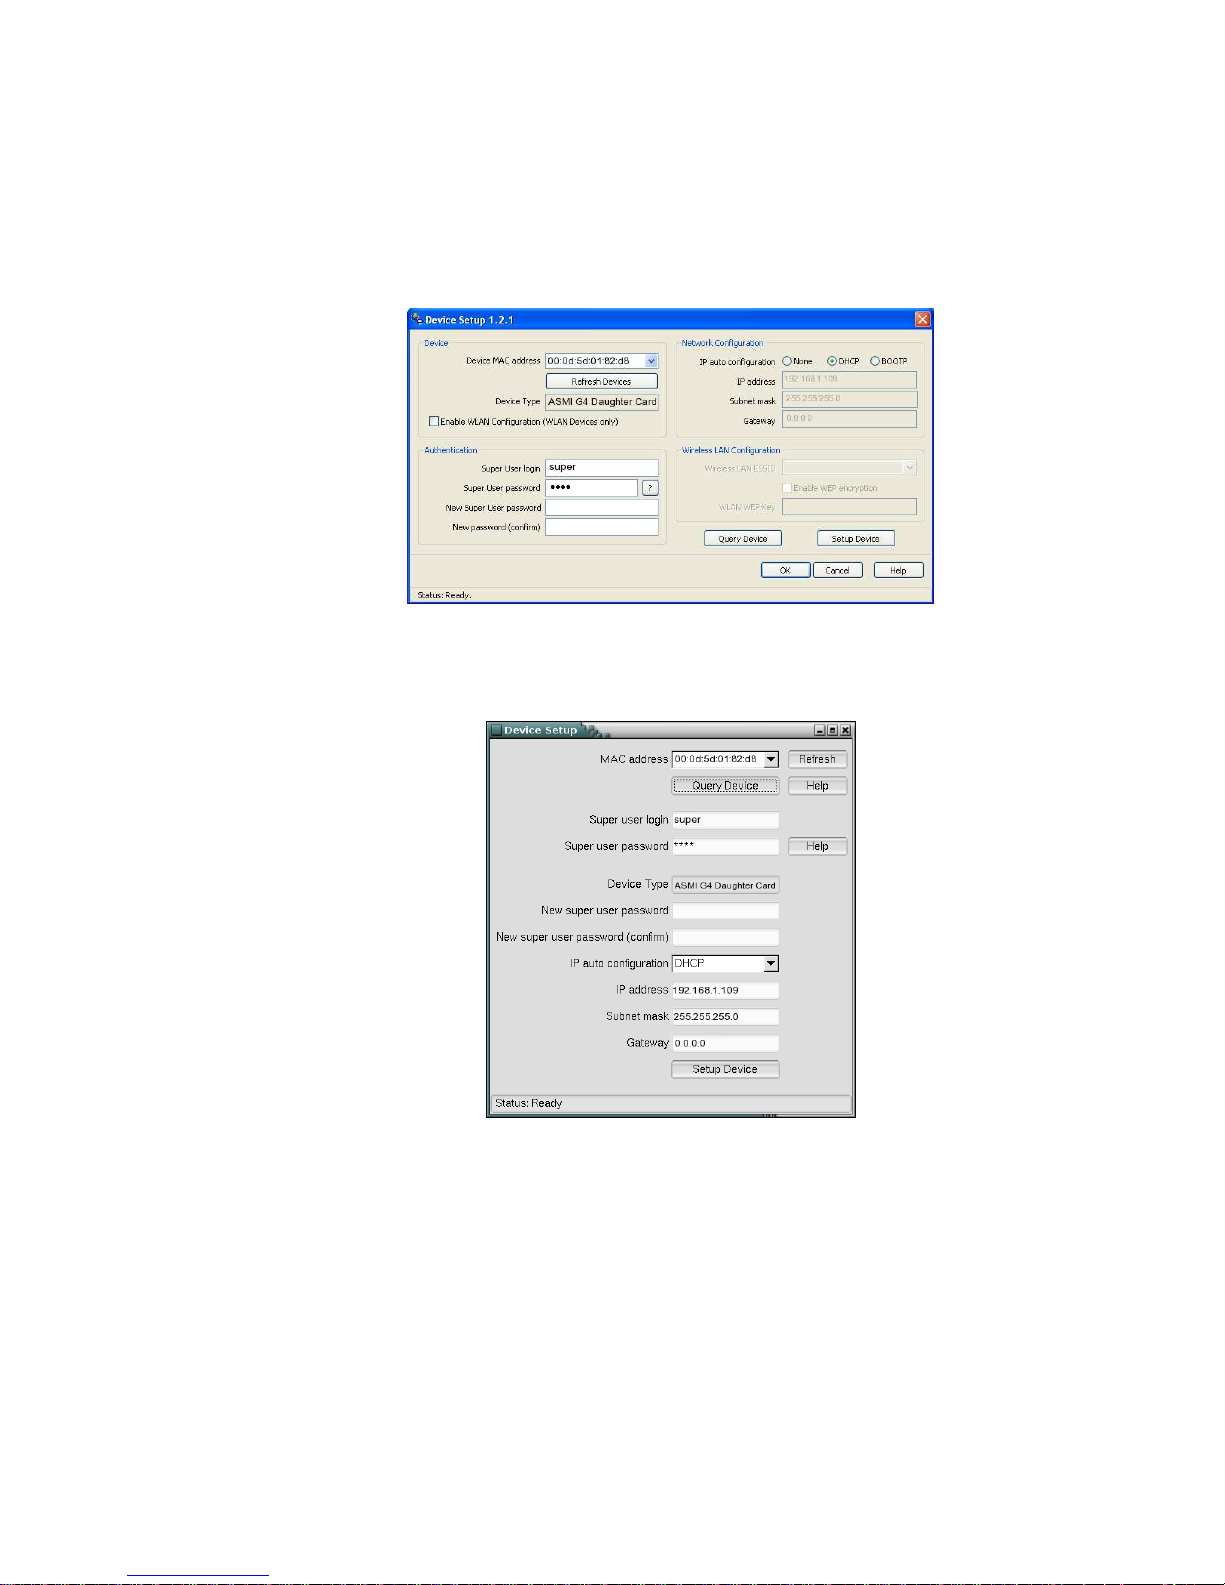
After invoking psetup a window opens as shown in
Figure 4-1 (Windows Version) and Figure 4-2 (Linux
Version).
Figure 4-1. Psetup Tool (Windows Version)
Figure 4-2. Psetup Tool (Linux Version)
On startup, the psetup tool automatically auto-detects all ASMI modules in the local host and on the
network subnet. The MAC addresses of all detected modules are available as a drop down list. This list
allows you to connect to a specific ASMI module. You can retrigger the auto-detection by hitting
"Refresh Devices" or "Refresh".
10

Chapter 4. ASMI G4 Module Configuration
After selecting a device, the "Device Type"should show "Raritan ASMI G4". You may now query the
current network settings of that device using "Query Device".
In order to change the network settings or to assign a new super-user password, you have to authenticate
as the super-user. See
the Section called Authentication.
Running the Linux Psetup Tool via Command Line
The following list shows the command syntax and their usage:
--mac <MAC address of the device>
Shows the current network configuration of the device with the specified MAC(Ethernet) address.
--ip <new IP address>
Set a new IP address.
--ipacp <dhcp|bootp|none>
Set the auto configuration mode to either DHCP or BOOTP. Enter "none" if you want to set the
network access parameters manually.
--netmask <net mask>
Set a new netmask.
--gateway <gateway address>
Set a new gateway address.
--login <username>
A valid user name with administration rights is required in order to change the network
configuration.
--pw <password>
Password of the user specified in the above --login option.
--pw-new <password>
The user specified with --login gets the new password entered here.
Here is an example of the commands described above and their effects:
Displaying the current network settings
test@teststation:~# /home/test/psetup --mac 00:0D:5D:00:65:78
IP auto configuration: dhcp
IP address: 192.168.5.135
Subnet mask: 255.255.255.0
Gateway: 192.168.5.1
11

Chapter 4. ASMI G4 Module Configuration
Changing the network settings
test@teststation:~# /home/test/psetup
--mac 00:0D:5D:00:65:78 --ipacp none --ip 192.168.5.55
--gateway 192.168.5.1 --netmask 255.255.255.0
--login super --pw pass
Device configured successfully.
MAC Address Detection
Using the Psetup Tool for Windows
The MACaddress of the ASMI module is displayed in the top left hand corner.In order to manually
detect the MAC address, press "Refresh Devices". The displayed MAC address corresponds to the
MAC address printed on the sticker attached to the ASMI module. If this is not the case please
contact our Product Support immediately.
The lower right corner of the window shows two buttons: "Query Device" and "Setup Device".
Press the "Query Device"button to display the preconfigured values of the network configuration.
The values are displayed in the appropriate text fields. If necessary,adjust the network settings to
your needs. If you wish to save the changes enter a user name and the proper password, then press
the "Setup Device" button.
Using the Linux Psetup Tool
The window the MAC address of the device is displayed in the top edge of the window. In order to
manually detect the MAC address, press the button "Refresh". The displayed MAC address
corresponds to the MAC address printed on the sticker attached to the ASMI module. If this is not
the case please contact our Product Support immediately.
Furthermore, there are two buttons on the window: "Query Device" and "Setup Device". Press the
"Query Device" button in order to display the preconfigured values of the network configuration.
The values are displayed in the corresponding text fields. If necessary,adjust the network settings to
your needs. If you want to save the changes enter a user name and an appropriate password. Press
the "Setup Device" button to finish.
Authentication
Enter your login as a super-user and change your password, so you can adjust the authentication settings.
Super-user login
Enter the login name of the super-user. The initial value is "super".
Super-user password
Enter the current password for the super-user. The initial value is "pass".
12

Chapter 4. ASMI G4 Module Configuration
New super-user password
Enter the new password for the super-user.
New password (confirm)
Re-type the new password for the super-user.
Press the "OK" button to accept the changes and close the window. If you wish to abandon the changes,
press the "Cancel" button (on Windows). On a Linux system simply close the window by clicking the
required button of the window frame.
Initial Configuration via DHCP Server
By default, the ASMI module will try to contact a DHCP server in the subnet to which it is physically
connected. If a DHCP server is found, it may provide a valid IP address, gateway address and net mask.
Before you connect the device to your local subnet, be sure to complete the corresponding configuration
of your DHCP server. It is recommended to configure a fixed IP assignment to the MAC address of the
ASMI module. You can find the MAC address on the outside of the shipping box and labelled on the
bottom side.
If this initial configuration does not meet your local requirements, use the setup tool psetupto adjust the
values to your needs. The psetuptool can be found on the CD ROM deliveredwith this package. You can
then employ the procedure described below.
Web Interface
The ASMI module may be accessed using a standard Java enabled web browser. Youmay use the HTTP
protocol or a secure encrypted connection via HTTPS to reach the ASMI module. Simply enter the
configured IP address of the ASMI module into your web browser.
The initial login settings are:
Table 4-2. Default User Settings
Parameter Value
Login super
Password pass
Changing these settings to user specific values is strongly recommended and can be done on the "User
Management" page (see the Section called Users And Groups in Chapter 6).
13

Chapter 4. ASMI G4 Module Configuration
Mouse and Keyboard Configuration
Three Blind Mice, See How They Run...
The proper configuration of a remote mouse is somewhat difficult to understand unless you know some
underlying concepts. Basically mice transmit their movement using two methods: either absolute or
relative mode.
Absolute mode means that the mouse transmits absolute co-ordinates to the ASMI module. This is
information like: "I am moving to screen co-ordinates X,Y". This mode is very easy to track and most
modern Windows versions (XP, 2000, 2003) as well as Mac OS X use it. This mode is also easiest for the
ASMI module to track.
The second mode is relative mode. In this case the mouse transmits information like "I am moving 97
pixels vertically and 88 pixels horizontally from my previous position". This is much more difficult to
track.
First and foremost the ASMI module has to know the starting point of the movement (hence you need to
press a special "Synchronize" Button, which allows the ASMI module to locate the starting point of the
mouse).
Secondly a lot of other factors come into play like the mouse acceleration which can be different on the
remote system and the local system/PC you are using to talk to the ASMI module. Hence the ASMI
module has to do a lot more conversionwork to track the mouse than using absolute mode.
Relative mode is used by most Linux Systems and older operating system like Windows 95/98.
Therefore you need to select "Other Operating Systems" if your PC uses this mode.
Remote Mouse Settings
A common problem with KVM devices is the synchronization between the local and remote mouse
cursors. The ASMI module addresses this situation with an intelligent synchronization algorithm. There
are three mouse modes available on the ASMI module:
Auto Mouse Speed
The automatic mouse speed mode tries to detect the speed and acceleration settings of the host
system automatically.See the section below for a more detailed explanation.
Fixed Mouse Speed
This mode just translates the mouse movements from the Remote Console in a way that one pixel
move will lead to n pixel moves on the remote system. This parameter n is adjustable with the
scaling. It should be noted that this works only when mouse acceleration is turned off on the remote
system.
Single/Double Mouse Mode
This mode is described in
the Section called Single and Double Mouse Mode.
14
Chapter 4. ASMI G4 Module Configuration
Auto Mouse Speed and Mouse Synchronization
The automatic mouse speed mode performs the speed detection during mouse synchronization.
Whenever the mouse does not behave correctly, there are two ways for re-synchronizing local and
remote mouse:
Fast Sync
The fast synchronization is used to correct a temporary but fixed skew.Choose this option from the
Remote Console Options menu (entry: Mouse Handling). If defined you may also press the mouse
synchronization hotkey sequence (see
the Section called Remote Console Control Bar in Chapter 5
for details)
Intelligent Sync
If the Fast Sync does not work or the mouse settings have been changed on the host system, use the
Intelligent Synchronization, instead. This method adjusts the parameters for the actual movement of
the mouse pointer so that the mouse pointer is displayed at the correct position on the screen.
This method takes longer than the Fast Sync and can be accessed with the appropriate item in the
Remote Console Option menu (entry: Mouse Handling).
On top of that please note that the shape of the mouse pointer has a significant influence on the
pointer detection. We recommend to use a simple, but common pointer shape. In most cases, the
detection and synchronization of animated pointer shapes is likely to fail. In general, pointer shapes
that change during the pointer detection process are almost impossible to find in the transmitted
video picture. With the usage of a standard mouse pointer shape the detection is rather simple and
the synchronization works best.
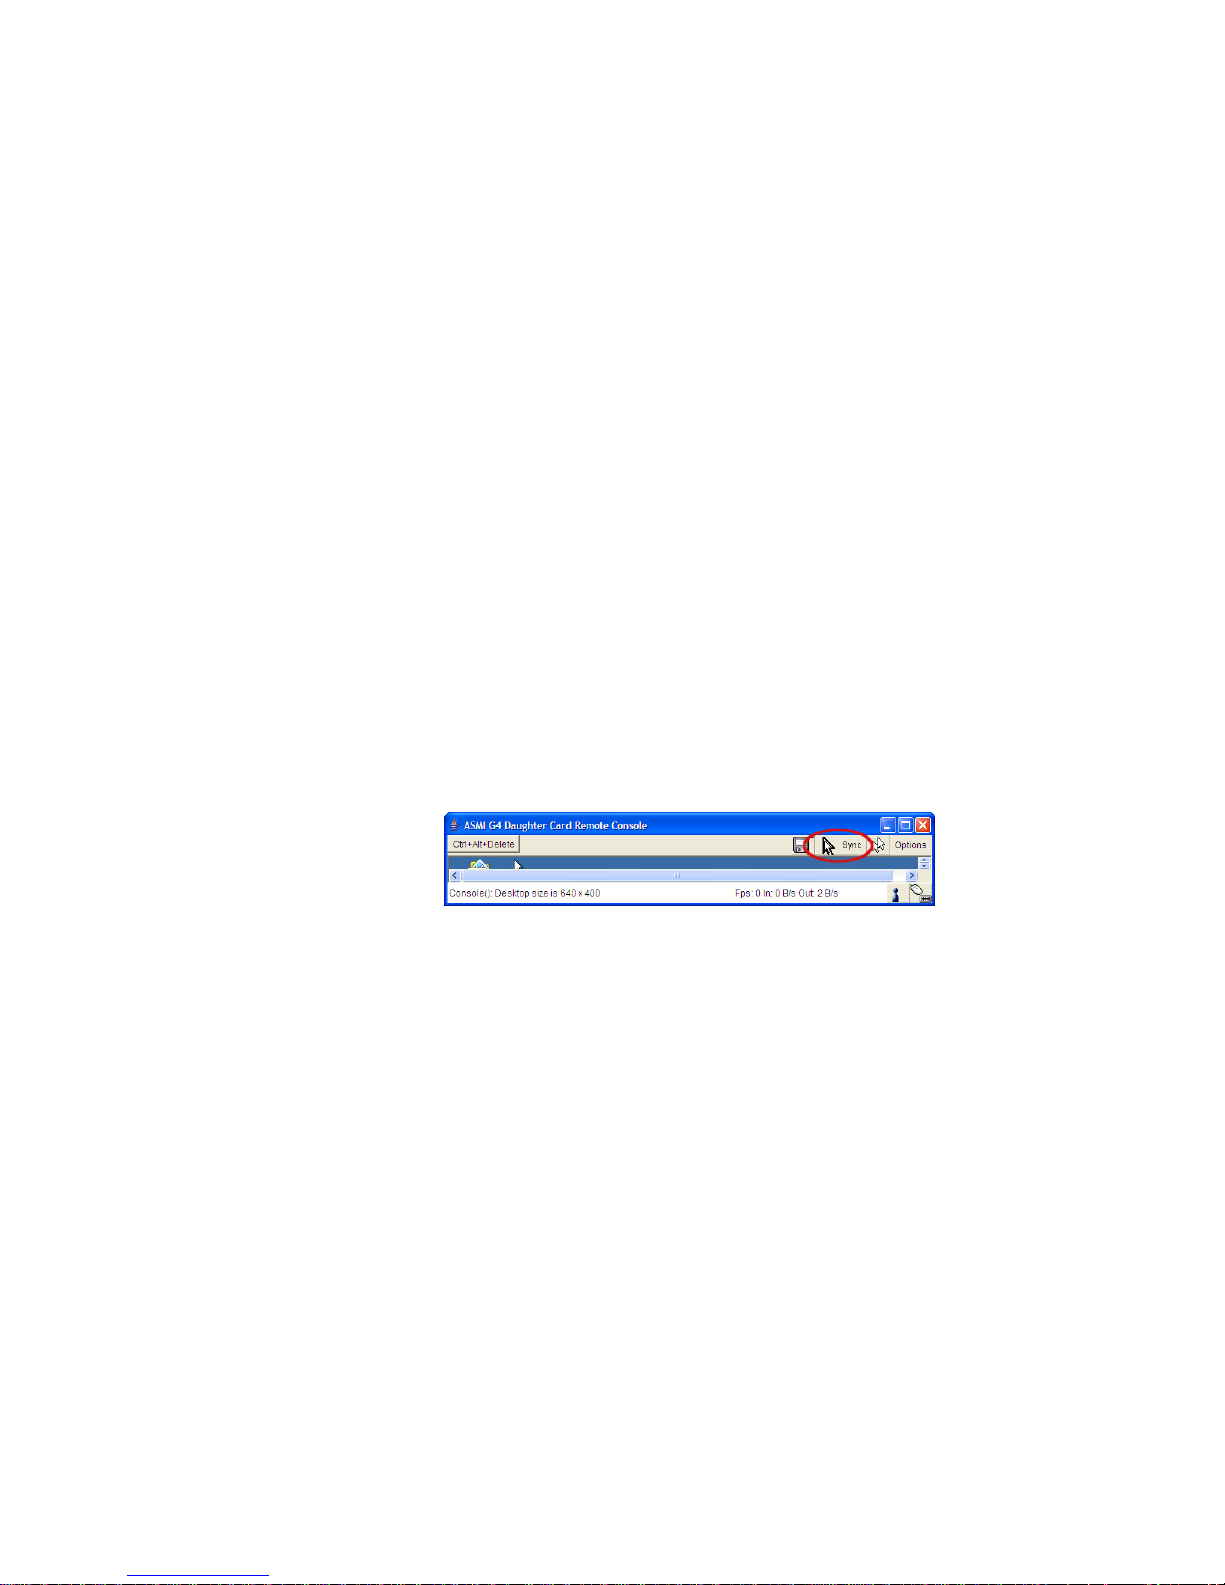
Figure 4-3. Remote Console Control Bar: Sync Mouse Button
The "Sync Mouse" button in the Remote Console Tool Bar can behave differently,depending on the
current state of the mouse synchronization. Usually pressing this button leads to a Fast Sync, except
in situations where the KVM port or the video mode have recently changed. See also
the Section called Remote Console ControlBar in Chapter 5.
Host System Mouse Settings
The host’s operating system knows various settings for the mouse driver.
Note: The following limitations do not apply to USB mice and Mouse Type "MS Windows 2000 and
newer" (Absolute Mouse Mode).
15

Chapter 4. ASMI G4 Module Configuration
While the ASMI module works with accelerated mice and is able to synchronize the local with the
remote mouse pointer, there are some limitations which may prevent this synchronization from working
properly:
Special Mouse Driver
There are mouse drivers which influence the synchronization process and lead to unsynchronized
mouse pointers. If this happens, make sure you do not use a special vendor-specific mouse driver on
your host system.
Windows 2003 Server/XP Mouse Settings
Windows XP knows a setting called "improve mouse acceleration" which has to be deactivated.
Active Desktop
If the Active Desktop feature of Microsoft Windows is enabled, do not use a plain background.
Instead use some kind of wallpaper.As an alternative, you can also disable the Active Desktop
completely.
See also
the Section called Recommended Mouse Settings for mouse mode recommendations.
Navigate your mouse pointer into the upper left corner of the applet screen and move it slightly back and
forth. This will resynchronize the mouse. If resynchronizing the mouse fails, then disable the mouse
acceleration and repeat the procedure.
Single and Double Mouse Mode
The above information applies to the Double Mouse Mode where remote and local mouse pointers are
visible and need to be synchronized. The ASMI module also features another mode, the Single Mouse
Mode, where only the remote mouse pointer is visible. Activate this mode in the Remote Console (see
the Section called Remote Console ControlBar in Chapter 5) and click into the window area. The local
mouse pointer will be hidden and the remote one can be controlled directly. To leave this mode it is
necessary to define a mouse hotkey in the Remote Console Settings Panel Press this key to free the
captured local mouse pointer.
Recommended Mouse Settings
We advise you to use the following mouse settings for different operating systems:
MS Windows 2000, 2003, XP (all versions)
For a PS/2 mouse choose Auto Mouse Speed. For XP disable the option "enhance pointer precision"
in the Control Panel.
Note: The remote mouse is always synchronized with the local mouse if selecting the option
"MS Windows 2000 or newer".
16

Chapter 4. ASMI G4 Module Configuration
SUN Solaris
Adjust the mouse settings either via "xset m 1" or use the CDE Control Panel to set the mouse to
"1:1, no acceleration". As an alternative you may also use the Single Mouse Mode.
MAC OS X
We recommend using the Single Mouse Mode.
Linux
First choose the option "Other Operating Systems" from the Mouse Type selection box. Then
choose the option Auto Mouse Speed. This applies to both USB and PS/2 mice.
Video Modes
The ASMI module recognizes a number of common video modes. When running X11 on the host system
please do not use any custom modelines with special video modes. If you do the ASMI module may not
be able to detect them. We recommend using any of the standard VESA video modes instead.
Resetting the ASMI module to its Factory Settings
Using the KiraTool
The ASMI configuration can be reset to factory defaults by using the KiraTool. KiraTool can be used
locally on the server hosting the ASMI module or remotely from your admin PC or workstation. E.g.
locally:
kiratool -a -u super -p pass defaults Remotely: kiratool -a -l 192.168.1.52 -u
super -p pass defaults
17

Chapter 5. ASMI Module Usage
Prerequisites
The ASMI module features an embedded operating system and applications offering a variety of
standardized interfaces. This chapter will describe these interfaces and the way to use them in a more
detailed manner.The interfaces are accessed using the TCP/IP protocol family,thus they can be accessed
using the built-in Ethernet adapter.
The following interfaces are supported:
HTTP/HTTPS
Full access is provided by the embedded web server. The ASMI module environmentcan be fully
managed using a standard web browser. You can access the ASMI module using the insecure HTTP
protocol or using the encrypted HTTPS protocol. Whenever possible use the more secure HTTPS.
Telnet
A standard Telnet client can be used to access most of the ASMI module’s functionality including a
text-mode console redirection.
SSH
A Secure Shell (SSH) client can also be used to access the ASMI module including a text-mode
console redirection as mentioned above.
The primary interface of the ASMI module is the HTTP interface. This is covered extensively in this
chapter. Other interfaces are addressed in subtopics.
In order to use the Remote Console window of your managed host system, the browser has to include a
Java Runtime Environment version 1.4 or higher. If the browser has no Java support (for example as
found on small handheld devices), you are still able to manage your remote host system using the
administration forms displayed by the browser itself.
Important: We strongly recommend that you to install a Sun JVM version 1.4 or higher.
For an insecure connection to the ASMI module we can recommend the followingweb browsers:
• Microsoft Internet Explorer version 5.0 or higher on Windows 98, Windows ME, Windows 2000 and
Windows XP
• Netscape Navigator 7.0, Mozilla 1.6 and Mozilla Firefox on Windows 98, Windows ME, Windows
2000, WindowsXP, Linux and other UNIX-like Operating Systems
18
Chapter 5. ASMI Module Usage
In order to access the remote host system using a securely encrypted connection, you need a browser that
supports the HTTPS protocol. Strong security is only assured by using a key length of 128 Bit. Some old
browsers do not offer a strong 128 Bit encryption algorithm. For security reasons you should use a
modern browser that supports proper encryption.
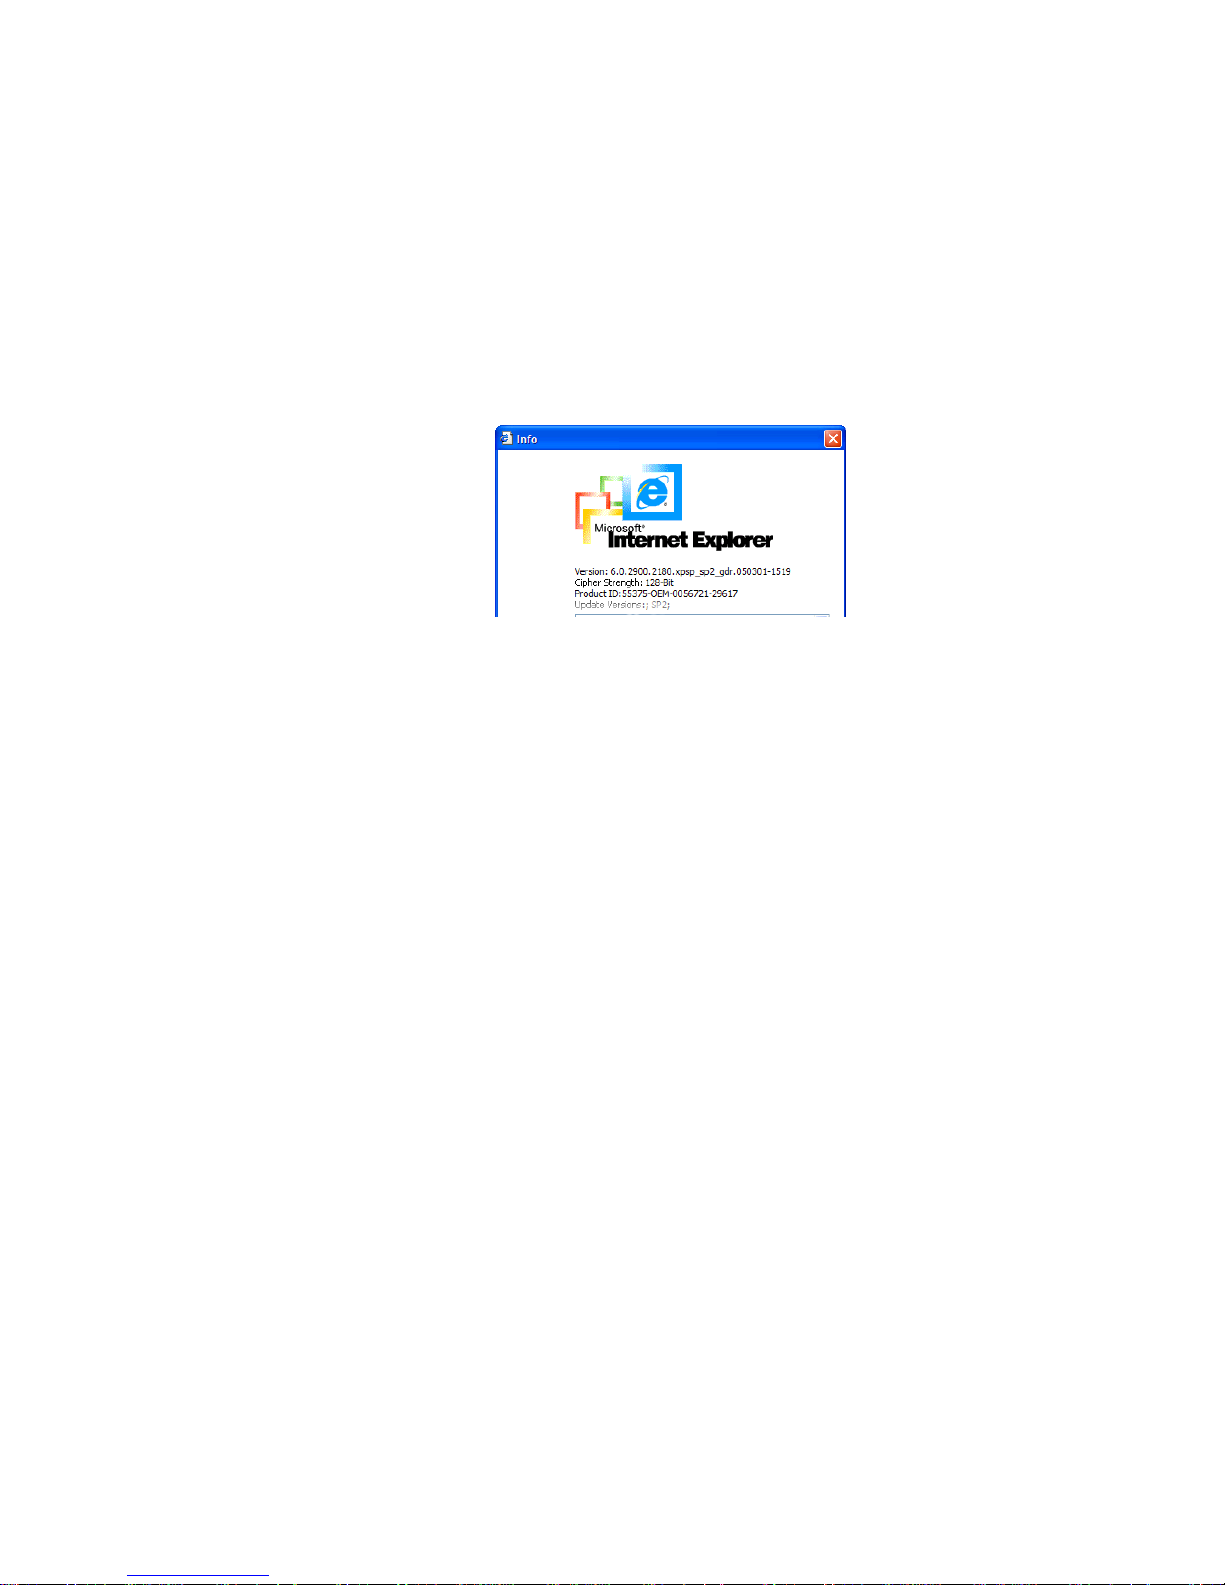
Using the Internet Explorer,open the menu entry "?" and "Info" to find out about the key length that is
currently activated.The dialog box contains a link that leads you to information on how to upgrade your
browser to a state of the art encryption scheme.
Figure 5-1 shows the dialog box presented by the
Internet Explorer 6.0.
Figure 5-1. The Internet Explorer displaying the encryption key length
Modern web browsers support strong encryption by default.
Login and Logout to the ASMI Module
Login into the ASMI module
Open your web browser. Type in the address of your ASMI module which you configured during the
installation process. The address used might be a plain IP address or a host and domain name in case you
have given your ASMI module a symbolic name in the DNS or another Name Service in your
organisation. For instance type the following in the address line of your browser when establishing an
unsecured connection:
http://192.168.1.22/
In order to use a secure connection simply type:
https://192.168.1.22/
This will take you to the ASMI module login page as shown in
Figure 5-2.
19

Chapter 5. ASMI Module Usage
Figure 5-2. Login screen
Note: Your web browser has to accept cookies or else login is not possible.
The ASMI module has a built-in super-user that has all the permissions to administrate your ASMI
module. See the following table for the default settings.
Table 5-1. Default User Settings
Parameter Value
Login super
Password pass
Navigation
After a successful login to the ASMI module, the main page of the ASMI module appears (see
Figure 5-3). This page consists of three parts, each containing specific information. The buttons on the
upper border allow you to navigate inside the front end (see
Table 5-2 for details). The lower left frame
contains a navigation bar and allows you to switch between the different sections of the ASMI module.
Within the right frame, task-specific information is displayed that depends on the section you have
previously selected.
20
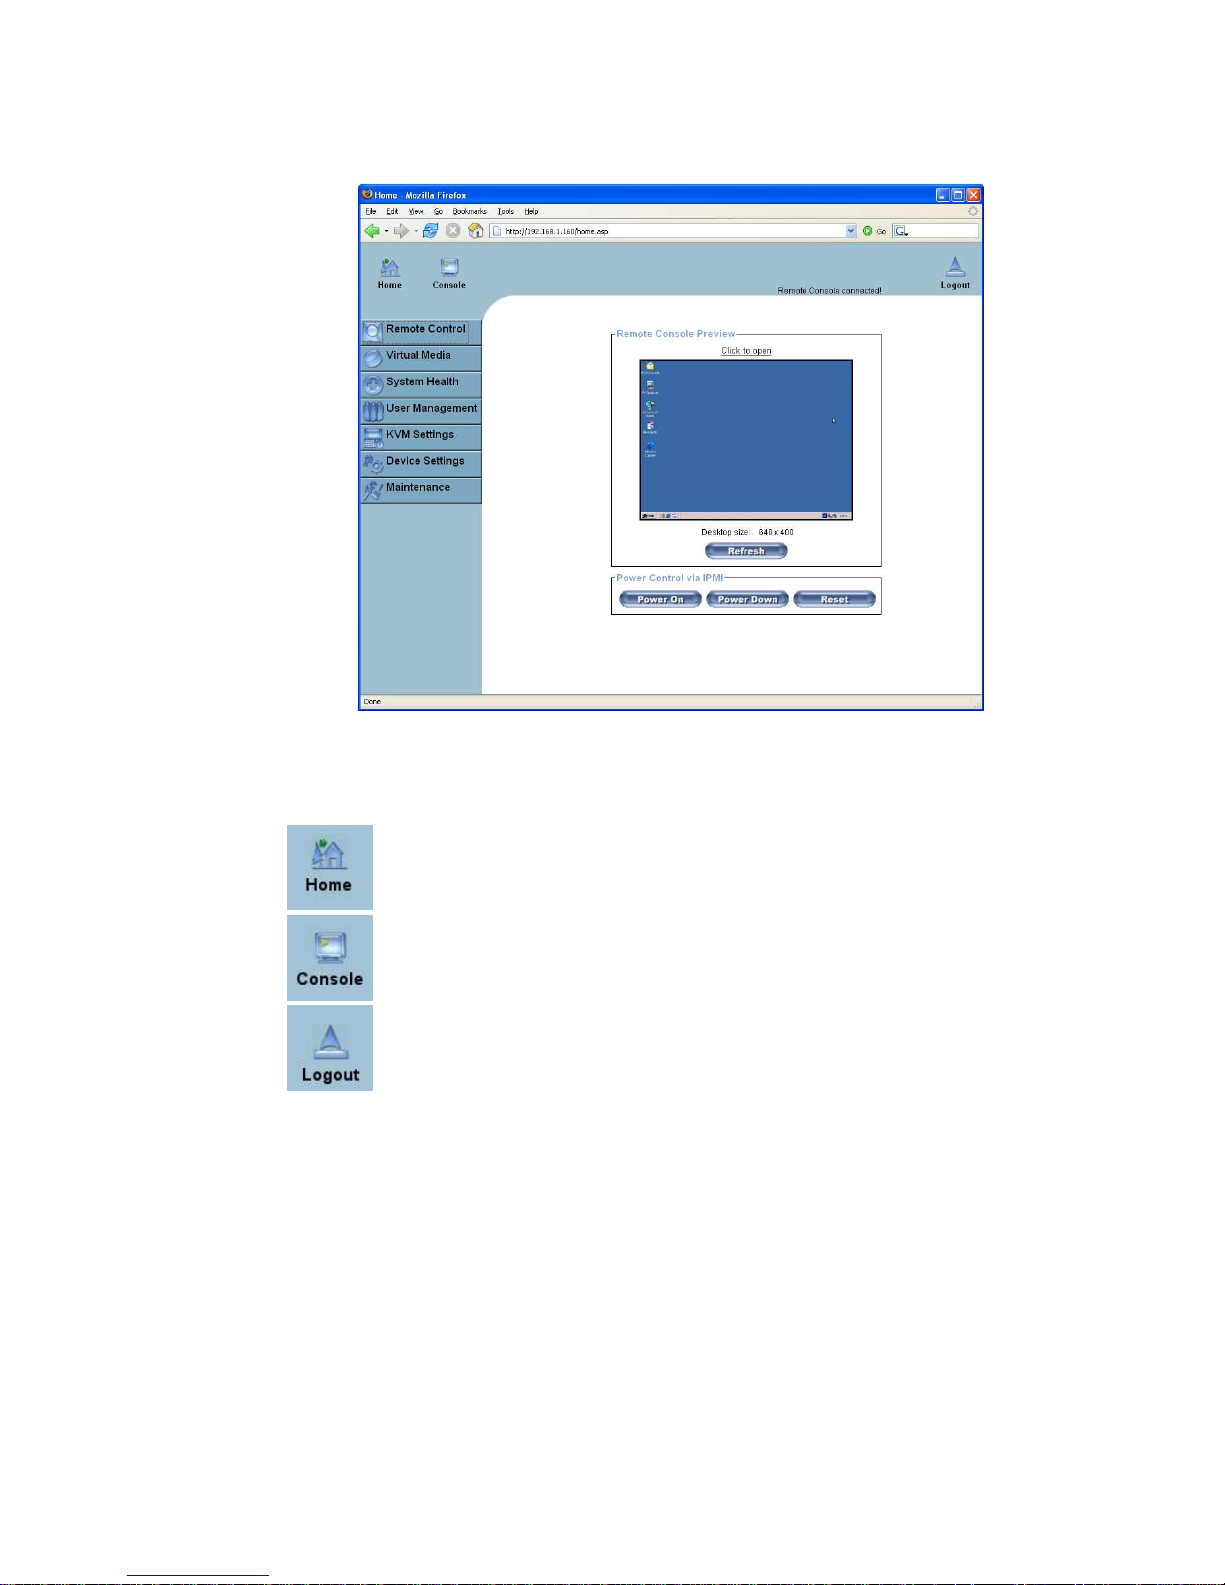
Chapter 5. ASMI Module Usage
Figure 5-3. Main Page
Table 5-2. Front End Buttons
Return to the main page of the ASMI module.
Open the ASMI module Remote Console.
Exit from the ASMI module front end.
Logging out of the ASMI module
This link logs out the current user and presents a new login screen. Please note that an automatic logout
will be performed in case there is no activity for half an hour.
21
 Loading...