

Page 1
RAPTOR E5 - Quick Start
R
APTOR
Page 2
R
APTOR
R
APTOR
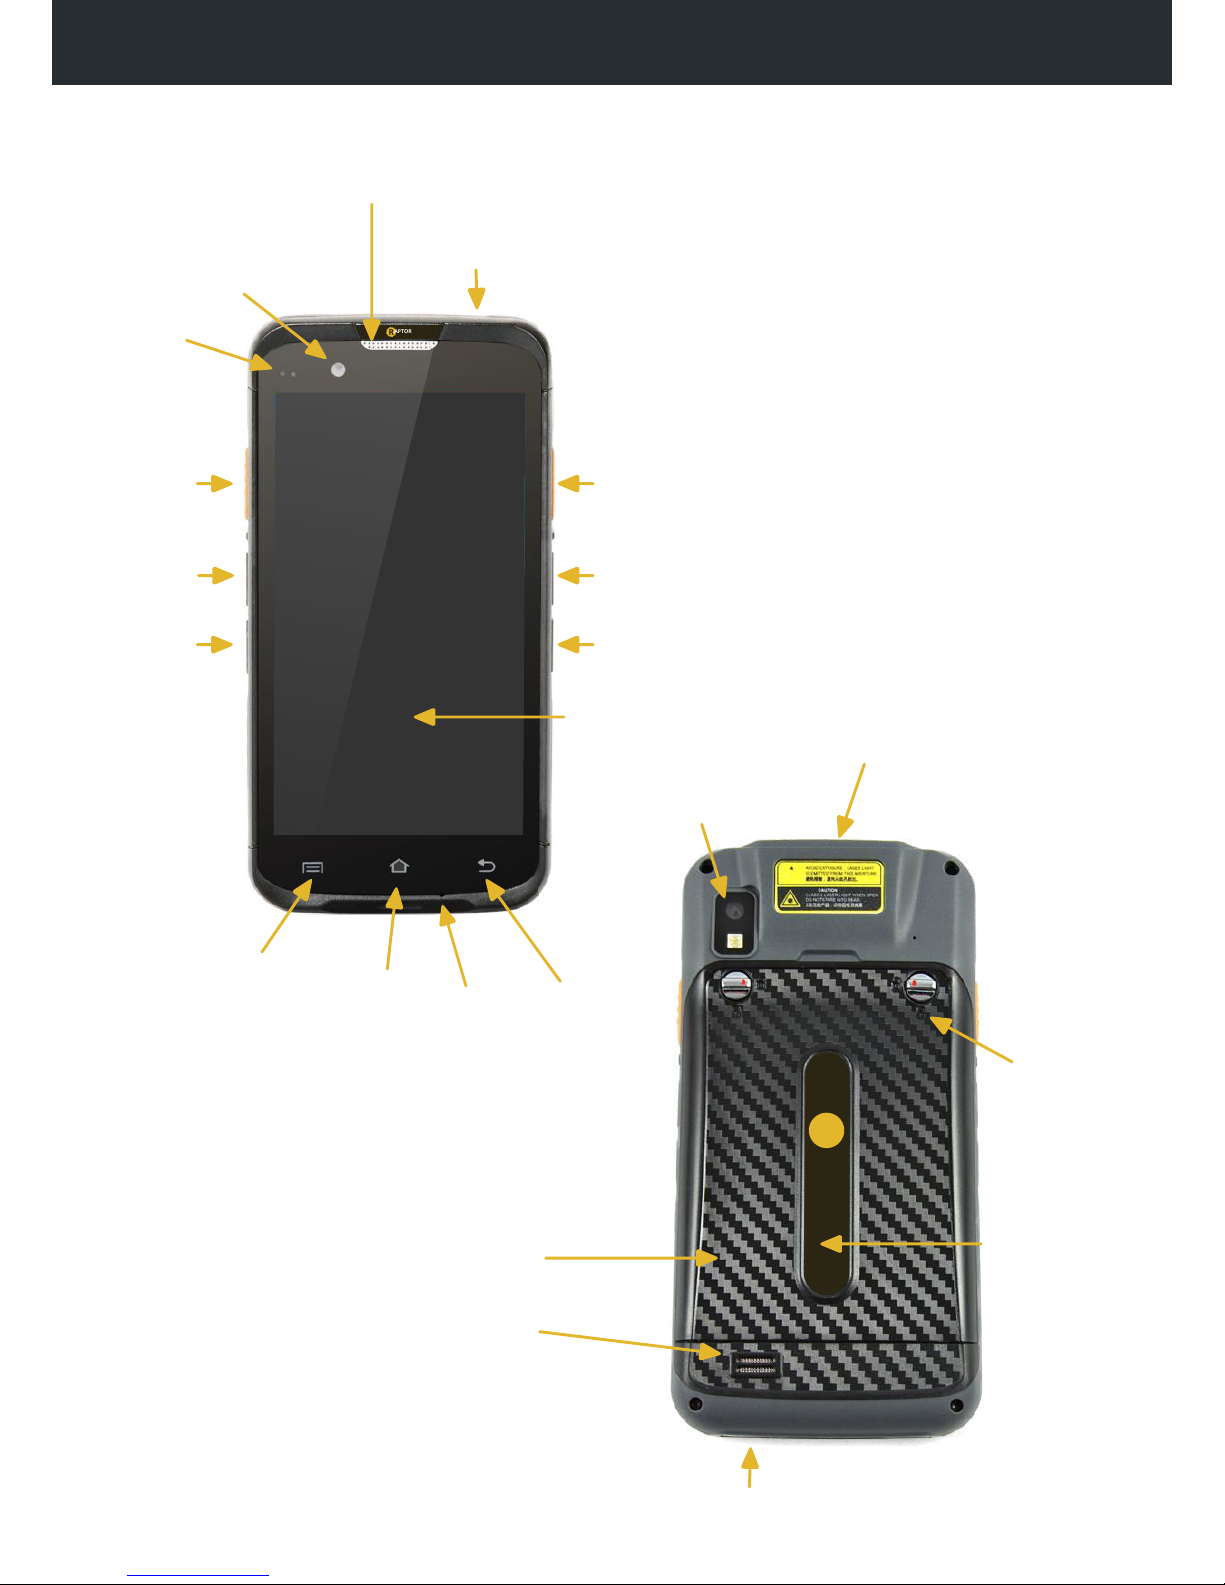
OVERVIEW
Rear camera
Loud speaker
Battery door
Battery door
locks
Main screen
Power
Light sensor
External headset
Ear phone
Volume +
Volume -
Menu softkey
USB Connector
MIC
Back softkey
Home
Front camera
Logo Space
Programmable button
Scanner buttonScanner button
Barcode scanner
Page 3
ACCESSORIES
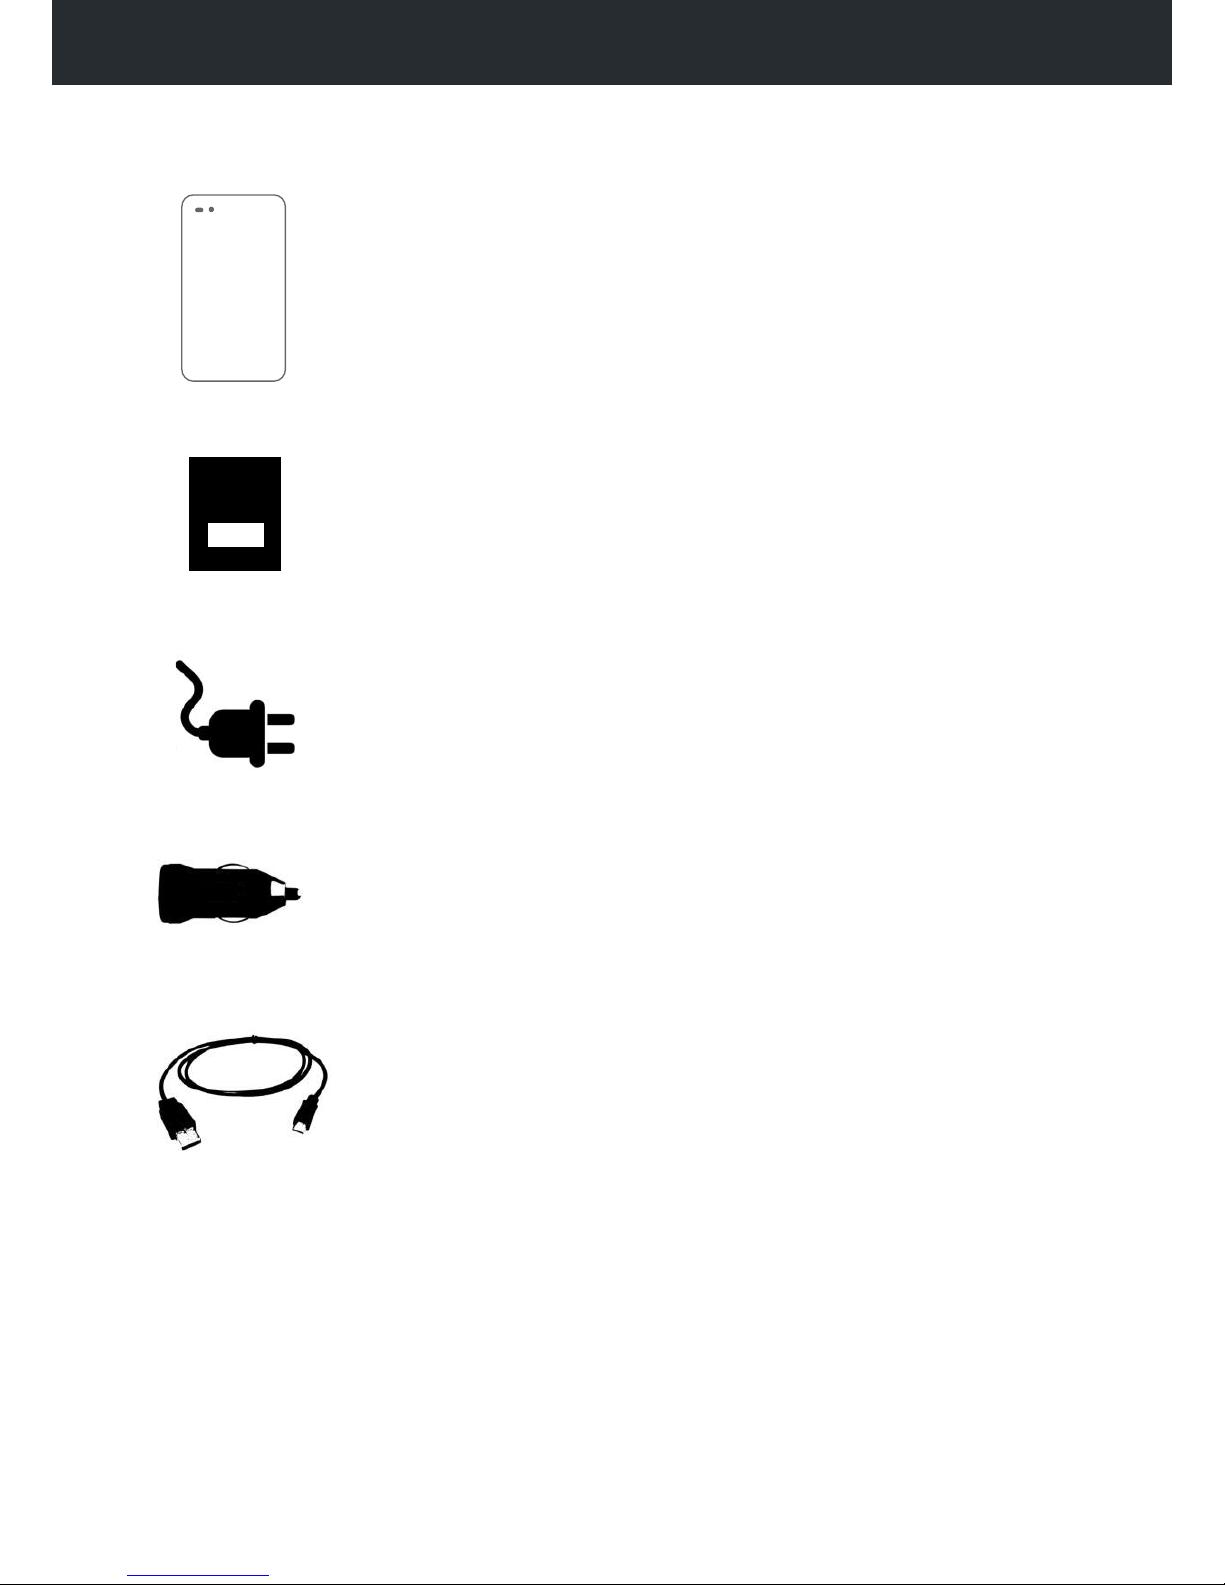
Screen protector - Added protection for your device screen against knocks
and scratches.
Battery - Large 4000mAh battery and back door.
The following accessories are included with every Raptor E5:
Power supply - Country specific power supply used for charging.
Vehicle Charger - 12/24v USB charger to charge device whilst in vehicle.
USB Cable - USB cable for charging and syncing via PC or power supplies.
Page 4
BUTTONS
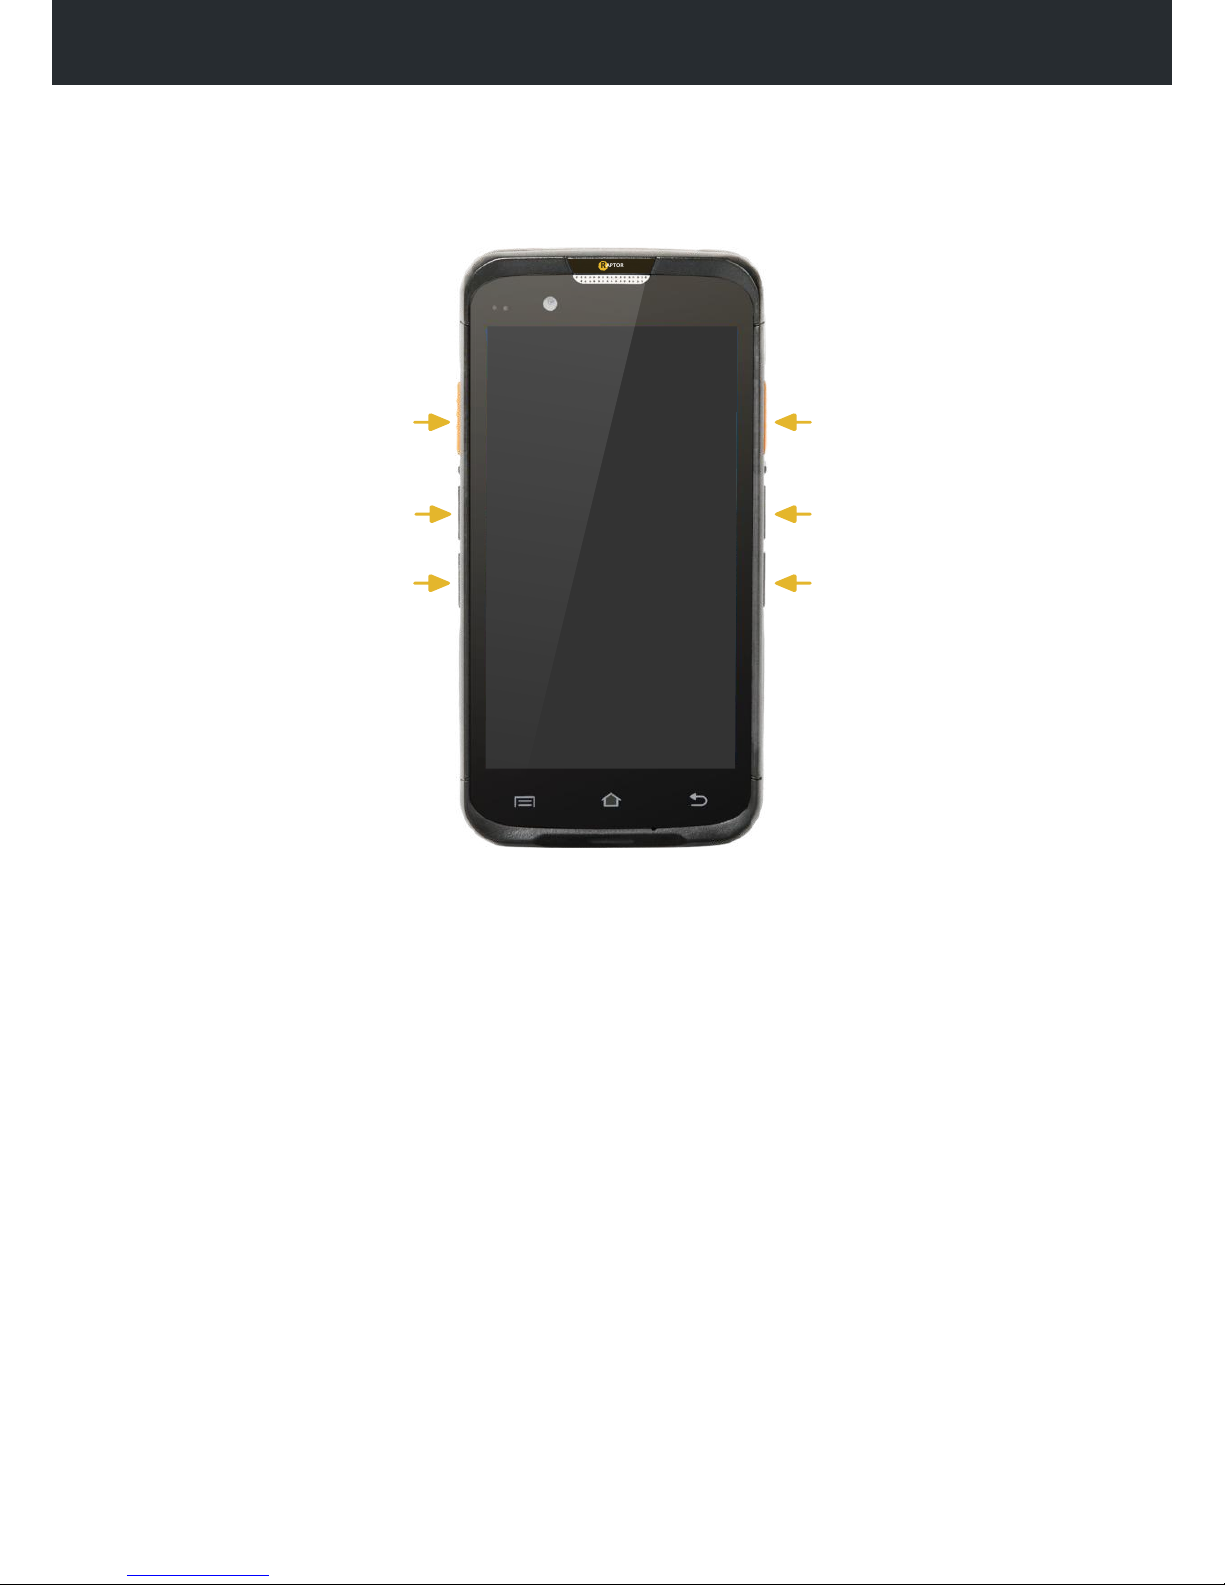
Volume + - Increase volume of speaker and earpiece while in call.
The Raptor E5 has six buttons which will make the use of your device much easier.
Bellow there’s a list of the buttons and the respective descriptions.
Volume - - Decrease volume of speaker and earpiece while in call.
Power - Used to switch device on, or put/wake device into/out of standby mode.
Home - The Android “Home” button brings the device to the home screen.
Menu soft key - The Android “Menu” key brings up the menu feature and will behave differently
depending on what app you are running at the time.
Back soft key - The Android “Back” key will revert to the last app/page in the application stack
running on the device.
Power
Volume +
Volume -
Programmable button
Scanner buttonScanner button
R
APTOR
SOFT KEYS
PHYSICAL KEYS
Programmable button - Can be assigned to any task or function using the E5’s API, PTT compatible.
Scanner buttons - left and right scanner / RFID activate buttons.
Page 5
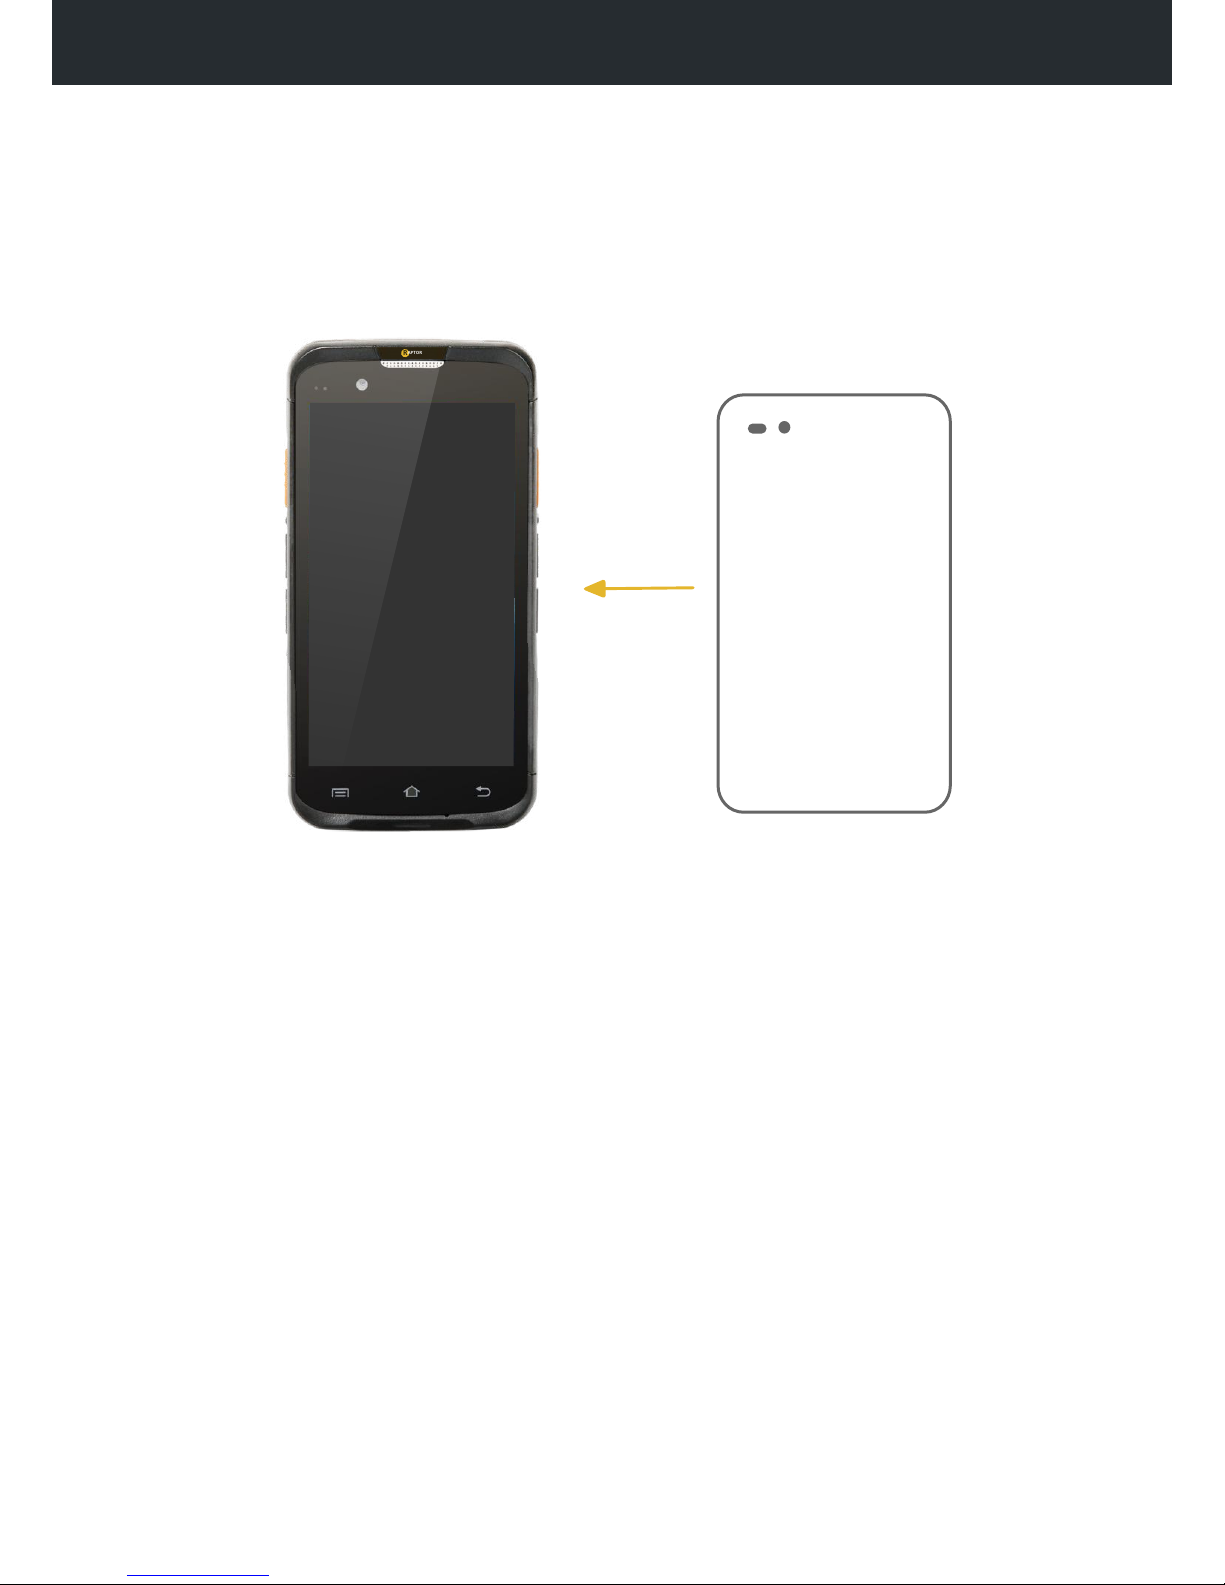
Attaching the screen protector
Attach the screen protector following these instructions:
All Raptors are provided with a screen protector which must be used in order to
maintain the warranty of the device. A screen protector not only helps defend against
scratches and knocks to the screen, but it will also help prolong the life of your device.
A range of different protectors are avaiable for different purposes (privacy, anti glare,
impact).
Step 1: Check there isn’t already a screen protector on the device. Most Raptor smartphones have
one pre-attached in the box.
Step 2: Remove the old screen protector if necessary by simply peeling it of. Now make sure you
clean the screen thoroughly to remove dirt, dust and any fluff that will create bubbles in the adhesion.
Step 3: Peel the underside of the screen protector off, being careful not to let it touch anything.
Step 4: Now carefully line up the top of the screen protector with the top of the device LCD. Carefully
let it drop onto the screen making sure it lines true all the way down to the bottom as you go. Use a
credit card to smooth out any bubbles as you go.
Step 5: Once you’re happy, peel off the top protective layer of the screen protector off and you’re
done!
R
APTOR
Page 6
R
APTOR
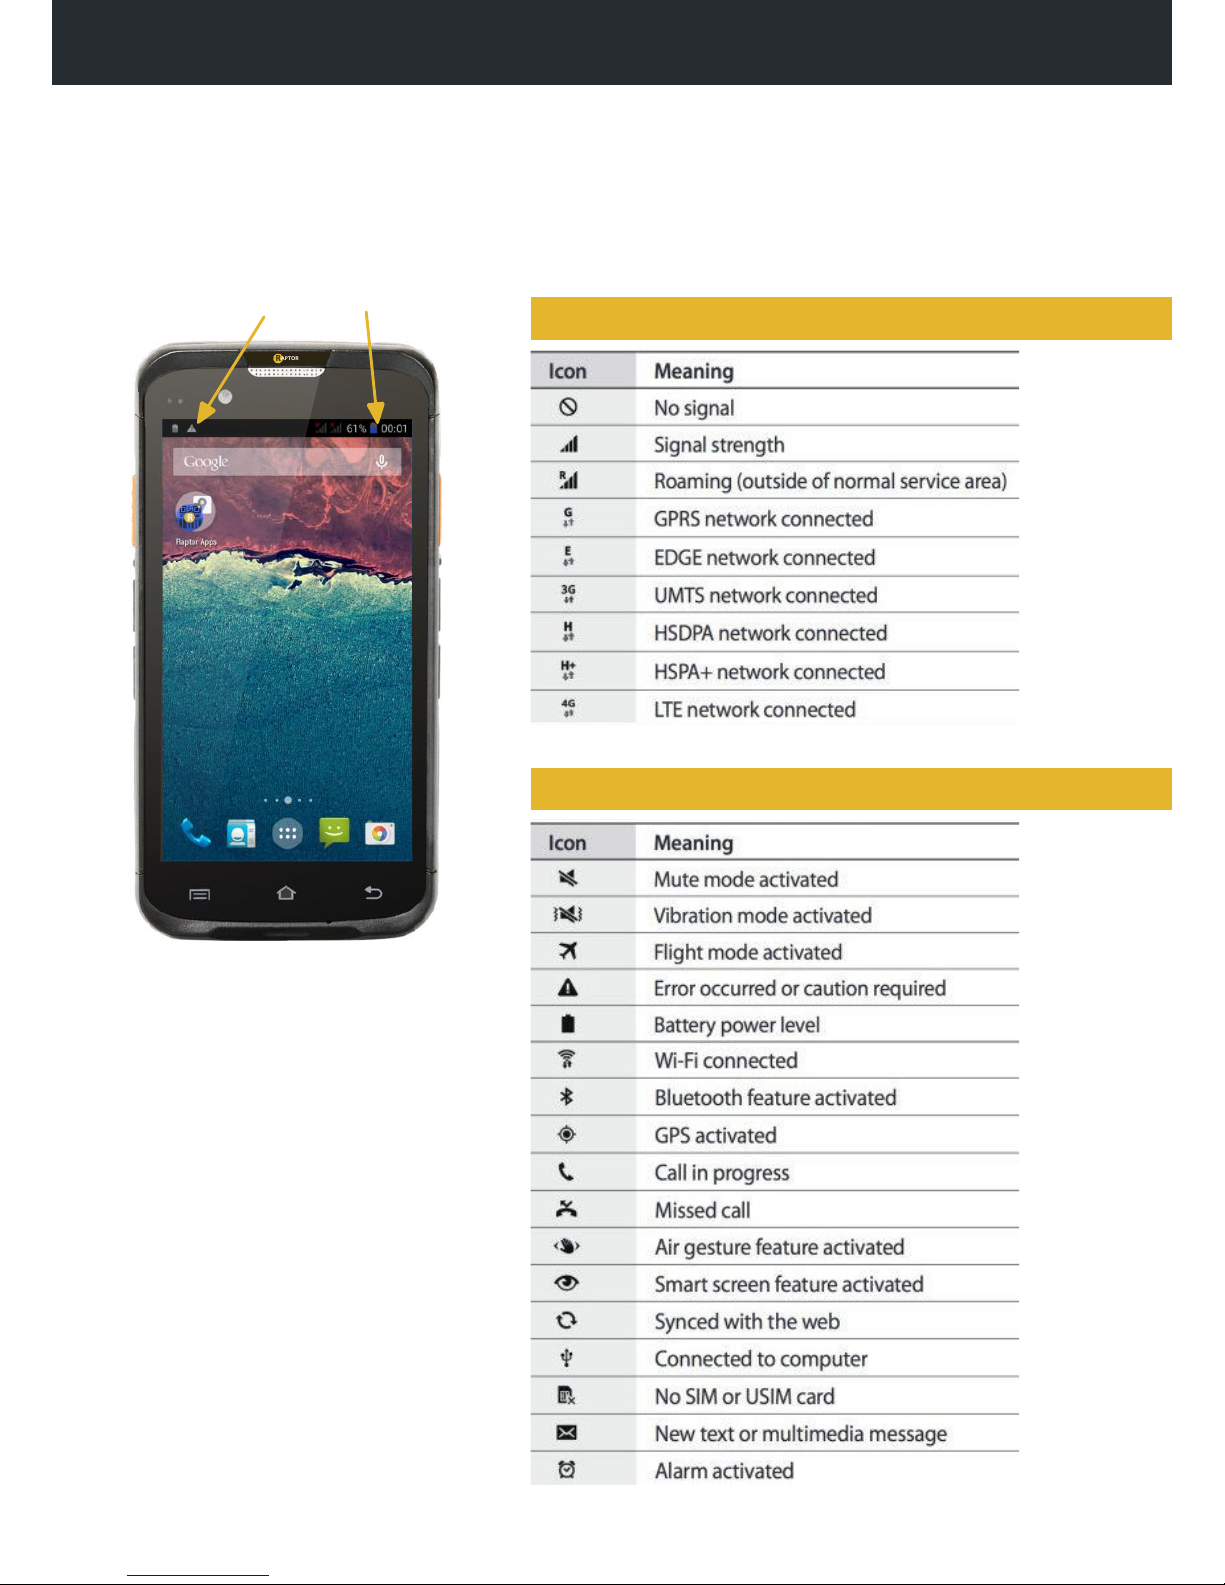
STATUS BAR ICONS
The Android OS of the Raptor E5 device is constantly monitoring for new notifications
and status’ of the device. Apps can create there own icons but below are some of the
more common ones with their meanings.
Phone connection icons:
Status bar with icons
Other icons:
Page 7
CHARGING
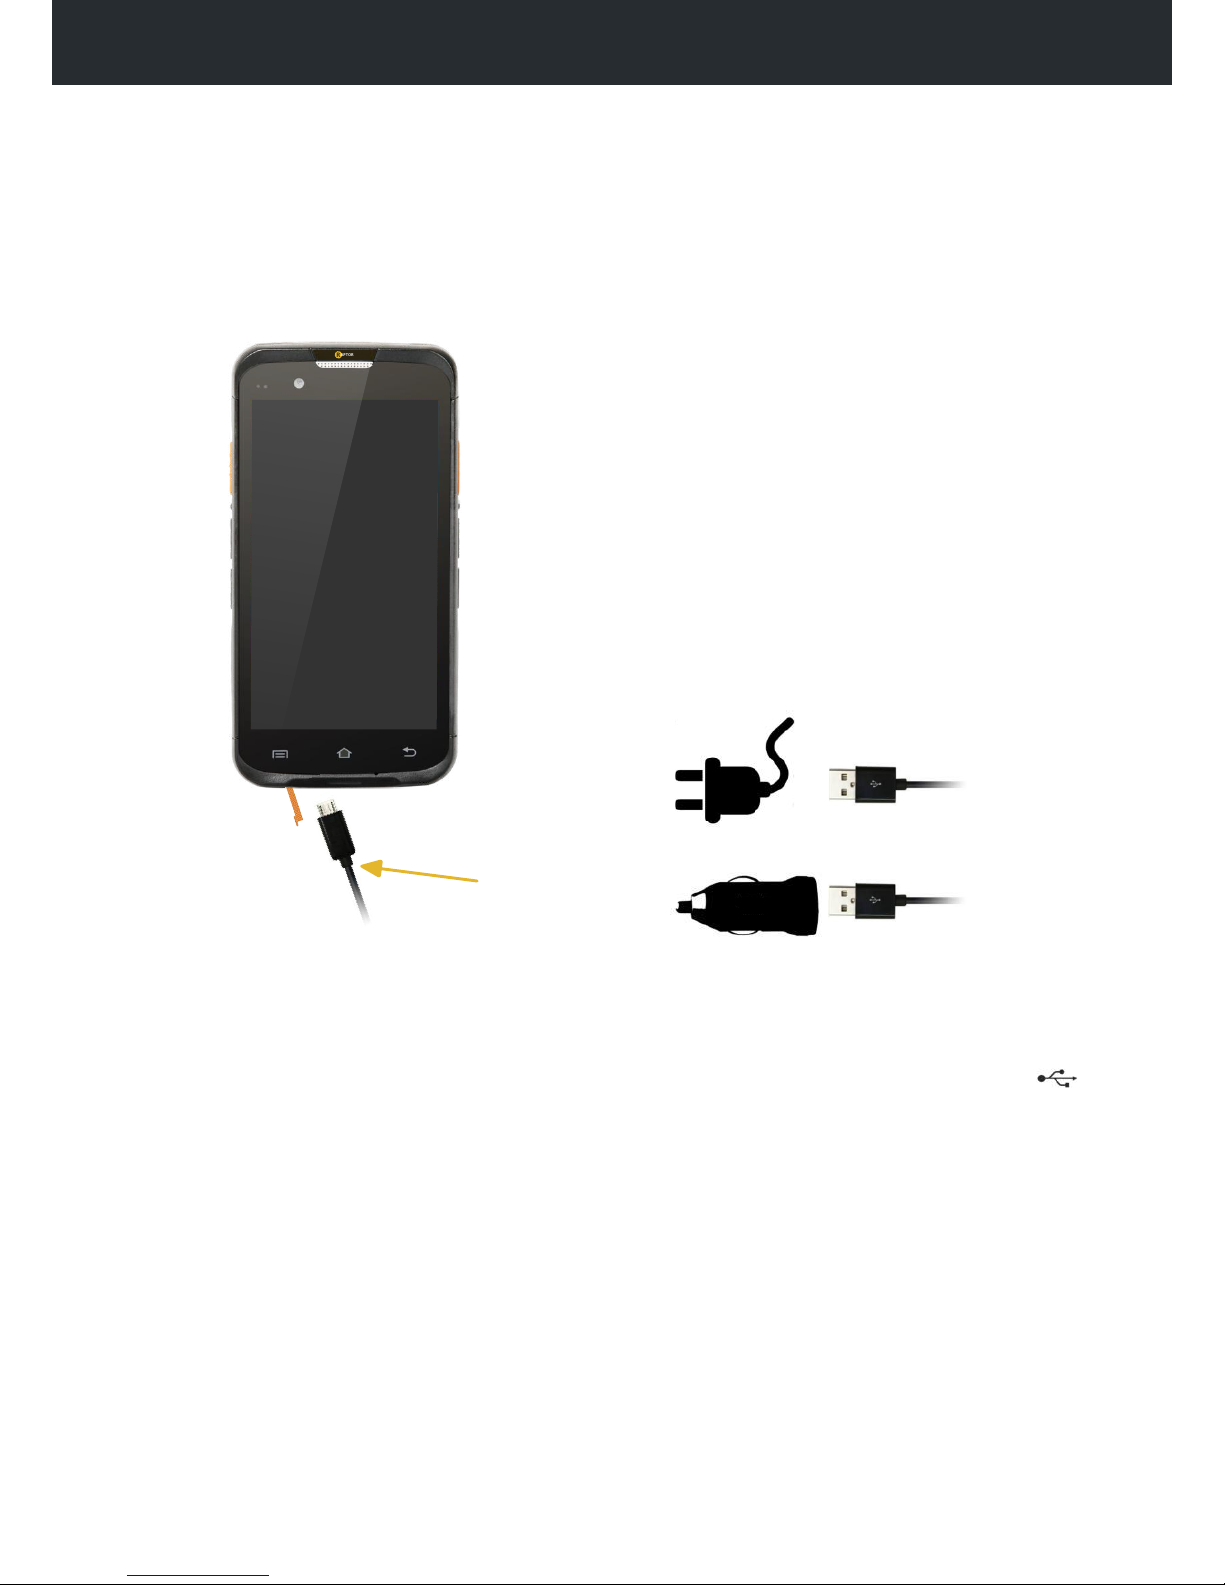
The Raptor E5 can be charged in multiple ways:
The Micro USB connector on the device along with the USB lead and chargers provided
are used to charge your device safely.
How to charge your device using a domestic charger:
Step 1: Pull open the rubber cover at the bottom of the device marked with the USB symbol.
Step 2: Insert the micro USB end of the provided USB cable carefully into the Micro-USB connector
in the device. Please ensure you are careful when doing this as Micro-USB connectors can be easily
damaged if not used correctly.
Step 3: Plug the other side of the cable into either the USB-A socket of the domestic or vehicle
charger.
Please note: Only the supplied power units and cables must be used. Third party accessories have
not been tested with Raptor devices and could cause electrical and physical harm to the connectors
and the device.
USB Connector
R
APTOR
Page 8
CHARGING
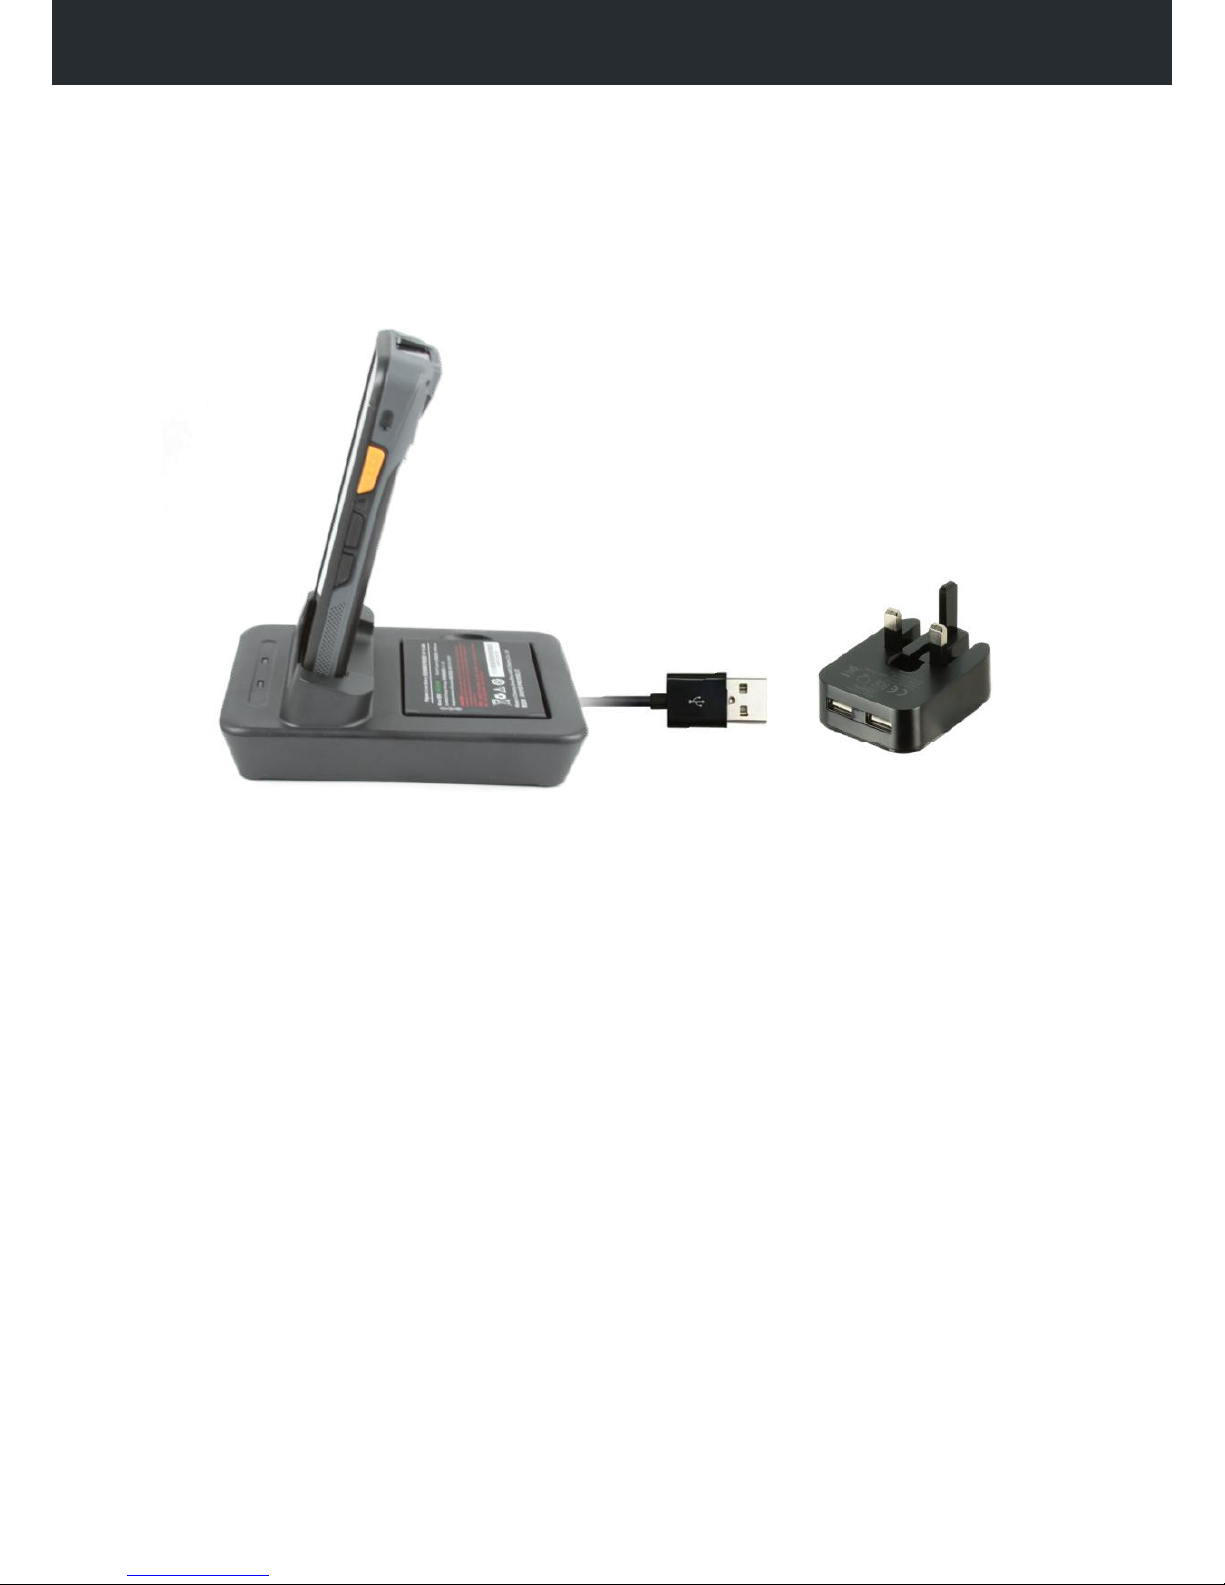
The Raptor E5 can be charged in multiple ways:
The rugged connector on the E5 allows for rugged, drop in charging with the E5 cradle. The
cradle will charge a device and spare battery at the same time.
How to charge your device using a cradle charger:
Step 1: Ensure there is nothing obstructing the connector on the device and pins on the cradle.
Step 2: Plug the barrel connector cable, supplied with the cradle kit into the connector at the back of
the cradle, ensureing the other side is plugged into the supplied USB power supply.
Step 3: Slide the E5 device carefully into the cradle until you see the charge light or can see the battery
icon change to the charging indicator.
Please note: Only the supplied power units and cables must be used. Third party accessories have
not been tested with Raptor devices and could cause electrical and physical harm to the connectors
and the device.
Page 9
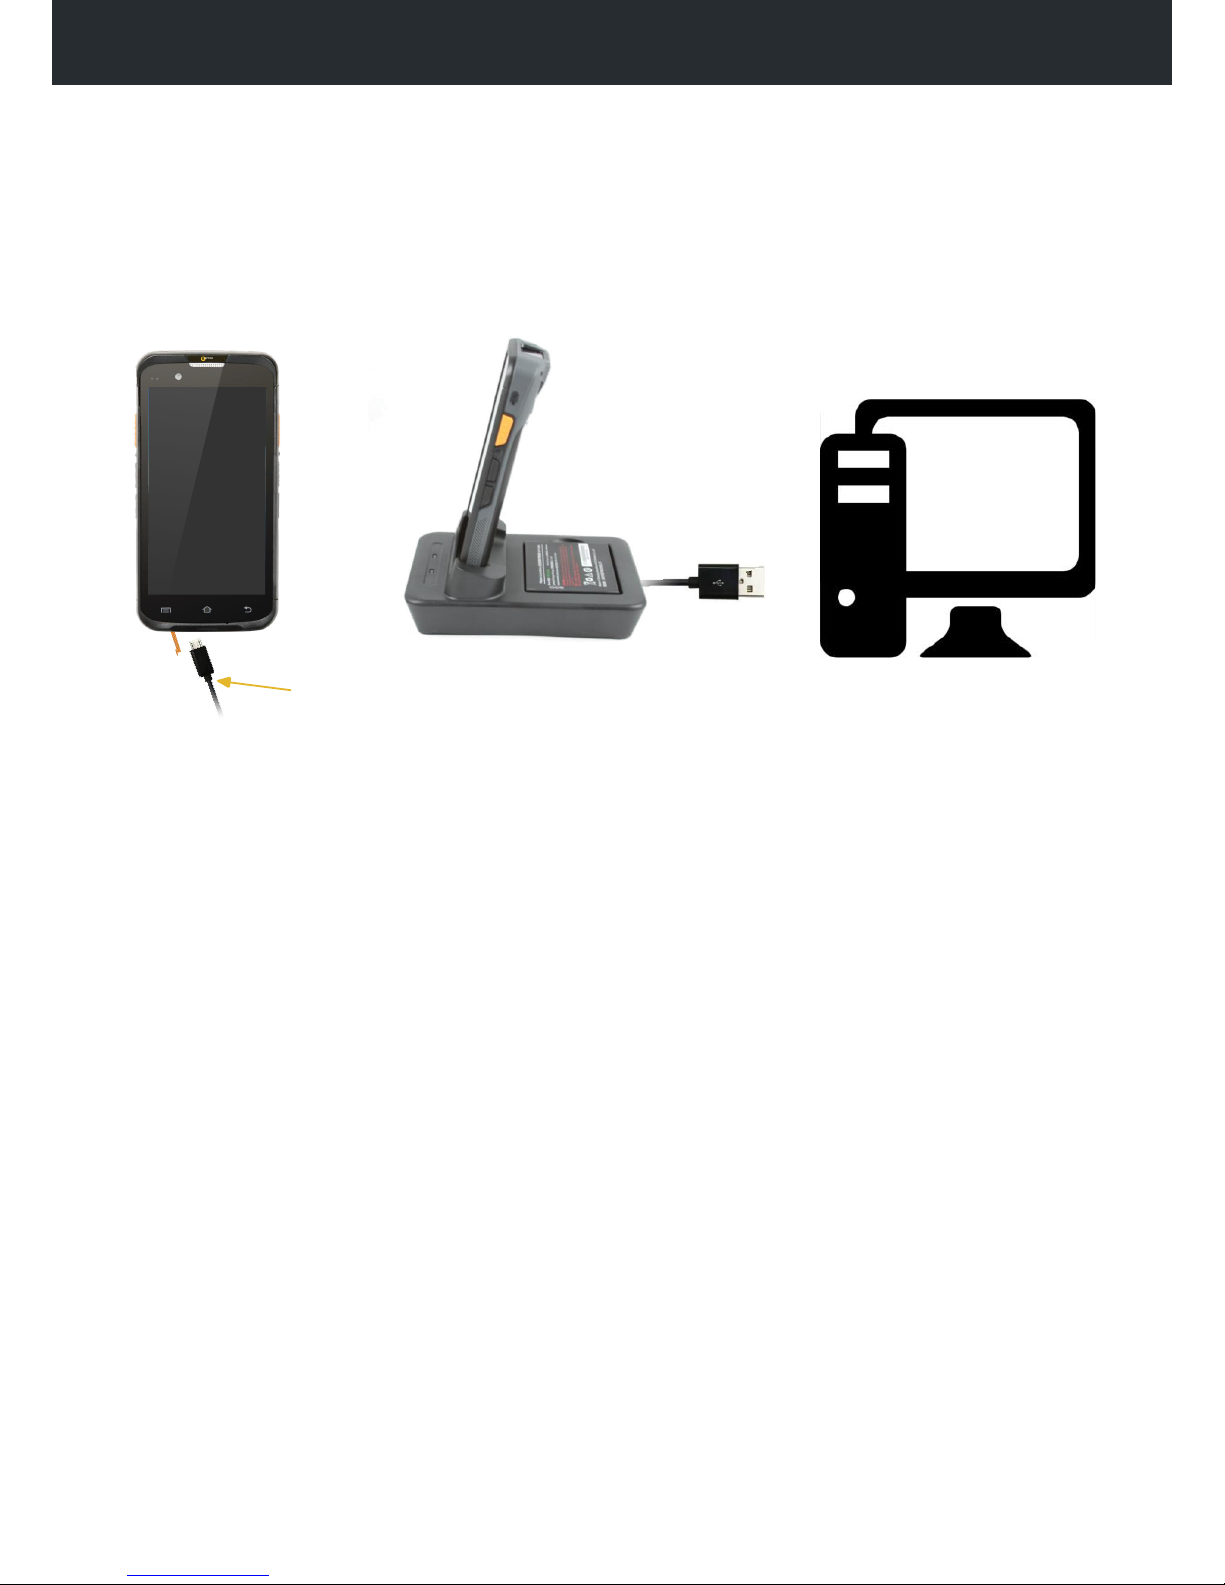
SYNCING & CONNECTING ACCESSORIES
The Micro USB connector can also be used to connect and sync your device with other
accessories or devices. You can connect either via the cradle or directly from, the device.
How to connect your device with a PC:
Step 1: Pull open the rubber cover at the bottom of the device marked with the USB symbol, or find the
data USB connector on the underneath of the cradle.
Step 2: Insert the micro USB end of the provided USB cable carefully into the Micro-USB connector
in the device or cradle, ensuring you are careful when doing this, as Micro-USB connectors can be easily
damaged if not used correctly.
Step 3: Plug the other side of the USB cable into a free USB-A socket in your PC or laptop.
Please note that the USB cable on the cradle will not charge the device, it will only pass data.
Using an OTG (on the go) cable:
Carefully connect the cable into the device exactly the same as described above. The other end of
the OTG cable is a USB-A socket. You can now connect any device with a USB connector into this
socket, such as a keyboard or barcode scanner, and the device should be able to automatically
communicate with it.
USB Connector
R
APTOR
Page 10
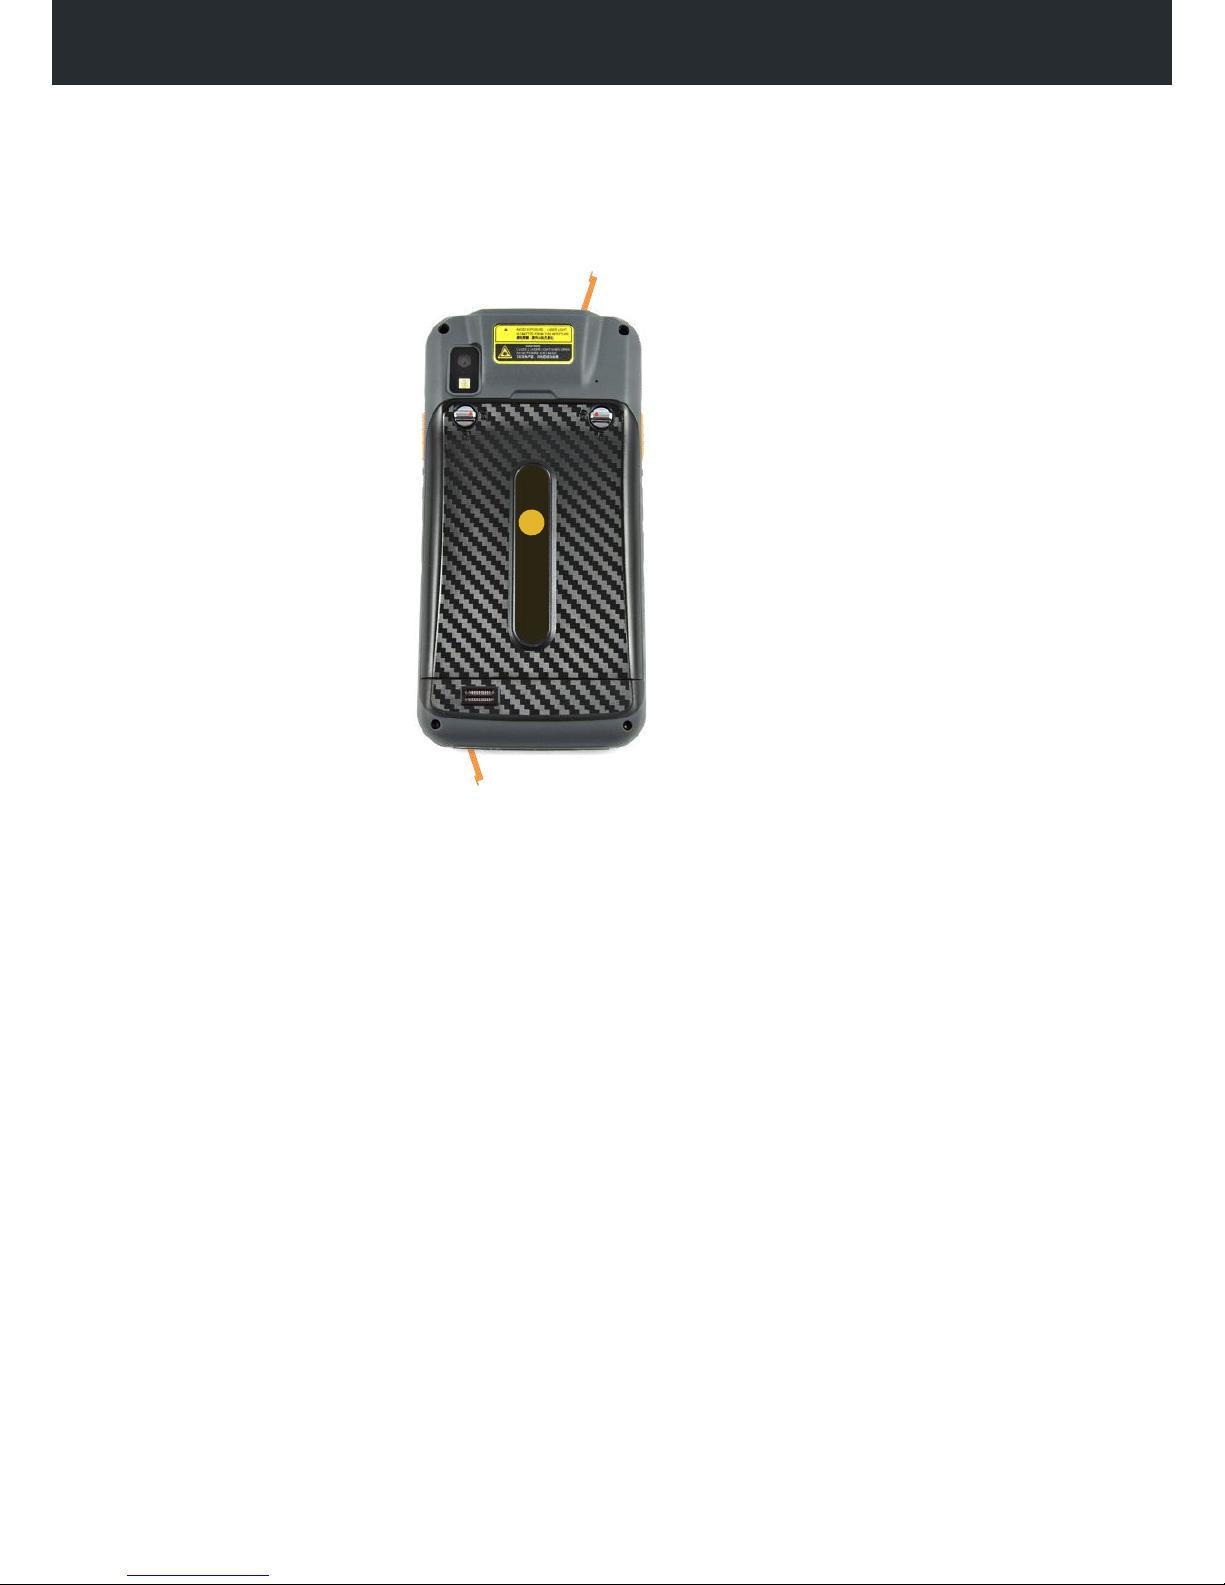
CONNECTORS
The connectors allow external peripherals to be connected to the device. Read bellow
a short explanation of the connectors and their location.
USB connector - Standard Micro-USB connector used for charging the device, syncing with a
PC or to host USB communication via the supplied OTG cable.
External headset - Stereo DIN connector for use with supplied headset/MIC. It can be used
for making phone calls and for listening to music on the device discretely.
External headset
All connectors have rubber covers which are required to maintain the IP rating of
the device.
To use the connector, simply pull up on the tab of the rubber cover, to expose the
connector underneath.
R
APTOR
USB Connector
Page 11
R
APTOR
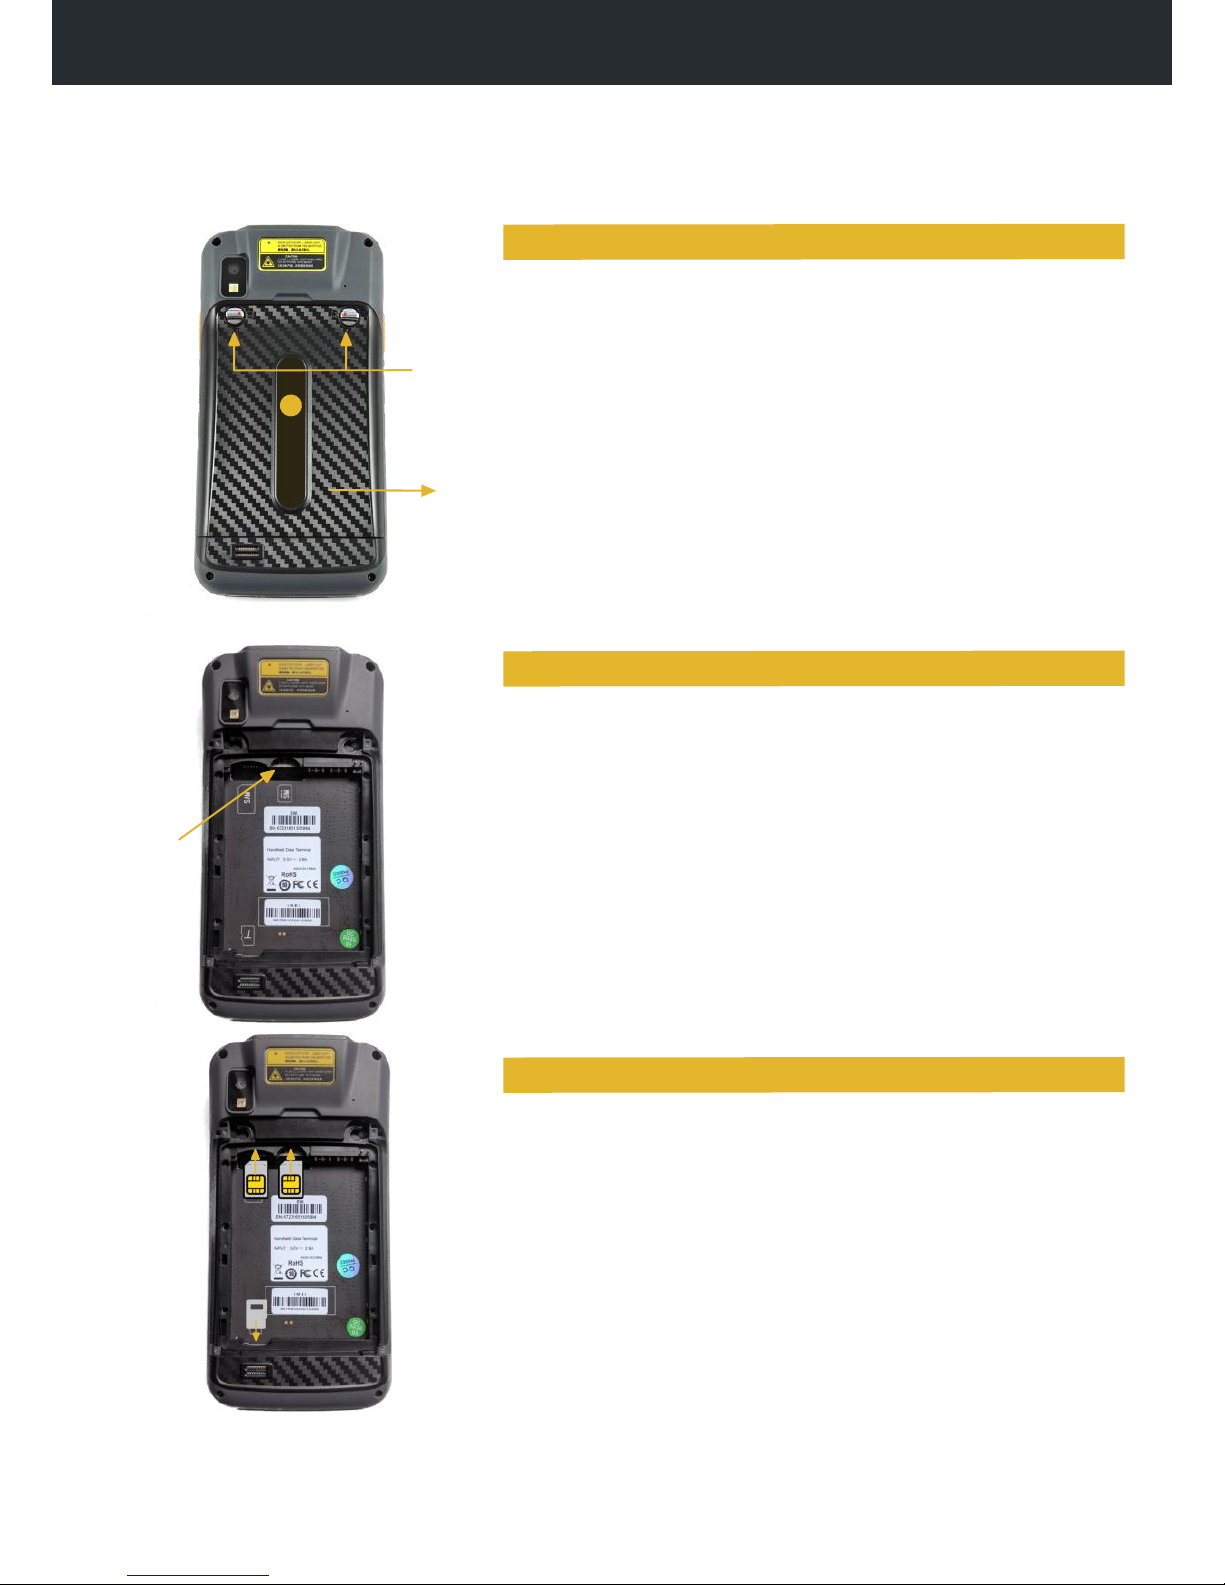
REPLACING THE BATTERY AND CARDS
The replaceable battery, dual SIM cards and Micro-SD storage cards are accessed by
removing the battery cover.
Step 1: Twist both screws on the battery cover on the back of the
device until they’re in the unlocked position.
Step 2: Remove the cover by pulling from top at point A where
there’s a small recess in the cover with your finger.
Step 3: Remove the battery back cover from the device fully, taking
care not to lose any screws.
Back case
screws
Pull the battery up at the top at point A using your finger. The
battery will lift up and you can then get hold of it to remove it
completely.
To replace the battery you do the opposite, seating the top of
the battery in first and then pushing the bottom in until the battery
is seated firmly in place.
Once the batteyr is removed you can insert SIM/SAM and SD cards.
Raptors use standard sizes for all cards as found in most mobile devices.
To install a SIM or SAM card, place the card onto the device and then
gently slide it up and into the connector until firmly in place.
To remove or install a micro-SD card:
•The Micros-SD slot is at the bottom left corner of the battery
compartment.
•Simply slide the SD card down into the slot.
•Pull the card up and out to remove it.
A
Battery
Installing SIM and SD cards
Replacing / replacing the battery
Removing the battery cover
Battery
door
A
Page 12
R
APTOR
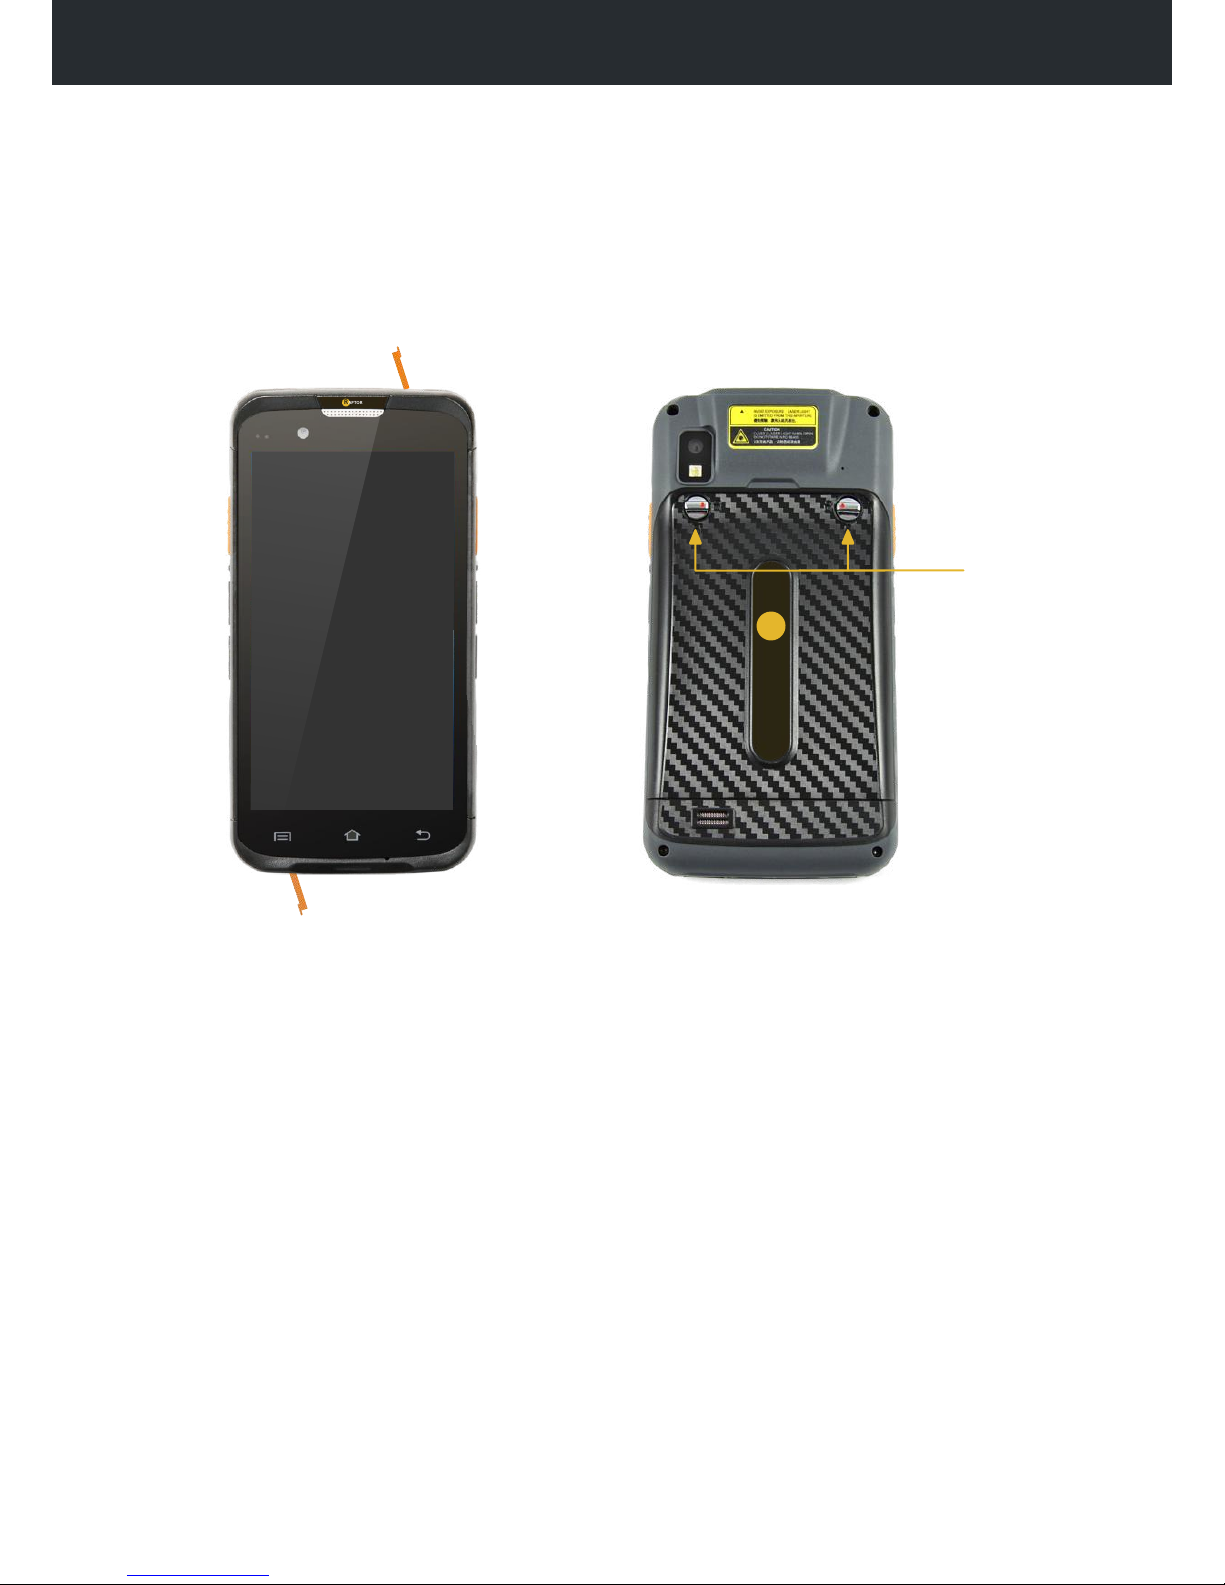
MAINTAINING RUGGEDNESS
Your Raptor device is fully rugged. However, you must be careful and use the device
correctly to ensure it remains rugged at all times.
Connector rubber covers - Must be kept securely fitted at all times to ensure maximum IP rating
of the device. When using connectors, make sure to only use supplied accessories and be careful to
not allow water or dust to enter the device.
Battery cover - Must be securely fastened and in the “locked” position securely. make sure the seal on
the cover is clean and clear of anything which will compromise the sealing of the device.
Be careful not to expose the device to water or dust when swapping out the battery, SIM/SAM or SD
cards.
Immersion - In water is not recommended. The E5 has an IP rating of IP65 so whilst it is weather proof
and can withstand heavy sprays of water at all angles, it is not designed to be submerged in water.
Casing - Check your device regularly for knocks or cracks in the casing. Your Raptor is rugged,
however, multiple drops over time can compromise the case and seals, allowing water and dust to
enter the device.
External headset
USB Connector
Battery door
R
APTOR
 Loading...