

Page 1
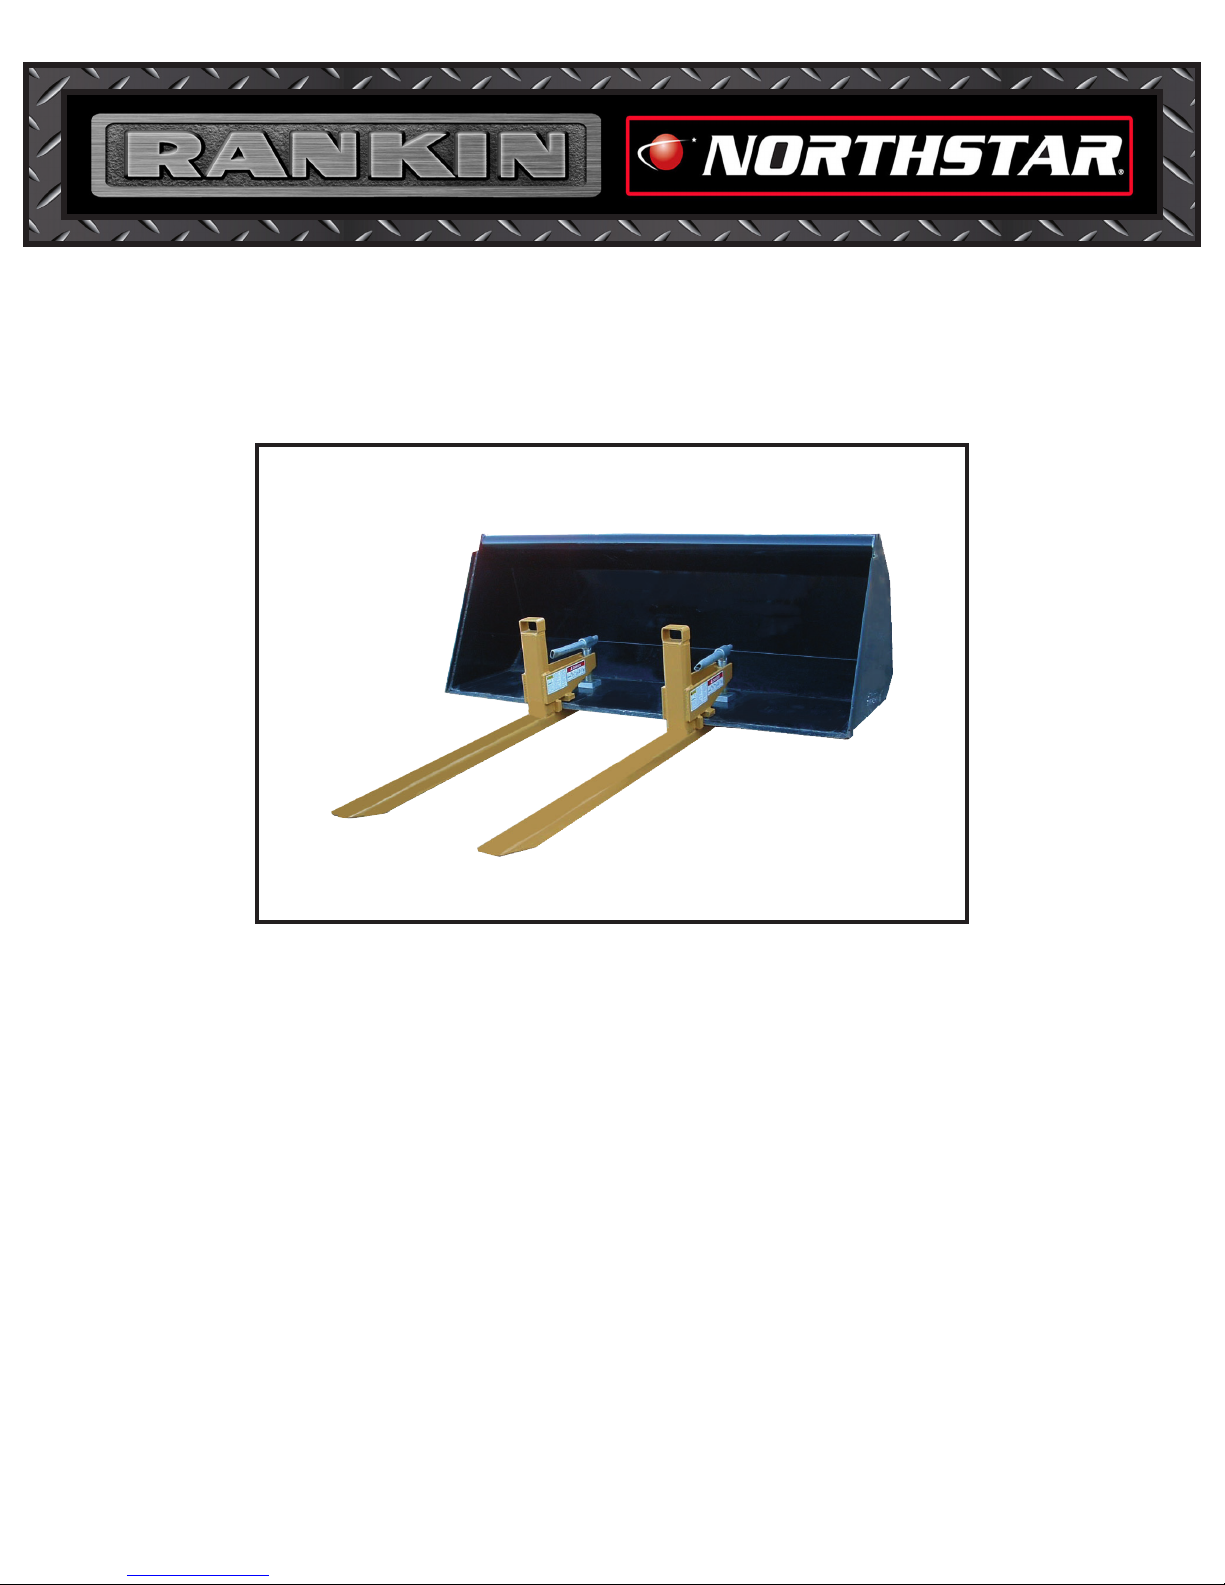
CLAMP-ON BUCKET FORKS
OPERATOR’S MANUAL
Models BF-1000, BF-2000, BF-3000
BF-4000, & BF-6000
Page 2

LIMITED WARRANTY
RANKIN EQUIPMENT/NORTHSTAR ATTACHMENTS warrants each new
RANKIN/NORTHSTAR product to be free from defects in material and
workmanship for a period of twelve (12) months from date of purchase to the
original purchaser. This warranty shall not apply to implements or parts that
have been subject to misuse, negligence, accident, or that have been altered in
any way.
Our obligation shall be limited to repairing or replacement of any part, provided
that such part is returned within thirty (30) days from date of failure to RANKIN/
NORTHSTAR through the dealer from whom the purchase was made,
transportation charges prepaid.
This warranty shall not be interpreted to render us liable for injury or damages
of any kind or nature, direct, consequential or contingent, to person or property.
This warranty does not extend to loss of crops, loss because of delay in
harvesting or any other expenses, for any other reasons.
RANKIN/NORTHSTAR in no way warranties engines, tires, or other trade
accessories, since these items are warranted separately by these respective
manufacturers.
RANKIN/NORTHSTAR reserves the right to make improvements in design or
changes in specication at any time, without incurring any obligations to owners
or units previously sold.
RANKIN EQUIPMENT/NORTHSTAR ATTACHMENTS
3205 BAY STREET
UNION GAP, WA 98903
Always refer to and heed machine operating warning decals on machine.
Page 3

TABLE OF CONTENTS
SECTION DESCRIPTION
PAGE
1 Introduction ........................................................ 1
2 Safety ................................................................... 2
2.1 General Safety ...................................................... 3
2.2 Equipment Safety Guidelines ............................... 4
2.3 Safety Training ..................................................... 5
2.4 Safety Signs ......................................................... 5
2.5 Preparation ........................................................... 6
2.6 Operating Safety................................................... 7
2.7 Transport Safety ................................................... 8
2.8 Maintenance Safety .............................................. 8
2.9 Hydraulic Safety ................................................... 9
2.10 Storage Safety ...................................................... 9
2.11 Sign-Off Form ..................................................... 10
3 Safety Sign Locations ...................................... 11
4 Operation........................................................... 12
4.1 To the New Operator or Owner .......................... 12
4.2 Machine Components ......................................... 13
4.3 Machine Break-In................................................ 13
4.4 Pre-Operation Checklist...................................... 13
4.5 Field Operation ................................................... 14
4.6 Transporting ....................................................... 17
4.7 Storage ............................................................... 17
5 Trouble Shooting .............................................. 18
6 Assembly........................................................... 19
7 Specifications ................................................... 20
7.1 Mechanical ......................................................... 20
7.2 Bolt Torque ......................................................... 20
8 Index .................................................................. 21
Page 4
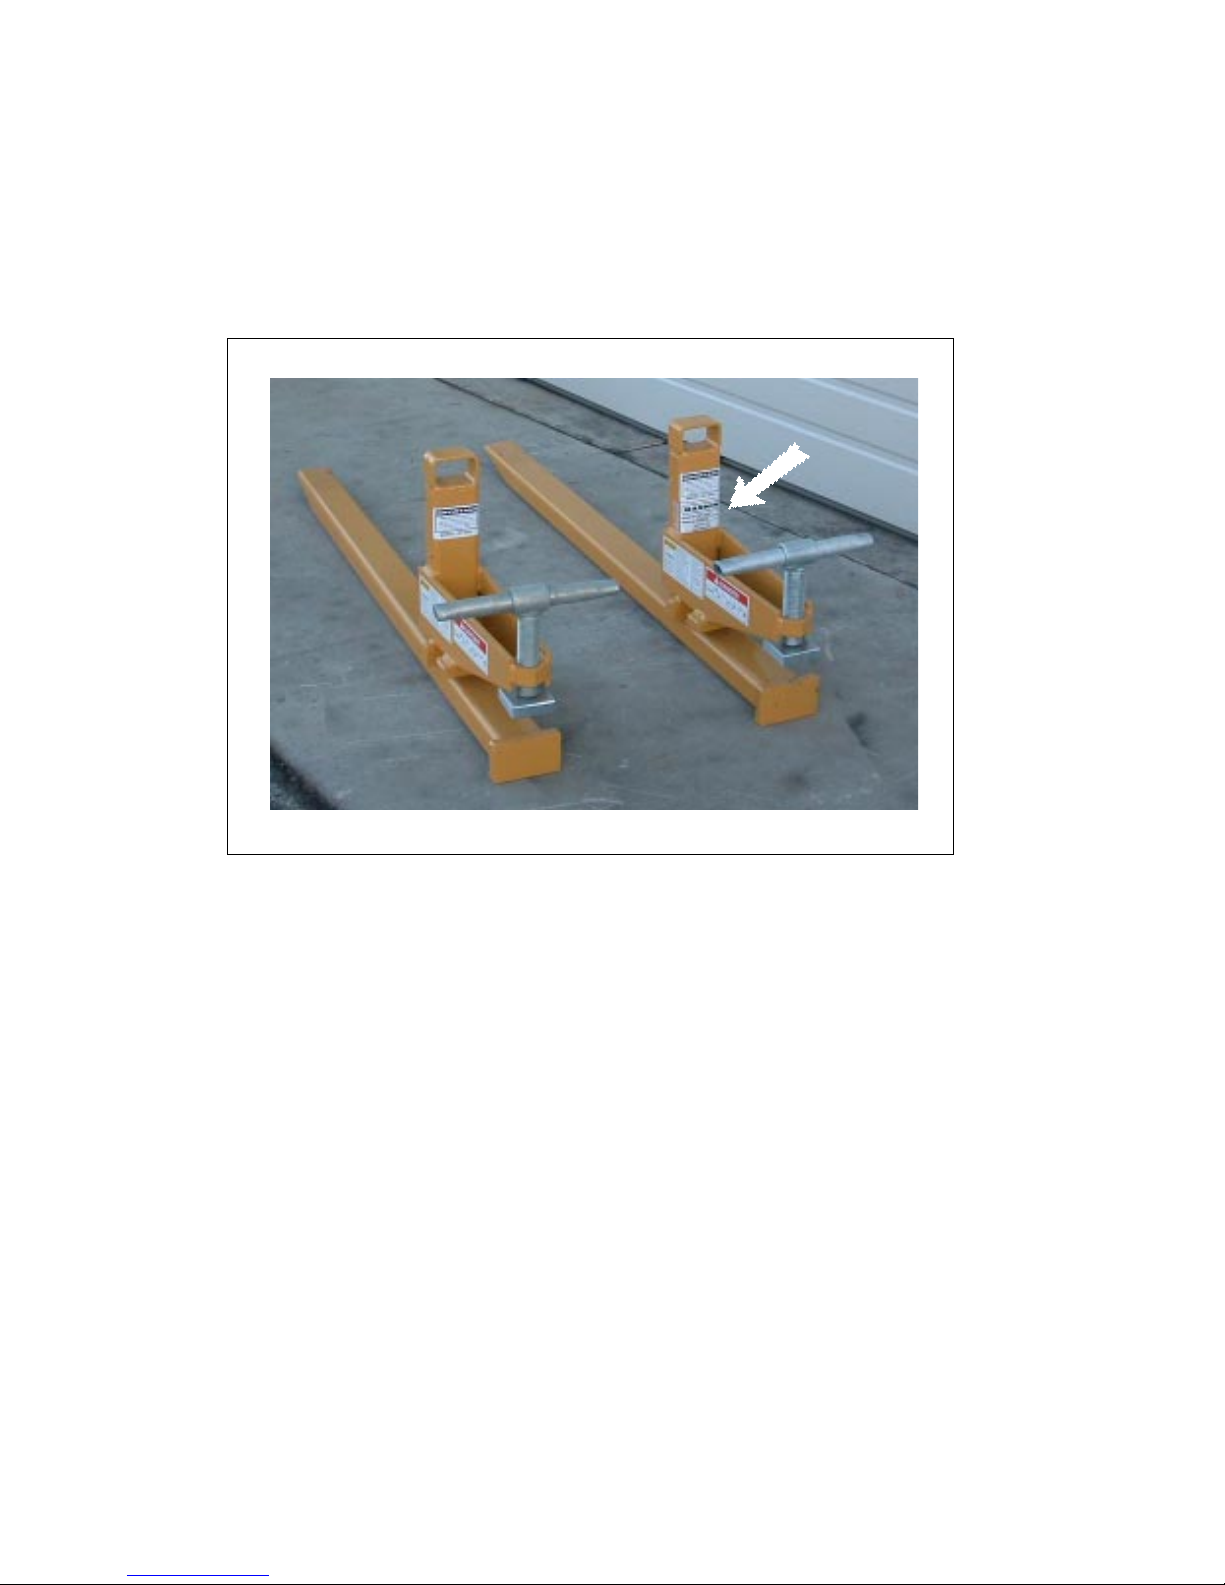
SERIAL NUMBER LOCATION
Always give you dealer the serial number of your Clamp-On Bucket Forks when ordering parts or
requesting service or other information.
The serial number plate is located where indicated. Please mark the number in the space provided for
easy reference.
Model Number _______________________________________
Serial Number ________________________________________
Page 5
1 INTRODUCTION
Congratulations on your choice of Clamp-On Bucket Forks to complement your pallet moving and storage
operation. This equipment has been designed and manufactured to meet the needs of a discriminating
buyer for the efficient lifting and moving of pallets.
Safe, efficient and trouble free operation of your Clamp-On Bucket Forks requires that you and anyone
else who will be operating or maintaining the machine, read and understand the Safety, Operation,
Maintenance and Trouble Shooting information contained within the Operator's Manual.
This manual covers the Clamp-On Bucket Forks Models BF-1000, BF-2000, BF-3000, BF-4000 & BF-
6000. Differences are explained where appropriate. Use the Table of Contents and Index as a guide to
locate required information.
Keep this manual handy for frequent reference and to pass on to new operators or owners. Call your
Rankin dealer or distributor if you need assistance, information or additional copies of the manuals.
OPERATOR ORIENTATION - The directions left, right, front and rear, as mentioned throughout this
manual, are as seen from the driver's seat and facing in the direction of travel.
1
Page 6

2 SAFETY
SAFETY ALERT SYMBOL
This Safety Alert symbol means
ATTENTION! BECOME ALERT!
YOUR SAFETY IS INVOLVED!
Why is SAFETY important to you?
3 Big Reasons
SIGNAL WORDS:
Note the use of the signal words DANGER,
WARNING and CAUTION with the safety
messages. The appropriate signal word for
each message has been selected using the
following guide-lines:
The Safety Alert symbol identifies
important safety messages on the
Clamp-On Bucket Forks and in the
manual. When you see this symbol,
be alert to the possibility of personal
injury or death. Follow the instructions in the safety message.
Accidents Disable and Kill
Accidents Cost
Accidents Can Be Avoided
DANGER - Indicates an imminently hazardous
situation that, if not avoided, will
result in death or serious injury.
This signal word is to be limited to
the most extreme situations typically for machine components
which, for functional purposes,
cannot be guarded.
SI NO LEE INGLES, PIDA AYUDA
A AIGUIEN QUE SI LO LEA PARA
QUE LE TRADUZCA LAS
MIDIDAS DE SEGURIDAD.
If you have any questions not answered in this manual or require additional copies or the manual is
damaged, please contact your dealer.
2
WARNING - Indicates a potentially hazard-
ous situation that, if not avoided,
could result in death or serious
injury, and includes hazards that are
exposed when guards are removed.
It may also be used to alert against
unsafe practices.
CAUTION - Indicates a potentially hazardous
situation that, if not avoided, may
result in minor or moderate injury.
It may also be used to alert against
unsafe practices.
Page 7
SAFETY
2.1 GENERAL SAFETY
YOU are responsible for the SAFE operation and
maintenance of your Clamp-On Bucket Forks.
YOU must ensure that you and anyone else who
is going to operate, maintain or work around the
Forks be familiar with the operating and maintenance procedures and related SAFETY information contained in this manual. This manual will take
you step-by-step through your working day and
alerts you to all good safety practices that should
be adhered to while operating the Forks.
Remember, YOU are the key to safety. Good
safety practices not only protect you but also the
people around you. Make these practices a
working part of your safety program. Be certain
that EVERYONE operating this equipment is
familiar with the recommended operating and
maintenance procedures and follows all the safety
precautions. Most accidents can be prevented. Do
not risk injury or death by ignoring good safety
practices.
• Clamp-On Bucket Forks attachment is
designed to engage and load palleted
materials. Do not use forks to handle large
loads such as bales, posts, etc. and avoid
carrying loose or shiftable loads.
• Fork owners must give operating instructions
to operators or employees before allowing
them to operate the machine, and at least
annually thereafter per OSHA (Occupational
Safety and Health Administration) regulation
1928.57.
1. Read and understand the
Operator’s Manual and all
safety signs before operating,
maintaining or adjusting the
Clamp-On Bucket Forks.
2. Have a first-aid kit available
for use should the need
arise and know how to use
it.
3. Have a fire extinguisher
available for use should the
need arise and know how to
use it.
4. Wear appropriate
protective gear. This
list includes but is not
limited to:
- A hard hat
- Protective shoes
with slip resistant
soles
- Protective goggles, glasses or face shield
- Heavy gloves
- Protective clothing
5. Install and secure all guards before starting.
• The most important safety feature on this
equipment is a SAFE operator. It is the
operator’s responsibility to read and understand ALL Safety and Operating instructions
in the manual and to follow these. Most
accidents can be avoided.
• A person who has not read and understood all
operating and safety instructions is not qualified to operate the machine. An untrained
operator exposes himself and bystanders to
possible serious injury or death.
• Do not modify the equipment in any way.
Unauthorized modification may impair the
function and/or safety and could affect the life
of the equipment.
6. Do not allow riders.
7. Wear suitable ear protection
for prolonged exposure to
excessive noise.
8. Lower bucket/forks to the ground, set park
brake, remove ignition key and wait for all
moving parts to stop before servicing, adjusting and repairing.
9. Clear the area of people, especially small
children, before starting.
10. Review safety related items annually with all
personnel who will operating or maintaining
the Clamp-On Bucket Forks.
3
Page 8

2.2 EQUIPMENT SAFETY GUIDELINES
1. Safety of the operator and bystanders is one
of the main concerns in designing and developing a machine. However, every year many
accidents occur which could have been
avoided by a few seconds of thought and a
more careful approach to handling equipment.
You, the operator, can avoid many accidents
by observing the following precautions in this
section. To avoid personal injury or death,
study the following precautions and insist
those working with you, or for you, follow
them.
2. In order to provide a better view, certain
photographs or illustrations in this manual
may show an assembly with a safety shield
removed. However, equipment should never
be operated in this condition. Keep all shields
in place. If shield removal becomes necessary for repairs, replace the shield prior to
use.
3. Replace any safety sign or instruction sign
that is not readable or is missing. Location of
such safety signs is indicated in this manual.
4. Never use alcoholic beverages or drugs which
can hinder alertness or coordination while
operating this equipment. Consult your doctor
about operating this machine while taking
prescription medications.
5. Under no circumstances should young
children be allowed to work with this
equipment. Do not allow persons to
operate or assemble this unit until they
have read this manual and have developed
a thorough understanding of the safety
precautions and of how it works. Review
the safety instructions with all users annually.
6. This equipment is dangerous to children and
persons unfamiliar with its operation. The
operator should be a responsible, properly
trained and physically able person familiar
with farm machinery and trained in this
equipment's operations. If the elderly are
assisting with farm work, their physical limitations need to be recognized and accommodated.
7. Use a tractor equipped with a Roll Over
Protective Structure (ROPS) and a seat belt.
8. Never exceed the limits of a piece of machinery. If its ability to do a job, or to do so safely,
is in question - DON'T TRY IT.
9. Do not modify the equipment in any way.
Unauthorized modification result in serious
injury or death and may impair the function
and life of the equipment.
10. In addition to the design and configuration of
this implement, including Safety Signs and
Safety Equipment, hazard control and accident prevention are dependent upon the
awareness, concern, prudence, and proper
training of personnel involved in the operation,
transport, maintenance, and storage of the
machine. Refer also to Safety Messages and
operation instruction in each of the appropriate sections of the Tractor and machine
Manuals. Pay close attention to the Safety
Signs affixed to the Tractor and the machine.
4
Page 9

2.3 SAFETY TRAINING
2.4 SAFETY SIGNS
1. Safety is a primary concern in the design and
manufacture of our products. Unfortunately,
our efforts to provide safe equipment can be
wiped out by a single careless act of an
operator or bystander.
2. In addition to the design and configuration of
equipment, hazard control and accident
prevention are dependent upon the awareness, concern, prudence and proper training
of personnel involved in the operation, transport, maintenance and storage of this equipment.
3. It has been said, "The best
safety feature is an informed, careful operator."
We ask you to be that kind
of an operator. It is the
operator's responsibility to read and understand ALL Safety and Operating instructions
in the manual and to follow these. Accidents
can be avoided.
4. Working with unfamiliar equipment can lead to
careless injuries. Read this manual, and the
manual for your tractor, before assembly or
operating, to acquaint yourself with the
machines. If this machine is used by any
person other than yourself, or is loaned or
rented, it is the machine owner's responsibility
to make certain that the operator, prior to
operating:
a. Reads and understands the operator's
manuals.
b. Is instructed in safe and proper use.
1. Keep safety signs clean and legible at all
times.
2. Replace safety signs that are missing or have
become illegible.
3. Replaced parts that displayed a safety sign
should also display the current sign.
4. Safety signs are available from your authorized Distributor or Dealer Parts Department or
the factory.
How to Install Safety Signs:
• Be sure that the installation area is clean and
dry.
• Be sure temperature is above 50°F (10°C).
• Determine exact position before you remove
the backing paper. (See Section 3).
• Remove the smallest portion of the split
backing paper.
• Align the sign over the specified area and
carefully press the small portion with the
exposed sticky backing in place.
• Slowly peel back the remaining paper and
carefully smooth the remaining portion of the
sign in place.
• Small air pockets can be pierced with a pin
and smoothed out using the piece of sign
backing paper.
5. Know your controls and how to stop tractor,
engine, and machine quickly in an emergency. Read this manual and the one provided with your tractor.
6. Train all new personnel and review instructions frequently with existing workers. Be
certain only a properly trained and physically
able person will operate the machinery. A
person who has not read and understood all
operating and safety instructions is not qualified to operate the machine. An untrained
operator exposes himself and bystanders to
possible serious injury or death. If the elderly
are assisting with farm work, their physical
limitations need to be recognized and accom-
modated.
5
Page 10
2.5 PREPARATION
1. Never operate the tractor and machine until
you have read and completely understand this
manual, the Tractor Operator's Manual, and
each of the Safety Messages found on the
safety signs on the tractor and machine.
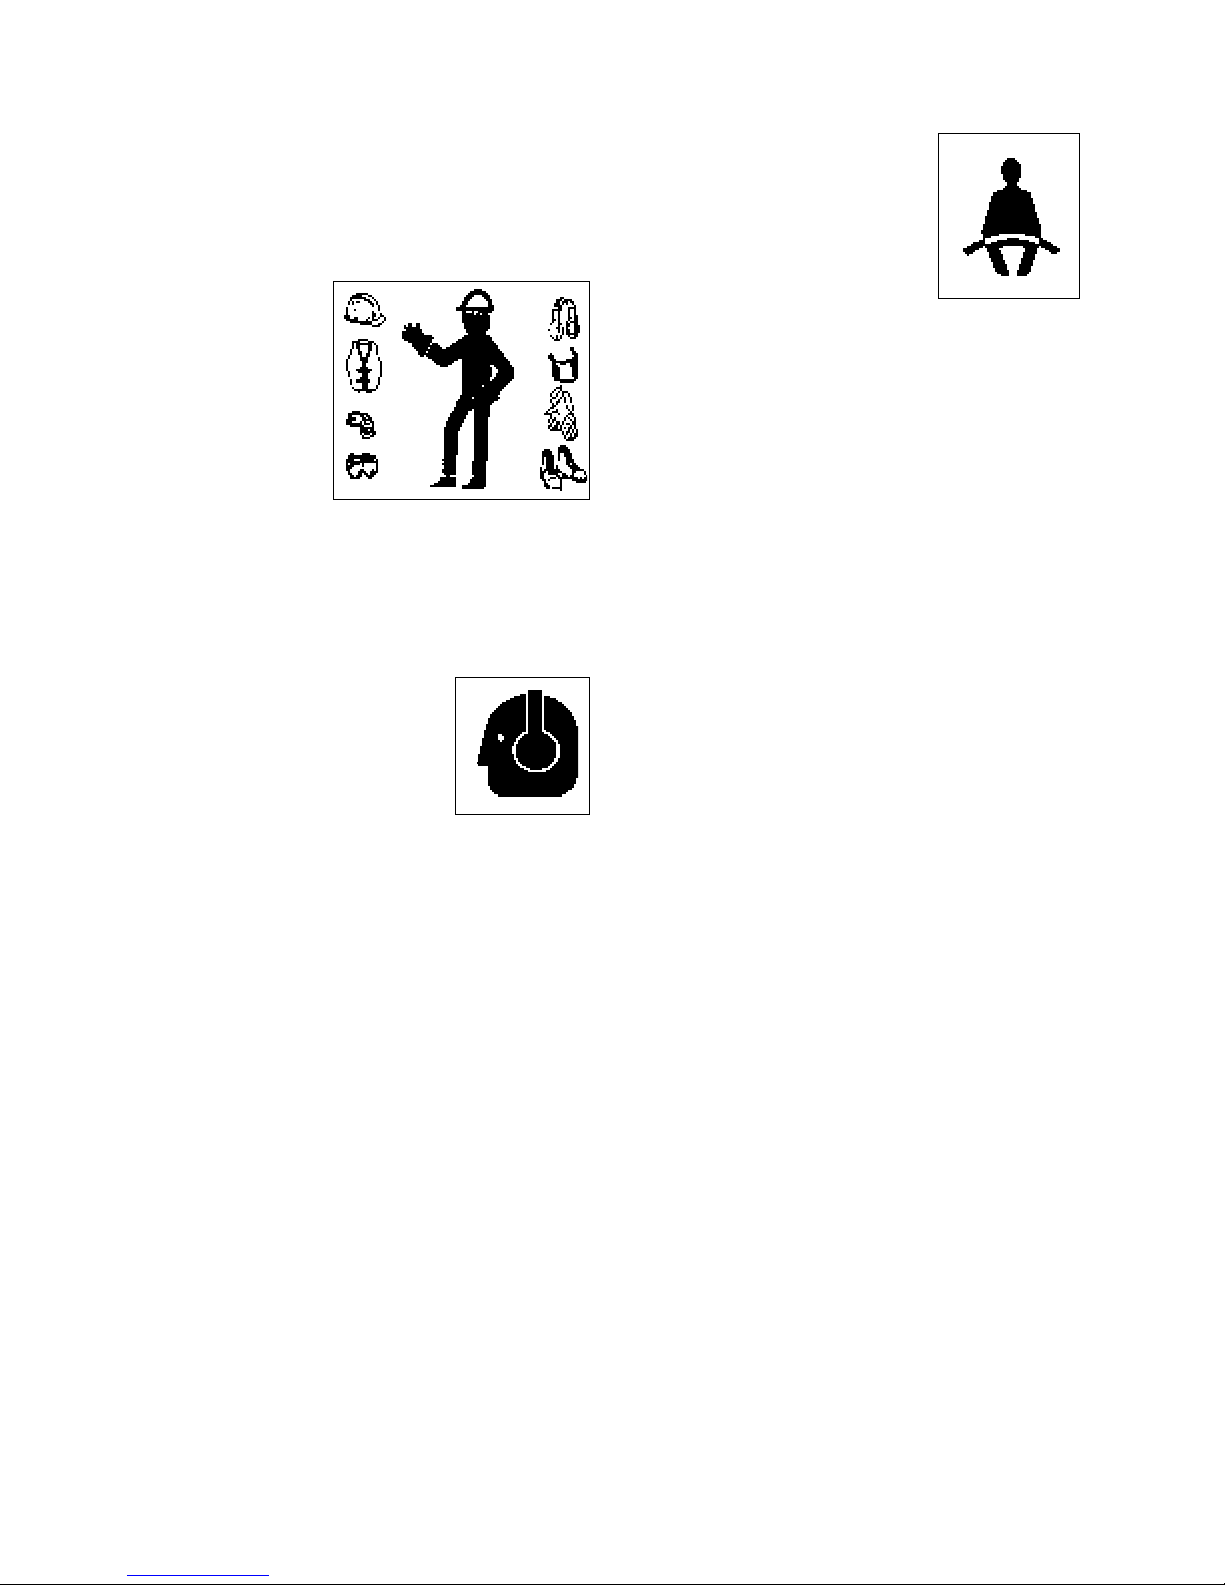
2. Personal
protection
equipment
including hard
hat, safety
glasses, safety
shoes, and
gloves are
recommended
during assembly, installation, operation, adjustment, maintaining, repairing, removal, or moving the
implement. Do not allow long hair, loose
fitting clothing or jewellery to be around
equipment.
3. PROLONGED EXPOSURE
TO LOUD NOISE MAY
CAUSE PERMANENT
HEARING LOSS!
Tractors with or without
equipment attached can
often be noisy enough to
cause permanent, partial
hearing loss. We recommend that you wear
hearing protection on a full-time basis if the
noise in the Operator's position exceeds
80db. Noise over 85db on a long-term basis
can cause severe hearing loss. Noise over
90db adjacent to the Operator over a longterm basis may cause permanent, total
hearing loss. NOTE: Hearing loss from loud
noise (from tractors, chain saws, radios, and
other such sources close to the ear) is cumulative over a lifetime without hope of natural
recovery.
4. Operate the machine only
with a tractor equipped with
an approved Roll-OverProtective Structure (ROPS).
Always wear your seat belt.
Serious injury or even death
could result from falling off
the tractor ---particularly
during a turnover when the operator could be
pinned under the ROPS or the tractor.
5. Clear working area of stones, branches or
hidden obstacles that might be hooked or
snagged, causing injury or damage.
6. Keep bucket/forks away from overhead power
lines. Electrocution can occur without direct
contact with an overhead power line.
7. Operate only in daylight or good artificial light.
8. Be sure machine is properly mounted, adjusted and in good operating condition.
9. Before starting, give the machine a "once
over" for any loose bolts, worn parts, cracks,
leaks, frayed hoses and make necessary
repairs. Always follow maintenance instructions.
10. Ensure that all safety shielding and safety
signs are properly installed and in good
condition.
11. Check that mounting clamps are in good
condition and all locking clamps are installed.
12. Move wheels or tires to their widest position
for maximum stability.
13. Add wheel ballast or rear weight for maximum
stability.
14. Do not use on tractors with narrow front ends.
Use wide front axle only.
6
Page 11

2.6 OPERATING SAFETY
1. Please remember it is important that you read
and heed the safety signs on the Loader and
Forks. Clean or replace all safety signs if they
cannot be clearly read and understood. They
are there for your safety, as well as the safety
of others. The safe use of this machine is
strictly up to you, the operator.
2. All things with moving parts are potentially
hazardous. There is no substitute for a
cautious, safe-minded operator who recognizes potential hazards and follows reasonable safety practices. The manufacturer has
designed these Forks to be used with all its
safety equipment properly attached, to minimize the chance of accidents. Study this
manual to make sure you have all safety
equipment attached.
3. Fork attachments are designed to engage and
load palleted material. Do not use forks to
handle large loads such as bales, posts, etc.
and avoid carrying loose or shiftable loads.
4. Practice raising, lowering and tilting unit and
its load when learning to operate loader and
forks. Become familiar with controls before
operating.
5. If a safety shield or guard is removed for any
reason, it must be replaced before the machine is again operated.
6. Keep the loader arms and forks at a low
position when moving and when working on
inclines.
12. Use extra care when handling large round
loads or other shiftable objects unless loader
and forks are equipped with an attachment
designed to secure objects. A grapple fork
anchor devise is recommended.
13. Large round loads or loose objects can roll
back down loader arms. Secure objects
before raising arms. Keep arms low.
14. Keep bucket/forks away from overhead power
lines. Electrocution can occur without direct
contact with an overhead power line.
15. Do not exceed machine lift capacity. Overloading can cause structural damage and lead
to unsafe operating conditions.
16. Never carry, lift or move people on arms, forks
or bucket. Do not use machine as a work
platform.
17. Always use two people to handle heavy,
unwieldy components during assembly,
installation, removal or moving.
18. Never place any part of your body where it
would be in danger if movement should occur
during assembly, installation, operation,
maintaining, repairing, removal or moving.
19. Do not walk or work under a raised machine
or attachment unless it is securely blocked or
held in position. Do not depend on the tractor
hydraulic system to hold the machine or
attachment in place.
7. Do not operate near the edge of drop-offs or
banks.
8. Do not operate at an angle on steep slopes.
Drive up or down but not across. Keep
bucket, forks and arms low.
9. Make allowances for increased length and
weight of tractor during operation and moving.
10. Remove all sticks, stones, roots, and wires
from working area before starting. Take care
not to contact overhead obstructions during
operation.
11. Never operate controls from the ground.
Operate only from the operators seat to
prevent unexpected loader and fork movement that can lead to crushing between frame
members.
20. Never use alcoholic beverages or drugs which
can hinder alertness or coordination while
operating this equipment. Consult your doctor
about operating this machine while taking
prescription medications.
21. Do not allow riders on the machine or tractor
at any time. There is no safe place for any
riders.
22. Do not go under raised loader or forks. Keep
others away.
23. Before you operate the machine, check over
all pins, bolts, and connections to be sure all
are securely in place. Replace any damaged
or worn parts immediately.
24. Review safety instructions annually.
7
Page 12
2.7 TRANSPORT SAFETY
2.8 MAINTENANCE SAFETY
1. Comply with state and local laws governing
highway safety and movement of farm machinery on public roads.
2. The use of flashing amber lights is acceptable
in most localities. However, some localities
prohibit their use. Local laws should be
checked for all highway lighting and marking
requirements.
3. At all times, when driving the tractor and
equipment on the road or highway under 20
mph (32 kph) use flashing amber warning
lights and a slow moving vehicle (SMV)
identification emblem. Do not exceed 20 mph
(32 kph). Reduce speed on rough roads and
surfaces.
4. Keep tractor in gear to provide engine braking
when going downhill. Do not coast.
5. Plan your route to avoid heavy traffic.
6. Keep brake pedals latched together at all
times.
7. Do not drink and drive.
1. Good maintenance is your responsibility.
Poor maintenance is an invitation to trouble.
2. Follow good shop practices.
- Keep service
area clean and
dry.
- Be sure electrical
outlets and tools
are properly
grounded.
- Use adequate
light for the job at
hand.
3. Make sure there is plenty of ventilation.
Never operate the engine in a closed building.
The exhaust fumes may cause asphyxiation.
4. Before working on this machine, lower loader
arms and forks to the ground, shut off the
engine, set the brakes, and remove the
ignition key.
5. Never work under equipment unless it is
blocked securely.
8. Be a safe and courteous driver. Always yield
to oncoming traffic in all situations, including
narrow bridges, intersections, etc. Watch for
traffic when operating near or crossing
roadways.
9. Turn into curves or go up or down hills only at
a low speed and at a gradual steering angle.
Make certain that at least 20% of the tractor's
weight is on the front wheels to maintain safe
steerage. Slow down on rough or uneven
surfaces.
10. Keep loader in a low position when traveling.
Remember, the higher the loader, the higher
the center of gravity with increased risk of the
unit upset.
11. Never allow riders on either tractor or machine.
6. Use personal protection devices such as eye,
hand and hearing protectors, when performing
any service or maintenance work.
7. Where replacement parts are necessary for
periodic maintenance and servicing, genuine
factory replacement parts must be used to
restore your equipment to original specifications. The manufacturer will not be responsible for injuries or damages caused by use of
unapproved parts and/or accessories.
8. A fire extinguisher
and first aid kit
should be kept
readily accessible
while performing
maintenance on
this equipment.
9. Periodically tighten all bolts, nuts and screws
and check that all cotter pins are properly
installed to ensure unit is in a safe condition.
8
10. When completing a maintenance or service
function, make sure all safety shields and
devices are installed before placing unit in
service.
Page 13

2.9 HYDRAULIC SAFETY
2.10 STORAGE SAFETY
1. Make sure that all the components in the
hydraulic system are kept in good condition
and are clean.
2. Replace any worn, cut, abraded, flattened or
crimped hoses and metal lines.
3. Relieve pressure before working on hydraulic
system.
4. Do not attempt any makeshift repairs to the
hydraulic lines, fittings or hoses by using
tapes, clamps or cements. The hydraulic
system operates under extremely highpressure. Such repairs will fail suddenly and
create a hazardous and unsafe condition.
5. Wear proper hand and
eye protection when
searching for a highpressure hydraulic leak.
Use a piece of wood or
cardboard as a backstop
instead of hands to
isolate and identify a
leak.
1. Store the unit in an area away from human
activity.
2. Do not permit children to play on or around
the stored machine.
3. Store the unit in a dry, level area. Support the
frame with planks if required.
6. If injured by a concentrated high-pressure
stream of hydraulic fluid, seek medical attention immediately. Serious infection or toxic
reaction can develop from hydraulic fluid
piercing the skin surface.
7. Before applying pressure to the system, make
sure all components are tight and that lines,
hoses and couplings are not damaged.
8. When disconnecting hydraulic lines, shut off
hydraulic supply and relieve hydraulic pressure.
9
Page 14

2.11 SIGN-OFF FORM
The Manufacturer follows the general Safety Standards specified by the American Society of Agricultural
Engineers (ASAE) and the Occupational Safety and Health Administration (OSHA). Anyone who will be
operating and/or maintaining the Clamp-On Bucket Forks must read and clearly understand ALL Safety,
Operating and Maintenance information presented in this manual.
Do not operate or allow anyone else to operate this equipment until such information has been reviewed.
Annually review this information before the season start-up.
Make these periodic reviews of SAFETY and OPERATION a standard practice for all of your equipment. We
feel that an untrained operator is unqualified to operate this machine.
A sign-off sheet is provided for your record keeping to show that all personnel who will be working with the
equipment have read and understand the information in the Operator’s Manual and have been instructed in
the operation of the equipment.
SIGN-OFF FORM
DATE
EMPLOYEES SIGNATURE EMPLOYERS SIGNATURE
10
Page 15
3 SAFETY SIGN LOCATIONS
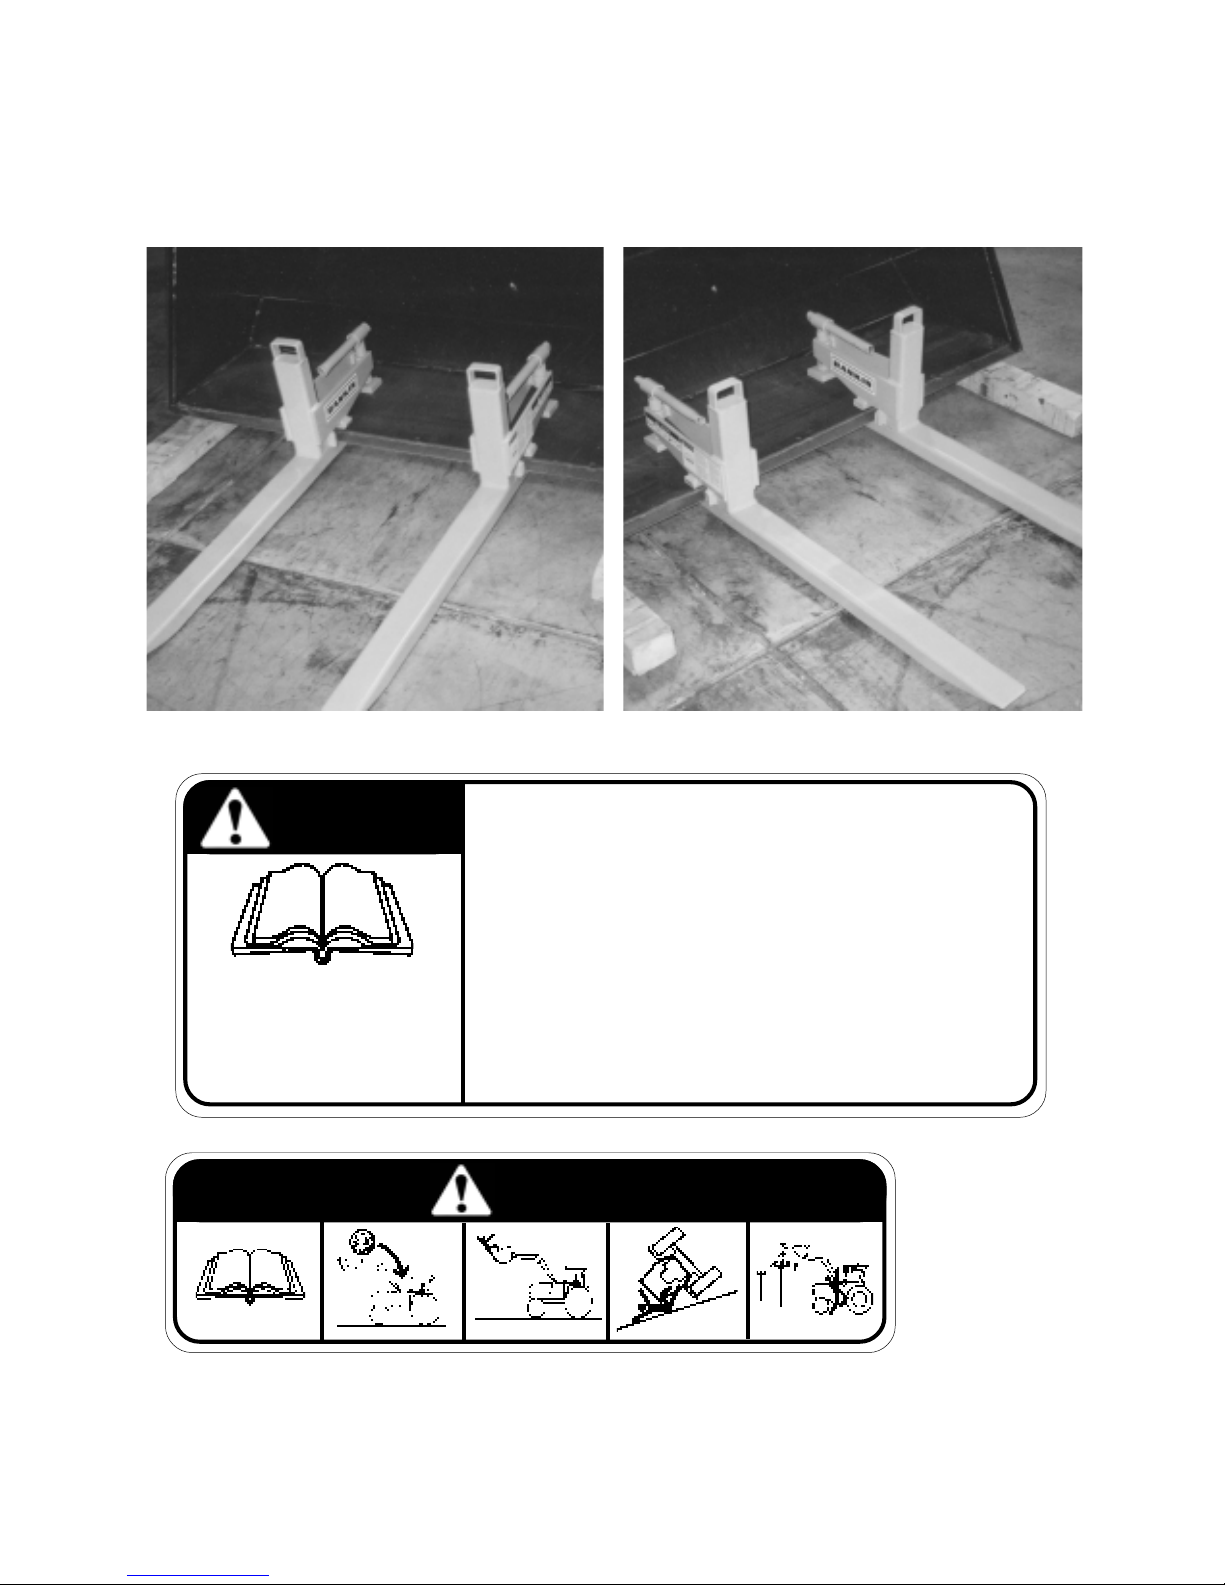
The types of safety signs and locations on the equipment are shown in the illustration below. Good safety
requires that you familiarize yourself with the various safety signs, the type of warning and the area, or
particular function related to that area, that requires your SAFETY AWARENESS.
B
A
CAUTION
Fork attachments are designed
to engage and load palleted
materials. Do not use forks to
handle large loads such as
bales, posts, etc. and avoid
carrying loose or shiftable loads.
A
B
A
• Read Operator's Manual.
• Lower bucket/forks to the
ground, stop engine, set park
brake, remove ignition key and
wait for all moving parts to stop
before servicing, adjusting and
repairing.
• Do not carry people in bucket
or on frame.
• Add weight to rear of frame to
balance bucket load.
• Stay away from overhead
power lines. Electrocution can
occur without direct contact.
• Widen wheels or tires to
prevent tipping.
• Use only with a unit with
ROPS and a seat belt.
• Secure load in bucket to
prevent roll-back down loader
arms.
• Carry load close to the ground
when moving.
• Do not go under raised
bucket. Keep others away.
• Review safety instructions.
CAUT002
B
REMEMBER - If safety signs have been damaged, removed, become illegible or parts replaced without
signs, new signs must be applied. New signs are available from your authorized dealer.
DANGER
DANG001
11
Page 16

4 OPERATION
OPERATING SAFETY
1. Read Operator's Manual.
2. Lower bucket/forks to the ground, stop
engine, set park brake, remove ignition key
and wait for all moving parts to stop before
servicing, adjusting and repairing.
3. Do not carry people in bucket or on frame.
4. Add weight to rear of frame to balance
bucket load.
5. Stay away from overhead power lines.
Electrocution can occur without direct
contact.
6. Widen wheels or tires to prevent tipping.
7. Use only with a unit with ROPS and a seat
belt.
8. Secure load in bucket to prevent roll-back
down loader arms.
9. Carry load close to the ground when moving.
10. Do not go under raised bucket. Keep
others away.
4.1 TO THE NEW OPERATOR
OR OWNER
Clamp-On Bucket Forks are designed as a light to
medium duty forks to engage and load palleted
materials. Do not use forks to handle large loads
such as bales, posts, etc. and avoid carrying loose
or shiftable loads. Be familiar with the machine
before starting.
It is the responsibility of the owner or operator
to read this manual and to train all other
operators before they start working with the
machine. Follow all safety instructions exactly. Safety is everyone's business. By
following recommended procedures, a safe
working environment is provided for the
operator, bystanders and the area around the
worksite. Untrained operators are not qualified to operate the machine.
Many features incorporated into this machine are
the result of suggestions made by customers like
you. Read this manual carefully to learn how to
operate the machine safely and how to set it to
provide maximum field efficiency. By following the
operating instructions in conjunction with a good
maintenance program, your Clamp-On Bucket
Forks will provide many years of trouble-free
service.
11. Review safety instructions.
12
Page 17
4.2 MACHINE COMPONENTS
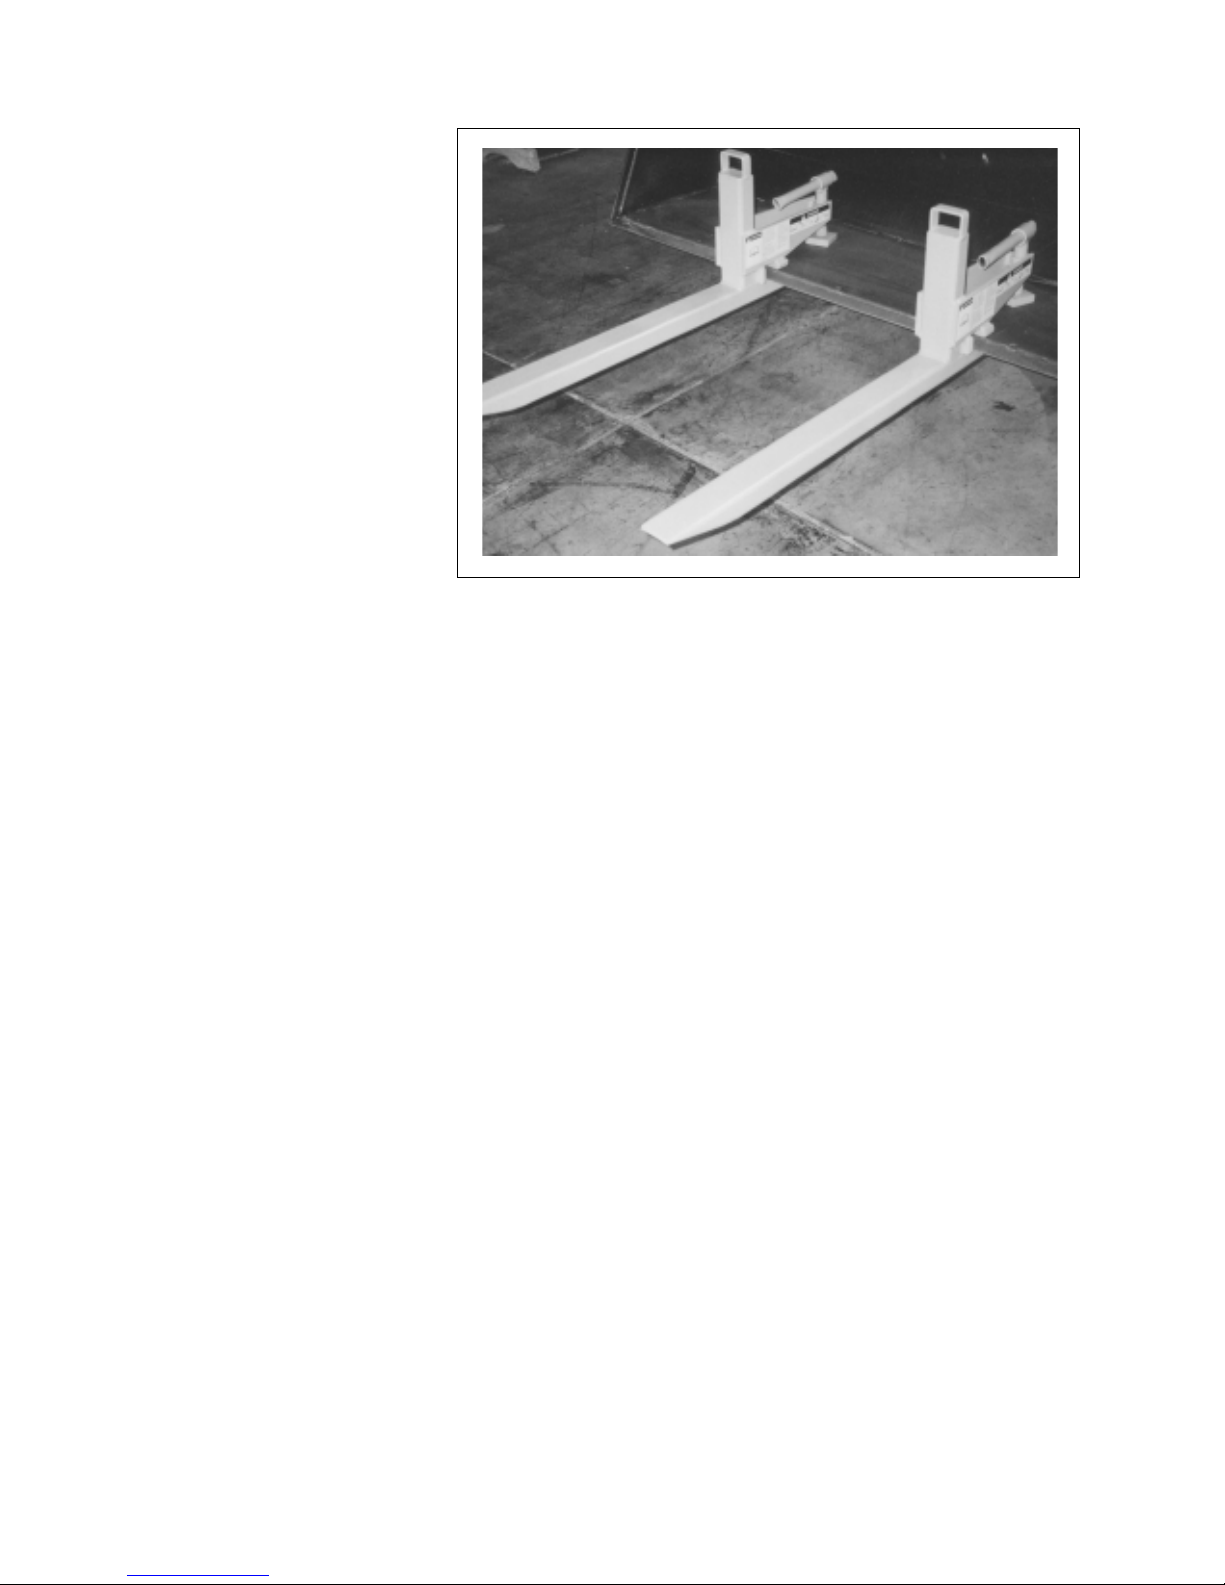
Clamp-On Bucket Forks are
clamped to the front of the loader
bucket and are used to lift, move
and transport pallets.
A Forks
B Clamping Frame
C Bucket
Fig. 1 MACHINE COMPONENTS
B
B
C
A
A
4.3 MACHINE BREAK-IN
Although there are no operational restrictions on
the Clamp-On Bucket Forks when used for the
first time, it is recommended that the following
mechanical items be checked:
A. After Operating For 1 and 5 Hours:
1. Check all nuts, bolts and other fasteners.
Tighten to their specified torque level.
2. Check that the forks are in good condition.
4.4 PRE-OPERATION CHECKLIST
Efficient and safe operation of the Clamp-On Bucket
Forks requires that each operator reads and understands the operating procedures and all related safety
precautions outlined in this section. A pre-operation
checklist is provided for the operator. It is important
for both the personal safety and maintaining the good
mechanical condition of the Clamp-On Bucket Forks
that this checklist is followed.
Before operating the machine and each time thereafter, the following areas should be checked off:
1. Use only an Agricultural tractor of the appropriate horsepower on the machine.
2. Check that the forks are properly attached to the
bucket and loader. Be sure the clamps are
tightened.
3. Be sure extra weights are mounted on the rear of
the tractor if required to balance the load.
4. Check the forks and clamps. Be sure they are
not damaged or broken and are not badly worn.
Repair or replace as required.
5. Check for entangled material. Remove this
material.
13
Page 18
4.5 FIELD OPERATION
OPERATING SAFETY
1. Read Operator's Manual.
2. Lower bucket/forks to the ground, stop
engine, set park brake, remove ignition key
and wait for all moving parts to stop before
servicing, adjusting and repairing.
3. Do not carry people in bucket or on frame.
4. Add weight to rear of frame to balance
bucket load.
5. Stay away from overhead power lines.
Electrocution can occur without direct contact.
Clamp-On Bucket Forks are designed as a light to
moderate duty set of forks that clamps to the front
of the bucket on a loader. The forks are designed
specifically for handling pallets. However the
operator has the responsibility of being familiar
with all operating and safety procedures and
following them.
6. Widen wheels or tires to prevent tipping.
7. Use only with a unit with ROPS and a seat
belt.
8. Secure load in bucket to prevent roll-back
down loader arms.
9. Carry load close to the ground when moving.
10. Do not go under raised bucket. Keep others
away.
11. Review safety instructions.
Each operator should review this section of the
manual at the start of the season and as often as
required to be familiar with the machine. When
using, follow this procedure:
1. Review and follow the PreOperation Checklist.
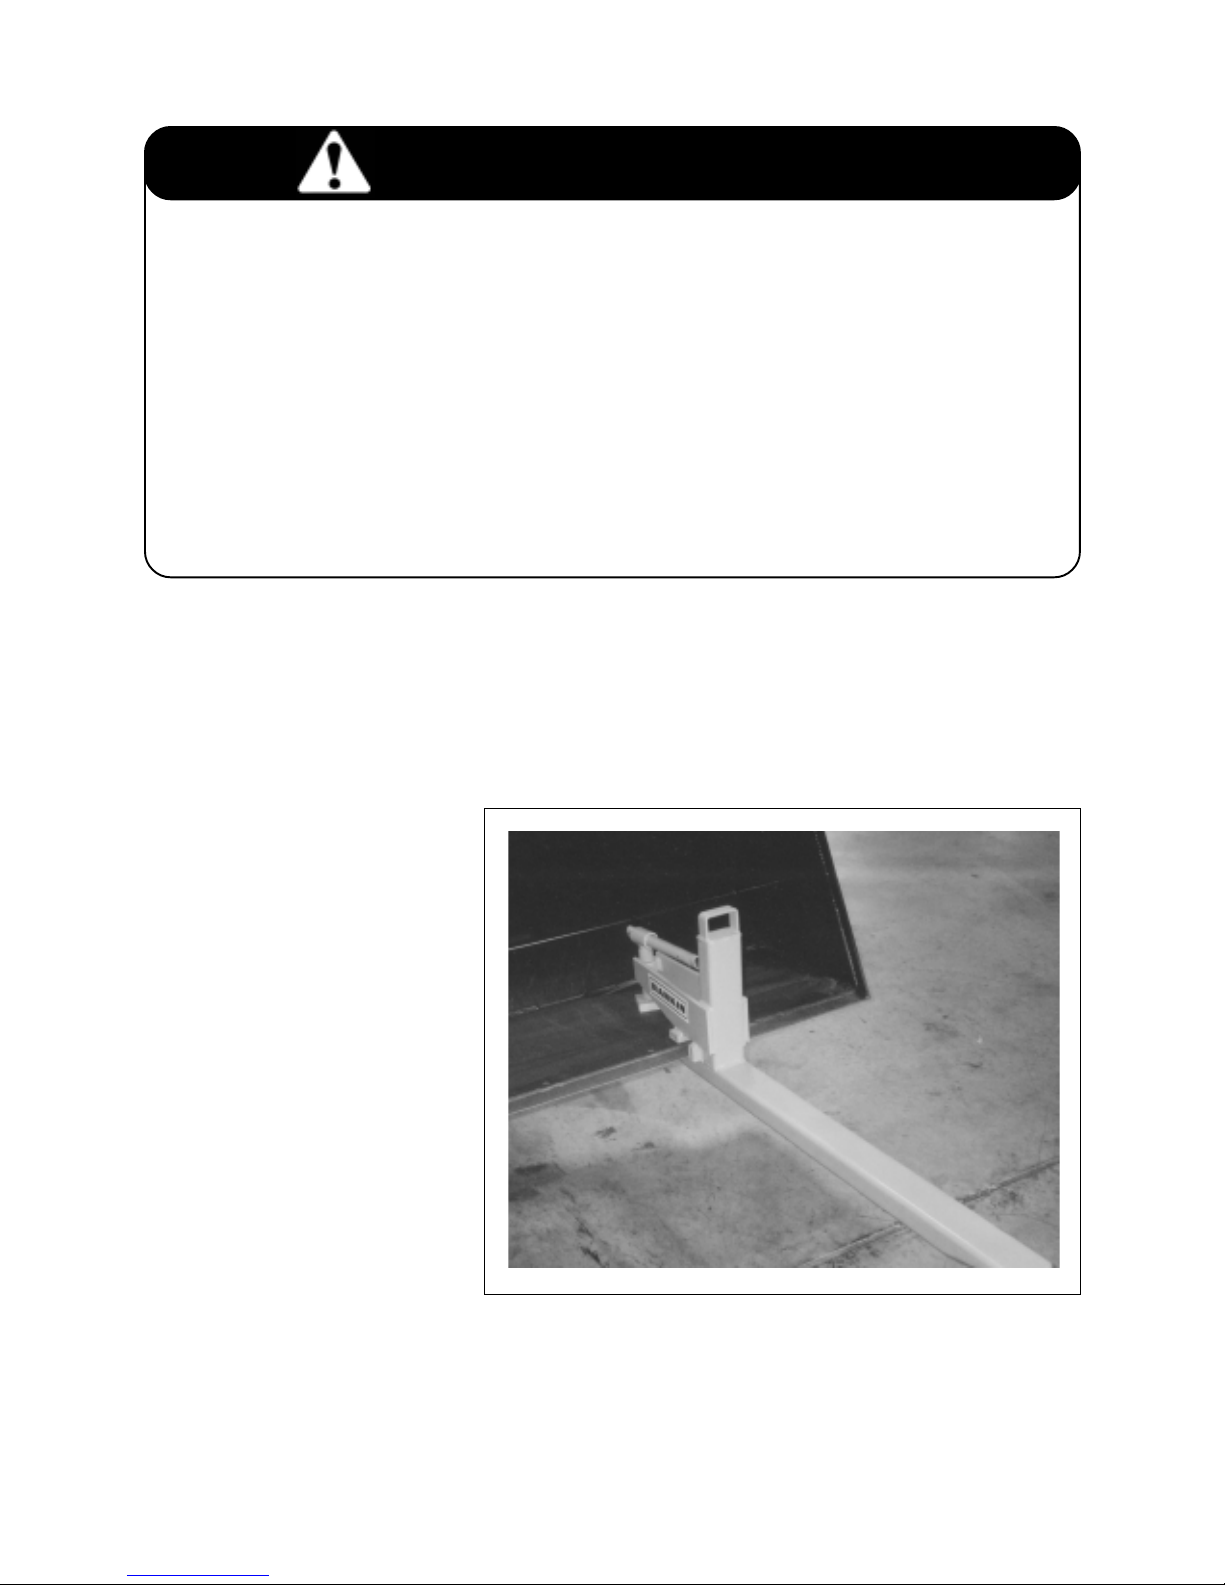
2. Attach the forks to the bucket:
a. Position the bucket a few
inches above the ground.
b. Slide one of the forks over
the front of the bucket lip.
Fig. 2 LEFT FORK
14
Page 19
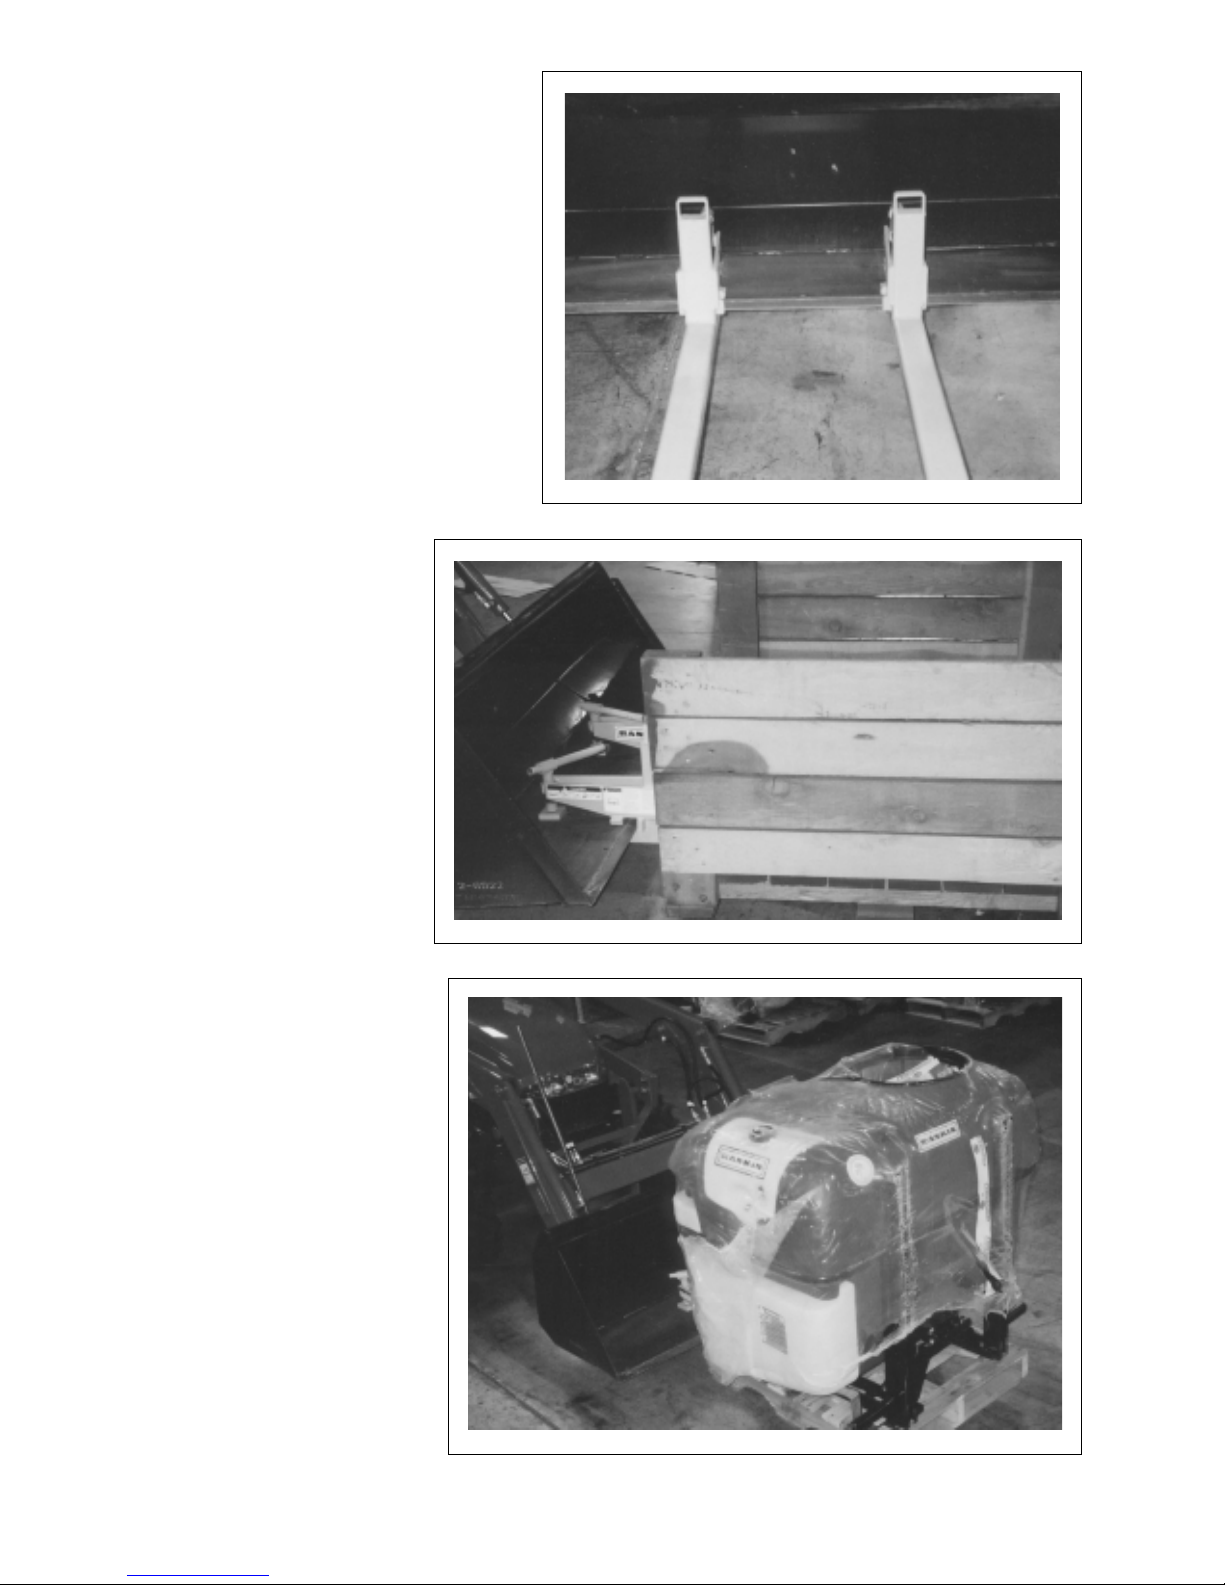
c. Slide the other fork over the bucket
lip.
d. Tighten fork clamps.
3. Before going to the working area review Section
4.6 Transporting.
4. Drive to the working area
and stop in a level area.
Fig. 3 BOTH FORKS
5. Align with the pallet and
lower into working position.
6. Drive slowly into the pallet
while adjusting the fork
angle if required.
7. Raise the pallet.
Fig. 4 DRIVING IN
Fig. 5 RAISING
15
Page 20
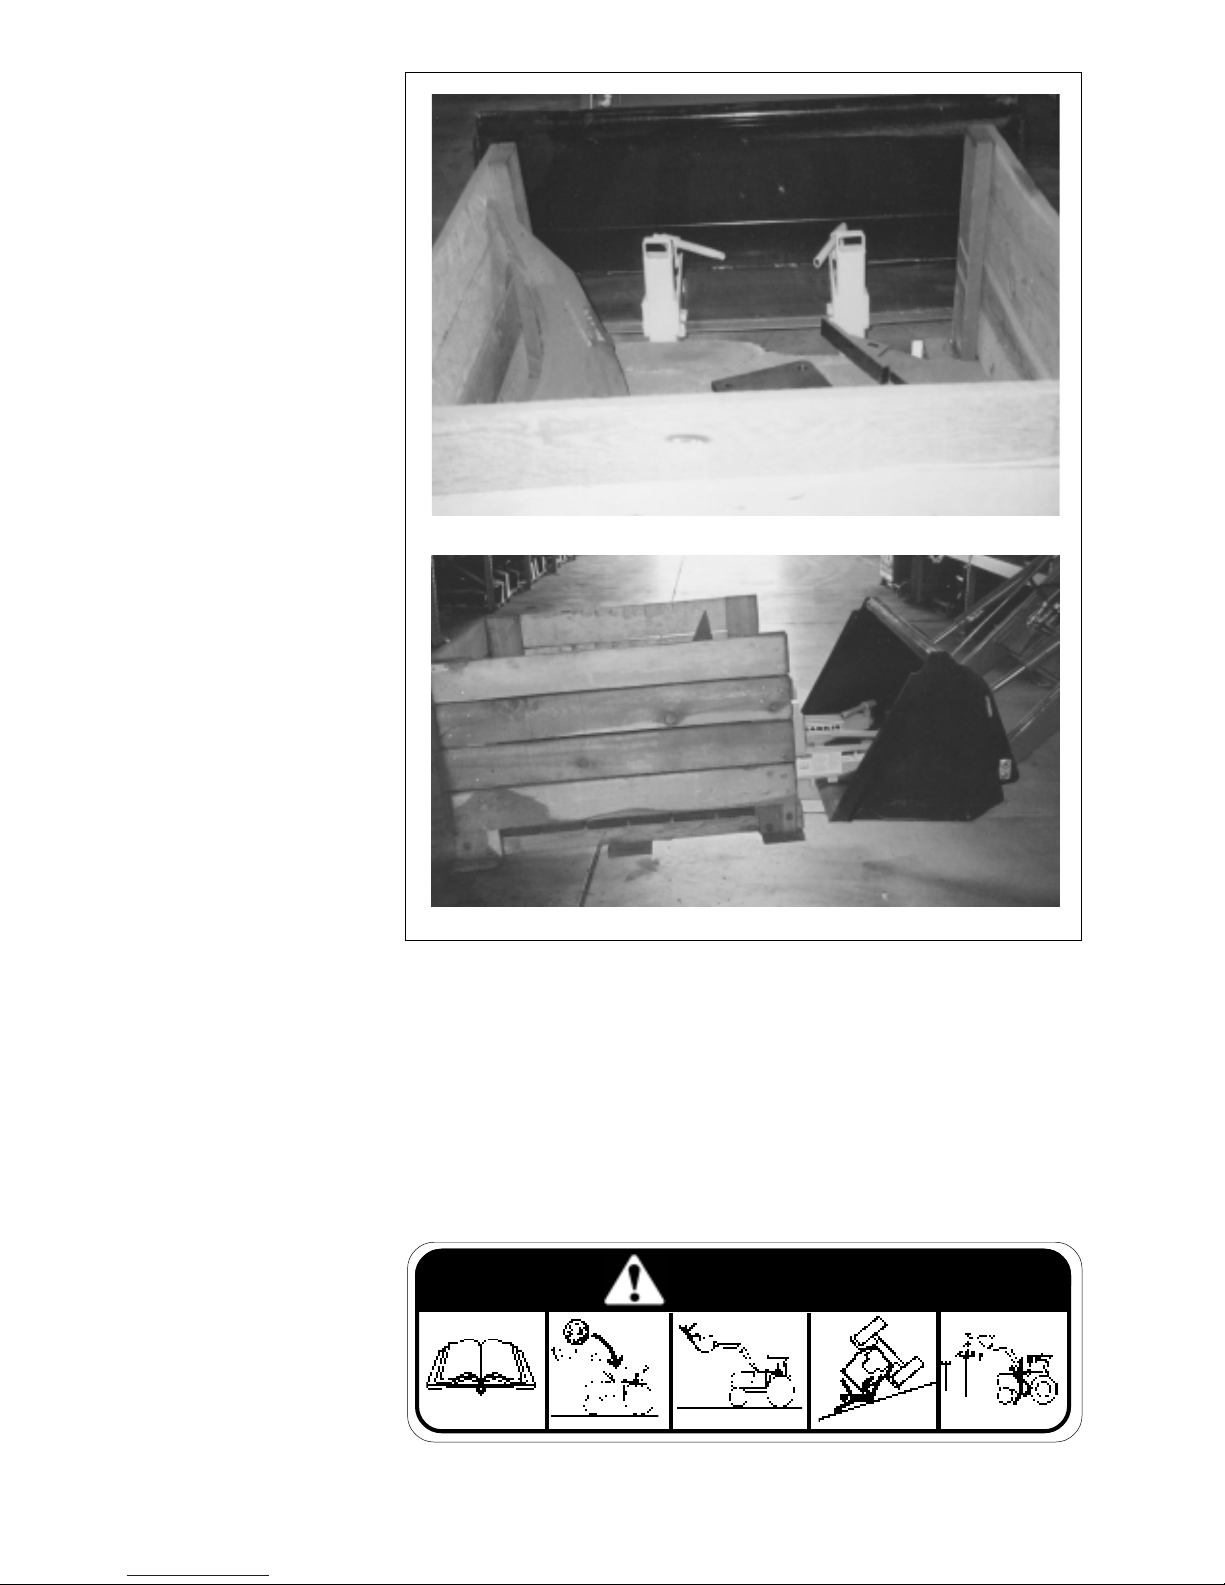
8. Operating Hints:
a. Always center the
load on the pallet
between the forks
to provide maximum stability.
b. Drive into the pallet
as far as you can to
bring the pallet
center-of-gravity as
close to the tractor
as possible to
improve stability.
c. Move wheels/tires
to their widest
position.
d. Add ballast to the
rear of the tractor
to improve stability.
e. Keep loader arms
low when moving.
Centered
f. Do not go under
raised forks. Keep
others away.
g. Stay away from
overhead power
lines. Electrocution
can occur without
direct contact.
h. Use only with a
tractor equipped
with a ROPS and seat belt.
i. Do not drive across slopes. Go straight
up or down. Carry arms low.
j. Do not carry people on forks or on frame.
k. Use only to handle, lift or move palleted
material. Do not use with loose or movable loads.
Fig. 6 WORKING
Raising
DANGER
16
DANG001
Page 21

4.6 TRANSPORTING
4.7 STORAGE
TRANSPORT SAFETY
1. Make sure you are in compliance with all
local regulations regarding transporting
equipment on public roads and highways
including lights, reflectors and the SMV.
2. Carry forks low when moving or transporting.
3. Do not allow anyone to ride on the Forks or
tractor during transport.
4. Do not exceed 20 mph (32 kph). Reduce
speed on rough roads and surfaces.
5. Tighten clamping hardware to its specified
torque.
6. Always use hazard flashers on the tractor
when transporting unless prohibited by law.
When transporting the machine, review and follow
these instructions:
1. Be sure all bystanders are clear of the machine.
2. Be sure that the forks securely attached to the
bucket.
STORAGE SAFETY
1. Store the unit in an area away from human
activity.
2. Do not permit children to play on or around
the stored machine.
3. Store the unit in a dry, level area. Support
the frame with planks if required.
After the season's use, the machine should be
thoroughly inspected and prepared for storage.
Repair or replace any worn or damaged components to prevent any unnecessary down time at
the start of next season. To insure a long, trouble
free life, this procedure should be followed when
preparing the unit for storage:
1. Clear the area of bystanders, especially small
children.
2. Thoroughly wash the machine using a pressure washer to remove all dirt, mud, debris
and residue.
3. Inspect the forks and frame for damage or
entangled material. Repair or replace damaged parts. Remove all entangled material.
3. Be sure you have installed extra weights on
the rear of the tractor if required.
4. Clean the SMV emblem, lights and reflectors
and be sure they are working. Comply with all
local regulations.
5. Carry forks low when moving or transportiing.
6. Stay away from overhead power lines. Electrocution can occur without direct contact.
7. Be sure your machine can clearly be seen by
overtaking and oncoming traffic.
8. Do not allow riders.
9. Always use hazard flashers on the tractor
when transporting unless prohibited by law.
4. Touch up all paint nicks and scratches to
prevent rusting.
5. Move to storage area.
6. Select an area that is dry, level and free of
debris.
7. Remove forks from bucket.
8. If the machine cannot be placed inside, cover
with a waterproof tarpaulin and tie securely in
place.
9. Store the forks in an area away from human
activity.
10. Do not allow children to play on or around the
stored forks.
17
Page 22

5 TROUBLE SHOOTING
Clamp-On Bucket Forks consists of a set of forks that mount on the front of a loader bucket for handling
pallets and palleted material. It is a simple and reliable system that requires minimal maintenance.
In the following section, we have listed many of the problems, causes and solutions to the problems that
you may encounter.
If you encounter a problem that is difficult to solve, even after having read through this trouble shooting
section, please call your local dealer or distributor. Before you call, please have this Operator's Manual
and the serial number from your Clamp-On Bucket ready.
PROBLEM CAUSE SOLUTION
Cannot lift pallet. Insufficient lift capacity. Reduce load on pallet.
Use larger capacity loader.
18
Page 23
6 ASSEMBLY
The machine is shipped from the
factory in a partially disassembled form
that allows for easy and convenient
shipping.
When preparing for the customer,
follow this procedure:
1. Clear the area of bystanders,
especially small children.
2. Use 2 men to guide or direct and
handle the heavy and bulky components.
3. Use a crane, hoist or forklift of
sufficient capacity and stability to
handle the components.
4. Attach to the lifting device,
remove tie-downs, lift from
the truck and move to the
assembly area. Drive slow
and keep the machine close
to the ground.
5. Remove tie-downs.
6. Remove pallet.
7. Place bucket on blocks.
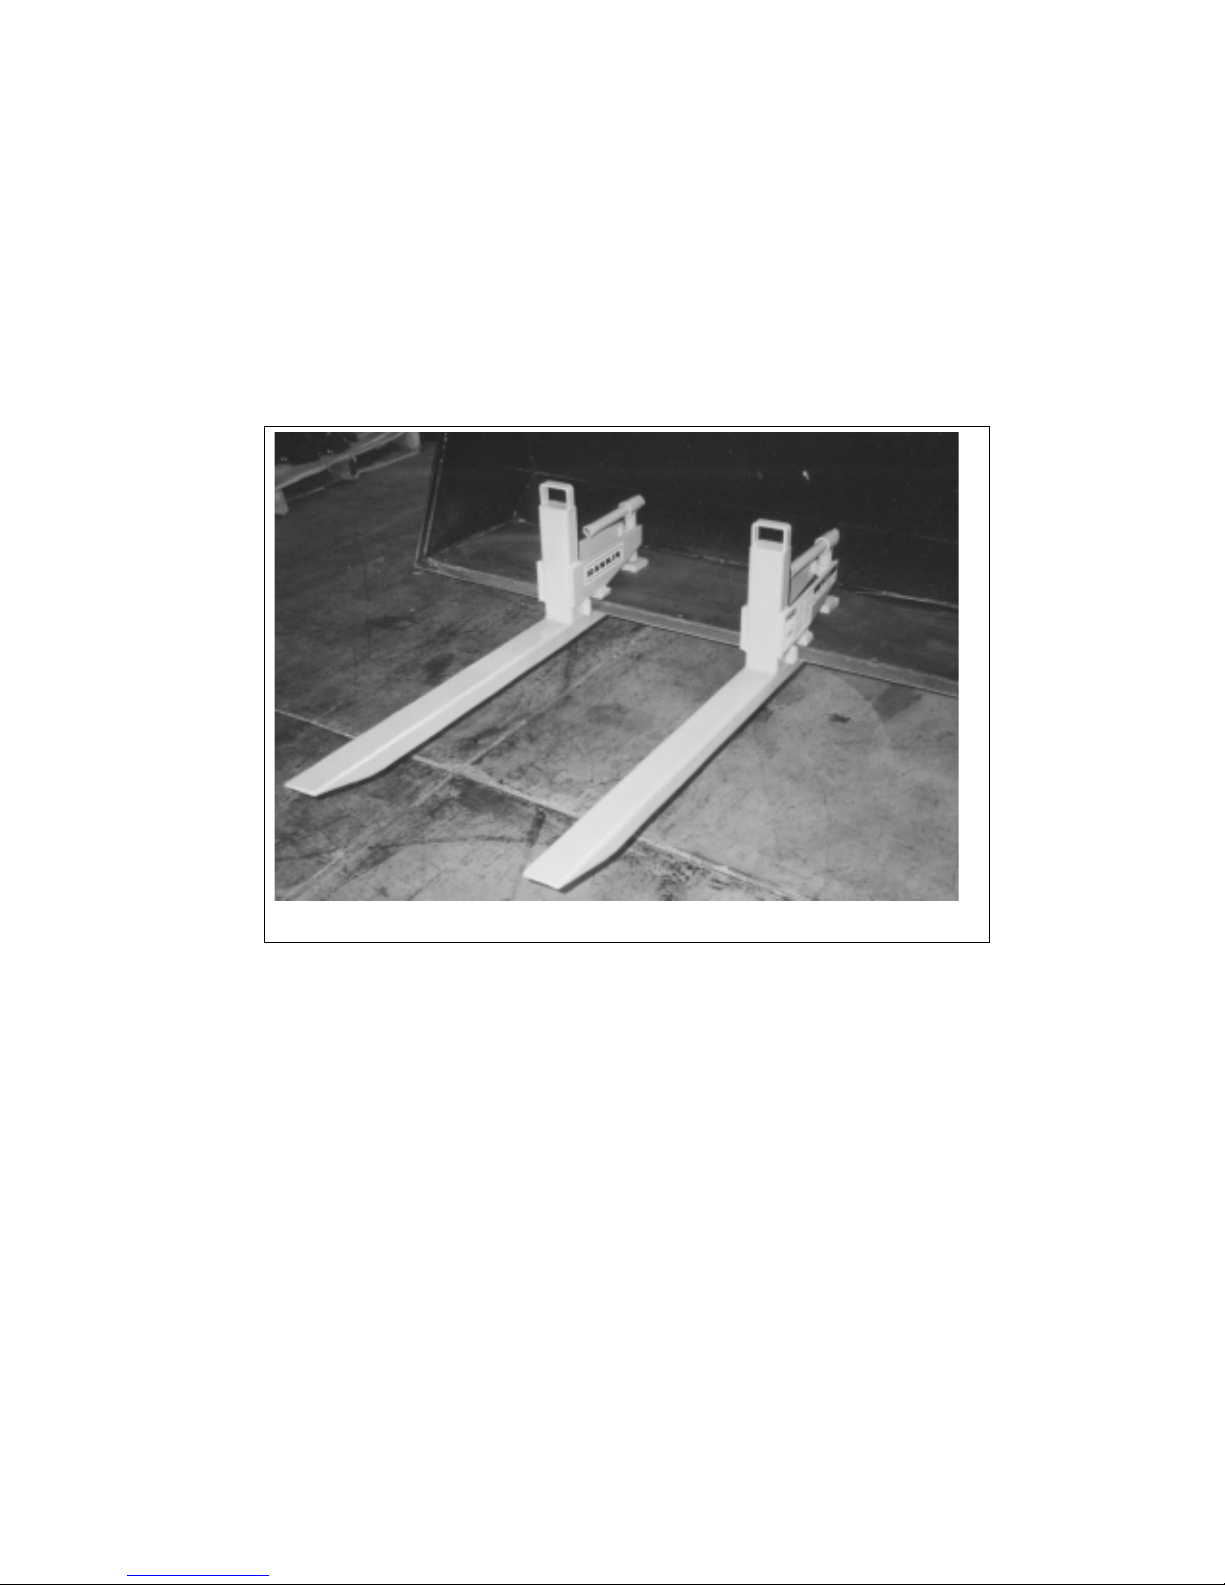
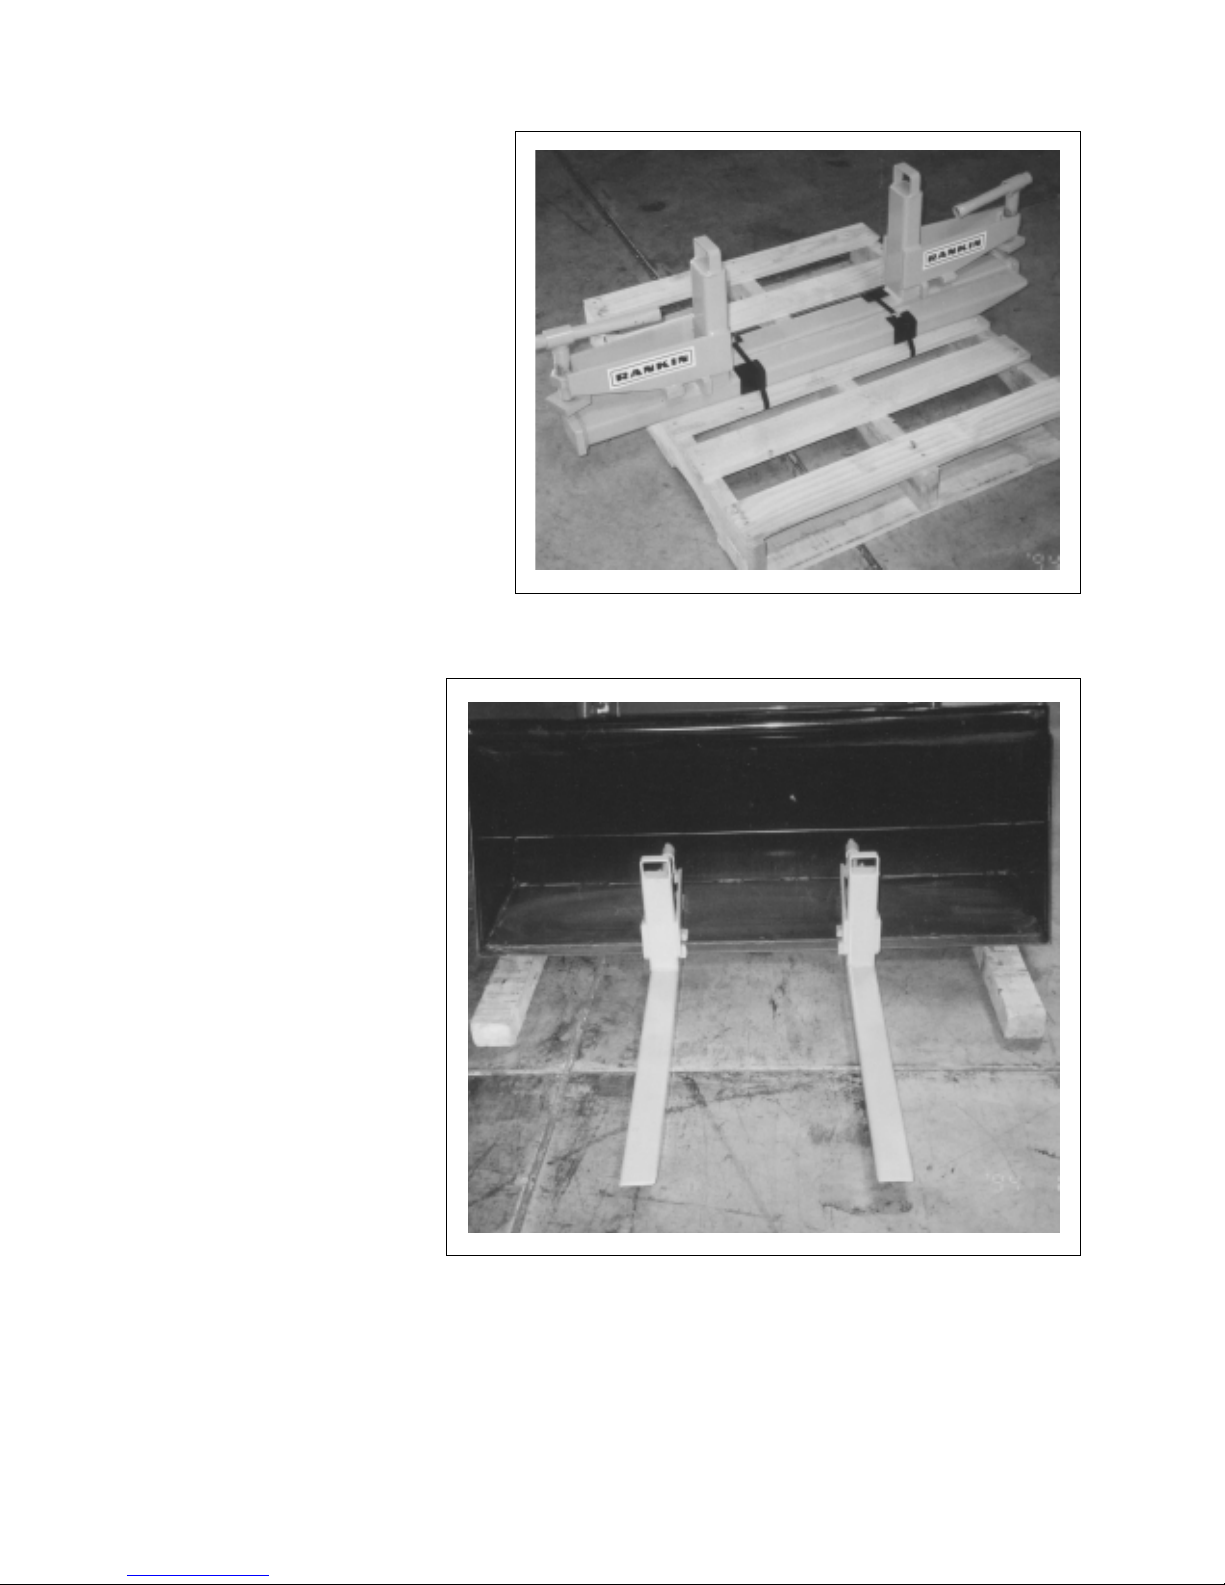
8. Attach forks to bucket and
secure with clamps.
Fig. 7 SHIPPING CONFIGURATION
Fig. 8 FORKS
19
Page 24
7 SPECIFICATIONS
7.1 MECHANICAL
MODELS BF-1000 BF- 2000 BF-3000 BF-4000 BF-6000
LIFT CAPACITY 1000 LBS. 2000 LBS. 3000 LBS. 4000 LBS. 5000 LBS.
USEABLE TINE LENGTH 32" 36" 42" 42" 49"
MAXIMUM BUCKET UP TO 3/4" 3/4" 1 1/4" 1 3/4" 2 1/4"
LIP THICKNESS
TINE SIZE 2" X 3" 2" X 3" 2" X 4" 2" X 4" 2" X 5"
WEIGHT 90 LBS. 110 LBS. 150 LBS. 170 LBS. 275 LBS.
SPECIFICATIONS ARE SUBJECT TO CHANGE WITHOUT NOTICE
7.2 BOLT TORQUE
CHECKING BOLT TORQUE
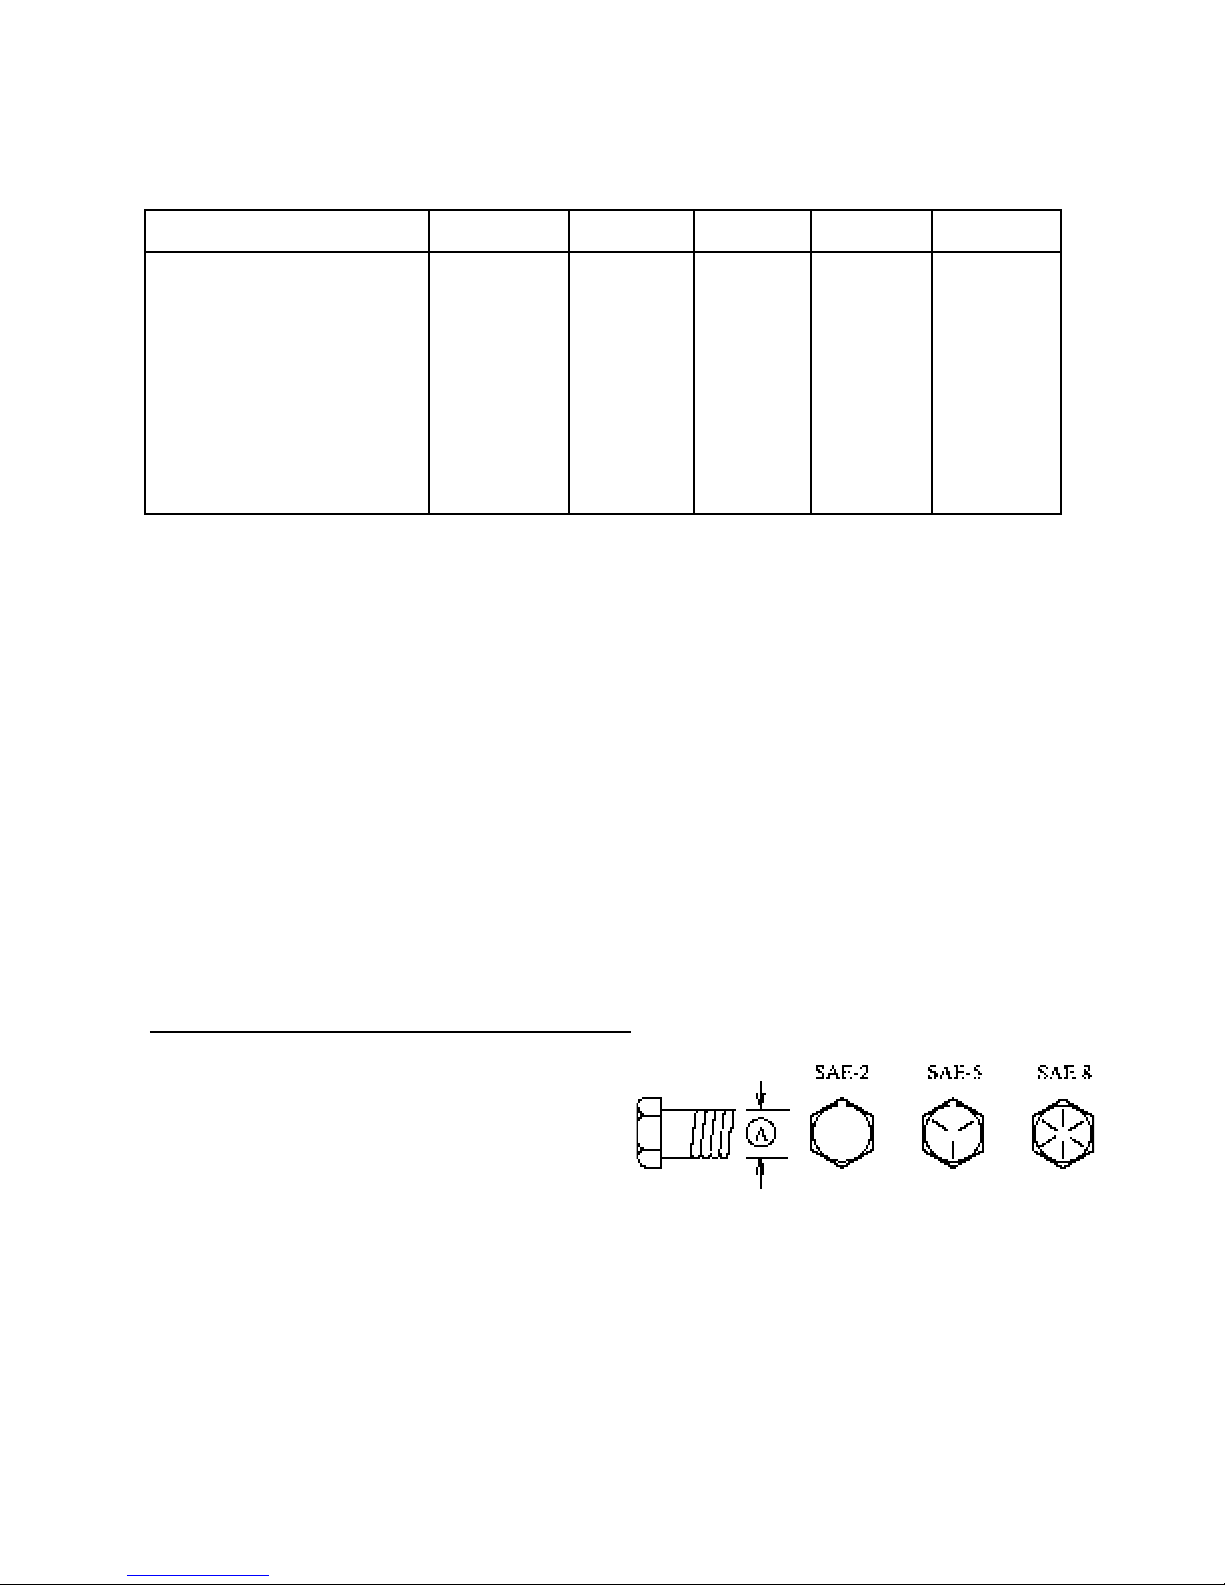
The tables shown below give correct torque values for various bolts and capscrews. Tighten all bolts to
the torques specified in chart unless otherwise noted. Check tightness of bolts periodically, using bolt
torque chart as a guide. Replace hardware with the same strength bolt.
ENGLISH TORQUE SPECIFICATIONS
Bolt
Diameter
"A"
1/4"
5/16"
3/8"
7/16"
1/2"
9/16"
5/8"
3/4"
7/8"
1"
SAE 2
N.m (lb-ft)
8
13
27
41
61
95
128
225
230
345
(6)
(10)
(20)
(30)
(45)
(70)
(95)
(165)
(170)
(225)
Bolt Torque *
SAE 5
N.m (lb-ft)
12
25
45
72
110
155
215
390
570
850
(9)
(19)
(33)
(53)
(80)
(115)
(160)
(290)
(420)
(630)
SAE 8
N.m (lb-ft)
17
36
63
100
155
220
305
540
880
1320
(12)
(27)
(45)
(75)
(115)
(165)
(220)
(400)
(650)
(970)
Torque figures indicated above are valid for non-greased or non-oiled threads and heads unless otherwise specified. Therefore, do not grease or oil bolts or capscrews unless otherwise specified in this
manual. When using locking elements, increase torque values by 5%.
* Torque value for bolts and capscrews are identified by their head markings.
20
Page 25

8 INDEX
A
Assembly...................................................... 19
I
Introduction .................................................... 1
O
Operation ..................................................... 12
Field Operation ........................................ 14
Machine Break-In .................................... 13
Machine Components ............................. 13
Pre-Operation Checklist .......................... 13
Storage .................................................... 17
To the New Operator or Owner ............... 12
Transporting ............................................ 17
PAGE
S
Safety .............................................................2
Equipment Safety Guidelines .................... 4
General Safety .......................................... 3
Hydraulic Safety ........................................ 9
Maintenance Safety................................... 8
Operating Safety ....................................... 7
Preparation ................................................ 6
Safety Training .......................................... 5
Safety Signs .............................................. 5
Sign-Off Form .......................................... 10
Storage Safety........................................... 9
Transport Safety ........................................ 8
Safety Sign Locations................................... 11
Specifications ............................................... 20
Bolt Torque .............................................. 20
Mechanical .............................................. 20
T
Trouble Shooting .......................................... 18
PAGE
21
Page 26

P.O. Box 168
Yakima, WA 98907-0168
P.O. Box 1937
Yakima, WA 98907-1937
Phone: 509.453.8271
Fax: 509.457.2456
www.rankinequipment.com
3205 Bay Street, Union Gap, WA 98903
Phone: 509.452.1651
Fax: 509.457-6601
www.northstarattachments.com
 Loading...