

Rangemaster Professional+ 100 FX User's Manual & Installation Instructions
Professional+ 100 FX Dual Fuel
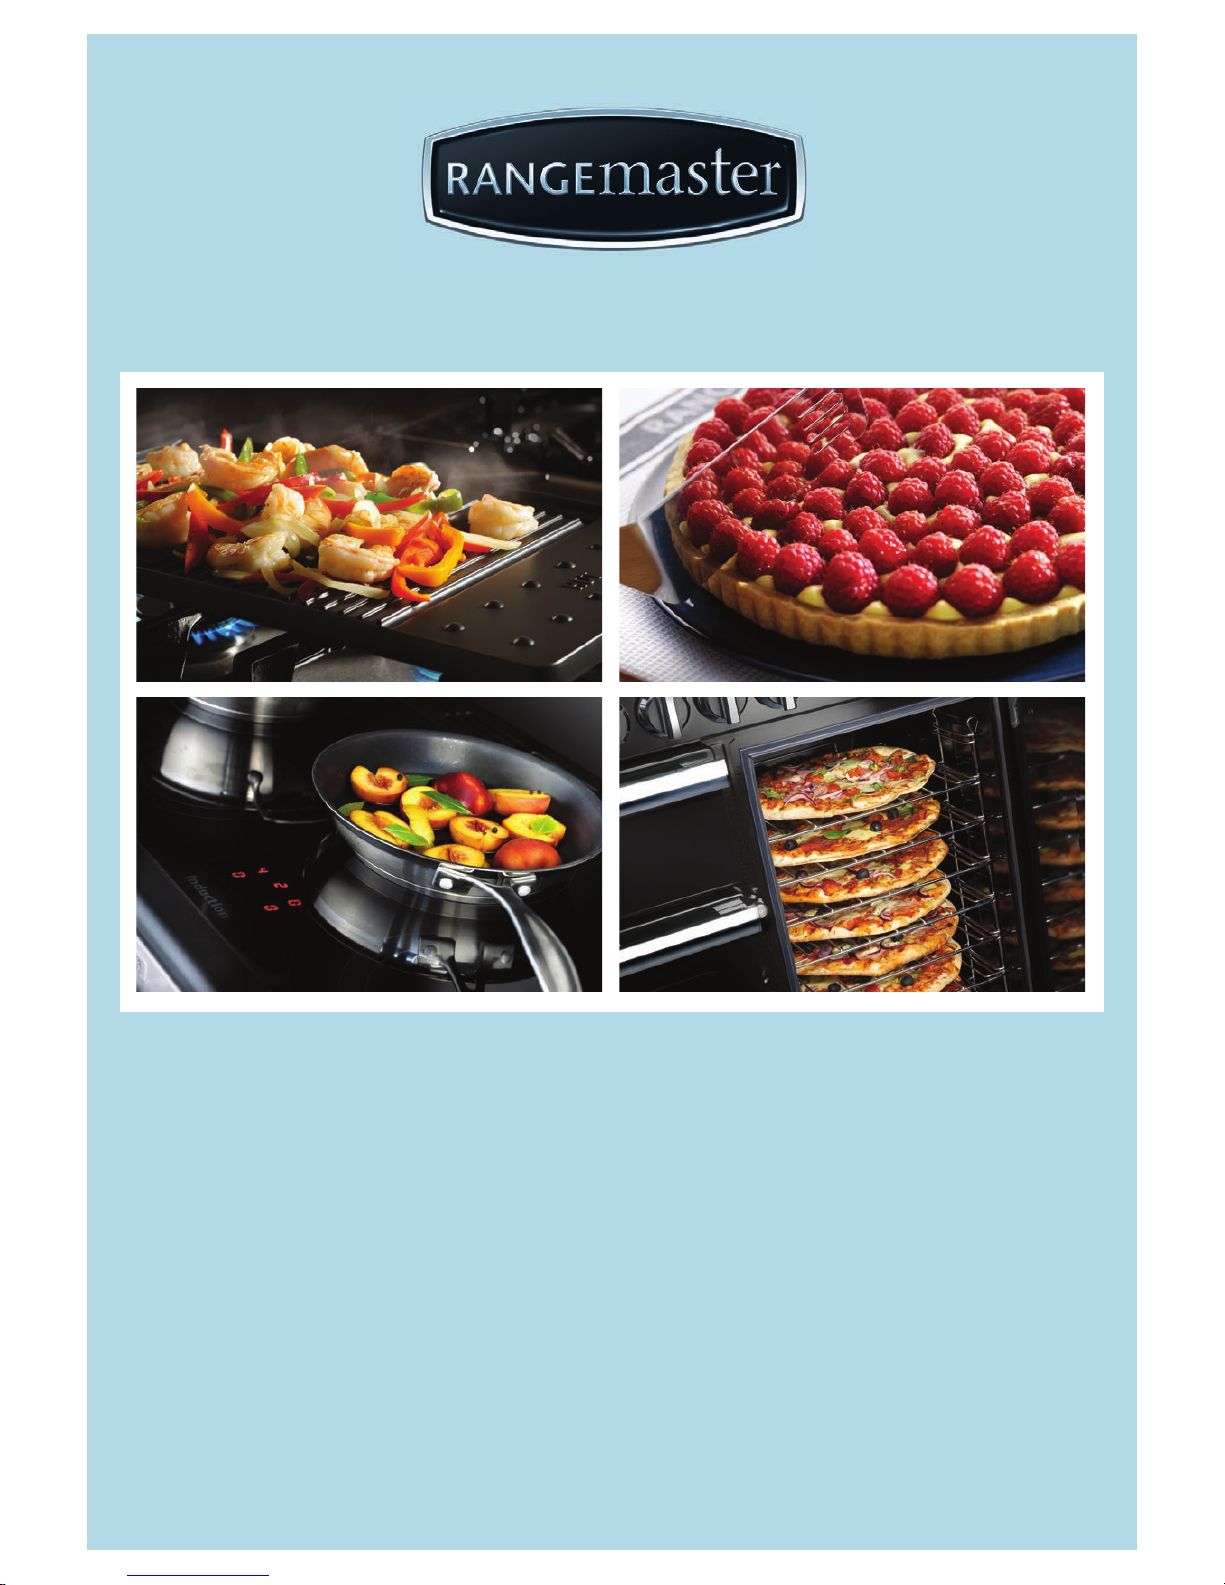
Britain’s No.1 Range Cooker
USER GUIDE &
INSTALLATION INSTRUCTIONS
RANGEMASTER COOKWARE
Our range cookers are well known for providing the
best possible cooking performance and years of
faithful service. However, a great cooker alone cannot
guarantee perfect results every time. The other vital
ingredients are of course enthusiasm and quality
cookware.
We oer cookware to work perfectly with all fuel types
manufactured by Rangemaster, including induction
hobs. You can be assured of functionality with style, as
well as the quality and meticulous attention to detail
you expect from the pioneers of range cooking.
Visit: www.rangemastercookshop.co.uk
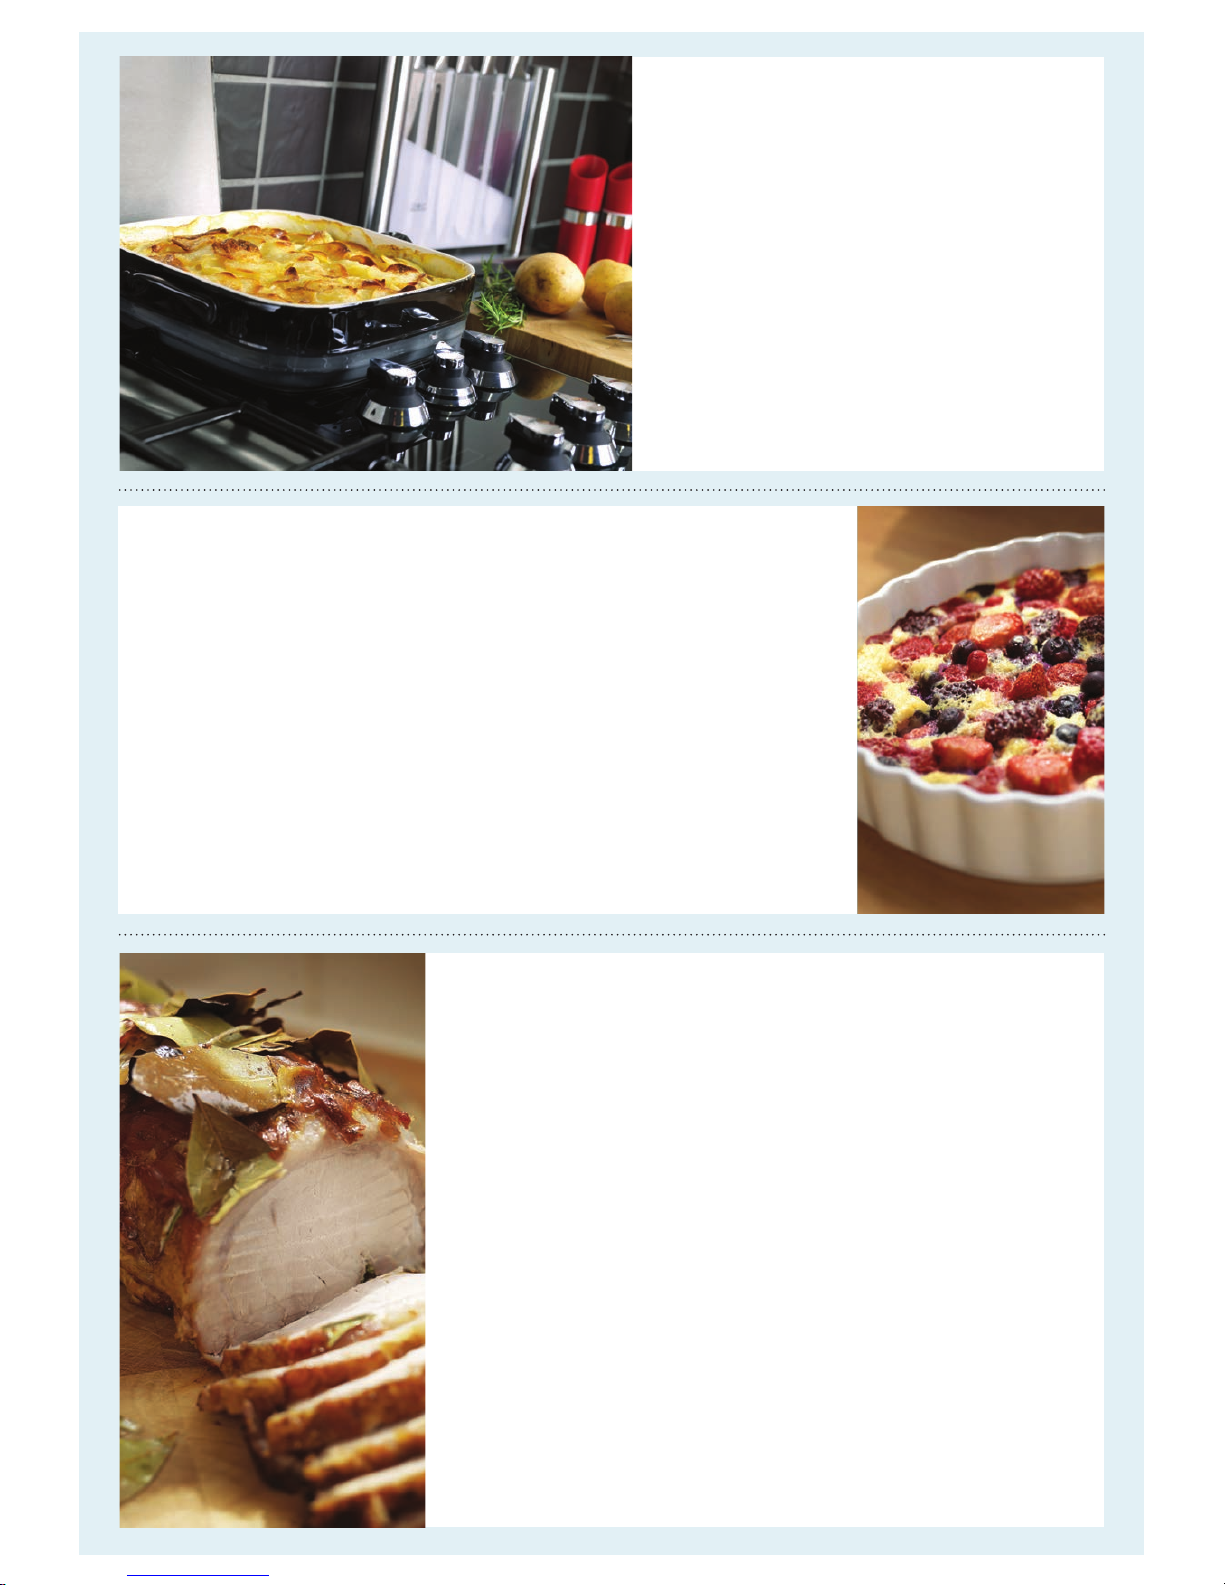
Ingredients
• Oil for greasing
• 100 g strawberries
• 100 g raspberries
• 100 g redcurrants
• 100 g blackberries
• or a 400 g mixture of any soft
fruits
• 2 medium eggs
• 30 g caster sugar
• 80 ml skimmed milk
• 2 tsp vanilla extract
• 60 g plain our (sifted)
• 1 tsp baking powder
• Icing sugar to dust
Method
1. Preheat the oven to 200 °C (for a conventional oven),
180 oC (for a fan oven) or gas mark 6.
2. Lightly grease a dish 26 cm wide x 4 cm deep.
3. Thickly slice any large strawberries and place them with the other fruits
into an ovenproof dish, deep enough so the berries are about 2 deep.
4. Whisk the eggs and caster sugar until pale and uy. Beat the milk and
vanilla extract into the mixture and then fold in the sifted our and
baking powder.
5. Pour the cake mix over the fruit and bake on the centre shelf of the
oven for 15-20 minutes, or until the mixture is cooked through and
golden on the top.
6. Dust with icing sugar and serve immediately with cream or crème
fraiche.
FRUITY BAKED PUDDING
Serves 4–6
Ingredients
• 3 kg (6½ lb) skinned and
boned loin of pork
• 2 x 70 g packs prosciutto
• Grated zest of 2 lemons
• Bay leaves
• Salt and freshly ground
black pepper
For the sauce:
• 1 tablespoons plain our
• 4 tablespoons lemon
juice
• Chicken stock/water
Method
1. Preheat the oven to 220 °C (for a conventional oven), 200 °C (for a fan
oven) or gas mark 7.
2. Spread one of the packs of prosciutto over a chopping board; place
the pork on top with the outer (fat) part of the pork resting on the
prosciutto.
3. Sprinkle the lemon zest onto the inside of the meat and season well. Lay
the remaining prosciutto on top of the zest and roll up.
4. Secure the pork with string or silicone bands and thread bay leaves
under the string, covering the whole piece of pork. Put the meat on to
a trivet over a large roasting tin containing enough water to cover the
base.
5. Place into the oven and cook for 30 minutes. Reduce the heat to 180 °C
conventional oven/160 °C fan oven/gas 4 and continue roasting for a
further 25 minutes per 500 g. Should the prosciutto start becoming too
brown, cover with some foil.
6. When the pork is cooked, place onto a warm plate, cover with foil and
allow to rest for at least 20 minutes.
7. Spoon o most of the fat from the roasting tin and stir the our into the
remaining. Gradually add the stock and lemon juice, adding more stock
until the desired consistency is reached and simmer for 5 minutes. Check
the seasoning, adding more pepper or lemon juice as necessary.
8. Remove the string or bands from the pork and carve into slices, serve
with the sauce.
ROAST LOIN OF PORK WITH PROSCIUTTO
& BAY LEAVES

i
1. Before You Start... 1
Important! 1
Installation and Maintenance 1
Peculiar Smells 1
If You Smell Gas 1
Ventilation 1
Personal Safety 1
Cooker Care 2
Cleaning 2
2. Cooker Overview 3
Hotplate Burners 3
Wok Burner 4
The Wok Cradle
5
The Griddle 5
The Multi-function Ovens 6
The Ovens 7
The Clock 8
Accessories 10
Oven Lights 10
Storage 10
3. Cooking Tips 11
Cooking with a Multi-function Oven 11
Tips on Cooking with the Timer 11
General Oven Tips 11
4. Cooking Table 12
5. Cleaning Your Cooker 13
Essential Information 13
Hotplate Burners 13
The Wok Cradle 13
The Griddle 13
Control Panel and Doors 14
Removing the Right-hand Oven
Cover Plate and Reector Tray
15
Cleaning Table 16
Contents
6. Troubleshooting 17
7. Installation 19
Dear Installer 19
Safety Requirements and Regulations 19
Provision of Ventilation 19
Location of Cooker 20
Conversion 20
Positioning the Cooker 21
Moving the Cooker 21
Completing the Move 22
Fitting the Stability Bracket or Chain 22
Conversion to Another Gas 23
Levelling 23
Gas Connection 23
Electrical Connection 24
Final Checks 25
Fitting the Plinth 25
Customer Care 25
8. Circuit Diagram 26
9. Technical Data 27
Professional+ FX 100 Dual Fuel U110206-02

ii

1
Your cooker should give you many years of trouble-free
cooking if installed and operated correctly. It is important
that you read this section before you start, particularly if you
have not used a dual fuel cooker before.
Important!
This appliance is designed for domestic cooking
only. Using it for any other purpose could invalidate
any warranty or liability claim. In particular, the
oven should NOT be used for heating the kitchen –
besides invalidating claims this wastes fuel and may
overheat the control knobs.
This appliance is for use in Great Britain and the
Republic of Ireland. It is a Cat II
2H3+
cooker and is
set for G20 at 20 mbar. (A conversion kit for LPG is
supplied with the cooker.)
Installation and Maintenance
In the UK, the cooker must be installed by a Gas Safe
registered engineer. The electrical installation should be in
accordance with BS 7671. Otherwise, all installations must be
in accordance with the relevant instructions in this booklet,
with the relevant national and local regulations, and with the
local gas and electricity supply companies’ requirements.
Make sure that the gas supply is turned on and that the
cooker is wired in and switched on (the cooker needs
electricity).
Set the clock to make sure that the oven is functional – see
the relevant section in this manual.
Only a qualied service engineer should service the cooker,
and only approved spare parts should be used.
Unless specied otherwise in this guide, always allow the
cooker to cool and then switch it o at the mains before
cleaning or carrying out any maintenance work.
Peculiar Smells
When you rst use your cooker it may give o an odour. This
should stop after use.
Before using for the rst time, make sure that all packing
materials have been removed and then, to dispel
manufacturing odours, turn the ovens to 200 °C and run for at
least an hour.
Make sure the room is well ventilated to the outside air
(see ‘Ventilation’ below). People with respiratory or allergy
problems should vacate the area for this brief period.
If You Smell Gas
• DO NOT turn electric switches on or off
• DO NOT smoke
• DO NOT use naked flames
• DO turn off the gas at the meter or cylinder
• DO open doors and windows to get rid of the gas
• DO keep people away from the area affected
• Call your gas supplier
If you are using natural gas in the UK, ring the National Grid
on: 0800 111 999.
Ventilation
CAUTION: The use of a gas cooking appliance results
in the production of heat and moisture in the room
in which it is installed. Therefore, make sure that the
kitchen is well ventilated: keep natural ventilation
holes open or install a powered cookerhood that
vents outside. If you have several burners on, or use
the cooker for a long time, open a window or turn on
an extractor fan.
Personal Safety
This appliance can be used by children aged from 8
years and above and persons with reduced physical,
sensory or mental capabilities or lack of experience
and knowledge if they have been given supervision
or instruction concerning use of the appliance in
a safe way and understand the hazards involved.
Children shall not play with the appliance. Cleaning
and user maintenance shall not be made by children
without supervision.
WARNING: The appliance and its accessible parts
become hot during use and will retain heat even
after you have stopped cooking. Care should be
taken to avoid touching heating elements. Children
less than 8 years of age shall be kept away unless
continuously supervised.
DO NOT modify this appliance.
This appliance is not intended for use by persons
(including children) with reduced physical, sensory
or mental capabilities, or lack of experience and
knowledge, unless they have been given supervision
or instruction concerning use of the appliance by a
person responsible for their safety.
This appliance is not intended for use by young
children or inrm persons unless they have been
adequately supervised by a responsible person to
make sure that they can use the appliance safely.
CAUTION: A long term cooking process has to be
supervised from time to time. A short term cooking
process has to be supervised continuously.
1. Before You Start...

2
Danger of re: DO NOT store items on the cooking
surfaces.
To avoid overheating, DO NOT install the cooker
behind a decorative door.
Accessible parts will become hot during use and will
retain heat even after you have stopped cooking.
Keep babies and children away from the cooker and
never wear loose-tting or hanging clothes when
using the appliance.
DO NOT use a steam cleaner on your cooker.
Always be certain that the controls are in the OFF position
when the oven is not in use, and before attempting to clean
the cooker.
When the oven is on, DO NOT leave the oven door
open for longer than necessary, otherwise the
control knobs may become very hot.
Note that this appliance has a cooling fan. When an
oven is in operation the fan will run to cool the fascia
and control knobs.
DO NOT use harsh abrasive cleaners or sharp metal
scrapers to clean the oven door glass since they can
scratch the surface, which may result in shattering of
the glass.
Always keep combustible materials, e.g. curtains, and
ammable liquids a safe distance away from your cooker.
DO NOT spray aerosols in the vicinity of the cooker
while it is on.
Use dry oven gloves when applicable – using damp gloves
might result in steam burns when you touch a hot surface.
Do not use a towel or other bulky cloth in place of a glove – it
might catch re if brought into contact with a hot surface.
NEVER operate the cooker with wet hands.
DO NOT use aluminium foil to cover shelves, linings
or the oven roof.
DO NOT use hotplate protectors, foil or hotplate
covers of any description. These may aect the safe
use of your hotplate burners and are potentially
hazardous to health.
NEVER heat unopened food containers. Pressure
build up may make the containers burst and cause
injury.
DO NOT use unstable saucepans. Always make sure
that you position the handles away from the edge of
the hotplate.
DO NOT use cooking vessels on the hotplate that
overlap the edges.
DO NOT drop or rest objects on the door glass.
Although the glass is very strong, a sharp blow or a
falling object might cause the glass surface to crack
or break.
Never leave the hotplate unattended at high heat settings.
Pans boiling over can cause smoking, and greasy spills may
catch on re. Use a deep fat thermometer whenever possible
to prevent fat overheating beyond the smoking point.
WARNING!
Unattended cooking on a hob with fat or oil can be
dangerous and may result in re.
NEVER leave a chip pan unattended. Always heat fat
slowly, and watch as it heats. Deep fry pans should
be only one third full of fat. Filling the pan too full
of fat can cause spill over when food is added. If you
use a combination of oils or fats in frying, stir them
together before heating, or as the fats melt.
Foods for frying should be as dry as possible. Frost on frozen
foods or moisture on fresh foods can cause hot fat to bubble
up and over the sides of the pan. Carefully watch for spills or
overheating of foods when frying at high or medium high
temperatures. Never try to move a pan of hot fat, especially a
deep fat fryer. Wait until the fat is cool.
Do not use the top of the ue (the slots along the back of
the cooker) for warming plates, dishes, drying tea towels or
softening butter.
DO NOT use water on grease res and never pick
up a aming pan. Turn the controls o and then
smother a aming pan on a surface unit by covering
the pan completely with a well tting lid or baking
tray. If available, use a multi-purpose dry chemical
or foam-type re extinguisher.
Cooking high moisture content foods can create a ‘steam
burst’ when the oven door is opened. When opening the
oven stand well back and allow any steam to disperse.
Take care that no water seeps into the appliance.
This appliance is heavy so take care when moving it.
Cooker Care
As steam can condense to water droplets on the cool outer
trim of the oven, it may be necessary during cooking to wipe
away any moisture with a soft cloth. This will also help to
prevent soiling and discolouration of the oven exterior by
cooking vapours.
Cleaning
In the interests of hygiene and safety, the cooker should be
kept clean at all times as a build up in fats and other food
stu could result in a re.
Clean only the parts listed in this guide.
Clean with caution. If a wet sponge or cloth is used to wipe
spills on a hot surface, be careful to avoid steam burns. Some
cleaners can produce noxious fumes if applied to a hot
surface.
3
ArtNo.270-0001
Proplus control to high
2. Cooker Overview
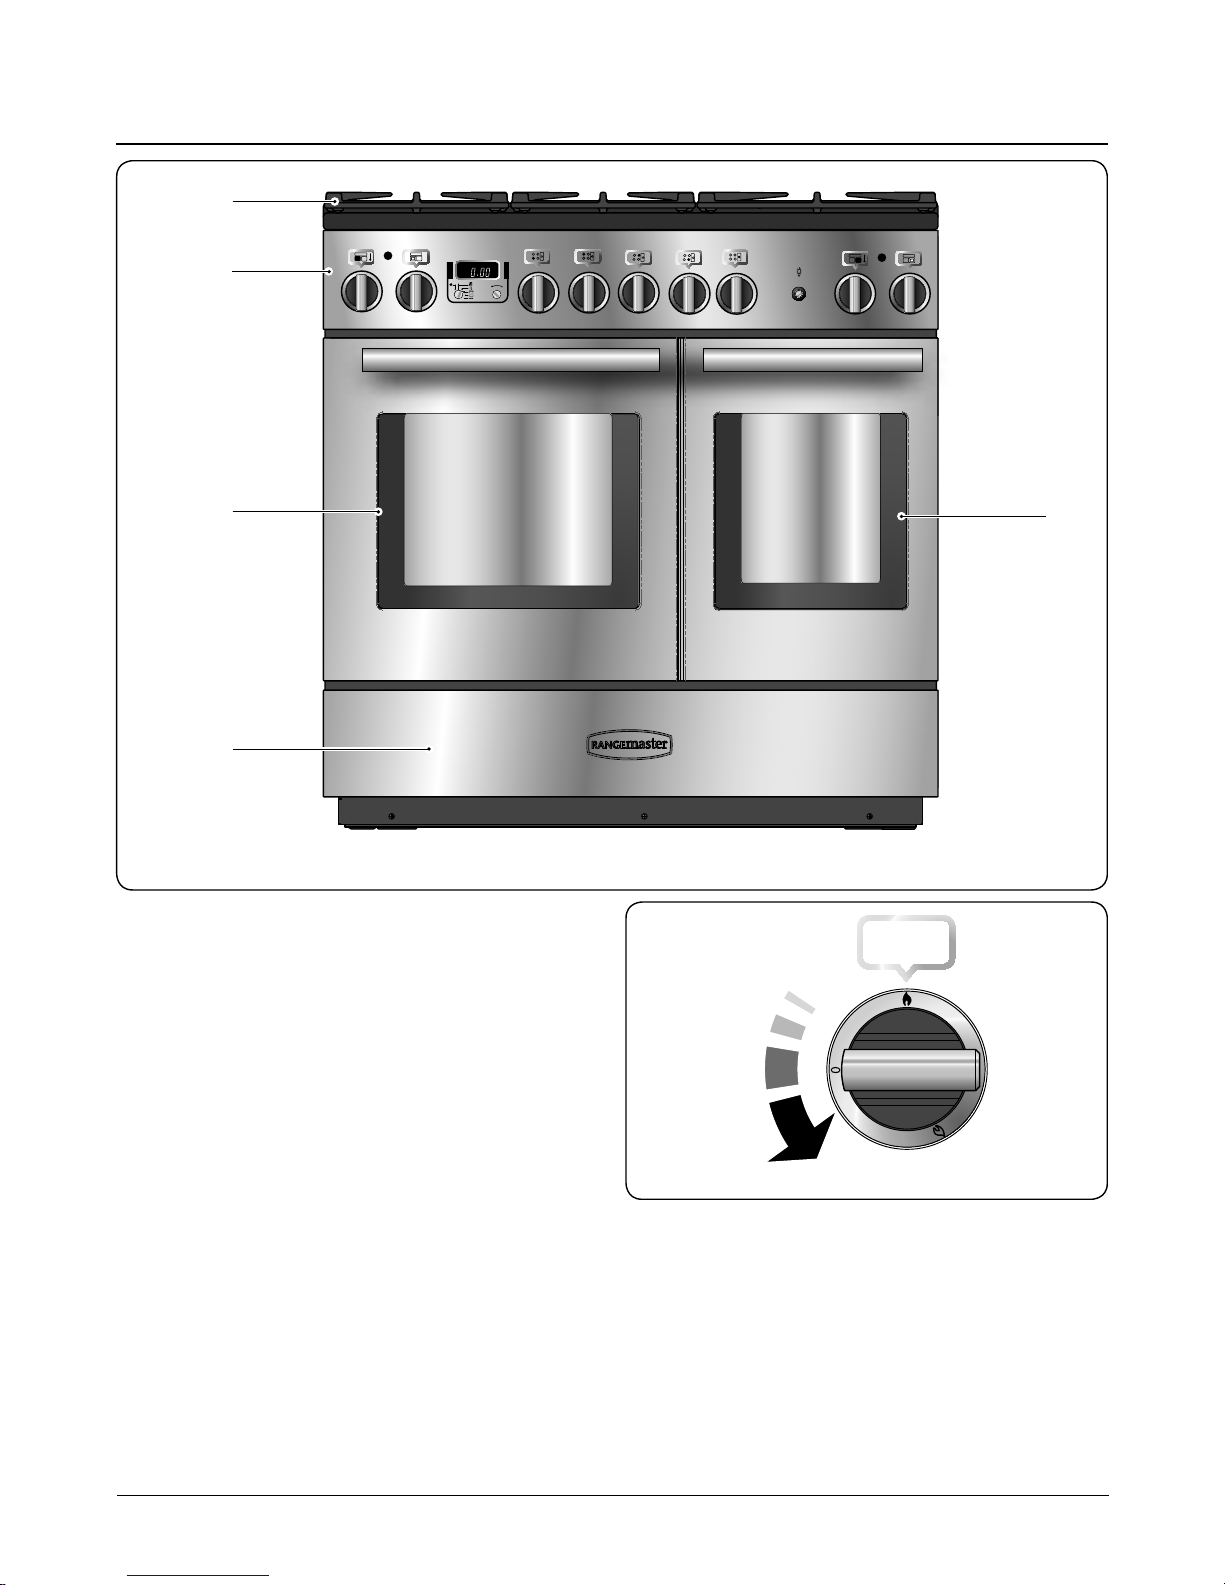
The 100 dual fuel cooker (Fig.2-1) has the following features:
A. 5 hotplate burners including a wok burner
B. A control panel incorporting a timer
C. Main multi-function oven
D. Multi-function oven
E. Storage drawer
Hotplate Burners
The drawing by each of the control knobs indicates which
burner that knob controls.
Each burner has a Flame Supervision Device (FSD) that
prevents the ow of gas if the ame goes out.
When the igniter button is pressed in, sparks will be
made at every burner – this is normal. Do not attempt to
disassemble or clean around any burner while another
burner is on, otherwise an electric shock could result.
To light a burner, push in and turn the associated control
knob to the high position as indicated by the large ame
symbol (
), (Fig.2-2).
The igniter should spark and light the gas. Keep holding the
knob pressed in to let the gas through to the burner for about
ten seconds.
Fig.2-2
ArtNo.270-0029 - Prof+ 90SC annotated
Professional + 100 FX
A
B
C
D
E
Fig.2-1
DocNo.020-0006 - Overview - 100DF - Prof+
4
ArtNo.311-0002 Pan with rim
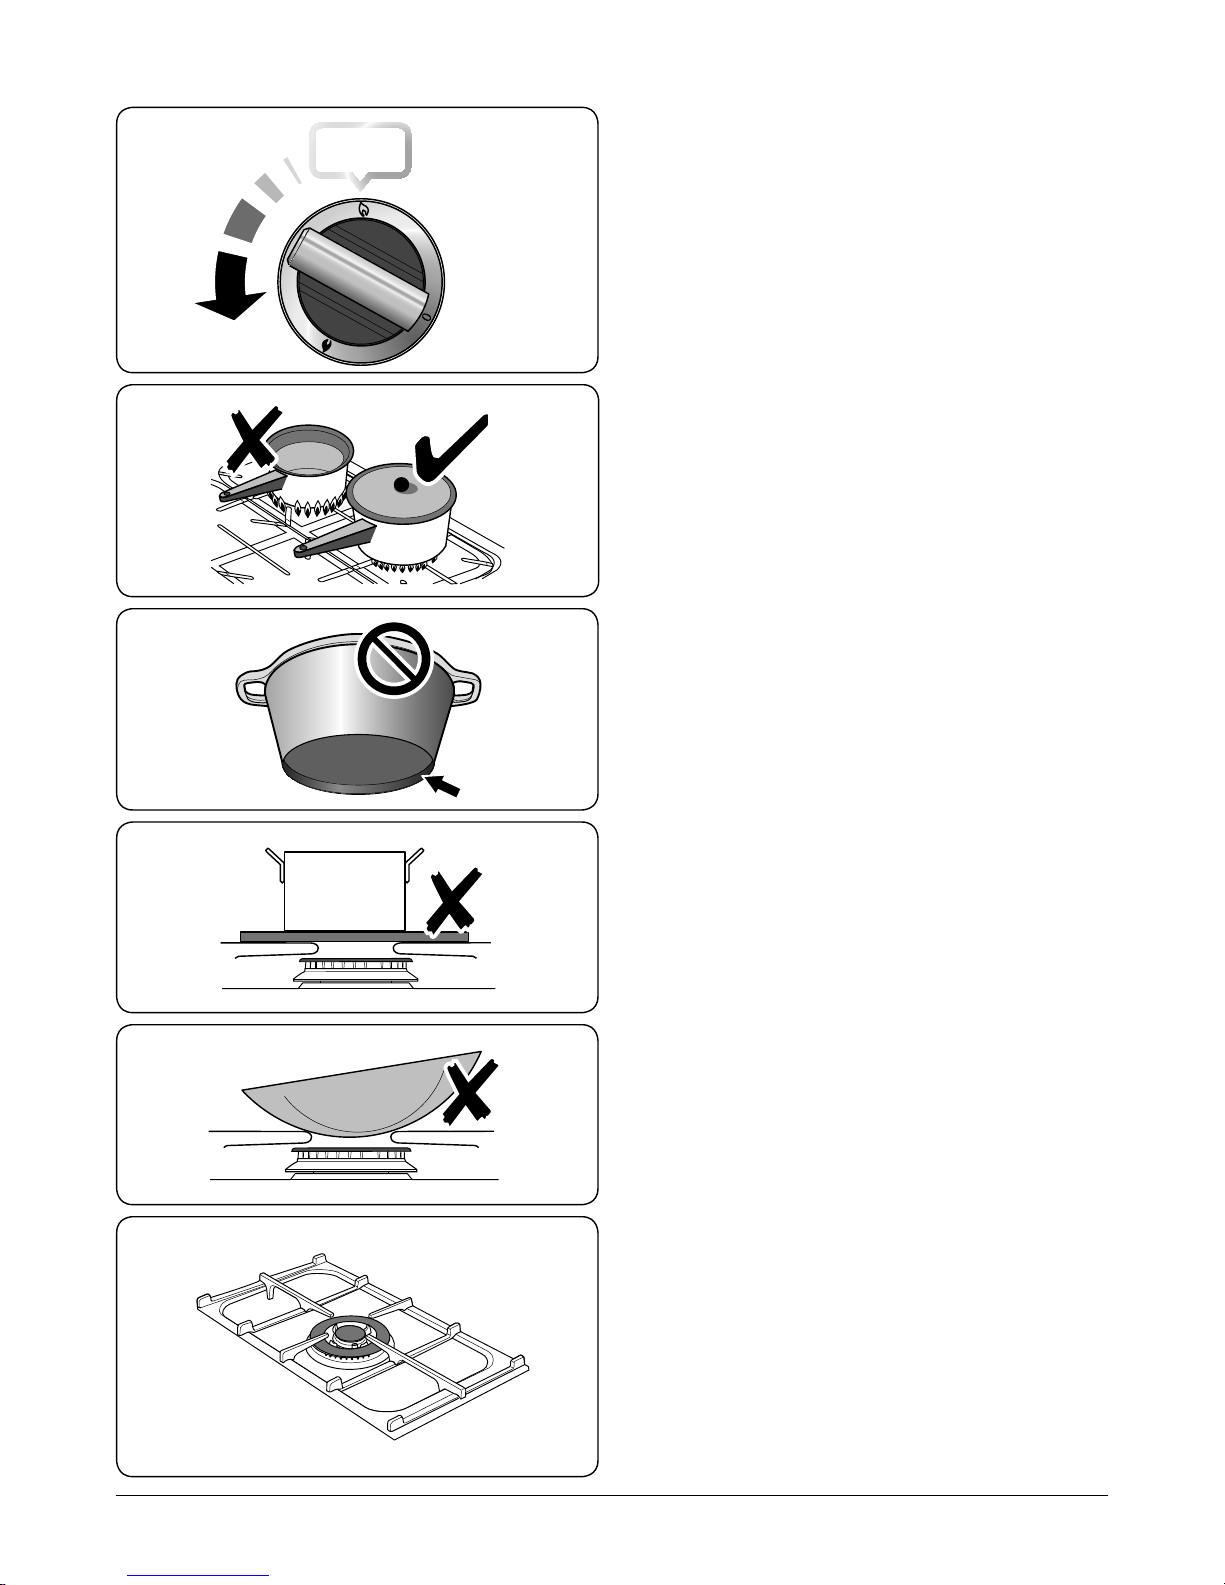
If, when you let go of the control knob, the burner goes out,
then the FSD has not been bypassed. Turn the control knob
to the ‘OFF’ position and wait for one minute before you try
again, this time making sure to hold in the control knob for
slightly longer.
Adjust the ame height to suit by turning the knob counterclockwise (Fig.2-3). On this cooker the low position is beyond
high, NOT between high and o.
If a burner ame goes out, turn o the control knob and
leave it for one minute before relighting it.
Make sure that the ames are under the pans. Using a lid will
help the contents boil more quickly (Fig.2-4).
Large pans should be spaced well apart.
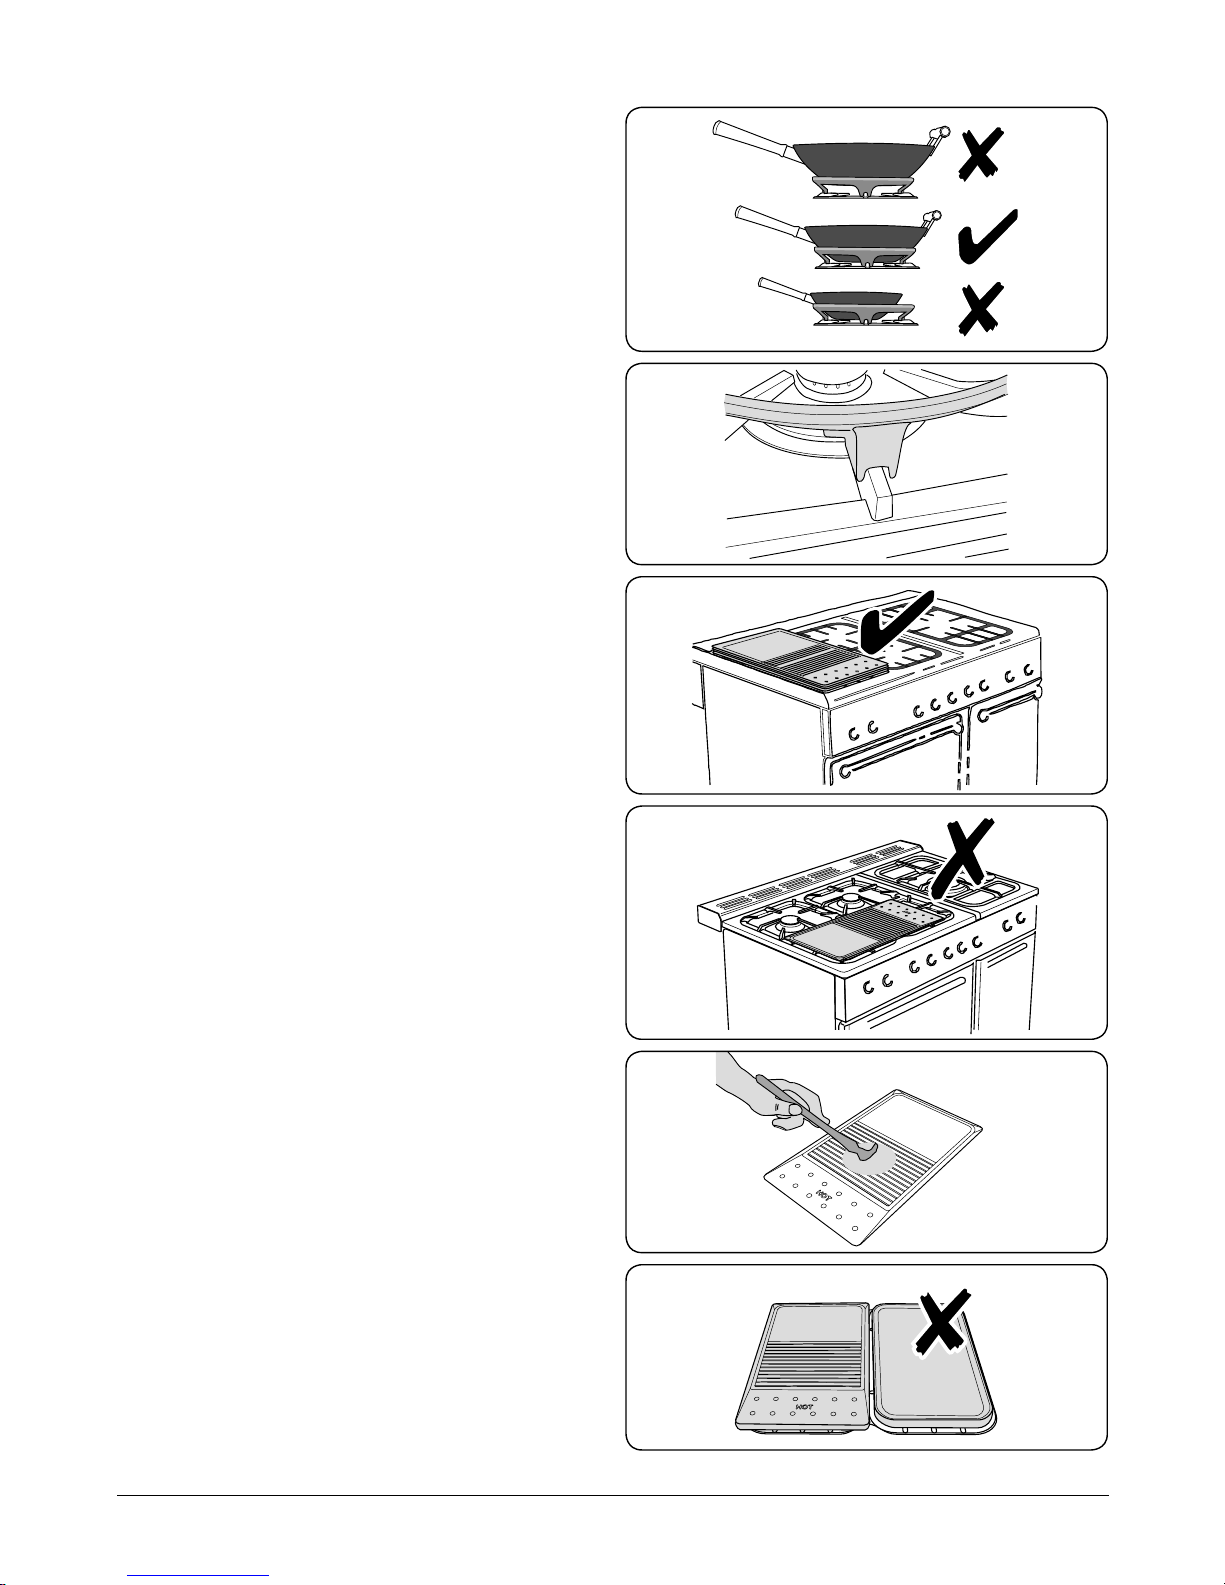
Pans and kettles with concave bases or down-turned base
rims should not be used (Fig.2-5).
Simmering aids, such as asbestos or mesh mats, are
NOT recommended (Fig.2-6). They will reduce burner
performance and could damage the pan supports.
You should also avoid using unstable and misshapen pans
that may tilt easily, and pans with a very small base diameter,
e.g. milk pans, single egg poachers (Fig.2-7).
The minimum recommended pan diameter is 120 mm. The
maximum allowable pan base diameter is 260 mm.
DO NOT use cooking vessels on the hotplate that overlap the
edges.
Wok Burner
The wok burner is designed to provide even heat over a large
area. It is ideal for large pans and stir-frying (Fig.2-8).
For heating smaller pans, the aforementioned hotplate
burners may be more ecient.
You should wipe the enamel top surface of the cooker around
the hotplate burners as soon as possible after spills occur. Try
to wipe them o while the enamel is still warm.
Note:
The use of aluminium pans may cause metallic marking
of the pan supports. This does not aect the durability of the
enamel and may be cleaned o with an appropriate metal
cleaner.
Fig.2-5
ArtNo.311-0001 Right pans gas
Fig.2-4
ArtNo.270-0003
Proplus control to low
Fig.2-3
Art No. 311-0003 Simmer aids
Fig.2-6
ArtNo.311-0004 T ipping wok
Fig.2-7
ArtNo.311-0005 Wok burner & pan support
Fig.2-8
5
ArtNo.311-0006 Correct wok sizes
The Wok Cradle
The wok cradle is designed to t a 35 cm wok. If you use a
dierent wok, make sure that it ts the cradle. Woks vary very
widely in size and shape. It is important that the wok sits
down on the pan support – however, if the wok is too small,
the cradle will not support it properly (Fig.2-9).
The cradle should be used on the triple ring wok burner
only. When you t the cradle, make sure that it is supported
properly on a pan support and the wok is sitting level in the
cradle (Fig.2-10).
The cradle will get very hot in use – allow plenty of time for it
to cool before you pick it up.
The Griddle
The griddle ts the left-hand pan support, front to back
(Fig.2-11). It is designed for cooking food on directly. DO NOT
use pans of any kind on it. The griddle surface is non-stick and
metal cooking utensils (e.g. spatulas) will damage the surface.
Use heat resistant plastic or wooden utensils.
DO NOT put it crossways – it will not t properly and
will be unstable (Fig.2-12).
DO NOT put it on any other burner – it is not
designed to t in any of the other pan supports.
Position the griddle over the hotplate burners resting on the
pan support. Check that it is securely located.
The griddle can be lightly brushed with cooking oil before
use or alternatively brush oil onto the food to be cooked
(Fig.2-13). Light the hotplate burners. Adjust the ame
heights to suit.
Preheat the griddle for a maximum of 5 minutes before
adding food. Leaving it longer may cause damage. Turn the
control knobs towards the low position, marked with the
small ame symbol, to reduce the burner ames.
Always leave space around the griddle for the gases
to escape.
NEVER t two griddles side by side (Fig.2-14).
After cooking, allow the griddle to cool before cleaning.
Fig.2-11
Fig.2-12
Fig.2-9
ArtNo.311-0007 Wok stand close-up
Fig.2-10
ArtNo.311-0009 Oil on griddle
Fig.2-13
ArtNo.311-0008 Griddle positioning
Fig.2-14
6
The Multi-function Ovens
Both ovens are multi-function ovens. In addition to the
element around the fan, it is tted with extra heating
elements, in the top of the oven and under the oven base.
Take care to avoid touching the top elements when placing
or removing items from the oven.
The left-hand multi-function oven has 3 main cooking
functions: fan, fan assisted and conventional cooking.
These functions should be used to complete most of your
cooking.
The browning element and base heat can be used in the
latter part of the cooking process to ne tune the results to
your particular requirements.
Use fanned grilling for all your grilling needs and defrost to
safely thaw small items of frozen food.
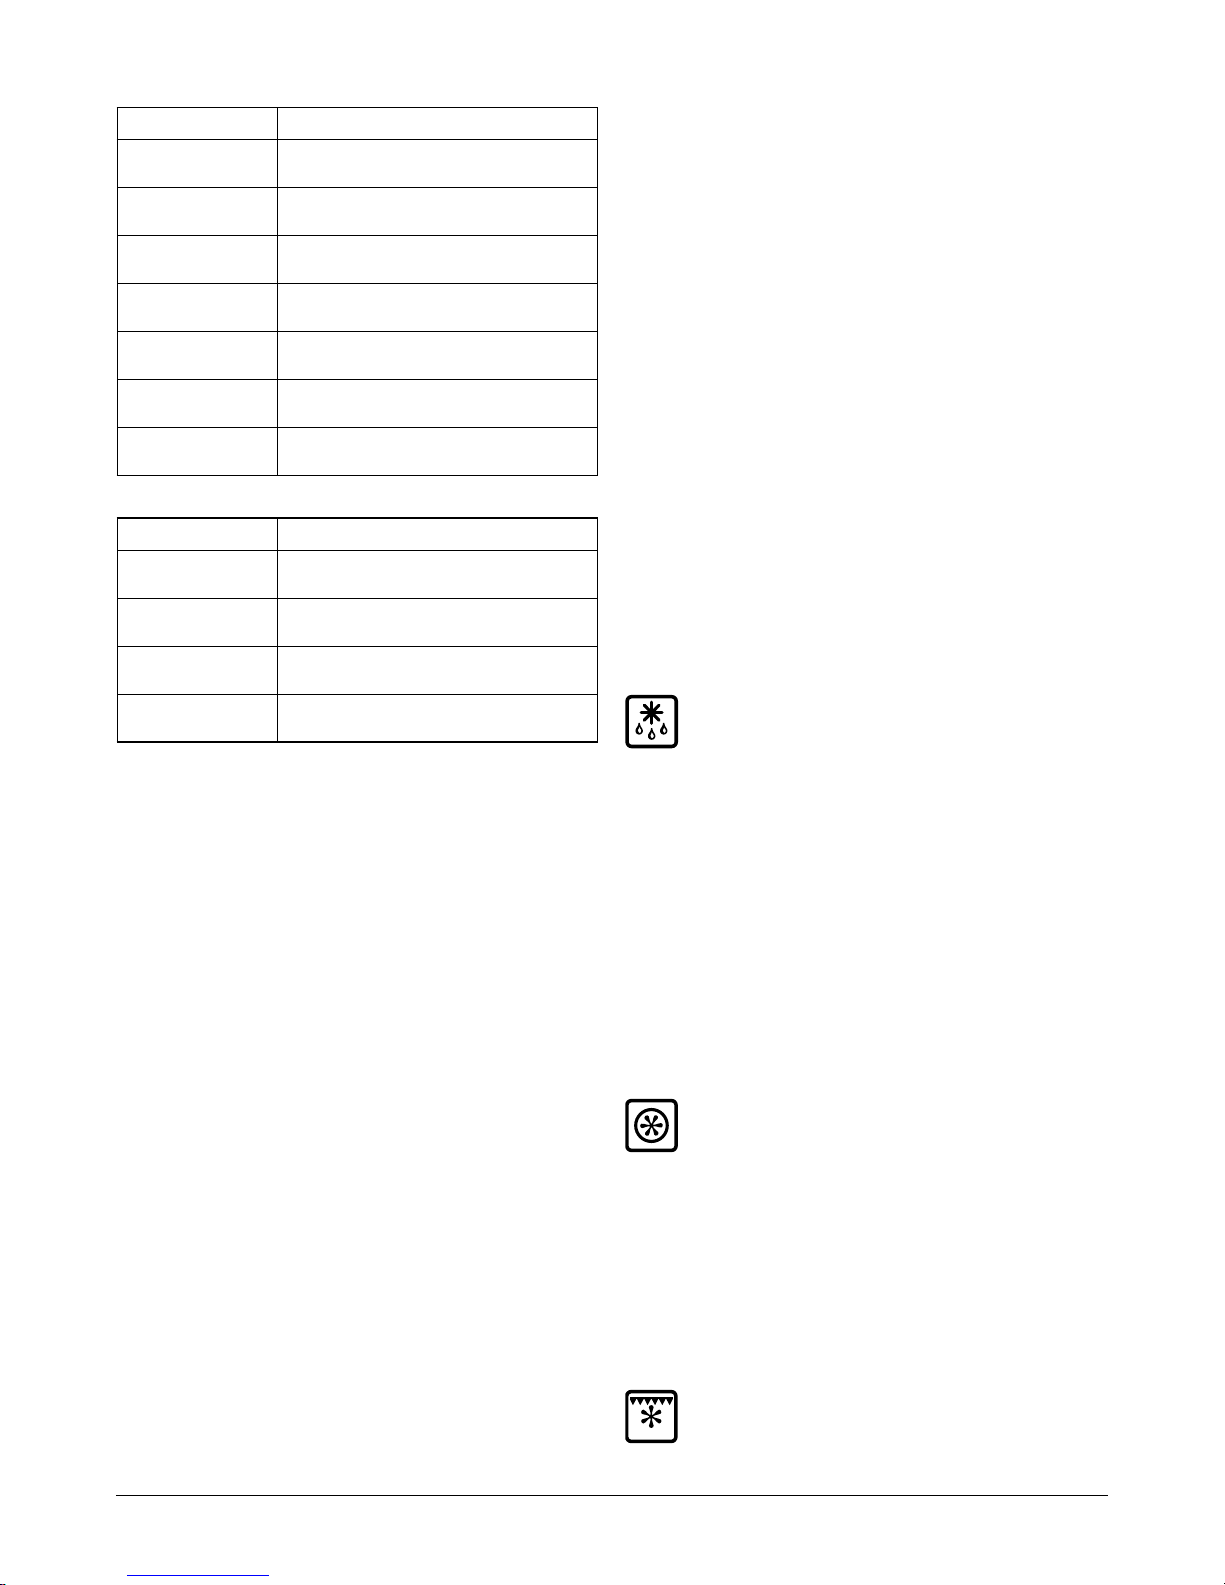
Table 2-1 gives a summary of the multi-function modes. The
multi-function oven has many varied uses. We suggest you
keep a careful eye on your cooking until you are familiar with
each function. Remember, not all functions will be suitable
for all food types.
Left-hand Multi-function Oven Modes
Defrost
This function operates the fan to circulate cold air
only. Make sure the temperature control is at 0°C and
that no heat is applied. This enables small items such
as desserts, cream cakes and pieces of meat, sh and poultry
to be defrosted.
Defrosting in this way speeds up the process and protects
the food from contamination. Pieces of meat, sh and poultry
should be placed on a shelf, over a tray to catch any drips. Be
sure to wash the shelf and tray after defrosting.
Defrost with the oven door closed. Defrosting should not
be carried out in a warm oven. Large items, such as whole
chickens and meat roasts should not be defrosted in this way.
We recommend this be carried out in a refrigerator. Make sure
that dairy foods, meat and poultry are completely defrosted
before cooking.
Fan Oven
This function operates the fan and the heating
element around them. An even heat is produced
throughout the oven, allowing you to cook large
amounts quickly.
Fan oven cooking is particularly suitable for multi-shelf
cooking and is a good ‘all-round’ function. It may be
necessary to reduce the temperature by approximately 10 °C
for recipes previously cooked in a conventional oven.
If you wish to preheat the oven, wait until the indicator light
has gone out before inserting the food.
Fanned Grilling
This function operates the fan while the top element
is on. It produces a more even, less erce heat than a
conventional grill. For best results place the food to
be grilled on the pan provided. Thick pieces of meat or sh
Function Use
Defrost
To thaw small items in the oven without
heat
Fan oven
A full cooking function, even heat
throughout, great for baking
Fanned grilling
Grilling meat and fish with the door
closed
Fan assisted
A full cooking function good for roasting
and baking
Conventional oven
A full cooking function for roasting and
baking in the lower half of the oven
Browning element
To brown and crisp cheese topped
dishes
Base heat
To crisp up the bases of quiche, pizza or
pastry
Table 2-1
Function Use
Grilling
Grilling meat and fish with the door
closed
Conventional oven A full cooking function for roasting
Browning element
To brown and crisp cheese topped
dishes
Base heat
To crisp up the bases of quiche, pizza or
pastry
Table 2-2

7
are ideal for cooking in this way, as the circulated air reduces
the erceness of the heat from the grill. The oven door should
be kept closed while cooking is in progress, so saving energy.
You will also nd that the food needs to be watched and
turned less than for normal grilling. Preheat this function
before cooking.
Note: When grilling full width, to allow sucient access
for tending foods we recommend placing the grill pan tray
support on the second from top level.
Fan Assisted Oven
This function operates the fan, circulating air heated
by the elements at the top and the base of the oven.
The combination of fan and conventional cooking
(Top and Base Heat) makes this function ideal for cooking
large items that need thorough cooking, such as a large meat
roast. It is also possible to bake on two shelves at one time,
although they will need to be changed over during the
cooking time, as the heat at the top of the oven is greater
than at the base, when using this function.
This is a fast intensive form of cooking; keep an eye on the
food cooking until you are familiar with this function.
Conventional Oven (Top and Base Heat)
This function combines the heat from the top and
base elements. It is particularly suitable for roasting
and baking pastry, cakes and biscuits.
Food cooked on the top shelf will brown and crisp faster than
on the lower shelf, because the heat is greater at the top of
the oven than at the base, as in ‘Fan Assisted Oven’ function.
Similar items being cooked will need to be swapped around
for even cooking. This means that foods requiring dierent
temperatures can be cooked together, using the cooler zone
in the lower half of the oven and hotter area to the top.
The exposed top element may cook some foods too quickly,
so we recommend that the food be positioned in the lower
half of the oven to cook. The oven temperature may also need
to be lowered.
Browning Element
This function uses the element in the top of the oven
only. It is a useful function for the browning or
nishing of pasta dishes, vegetables in sauce and
lasagne, the item to be browned being already hot before
switching to the top element.
Base Heat
This function uses the base element only. It will crisp
up your pizza or quiche base or nish o cooking the
base of a pastry case on a lower shelf. It is also a
gentle heat, good for slow cooking of casseroles in the
middle of the oven or for plate warming.
The Browning and Base Heat functions are useful additions
to your oven, giving you exibility to nish o items to
perfection. With use, you will soon realize how these
functions can combine to extend your cooking skills.
Right-hand Multi-function Oven Modes
Table 2-2 gives a summary of the right-hand multi-function
modes. The multi-function oven has many varied uses. We
suggest you keep a careful eye on your cooking until you are
familiar with each function. Remember, not all functions will
be suitable for all food types.
Grilling
For best results place the food to be grilled on the
pan provided. The oven door should be kept closed
while cooking is in progress. Preheat this function
before cooking. Place the pan on shelf level 4 or 5 depending
on what is being cooked.
Conventional Oven (Top and Base Heat)
This function combines the heat from the top and
base elements. It is particularly suitable for roasting
and baking pastry, cakes and biscuits.
Food cooked on the top shelf will brown and crisp faster than
on the lower shelf, because the heat is greater at the top of
the oven than at the base. Similar items being cooked will
need to be swapped around for even cooking. This means
that foods requiring dierent temperatures can be cooked
together, using the cooler zone in the lower half of the oven
and hotter area to the top.
The exposed top element may cook some foods too quickly,
so we recommend that the food be positioned in the lower
half of the oven to cook. The oven temperature may also need
to be lowered.
Browning Element
This function uses the element in the top of the oven
only. It is a useful function for the browning or
nishing of pasta dishes, vegetables in sauce and
lasagne, the item to be browned being already hot before
switching to the top element.
Base Heat
This function uses the base element only. It will crisp
up your pizza or quiche base or nish o cooking the
base of a pastry case on a lower shelf. It is also a
gentle heat, good for slow cooking of casseroles in the
middle of the oven or for plate warming.
The Browning and Base Heat functions are useful additions
to your oven, giving you exibility to nish o items to
perfection. With use, you will soon realize how these
functions can combine to extend your cooking skills.
The Ovens
The clock must be set to the time of day before the lefthand oven will work. See the following section on ‘The
Clock’ for instructions on setting the time of day. The
clock only controls the left-hand oven.
References to ‘left-hand’ and ‘right-hand’ ovens apply as viewed
from the front of the appliance.
Note: Please remember that all cookers vary so temperatures
in your new ovens may dier to those in your previous
cooker.
 Loading...