

Page 1
User Guide
Digital BBQ
Thermometer
®
P
E
O
D
L
E
I
N
V
E
D
L
A
U
N
A
M
m
y
h
a
n
s
G
c
.
l
o
r
e
t
c
n
o
User-friendly
Manual
ID: #05007
E
R
M
A
N
Y
m
o
Page 2

QR codes take you where you want to go
and fiand fi
tains
quickly and easily
Whether you require product information, spare parts or
accessories, details on warranties or aftersales services, or
if you want to watch a product demonstration video, our QR
codes will take you there in no time at all.
What is a QR code?
A QR code (QR = Quick Response) is a type of matrix that can be
read with a smartphone camera and that contains a link to a
website or contact details, for example.
Advantage: You do not need to manually enter a website ad-
dress or contact details.
This is how it works
To scan the QR code, all you need is a smartphone with QR
code reader software and an internet connection*. This type
of software can be downloaded for free from your app store.
Try it out now
Just scan the QR code with your
smartphone and find out
more about the Aldi product you have
purchased.*
* Depending on your tariff plan you may be
charged for the connection.
Page 3

Contents
......
.......................
..................
.....................................
.......................................
......................................
..................................
al BBQ therm
al BBQ the
Overview ............................................................................. 4
Use ........................................................................................ 5
Product contents/device parts .......................................... 6
General information ............................................................7
Before you use this digital BBQ thermometer,
read through the instruction manual and store it in
a safe place! ............................................................................. 7
Explanation of symbols .........................................................8
Checking the digital BBQ thermometer and
scope of delivery .....................................................................9
Safe ty .................................................................................. 10
Proper use .............................................................................. 10
Safety notes ........................................................................... 10
Safety notes for batteries .....................................................14
First use ..............................................................................16
Basic cleaning .........................................................................16
Assembling the digital BBQ thermometer ........................16
Operation ...........................................................................18
Selecting the type of food and cooking level .................. 18
Timer function ...................................................................... 22
Selecting the target temperature ..................................... 23
Cleaning ................................................................................. 25
Storage and transport .........................................................28
Technical data ................................................................... 29
FCC Declaration of Conformity .......................................... 30
Disposal ............................................................................. 33
Disposing of packaging ....................................................... 33
Disposing of the barbecue thermometer......................... 33
Warr anty ............................................................................ 35
Warranty card ........................................................................35
Warranty conditions .............................................................36
Dok./Rev.-Nr. 92954_20141211
Page 4

A
Freigabe
4
USA
Overview
1
BEEF
2
MEAT
STOP
MIN
+
TARGET TEMP
MODE
SEC
–
CURRENT TEMP
TASTE
START
ON
3
OFF
4
5
6
B
1
7
5
9
10
118
C
POWER
OFF
ON
Page 5
Use
4
Freigabe
15
USA
5
D
21
20
19
18
1 2
BEEF
TARGET TEMP CURRENT TEMP
MEAT
MODE
TASTE
12
13
14
15
E
10
4x
F
H
17
22
SEC
4
16
6
G
POWER
OFF
ON
23
Page 6

6 Product contents/device parts
/ST
P buP bu
USA
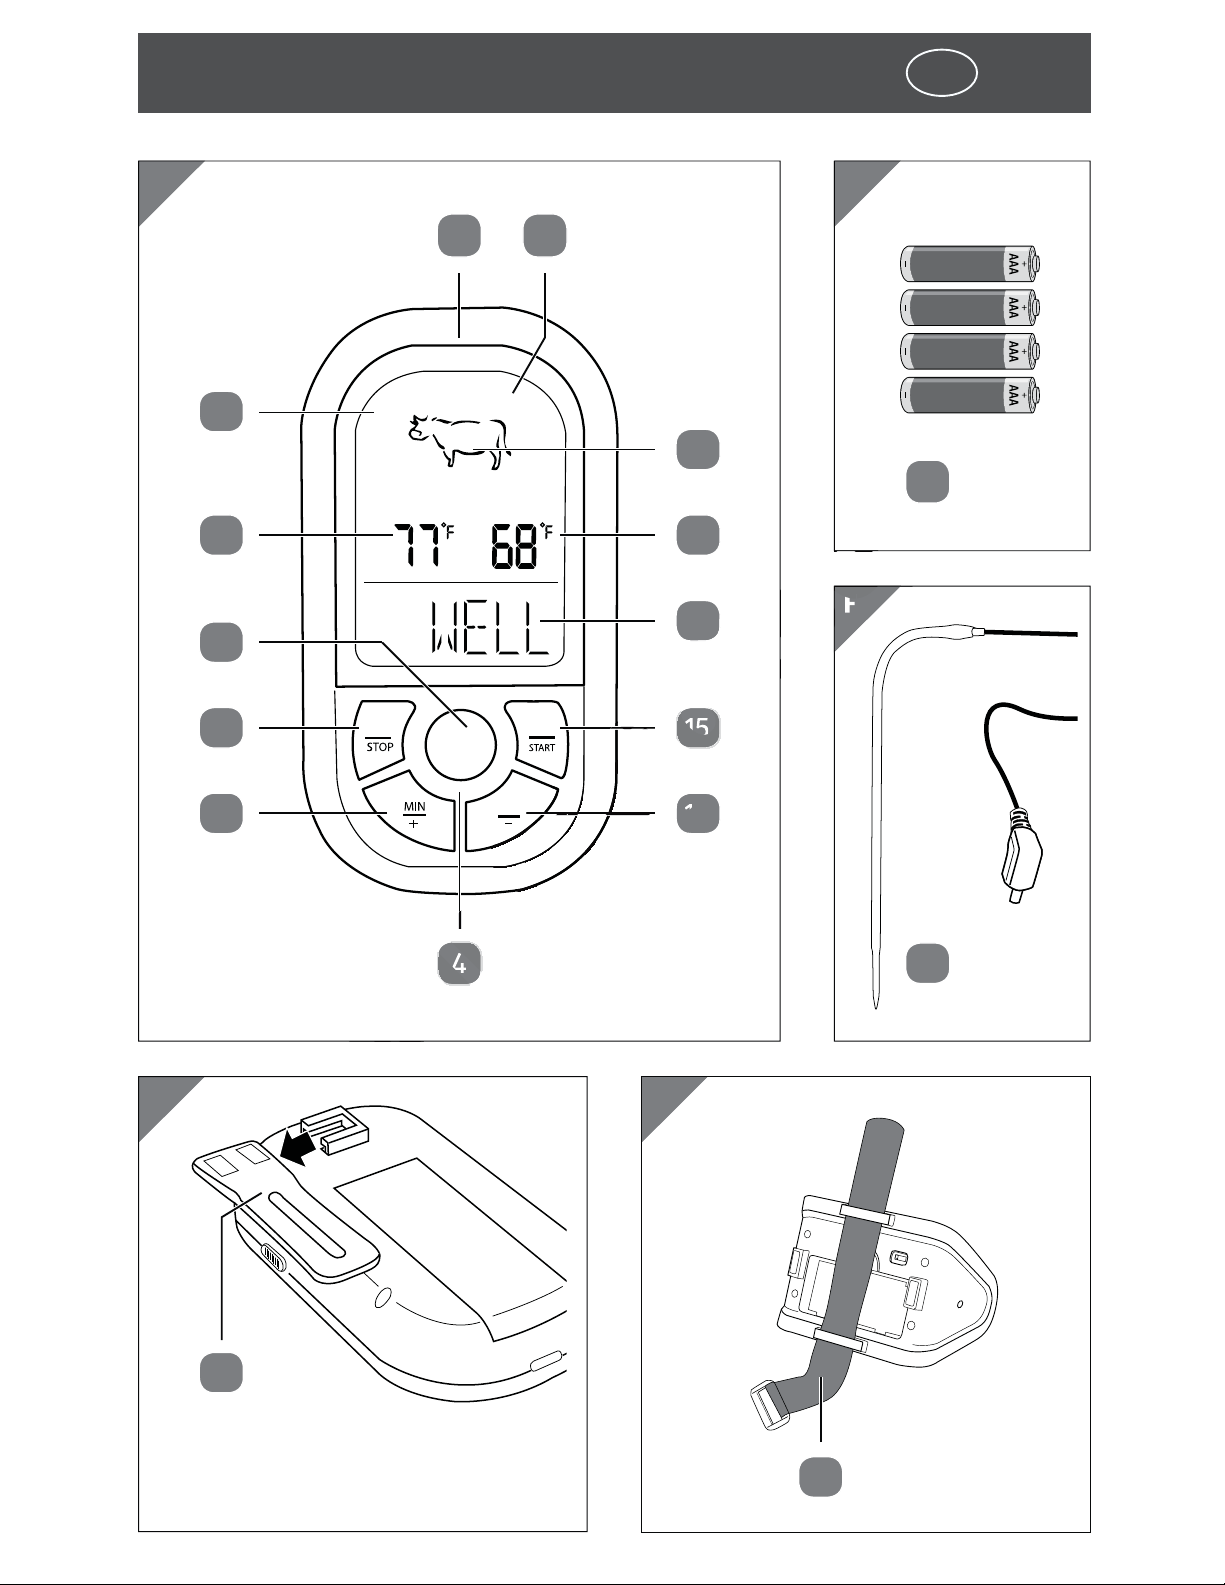
Product contents⁄device parts
1
2
3
4
5
6
7
8
9
10
11
12
Receiver
Display
ON/OFF switch
Control panel
Base unit
Temperature sensor
Battery compartment cover
°C/°F selector switch
Power ON/OFF switch
4x AAA batteries
Battery compartment cover
Food icon indicator
13
14
15
16
17
18
19
20
21
22
23
CURRENT TEMP indicator
COOKING LEVEL indicator
COOKING LEVEL/START button
SEC/- button
MIN/+ button
MEAT/STOP button
MODE button
TARGET TEMP indicator
FOOD LEVEL indicator
Fastening clip for receiver
Velcro strip
The product contents include
four type LR03 1.5V batteries.
Page 7

General information
ins
of thi
d handling.handling
tion manual cion manua
USA
7
General information
Before you use this digital BBQ
thermometer, read through the
instruction manual and store it in a safe
place!
This instruction manual is part of this digital
BBQ thermometer. It contains important information on setup and handling.
Before using the digital BBQ thermometer,
read the instruction manual carefully. This
particularly applies for the safety notes.
Non-observance of this instruction manual may cause damage to the digital BBQ
thermometer.
This instruction manual is based on the
standards and rules in force in the European
Union. When abroad, you must also observe
country-specific guidelines and laws.
Store the instruction manual for further use.
Make sure to include this instruction manual
when passing the digital BBQ thermometer
on to third parties.
Page 8
8 General information
ry if n
USA
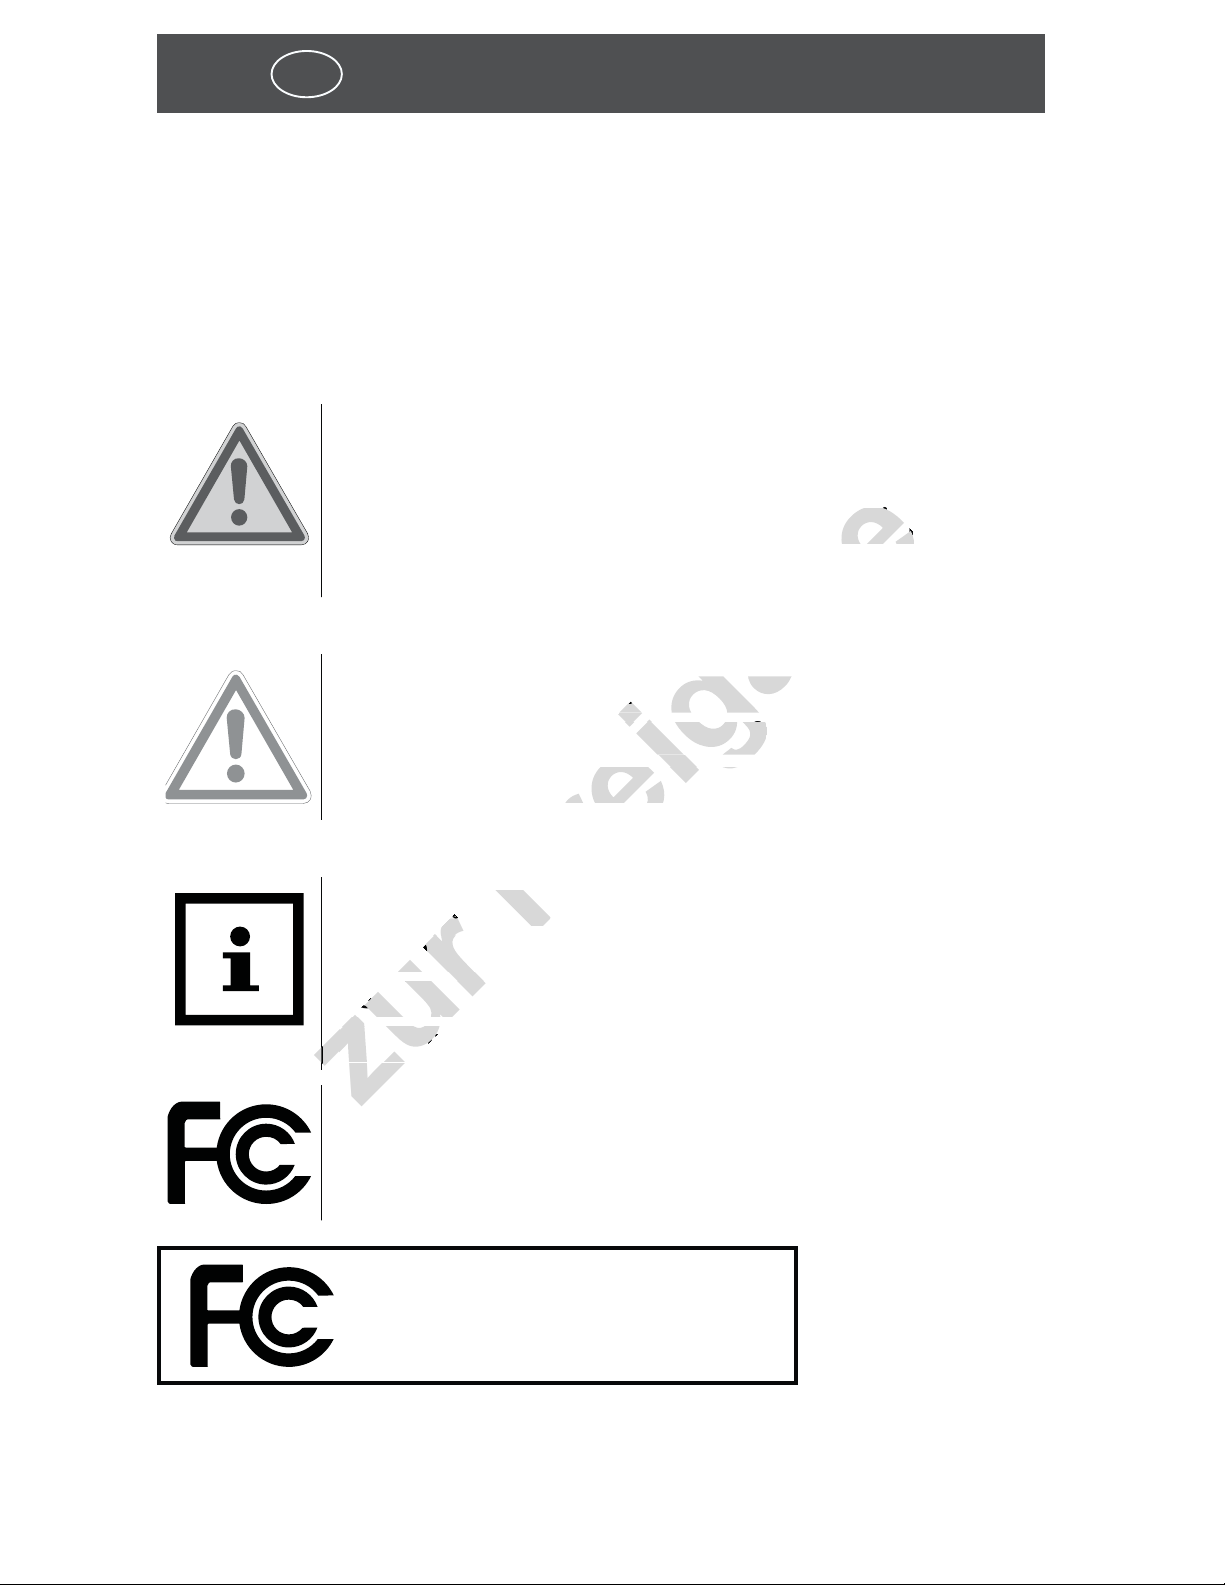
Explanation of symbols
The following symbols and signal words are used in this
instruction manual, on the digital BBQ thermometer or
on the packaging.
WARNING! This signal word designates a
hazard with moderate degree of risk which
may lead to death or severe injury if not
avoided.
CAUTION! This signal word designates a
hazard with low risk that, if not avoided,
may result in minor or moderate injury.
NOTICE! This signal word warns of possible
damage to property or provides you with
useful additional information regarding assembly or operation.
This digital BBQ thermometer complies with
part 15 of the FCC rules.
Digital BBQ thermometer
FCC ID: 2ADQUFB6200
Page 9
General information
parts
use the duse the d
Freigabe
ng
nty
mage th
meter. eter.
, be very ca, be very
USA
9
Checking the digital BBQ thermometer
and scope of delivery
NOTICE!
Risk of damage!
If you are not cautious when
opening the packaging with a
sharp knife or other pointy object,
you may quickly damage the digital BBQ thermometer.
− Therefore, be very careful
when opening.
1. Take the digital BBQ thermometer out of the
packaging.
2. Check whether the digital BBQ thermometer or the
individual parts exhibit damage. If this is the case,
do not use the digital BBQ thermometer. Contact the
manufacturer via the service address indicated on
the warranty card.
3. Check to make sure that the delivery is complete
(see fig. A).
Page 10

10 Safety
o
red th
Freigabe
ded fo
commercial a
ommercia
other use will er use will
USA
Safety
Proper use
For improved readability, the digital BBQ thermometer
will only be referred to as the “barbecue thermometer”;
it is designed exclusively for measuring and monitoring
the internal temperature of food being barbecued. The
barbecue thermometer is exclusively intended for private use indoors. It is not suitable for commercial application. The barbecue thermometer is only intended for
private use and is not suitable for commercial purposes.
Only use the barbecue thermometer as described in this
instruction manual. Any other use will be deemed as
not in accordance with the instructions and may lead to
damage of property and/or injury to persons.
The manufacturer or vendor cannot be held liable for
damages incurred through improper or incorrect use.
Safety notes
Carefully read through this instruction manual before
using the barbecue thermometer for the first time. Familiarise yourself with how to use it, the various settings
and functions. Observe all safety notes and operating
instructions and adhere to them at all times in order to
rule out any potential risks and dangers.
Page 11

Safety
o
or an
he barbec
he barbe
able duringble during
USA
11
WARNING!
Burn hazard!
Handling the barbecue thermometer improperly may result
in injury.
− Make sure that there is no risk of other
persons, especially children, or animals
burning themselves on the barbecue
thermometer.
− Always wear barbecue gloves when
touching the temperature sensor or the
transmission cable during or after use.
WARNING!
Danger for children and persons with impaired physical,
sensory or mental capacities
(e.g. partially disabled persons,
older persons with reduced
physical and mental capacities) or lack of experience
and knowledge (e.g. older
children).
Page 12

12 Safety
ow
unders
ders
operating i
perating
with the bawith the
st not be penot be p
the barbec
the ba
USA
− This barbecue thermometer may be
used by children ages eight and over as
well as persons with impaired physical,
sensory or mental capacities or those
lacking experience and knowledge if
they are supervised or have been instructed in how to safely use the barbecue thermometer and have understood
the risks associated with operating it.
Children may not play with the barbecue thermometer. Cleaning and user
maintenance must not be performed by
children.
− Do not leave the barbecue thermometer
unattended while in operation.
− Do not allow children to play with the
packaging wrapper. They may get
caught in it and suffocate.
− Keep children away from the temperature sensor.
NOTICE!
Risk of damage!
Improper handling of the barbecue thermometer may result in
damage.
Page 13

Safety
ther
or separ
USA
13
− Never use the barbecue thermometer in
a microwave or oven.
− Keep the barbecue thermometer and its
accessories away from open fire and hot
surfaces.
− Do not expose the base unit and the
receiver to direct sunlight.
− Do not connect the barbecue thermometer to an external timer or separate
telecontrol system.
− Do not kink the thermometer cable and
do not lay it over sharp edges.
− Do not allow the base unit and the
receiver to come into contact with moisture.
− Never store the barbecue thermometer
so that it is at risk of falling into a bath
tub or washbasin.
− Always switch off the barbecue thermometer if you don't use the barbecue
thermometer, if you clean it or if a fault
occurs.
Page 14

14 Safety
Freigabe
herm
erm
Safety notes for batteries
− Do not subject the barbecue thermometer to direct sunlight to prevent the
batteries from becoming too hot.
USA
WARNING!
Danger of explosion!
Batteries may explode if they are
excessively heated up.
− Don't heat up the batteries and don't
throw them in an open fire.
WARNING!
Risk of chemical burns from
battery acid!
The older the batteries, the greater the risk of battery acid being
leaked. Leaking battery acid may
lead to chemical burns.
− Do not allow battery acid to come into contact with skin, eyes or mucus membranes.
− In the event of contact with battery acid,
immediately flush the applicable areas
with plenty of clean water and consult a
physician if necessary.
Page 15

Safety
t is le
u do n
the barbe
the ba
USA
15
− Immediately consult a physician if
children or animals have swallowed a
battery.
NOTICE!
Risk of damage!
Improper handling of the batteries may result in damage.
− Remove all batteries if you do not use the
barbecue thermometer for a prolonged
period of time.
− Do not subject the batteries to extreme
temperatures, direct sunlight or fire.
Never place the barbecue thermometer
on a hot surface or heat source. Battery
acid that is leaked may cause injury and
damage to property.
− Never insert the batteries in the battery
compartment incorrectly – contrary to
the instructions. Always make sure that
they are properly positioned with the
correct polarity (+ and -) as illustrated in
the battery compartment.
Page 16

16 First use
ged
Freigabe
al and all protand all p
in the chapte the chapte
USA
− Only replace batteries with equivalent
batteries or batteries of the same type. Do
not use new and used batteries together.
Only use batteries of the same type and
from the same manufacturer.
First use
Basic cleaning
− Remove the packaging material and all protective
foils.
− Clean all parts of the barbecue thermometer before
first use as described in the chapter “Cleaning”.
Assembling the digital BBQ
thermometer
1. Check whether the package contents are complete
and that the parts of the barbecue thermometer are
undamaged.
2. Sort all parts of the barbecue thermometer as indicated on the fold-out page of the assembly instructions.
3. Take the receiver
1
, open the cover of the battery
7
compartment
teries
cated polarity (see fig. B).
10
in the battery compartment with the indi-
and insert two of the enclosed bat-
Page 17

First use
e receive
e receiv
Freigabe
witch th
).)
and insertand ins
sion cable in tsion cable i
r on the base n the bas
ermometer is ermometer
4. Close the battery compartment and switch the receiv-
3
er on with the switch
(> ON). Once the indicator
USA
17
appears on the display
is operational.
5. Take the base unit
ment
closed batteries
the indicated polarity (see fig. C).
6. Close the battery compartment and switch the base
unit on with the switch
7. Take the temperature sensor
at the end of the transmission cable in the jack of the
base unit (see fig. A).
The power indicator on the base unit will illuminate.
11
on the bottom of it. Insert two of the en-
5
10
in the battery compartment with
2
of the receiver, the receiver
and open the battery compart-
9
(POWER ON).
6
and insert the plug
The barbecue thermometer is now operational.
8. Push various buttons to test whether all functions of
the barbecue thermometer are accessible.
9. Switch the receiver and the base unit back off. Affix
the enclosed fastening clip
clothing (bag, belt) to the receiver (see fig. H) and affix the enclosed Velcro strip
(see fig. G) to attach it to the place of use (barbecue).
22
for attaching it to
23
to the base unit
Page 18

18 Operation
Freigabe
emp
tly inserted i
tly inserted
USA
NOTICE!
As soon as the base unit
on and the temperature sensor is connected
with the base unit, the current temperature
will appear as CURRENT TEMP
play
current temperature is shown, check whether the connector plug of the temperature
sensor
jack of the base unit.
2
of the receiver
6
has been correctly inserted in the
5
has been switched
13
on the dis-
1
(see fig. A). If no
Operation
Prepare the digital BBQ thermometer in accordance with
the instructions for first-time use. Switch the receiver
and the base unit on and connect the temperature sensor to the base unit.
Selecting the type of food and cooking
level
Sort the food according to type and cooking level. Use
8
the switch
receiver to select the format for displaying the temperature (°C or °F).
(fig. C) in the battery compartment of the
Page 19

Operation
F
F
USA
19
Food/
Cooking
level
Beef
Lamb
Calf
Pork
Turkey
Chicken
WELL
Well
done
77 °C
170 °F
77 °C
170 °F
74 °C
165 °F
77 °C
170 °F
74 °C
165 °F
74 °C
165 °F
M WELL
Medium
well
74 °C
165 °F
74 °C
165 °F
71 °C
160 °F
74 °C
165 °F
MEDIUM
Medium
71 °C
160 °F
71 °C
160 °F
66 °C
150 °F
71 °C
160 °F
M RARE
Medium
rare
66 °C
150 °F
63 °C
145 °F
63 °C
145 °F
RARE
Rare
63 °C
145 °F
Hamburger
Fish
71 °C
160 °F
63 °C
145 °F
Page 20

20 Operation
sor is
Freigabe
mp
transmiss
transmi
e barbecubarbec
that th
tha
USA
WARNING!
Burn hazard!
The temperature sensor and
transmission cable may become
hot.
− Always wear barbecue gloves
when touching the temperature sensor or the transmission
cable during or after use.
− Do not use the barbecue thermometer and its components
in a microwave or oven.
NOTICE!
Make sure that the tip of the temperature
sensor is not in contact with bones, cartilage or fat.
The barbecue thermometer has preset target temperatures
depending on the selected type of food and cooking level.
1. On the receiver,
MEAT button
1
select the food type with the
18
. Push the MEAT button until the de-
sired food type appears on the display
2. On the receiver
the COOKING LEVEL button
LEVEL button until the desired cooking level appears
on the display
1
, set the desired cooking lever with
14
(see fig. D).
2
(see fig. D).
15
. Push the COOKING
Page 21

Operation
elt or a
n as you hn as you
STASTA
Freigabe
at you
re the base uthe base
) of the te) of the
NOTICE!
The preset target temperature is shown on
USA
21
the display
(see fig. D).
3. Insert the tip of the temperature sensor
thickest part of the food whose temperature you
would like to monitor. Insert the tip of the temperature sensor in the side of the food so that you can turn
the food while barbecuing it.
4. Use the Velcro strip
the piece of food.
5. Run the cable
sensor away from the food. Keep the base unit away
from hot surfaces.
6
(see fig. A) of the temperature
2
as the TARGET TEMP
23
to secure the base unit
6
20
in the
5
near
6. Use the clip
becue for easy viewing or attach the receiver to your
clothing (belt or apron, trouser or shirt pocket).
7. As soon as you have placed the food on the barbecue,
push the START button
D). This will start monitoring the temperature via the
temperature sensor inserted in the food. After a short
time, the current temperature of the food will appear
as CURRENT TEMP
(see fig. D).
22
to secure the receiver
15
on the receiver (see fig.
13
on the display of the receiver
1
near the bar-
Page 22

22
at t
Freigabe
the
the food b
food
USA
Operation
The CURRENT TEMP
ger the food is barbecued until the target temperature has been reached. Once the target temperature
has been reached, the display indicator (see fig. D)
will switch to the alarm function, the display will turn
red and flash. Additionally, a sound (beep) that is
synced with the optical indication will be emitted.
8. Push the STOP button
to end the measurement process for the food being
monitored by the temperature sensor.
If you place more pieces of food of the same type and
comparable weight and consistency on the grilling
grate at the same time, you can expect that these
13
will steadily increase the lon-
18
(see fig. D) on the receiver
pieces of food will also be cooked according to the
cooking level you selected.
9. You can now cook more pieces of food to perfection
by following the described steps.
Timer function
If you feel that the food is not quite cooked to perfection
or would like to cook it some more, you can use the timer function of the receiver.
1. On the receiver, push the MODE button
select the timer function.
2. The display indicator will switch to the timer function
19
(fig. D) to
with choices for the minutes (M) and seconds (S). You can
set the desired cooking time by pushing the MIN button
17
and/or the SEC button
16
(fig. D) on the receiver.
Page 23

Operation
e timer f
nd when you d when yo
function has efunction ha
to indicator m
to indicato
USA
23
3. Push the START button
15
(fig. D) to start the timer
function.
The timer indicator on the display will indicate the
remaining time for the temperature measurement
(fig. D).
4. Push the STOP button
18
(see fig. G) to interrupt the
timer function, for example, to check how well cooked
the food is.
5. Push the START button
15
to start the timer function
again.
The timer function will not end when you use the
MODE button
19
to switch back to the display with
the select functions.
Once the set timer function has elapsed, the display
will switch back to indicator mode for reaching the
target temperature.
You can stop the timer function with the STOP button
18
.
Selecting the target temperature
The digital BBQ thermometer reliably helps you to achieve
convincing cooking results. If you prefer individual cooking results, you can increase or decrease the cooking time
by selecting the target temperature manually.
1. On the receiver
1
, use the MODE button
19
(see fig. D) to select the entry of the target temperature. For this, push the MODE button until the TARGET
20
TEMP indicator
starts to flash on the display.
Page 24

24
Freigabe
tting
will ap
will a
icate the end ate the end
USA
Operation
2. Now push the MIN button
the desired target temperature. If you would like to
correct your entry, you can use the SEC button
reduce the preset time by one minute each.
3. If the target temperature setting is correct, you can exit
the select function by pushing the MODE button
4. Push the START button
temperature based on your individual setting. Only
20
TARGET TEMP
on the display.
Once the cooking process is complete, the alarm indicator will be triggered again with the display flashing
and CURRENT TEMP
17
until you have reached
15
to start monitoring the
13
will appear
16
19
to
.
in red and a beep to indicate the end of the cooking
process.
If you would like to delete the target temperature
setting, push the POWER ON/OFF switch
receiver.
3
on the
Page 25

Cleaning
timtim
s
f the
the socket
he sock
tal BBQ thel BBQ the
WARNING!
Risk of electric shock!
Improper handling of the digital
BBQ thermometer poses an increased risk of electrical shock.
– Do not insert the tip of the temperature sensor in the socket.
USA
25Operation
WARNING!
Burn hazard!
The digital BBQ thermometer will
become hot during operation!
− Let the barbecue thermometer,
particularly the temperature
sensor, cool off completely each
time before you clean it!
Page 26

26 Operation
er p
USA
NOTICE!
Risk of short circuit!
Water that has penetrated the
housing may cause a short circuit.
− Never submerge the digital
BBQ thermometer in water.
− Make sure that no water penetrates the housing.
NOTICE!
Risk of damage!
Improper handling of the digital
BBQ thermometer may result in
damage.
− Do not use any aggressive
cleaners, brushes with metal
or nylon bristles, sharp or metallic cleaning utensils such as
knives, hard scrapers and the
like. They could damage the
surfaces.
Page 27

USA
Freigabe
o
o
and the and
27Operation
− Do not in any case place the
barbecue thermometer in the
dishwasher. It would be destroyed as a result.
1. Let all parts of the barbecue thermometer cool off
completely.
2. Wipe the receiver
damp cloth.
Then let all parts dry completely.
3. Clean the temperature sensor
sion cable with warm water and a small amount of
detergent.
Clean the barbecue thermometer after every use.
1
and the base unit
6
and the transmis-
5
off with a
Page 28

28 Operation
ries
rie
Freigabe
the
the barbecue
he barbec
USA
Storage and transport
− Clean the barbecue thermometer as described.
− Remove all batteries if you do not intend to use the
barbecue thermometer for a prolonged period of
time or when putting it into storage.
− Store the barbecue thermometer and the accesso-
ries in a dry, frost-free area that is out of the reach of
children.
− It is recommended that you store the barbecue ther-
mometer in the original packaging and cover it with
a cloth to protect it against dust and moisture.
− Make sure that there is no risk of the barbecue ther-
mometer falling during transport.
− Transport the barbecue thermometer in the original
packaging to prevent transport damages and the
loss of accessories parts.
Page 29

USA
Freigabe
" (120 cm)(120 cm)
32 °F – 2932 °F – 2
29Technical data
Technical data
Model: FB6200-S (transmitter)
FB6200-E (receiver)
Power supply: 6V, 4 x 1.5V DC AAA
type AAA / LR 03
Receiver category: 3
Transmit duty cycle: 10%
Cable length temp. sensor: 47.24 " (120 cm)
Cordless transmission: 10–12 m
Measurable temperature
range:
Base unit dimensions: approx. 3.15 x 1.97 x 2.32 "
Dimensions of the receiver: approx. 4.53 x 2.48 x 0.98 "
0 °C – 148 °C
32 °F – 298.4 °F
(8 x 5 x 5.9 cm)
(11.5 x 6.3 x 2.5 cm)
Net weight: approx. 170 g
Page 30

30 FCC Declaration of Conformity
Freigabe
ations n
pment.pment.
USA
FCC Declaration of Conformity
This device complies with part 15 of the FCC Rules. Operation is subject to the following two conditions:
(1) This device may not cause harmful interference, and
(2) this device must accept any interference received,
including interference that may cause undesired
operation.
NOTICE!
Changes or modifications not expressly approved by the party
responsible for compliance could
void the user’s authority to operate
the equipment.
Page 31

FCC Declaration of Conformity
s no g
s no
Freigabe
n a
This equip
his eq
es and cans and ca
ful inter
ful int
NOTICE!
This equipment has been tested
and found to comply with the limits
for a Class B digital device, pursuant
to part 15 of the FCC Rules. These
limits are designed to provide
reasonable protection against
harmful interference in a residential installation. This equipment
USA
31
generates, uses and can radiate
radio frequency energy and, if not
installed and used in accordance
with the instructions, may cause
harmful interference to radio
communications. However, there
is no guarantee that interference will not occur in a particular
installation. If this equipment does
cause harmful interference to
radio or television reception,
which can be determined by turning the equipment off and on, the
user is encouraged to try to correct
the interference by one or more of
the following measures:
Page 32

32 FCC Declaration of Conformity
Suite 20
Suite
Freigabe
re
USA
− Reorient or relocate the receiving
antenna.
− Increase the separation between
the equipment and receiver.
− Connect the equipment into
an outlet on a circuit different
from that to which the receiver
is connected.
− Consult the dealer or an experienced radio/TV technician for
help.
Responsible Party:
Wachsmuth & Krogmann Inc.
621 IL Route 83, Suite 202
Bensenville, IL 60106
Telephone No.: 1-888-367-7373
Page 33

USA
n harmfu
n harmfu
so tho th
thermom
thermo
are requare
33Disposal
Disposal
Disposing of packaging
− Sort the packaging before you dispose of it. Dispose
of cardboard and carton as waste paper and foils via
the recyclable material collection service.
Disposing of the barbecue thermometer
− Should the barbecue thermometer no longer be
capable of being used at some point in time, dispose
it in accordance with the regulations in force in your
state or country.
Batteries and rechargeable batteries may not be disposed of with household waste!
As the end user you are required by law to bring all batteries and rechargeable batteries, regardless whether
they contain harmful substances* or not, to a collection
point run by the communal authority or borough or to
a retailer, so that they can be disposed of in an environmentally friendly manner.
Turn in the complete digital BBQ thermometer (including the battery) at your collection point in a discharged
state!
* labeled with: Cd = cadmium, Hg = mercury, Pb = lead
Page 34

34
Freigabe
USA
Page 35

Warranty
Freigabe
USA
WARRANTY CARD
35
®
DIGITAL BBQ THERMOMETER
Your details:
Name
Address
E-mail
Date of purchase*
* We recommend you keep the receipt with this warranty card.
Location of purchase
Description of malfunction:
Return your completed warranty card
together with the faulty product to:
Wachsmuth & Krogmann Inc.
621 IL Route 83, Suite 202
Bensenville, IL 60106
USA
AFTER SALES SUPPORT
USA
1-888-367-7373
Model: FB6200-S (transmitter)
FB6200-E (receiver)
Toll free hotline
BEEF
TARGET TEMP
CURRENT TEMP
MEAT
STOP
MODE
START
MIN
+
SEC
–
customer-service@wk-usa.com
Product code: 92205
ON
OFF
TASTE
05/2015
3
YEARS WARRANTY
Page 36

36
t
Freig
and co
d co
and proper
nd prope
g. recharge
ntact our ser
USA
Warranty
Warranty conditions
Dear Customer,
The ALDI warranty offers you extensive benefits compared to the statutory obligation arising from a warranty:
Warranty period:3 years from date of purchase.
6 months for wear parts and consu-
mables under normal and proper
conditions of use (e.g. rechargeable
batteries).
Costs: Free repair/exchange or refund.
No transport costs.
ADVICE: Please contact our service hotline by
phone, e-mail or fax before sending
in the device. This allows us to provide
support in the event of possible operator errors.
In order to make a claim under the warranty, please
send us:
• together with the faulty item the original receipt
and the warranty card properly completed.
• the faulty product with all components included
in the packaging.
Page 37

Warranty
ssume
Freigabe
have
ree of char
The warranty does not cover damage caused by:
• Accident or unanticipated events
(e.g. lightning, water, fire).
• Improper use or transport.
• Disregard of the safety and maintenance
instructions.
• Other improper treatment or modification.
After the expiry of the warranty period, you still have the possibility to have your product repaired at your own expense. It
the repair or the estimate of costs is not free of charge you will
be informed accordingly in advance.
USA
37
This warranty does not limit the statutory obligation of the
seller arising from a warranty. The period of warranty can only
be extended in accordance with a legal standard. In countries
where a (compulsory) warranty and/or spare part storage
and/or a system for compensation are/is required by law, the
statutory minimum conditions apply. In the event that a product is received for repair, neither the service company nor
the seller will assume any liability for data or settings possibly
stored on the product by the customer.
Page 38

Freigabe
Page 39

Made in China
USA
DISTRIBUTED BY:
ALDI INC.
BATAVIA, IL 60510
USA
www.aldi.us
AFTER SALES SUPPORT
1-888-367-7373
Model: FB 6 2 0 0 - E ( r e c e i v e r )
FB6200-S (transmitter)
customer-service@wk-usa.com
Product code: 92205
05/2015
YEARS
WARRANTY
 Loading...