

Page 1
INSTALLATION INSTRUCTIONS
FOR OUTPUT CARRIER KIT #251250
USED ON RPH 20000/25000 WINCH
WITH QUANTUM GEAR BOX
Note: For complete instructions for disassembly and reassembly of winch, refer to winch Owner’s
Manual.
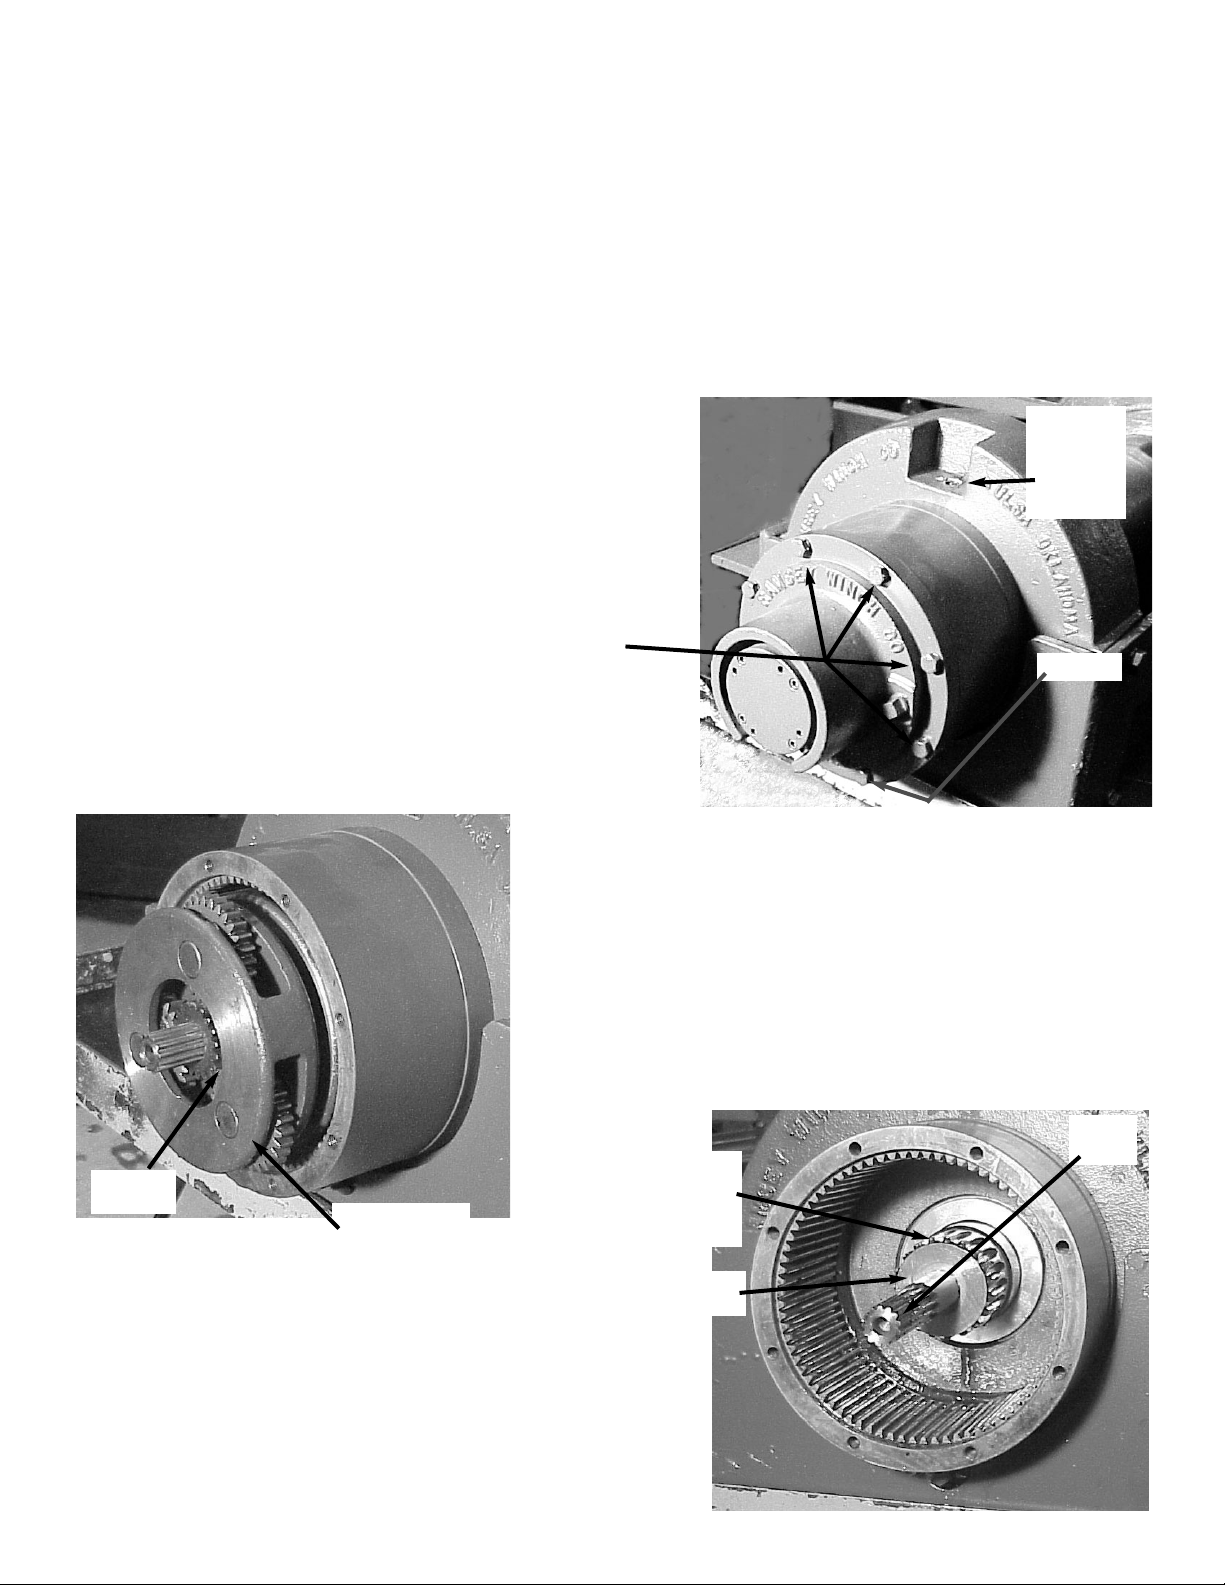
1. Drain oil from Gear Housing by removing Pipe Cap from
pipe nipple in end bearing. Remove Reducer and Relief
Fitting.
2. Remove (8) capscrews to remove Gear Housing Cover
from ring gear. Remove Input Thrust Washer and Gear
Housing Cover O-ring.
CAUTION: HOLD GEAR HOUSING COVER WHILE REMOVING THE LAST
BOLT
. THE COVER WILL BE FORCED OUT DUE TO CLUTCH SPRING LOAD.
Input Sun
Gear
Input Carrier
Assembly
(Output Carrier
Assembly is
behind)
Output Coupling
(Input Coupling is
inside Output
Coupling)
Clutch
Washer
Shifter
Shaft
3. Remove Sun Gear, Carrier assemblies, Separator Washer, and
Spacer from inside of ring gear.
Note: Discard Output Carrier Assembly, Separator Washer,
Thrust Washer and Gear Housing Cover O-ring. They will be
replaced with items in kit.
4. Remove Input Shifter Shaft, Input Coupling, Output Coupling,
and 2 Clutch Washers.
Reducer and
Relief
Fitting are
removed
here
Pipe Cap
1
Page 2
5. Thoroughly clean all parts to be free of any debris.
6. Place first Clutch Washer over splined end of Input Shaft and
against Spring.
7. Place end of Output Coupling Assembly, with longest spline inward,
through End Bearing Bushing and mesh Shaft Coupling spline with
splined end of shaft and splines in Drum Driver.
8. Place short splined end of Shifter Shaft through second Clutch
Washer and into Shaft Coupling, meshing splines of shifter shaft
with splines in Input Coupling.
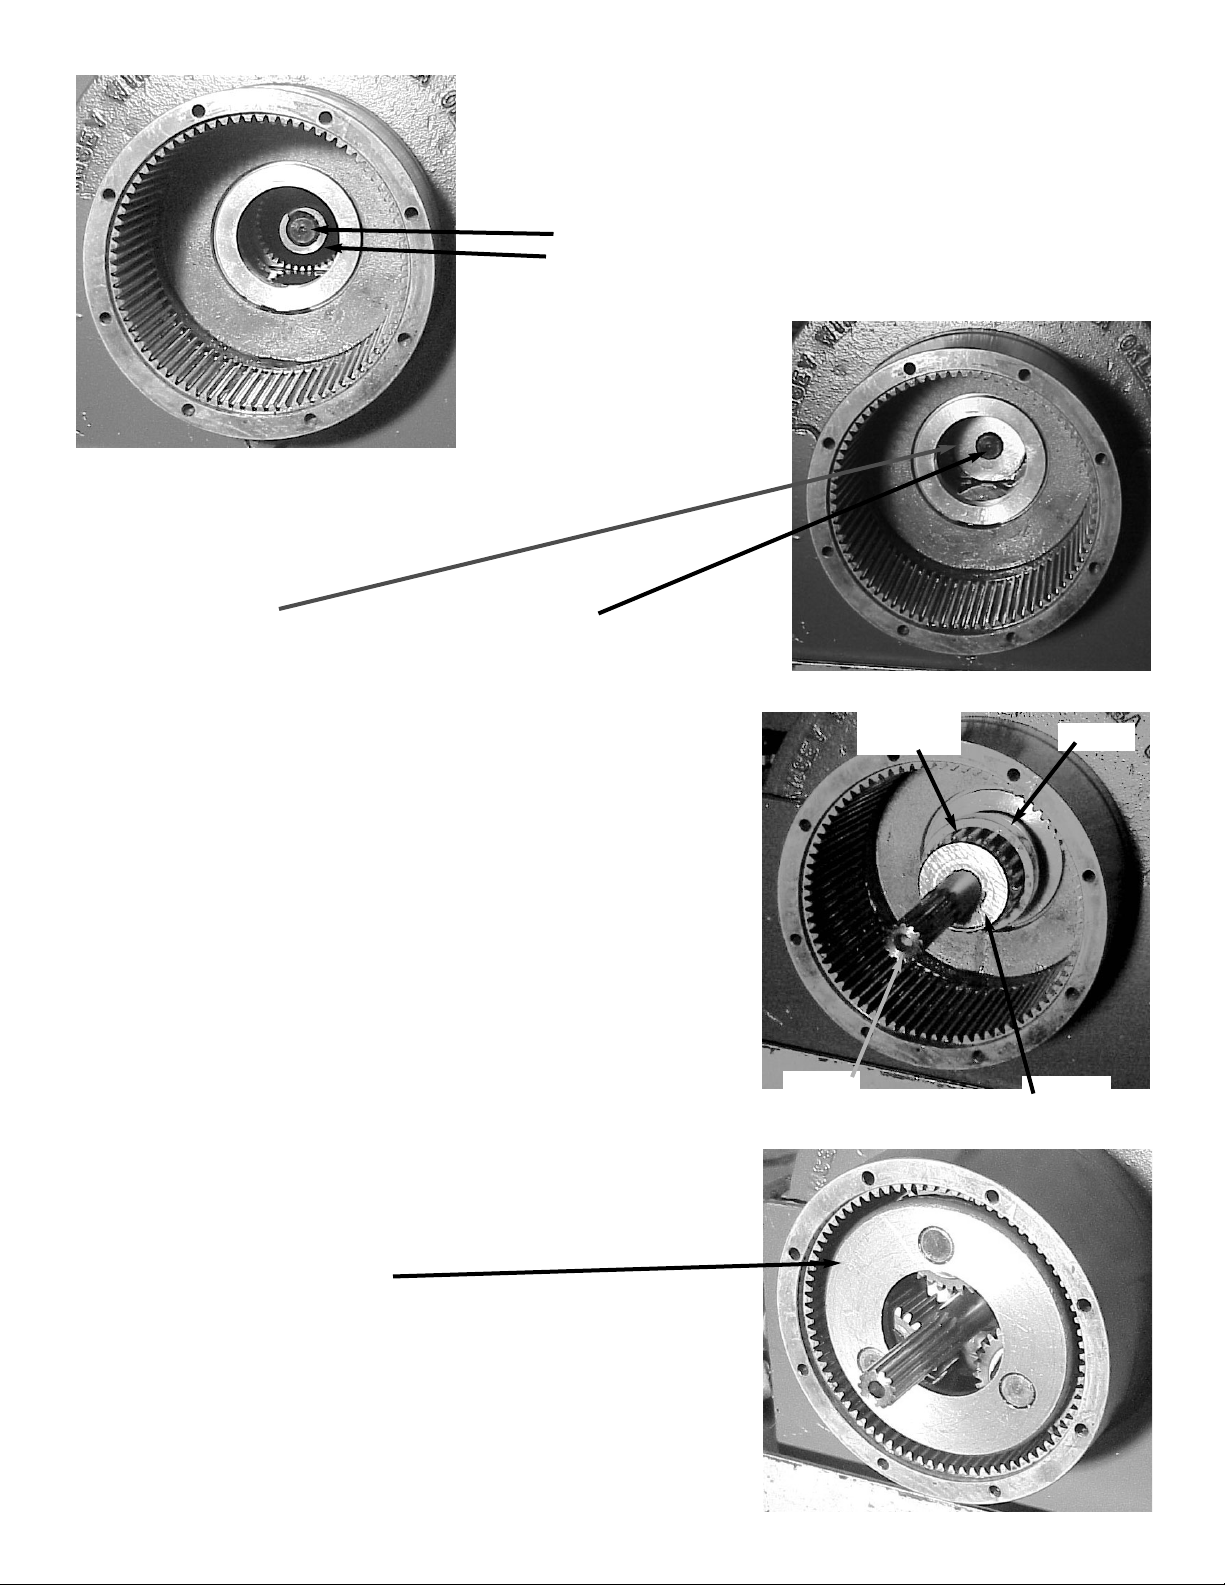
9. Place Spacer over Output Coupling Assembly.
10. Place new Output Carrier Assembly into Ring Gear. Mesh Output
Carrier splines with Output Coupling.
Spacer
Output
Coupling
Assembly
Clutch
Washer
Shifter
Shaft
2
IMPORTANT: DO NOT REMOVE
INPUT SHAFT OR CLUTCH
SPRING.
Page 3

11. Install new Separator Washer over Output Sun Gear on Input
Carrier Assembly.
12. Place Input Carrier Assembly with Separator Washer into Ring
Gear and Output Carrier Assembly so that Output Sun Gear
goes over Shifter Shaft and into Output Carrier Assembly.
13. Place Input Sun Gear into Input Carrier Assembly meshing
with Shifter Shaft and Carrier Assembly gears.
14. Apply grease to new Input Thrust Washer and place onto
Gear Housing Cover. Place new O-ring onto Gear Housing
Cover.
Separator
Washer
Output
Sun Gear
Input Carrier
Assembly
Input Sun
Gear
Input Carrier
Assembly
Gear Housing
Cover
Input Thrust
Washer
O-ring
3
Page 4

15. Place Gear Housing Cover onto Ring Gear by compressing Clutch Spring while aligning gear teeth and bolt holes
with Ring Gear as shown at right.
16. Replace (8) Capscrews, torquing in a criss-cross pattern
to 18 ft-lbs. (24 Nm) each.
17. Apply Permatex to threads of Pipe Cap. Thread pipe cap
onto pipe nipple in bottom of Gear Housing End Bearing.
Pour approx. 1.75 pints of SAE 80W-140 oil into end
bearing. Check oil level by removing oil plug. Insert
Relief Fitting and Thread Reducer into end bearing at oil
fill hole.
18. Install winch and connect pressure lines.
19. Check proper operation of clutch by applying air pressure
to clutch air cylinder to disengage clutch. Verify that
winch drum freespools. Re-engage clutch. A loud noise
should be heard when clutch engages. Winch drum
should not freespool.
20. Operate winch forward and reverse to verify that drum
rotates.
914100-0902-A
Parts List
Item Part
No. Qty. No. Description
1 1 247030 Output Carrier Assembly
2 1 418435 Separator Washer
3 1 418443 Input Thrust Washer
4 1 462063 O-Ring
1
2
4
3
RAMSEY WINCH COMPANY
P.O. BOX 581510 TULSA, OK 74158-1510 USA
PHONE: (918) 438-2760 FAX: (918) 438-
visit us at http://www.ramsey.com
4
Oil Level
Plug
6688
 Loading...