

Page 1
RCI-7M Instruction Manual
The Rako RCI-7M is a battery powered interface unit for up to 7 momentary voltfree switch inputs. Programmed by NFC (Near Field Communication) with macro
capability.
The RCI-7M accepts volt-free momentary switch inputs and transmits wireless
Rako coded Rakom messages to other Rako wireless receiver and Bridge units.
Cabling – The RCI module is designed to fit in a back-box locally to the connected
switch inputs. Excessive cable lengths can pick up noise which can cause
intermittent operation or spurious triggering. The recommended maximum cable
length is 300mm. For interfacing remotely the RMRVF should be used instead.
Note: This product can only be programmed with RASOFT Pro software and the
Rako RAMPI programming interface.
Battery
The RCI-7M requires a single CR2032 lithium cell battery for power.
Warning
Lithium batteries may explode if handled incorrectly. Always dispose of used
batteries in accordance with manufacturer’s recommendations.
Installation
The RCI-7M is designed to fit into a UK
backbox. As the unit transmits a wireless
message to remote receivers it is
important that the aerial is not
surrounded by metalwork which will
restrict transmitting range, as may be the
case with a metal backbox and cover
plate. It is highly recommended to feed
the aerial out of any backbox as shown
right.
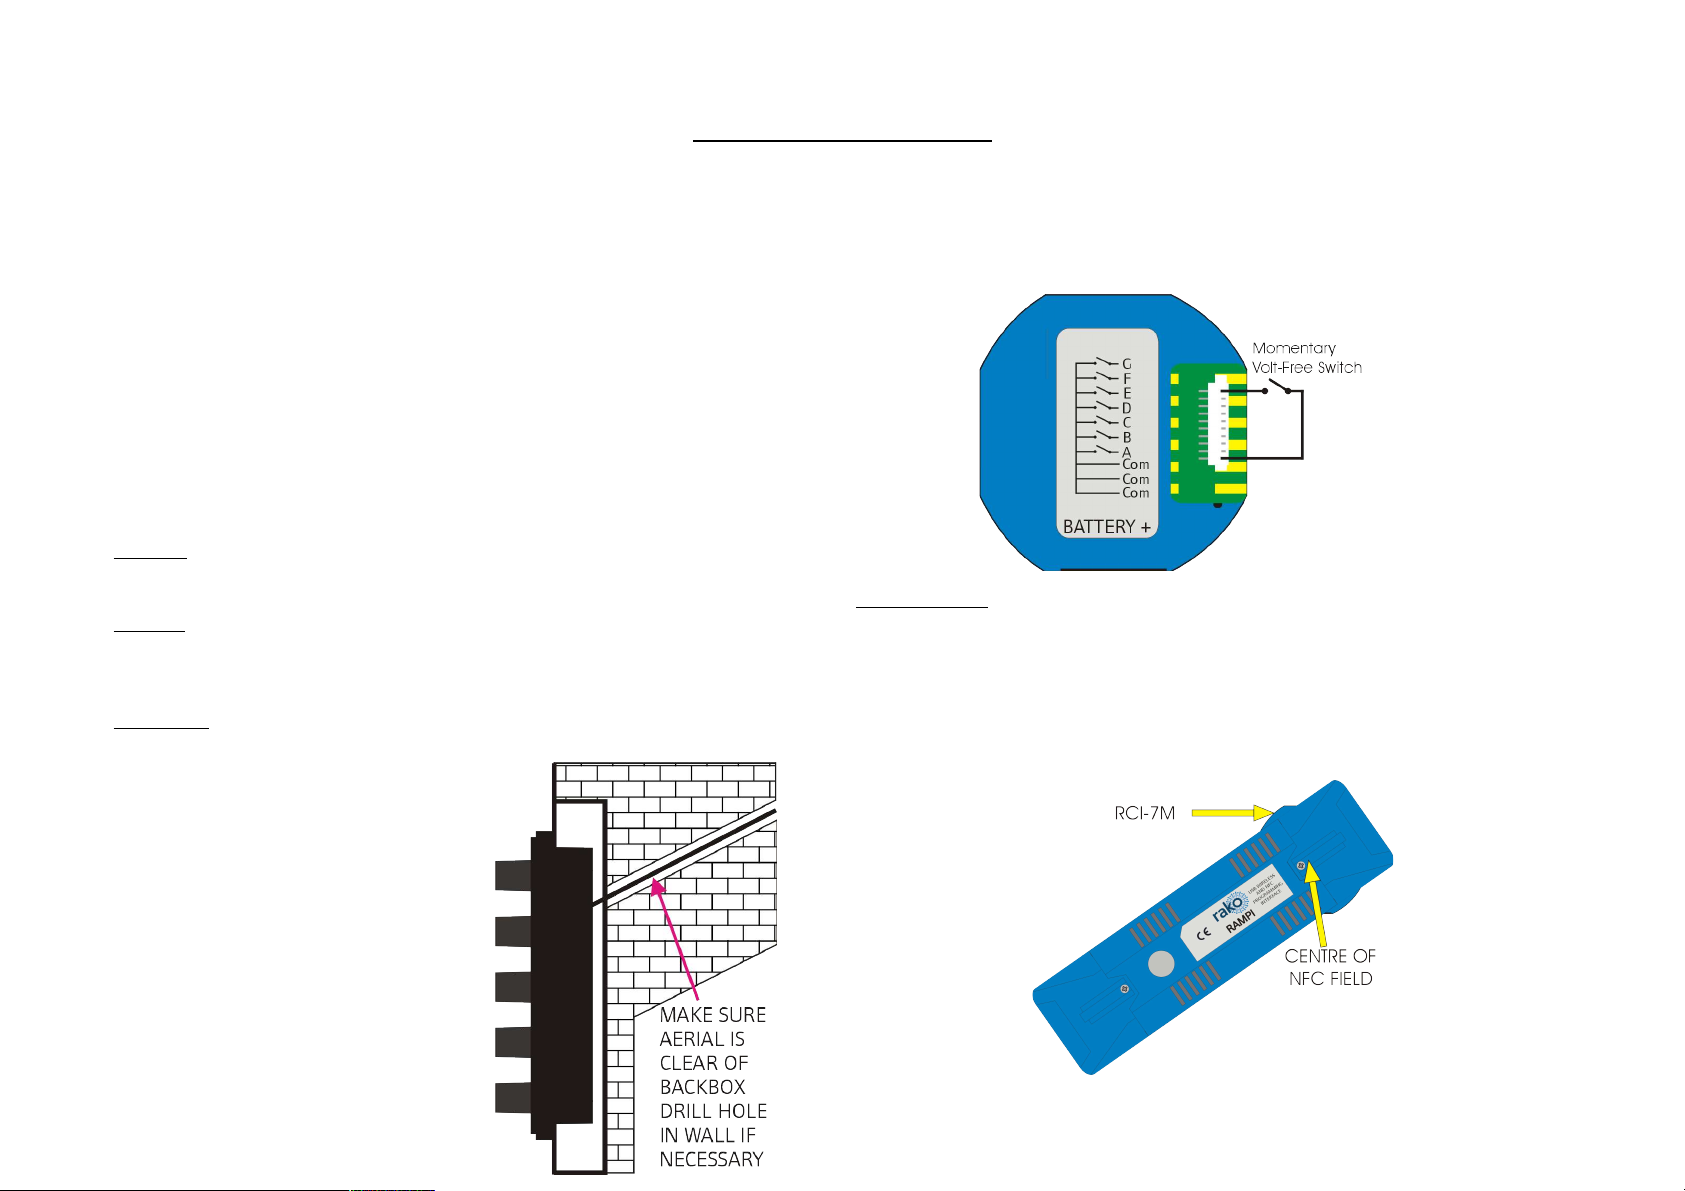
The only connections required are those to the switched inputs and should be
made as shown below. Note: the RCI-7M is supplied with a 10-way socket and
crimped leads. Connections to the contacts should be no longer than the supplied
leads.
Pr ogramming.
The following assumes that the user is already programming a system using Rasoft
Pro, if this is not already the case follow the guide 'Rasoft Pro-Wireless module
set-up guide' downloadable from www.rakocontrols.com/support.
Hold the RAMPI against (or near to) the RCI-7M as shown below.
Page 2

When the device is correctly positioned a green LED will flash in the RAMPI and a
window will pop-up in Rasoft Pro prompting the device to be named and
associated to a Room. Having done this go to the Device editor page select the
inputs as necessary and assign the associated actions. This will be a single action
such as selecting a scene. If a macro function is desired then select the Macro
radio button and a drop down menu of actions will appear (the actual macro steps
are defined under the Macro tab). Having input the required actions click on the
Data Transfer tab and click Upload to device. Rasoft will issue a prompt to hold
the RAMPI against (or near) the RCI-7M. When transferring data a progress bar
will appear in Rasoft Pro and a solid green LED will appear on the RAMPI.
To confirm the RCI-7M has been correctly programmed activate the connected
switches. The RAMPI has an internal wireless receiver which will detect the
transmissions and display the transmissions in the bottom right hand corner of
Rasoft Pro.
For more detailed information on programming the RCI-7M refer to the set-up
guide from www.rakocontrols.com/ Support or Help/Set-up guides within Rasoft
Pro.
General
Rako thanks you for having purchased a Rako product and hopes that you are
pleased with your system. Should for any reason you need to contact us please
contact us via our website www.rakocontrols.com or by phoning our customer help
line on 01634 226666.
 Loading...