

Page 1
N2 N2 Plus
Quick Start Guide
N-Series 3D Printer
* Please review this entire guide before operating the printer.
Page 2
N-Series 3D Printer
/ Quick Start Guide
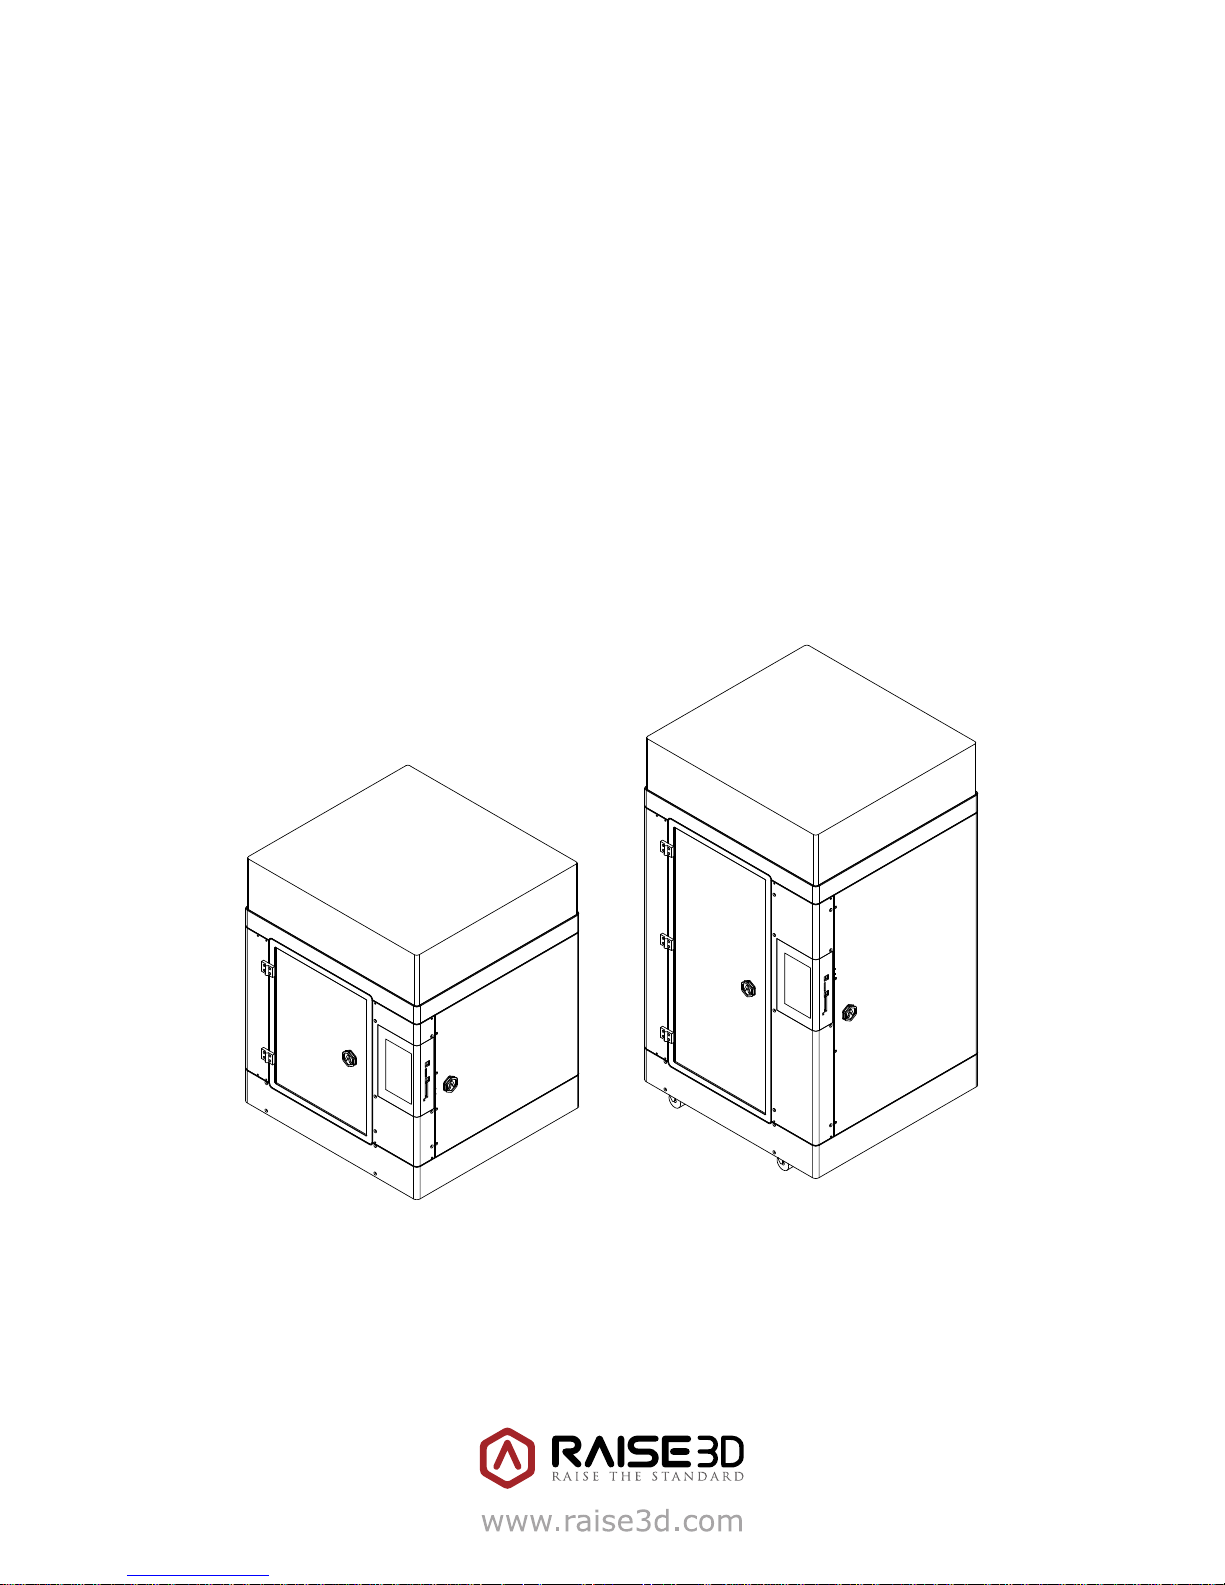
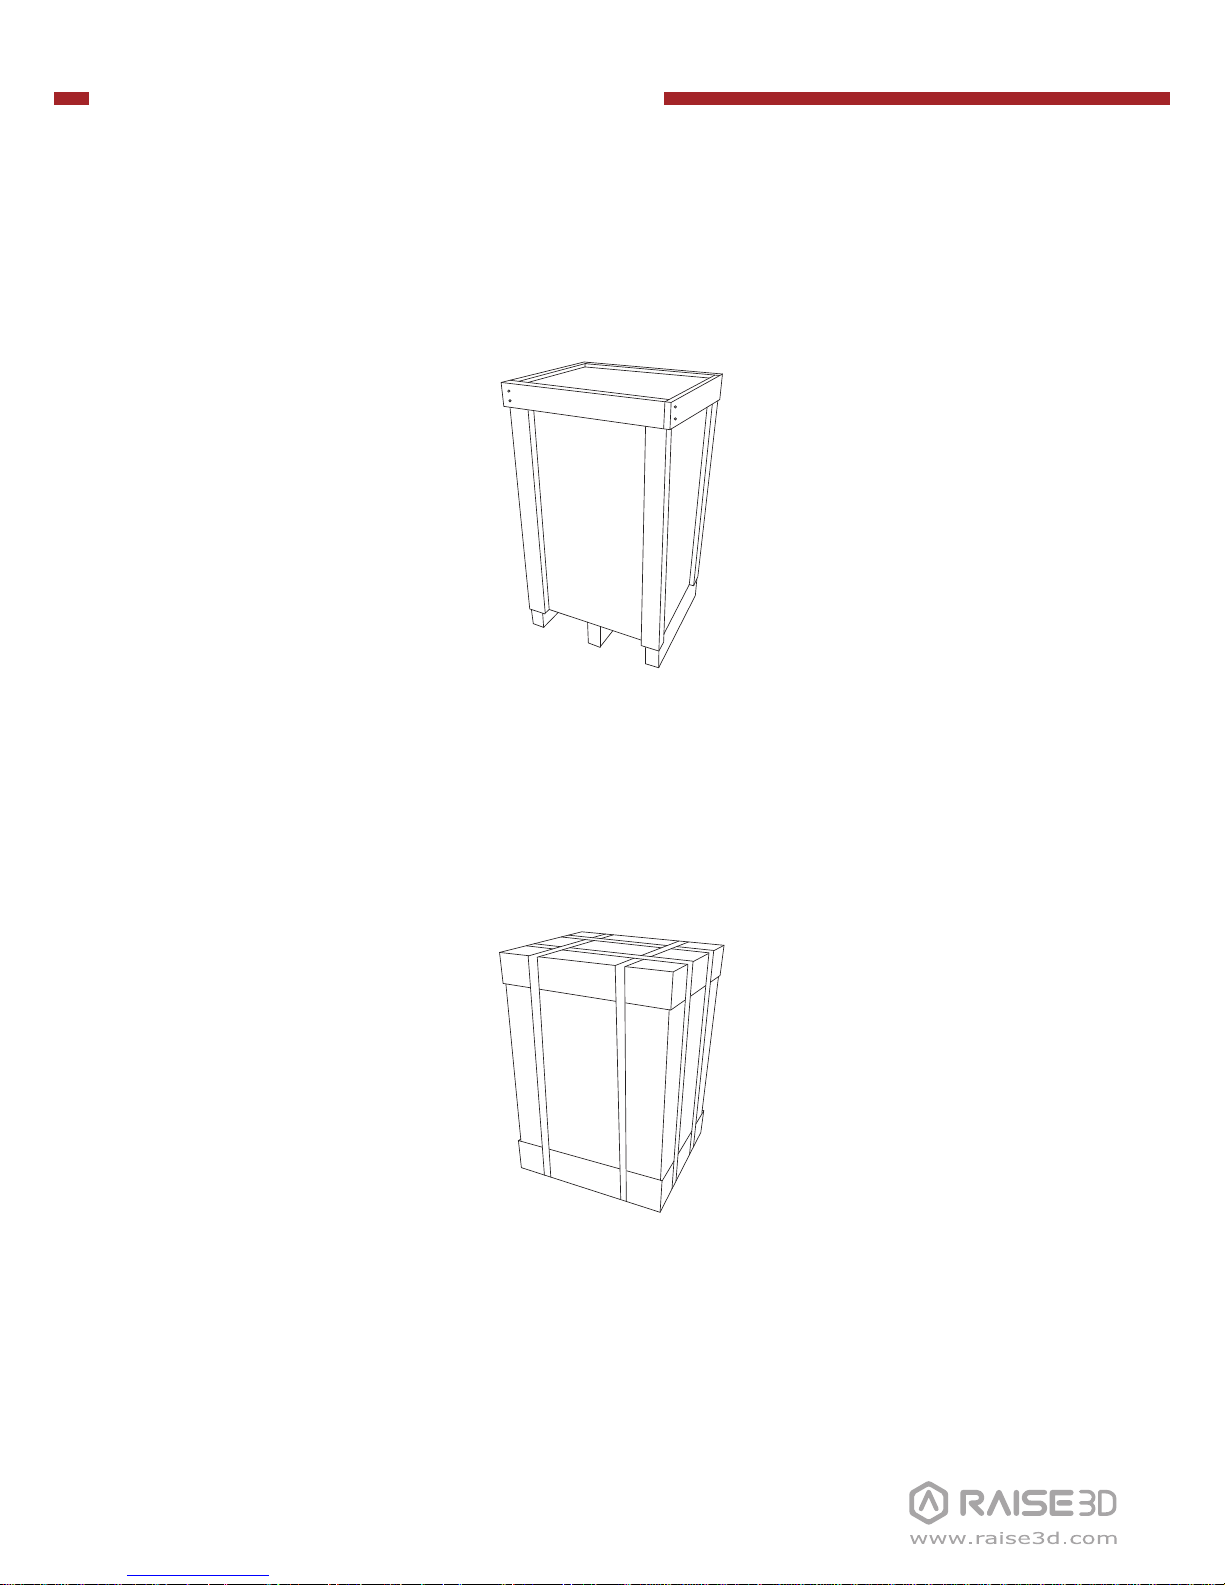
A Unpacking
Package Style: Wooden Case, Carton Case.
【Wooden Case】
Used for small quantity deliveries
【Carton Case】
Used for large quantity deliveries
Page 3
N-Series 3D Printer
/ Quick Start Guide
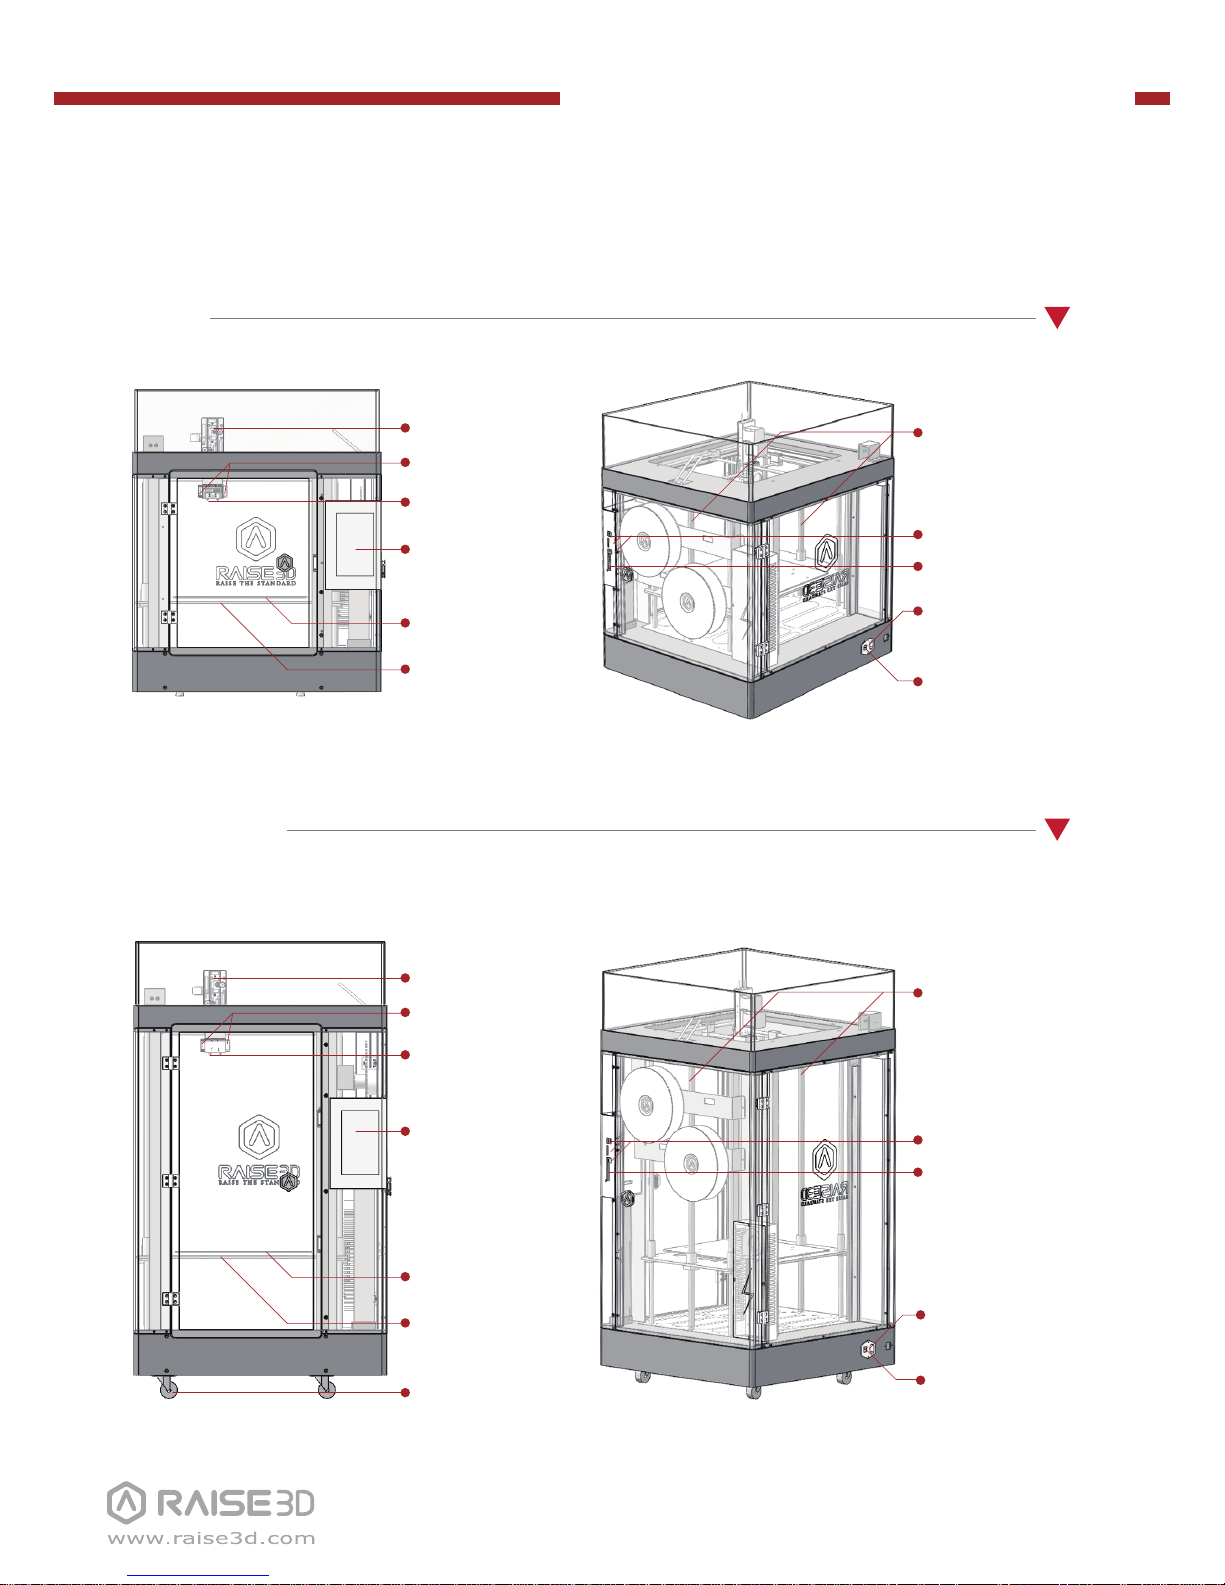
B List of Parts
N2
Touch Screen
Nozzle(s)
Fan(s)
Z-Stage
Print Bed
Filament Feeder
Z Ball Screws
Power Inlet
Power Switch
USB Storage &
SD Card Slot
N2 Plus
Touch Screen
Nozzle(s)
Fan(s)
Z-Stage
Print Bed
Filament Feeder
Z Ball Screws
Power Inlet
Power Switch
USB Storage &
SD Card Slot
Wheels
GPIO Ports
GPIO Ports
Page 4
N-Series 3D Printer
/ Quick Start Guide
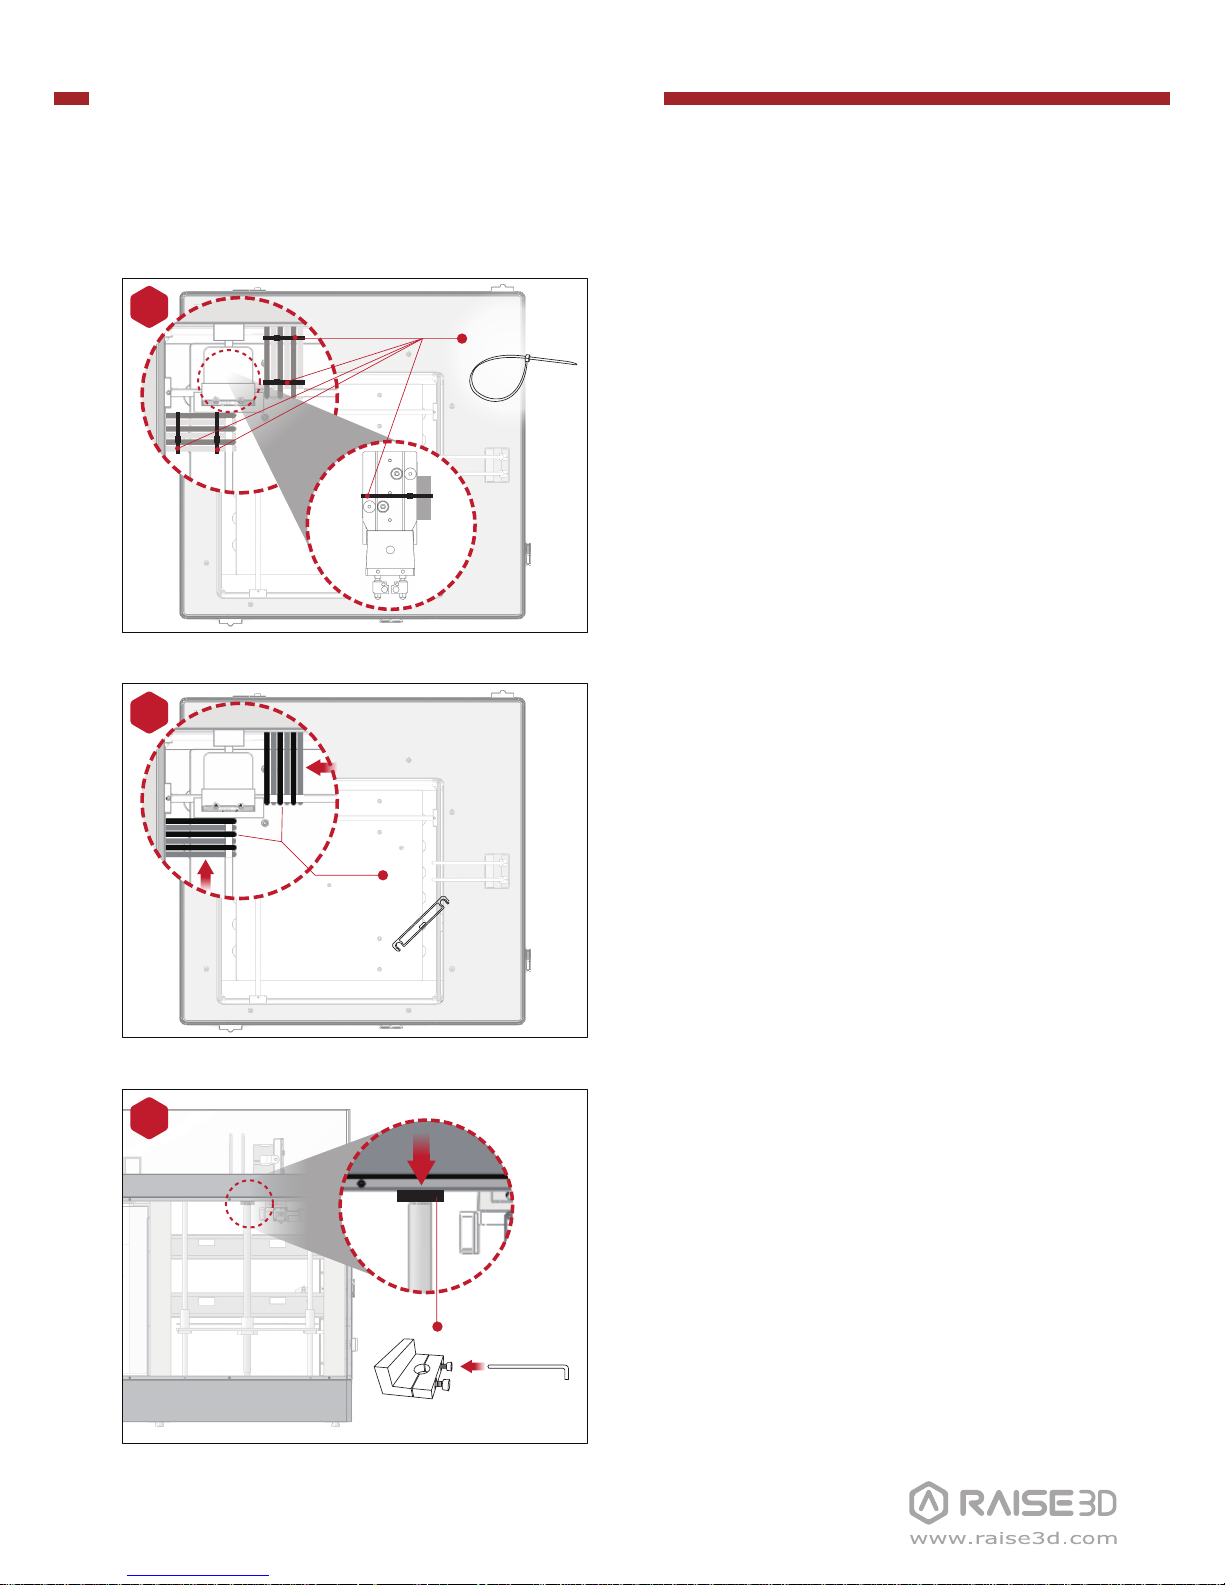
C Hardware Installation
Cut the 5 zip ties that are securing the
clips and the print head.
1
3
Remove!
(×2) Hex Wrench
(3 mm)
Unscrew the 2 screws on each of the two
clamps holding the Z-axis in place. Use the
3mm Hex wrench which was shipped
attached to the print platform.
Please remove the 12 clips holding the
extruder assembly in place before powering on your printer. If you fail to remove
these clips your printer will be damaged.
Please save these clips and re-install them
if you transport your printer.
Remove!
2
(×12)
(×5)
Remove!
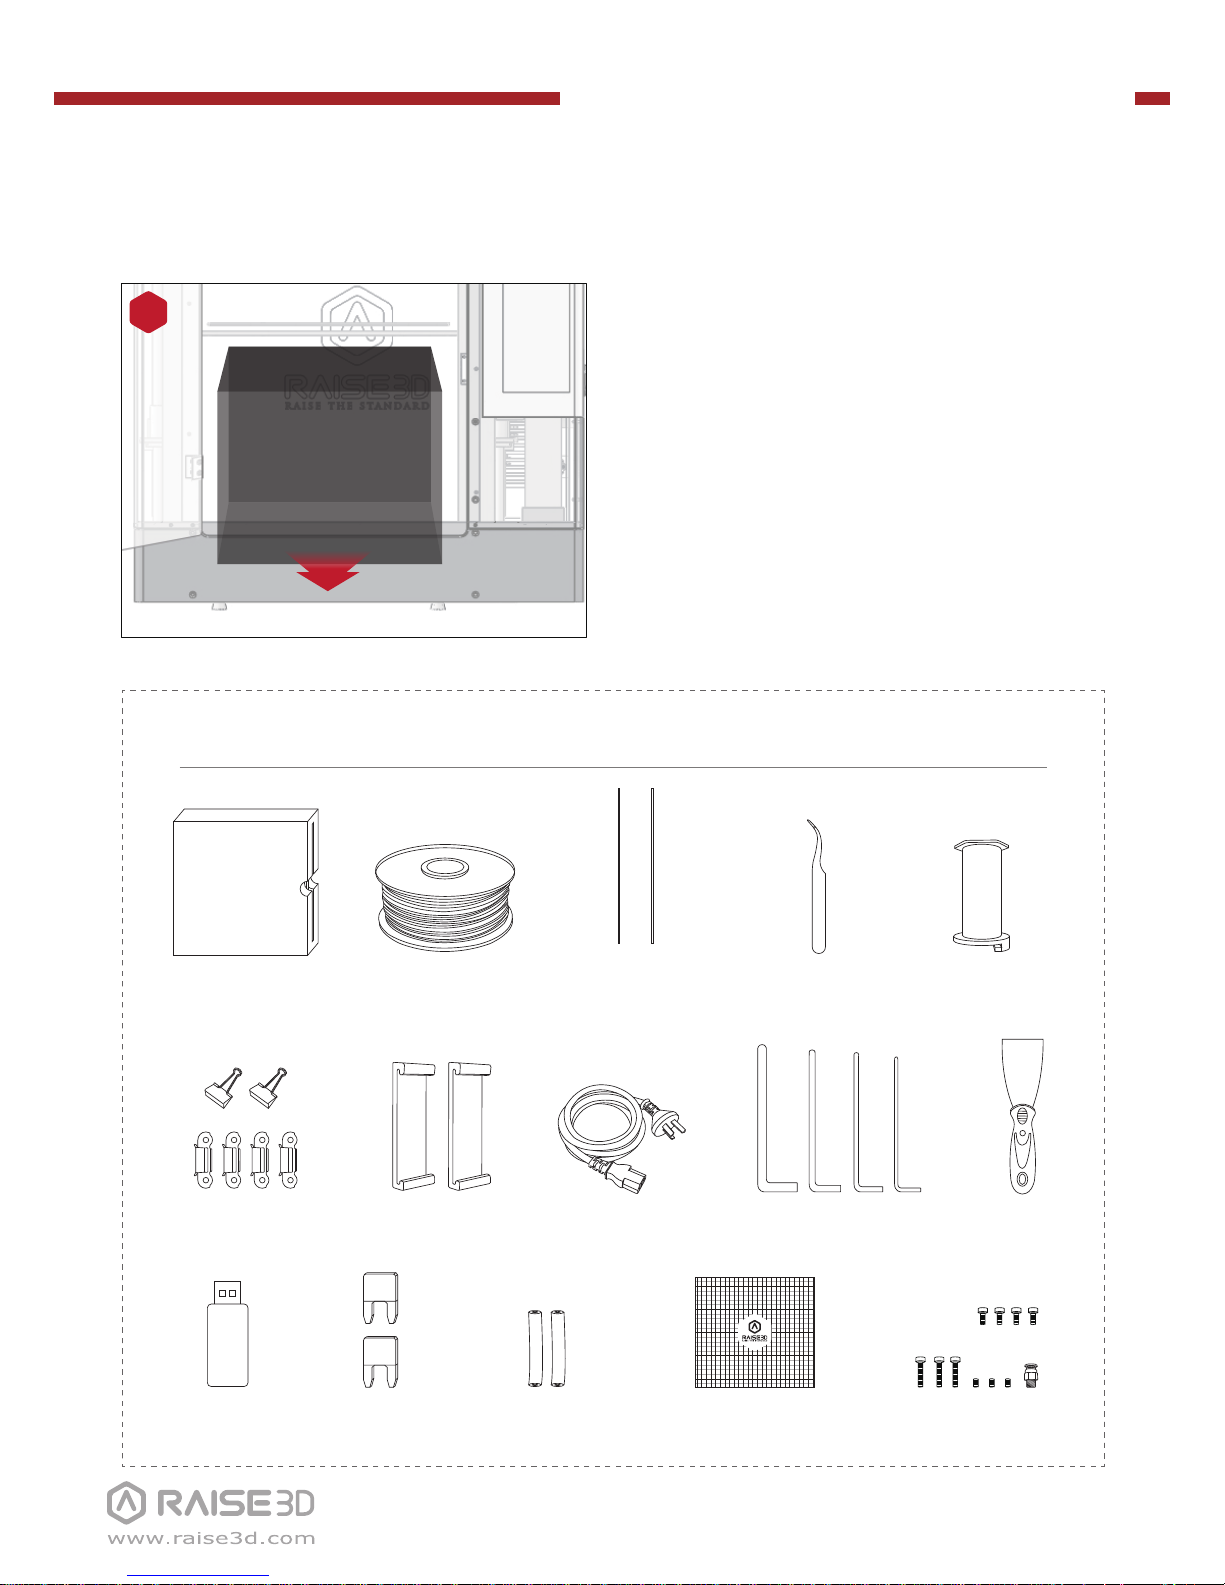
Page 5
N-Series 3D Printer
/ Quick Start Guide
C Hardware Installation (continued)
Lift the build plate gently with your hands
and remove the packaging material under
the build plate.
4
List of Contents
Spade
Tweezers
Filament
(×1/×2)
Filament Holder
(×1/×2)
Power Cable
USB Storage
Nozzle Cleaning Kit
Build Plate Clips
Glass with
Protective Foam
Others Accessories
(Spare)
Hex Wrenches
2.5mm 2mm 1.5mm3mm
Filament Guide
Tube (×2/×4)
Fan Cover
Fuse
15A
10A
Build Surface
Page 6

N-Series 3D Printer
/ Quick Start Guide
C Hardware Installation (continued)
Feed the filament through the guide tube.
7
Push the top of the filament until it
reaches the drive gear on the filament
guide.
8
Plug in the power plug.
5
Install the filament holder in the mounting
hole on the side of the printer and place a
spool of filament on the holder.
A B
C D
6
Mounting
holes
Page 7

N-Series 3D Printer
/ Quick Start Guide
C Hardware Installation (continued)
Gently slide the glass plate on the build
plate. Make sure it snaps into the build
plate clamps at the back.
10
Remove the glass build plate from the
protective foam.
9
Glass with
Protective Foam
Remove!
Use the remaining build clips to secure the
glass build plate to the heated build plate.
11
Page 8

N-Series 3D Printer
/ Quick Start Guide
D Install ideaMaker
Open the installer and choose the language. Set a path for installing ideaMaker then
click "Next".
1
The ideaMaker software is
available on the USB storage
included with your printer.
Or go to www.raise3d.com and
download the ideaMaker
software.
www.raise3d.com
Download ideaMaker
Windows Versions
Page 9

N-Series 3D Printer
/ Quick Start Guide
Click "Finish" and ideaMaker is installed.
Follow the instructions and click "Install". After the installation has finished, click "Next"
to move on the next step.
2
3
D Install ideaMaker (continued)
Page 10

N-Series 3D Printer
/ Quick Start Guide
D Install ideaMaker (continued)
Open the Disk Image for the ideaMaker installed on the USB storage included with your
printer or that you downloaded from www.raise3d.com.
Mac Versions
Page 11

N-Series 3D Printer
/ Quick Start Guide
The first time you open ideaMaker you will need to select your printer model from the
drop-down.
1
E ideaMaker initial settings
Select the diameter of the filament. Press "Done" to finish the initial settings.
3
Select the number of nozzles. Press "Continue" to move on to the next step.
2
NOTE: The N-Series all use 1.75mm filament.
Page 12

N-Series 3D Printer
/ Quick Start Guide
Click the "Add" button to import a .stl
and .obj file. You can download a file
or use the test model included in the
USB storage.
1
F Use ideaMaker
Click the "Slice" button to begin the
slicing of the model.
2
Choose the type of Raft support you
would like and click "OK".
4
Confirm that the files are saved and
eject the USB storage.
6
Save the sliced files (.gcode and .data)
to USB storage.
5
Select the slicing settings for your
print. If you have the material that
was shipped with your printer you will
choose "PLA 1.75mm" on the Primary
Extruder.
3
NOTE: File names that do not
conform to the Western Latin character set may not display properly.
Page 13

N-Series 3D Printer
/ Quick Start Guide
To load the filament, select "Utilities", choose the temperature of
material you are printing and then
press "Load". Follow the instructions
on the screen to finish loading the
filament.
3
G Start first print
Turn the printer on with the power
button on the back of the printer.
1
The printer will go through a start-up
sequence. When the touch screen
displays "Home", the printer is ready.
2
Page 14

N-Series 3D Printer
/ Quick Start Guide
4
USB Storage
6
During printing, you can check the
print status, print time remaining
and other parameters from the
touchscreen under "Home" menu.
Select the "Print" menu, choose
"USB Storage" in the file storage
path, select the default test file,
select the file to check the print
parameters and settings, then press
"Print" to start printing the test file.
5
G Start first print (continued)
The USB storage included with the
printer comes loaded with already
sliced models. They are a good place
to start for your first print. Insert the
USB storage into the USB slot on the
side of the touchscreen.
Page 15

N-Series 3D Printer
/ Quick Start Guide
H User Interface
· Status bar
· Menu title, Settings Button
· Taskbar
· Current model name,
total print time, current
print status and height
· Visual display of current
model
· Pause/resume button
· Stop button
· X/Y/Z axes move/return
to original position
· Load and Unload
function for the Left and
Right Extruders.
· Check file
uploading queue
· Moving step distance
setting
Home Tune
Utilities Print
· Choose where you
would like to load your
print job from
· Printing parameters
and adjustment
· Extruder and Heated
Bed Temperature
Page 16

Floor 4, Building B5, No.1600, North Guoquan Rd, Shanghai, China 200433
+86 21 65337855
2398 Walsh Ave, Santa Clara, CA, USA 95051
+1 888 963 9028
www.raise3d.com
support@raise3d.com
 Loading...