

Page 1
Manual IB-RD3662-C31
USB 3.1 (Gen 2) Raid Storage Enclosure for 2x 3.5" SATA HDDs
USB 3.1 (Gen 2) Raidsystem für 2x 3,5" SATA Festplatten
Boitier RAID externe pour 2 disques durs 3,5" SATA
RAID case esterno per 2x dischi rigidis 3,5" SATA
Sistema RAID externo para 2x 3,5" SATA discos duros
Dubbele externe HDD-behuizing, RAID, voor 2 x 3.5" SATA HDD‘s
Külső 2-rekeszek HDD RAID ház 2x 3.5" SATA merevlemezhez
Πλαίσιο εξωτερικής αποθήκευσης Raid για μονάδες σκληρών δίσκων 2x 3,5" SATA
Zewnętrzna obudowa na dyski twarde 2 x 3,5" SATA obsługująca technologię RAID
Handbuch IB-RD3662-C31
Manuel IB-RD3662-C31
Manual IB-RD3662-C31
Manuale IB-RD3662-C31
Handboek IB-RD3662-C31
Kézikönyv IB-RD3662-C31
Εγχειρίδιο IB-RD3662-C31
Podręcznik IB-RD3662-C31
Manuál IB-RD3662-C31
RAID systém pro 2x 3,5" SATA HDDs
Page 2

Safety information IB-RD3662-C31
Please read carefully the following information to prevent injuries, damage to material and device as well as data loss:
Warning levels
Signal words and safety codes indicate the warning level and provide immediate information in terms of the probability of occurrence as well as
the type and severity of the consequences if the measures to prevent hazards are not complied with.
DANGER
WARNING
CAUTION
IMPORTANT
1. Risk of electrical shock
WARNING
• Read the operating instructions prior to use
• Make sure the device has been de-energised prior to working on it
• Do not remove contact protection panels
• Avoid contact with conducting parts
• Do not bring plug contacts in contact with pointed and metal objects
• Use in intended environments only
• Operate the device using a power unit meeting the specifications of the type plate only!
• Keep the device/power unit away from humidity, liquid, vapour and dust
• Do not modify the device
• Do not connect the device during thunderstorms
• Approach specialist retailers if you require repairs
2. Hazards during assembly (if intended)
CAUTION
• Read the operating instructions prior to assembly
• Avoid coming into contact with sharp edges or pointed components
• Do not force components together
• Use suitable tools
• Use potentially enclosed accessories and tools only
3. Hazards caused by a development of heat
IMPORTANT
• Prevent externally heating up components and ensure an exchange of air
• Do not cover the fan outlet and passive cooling elements
• Avoid direct sunlight on the device/power unit
• Guarantee sufficient ambient air for the device/power unit
• Do not place objects on the device/power unit
4. Hazards caused by very small parts and packaging
WARNING
• Keep small parts and accessories away from children
• Store/dispose of plastic bags and packaging in an area that is inaccessible to children
• Do not hand over small parts and packaging to children
Warns of a directly hazardous situation causing death or serious injury.
Warns of a potentially hazardous situation that may cause death or serious injury.
Warns of a potentially hazardous situation that may cause minor injury.
Warns of a potential situation that may cause material or environmental damage and disrupt operative processes.
Contact with parts conducting electricity
Risk of death by electrical shock
Sharp components
Potential injuries to fingers or hands during assembly (if intended)
Insufficient device/power unit ventilation
Overheating and failure of the device/power unit
Risk of suffocation
Risk of death by suffocation or swallowing
Page 3
Safety information IB-RD3662-C31
5. Potential data loss
IMPORTANT
• Always comply with the information in the operating instructions/quick installation guide
• Exclusively use the product once the specifications have been met
• Back up data prior to commissioning
• Back up data prior to connecting new hardware
• Use accessories enclosed with the product
6. Cleaning the device
IMPORTANT
• Disconnect the device prior to cleaning
• Aggressive or intense cleaning agents and solvents are unsuitable
• Make sure there is no residual moisture after cleaning
• We recommend cleaning devices using a dry, anti-static cloth
7. Disposing of the device
IMPORTANT
pliance with the Waste Electrical and Electronic Equipment Directive (WEEE) this electrical device and potentially included batteries
must not be disposed of in conventional, domestic waste or recycling waste. If you would like to dispose of this product and potentially included batteries, please return it to the retailer or your local waste disposal and recycling point.
If you have any questions, please do not hesitate to contact our support at
support@raidsonic.de or visit our website at www.raidsonic.de.
Data lost during commissioning
Potentially irreversible data loss
Harmful cleaning agents
Scratches, discolouration, damage caused by moisture or short circuit in the device
Environmental pollution, unsuitable for recycling
Potential environmental pollution caused by components, recycling circle interrupted
This icon on product and packaging indicates that this product must not be disposed of as part of domestic waste. In com-
Page 4
Sicherheitshinweise IB-RD3662-C31
Zur Vermeidung körperlicher Schäden, sowie von Sach-, Geräteschäden und Datenverlust beachten Sie bitte folgende
Hinweise:
Warnstufen
Signalwort und Sicherheitszeichen kennzeichnen die Warnstufe und geben einen sofortigen Hinweis auf Wahrscheinlichkeit, Art und Schwere der
Folgen, wenn die Maßnahmen zur Vermeidung der Gefahr nicht befolgt werden.
GEFAHR
WARNUNG
VORSICHT
ACHTUNG
1. Gefahren durch elektrische Spannung
WARNUNG
• vor Benutzung Betriebsanleitung lesen
• vor Arbeiten am Gerät, Spannungsfreiheit sicherstellen
• Kontaktschutzblenden nicht entfernen
• Kontakt mit Spannungsführenden Komponenten vermeiden.
• Steckkontakte nicht mit spitzen und metallischen Gegenständen berühren
• Verwendung nur in dafür vorgesehenen Umgebungen
• Gerät ausschließlich mit Typenschildkonformen Netzteil betreiben!
• Gerät/Netzteil fern von Feuchtigkeit, Flüssigkeit, Dampf und Staub halten
• Eigenständige Modifikationen sind unzulässig
• Gerät nicht während eines Gewitters anschließen
• Geben Sie Ihr Gerät im Reparaturfall in den Fachhandel
2. Gefahren während Montage (wenn vorgesehen)
VORSICHT
• vor Montage, Betriebsanleitung lesen
• Kontakt mit scharfen Kanten oder spitzen Bauteilen vermeiden
• Bauteile nicht mit Gewalt zusammensetzen
• geeignetes Werkzeug verwenden
• nur gegebenenfalls mitgeliefertes Zubehör und Werkzeug verwenden
3. Gefahren durch Wärmeentwicklung
ACHTUNG
• externe Erwärmung vermeiden und Luftaustausch zulassen
• Lüfter-Auslass und passive Kühlkörper freihalten
• direkte Sonneneinstrahlung auf Gerät/Netzteil vermeiden
• ausreichend Umgebungsluft für Gerät/Netzteil sicherstellen
• keine Gegenstände auf dem Gerät/Netzteil abstellen
4. Gefahren durch Kleinstteile und Verpackung
WARNUNG
• Kleinteile, Zubehör für Kinder unzugänglich verwahren
• Plastiktüten und Verpackung für Kinder unzugänglich verwahren/entsorgen
• Kleinteile und Verpackungen nicht in Kinderhände geben
warnt vor einer unmittelbar gefährlichen Situation, die zum Tod oder zu schweren Verletzungen führen wird.
warnt vor einer möglicherweise gefährlichen Situation, die zum Tod oder zu schweren Verletzungen führen kann.
warnt vor einer möglicherweise gefährlichen Situation, die zu leichten Verletzungen führen kann.
warnt vor einer möglichen Situation, die zu Sach- und Umweltschäden führen und den Betriebsablauf stören kann.
Kontakt mit elektrisch leitenden Teilen
Lebensgefahr durch Stromschlag
Scharfkantige Bauteile
Finger- oder Handverletzungen bei Zusammenbau (wenn vorgesehen) möglich
Mangelhafte Belüftung des Geräts/Netzteils
Überhitzung und Ausfall des Geräts/Netzteils
Erstickungsgefahr
Lebensgefahr durch Ersticken oder Verschlucken
Page 5
Sicherheitshinweise IB-RD3662-C31
5. Möglicher Datenverlust
ACHTUNG
• Unbedingt Hinweise in der Bedienungsanleitung/Schnellinstallationsanleitung beachten
• Produkt nur verwenden, wenn Spezifikationen erfüllt sind
• Datensicherung vor Inbetriebnahme durchführen
• Datensicherung vor Anschluss neuer Hardware durchführen
• dem Produkt beiliegendes Zubehör verwenden
6. Reinigung des Gerätes
ACHTUNG
• vor Reinigung, das Gerät außer Betrieb nehmen
• aggressive bzw. scharfe Reinigungs- und Lösungsmittel sind ungeeignet
• nach der Reinigung sicherstellen, dass keine Restfeuchtigkeit vorhanden ist
• Reinigung der Geräte am besten mit trockenem Antistatiktuch durchführen
7. Entsorgung des Gerätes
ACHTUNG
entsorgt werden darf. In Übereinstimmung mit der Richtlinie über Elektro- und Elektronik-Altgeräte (WEEE) darf dieses Elektrogerät
und ggf. enthaltene Batterien nicht im normalen Hausmüll oder dem Gelben Sack entsorgt werden. Wenn Sie dieses Produkt und
ggf. enthaltene Batterien entsorgen möchten, bringen Sie diese bitte zur Verkaufsstelle zurück oder zum Recycling-Sammelpunkt Ihrer
Gemeinde.
Bei Fragen kontaktieren Sie gerne unseren Support unter support@raidsonic.de oder besuchen Sie unsere Internetseite www.raidsonic.de.
Datenverlust bei Inbetriebnahme
Unwiederbringlicher Datenverlust möglich
Schädigende Reinigungsmittel
Kratzer, Farbveränderungen, Feuchteschäden oder Kurzschluss am Gerät
Umweltverschmutzung, Wiederverwertung nicht möglich
Mögliche Umweltbelastung durch Bestandteile, Recyclingkreislauf unterbrochen
Dieses auf dem Produkt und der Verpackung angebrachte Symbol zeigt an, dass dieses Produkt nicht mit dem Hausmüll
Page 6
Manual IB-RD3662-C31
Package content
IB-RD3662-C31, external power supply and cord, USB Type-C™ cable, manual
System requirements
• Windows 7, 8, 10 (32/64 bit), (with MBR/GPT enabled, supports HDD capacity more than 2 TB/each)
• macOS® X 10.5 or later
• IB-RD3662-C31 is also working with computer/notebook with USB 3.0/2.0 interfaces. The full transfer rate up to 10 Gbit/s can only be
reached with USB 3.1 (Gen 2) interface/connection.
Key Features
• For 2x 3.5" SATA I, II, III (6 Gbit/s) HDDs
• Interface to PC: USB 3.1/Type-C™, UASP, up to 10 Gbit/s
• HDD capacity unlimited
• Easy Swap® - HDD exchange without tool
• Supports RAID 0/1/LARGE/SINGLE
• Automatic rebuilding
• Including cooling fan
• Plug&Play and HotSwap
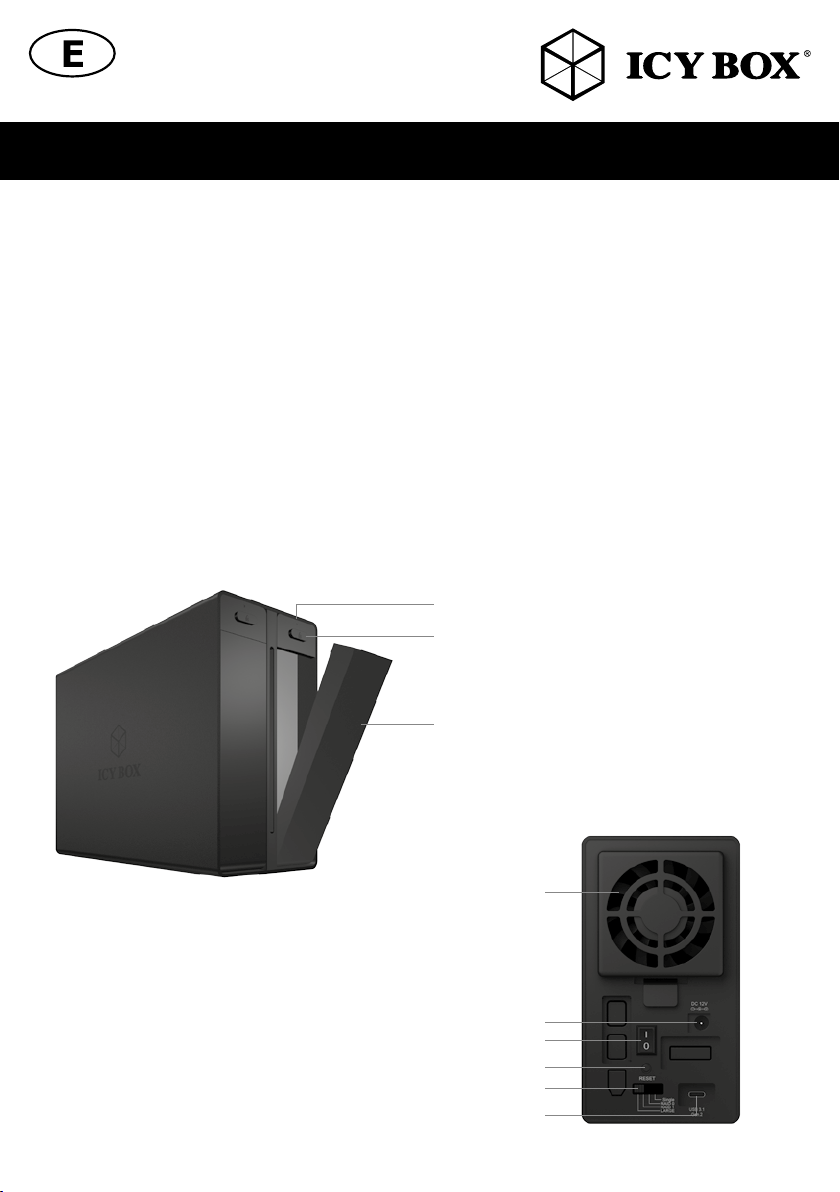
Overview
LED
Eject button
Front lid with EasySwap function for
easy HDD exchange
Cooling fan
DC IN
ON/OFF switch
RESET/Confirmation button
RAID level switch
USB Type-C™ interface
Page 7

Manual IB-RD3662-C31
HDD Installation
1. Open the front
Lid (push eject)
CONFIGURE THE RAID MODE
ATTENTION: Setting or changing the RAID mode requires you to re-format the drives. This will erase all data on the hard drives that are being
formatted. Make sure to backup all existing data first!
RAID Description:
The following table shows the available RAID options and settings:
1. LARGE:
To be exact LARGE is not a real RAID mode, but could be seen as one. In LARGE Mode, the space of the second disc is simply appended to the
first disc. So the space of the two disks is added to one big disk.
2. RAID 1:
In RAID 1 mode all data are written identically on both discs. So if one disc fails the other contains all data again. This provides security against
the failure of one disk at the cost of the bigger disks space.
Notice: the RAID 1 mode is NOT a data backup! The thought behind RAID 1 is to have a system you can work with even when one HDD fails!
3. RAID 0
RAID 0 writes data block wise alternating on the two disks. So two data blocks can be written at the same time which enhances speed. The disk
space of the combined volume is twice the smaller disk size.
4. SINGLE
Like LARGE it is not really a RAID mode. This means that both discs are integrated as separate hard drives with its own content, independent from
each other.
ATTENTION: You have to choose a RAID mode as described. In default there is no RAID configuration and the device shuts up within a few
seconds.
Application
Before plugging the enclosure with the installed HDDs to the computer you need to make sure that you have set the RAID function which you
requested (with the "RAID level switch").
2. Put the HDDs
inside the shaft
3. Close the
front lids
Single
RAID 0
RAID 1
BIG
LARGE
Attention: In order for the computer to access volumes larger than 2 TB, both the hardware and OS need to have the capacity to support large
volumes.
Changing the RAID mode
1. Install the HDDs and connect the IB-RD3662-C31 to the PC with the USB 3.1 Type-C™ cable.
2. Set the RAID switch and select your preferred RAID mode.
3. Turn on the power.
4. Press the "RAID-Reset-Button" on the rear side to confirm the setting.
5. Turn off the IB-RD3662U3S after 5 Seconds and turn on it again.
6. Format the drives.
7. Done.
Page 8

Manual IB-RD3662-C31
Attention: The HDDs will not start to run if no data cable is connected to the PC, this function is to protect the HDDs.
Attention: Changing the RAID mode requires you to reformat the drives. Make sure to backup all existing data first!
Replacing hard drives
When a drive fails, the corresponding HDD LED (1 or 2) will turn to red colour unless the RAID mode is set to SINGLE, in which case the HDD
will simply not be accessible anymore. If only one drive is defective and the RAID mode is set to RAID 1, the data can still be accessed but we
strongly recommend replacing the faulty drive immediately to assure continued proper backup and data safety.
1. Check the HDD LED and replace the faulty drive. The corresponding LED will turn to red colour indicating the defective drive. The power does
not have to be turned off when replacing the drive.
2. A few seconds after installing the new drive(s) the corresponding LED will turn on again.
3. For RAID 1, just exchange the defective HDD and power on the IB-RD3662-C31, the RAID array will be rebuilt automatically. During this
process, the LED will blink blue/pink. Rebuilding the RAID array will take several hours, depending on the drive capacity. If the capacity of the
new drive is less than the previous drive, the LED will blink slowly to indicate that the Rebuild process cannot be completed.
Attention: please don‘t push the RAID-reset-switch, otherwise all data will go lost.
Note: We recommend not turning off the power during the rebuild process but if the process is interrupted, it will continue rebuilding the data as
soon as the power is turned back on.
Note: If necessary check the device manager and disc manager for the working HDD of the RAID1 array.
Note: If necessary, you need to assign a drive letter to the found HDD of the RAID1 array.
About data security
To protect your files and help prevent the loss of your data, we strongly recommend that you keep two copies of your data, one copy on your
IB-RD3621U3and a second copy either on your internal drive or another storage media such as CD, DVD, Tape or an additional external drive.
Any loss or corruption of data while using the IB-RD3661-C31 is the sole responsibility of the user, and under no circumstances will the manufacturer be held liable for compensation or the recovery of this data.
Page 9

Handbuch IB-RD3662-C31
Verpackungsinhalt
IB-RD3662-C31, exteres Netzteil und Anschlusskabel, USB Type-C™Kabel, Handbuch
Systemanforderungen
• Windows 7, 8, 10 (32/64 bit), (mit MBR/GPT, unterstützt Festplattenkapazitäten von mehr als2 TB/ Laufwerk).
• macOS® X 10.5 oder höher
• IB-RD3662-C31 kann auch an Rechnern mit USB 3.0/2.0 Schnittstellen verwendet werden. Die maximale Datentransferrate von bis zu 10
Gbit/s kann aber nur mittels USB 3.1 (Gen 2) Schnittstelle/Verbindung erreicht werden.
Hauptmerkmale
• Für 2x 3,5" SATA I, II, III (6 Gbit/s) Festplatten
• Anschluss zu PC: USB 3.1 (Gen 2)/Type-C™, UASP, bis zu 10 Gbit/s
• Laufwerk-Kapazität unbeschränkt
• Easy Swap® - HDD Wechsel ohne Werkzeug
• Unterstützt RAID 0/1/LARGE/SINGLE
• Kühlung durch Lüfter
• Automatische Wiederherstellung
• Plug & Play und Hot Swap
Überblick
LED
Auswurftaste
Frontklappe mit EasySwap Funktion für einfachen
und werkzeuglosen Festplattenwechsel.
Lüfter
Strom-/Netzteilanschluss
AN/AUS Schalter
RESET/Bestätigungstaste
USB Type-C™ Schnittstelle
RAID Level Schalter
Page 10

Handbuch IB-RD3662-C31
Festplatteneinbau
3. Schließen Sie
1. Frontklappe öffnen
(Auswurftaste betätigen)
2. Schieben Sie vorsichtig die
Festplatte in das Gehäuse
EINSTELLEN / ÄNDERN DES RAID MODUS
Hinweis! Das Einstellen / Wechseln des RAID Modus erfordert ein Neuformatieren der Festplatten. Durch diesen Vorgang werden alle Daten auf
den Festplatten gelöscht. Stellen Sie sicher, dass vorher alle vorhanden Daten auf einen anderen Datenträger gesichert werden.
LARGE
LARGE verbindet mehrere Laufwerke zu einem großen virtuellen Laufwerk und umgeht damit die physische Begrenzung einzeln angeschlossener
Festplatten. Die Daten werden fortlaufend von HDD 1 bis HDD 2 geschrieben. Es handelt sich hier nicht um ein SINGLE (JBOD) Modus
RAID 0
(RAID 0 Striping)
Striping verbindet mehrere Laufwerke zu einem großen virtuellen Laufwerk als eine logische Einheit. Die Daten werden parallel auf alle Festplatten geschrieben, was zu einer Steigerung der Datentransferrate führt. Bei Ausfall einer Festplatte sind jedoch alle Daten verloren.
RAID 1
(RAID 1 Mirroring)
Mirroring ist das automatische Spiegeln der Daten auf mehrere Festplatten. Dadurch wird eine hohe Datensicherheit gewährleistet. Bei Ausfall einer Festplatte ist der Zugriff weiterhin möglich und nach Austausch der defekten Festplatte wird der Datenspiegel wiederhergestellt. Der nutzbare
Speicher entspricht der kleinsten Festplatte.
SINGLE
Konfiguration eines RAID-Controllers mit mehreren Festplatten, die keinen Verbund bilden. Damit werden die angeschlossenen Festplatten dem
Betriebssystem einzeln zur Verfügung gestellt.
Hinweis! Im Auslieferungszustand ist KEIN Raidmodus eingestellt! Bitte wählen Sie einen Raidmodus aus. Das Gerät schaltet sich sonst nach ein
paar Sekunden wieder ab.
Anwendung
Bevor Sie das Gehäuse mit den eingebauten Festplatten an den PC anschließen, stellen Sie sicher,
dass Sie den gewünschten RAID Modus eingestellt haben.
die Frontklappen
vorsichtig wieder
Single
RAID 0
RAID 1
BIG
LARGE
Achtung: Damit eine Verwendung von Volumen von mehr als 2 TB möglich sind, müssen Ihre Hardware und Betriebssystem dafür ausgelegt.
Änderung des RAID Modus
1. Festplatten einbauen und das IB-RD3662 an einen Computer per USB Type-C ™ Kabel anschließen.
2. Stellen Sie den gewünschten RAID Modus ein.
3. Schalten Sie das Gerät ein.
4. Drücken Sie die "RAID-Reset-Taste" auf der Rückseite, um den Aufbau des neuen RAID-Modus zu starten.
5. Nach 5 Sekunden schalten Sie das Gerät aus und wieder ein, der PC erkennt das Laufwerk neu.
Page 11

Handbuch IB-RD3662-C31
6. Formatieren Sie die Laufwerke.
7. Nun ist das Gerät einsatzbereit.
Achtung: Die Festplatten laufen nur an, wenn das IB-RD3662 über ein Datenkabel an einen laufenden Rechner angeschlossen ist – zur Festplatten-Schonung!
Achtung: Änderung der RAID-Einstellung bewirkt eine Formatierung der Festplatte. Bitte stellen daher Sie sicher, dass vorher ein Backup durchgeführt wurde!
Ersetzen von Festplatten
Sollte eine Festplatte ausfallen, leuchtet die Festplatten LED rot, außer es ist der Single Modus ausgewählt – in diesem Fall ist die Festplatte einfach nicht mehr zugänglich. Sollte nur eine Festplatte beschädigt sein und der RAID 1 Modus ist ausgewählt, können Sie noch auf Ihre Daten zugreifen. Es wird allerdings dringend empfohlen, die defekte Festplatte schnellstmöglich zu ersetzen, um die Sicherheit der Daten zu gewährleisten.
1. Überprüfen Sie anhand der LEDs, von welcher Festplatte der Fehler ausgeht und tauschen Sie die defekte Festplatte aus. Der Strom muss
hierfür nicht abgestellt werden.
2. Einige Sekunden nach erfolgreicher Installation der neuen Festplatte blinkt die LED blau/pink.
3. Im RAID 1 Modus wird das RAID Array automatisch wiederhergestellt. Tauschen Sie die defekten Festplatten aus und schalten Sie den Strom
ein. Der Rebuild-Vorgang startet automatisch. Während dieses Vorganges blinkt die LED blau/pink. Je nach Größe der Festplatten kann der
Rebuild mehrere Stunden in Anspruch nehmen. Sollte die neue Festplatte kleiner sein, als die vorherige oder einen Fehler aufweisen, blinkt die
LED nur langsam und der Rebuild kann nicht ausgeführt werden.
Achtung: Bitte nicht die RAID-Reset-Taste betätigen, sonst werden alle Daten gelöscht.
Hinweis! Stellen Sie sicher, dass die Stromversorgung während des Wiederherstellungsprozesses nicht unterbrochen wird. Sollte dies trotzdem
geschehen, wird der Wiederherstellungsprozess nach der Verbindung mit der Stromquelle fortgesetzt.
Hinweis! Falls notwendig, überprüfen Sie im Geräte-Manager und in der Datenträgerverwaltung ob die Festplatten des Raidverbundes angezeigt werden.
Hinweis! Falls notwendig, müssen Sie dem entsprechenden Laufwerk erneut einen Laufwerksbuchstaben hinzufügen.
Zur Datensicherheit
Um Ihre Daten zu sichern und Datenverlust zu vermeiden, sollten Sie immer mindestens zwei Kopien Ihre Daten anlegen. Einmal auf der
IB-RD3662-C31 und einmal auf einem anderen Laufwerk oder entsprechenden Speichermedien wie CD, DVD, Blu-Ray o.ä.
Jeglicher Datenverlust oder -schaden durch die Benutzung der IB-RD3662-C31 liegt in der Verantwortung des Benutzers und
es kann unter keinen Umständen der Hersteller für die Wiederherstellung der Daten oder deren Kosten zur Verantwortung
gezogen werden.
Page 12

Manuel IB-RD3662-C31
Spécialités principales
• Pour 2x 3,5" SATA I, II, III (6 Gbit/s) disques durs
• L’interface pour PC : USB 3.1 (Gen 2)/Type-C™, UASP, jusqu‘à 10 Gbit/s
• Disque dur à capacité illimitée
• Easy Swap® - disque dur échange sans outil
• Prend en charge RAID 0/1/LARGE/SINGLE
• Rétablissement automatique
• Plug & Play et Hot Swap
Utilisation
Avant de connecter votre boitier avec les disques durs installés sur votre ordinateur, vous devez vous assurer que vous avez correctement configuré la fonction RAID souhaitée.
Single
RAID 0
RAID 1
BIG
LARGE
Attention : Afin que votre ordinateur puisse accéder au volume supérieur à 2 To, votre matériel et votre OS doivent offrir le support de ce type
de volume.
Changer le mode RAID
1. Installez vos disques et branchez le câble USB Type-C™ câble à l‘ordinateur.
2. Configuré le switch RAID et sélectionnez le mode RAID désiré.
3. Branchez l’alimentation et allumez le boitier.
4. Appuyer sur le "RAID-Reset-Button" sur la face arrière
5. Éteignez le boitier et allumez le boitier.
6. Formatez les disques durs.
7. Installation terminée, boitier opérationnel.
Attention : Changez le mode RAID nécessite de reformater vos disques.
Attention: Veillez à faire une copie de sauvegarde de vos fichiers avant.
Changement des disques durs
Lorsqu’un disque dur tombe en panne, la LED correspondante (1 ou 2) s’affichera en rouge sauf si le mode RAID n’est pas activé. On ne pourra
alors pas accéder à ce disque. Si un seul disque est défectueux en mode RAID 1, les données seront toujours accessibles, mais nous vous recommandons de rapidement changer le disque dur défectueux afin de retrouver une sécurité optimale pour vos données.
1. Vérifier les LED de chaque disque dur et remplacez le disque dur défectueux. La LED correspondante s’allumera en rouge, indiquant ainsi le
disque à changer. Vous n’êtes pas obligés d’éteindre le boitier lorsque vous remplacez un disque.
2. Quelques secondes après l’installation du nouveau disque, la LED correspondante clignote en bleu / rose.
3. Pour le RAID 1, celui-ci sera reconstruit automatiquement. Pendant le processus, la LED de reconstruction clignote en bleu / rose. La durée
de la reconstruction de votre RAID dépendra de la capacité de vos disques durs. Si la capacité du nouveau disque est moins importante que le
précédent, la LED s’allumera en rouge afin d’indiquer l’impossibilité de la reconstruction de votre système RAID.
Attention : ne pas pousser le "RAID-Reset-Button", il delet toutes les données.
Page 13

Manuale IB-RD3662-C31
Caratteristiche principali
• Per 2x 3,5" SATA I, II, III (6 Gbit/s) dischi rigidis
• Interfaccia per PC: USB 3.1 (Gen 2)/Type-C™, UASP, fino a 10 Gbit/s
• Capacità del disco rigido illimitata
• Easy Swap® - disco rigido scambio senza utensile
• Compatibile con RAID 0/1/LARGE/SINGLE
• Rigenerazione automatica
• Plug&Play e HotSwap
Applicazione
Prima di collegare al computer l‘enclosure con i dischi rigidi installati, accertarsi di aver impostato la funzione RAID richiesta.
Single
RAID 0
RAID 1
BIG
LARGE
Attenzione: affinché il computer possa accedere a volumi superiori a 2TB, sia l‘hardware che il sistema operativo devono avere la capacità di
supportare volumi di grandi dimensioni.
Cambio della modalità RAID
1. Installare i dischi rigidi, collegare il cavo USB Type-C™ al computer.
2. Impostare il switch RAID, selezionando la modalità RAID preferita.
3. Inserire la corrente.
4. Premere il RAID-Reset-pulsante sul lato posteriore.
5. Spegnere l‘IB-RD3662 e accendere di nuovo l‘alimentazione.
6. Formattare i dischi rigidi.
7. Il cambio di modalità è così completato.
Attenzione: quando si cambia la modalità RAID, è necessario riformattare i dischi rigidi. Prima di procedere al cambio di modalità, eseguire il
backup di tutti i dati esistenti!
Attenzione: senza USB Type-C™ cavo gli HDD non si avvia.
Sostituzione dei dischi rigidi
Quando un disco rigido si guasta, il LED HDD corrispondente (1 o 2) lampeggia blu / rosa, a meno che la modalità RAID non sia impostata
su SINGLE (in tal caso il disco rigido non è più accessibile). Se è solo un disco a guastarsi e la modalità RAID è impostata su RAID 1, è ancora
possibile accedere ai dati ma si consiglia vivamente di sostituire subito il disco rigido guastatosi al fine di garantire il corretto backup costante dei
dati e la protezione dei dati.
1) Controllare il LED HDD e sostituire il disco rigido guastatosi. Il LED corrispondente si lampeggia lentamente, indicando il disco rigido difettoso.
Per sostituire un disco rigido non è necessario disinserire la corrente.
2) Trascorsi alcuni secondi dall‘installazione del nuovo disco rigido, il LED si illumina di nuovo al normale.
3) Per RAID 1, l‘array RAID viene ricostruito automaticamente. Durante questo processo, il LED lampeggia velocemente. La ricostruzione dell‘ar-
ray RAID dura alcune ore, a seconda della capacità del disco rigido. Se la capacità del nuovo disco rigido è inferiore a quella del disco rigido
precedente, il LED lampeggia lentamente per indicare che il processo Rebuild non può essere completato.
Attenzione: non premere il tasto "Reset-RAID-Button", è eliminare tutti i dati.
Page 14

Manual IB-RD3662-C31
Características principales
• Para discos duros de 2x 3,5" SATA I, II, III (6 Gbit/s)
• Interfaz de PC: USB 3.1 (Gen 2)/Type-C™, UASP, hasta 10 Gbit/s
• Capacidad del disco duro ilimitado
• Easy Swap® - intercambio del disco sin herramientas
• Admite RAID 0/1/LARGE/SINGLE
• Recomposición de discos duros automática
• Plug&Play y HotSwap
Aplicación
Antes de conectar el sistema RAID con los discos duros instalados al ordenador, fíjese de que la función RAID deseada esta seleccionada.
Single
RAID 0
RAID 1
BIG
LARGE
Atención: Para que el ordenador pueda acceder a capacidades mayores de 2 TB el hardware y el sistema operativo deben tener la abilidad
de acceder a grandes capacidades.
Cambiar el modo RAID
1. Instale las unidades de disco duro y conecte el USB Type-C™ cable a la computadora.
2. Ajuste los interruptores para fijar el modo RAID deseado
3. Encienda el Sistema
4. Pulse el botón "RAID-Reset" para confirmar los ajustes
5. Apague el IB-RD3662 y encienda el systema nuevo.
6. Los discos duros deben ser formateados
7. Listo
Atención: El cambio de modo RAID requiere formatear los discos duros. Recomendamos hacer un backup de sus datos.
Atención: Sin USB Type-C™ cable a la computadora de las discos duros no arranca.
1) Compruebe el HDD LED y cambie el disco. El LED parpadeará rojo para indicar el error del disco duro. El sistema RAID no tiene que estar
apagado para cambiar el disco.
2) Unos segundos después de cambiar el disco la LED se enciende indicando que el nuevo disco funciona.
3) En RAID1 la matriz RAID se reconstruye automáticamente. Durante la reconstrucción el LED correspondiente parpadeará azul / rosa. La
reconstrucción puede durar unas cuantas horas dependiendo del volumen del disco. Si la capacidad del nuevo disco es inferior a la capacidad
del disco defectuoso el LED papadeará lentamente para indicar el error.
Atención: no presione el botón "RAID-Reset-Button", que se delet todos los datos.
Page 15

Gebruikershandleiding IB-RD3662-C31
Belangrijkste kenmerken
• Geschikt voor 2x 3,5" SATA I, II, III (6 Gbit/s) HDDs
• Interface naar PC: USB 3.1 (Gen 2)/Type-C™, UASP, tot 10 Gbit/s
• HDD capaciteit onbeperkt
• Easy Swap® - HDD te wisselen zonder gereedschap
• Ondersteunt RAID 0/1/LARGE/SINGLE
• Automatische opbouw
• Plug&Play en HotSwap
Toepassing
Voordat u de behuizing met de geïnstalleerde HDD‘s in de computer plugt, moet u ervoor zorgen dat u de gewenste RAID-functie hebt ingesteld
(met de schakelaar voor RAID-instelling).
Single
RAID 0
RAID 1
BIG
LARGE
Let op: Om te zorgen dat de computer volumes groter dan 2 TB kan openen, moeten zowel de hardware als het besturingssysteem de capaciteit
hebben grotere volumes te ondersteunen.
De RAID-modus wijzigen
1. Installeer de HDD‘s en sluit de IB-RD3662-C31 aan op de computer met een USB Type-C™-kabel.
2. Stel de RAID-schakelaar in en selecteer de gewenste RAID-modus.
3. De stroomtoevoer inschakelen.
4. Druk op de knop "RAID-Reset" aan de achterkant om de instelling te bevestigen
5. Schakel de IB-RD3662-C31 na 5 seconden uit en schakel hem weer in.
6. Formatteer de stations.
7. Gereed.
Let op: de HDD‘s kunnen niet draaien als er geen datakabel is aangesloten op de computer. Deze functie is ter bescherming van de HDD‘s.
Let op: Voor het wijzigen van de RAID-modus moet u de stations formatteren. Zorg dat u eerst een back-up maakt van al uw gegevens!
Harde schijven vervangen
Als er een station defect is, gaat het overeenkomstige HDD-led-lampje (1 of 2) rood branden, tenzij de RAID-modus
is ingesteld op SINGLE, dan kan de HDD niet meer gebruikt worden. Als er slechts één station defect is en de RAID-modus is ingesteld op RAID
1, kunnen de gegevens nog steeds geopend worden, maar we raden met klem aan het defecte station direct te vervangen en om te zorgen voor
een juiste back-up en beveiliging van de gegevens.
1. Controleer het HDD led-lampje en vervang het defecte station. Het corresponderende led-lampje is blauw, wat duidt op een defect station. De
voeding hoeft niet ingeschakeld te worden voor het vervangen van het station.
2. Een paar seconden na installatie van het nieuwe station gaat het corresponderende led-lampje weer aan.
3. Vervang voor RAID 1 gewoon de defecte HDD en schakel de IB-RD3662-C31 in. Het RAID-bereik wordt automatisch opnieuw opgebouwd.
Tijdens dit proces knippert het led-lampje in blauw/roze. Het opnieuw opbouwen van het RAID-bereik kan enkele uren duren, afhankelijk van de
capaciteit van het station. Als de capaciteit van het nieuwe station minder is dan dat van het vorige, knippert het led-lampje langzaam om aan te
geven dat het opnieuw opbouwen niet voltooid kan worden.
Let op: druk niet op de knop RAID-reset, anders gaan alle gegevens verloren.
Page 16

Podręcznik obsługi IB-RD3662-C31
Charakterystyka
• Dla 2x 3,5" SATA I, II, III (6 Gbit/s) HDDs
• Interfejs do PC: USB 3.1 (Gen 2)/Type-C™, UASP, do 10 Gbit/s
• HDD pojemność nieograniczona
• Easy Swap® - Wymiana dysku twardego bez użycia narzędzi
• Obsługuje RAID 0/1/LARGE/SINGLE
• Automatyczne przebudowa
• Plug&Play i HotSwap
Zastosowanie
Przed podłączeniem obudowy z zainstalowanymi dyskami twardymi do komputera należy sprawdzić, czy funkcja RAID została ustawiona
zgodnie z wymaganiami.
Single
RAID 0
RAID 1
BIG
LARGE
Uwaga: W celu ustawienia w komputerze dostępu do pojemności powyżej 2 TB zarówno sprzęt, jak i SO muszą charakteryzować się pojemnością pozwalającą na obsługę dużych pojemności.
Zmiana trybu RAID
1. Instalowanie dysków i podłączyć IB-RD3662 z USB Type-C™ kabel do komputera.
2. Ustawić przełącznik RAID i wybrać preferowany tryb RAID.
3. Włączyć zasilanie.
4. Wcisnąć przycisk "Reset-RAID-Button"
5. Wyłącz IB-RD3662 i włącz ponownie zasilanie.
6. Sformatować dyski.
7. Gotowe.
Uwaga: bez USB Type-C™ kabel dysk HDD nie rozpocznie.
Uwaga: Zmiana trybu RAID wymaga ponownego sformatowania dysków. Najpierw należy wykonać kopie zapasowe wszystkich danych!
Wymiana dysków twardych
W przypadku uszkodzenia dysku twardego odpowiednia kontrolka LED dysku twardego (1 lub 2) zaświeci się na czerwono, chyba że tryb
RAID jest ustawiony na Non-RAID. W takim przypadku nie będzie dostępu do dysku twardego. Jeżeli tylko jeden dysk jest uszkodzony i tryb
RAID jest ustawiony w pozycji RAID 1, dostęp do danych będzie nadal możliwy, ale w celu prawidłowego tworzenia kopii zapasowych oraz
zapewnienia bezpieczeństwa danych zalecamy natychmiastową wymianę uszkodzonego dysku.
1) Należy sprawdzić kontrolkę LED HDD i wymienić uszkodzony dysk. Odpowiednia kontrola LED zaświeci się na czerwono, wskazując uszko-
dzony dysk. Nie ma potrzeby wyłączania zasilania do wymiany dysku(-ów).
2) Kilka sekund po zainstalowaniu nowego dysku(-ów) odpowiednia kontrolka LED miga niebieski / różowy.
3) W przypadku RAID 1 matryca RAID zostanie przywrócona w sposób automatyczny. Podczas trwania tego procesu kontrolka Rebuild LED
miga niebieski / różowy. Odzyskiwanie matrycy RAID zajmuje kilka godzin, w zależności od pojemności dysku. Jeżeli pojemność nowego
dysku jest mniejsza od poprzedniego dysku, diod LED miga powoli, wskazując brak możliwości zakończenia procesu przywracania.
Uwaga: nie naciskaj "RAID-Reset-Button", to usunięcie wszystkich danych.
Page 17

Használati utasítás IB-RD3662-C31
Fő jellemzők:
• 3,5" SATA I, II, III (6 Gbit/s) HDD-hez
• PC-csatlakozás: USB 3.1/Type-C™, UASP, akár 10 Gbit/s -ig
• HDD kapacitás korlátlan
• Easy Swap® - HDD cseréje szerszám nélkül
• Támogatja a RAID 0/1/LARGE/SINGLE módokat
• Automatikus újraépítés
• Plug&Play és HotSwap
Alkalmazás
Mielőtt csatlakoztatná a telepített merevlemezeket tartalmazó eszközt a számítógéphez, győződjön meg arról, hogy beállította a kívánt RAID
funkciót (a "RAID beállítási kapcsolóval").
Single
RAID 0
RAID 1
BIG
LARGE
Figyelem:
Ahhoz, hogy a számítógép hozzá tudjon férni a 2 TB-nál nagyobb meghajtókhoz, a hardvernek és az operációs rendszernek is támogatnia kell
a nagy meghajtók kapacitását.
A RAID mód váltása
1. Telepítse a merevlemezeket, és csatlakoztassa az IB-RD3662-C31-et a PC-hez egy USB Type C™ típusú kábellel.
2. Állítsa be a RAID kapcsolót, és válassza ki a kívánt RAID módot.
3. Kapcsolja be az áramellátást.
4. Nyomja meg a "RAID Reset" gombot a hátoldalon a beállítás megerősítéséhez
5. Kapcsolja ki az IB-RD3662-C31-et 5 másodperc után, majd kapcsolja be újra.
6. Formázza a meghajtókat.
7. Kész.
Figyelem: A merevlemezek nem kezdenek el forogni, ha az adatkábel nincs csatlakoztatva a PC-hez. Ez a funkció a merevlemezek védelmét
szolgálja.
Figyelem: A RAID mód váltása szükségessé teszi a meghajtók újraformázását. Előtte minden meglévő adatról készítsen biztonsági másolatot!
A merevlemezek cseréje
Merevlemezek meghibásodása esetén a merevlemez megfelelő LED-je (1 vagy 2) piros színre vált, ha nem a SINGLE RAID módot használja;
ez esetben a merevlemez egyszerűen nem lesz elérhető. Amennyiben csak egy merevlemez hibásodik meg, és a RAID mód RAID 1, akkor az
adatok továbbra is elérhetőek, de nyomatékosan ajánlott a meghibásodott meghajtót azonnal kicserélni a biztonsági mentés és az adatbiztonság fenntartása érdekében.
1. Ellenőrizze a merevlemez LED kijelzőjét, és cserélje ki a meghibásodott merevlemezt. A megfelelő LED pirosra vált, ezzel jelzi a meghajtó
meghibásodását. A merevlemezt nem kell kikapcsolni a cseréhez.
2. Az új meghajtó(k) beszerelése után néhány másodperccel a LED ismét bekapcsol.
3. RAID 1 esetén egyszerűen cserélje a meghibásodott merevlemezt, kapcsolja be az IB-RD3662-C31-et, és a RAID tömb automatikusan
újjáépül. A folyamat során a LED kéken/rózsaszínben villog. A RAID tömb újjáépítése több órát vesz igénybe a merevlemez kapacitásától
függően. Amennyiben az új meghajtó kapacitása kisebb, mint az előző meghajtóé, a LED lassan villog, jelezve, hogy az újjáépítési folyamat
nem hajtható végre.
Figyelem: Kérjük, ne nyomja meg a RAID Reset gombot, ellenkező esetben minden adat elveszik.
Page 18

Návod k použití IB-RD3662-C31
Funkce
• Dla 3,5" SATA I, II, III (6 Gbit/s) HDD
• Interfejs do PC: USB 3.1 (Gen 2)/Type-C™, UASP, do 10 Gbit/s
• HDD pojemność nieograniczona
• Easy Swap® - Wymiana dysku twardego bez użycia narzędzi
• Podporuje RAID 0/1/LARGE/SINGLE
• Automatické přestavby
• Plug&Play a HotSwap
Aplikace
Před zapojením pouzdra s instalovanými pevnými disky do počítače je třeba zkontrolovat, zda je nastavená vámi požadovaná funkce RAID
(přepínačem "Nastavení RAID").
Single
RAID 0
RAID 1
BIG
LARGE
Upozornění:
Aby mohl počítač přistupovat k objemům překračujícím 2 TB, musí být hardware i OS schopny podporovat velké objemy.
Změna režimu RAID
1. Nainstalujte pevné disky a připojte jednotku IB-RD3662-C31 k počítači kabelem USB Type-C™.
2. Pomocí přepínače RAID na zadní straně vyberte preferovaný režim RAID.
3. Zapněte napájení.
4. Stiskněte tlačítko "Reset RAID" na zadní straně a potvrďte nastavení.
5. Po 5 sekundách vypněte jednotku IB-RD3662-C31 a opět ji zapněte.
6. Naformátujte diskové jednotky.
7. Hotovo.
Pozor: Pevné disky se nerozeběhnou, pokud nebude připojen datový kabel k počítači. Tato funkce má za úkol chránit pevné disky.
Pozor: Změna režimu RAID vyžaduje nové naformátování diskových jednotek. Nejdříve si vytvořte zálohu všech uložených dat!
Výměna pevných disků
Pokud některá disková jednotka selže, odpovídající kontrolka LED příslušného pevného disku (1 nebo 2) se rozsvítí červeně, pokud není režim
RAID nastaven na SINGLE; v takovém případě nebude pevný disk vůbec přístupný. Jestliže je vadná pouze jedna jednotka a režim RAID je
nastaven na RAID 1, přístup k datům je stále možný, ale doporučujeme ihned vyměnit vadnou diskovou jednotku, aby bylo zajištěno správné
zálohování a zabezpečení dat.
1. Zkontrolujte kontrolku LED pevného disku a vyměňte vadnou diskovou jednotku. Odpovídající kontrolka LED se rozsvítí červeně a indikuje tak
vadnou diskovou jednotku. Při výměně diskové jednotky není třeba vypínat elektrické napájení.
2. Několik sekund po instalaci nových jednotek se příslušná kontrolka LED opět rozsvítí.
3. V režimu RAID 1 vyměňte vadný pevný disk a zapněte jednotku IB-RD3662-C31; pole RAID se automaticky obnoví. Během tohoto procesu
bude kontrolka LED blikat modře/růžově. Obnova pole RAID bude podle kapacity diskových jednotek trvat několik hodin. Jestliže je kapacita
nové diskové jednotky nižší než u předchozí jednotky, kontrolka LED bude blikat pomalu a indikovat, že proces obnovy nelze dokončit.
Pozor: Nesmíte stisknout spínač resetování jednotky RAID, protože by došlo ke ztrátě všech dat.
Page 19
Εγχειρίδιο IB-RD3662-C31
Βασικά Χαρακτηριστικά
• Για 3,5" SATA I, II, III (6 Gbit/s) HDD
• Σύνδεση με PC: USB 3.1/Type-C™, UASP, έως 10 Gbit/s
• HDD απεριόριστη χωρητικότητα
• Easy Swap® - εναλλαγή HDD χωρίς εργαλεία
• Υποστηρίζει RAID 0/1/LARGE/SINGLE
• Αυτόματη αναδόμηση
• Plug&Play και HotSwap
Εφαρμογή
Προτού συνδέσετε το πλαίσιο με τις εγκατεστημένες μονάδες σκληρών δίσκων στον υπολογιστή, πρέπει να βεβαιωθείτε
ότι έχετε καθορίσει τη λειτουργία RAID που επιθυμείτε.
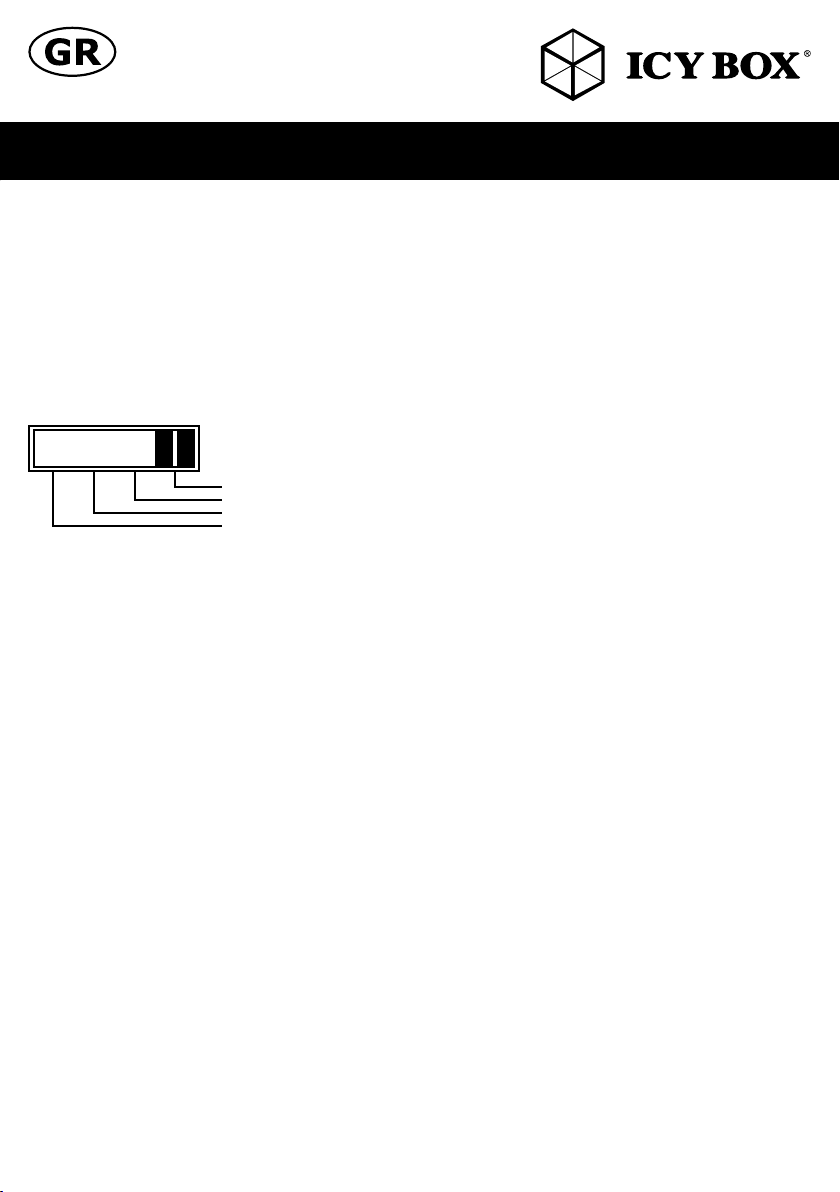
Single
RAID 0
RAID 1
BIG
Προσοχή: Για να είναι δυνατή η προσπέλαση τόμων μεγαλύτερων από 2 TB από τον υπολογιστή, τόσο το υλικό όσο και
το λειτουργικό σύστημα πρέπει να έχουν τη δυνατότητα υποστήριξης εγάλων τόμων.
Αλλαγή της κατάστασης RAID
1. Εγκαταστήστε τις μονάδες σκληρού δίσκου και συνδέστε το USB Type-C™ καλώδιο στον υπολογιστή.
2. Καθορίστε τον διακόπτη RAID και επιλέξτε την προτιμώμενη κατάσταση RAID.
3. Ενεργοποιήστε την τροφοδοσία.
4. Πατήστε το "RAID-Reset-Button" στην πλάτη
5. Τερματίστε τη λειτουργία του ΙΒ-RD3662 και ενεργοποιήστε το ξανά
6. Προχωρήστε σε διαμόρφωση των μονάδων.
7. Έτοιμο!
Προσοχή: Η αλλαγή της κατάστασης RAID απαιτεί εκ νέου διαμόρφωση των μονάδων. Φροντίστε πρώτα να εκτελέσετε
δημιουργία αντιγράφων ασφάλειας όλων των υφιστάμενων δεδομένων!Προσοχή: χωρίς USB Type-C™ καλώδιο στον
υπολογιστή οι σκληροί δίσκοι δεν θα ξεκινήσει.
Αντικατάσταση σκληρών δίσκων
Όταν ένας δίσκος χαλάσει, η αντίστοιχη λυχνία LED της μονάδας σκληρού δίσκου (1 ή 2) θα αναβοσβήνει αργά, εκτός
από την περίπτωση κατά την οποία η κατάσταση RAID έχει οριστεί σε SINGLE, οπότε η μονάδα σκληρού δίσκου δεν θα
είναι πλέον προσπελάσιμη. Εάν μόνο μία μονάδα είναι ελαττωματική και η κατάσταση RAID έχει οριστεί σε RAID 1, θα
είναι δυνατή η προσπέλαση των δεδομένων, αλλά σας προτείνουμε ανεπιφύλακτα να αντικαταστήσετε την ελαττωματική
μονάδα άμεσα ούτως ώστε να διασφαλίσετε την απρόσκοπτη και κατάλληλη δημιουργία αντιγράφων ασφάλειας και την
ασφάλεια των δεδομένων.
1) Ελέγξτε τη λυχνία LED της μονάδας σκληρού δίσκου και αντικαταστήστε την ελαττωματική μονάδα. Η αντίστοιχη
λυχνία LED θα αναβοσβήνει κόκκινος, υποδηλώνοντας την ελαττωματική μονάδα. Η τροφοδοσία δεν χρειάζεται να
αποκοπεί κατά την αλλαγή των μονάδων.
2) Λίγα δευτερόλεπτα μετά την εγκατάσταση της νέας μονάδας, η αντίστοιχη λυχνία LED θα ενεργοποιημένη ξανά.
3) Σε περίπτωση RAID 1, η συστοιχία RAID θα αναδομηθεί αυτομάτως. Κατά τη διάρκεια αυτής της διαδικασίας, η
λυχνία LED θα αναβοσβήνει μπλε / ροζ. Η αναδόμηση της συστοιχίας RAID ενδέχεται να χρειαστεί αρκετές ώρες,
ανάλογα με την χωρητικότητα της μονάδας. Εάν η χωρητικότητα της νέας μονάδας είναι μικρότερη από την αντίστοιχη
της προηγούμενης μονάδας, η λυχνία LED θα αναβοσβήνει αργά δείχνει ότι η διαδικασία ανασυγκρότησης δεν μπορεί να
ολοκληρωθεί.
Προσοχή: μην πατήσετε το "RAID-Reset-Button", θα διαγράψετε όλα τα δεδομένα.
LARGE
Page 20

The information contained in this manual is believed to be accurate and reliable. RaidSonic Technology GmbH assumes no responsibility for any errors
contained in this manual. RaidSonic Technology GmbH reserves the right to make changes in the specifications and/or design of the above mentioned
product without prior notice. The diagrams contained in this manual may also not fully represent the product that you are using and are there for illustration
purposes only. RaidSonic Technology GmbH assumes no responsibility for any differences between the product mentioned in this manual and the product
© Copyright 2017 by RaidSonic Technology GmbH. All Rights Reserved
you may have.
 Loading...