

Raidon InTANK HyBrid RunneR iH1010-2S-S2 User Manual
InTANK Series
HyBrid RunneR iH1010-2S-S2
User Manual
v.1.0 (July, 2010)

Introduction
About this User Manual
Thank you for using the product of RAIDON Technology Inc..
This user manual will introduce the RAIDON iH1010-2S-S2 product. It is recommended that you read
this manual carefully before using the RAIDON iH1010-2S-S2 product. Although the information has
been veried before published, specications are subject to change without prior notice. Please refer to
www.RAIDON.com.tw or contact your sales representative for any product specication or update of
related information.
If you have any questions on RAIDON products or need the latest product information, user manual
or rmware, please contact us at supporting@raidon.com.tw and we will get back to you as soon as
possible.
NOTE: RAIDON Technology Inc. only provides technical support and service to RAIDON direct customers. For end
users or non-direct customers, please contact your distributor for prompt and better responses. If your product
is not purchased directly from RAIDON, please do not contact us directly since you may not get any reply.
All the product information in this manual is the property of RAIDON Technology Inc. All rights reserved.

Index
Chapter 1 Product Introduction.................................................................. 4
1.1 Product Diagrams and Contents of Product Package.................... 4
1.2 LED Instructions.............................................................................. 4
1.3 Hardware Installation...................................................................... 5
1.4 Start-up of iH1010 and Drive Device.............................................. 6
1.5 Precautions before Usage.............................................................. 8
Chapter 2 HyBrid Function Introduction.................................................. 9
2.1 With Performance of SSD and Capacity of HDD............................ 9
2.2 Removable SSD Design................................................................. 10
2.3 Recover to New SSD...................................................................... 10
Chapter 3 GUI Function Introduction (Windows Only)....................... 12
3.1 System Status................................................................................. 12
3.2 System Setup.................................................................................. 12
3.3 Firmware Upgrade.......................................................................... 13
3.4 E-mail Notify.................................................................................... 14
3.5 About.............................................................................................. 14
Chapter 1 Product Introduction
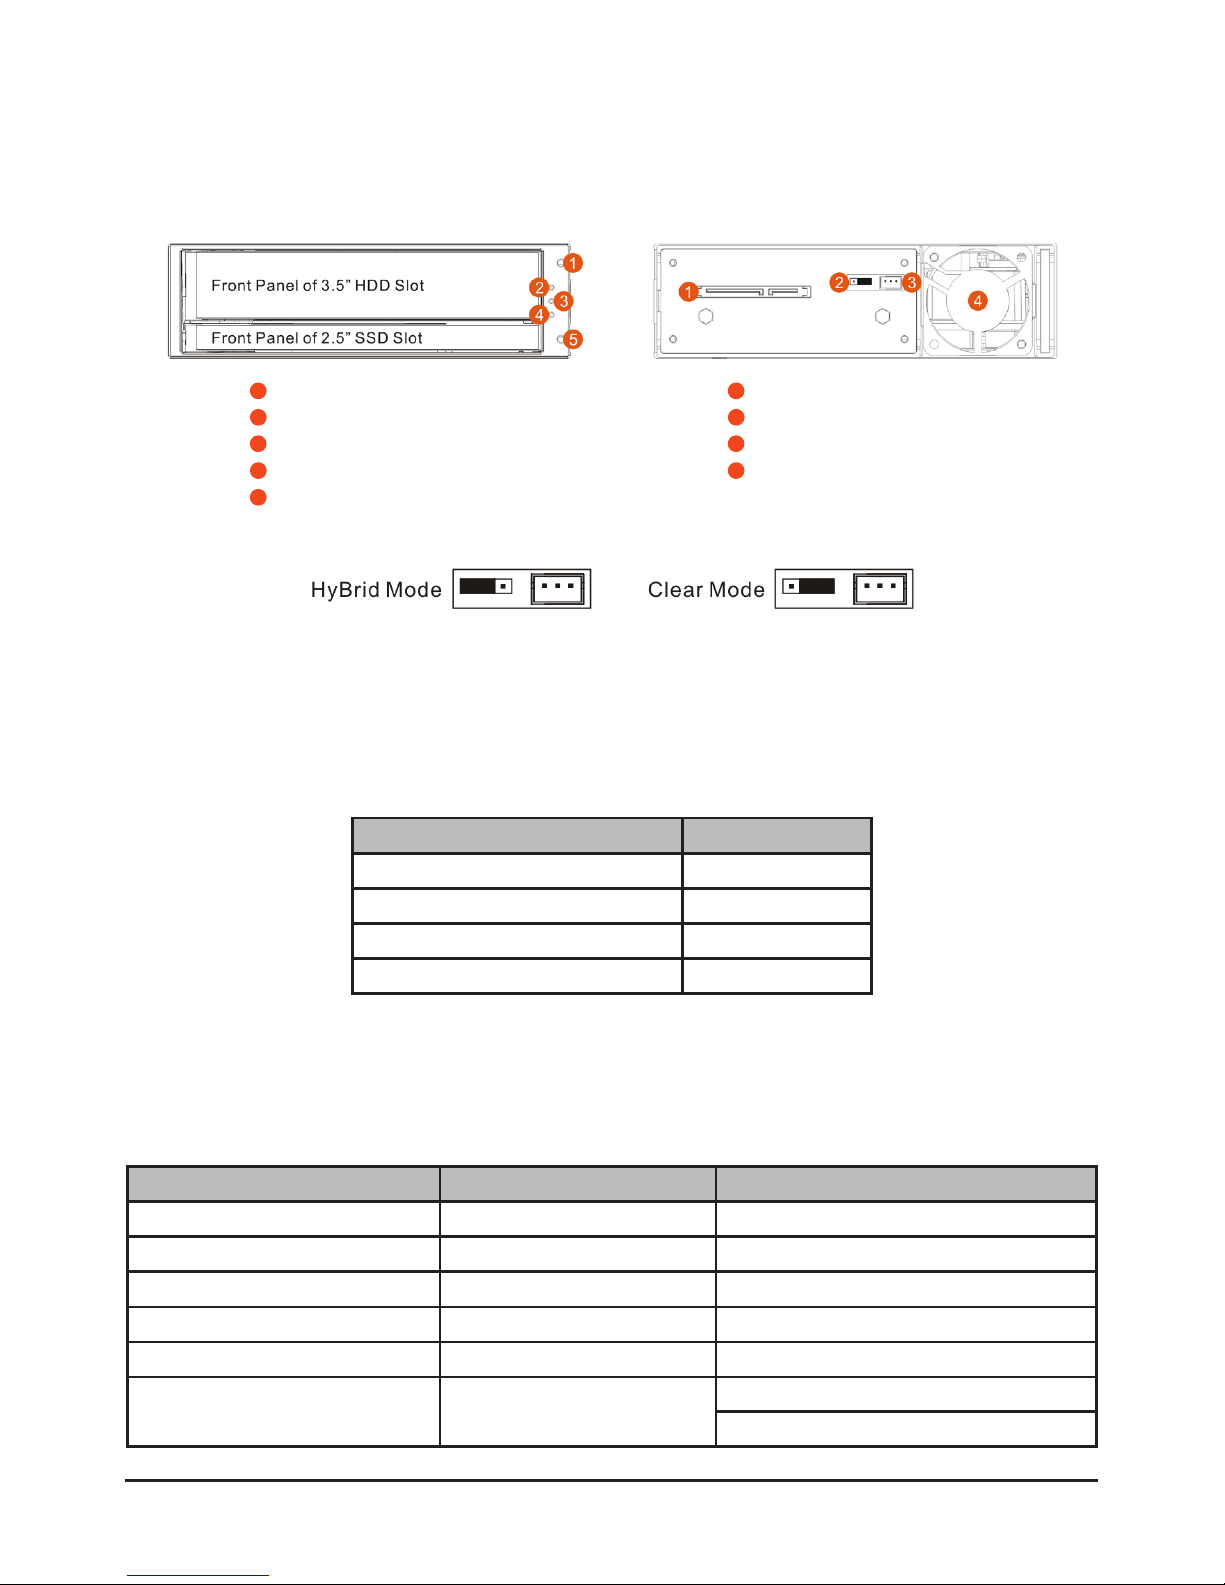
1.1 Product Diagrams and Contents of Product Package
Front View Rear View
1 Lock Hole of 3.5” HDD 1 SATA Port
2 LED of 3.5” HDD 2 Function Mode
3 Power LED 3 Power Connector of Fan
4 LED of 2.5” SSD 4 Fan
5 Lock Hole of 2.5” SSD
Function Mode
※ Please select the function mode with the jumper located at the back panel. There are three pins at
the back panel for function mode selection : HyBrid mode by setting the jumper on the left of the two
pins. Clear mode by setting the jumper on the right of the two pins.
After you open the outer package, make sure that the following items are contained in the
package:
Item Qty.
iH1010-2S-S2 Device 1
Quick Installation Guide 1
CD 1
Accessory Kit 1
Please make sure related accessories and product body are not missing or damaged. For any
questions, please contact local distributor or retailer from your purchase for further assistance.
1.2 LED Instruction
Status LED LED Status
Power on Power LED Blue / Lights On
Fan Failure (Stop Rotating) Power LED Purple / Lights On
Overheat (Over 55°C) Power LED Purple / Lights On
Accessing LED of 3.5” HDD / 2.5” SSD Purple & Blue / Blink Alternatively
Drive Failures or No HDD / SSD LED of 3.5” HDD / 2.5” SSD Blue & Red / Blink Alternatively
Data Backup Proceeding LED of 3.5” HDD / 2.5” SSD
Purple & Red / Blink Alternatively (Target)
Purple / Lights On (Source)
4 Product Introduction
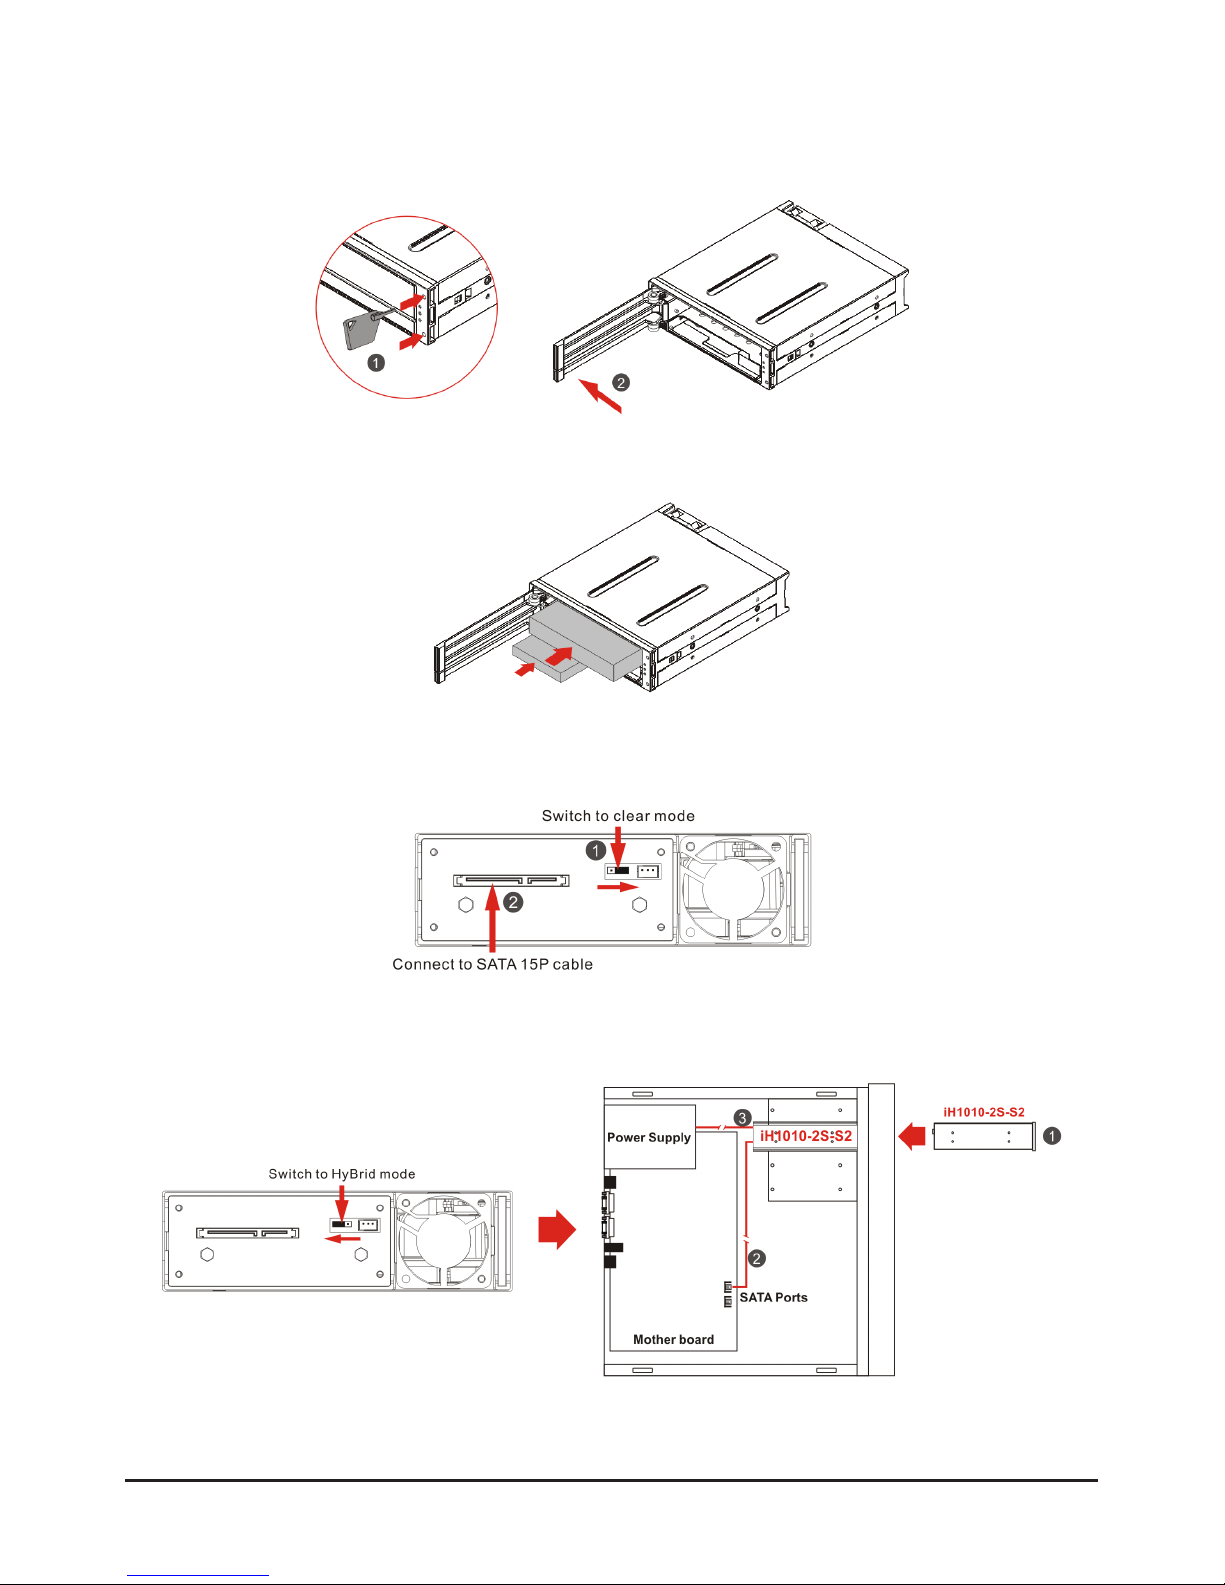
1.3 Hardware Installation
1. Use the key from accessory kit to unlock front panel of 3.5” HDD / 2.5” SSD from HDD/SSD lock
holes, and open the panel to 90 degrees, perpendicular from the original position.
2. Install 3.5” HDD / 2.5” SSD properly into each dened drive slots and make sure HDD/ SSD are
correctly positioned before closing the front panels.
3. Set the function mode to “Clear Mode” and connect DC cable (SATA 15 Pin). Then power on iH1010
to create new partition and wait for 30 seconds, the partition will be ready when the LED of both SSD
and HDD blink in blue & red alternately, nally power off the iH1010.
4. Set the function mode to “Hybrid Mode” and Install device into one of the CD-ROM bays with screws
from the accessory kit, then properly connect DC cable and SATA cable from your system to the
device.
Product Introduction 5
 Loading...