

Page 1
INSTRUCTIONS
FOR USE
Your Rado ‘Multifunction’ is not
only an exceptional piece of jewellery with an absolutely uncompromising avant-garde design; it also
offers seven useful additional functions, which can be easily accessed
via the crown.
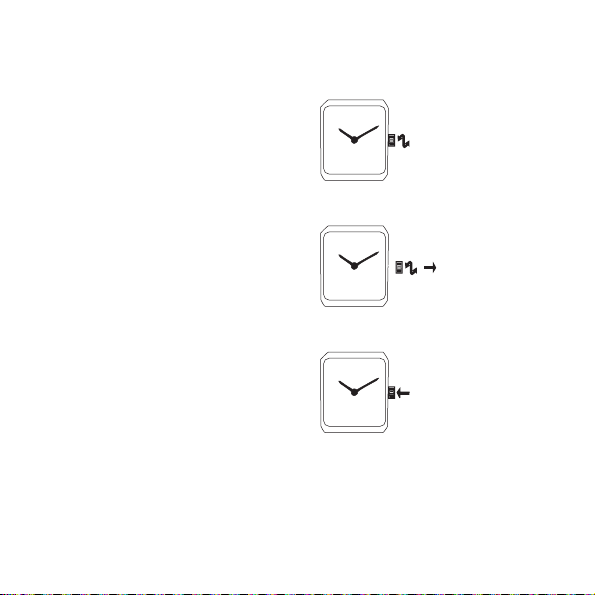
Function selection
Leave crown in normal position
and turn.
Function adjustment
Pull crown out and turn.
Switching function on or off
Press crown briefly.
Setting to zero
Press crown (at least 3 sec.)
Page 2

1. Setting the digital time
display: hours, minutes,
seconds
Select Function 1 (digital time display)
a) Hours and minutes:
Pull the crown out. The hours and
minutes display flashes. Set the
hours by turning the crown
quickly, the minutes by turning it
slowly. Push the crown back to
normal position.
Digital and analogue time displays
are set simultaneously.
b) Seconds in the digital display:
Pull the crown out: the hours and
minutes display flashes.
Push the crown in again: the seconds display flashes for one minute. In synchronisation with a
radio or telephone time signal,
press the crown briefly during this
minute to set the seconds to zero.
Check that the minute setting is
still correct. If not, set one minute
back or forward.
24-hour display / A.M.-P.M. display: see Function 5 (T2).
1.1 Synchronisation of analogue
and digital displays
If analogue display diverges from
digital display.
NB: The digital time must be set to
the 24-hour display (see Function 5: T2).
Select Function 8 (without digital
display). Pull out crown and turn
until both time displays are the
same. Turn crown quickly to move
the hour hand, slowly for the minute hand. Push the crown back
in.
2. Setting the date
Select Function 2 (seconds and
date display).
Pull out the crown: seconds display
disappears. The number of the
month appears next to the date.
Both numbers flash.
Page 3

Turning the crown quickly alters
the month, turning slowly alters
the date.
Push the crown back in. The
month display disappears, the seconds display is visible again.
Note:
The number of the month is not
continually displayed, but it is
memorised. It must be correctly
set so that the calendar functions
properly.
Leap year: 29th February
The date of 1st March is displayed
after 28th February even in leap
years.
This can be corrected as follows:
Select Function 2 (seconds and
date display). Pull the crown out
and adjust the date one day back,
so that 29th February is displayed.
Push the crown back in again.
3. Adjusting the
day-of-the-week display
Select Function 3 (day and date
display) and pull the crown out.
The day display flashes and instead
of the date appears the selected
language:
Midi-size = e/f/s/d
Maxi-size = e/f/s
f = French, e = English, s = Spanish,
d = German.
Set the day and the desired language by turning the crown.
Setting the language
NB: The language changes when
the day changes from Sunday to
Monday.
4. TM: Timer (hour and
minute counter)
Select Function 4 (TM).
Pull the crown out and set the
hours by turning the crown quickly,
the minutes by turning it slowly.
Push the crown back in: this starts
the countdown of the set time.
Page 4

When the set hours/minutes have
run out, the watch gives an acoustic signal.
To switch off the signal: briefly
press the crown.
Note:
The hours and minutes countdown
can be cancelled at any time by
setting to zero: select ‘Timer’ Function and press the crown for at
least 3 seconds.
5. T2: Different time zone
Select Function 5 (T2).
Pull out the crown: the hours display flashes. Set the desired time
by turning the crown.
Note:
The minutes and seconds displays
remain unaltered as they are the
same for all time zones.
24-hour display or 212 hours
display
The watch can display 24-hour
clock time or 212 hours (A.M.P.M.).
Select Function ‘T2’. To check the
display setting, press the crown
briefly once: if A or P appears, the
time display is 212 hours. If no
letter appears, the 24-hour display
is set. Pressing the crown for a
second time changes the display
setting.
6. CHR: Stopwatch
Select Function 6 (CHR).
Measurement is up to a maximum
of 24 hours, accurate to 1⁄100th of a
second.
Start - Stop - Re-Start - Stop: press
the crown briefly each time.
Setting to zero: press the crown for
at least 3 seconds.
Note:
With measurement of time segments longer than one hour, the
Page 5

display alternates between the
hours display and the minutes, seconds and hundredths of a second
display.
While the stopwatch is running,
other functions can be selected
and used. To stop and read the
measured time and to set to zero,
reselect Function 6 (CHR).
7. AL: Alarm
Select Function 7 (Alarm).
To set alarm time, pull out the
crown and set the hours by turning
quickly, the minutes by turning
slowly. Push the crown back in.
AL = acoustic signal in active
mode.
OF = acoustic signal deactivated.
To activate the acoustic signal, select Function 7 (AL) and press the
crown briefly. To deactivate it,
press the crown briefly again.
Note:
The alarm time can be set in the
212 hours (A.M.-P.M.) or the
24-hour mode. This should be
taken into account when setting
the alarm time (see Function 5).
8. Only analogue hours and
minutes display
Select Function 8: the digital display disappears.
For adjustment of the hands see
Function 1.
IMPORTANT
Crown
After the crown has been pulled
out for any adjustment to be
made, do not forget to push it back
in to its normal position right
against the side of the case. Otherwise there is a danger of damp,
water or dust getting in.
Page 6

Battery
Your Rado watch will draw your
attention to the battery having run
low by flashing the digital display.
A low battery must be changed by
a Rado concessionary as soon as
possible. Please ask in the same
time for a waterproof test. Approximate running life: 21⁄2 years.
Battery No. 399, 1.5 V
Ø 9.50 mm, H 2.60 mm
 Loading...