

Radio Shack Voice Activated Audionic Earphone, 21-1833 Owner's Manual
21-1833.fm Page 1 Wednesday, May 17, 2000 8:30 AM
Voice Activated Audionic Earphone
OWNER’S MANUAL — Please read before using this equipment.
FEATURES
Your RadioShack Voice-Activated Audionic Earphone makes it easier and safer to use your handheld transceiver. The ultra-light weight speaker/
microphone combined with voice-activation makes
hands-free communications a breeze. You can continue your activities without interrupting your communication. Just connect the earphone’s plugs to
the jacks on your transceiver.
You can use this earphone with many of the
RadioShack handheld amateur radio, business
band, Family Radio Service, citizen's band, and
GMRS tranceivers that have external microphone
and speaker jacks.
The earphone is also compatible with Icom, Standard, Yaesu, and Alinco transceivers.
The earphone’s features include:
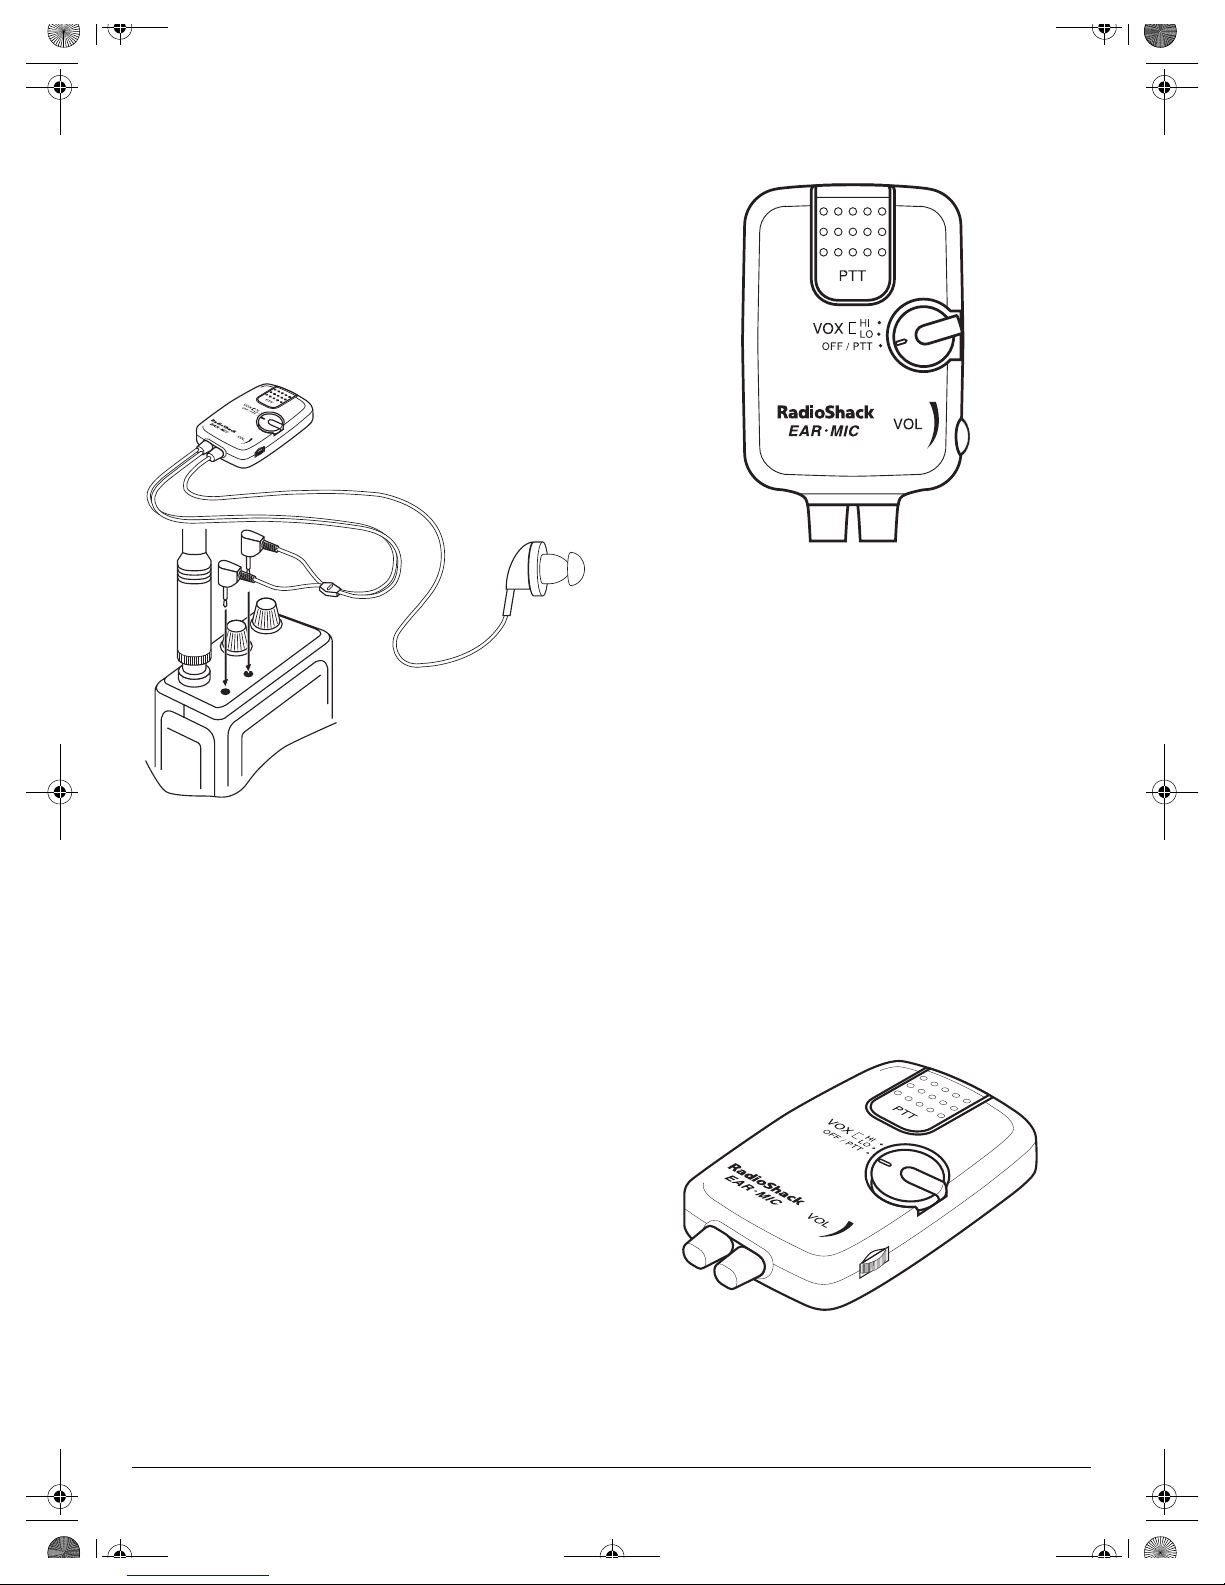
Voice Activation Control (VOX) — you can set the
earphone to automatically activate the transceiver
so you transmit only when you speak.
PREPARATION
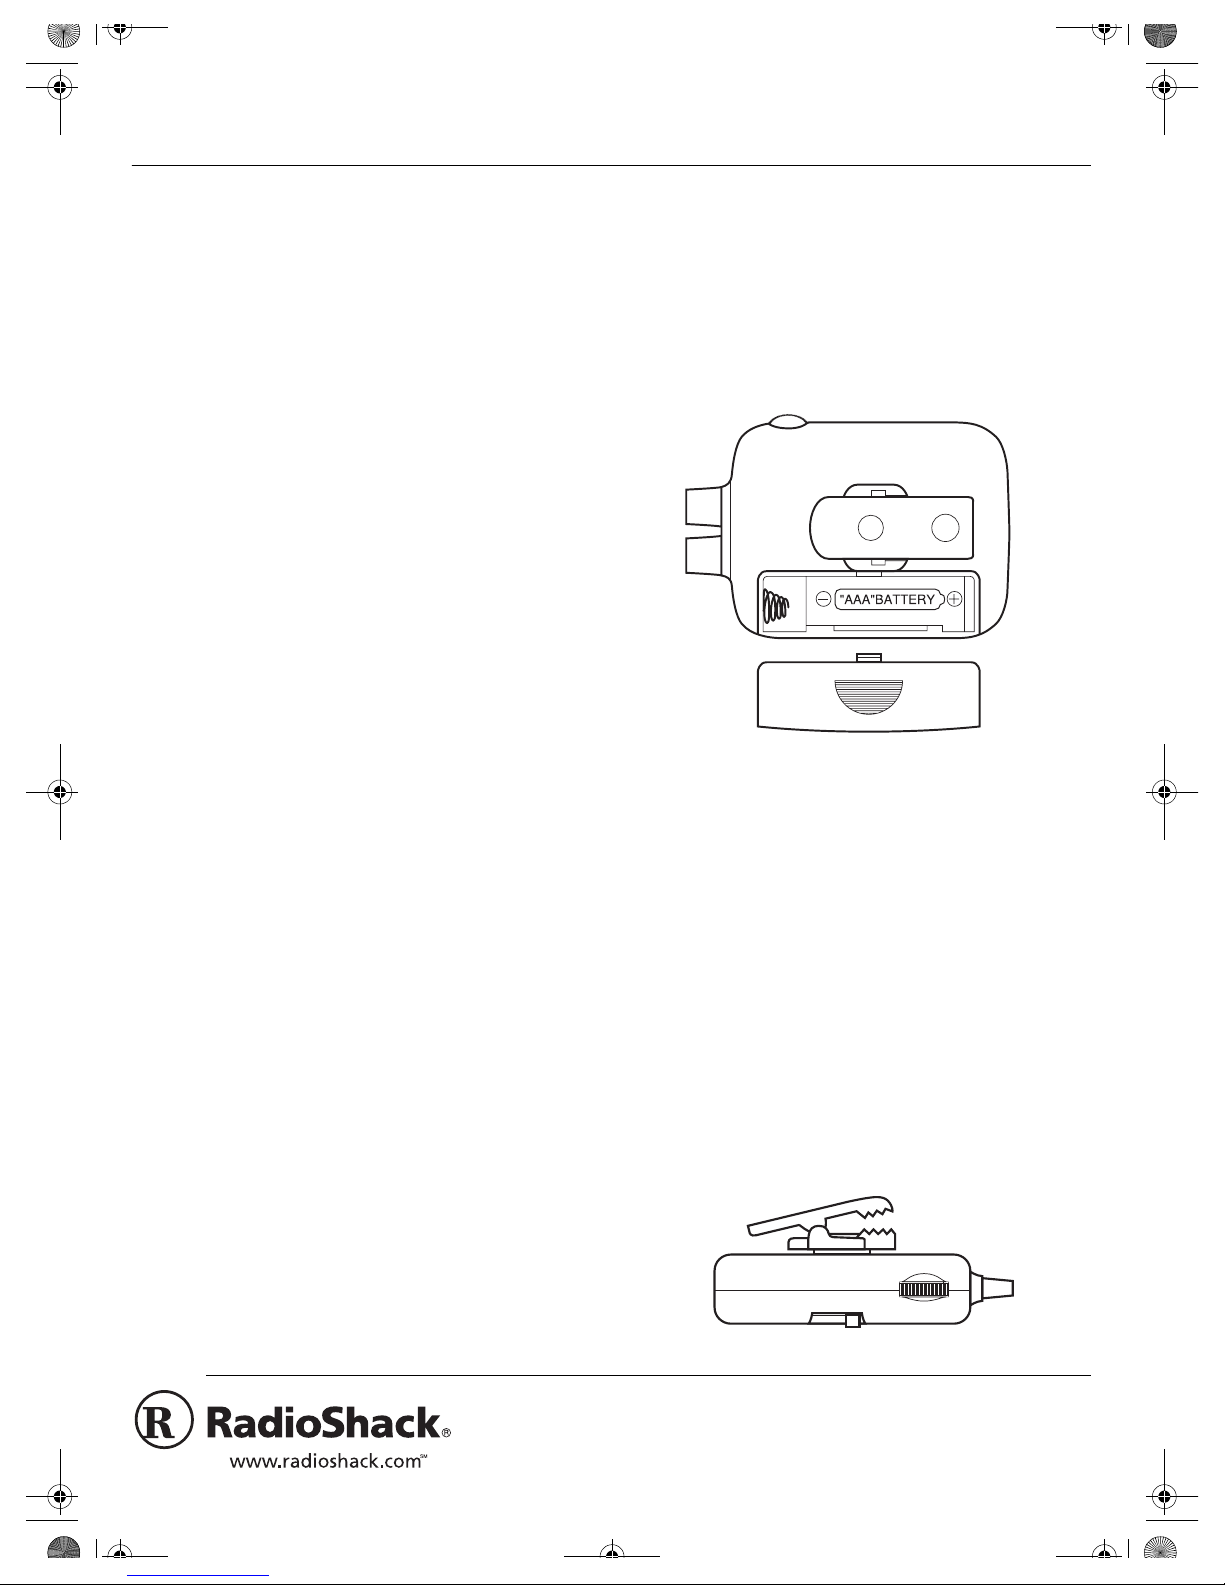
Installing the Battery
You need one AAA battery (not supplied) to operate
the earphone. F or the longest battery life, we recommend a RadioShack alkaline battery. Follow these
steps to install the battery.
VOX High/Low Positions —letsyouadjustthemicrophone's sensitivity to your voice level.
Push-To-Talk (PTT) Button — lets you manually
switch between transmitting and receiving.
Combination Mic/Earpiece —translatesyourvoice
into electrical signal for the transceiver during transmission, and acts as a normal earphone during reception.
Low-Power Circuitry — operates for more than
180 hours on one AAA alkaline battery (not supplied).
One Small and Two Large Replacement Earpieces — provide a comfortable fit for any size ear open-
ing.
1. Press down on the battery compartment cover
and slide away from the clip.
2. Install the battery in the compartment as indicated by the polarity symbols (+ and –) marked
inside.
3. Replace the cover.
Note: If you are using VOX and the transceiver does
not switch to transmit when you begin speaking, replace the battery.
Using the Clip
You can use the clip to attach the earphone's control
box to a pocket or belt.
© 2000 Tandy Corporation.
RadioShack and RadioShack.com are trademarks used by Tandy Corporation.
All Rights Reserved.
21-1833.fm Page 2 Wednesday, May 17, 2000 8:30 AM
Connecting to the Transceiver
Note: To avoid accidental transmission, set the
function switch to
OFF/PTT
ceiver before you connect the earphone to the transceiver.
Insert the earphone's
transceiver's earphone jack. Then insert the earphone's
3
/32-inch microphone plug into the transceiv-
er's microphone jack.
andturnoffyourtrans-
1
/8-inch speaker plug into the
1. Set the function switch to
2. Press
to transmit and release it to receive.
PTT
OFF/PTT
.
3. When you finish operation, turn off the transceiver.
VOX Operation
OPERATION
You can manually switch between transmitting and
receiving (see "PTT (Push-to-Talk) Button Operation"), or use VOX to automatically transmit when
you talk, then receive when you stop talking (see
"VOX Operation").
Before you begin operation, set the transceiver's volume control to the center position, squelch control to
the on position, and turn on the transceiver.
Caution: Never position the earphone's cord or control box near the transceiver's antenna. If the cord or
the control box is too close to the antenna, the range
might be reduced or the control box might not correctly switch the transceiver between transmit and
receive.
1. Set the function switch to
VOX LOorHI
.
2. When you start talking, the transceiver is automatically set to transmit. When you stop talking,
the transceiver automatically switches to receive
after about 1 second.
3. When you finish operation, turn off the transceiver first, then turn off the earphone by setting
the function switch to
OFF/PTT
.
Volume Control
To adjust the level of receiving sound, rotate
VOL
.
PTT (Push-to-Talk Button) Operation
You can use the PTT button to manually switch between transmitting and receiving.
2
 Loading...